Hobby Lobby Zebra Print Rolling Scrapbook Case
Modern + Minimal Nursery
I had too much fun designing my first nursery start to finish for some of my favorite clients! This super chic, modern. and minimal nursery is full of timeless pieces that can be grown into and used for many years to come. My clients knew they wanted a statement wall in Hale Navy (Benjamin Moore), but besides that, they really let me take the reigns on the design. My painter put together the simple gridwork trim on the wall and then painted it all one color. The rest of the walls were already gray which worked with our color scheme and the simple gray crib.
Read more
Neutral + Modern Living Room Makeover
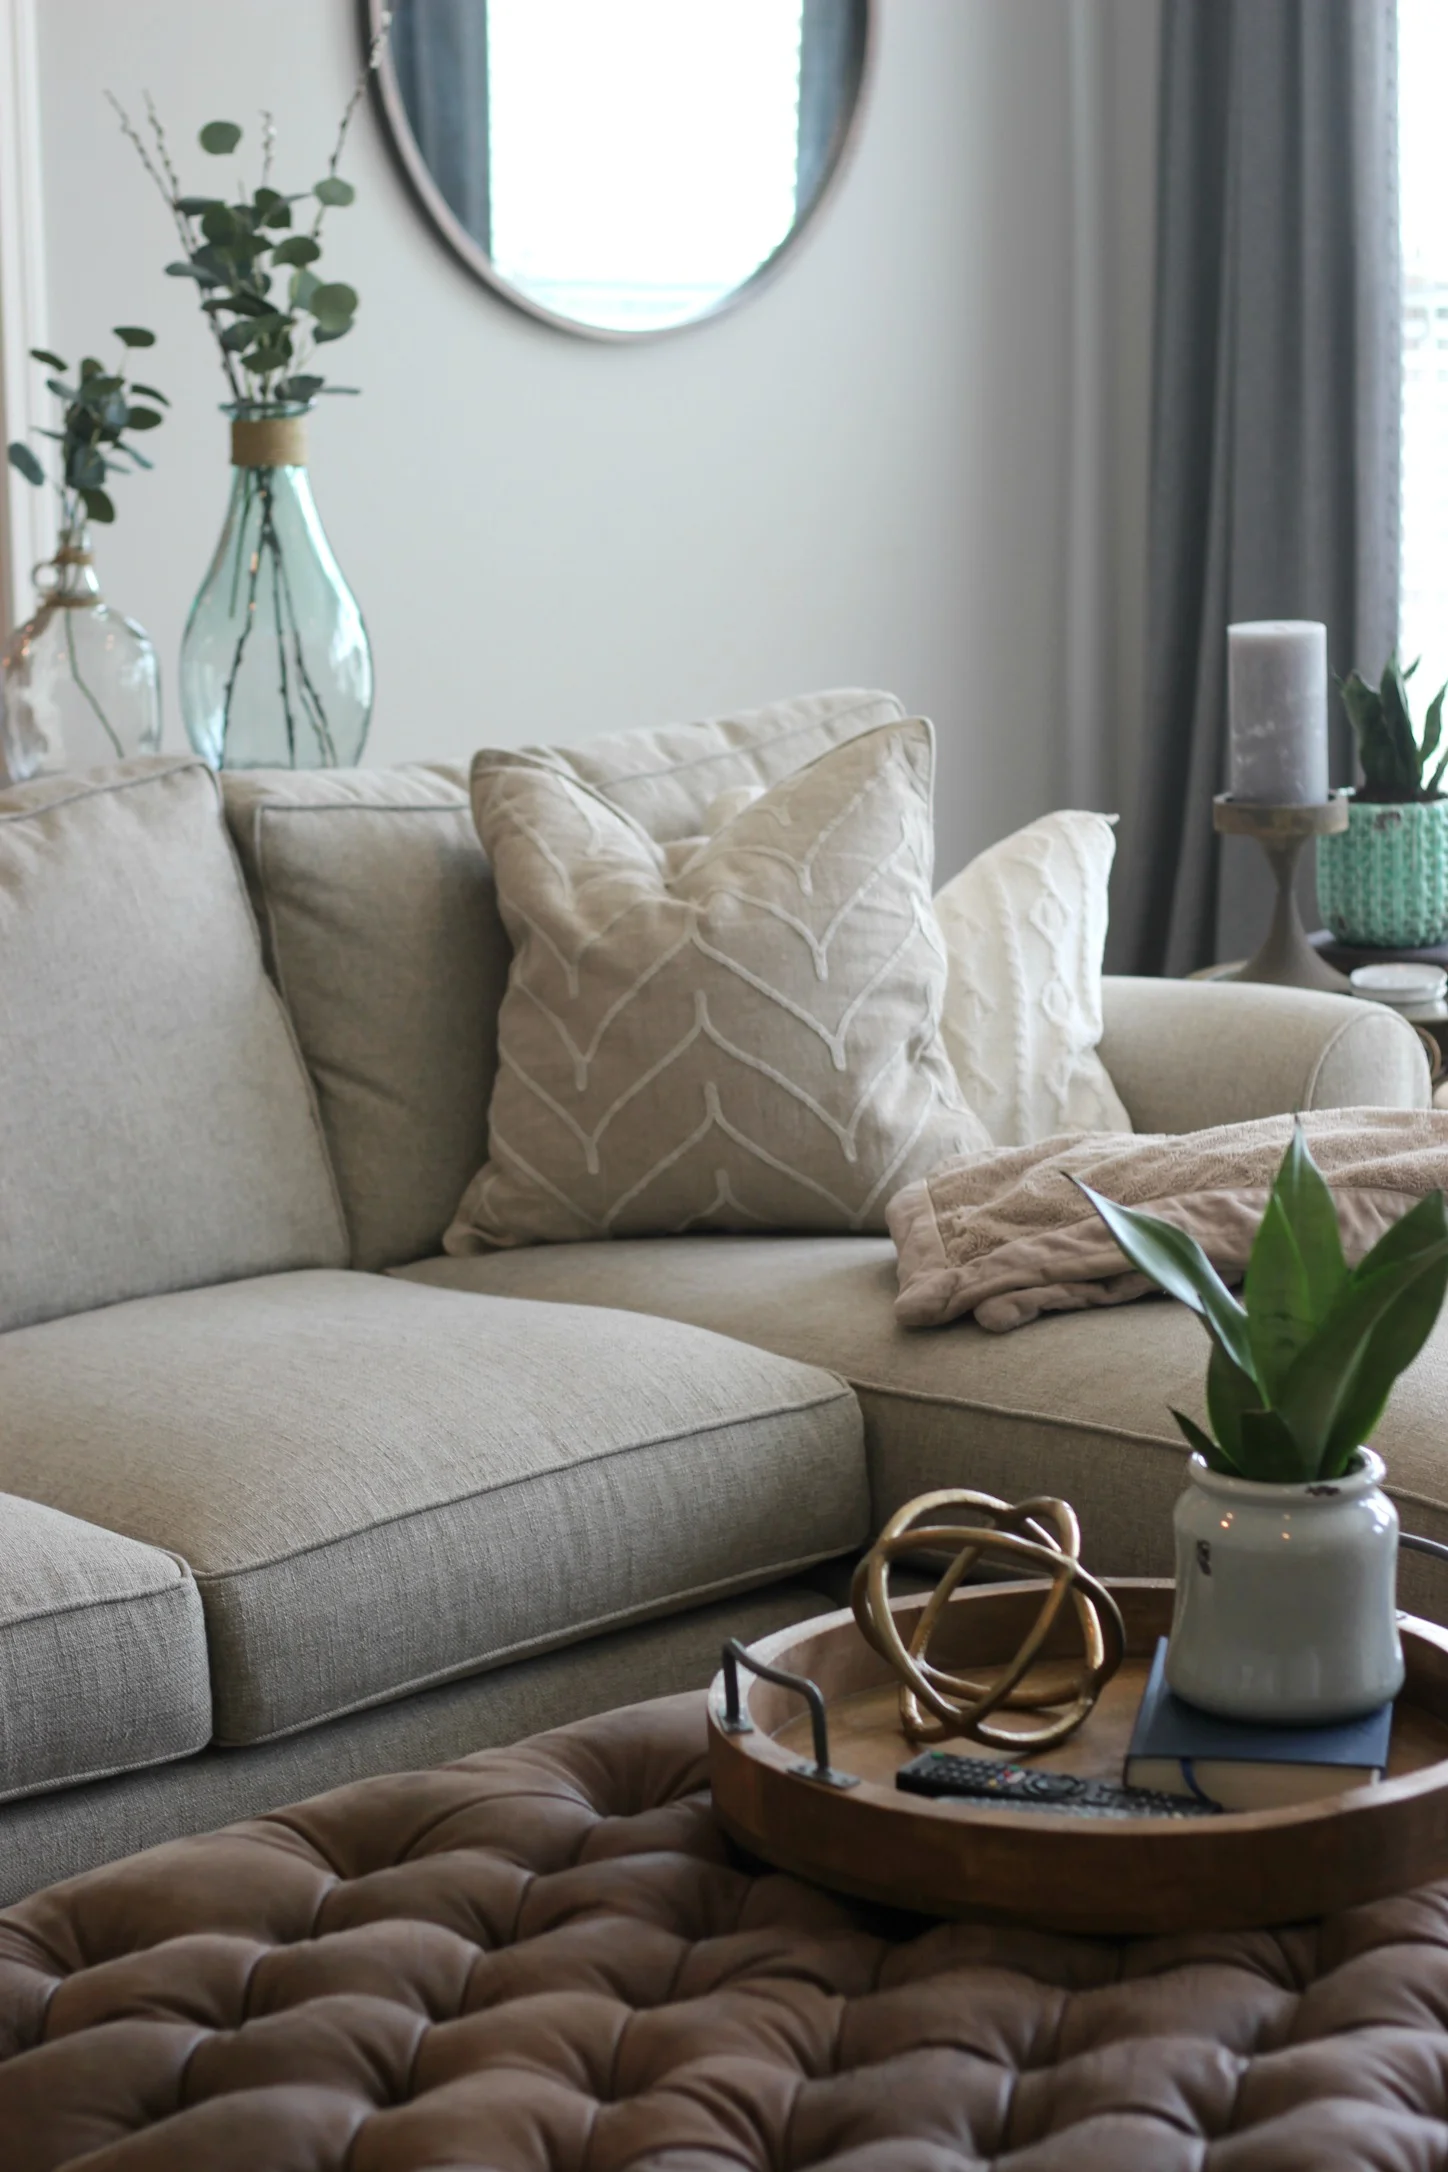
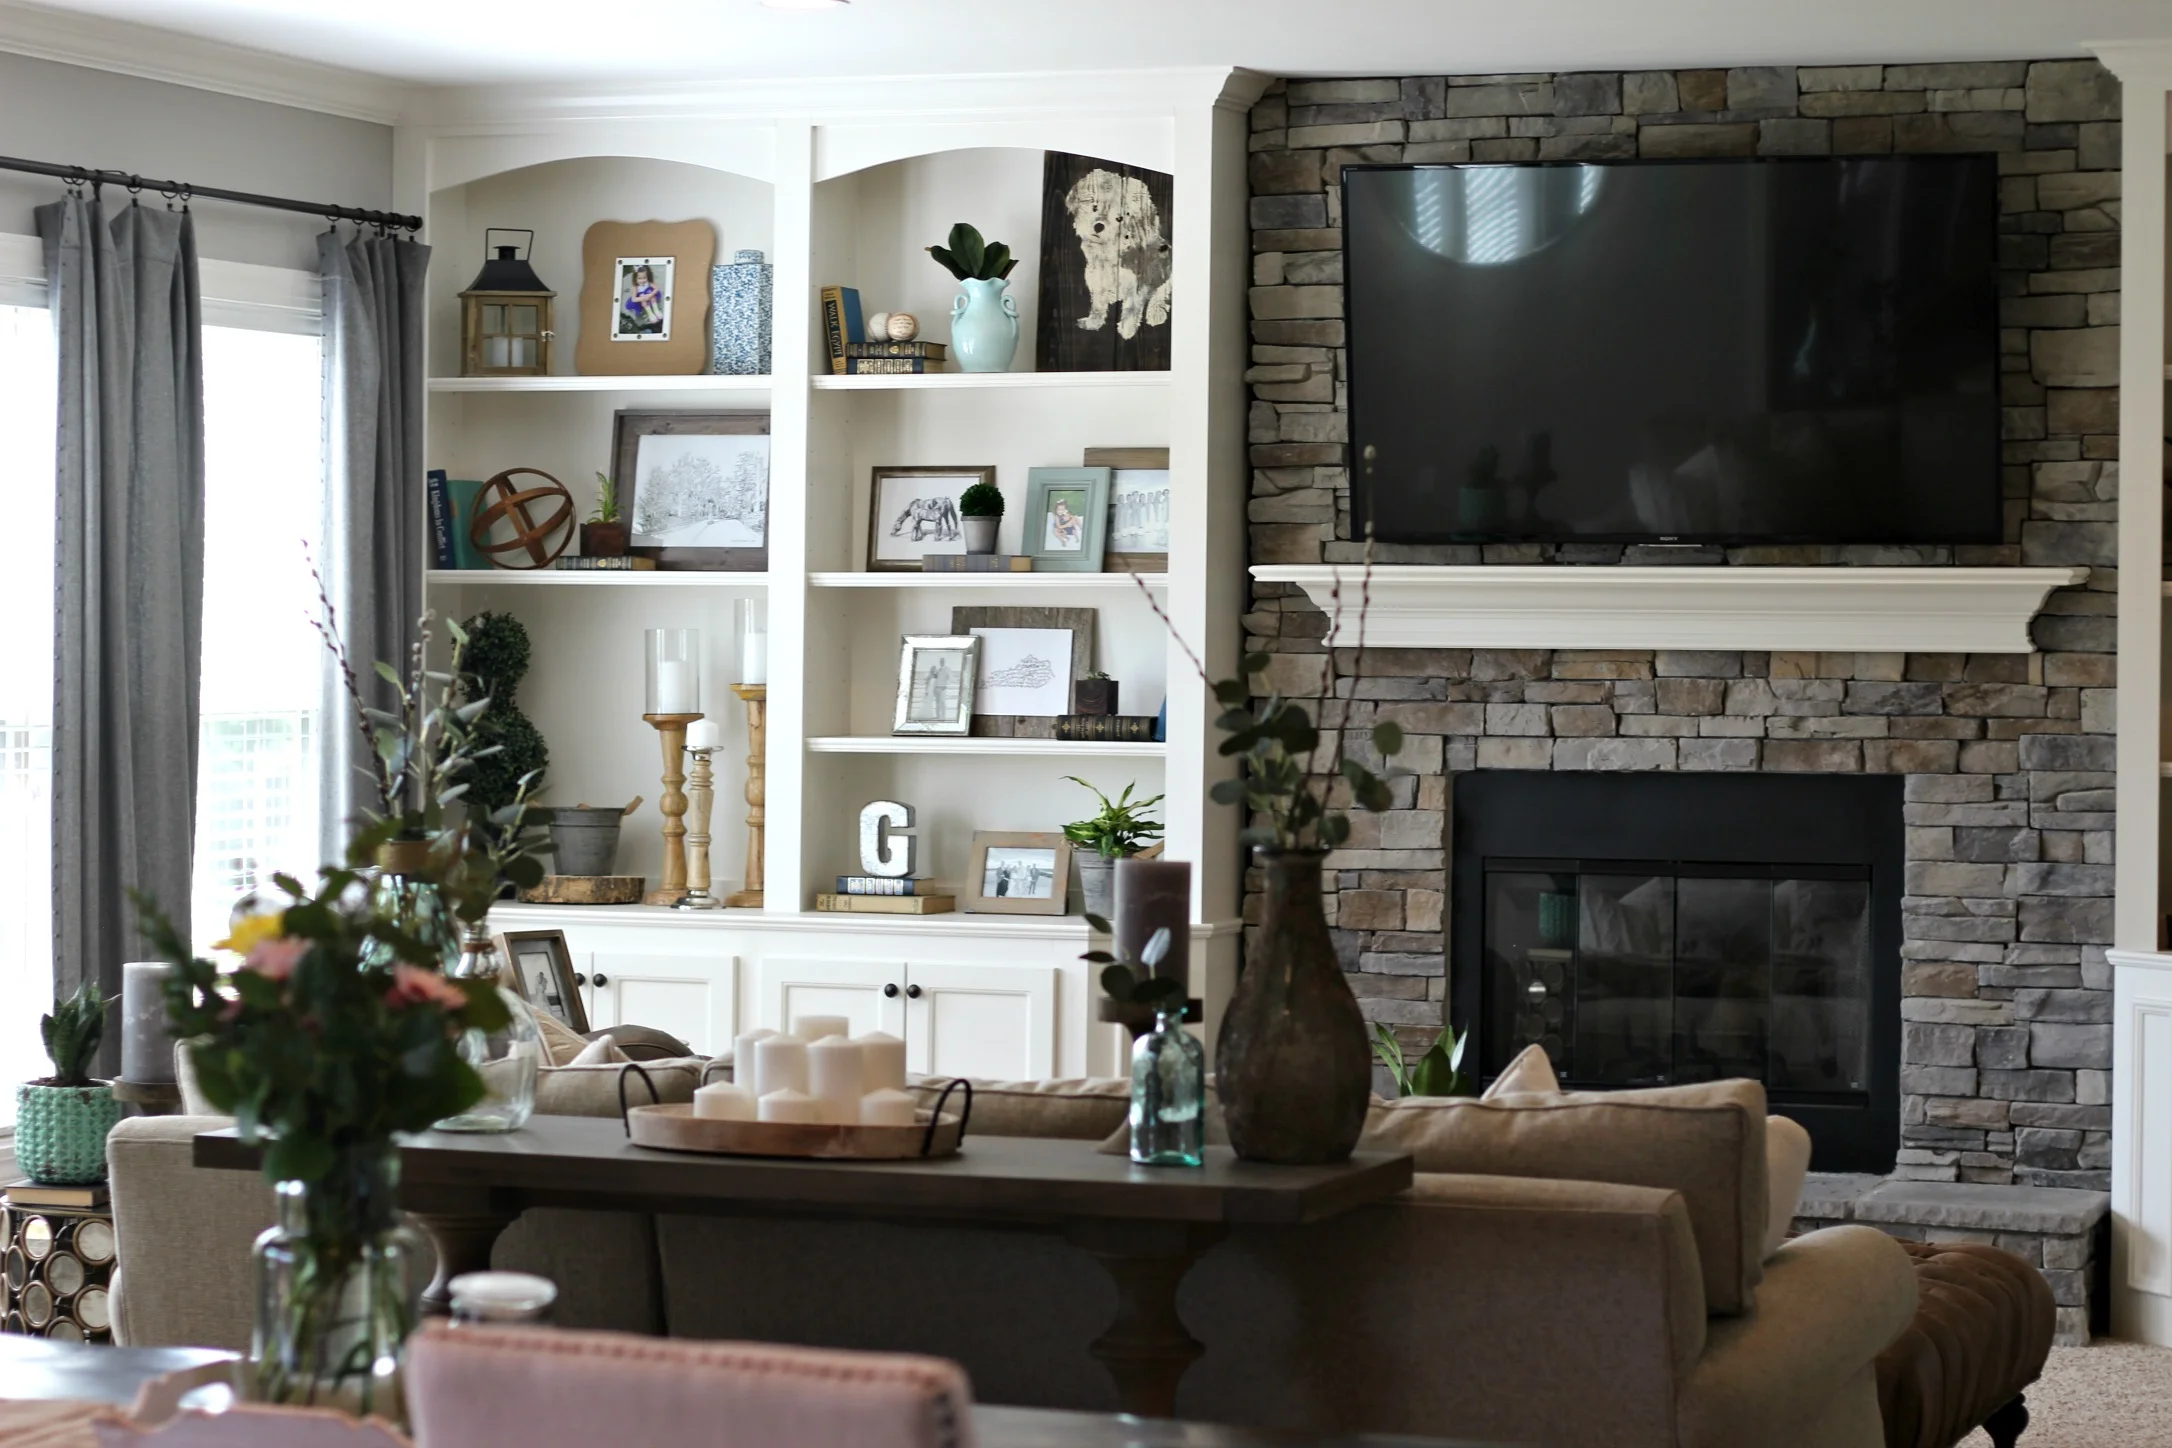
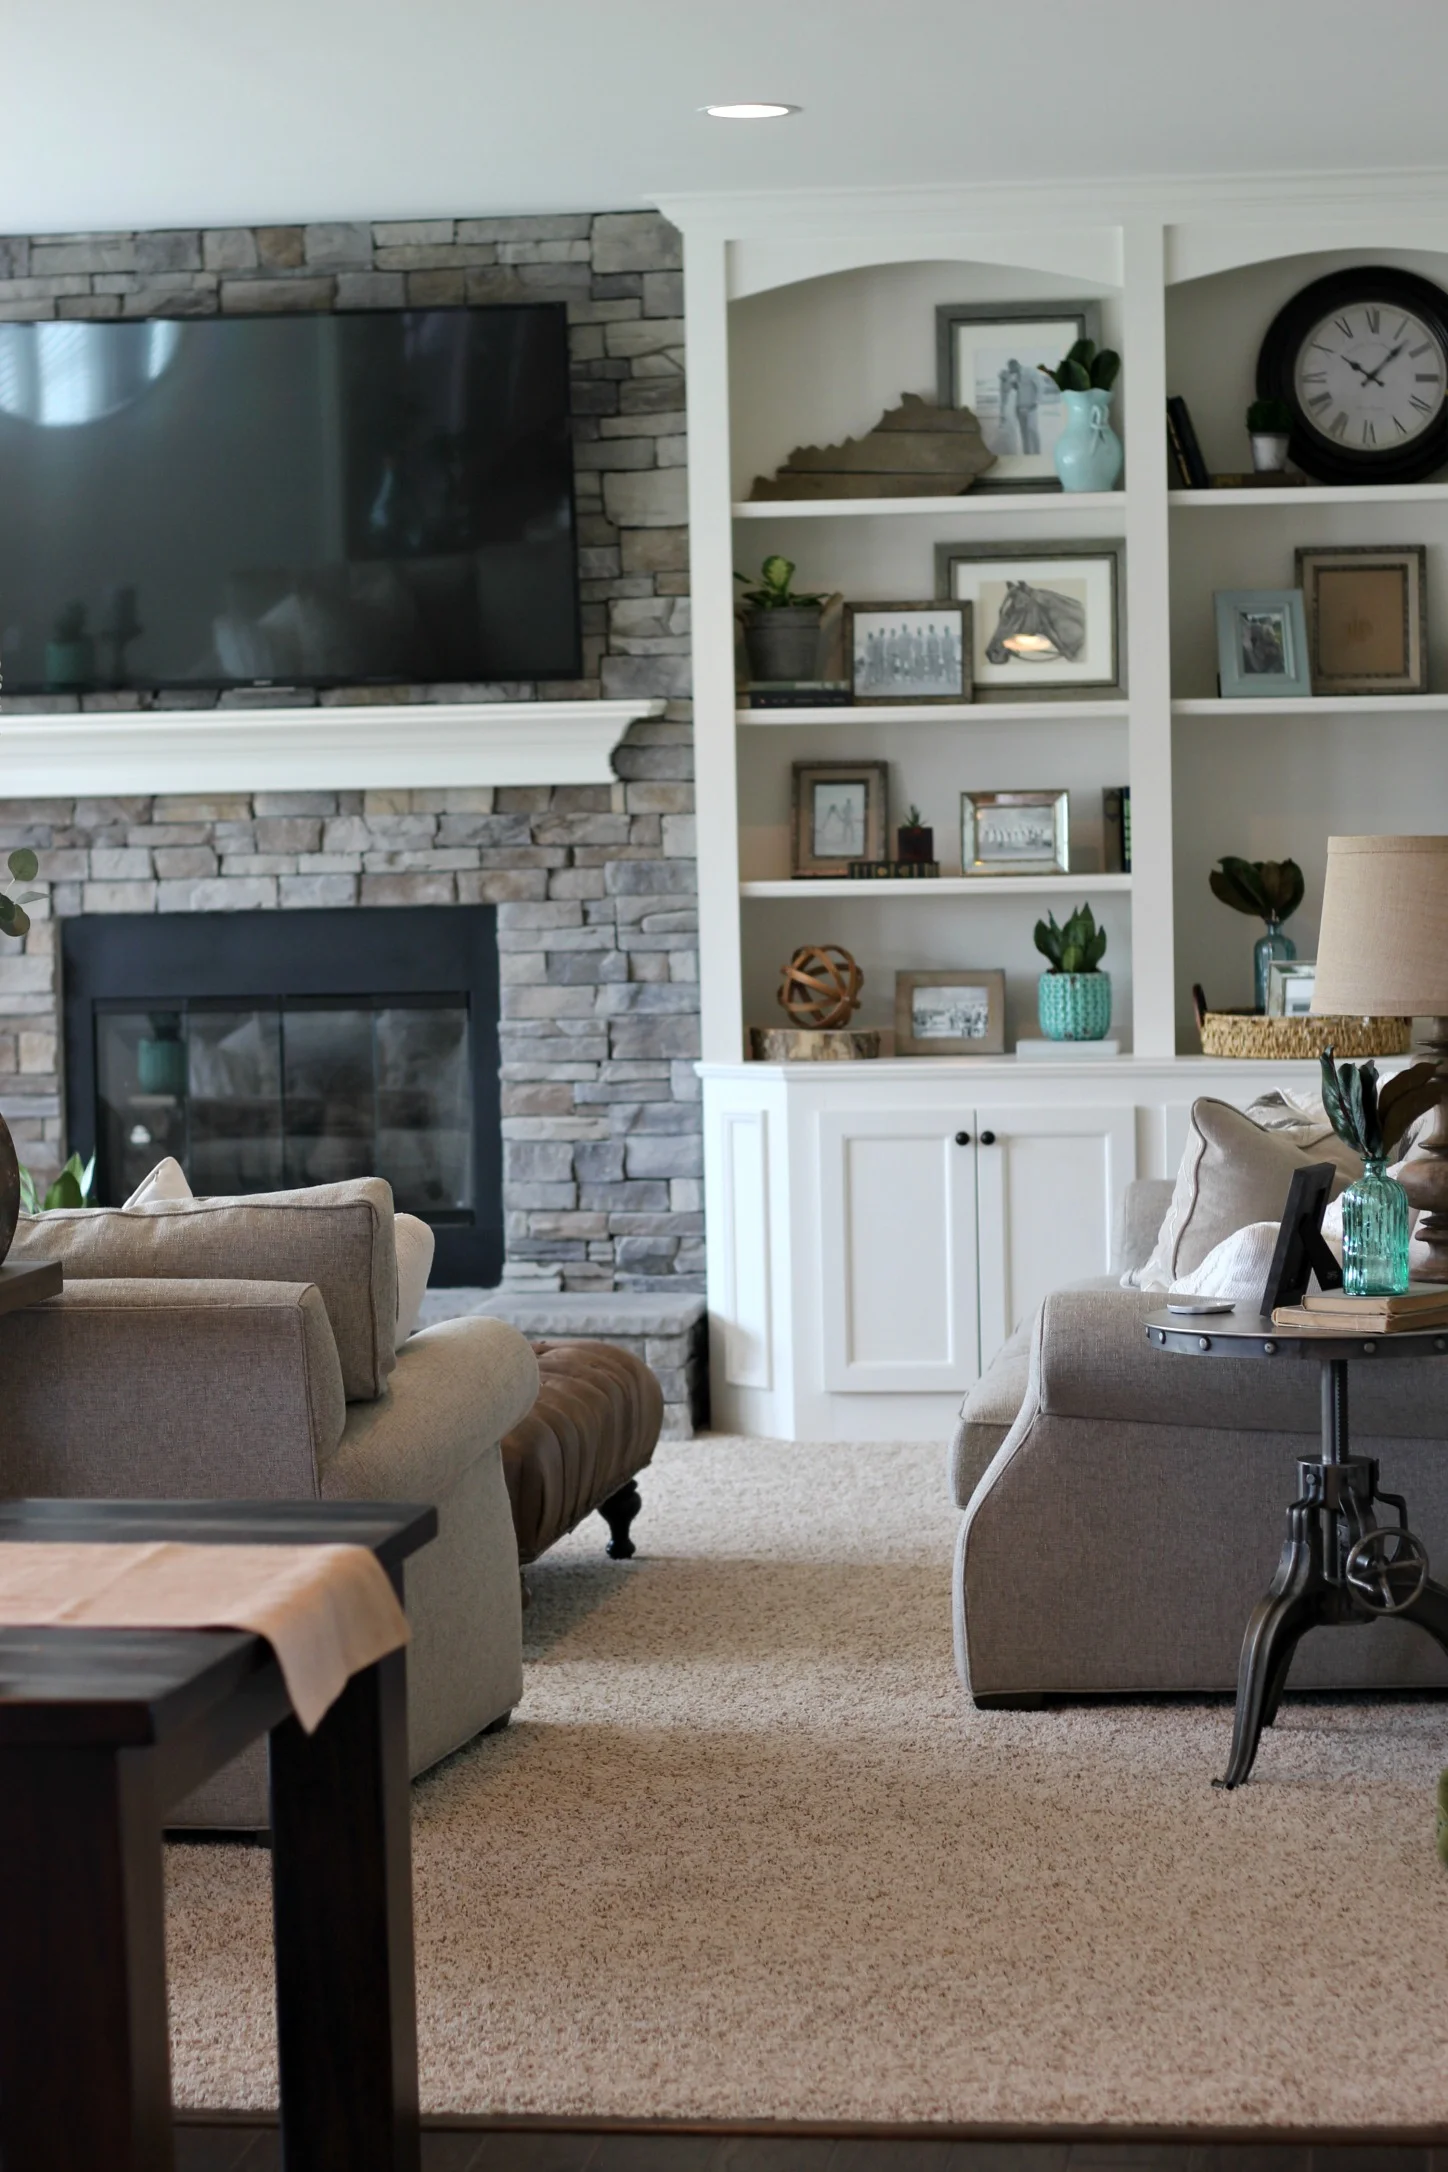
I've been dying to share this design project ever since the install a few weeks ago! The finishing touches are what made the biggest difference in this space and I think the end product perfectly emulates this couple's style and vision for the space. I was also lucky to start with a pretty clean slate and had some great base pieces to work off of (the couch, ottoman, and built-ins). Take a look at some of the before photos below:

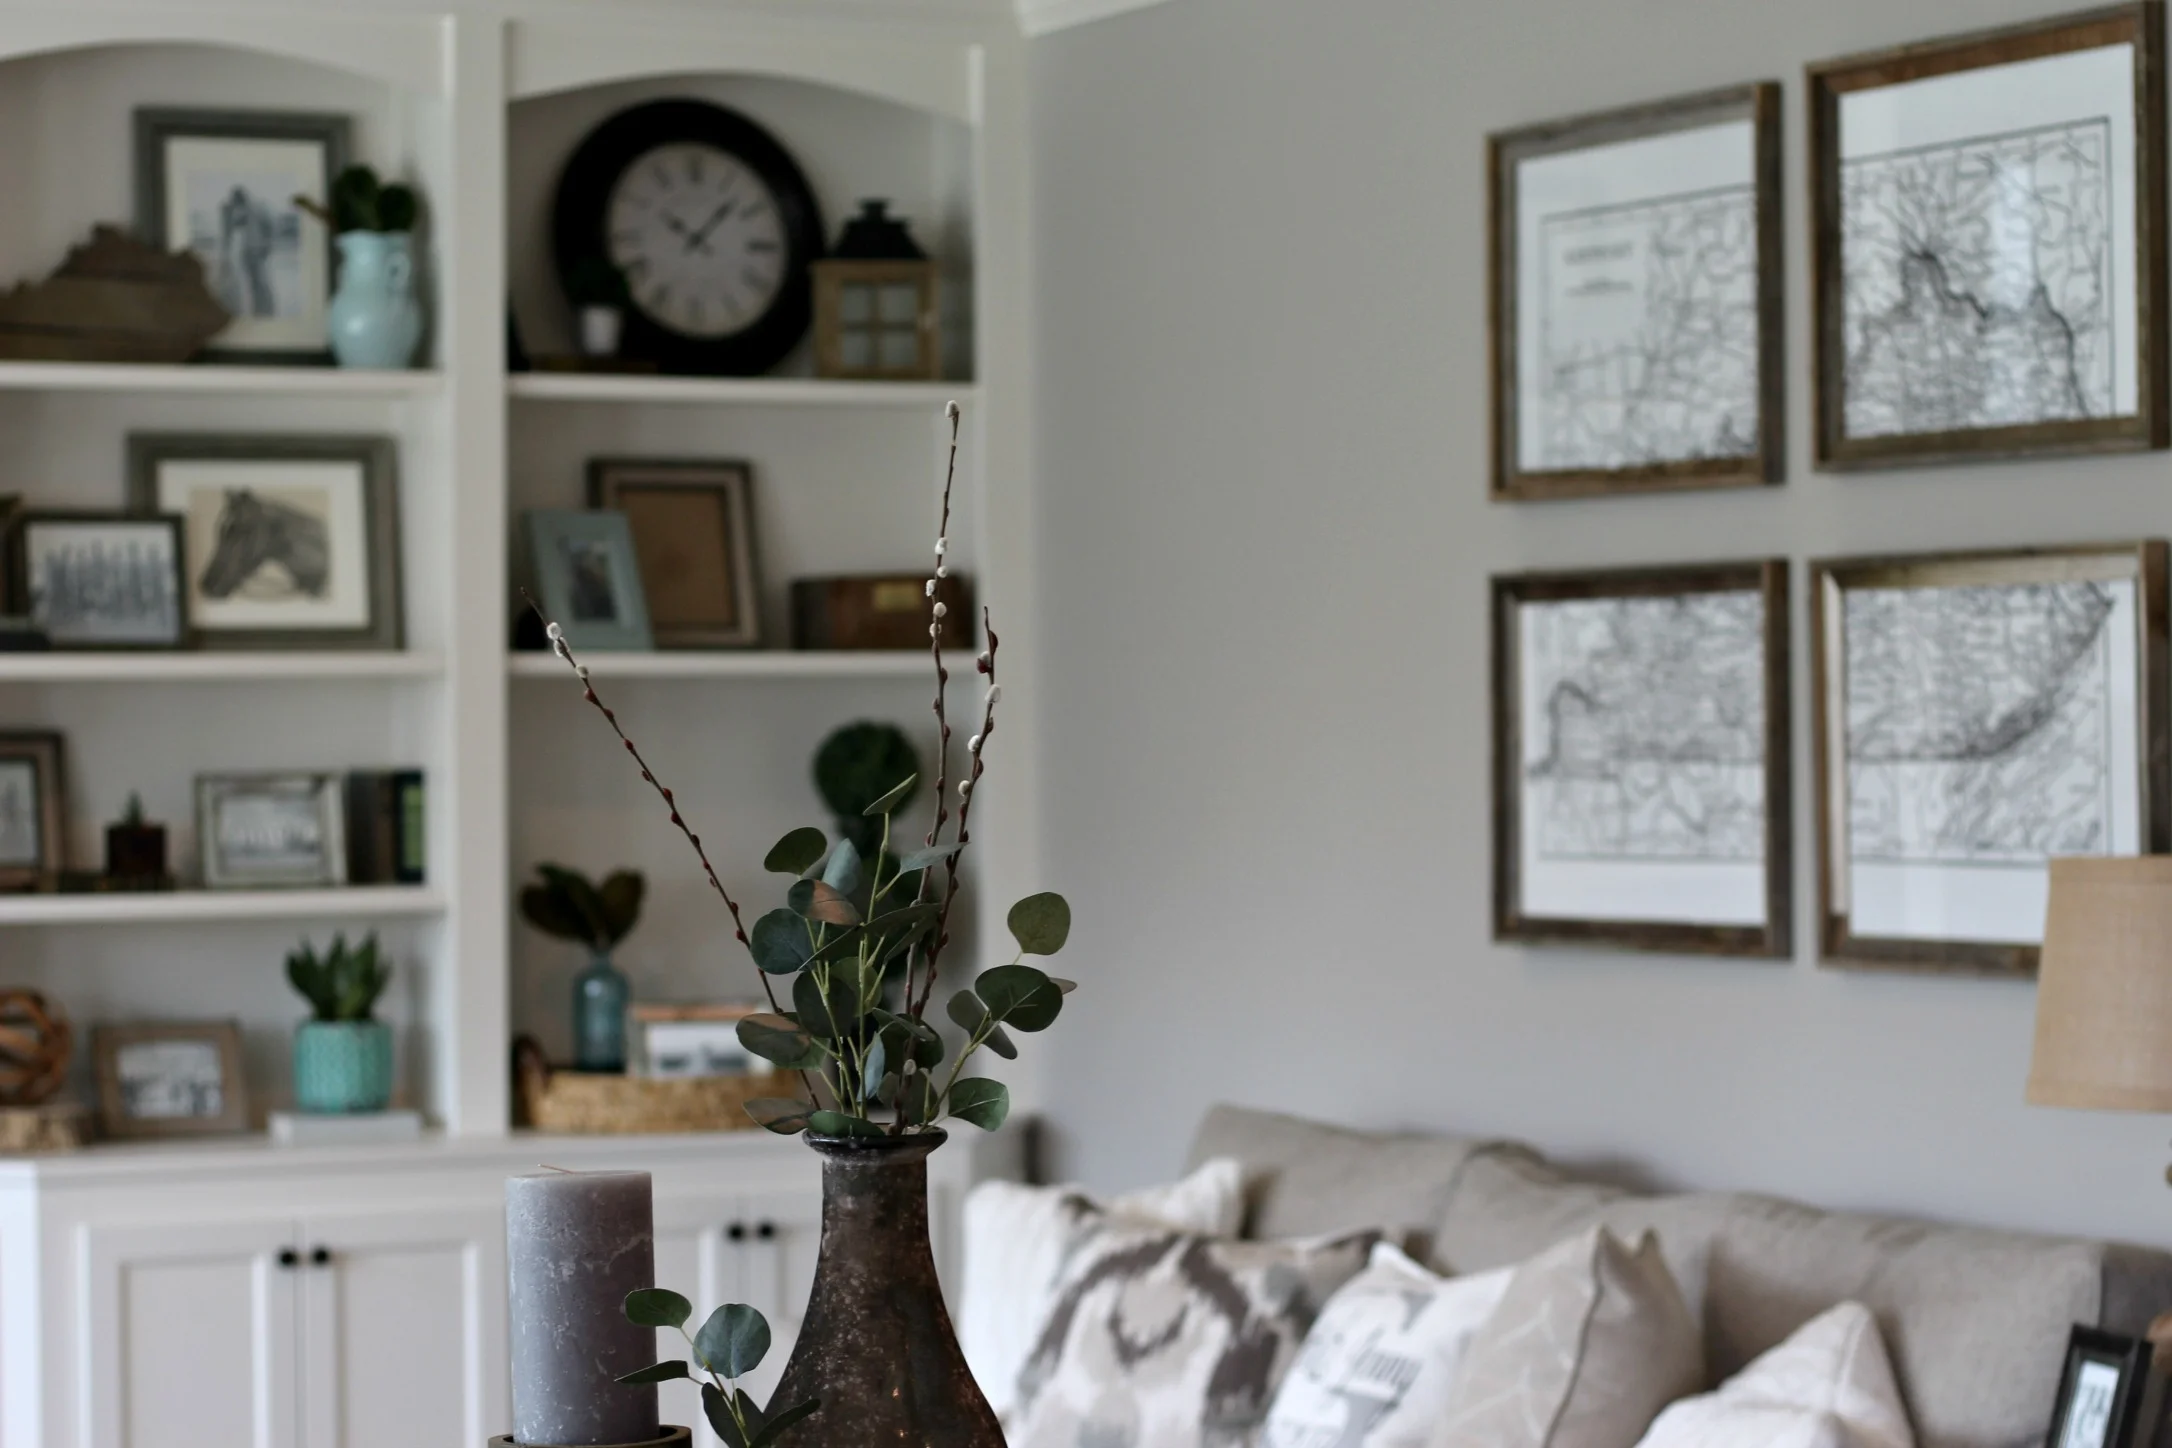
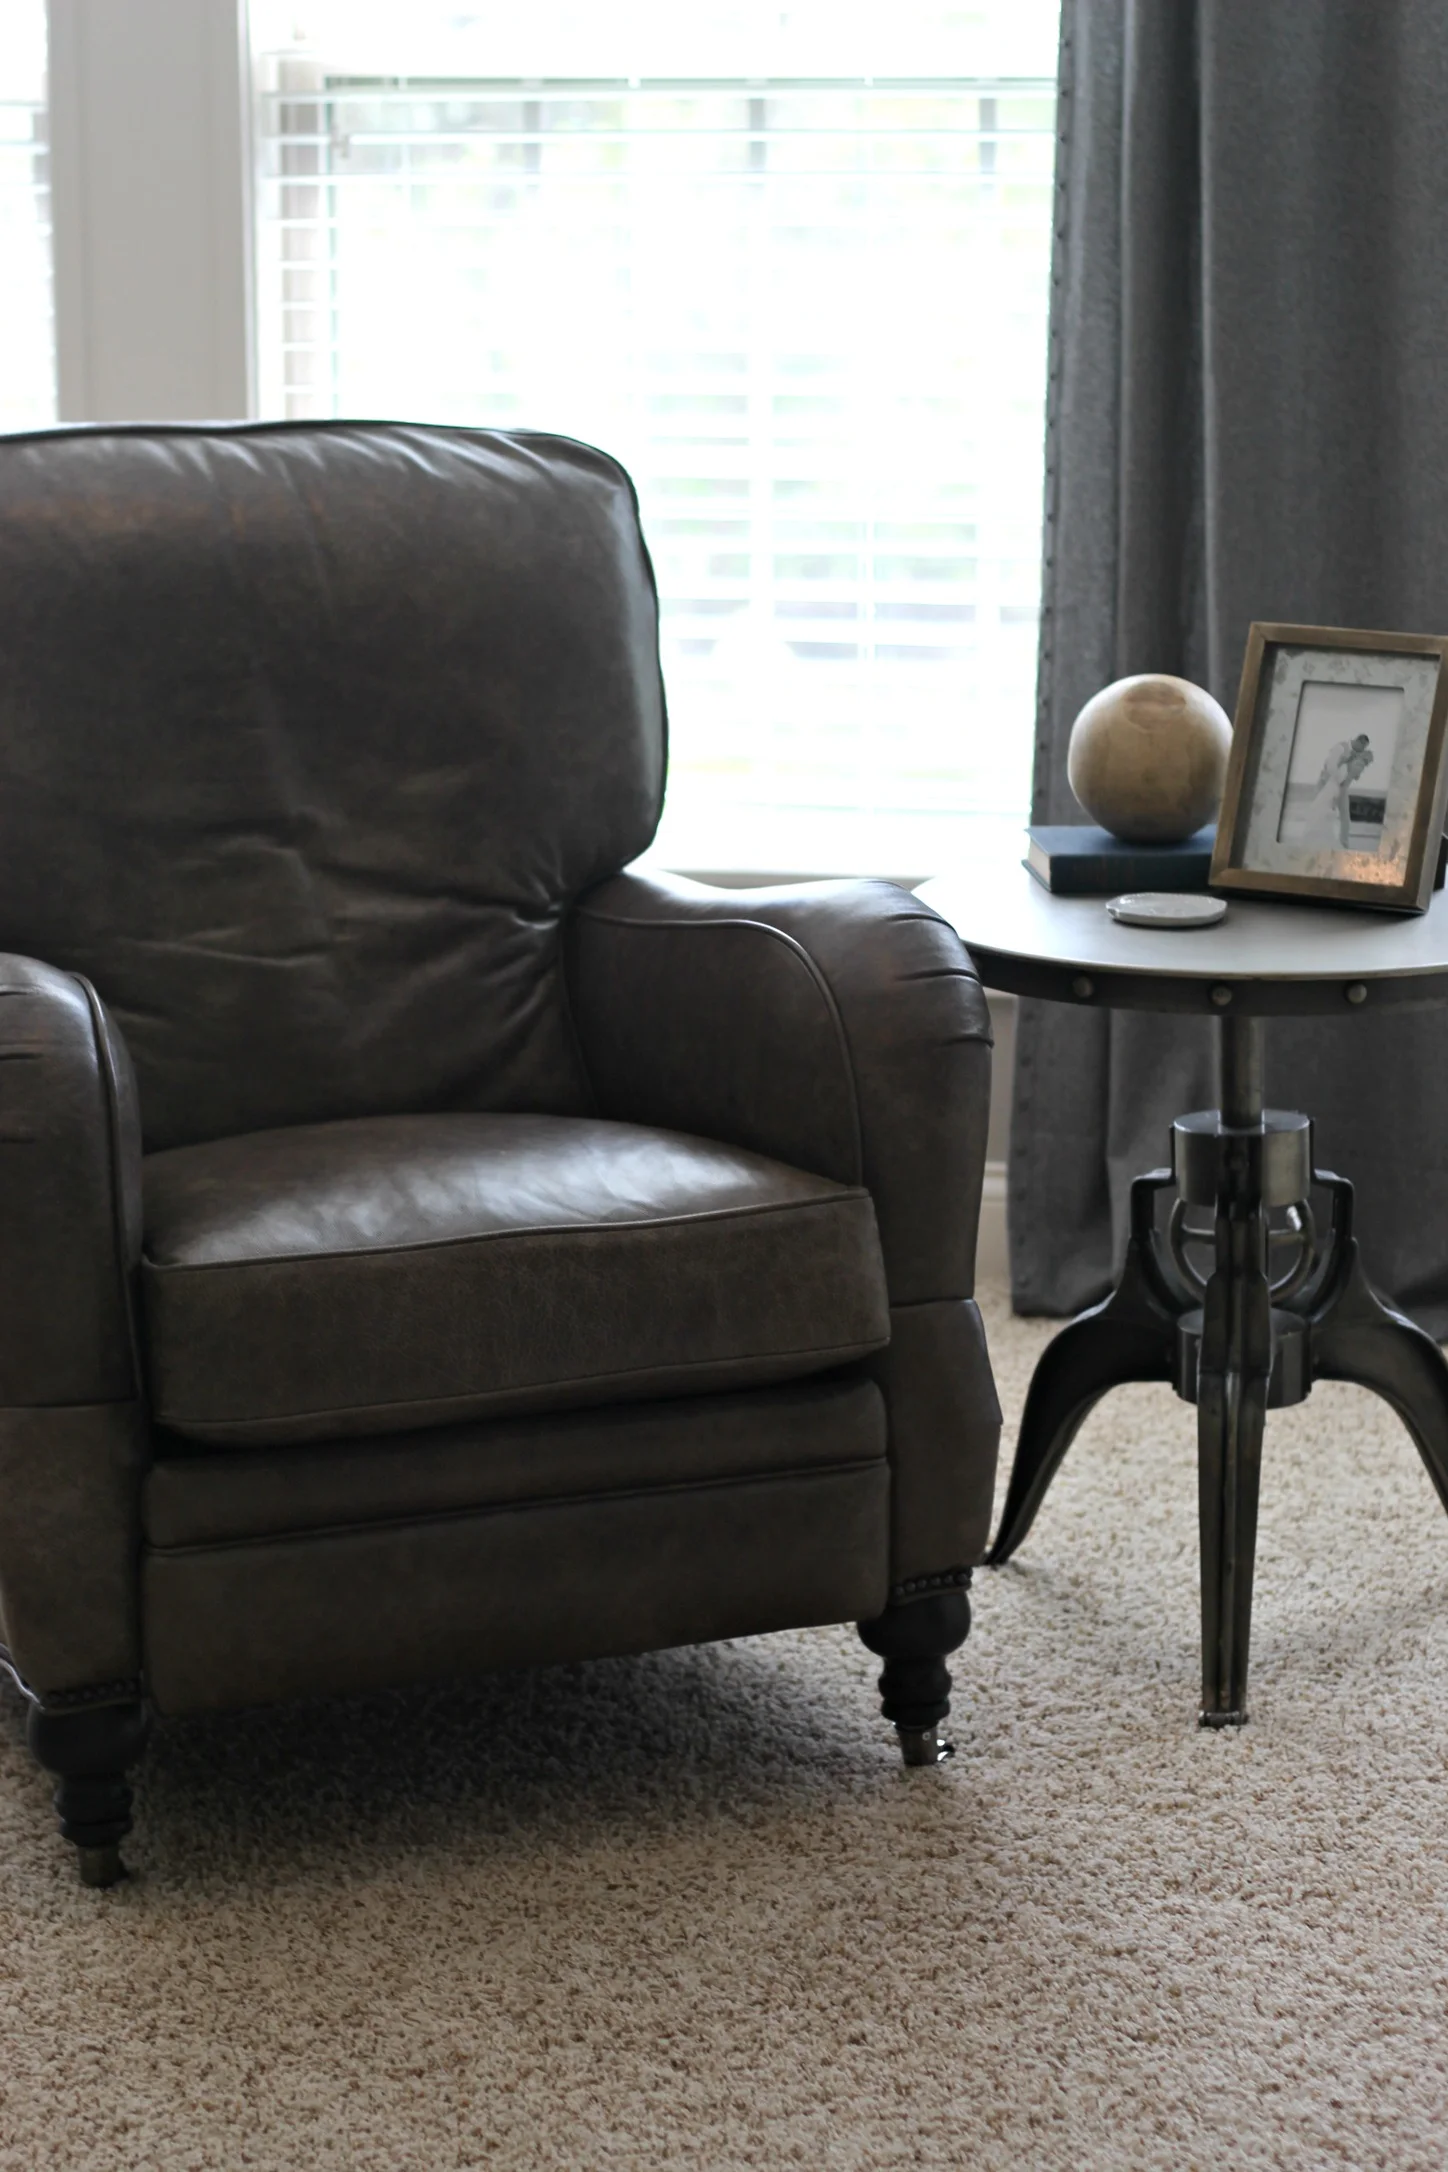
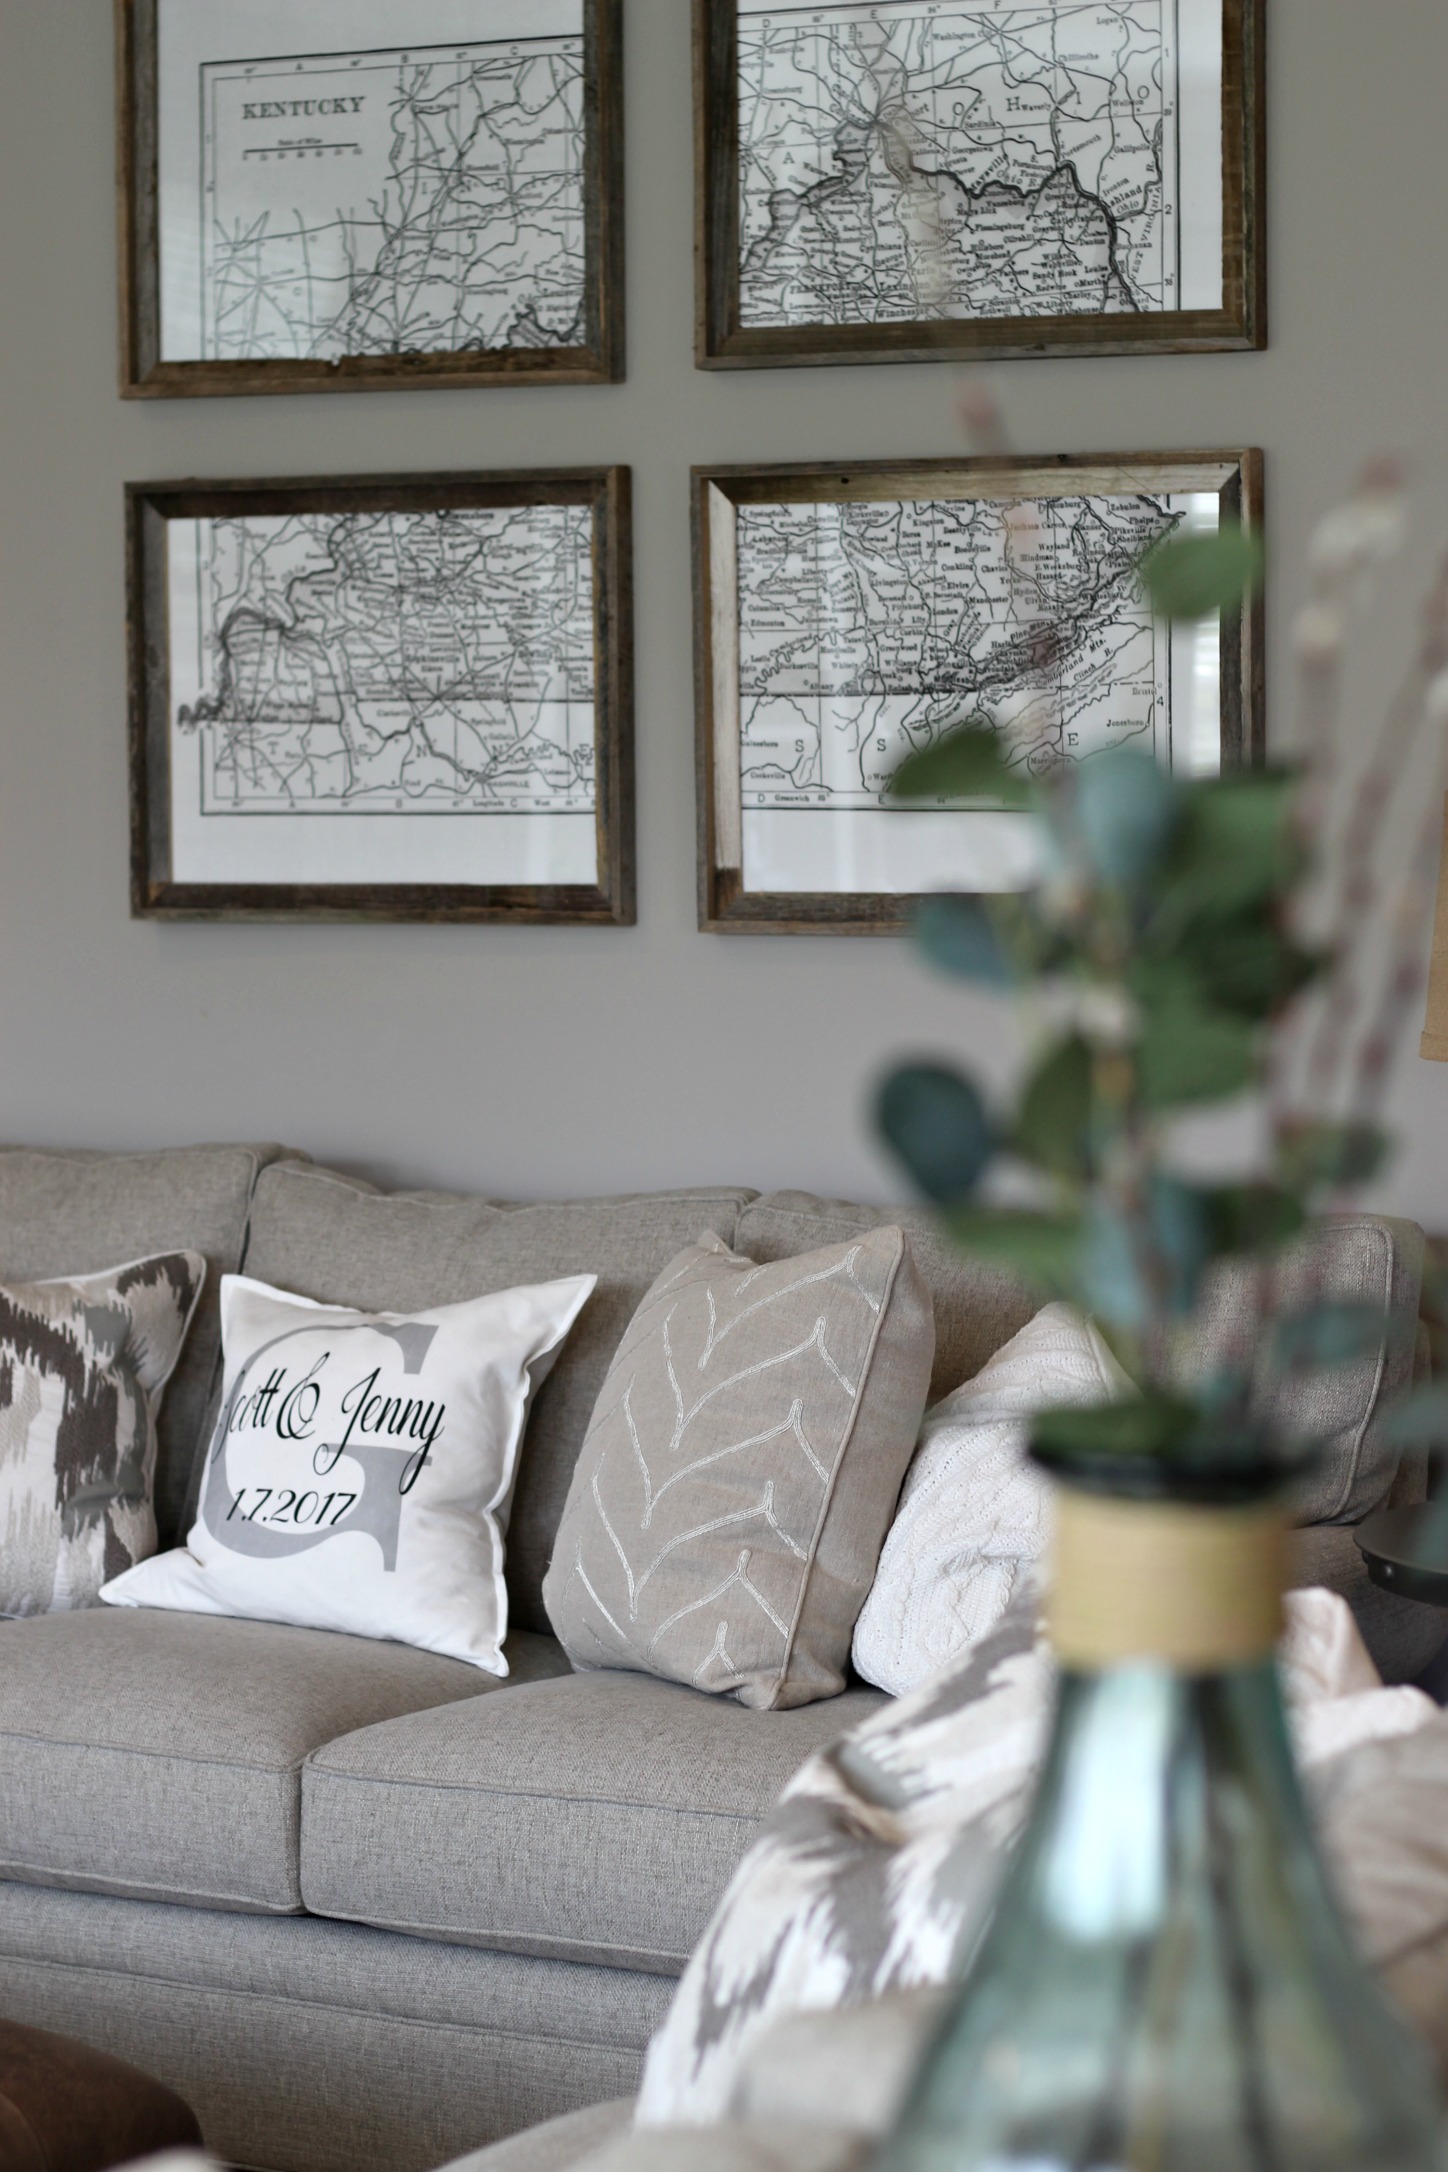
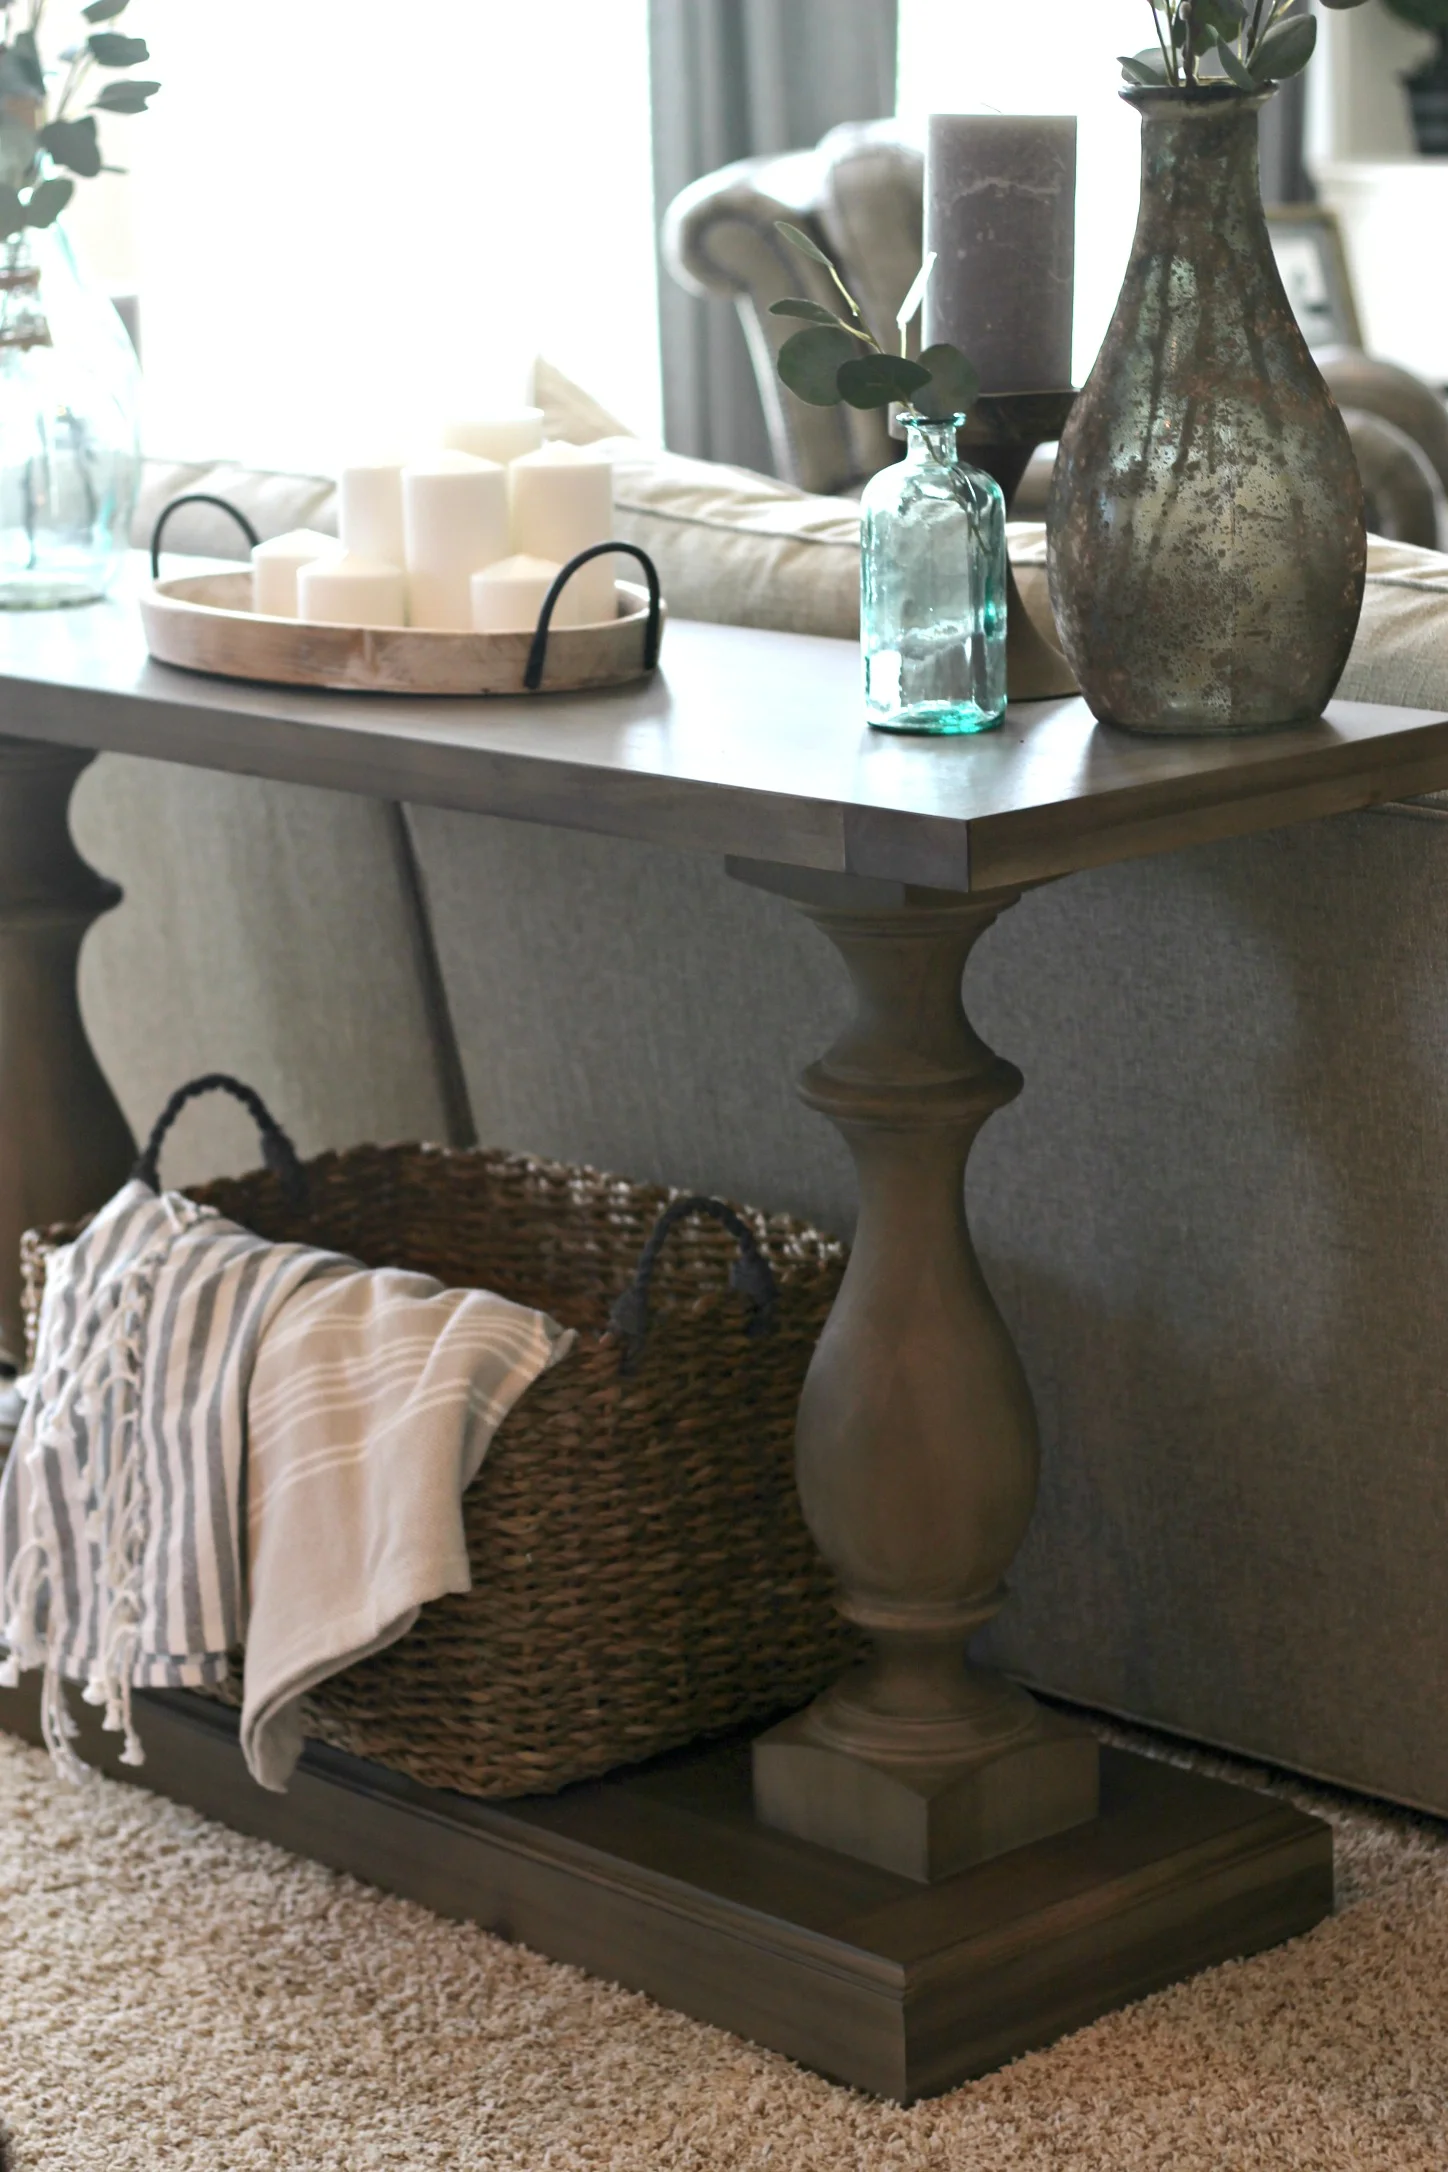
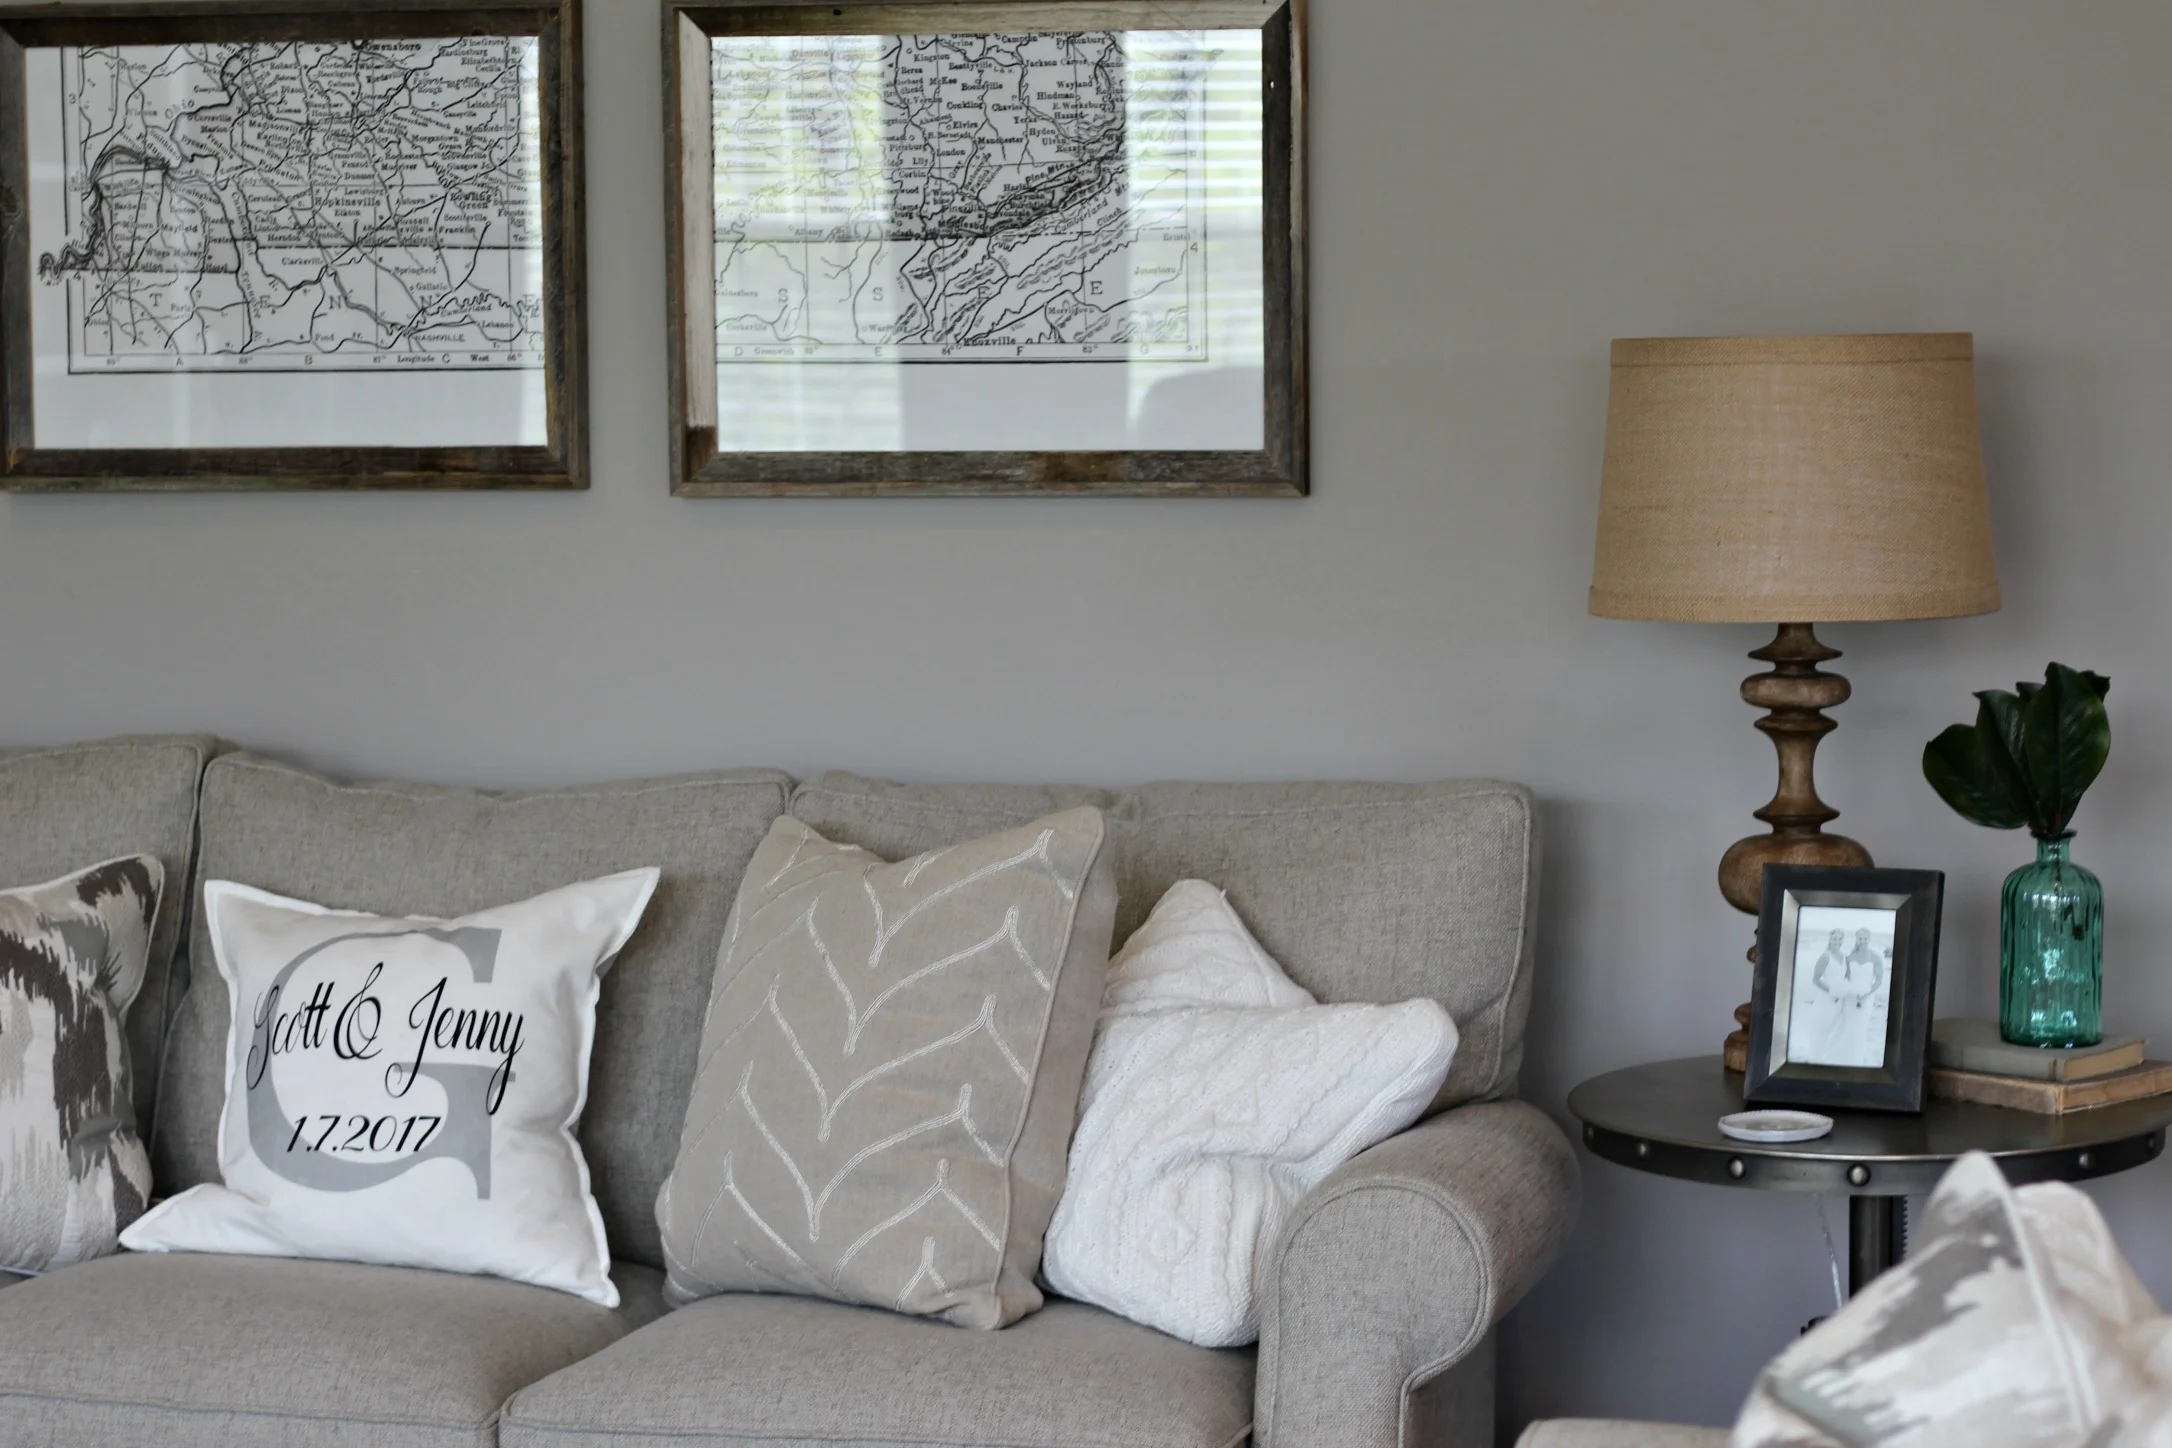
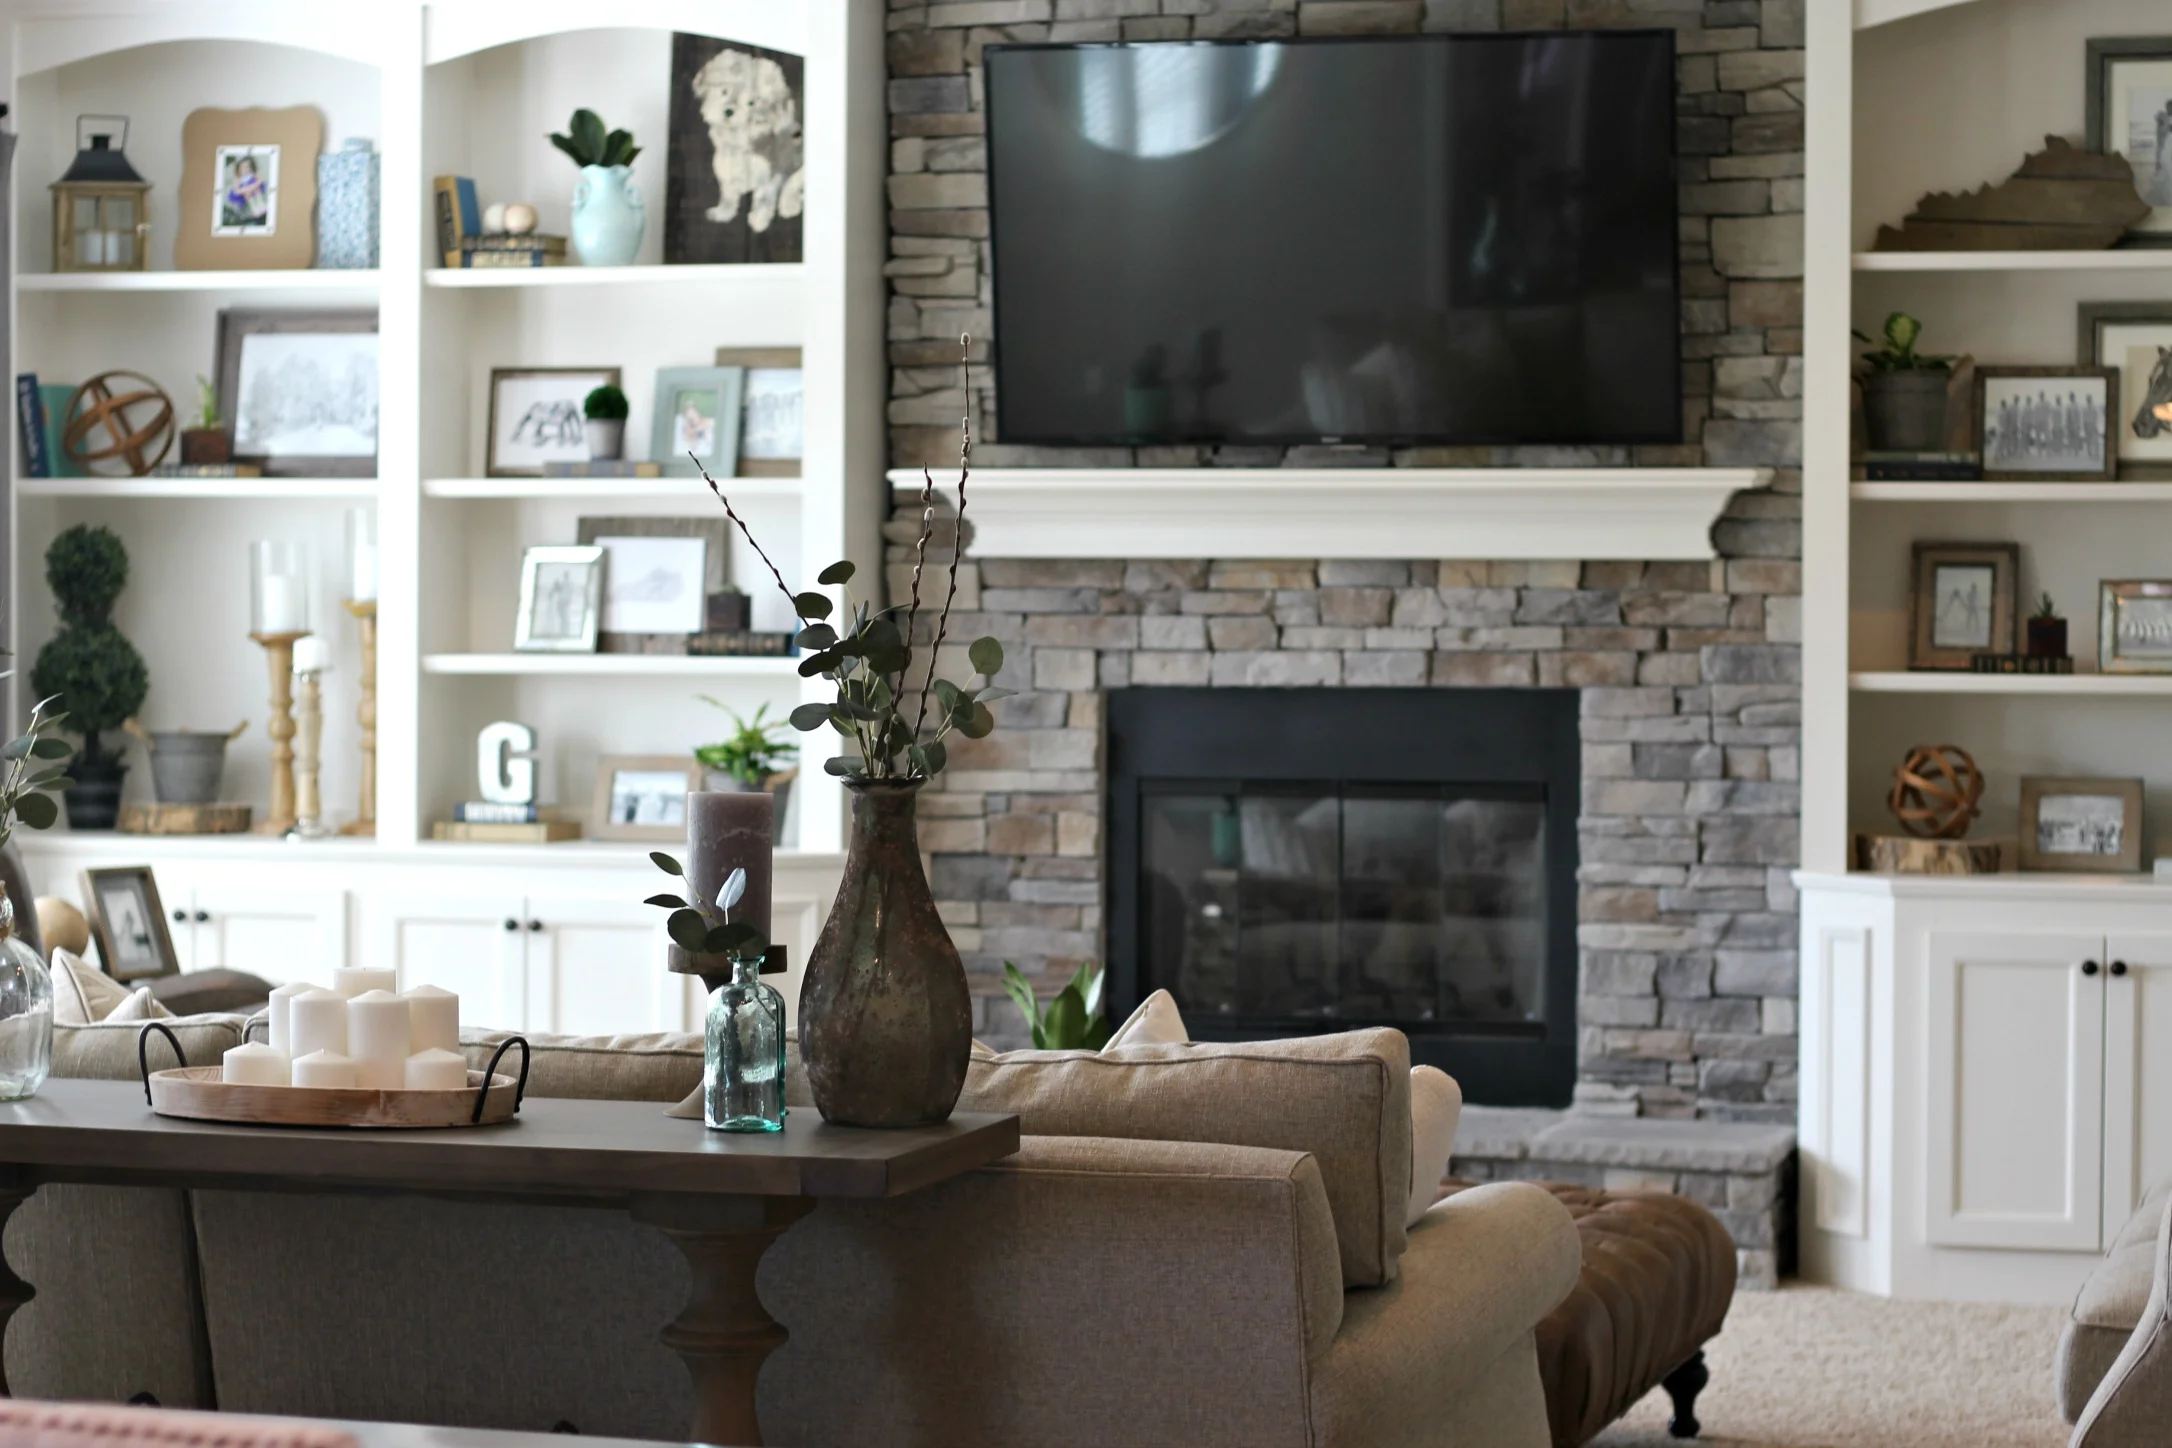
We added some more furniture pieces like the leather recliner, baluster style sofa table, and mirrored accent table to fill the room better and make the layout feel complete. I also restyled the built-in bookshelves and added quite a few new framed photos and prints, more books, + small accessories. To fill the large open window on the left side, we added a long oil rubbed bronze rod filled with several gray wool curtains from West Elm. I created some custom Kentucky map wall art to fill the large, empty wall above the couch and the barnwood frames perfectly tie the rustic, modern, and industrial elements of the room all together.
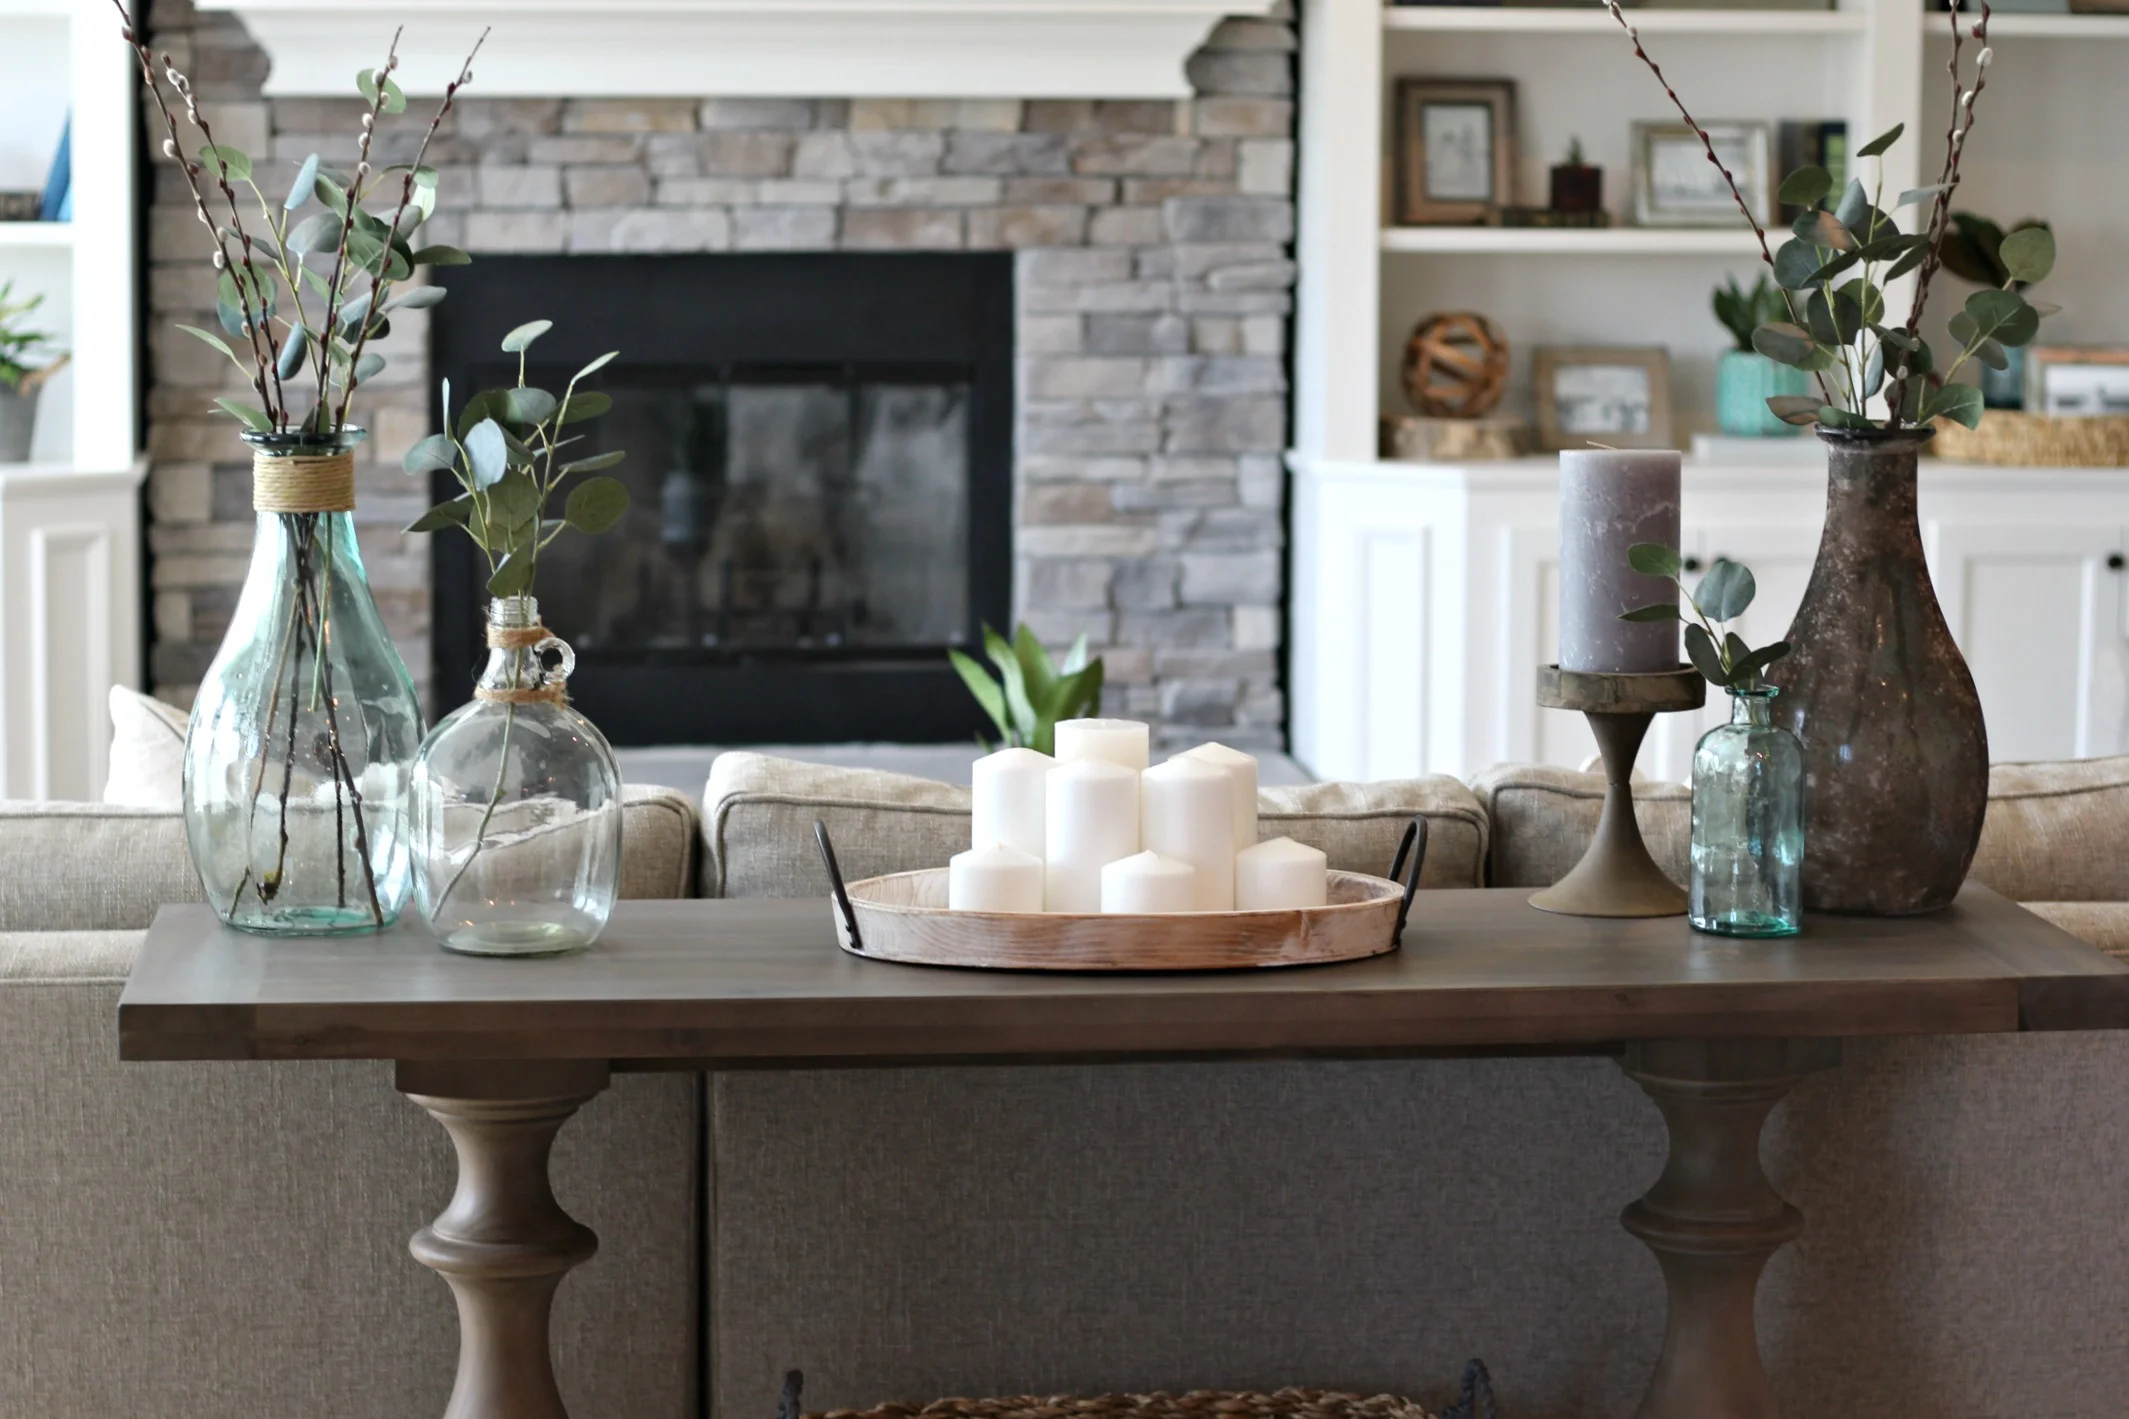
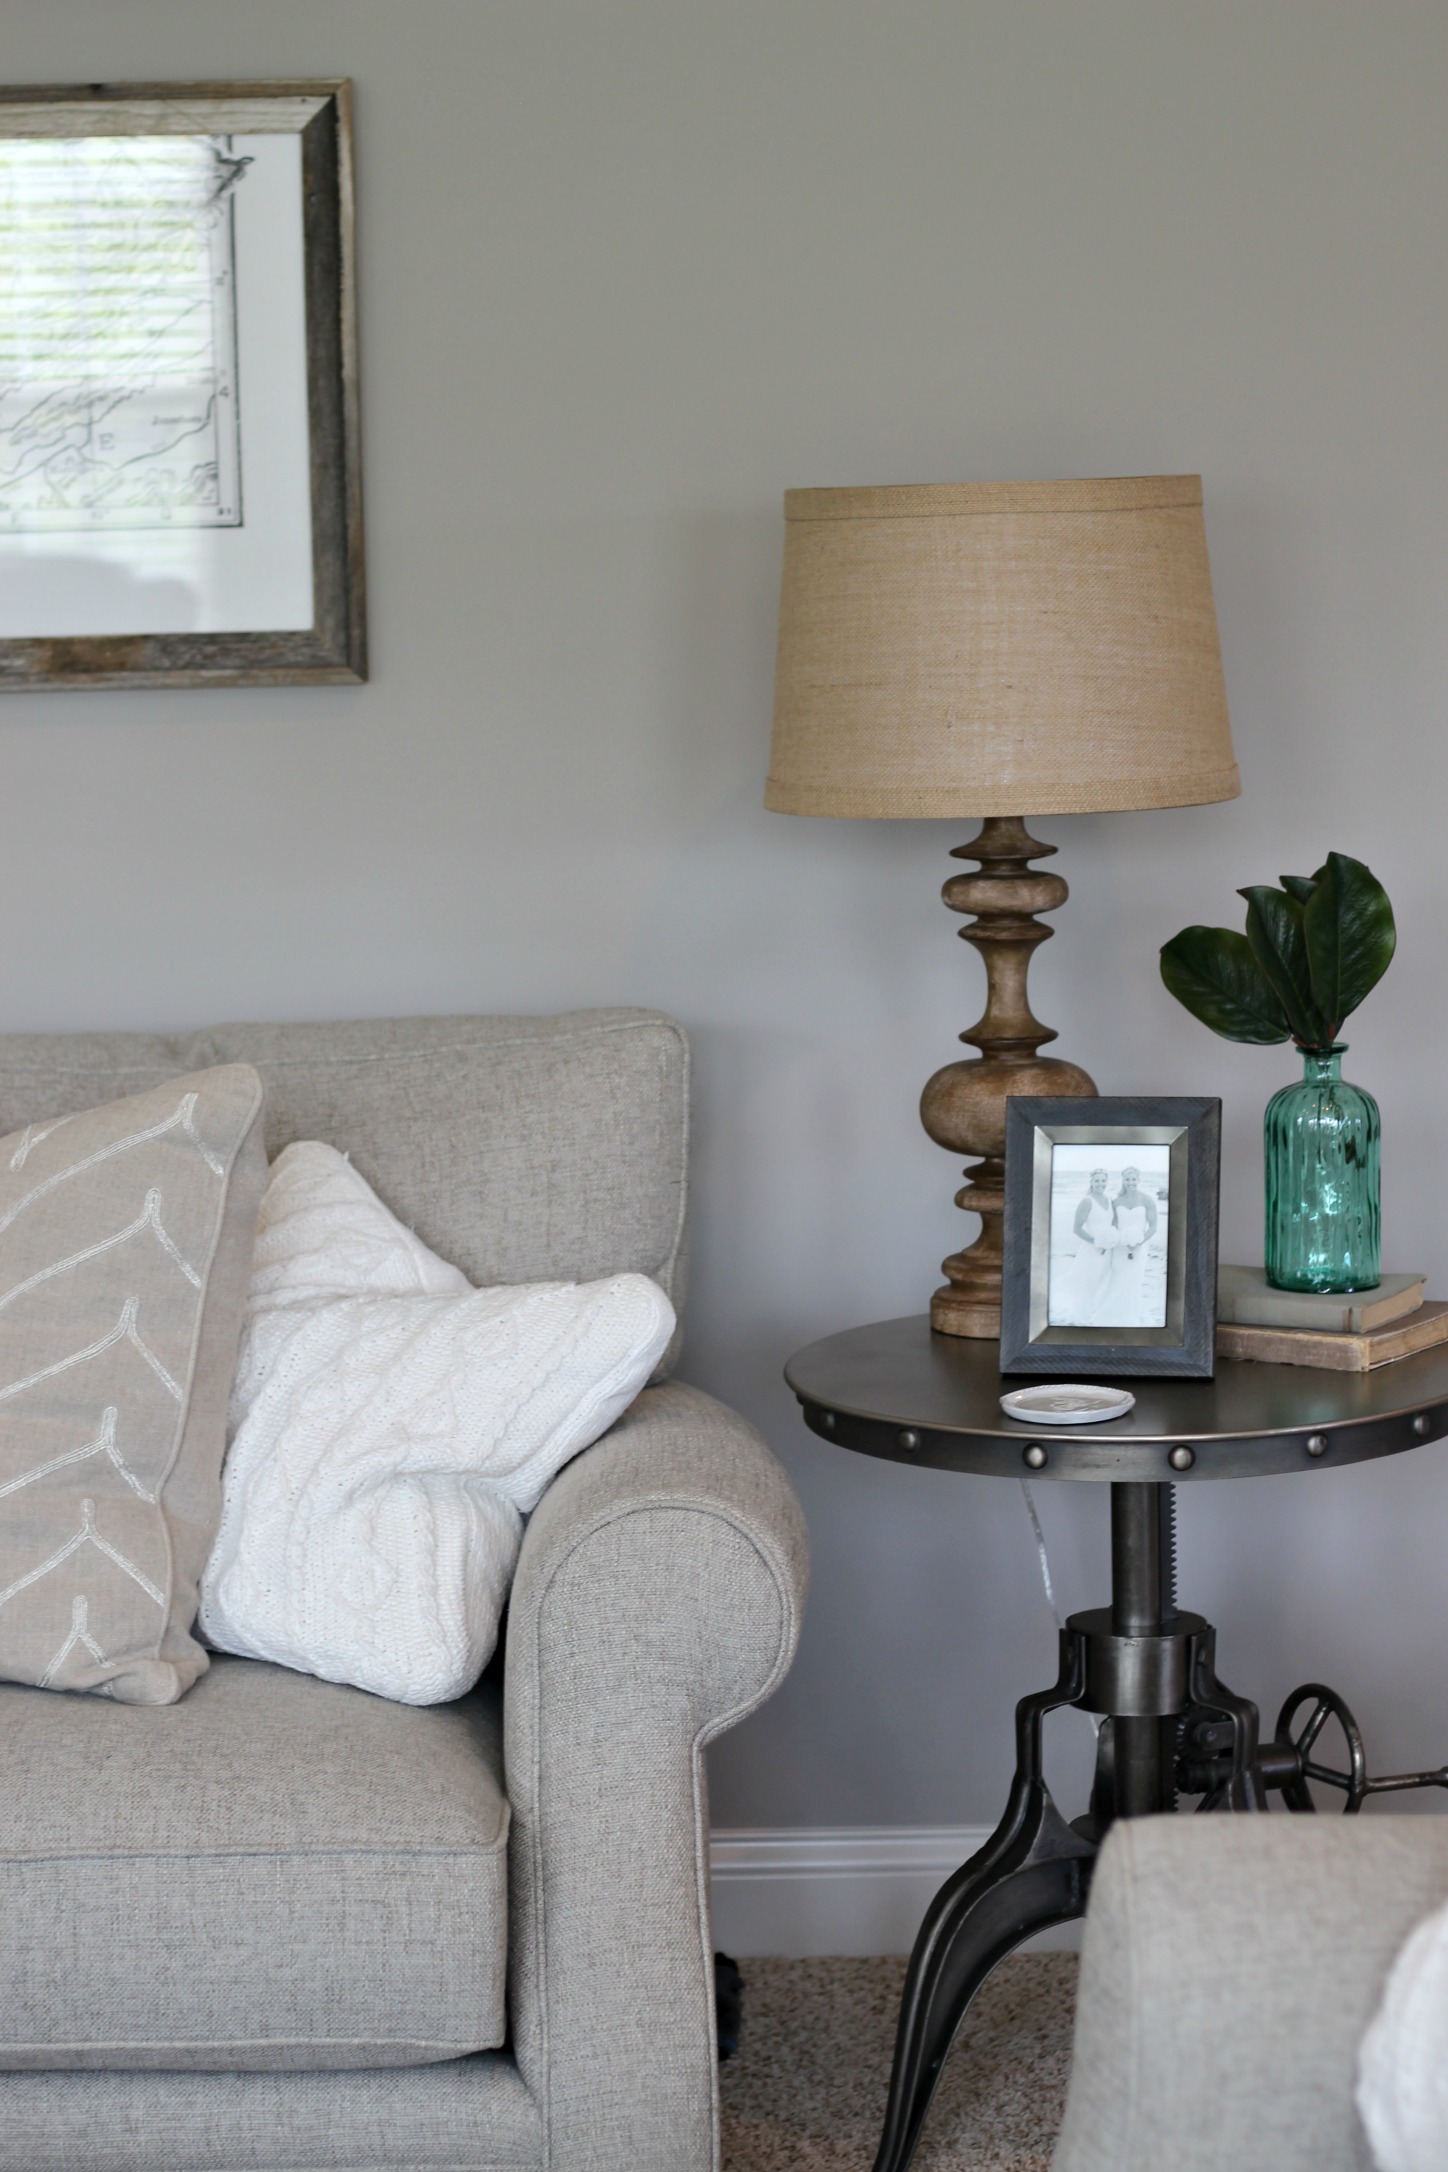
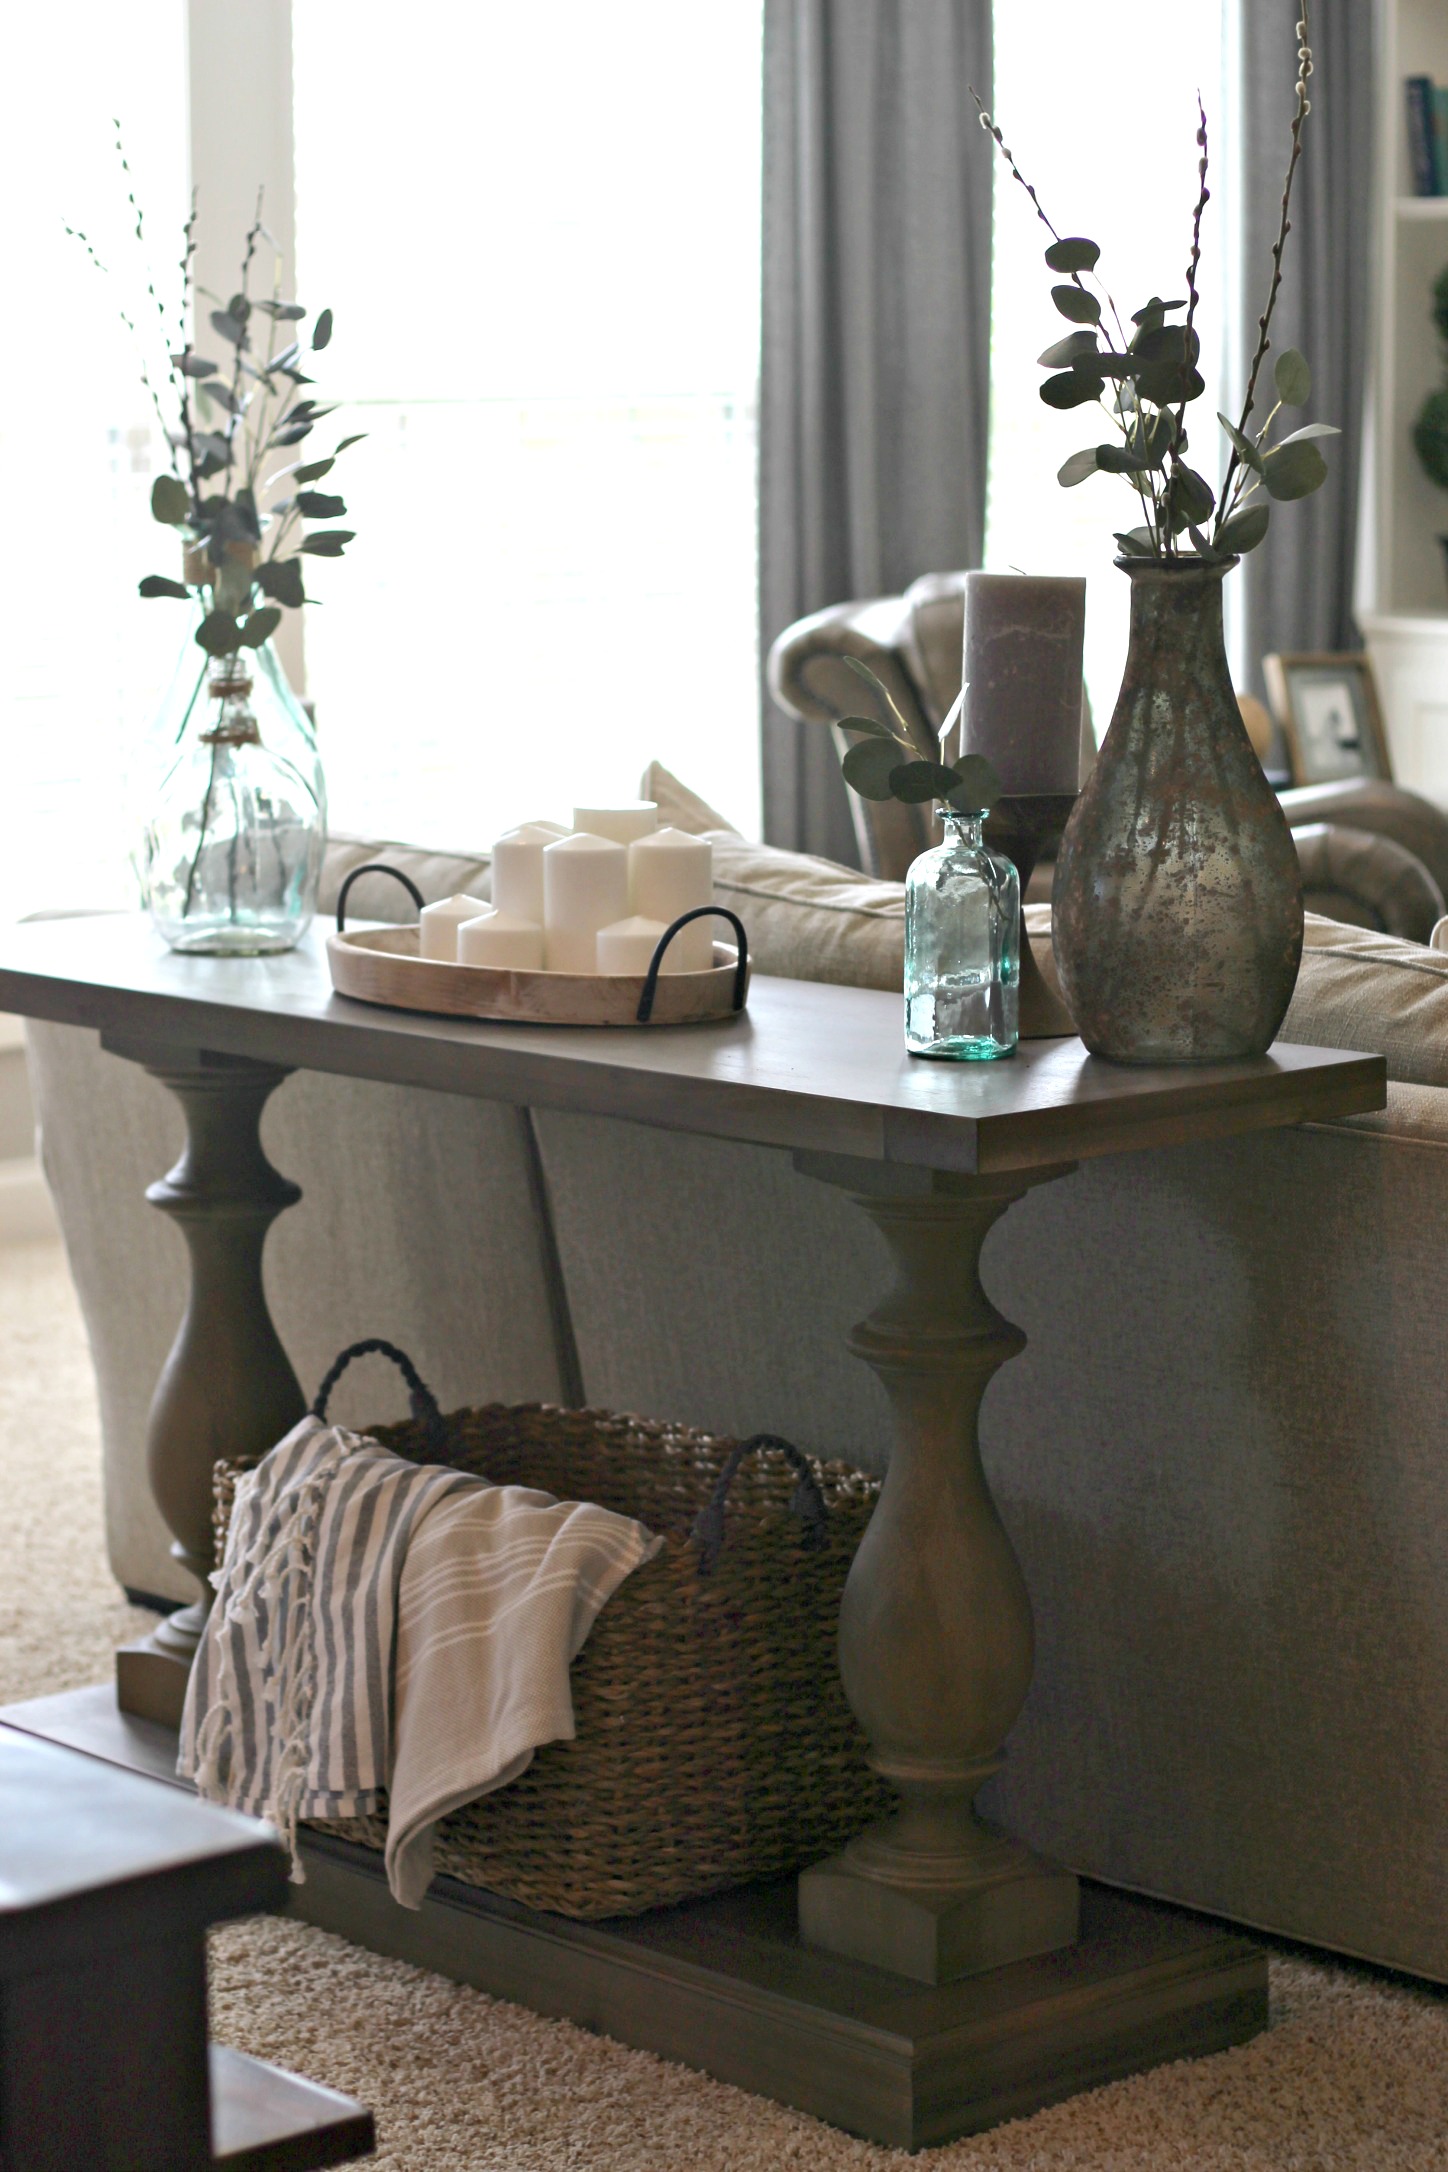
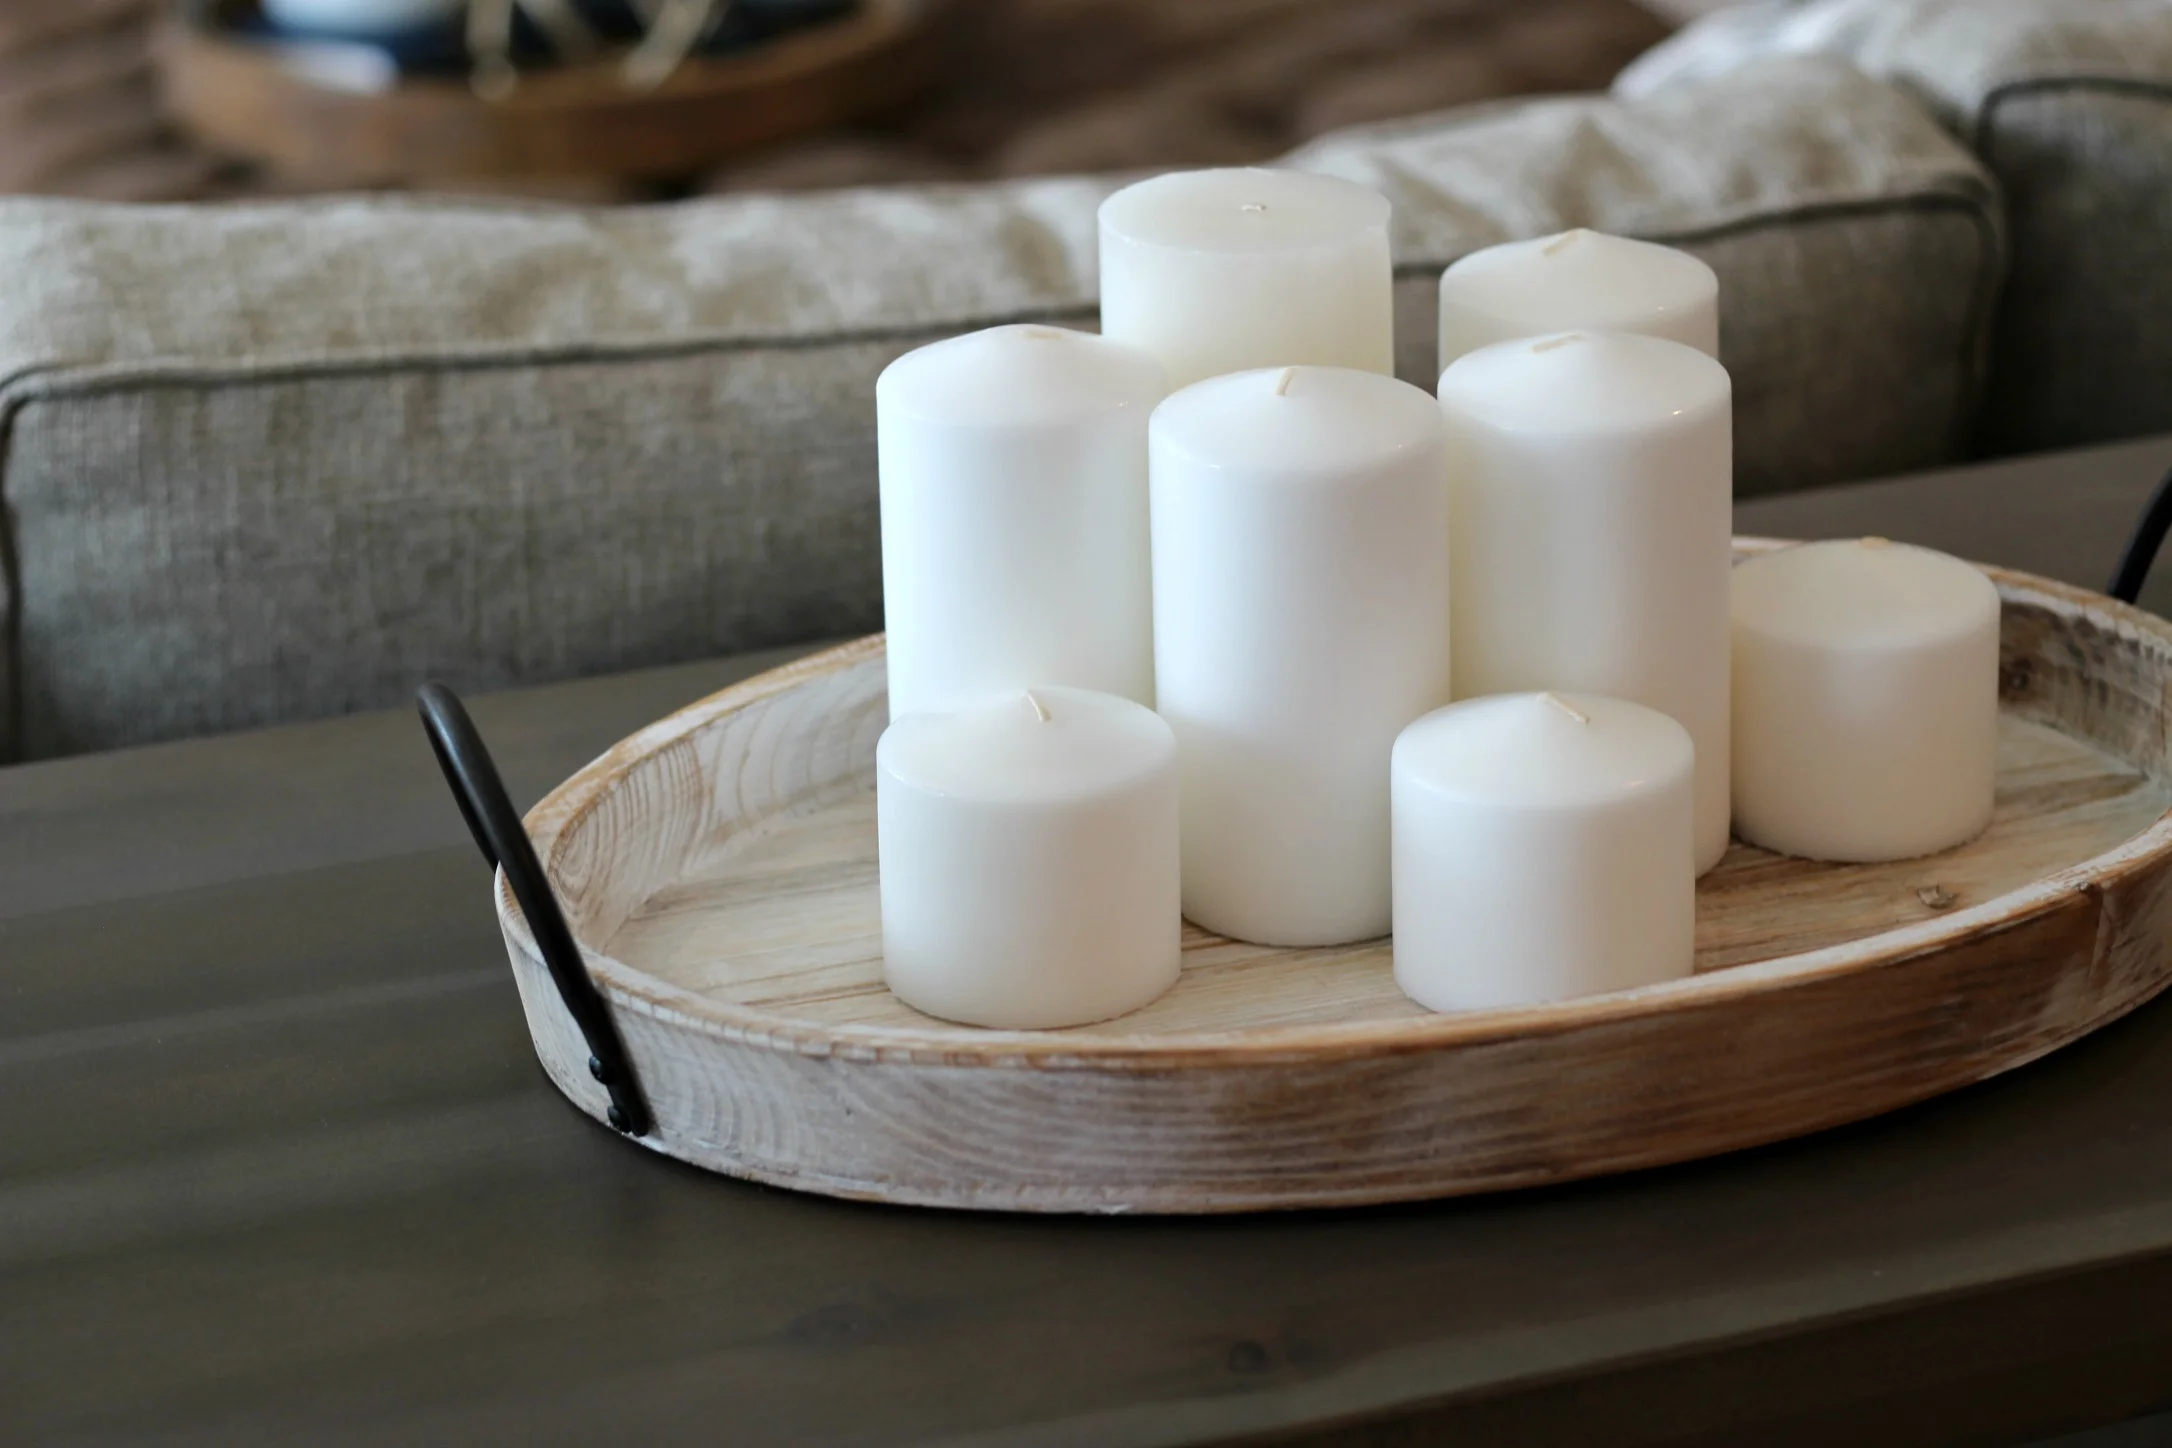
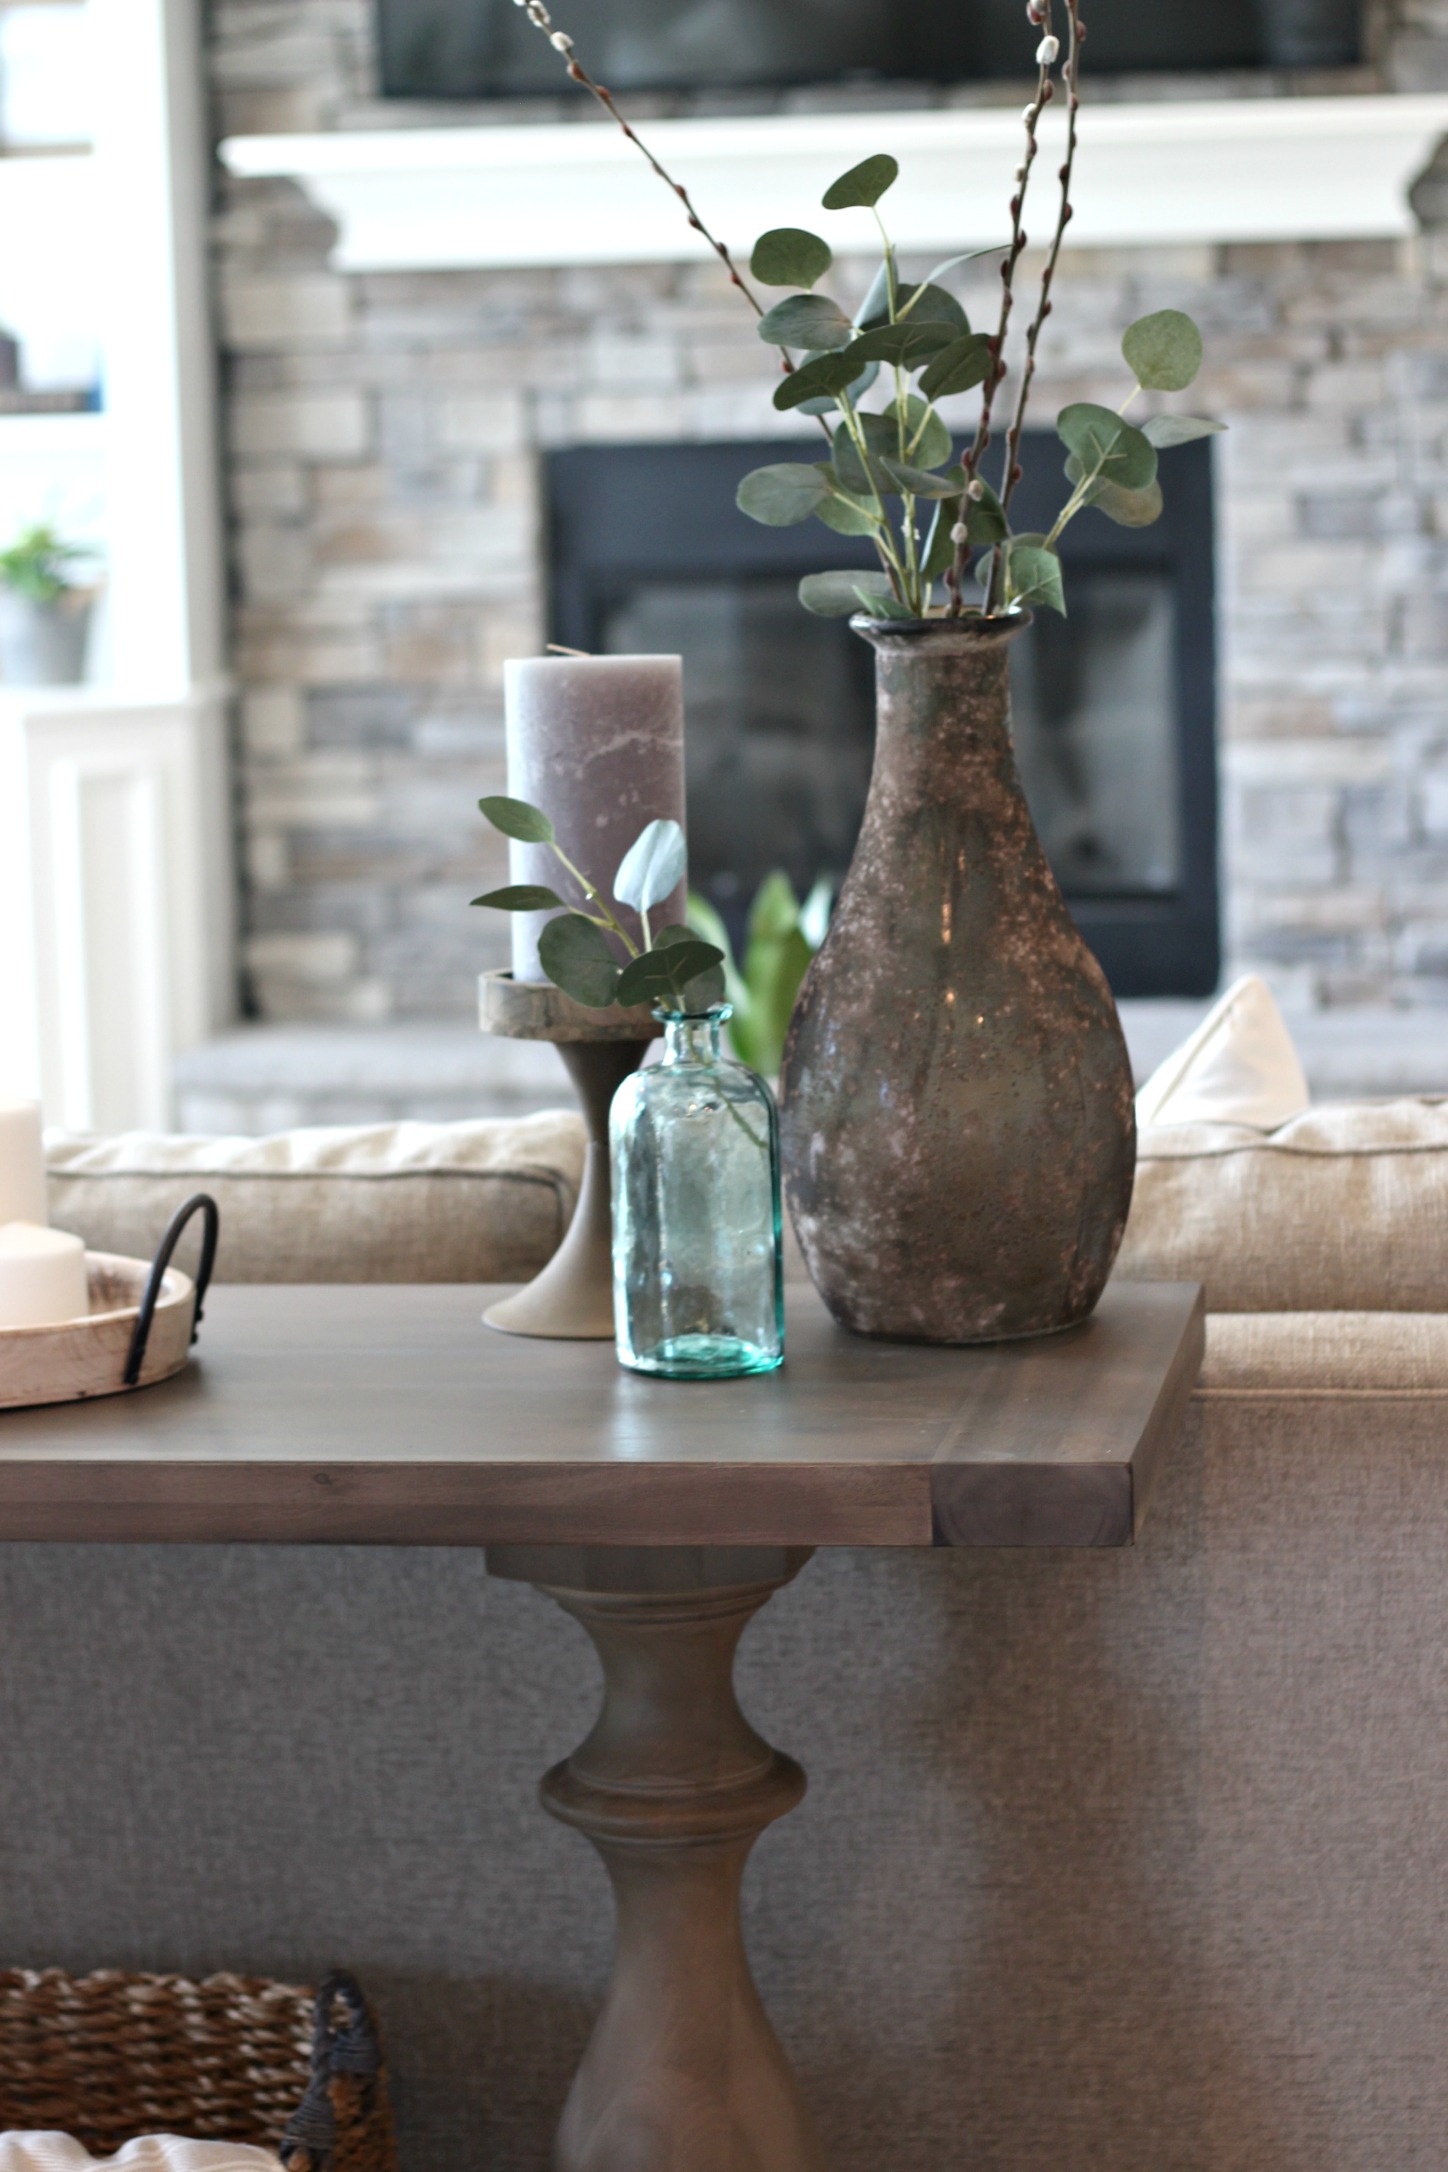
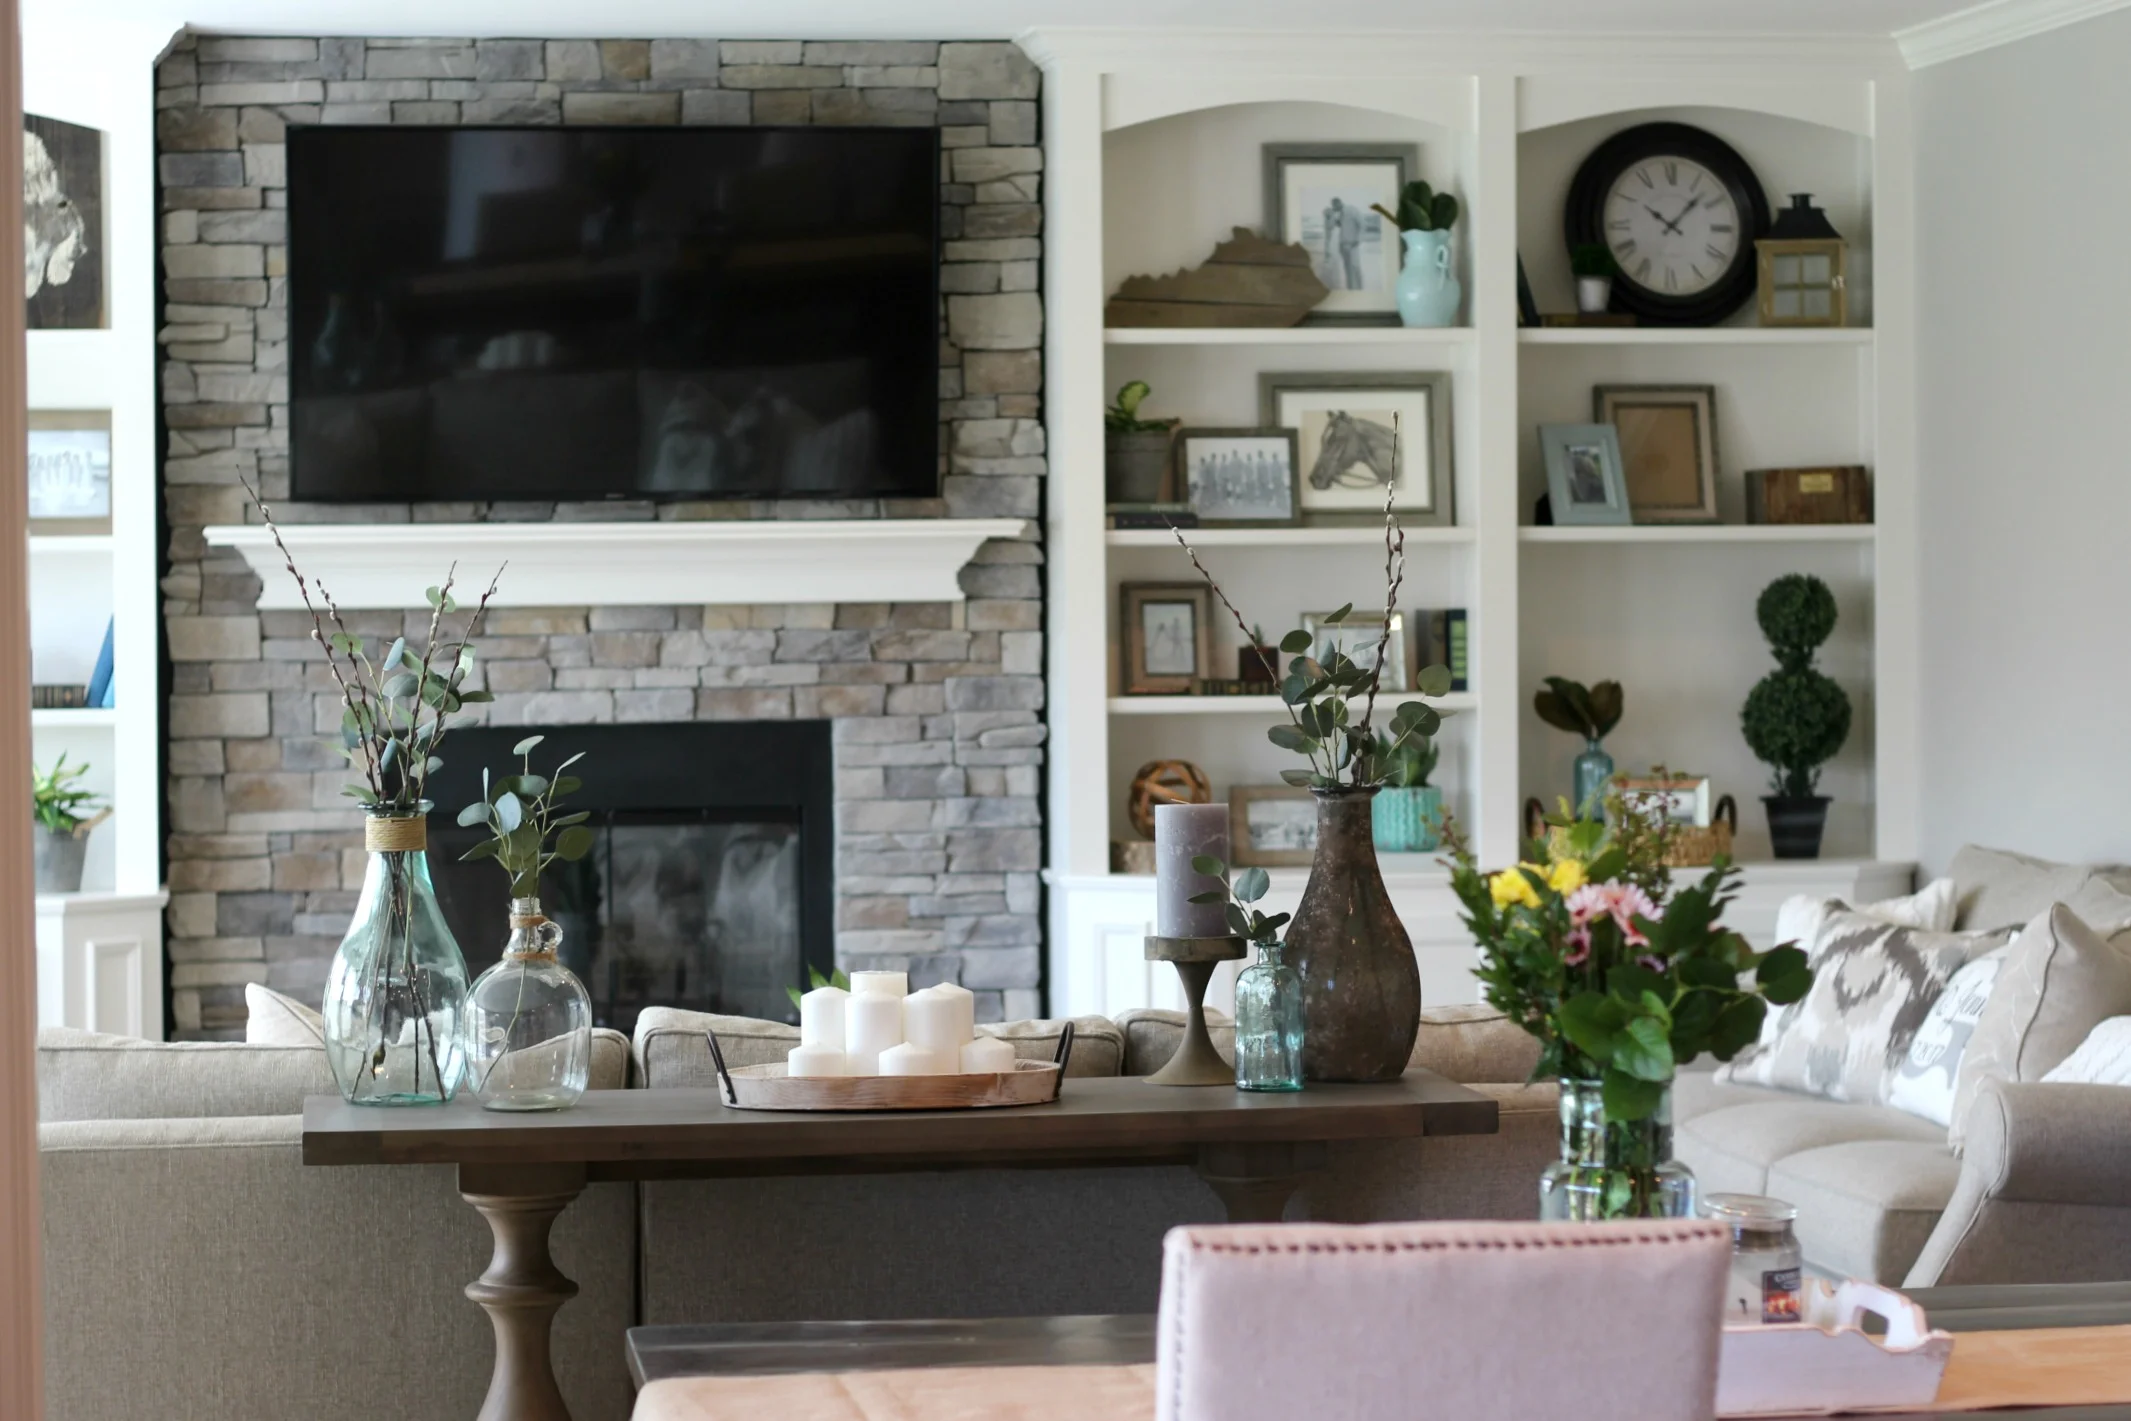
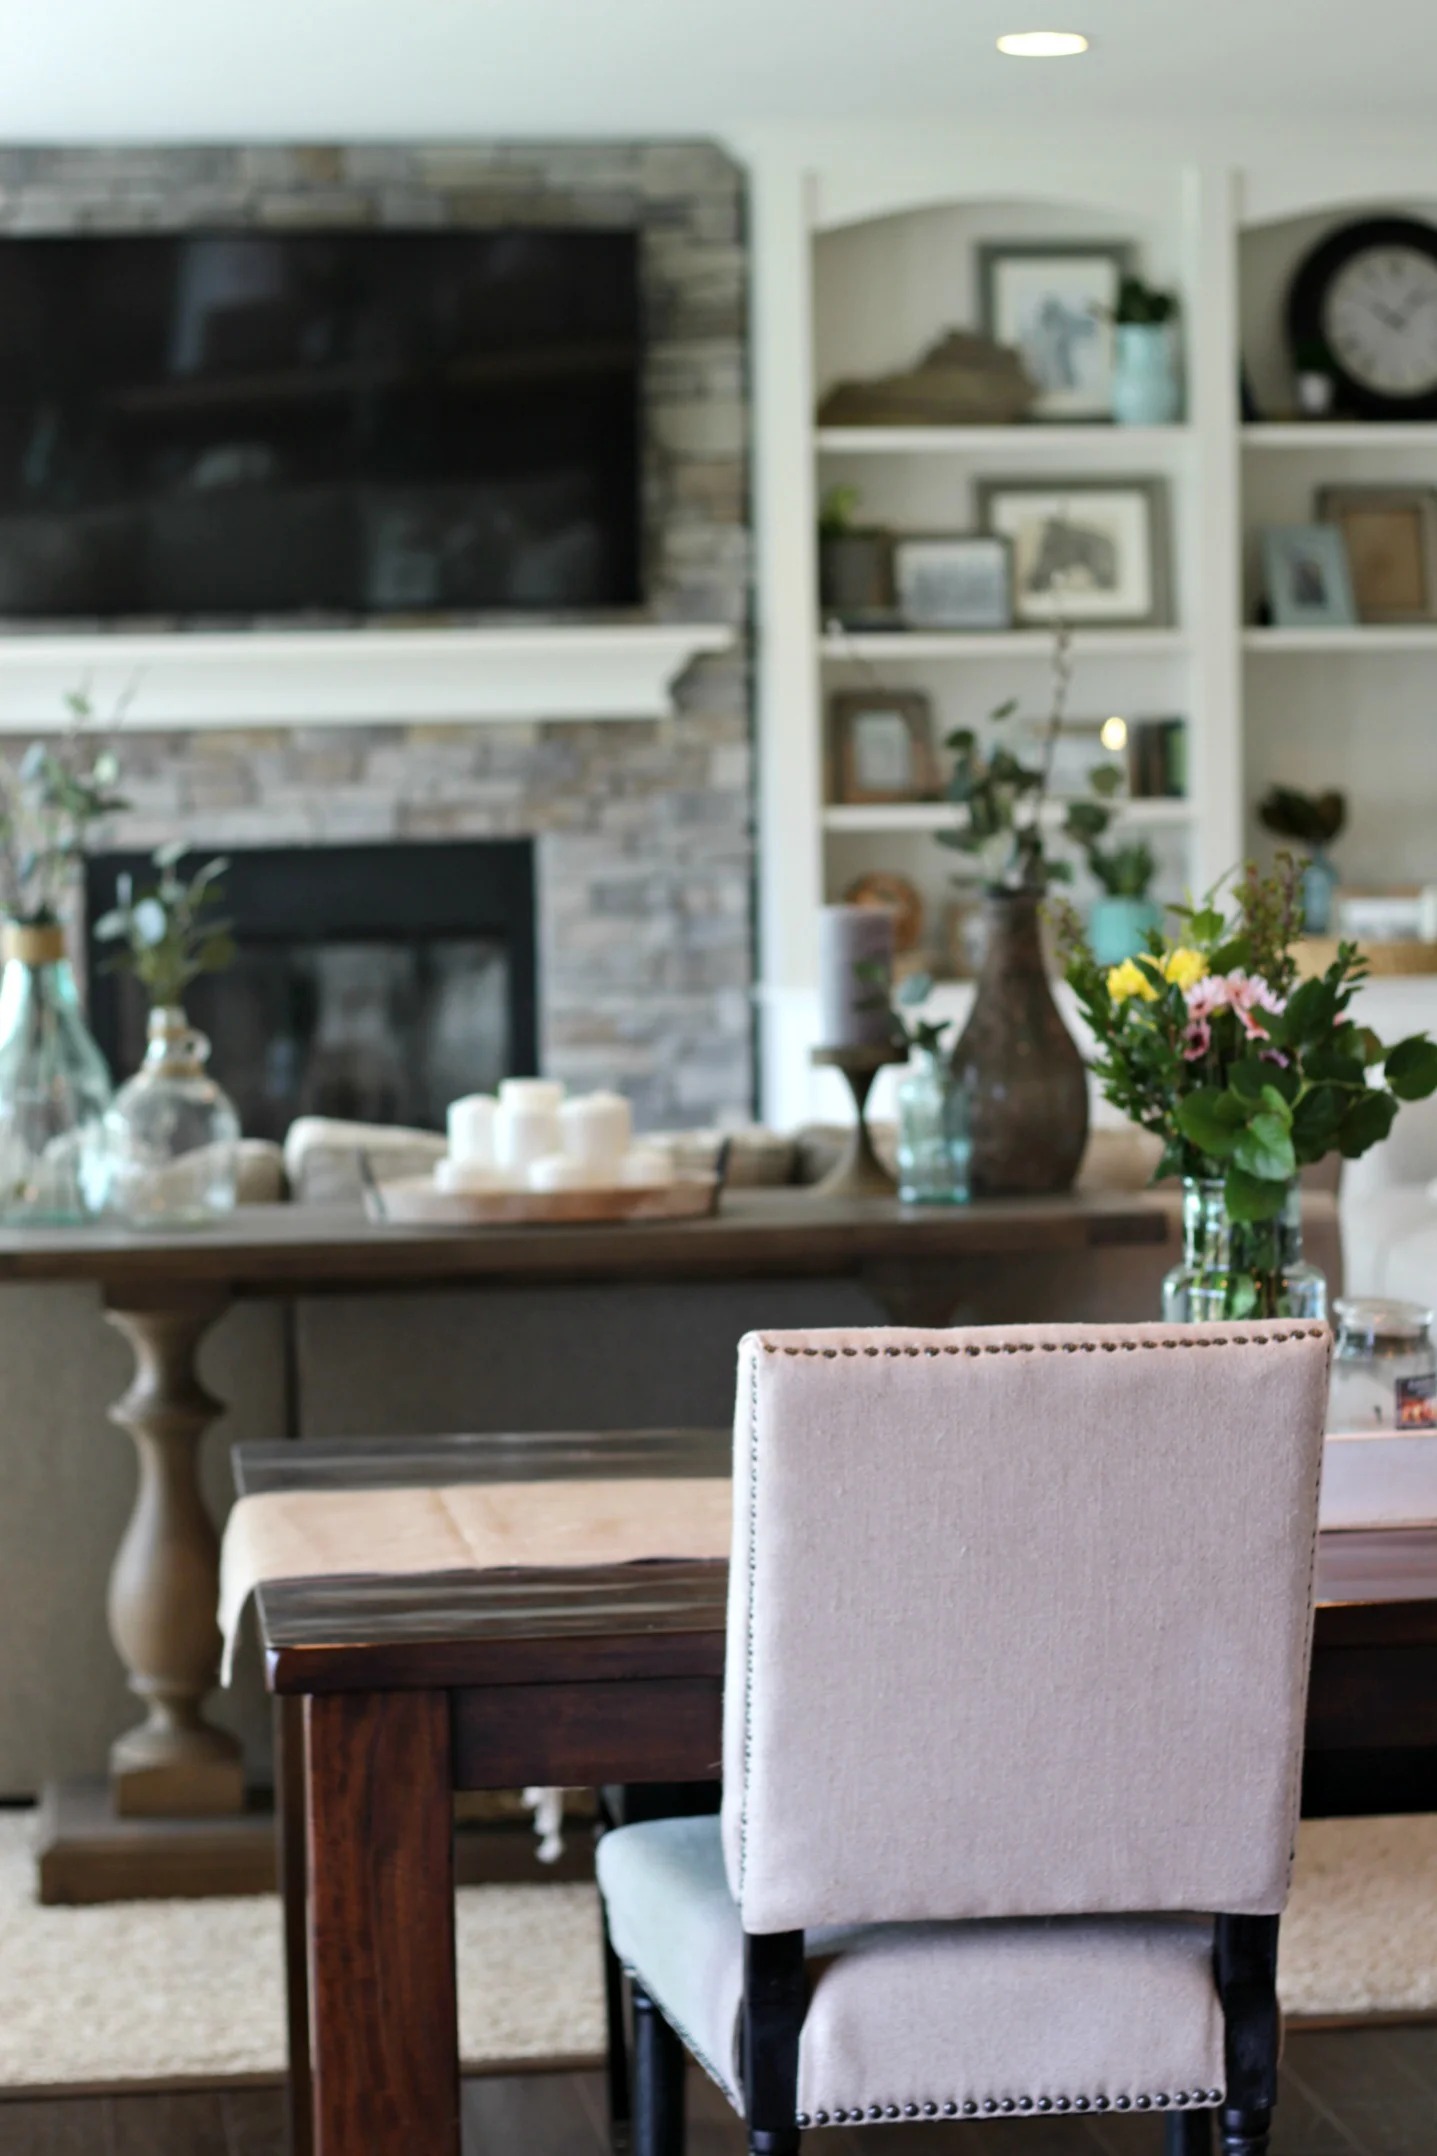
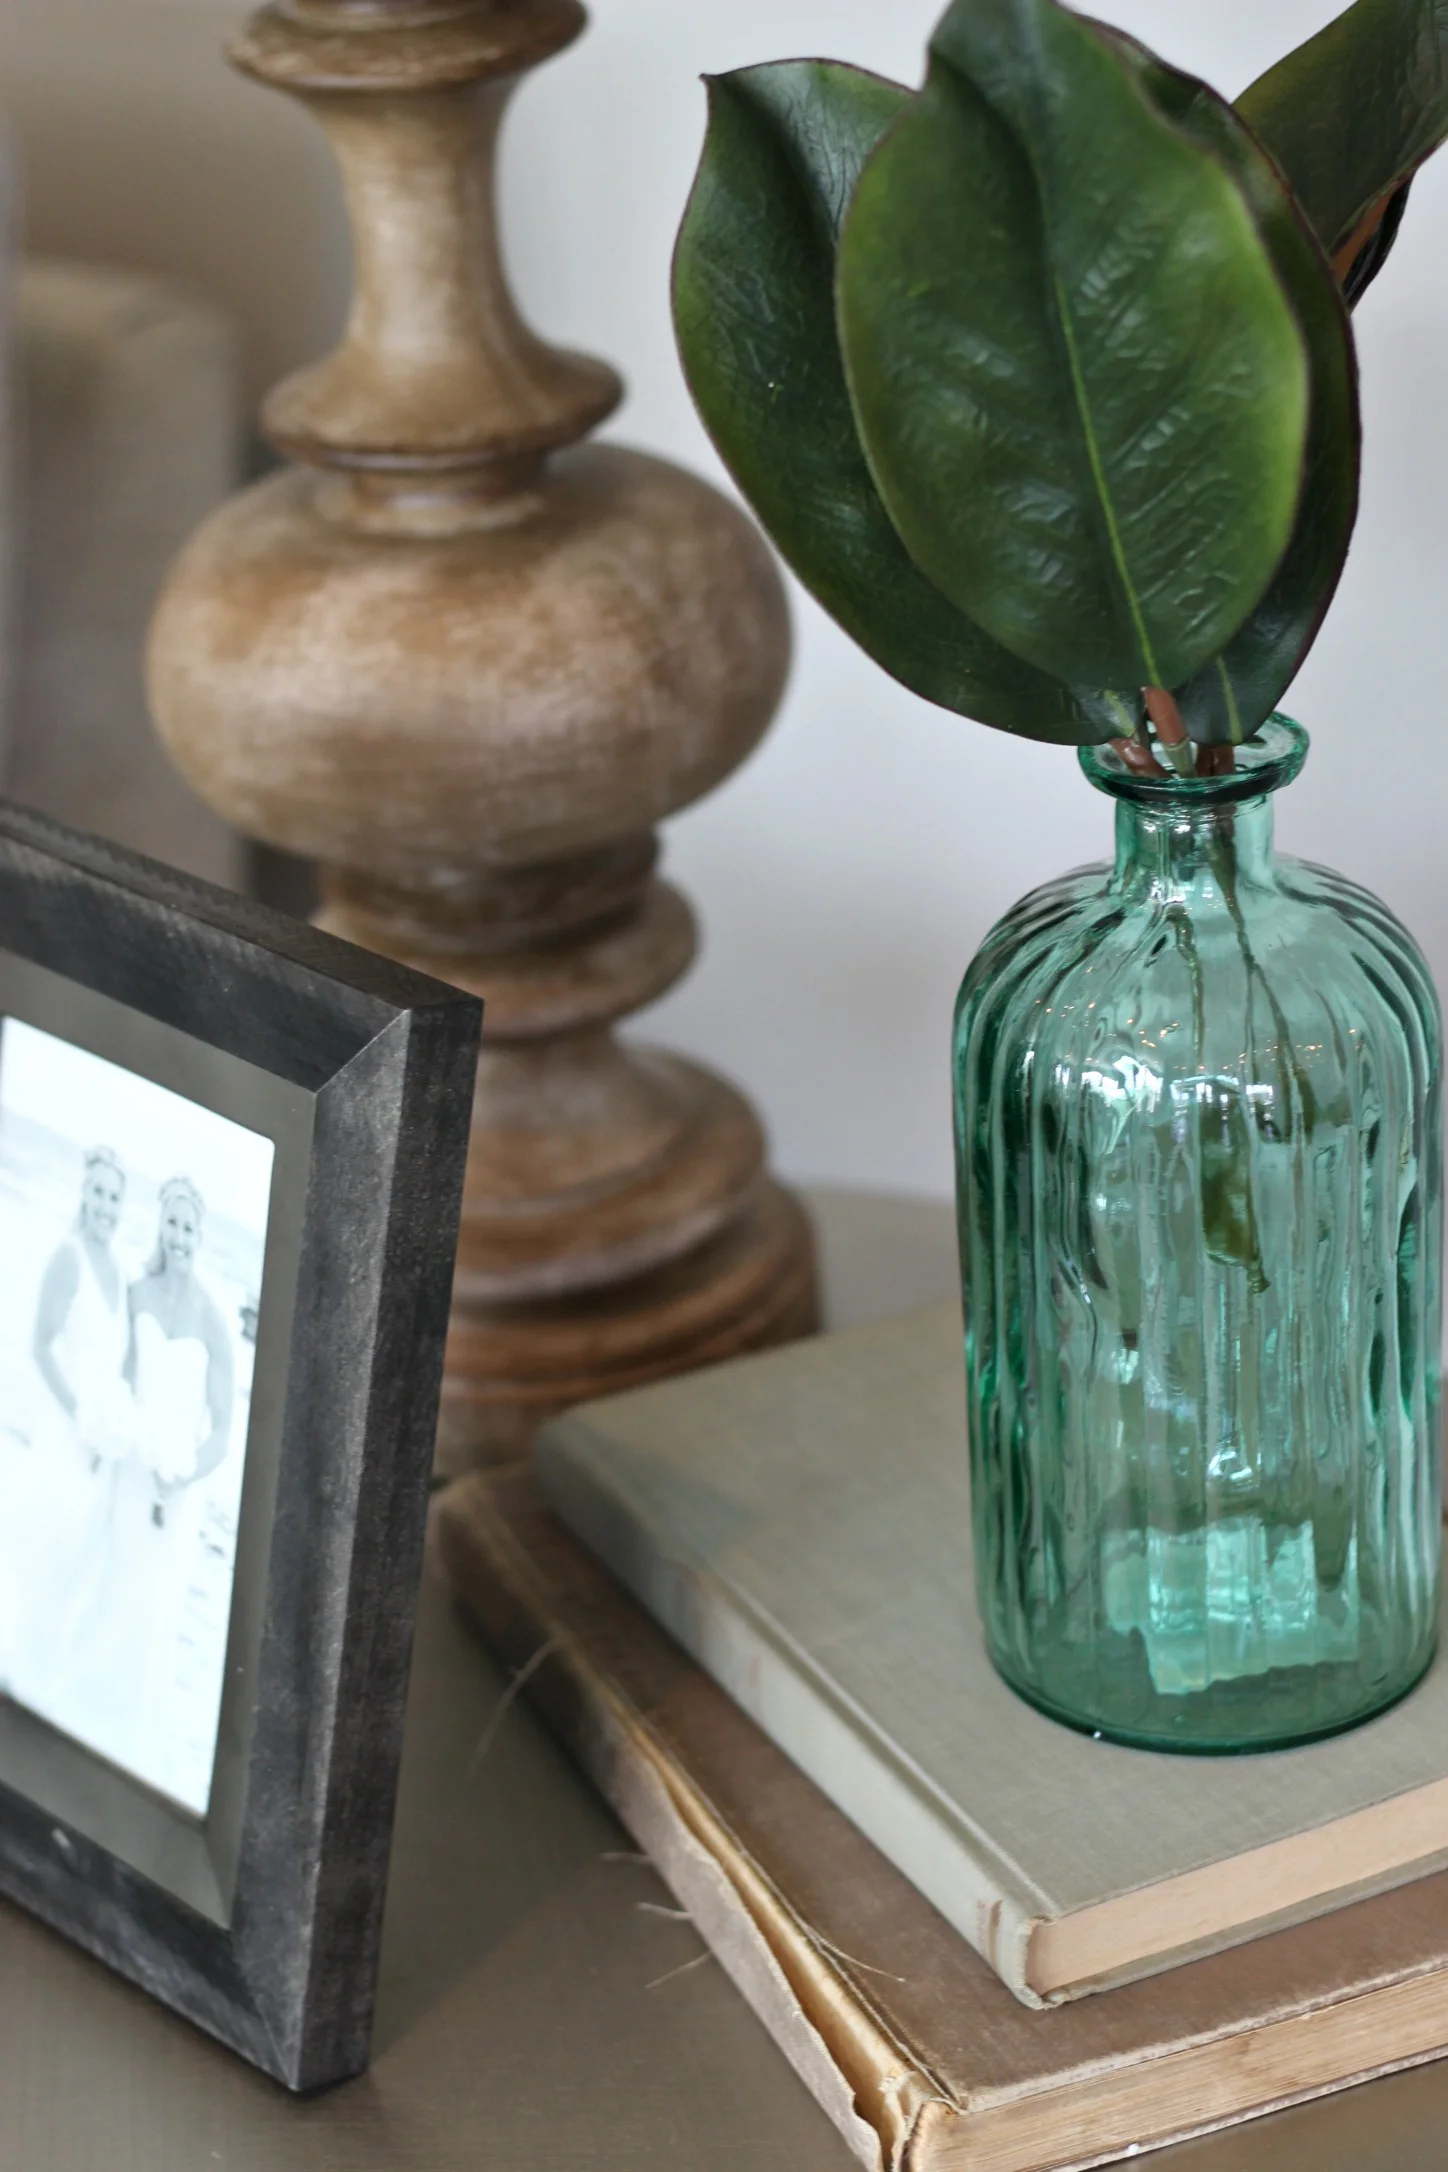
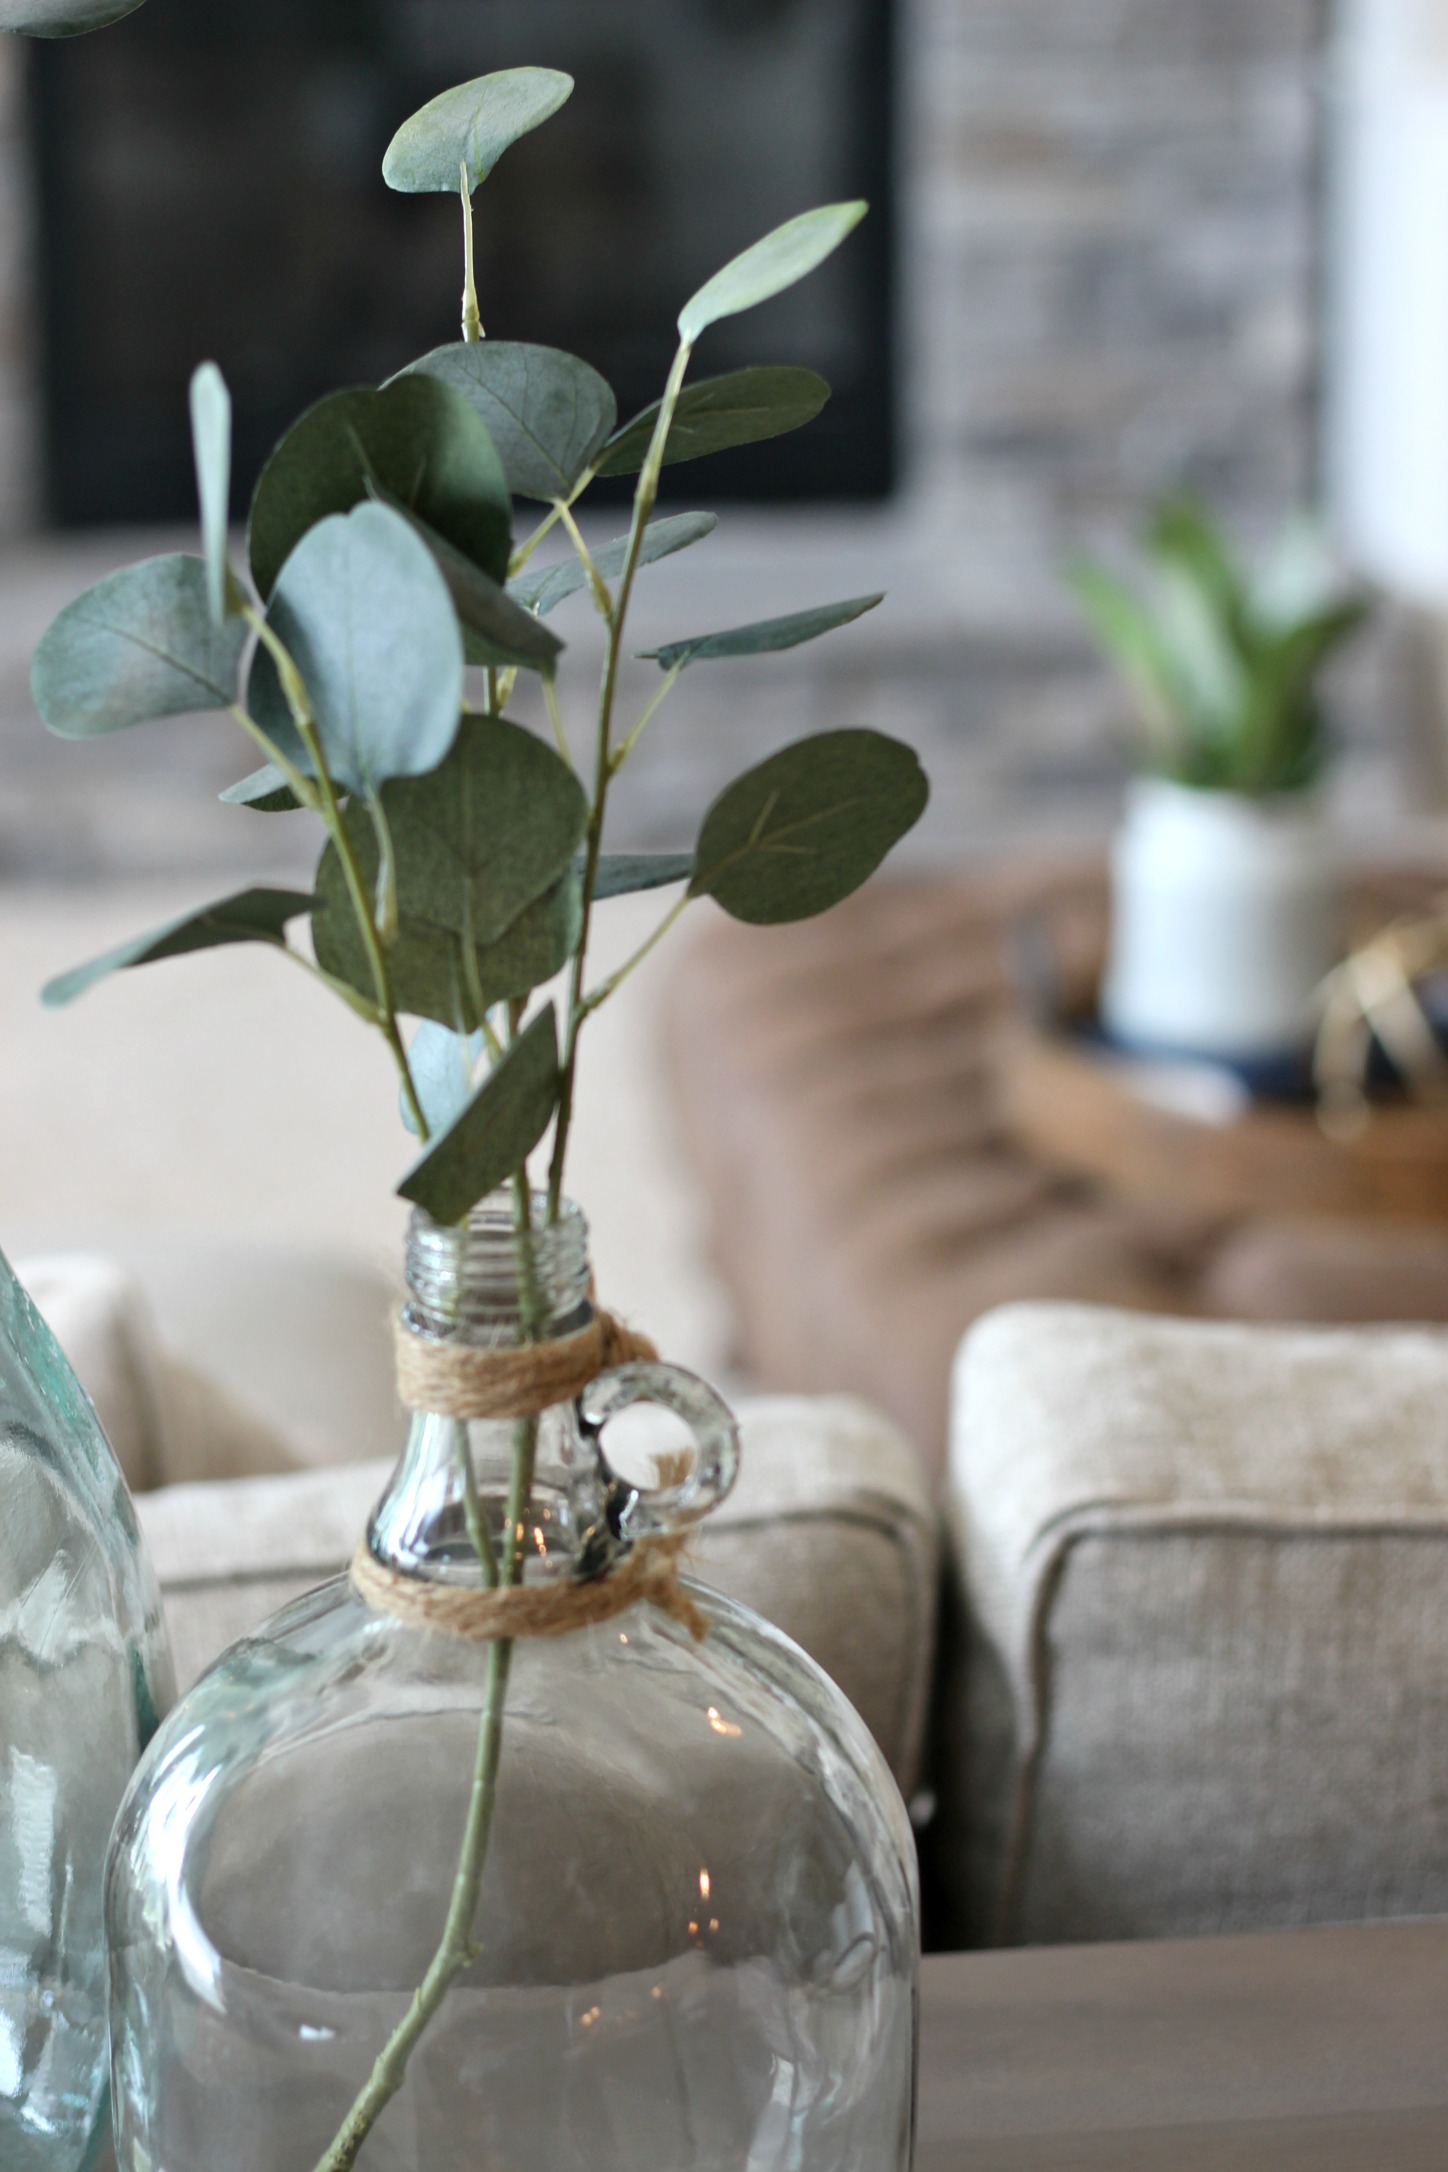
The overall color scheme of the space is neutral but with a few pops of green and blue (like these glass bottles, greenery stems, and lots of plants). I tried to tie in lots of distressed wood, recycled glass, and industrial metals to give the space that refined farmhouse feel but also lots of texture and warmth. The styling of the sofa table behind the couch did stump me at first because I'm so used to just placing lamps on these to anchor each side. Due to the location in the middle of the room, there was no way to plug in lamps without having a cord strewn across the walking space. So I went on the hunt for something tall to add some height here and the glass bottles ended up being the perfect choice (found these at HomeGoods and Hobby Lobby)! Since they are clear, they also don't block your sight lines into the living room or the natural light coming in from the windows. I placed some faux stems inside them to add color and they will last forever without wilting or watering! The super simple combination of the white pillar candles on the oval tray in the center ended up being one of our favorite elements of the entire space too. Adding a cluster of candles like this is such an easy way to make any tray, crate, or dish into a chic arrangement.
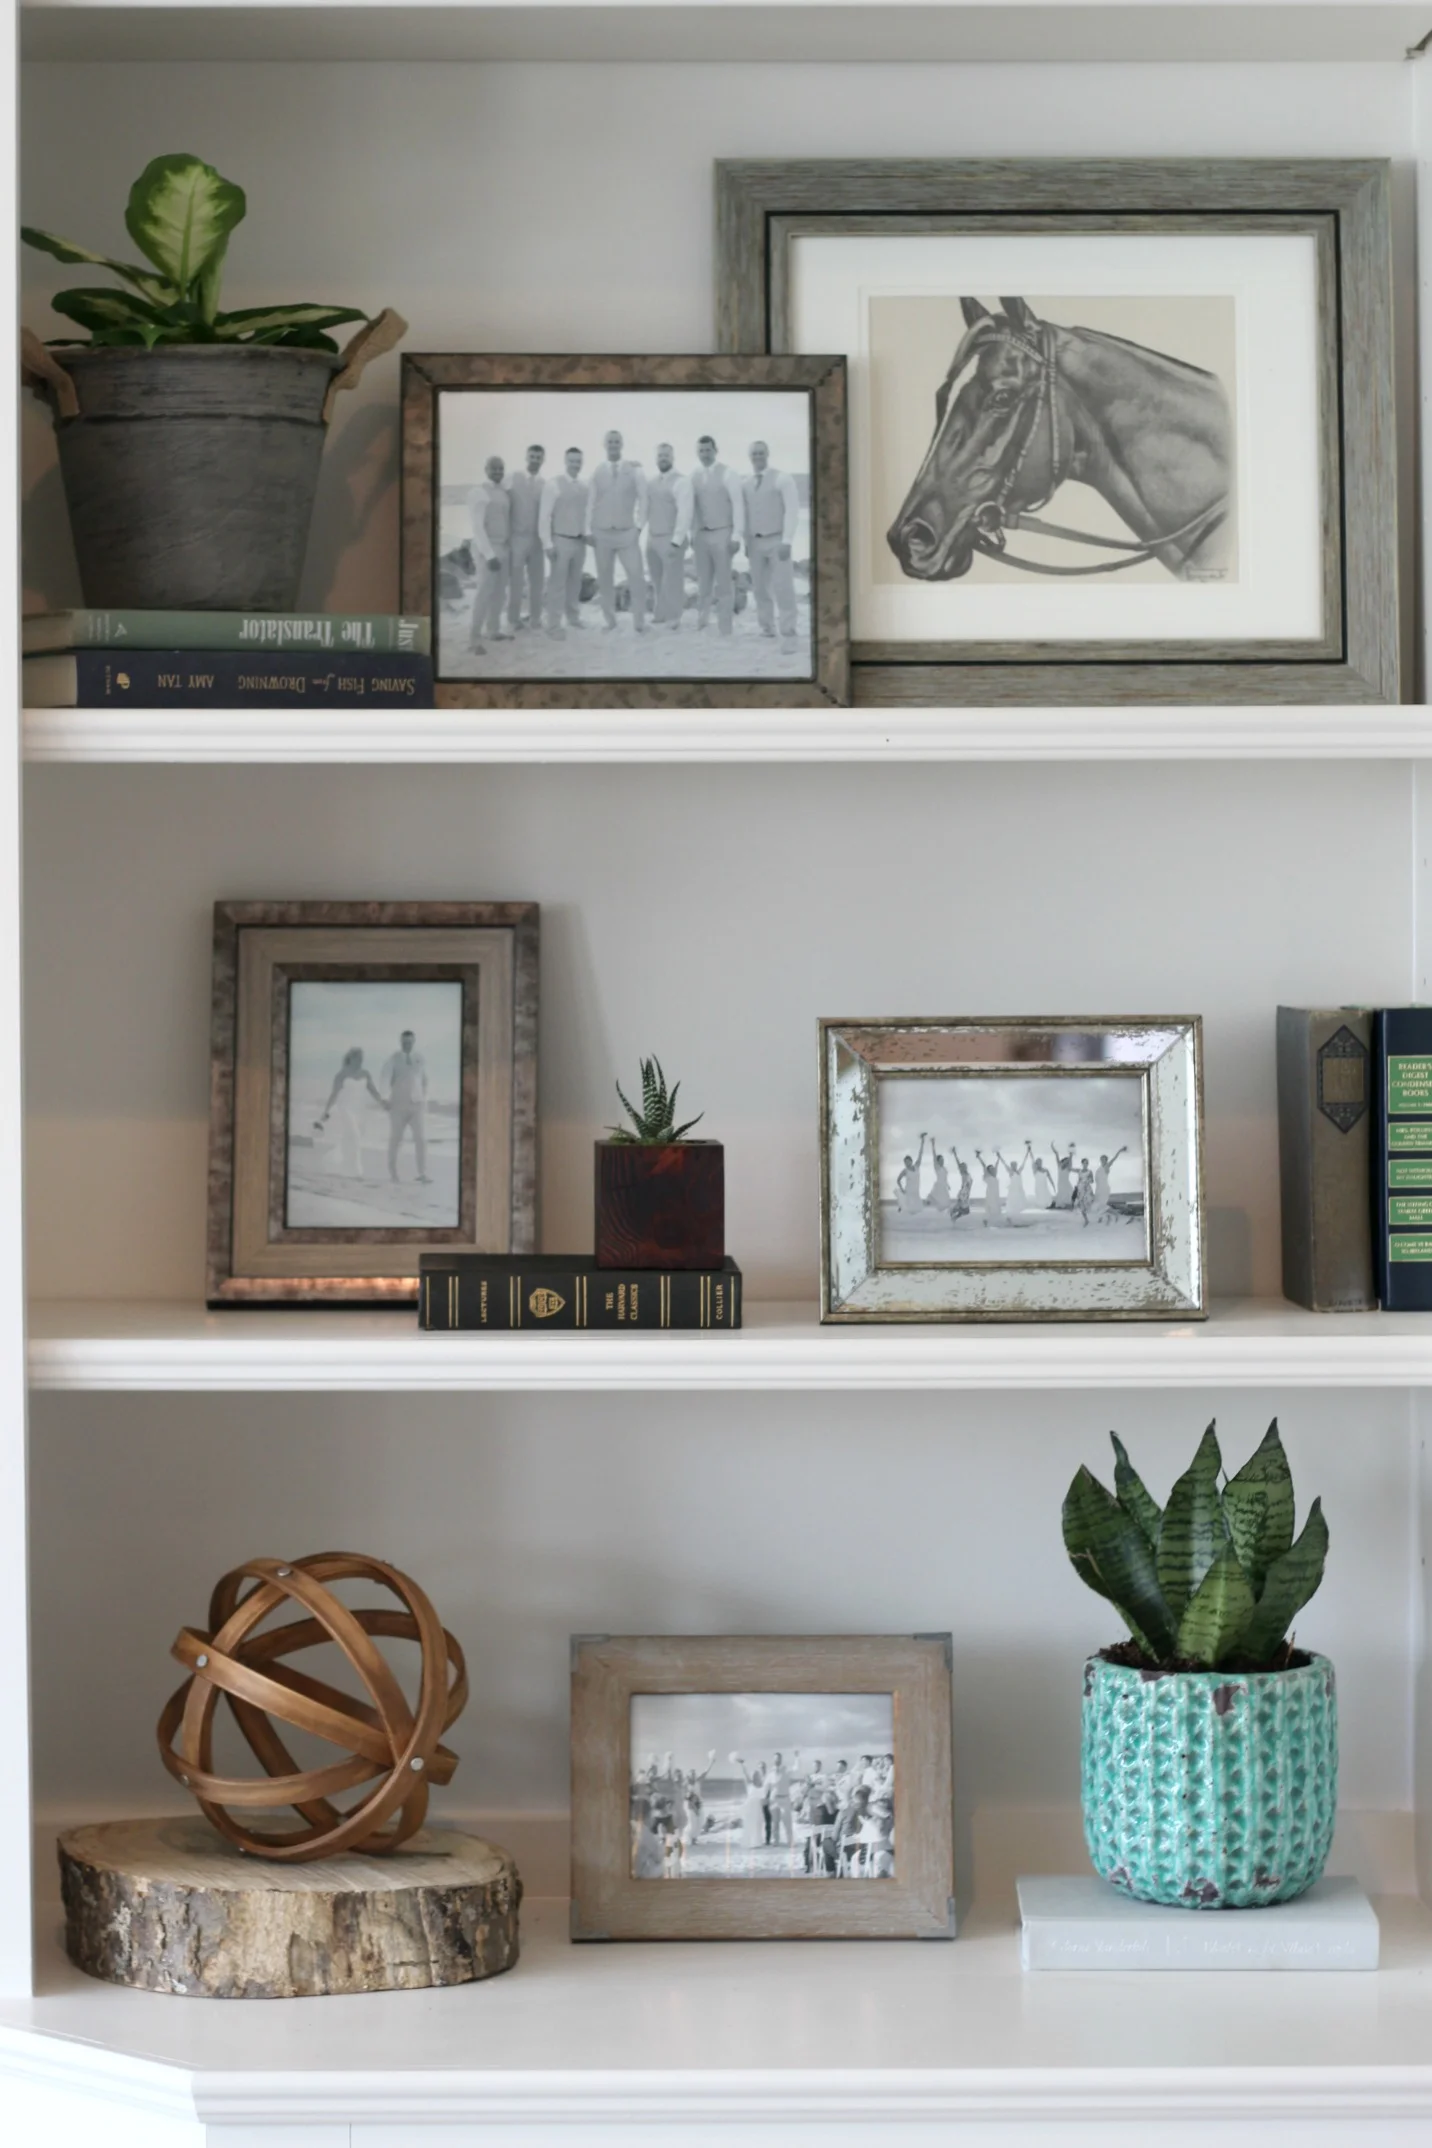
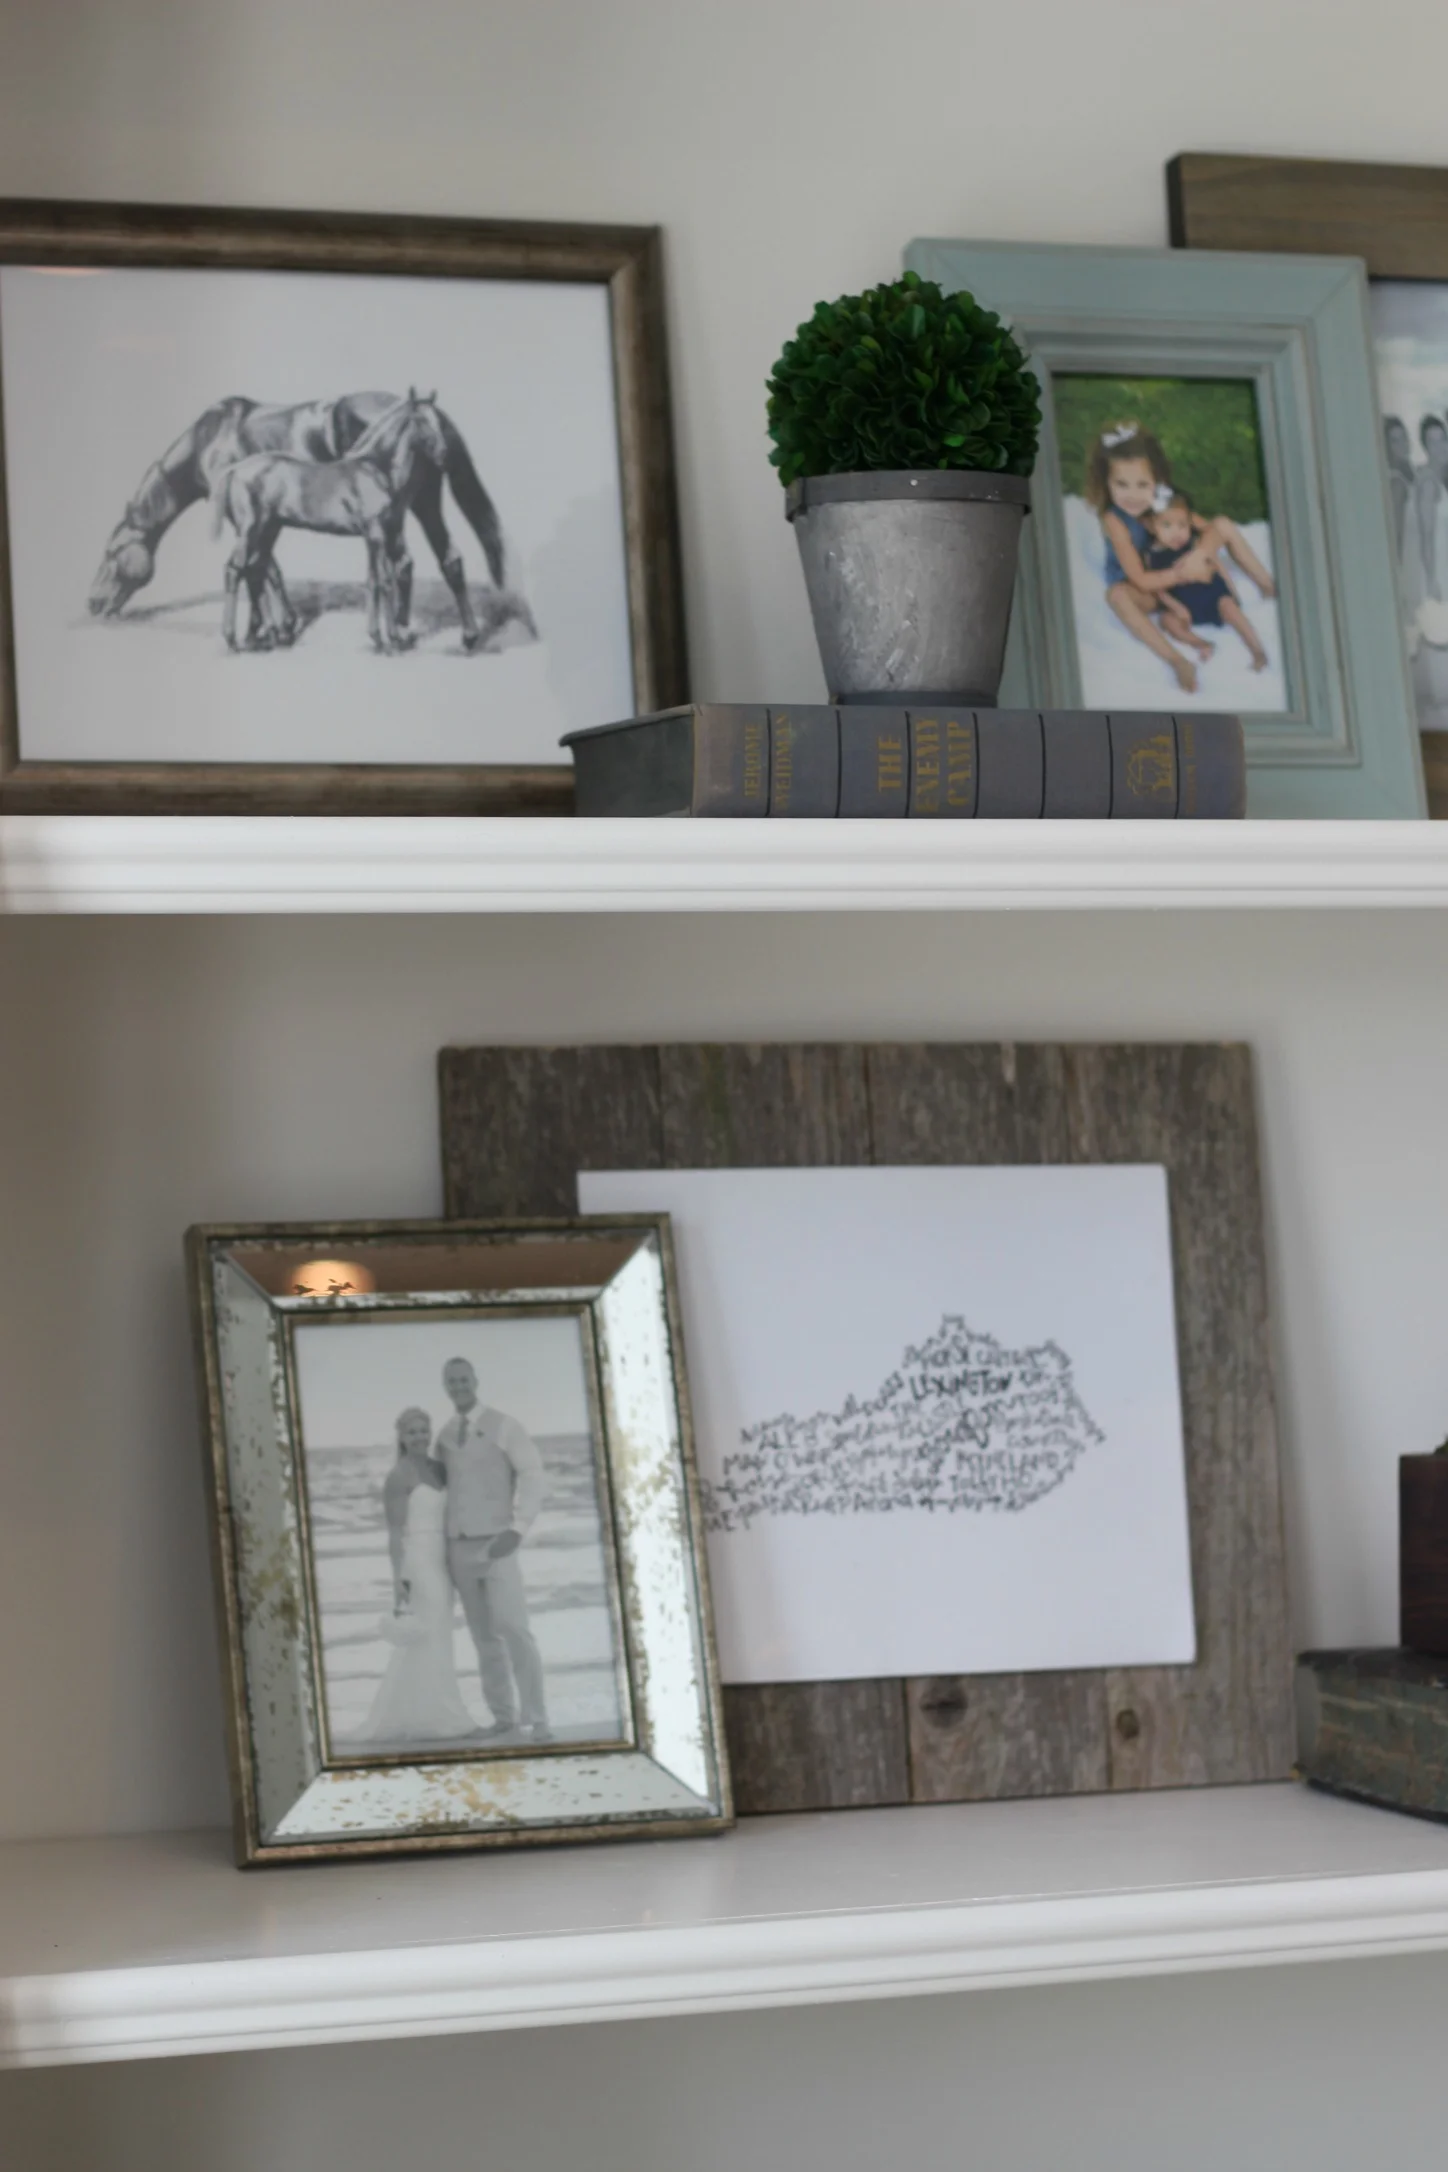
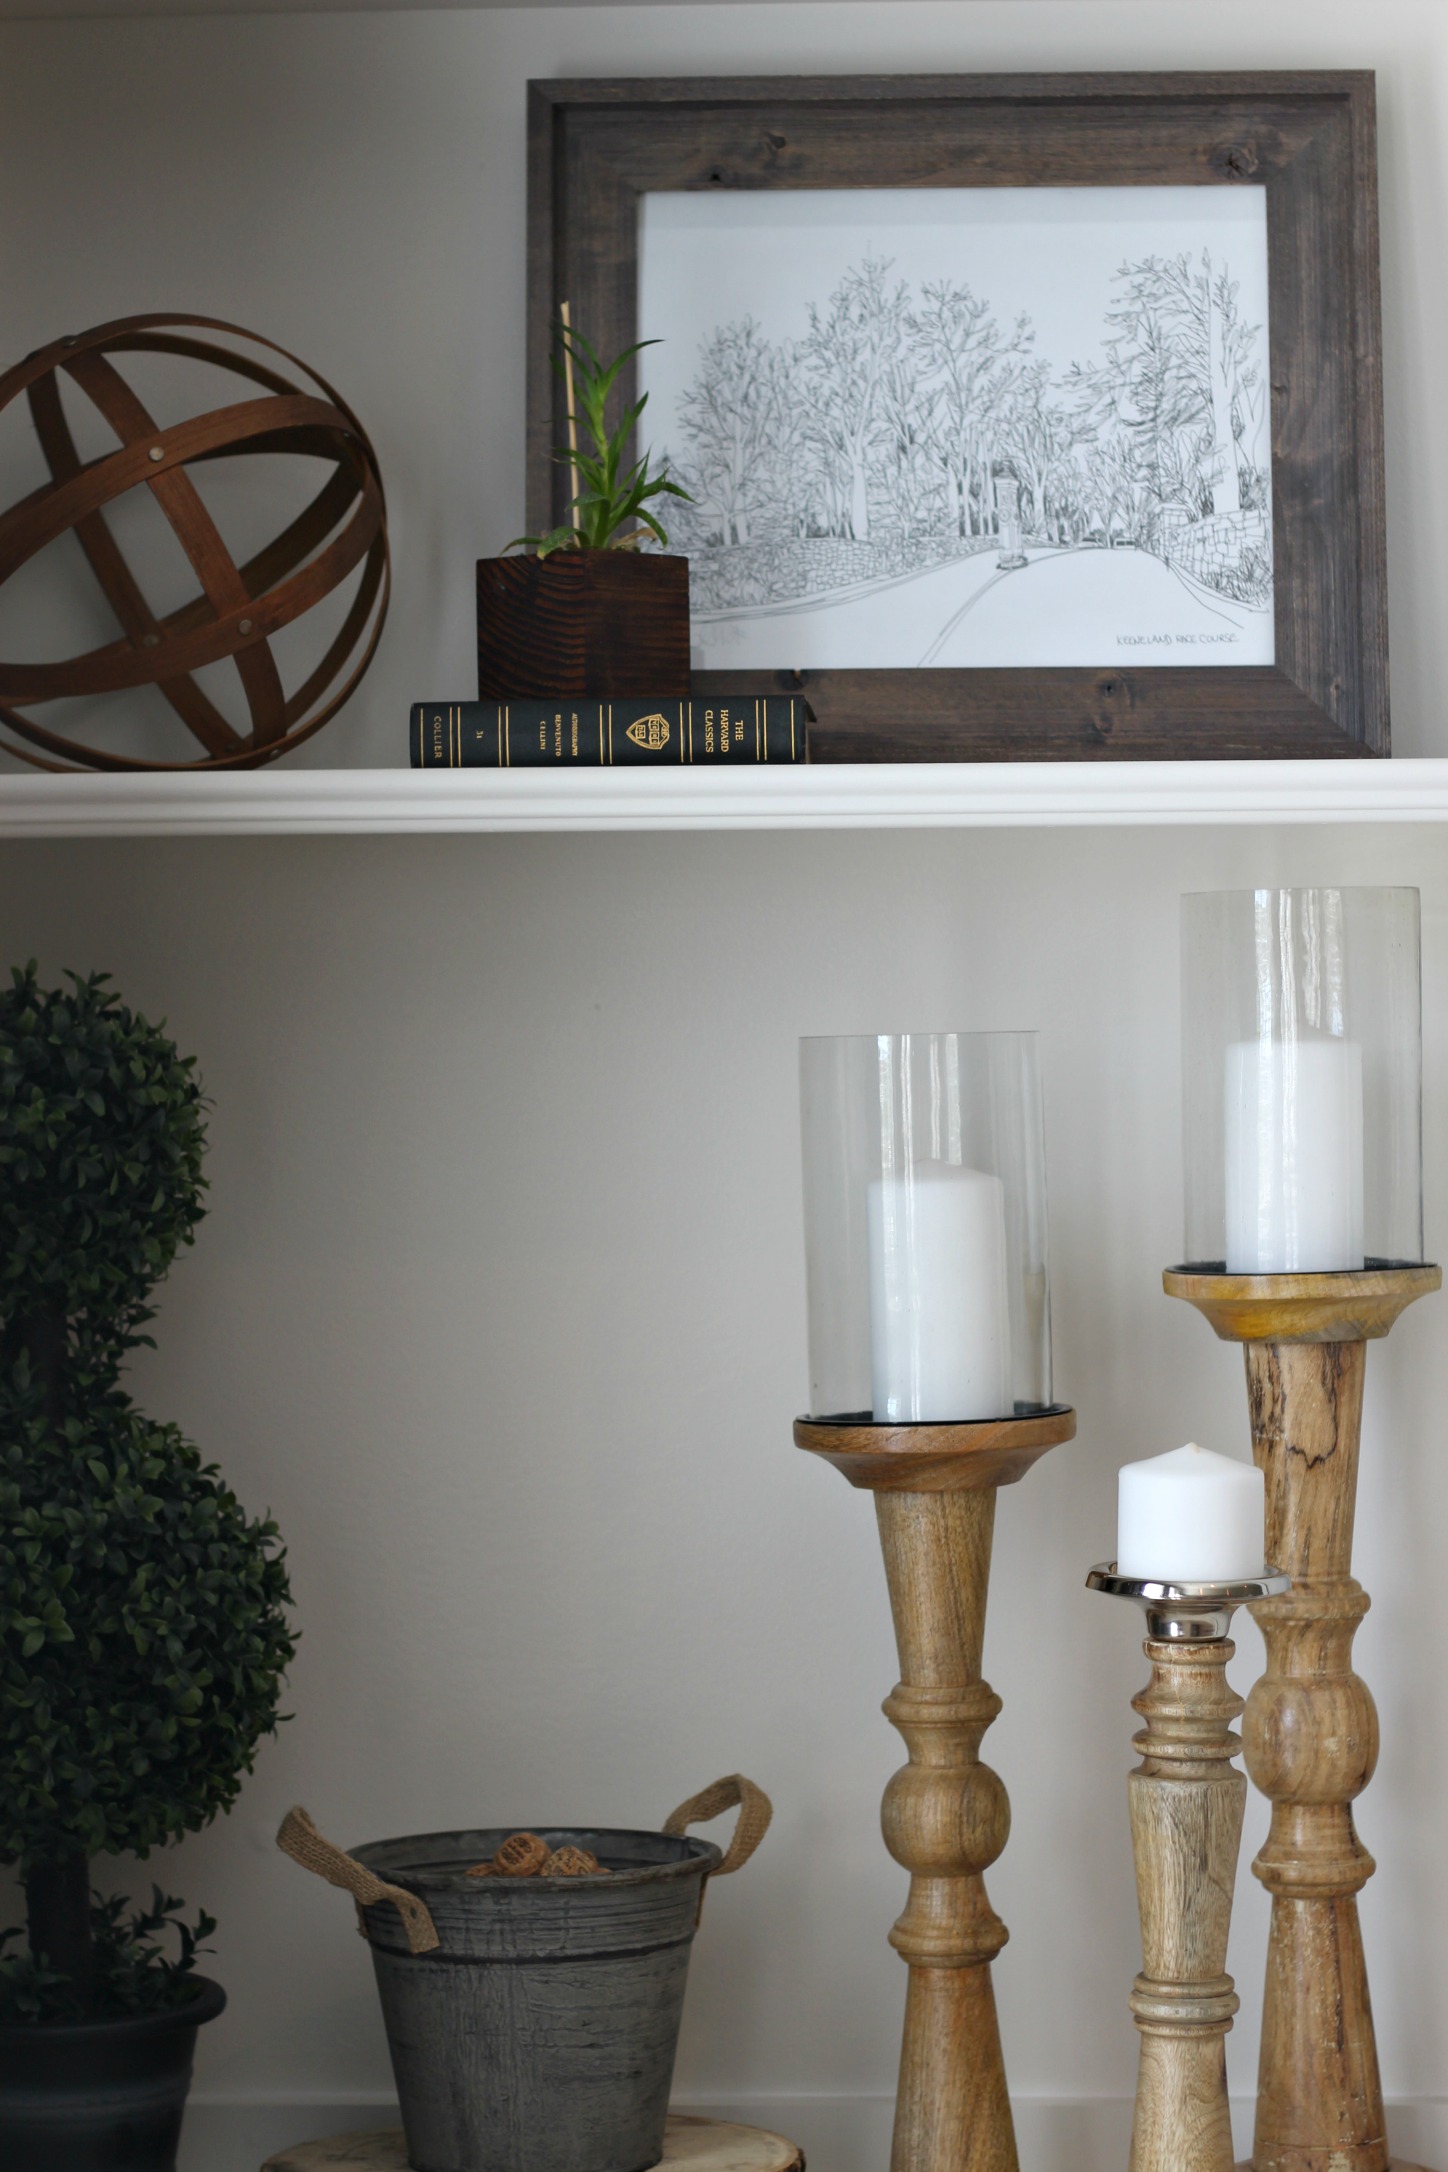
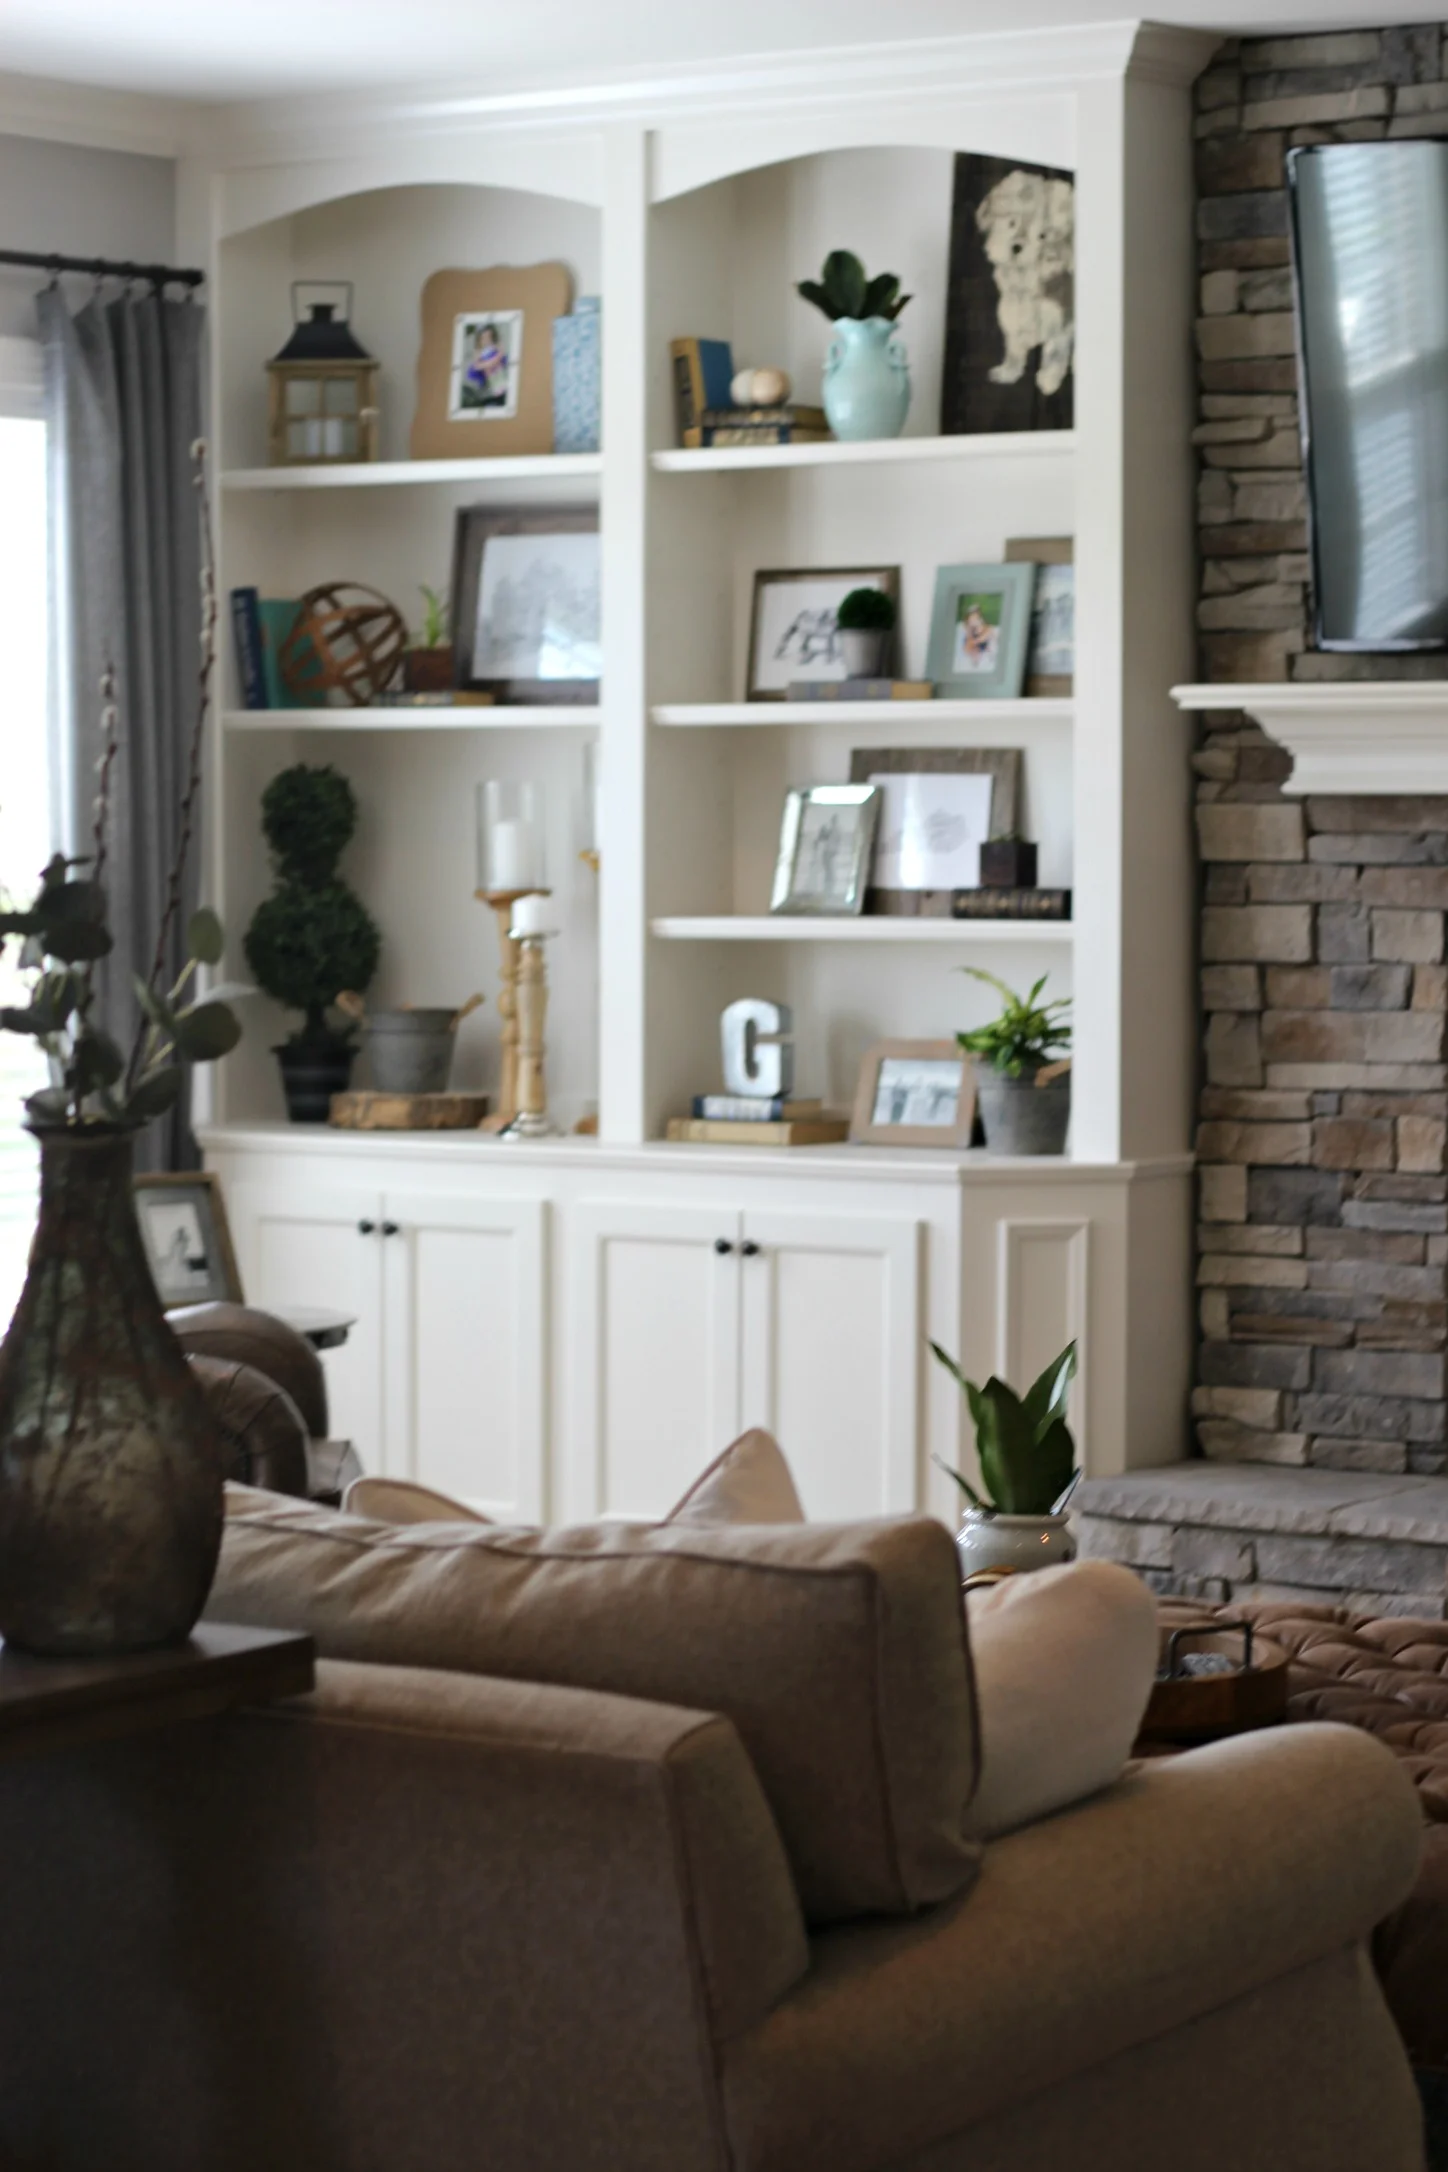
Above you can see a closer look at some of the frames and prints I chose to fill in the built-ins. They had lots of new pictures to frame since they just got married a few months ago, and I wanted to layer lots of different styles and sizes of frames to add dimension on these shelves. We also added a few Kentucky/equestrian themed prints from my shop to break up all the photos and add some unique character.
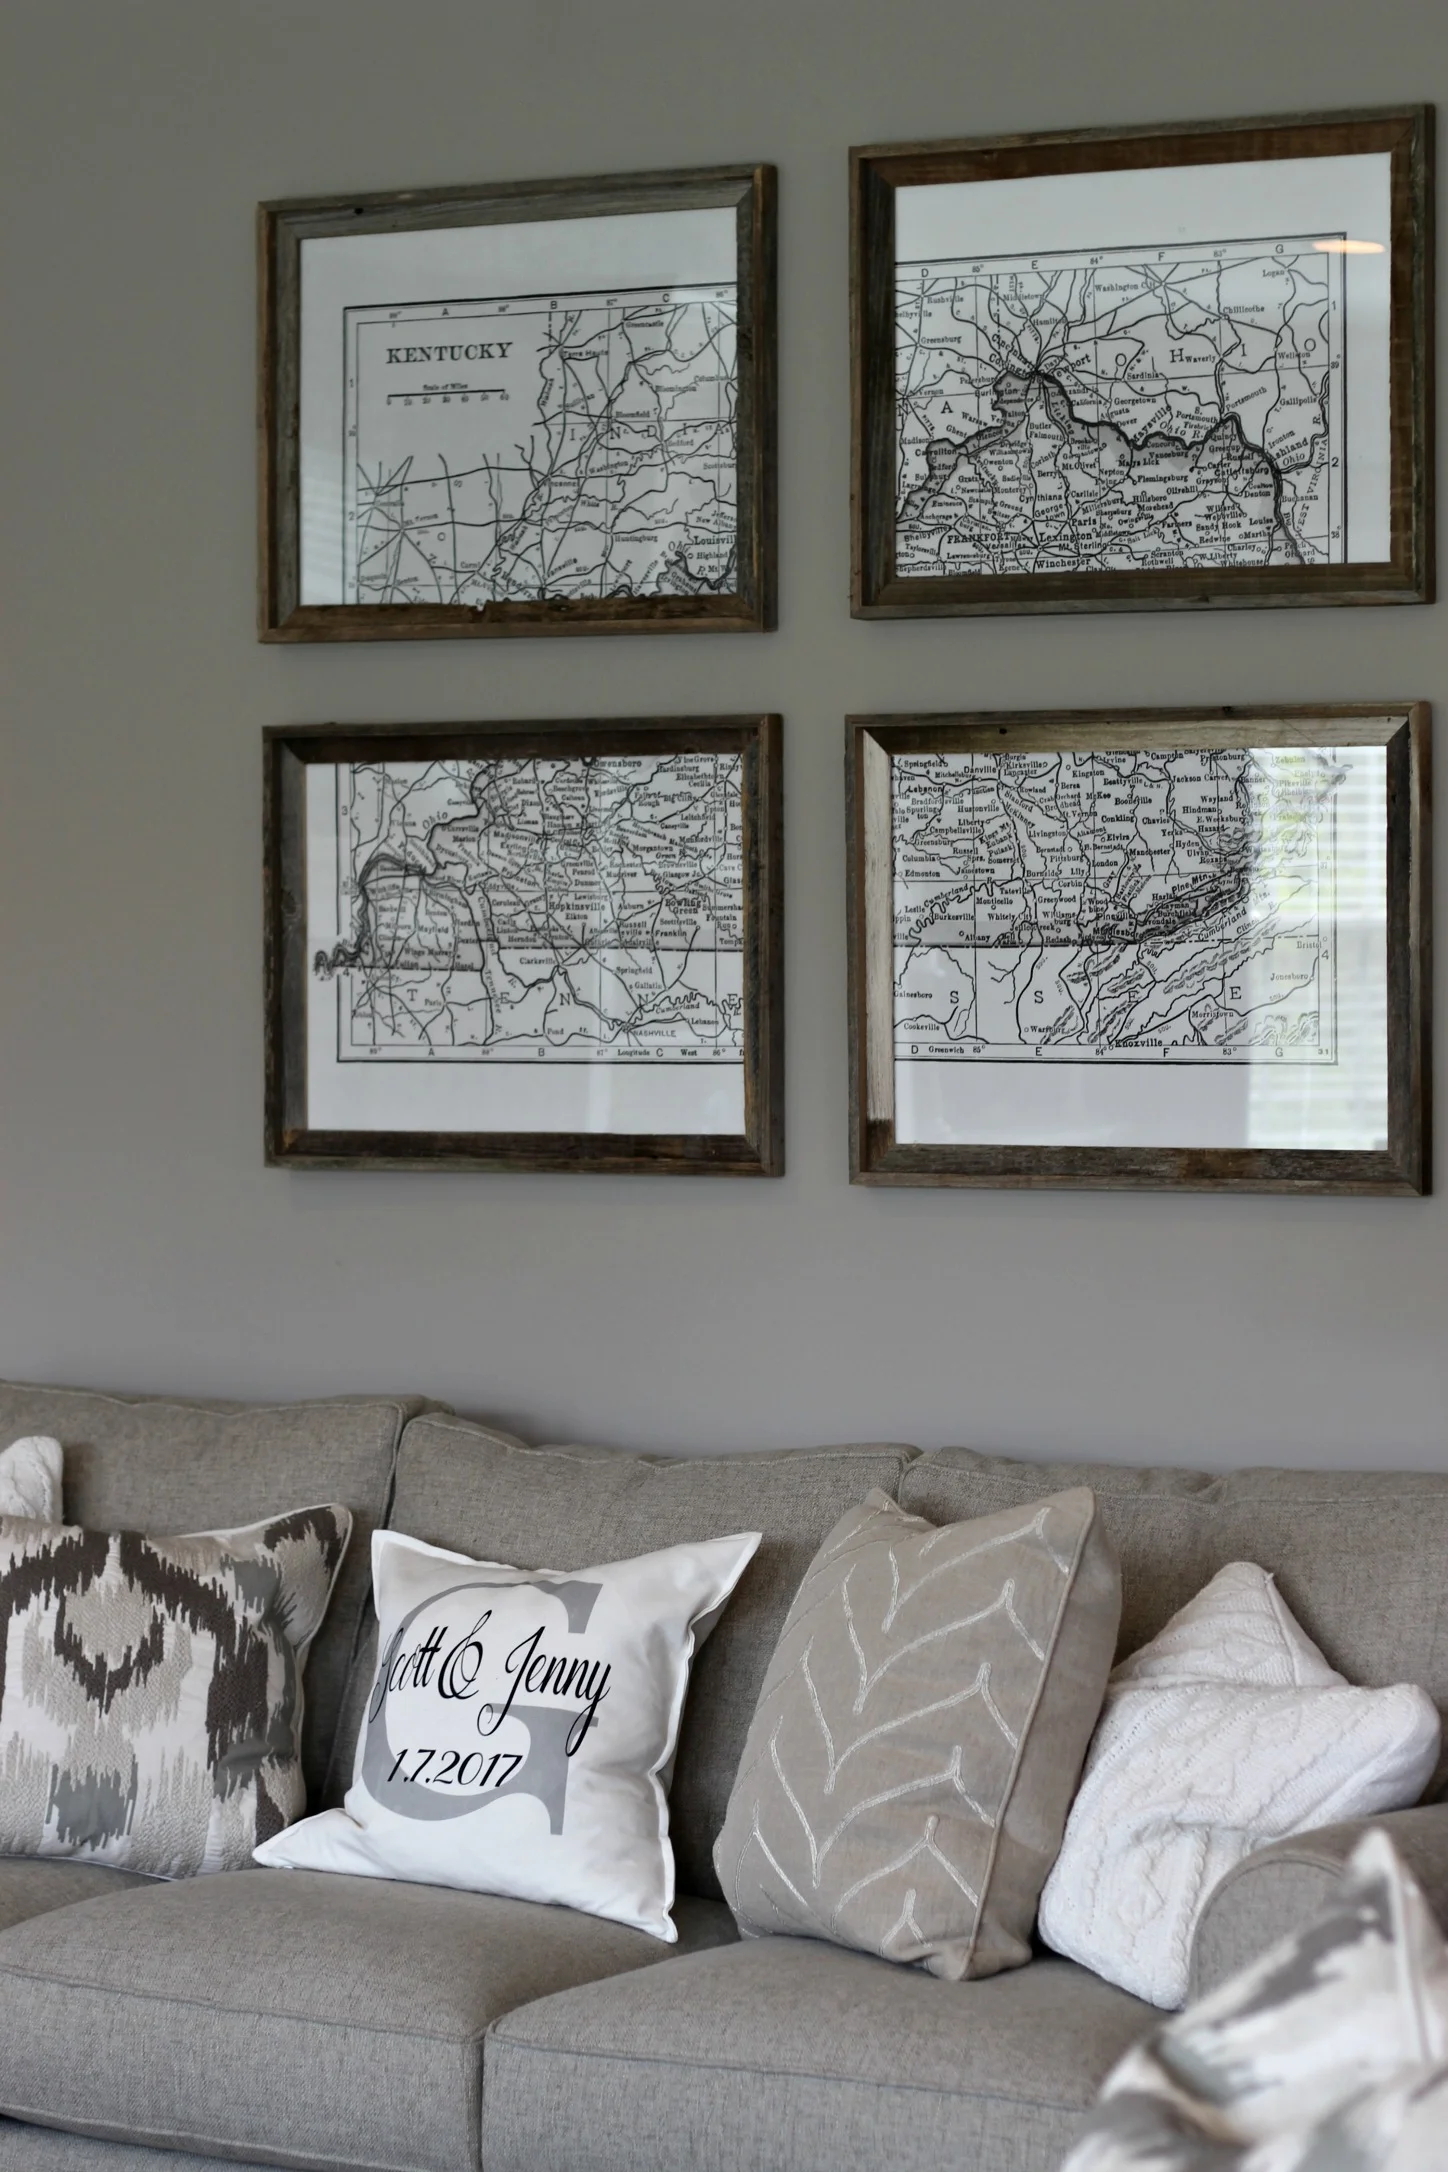
When we first met, this couple mentioned getting some type of map art to fill this wall and they really liked the idea of the divided style with multiple frames. I was able to enlarge an old Kentucky map and then divide it between four 16 x 20 barnwood frames from Hobby Lobby (the larger sizes are only available in-store but I linked some of the smaller sizes at the end of this post). I was thrilled to find these frames because they are all unique and completely made from reclaimed wood from barns and farm fencing across the U.S. I love the texture and warmth the frames add to the room and they fill the open space above the couch perfectly.
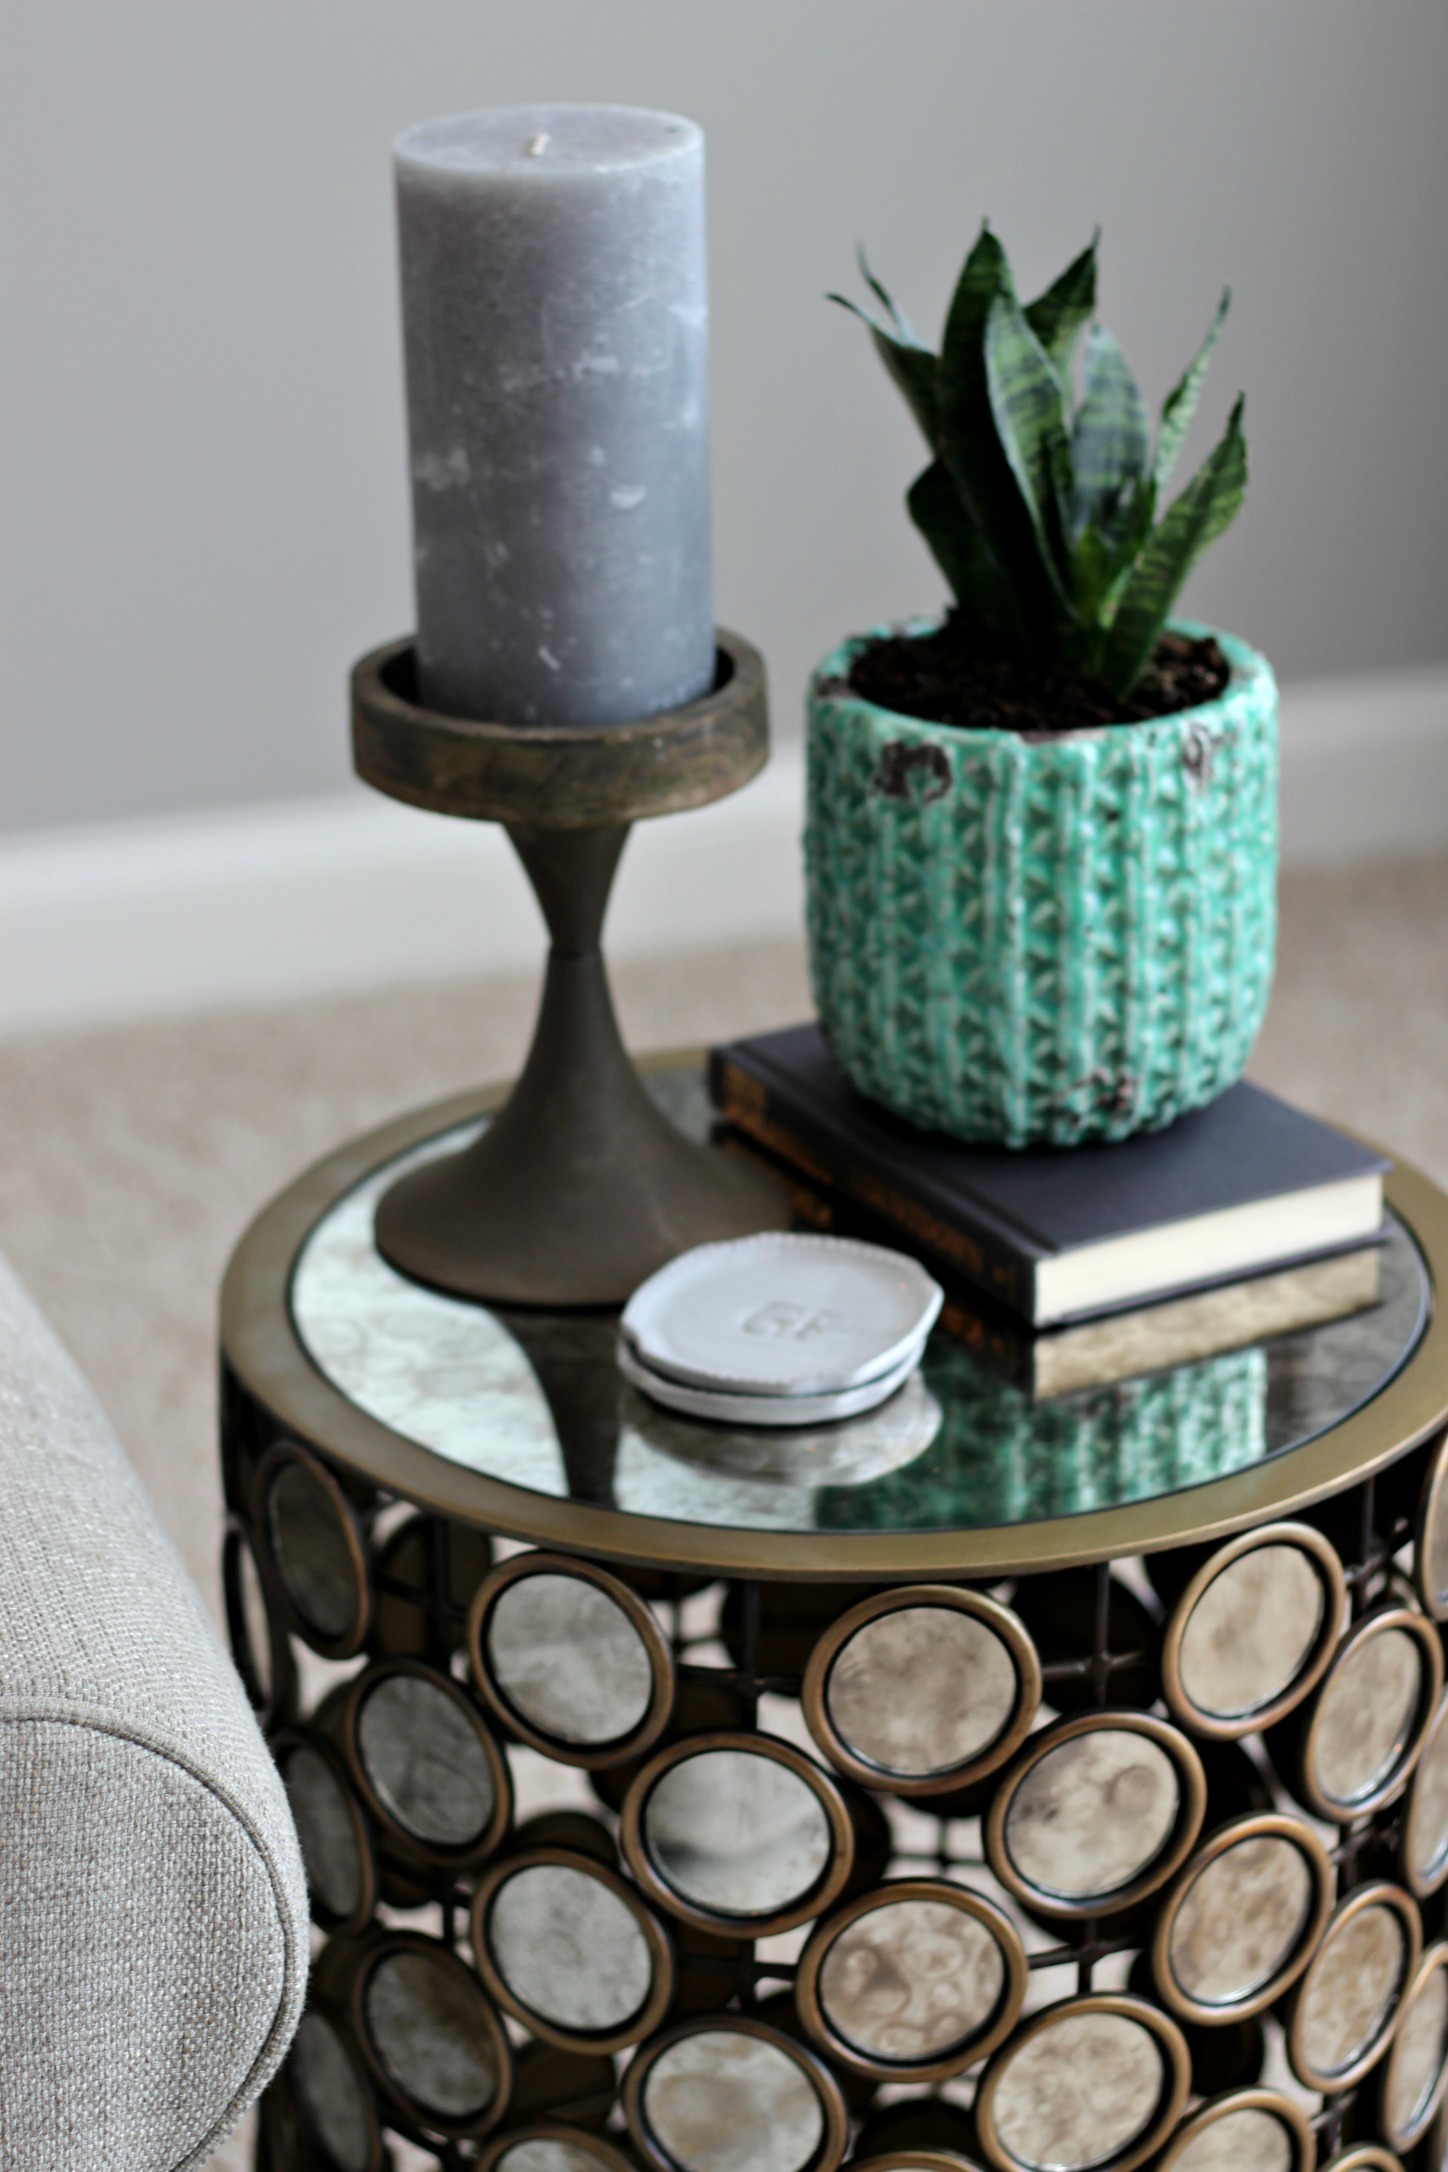
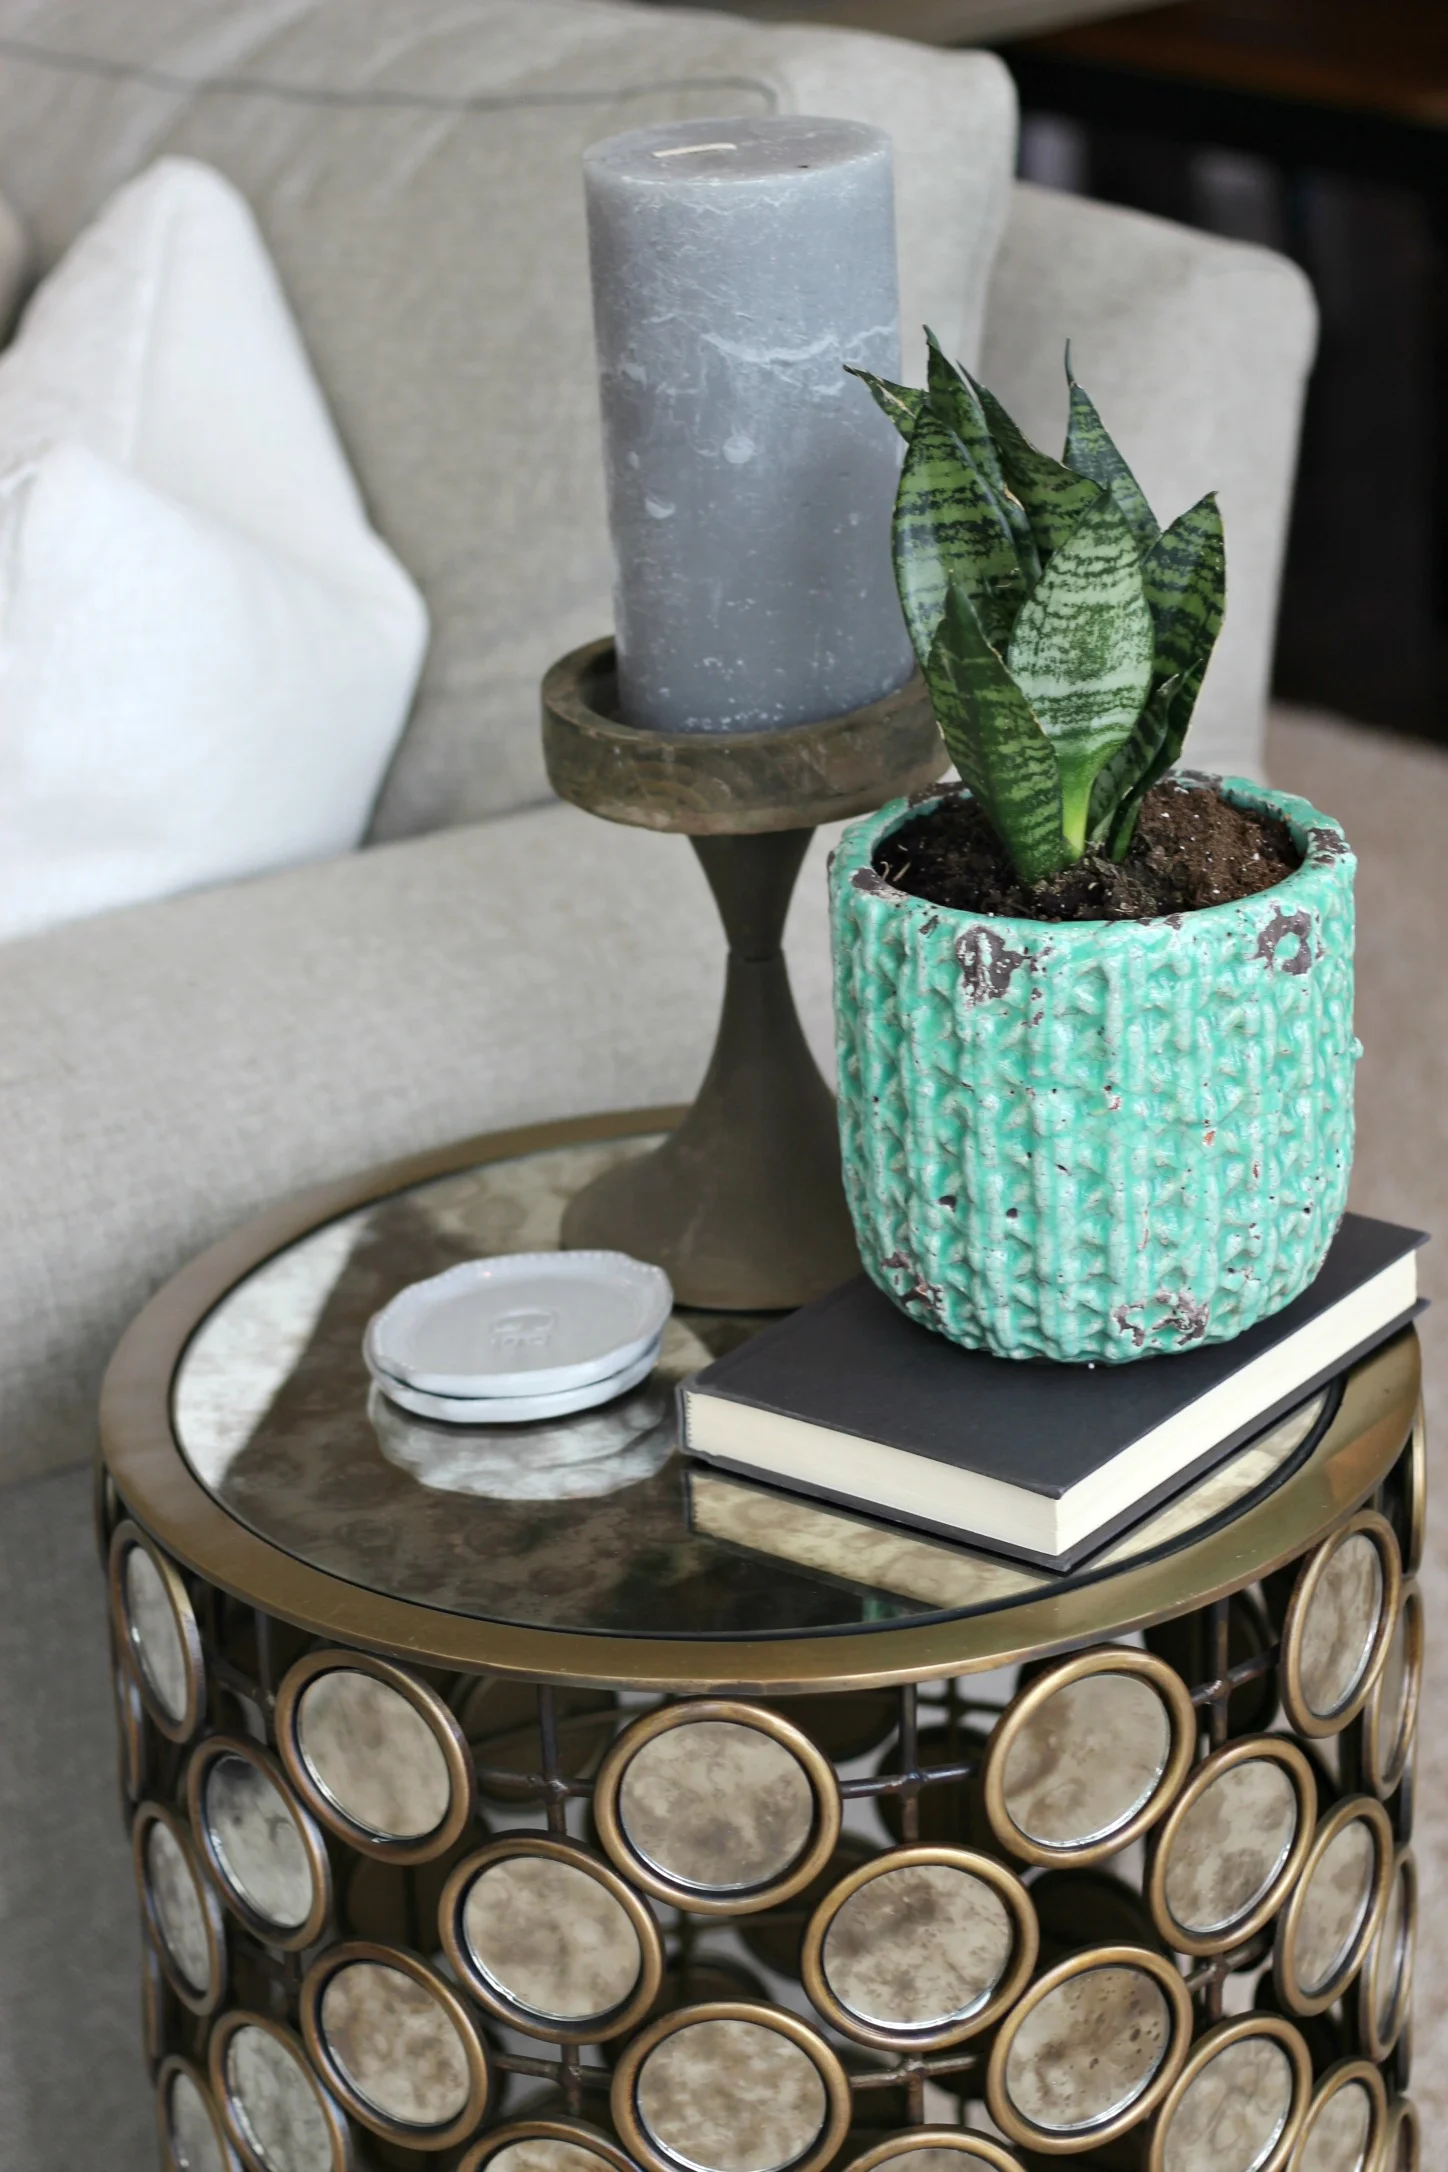
The couple also chose this mirrored side table from Ballard and I love the character it adds to the room, especially with all the mixed metals in the space. Once again, I wasn't able to use a lamp here due to it being in the center of the room, so I added some height and color with a tall pillar candle, plant, and an antique book to accessorize the table. I also added some antiqued mirrored frames to the built-ins to pull that old-world antique style throughout the room a bit.
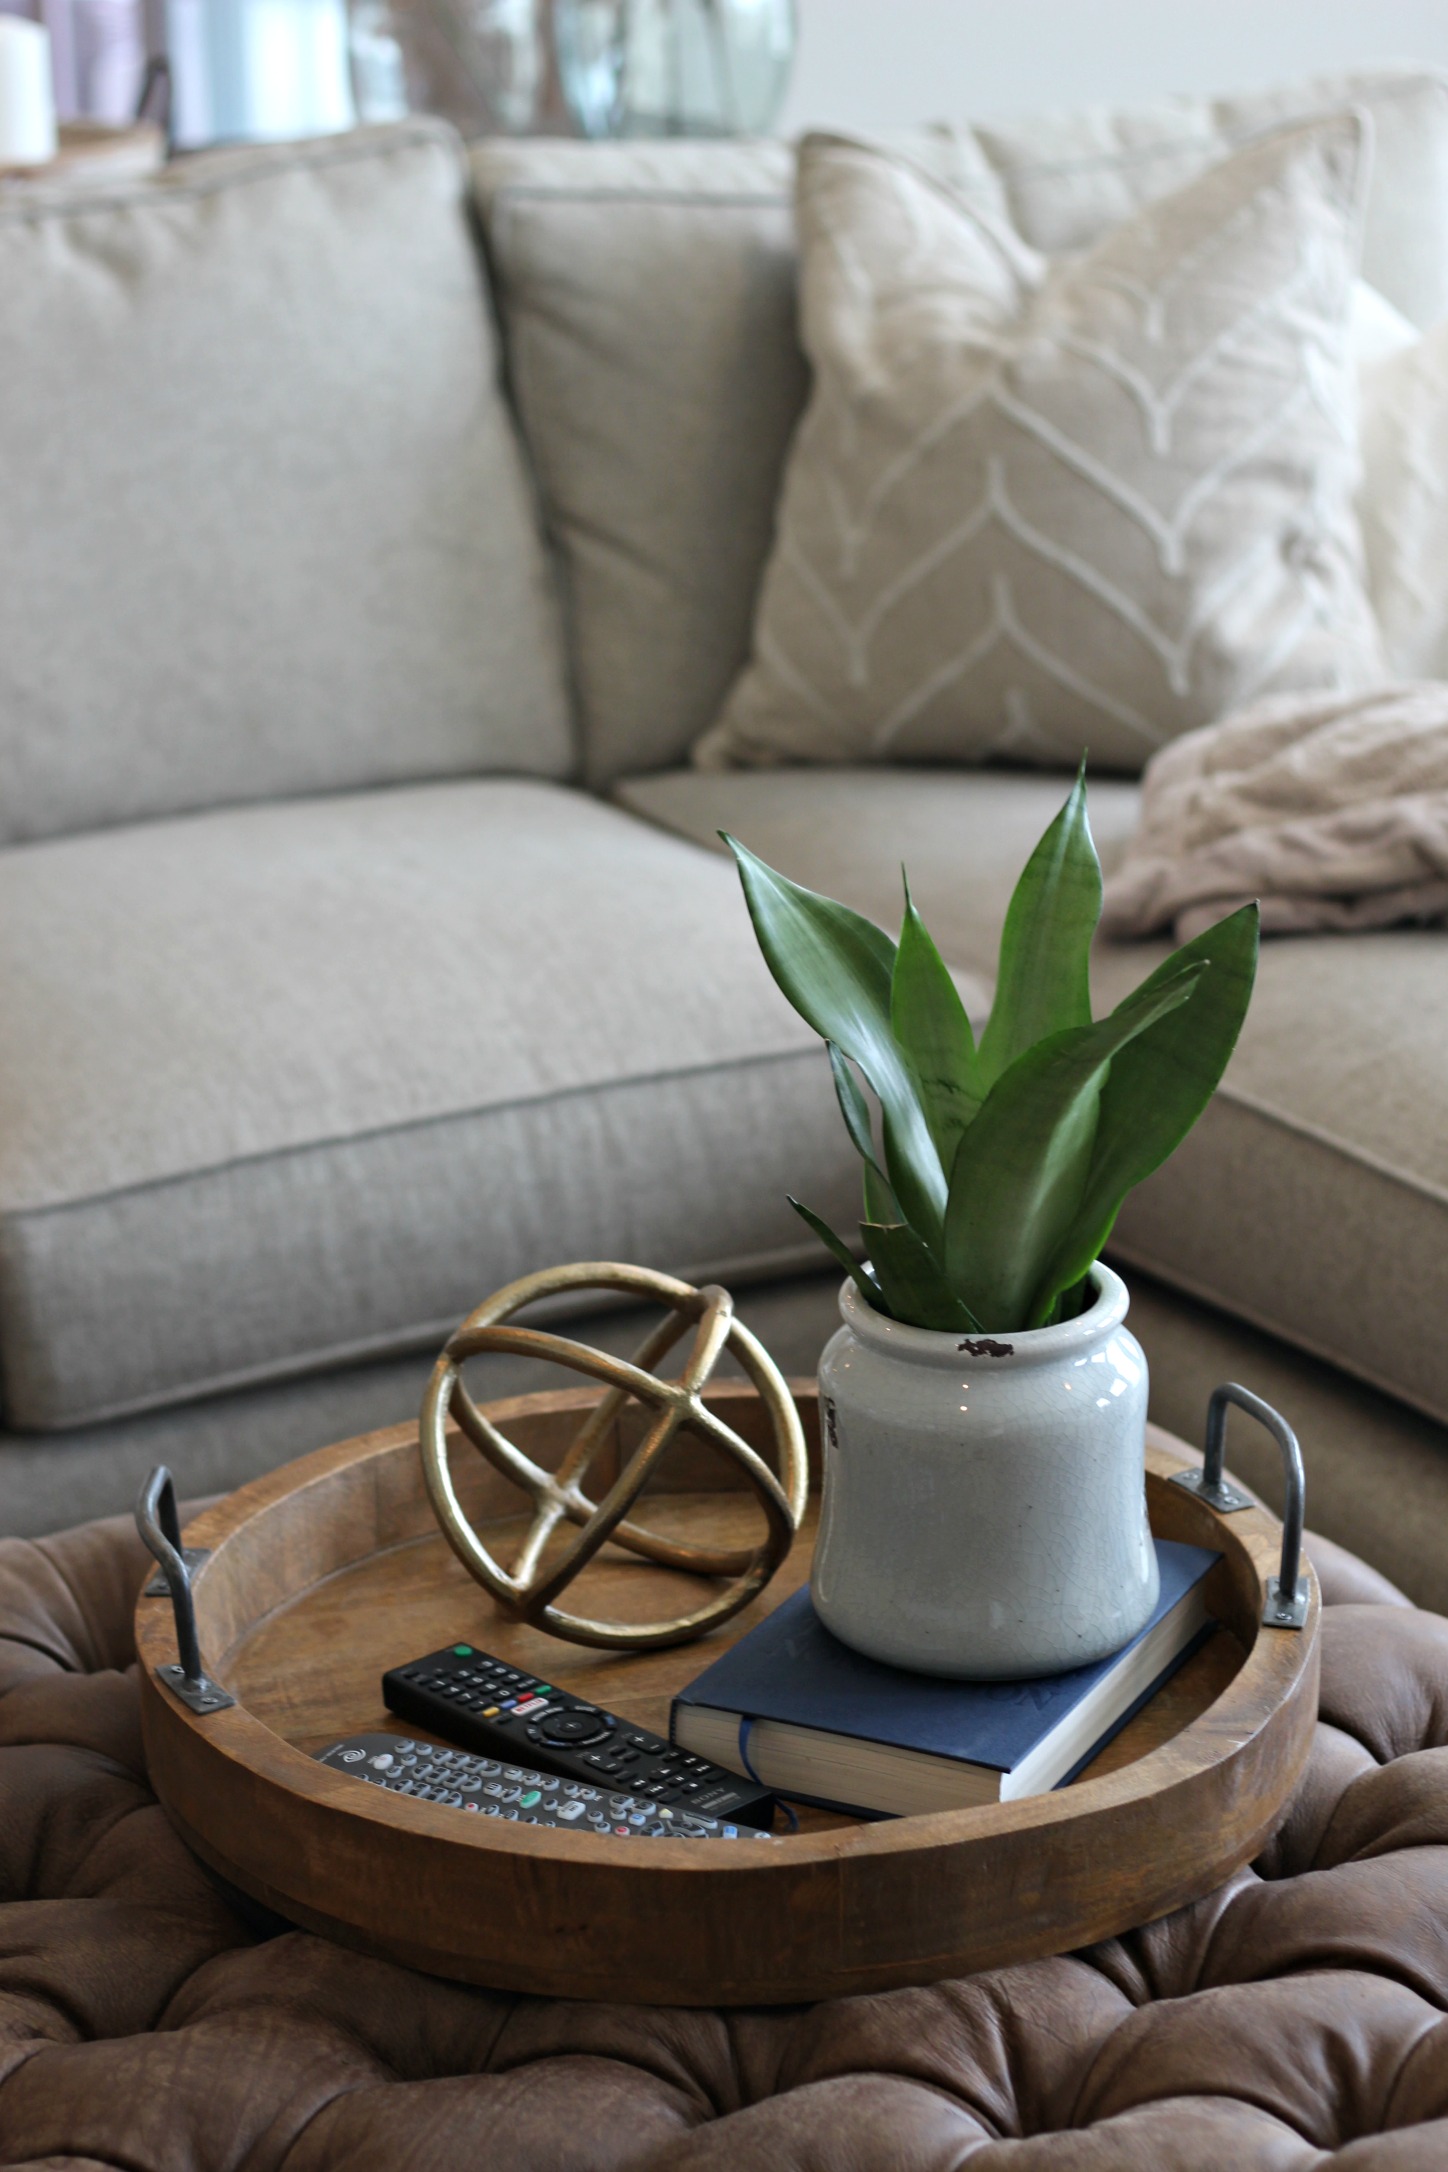
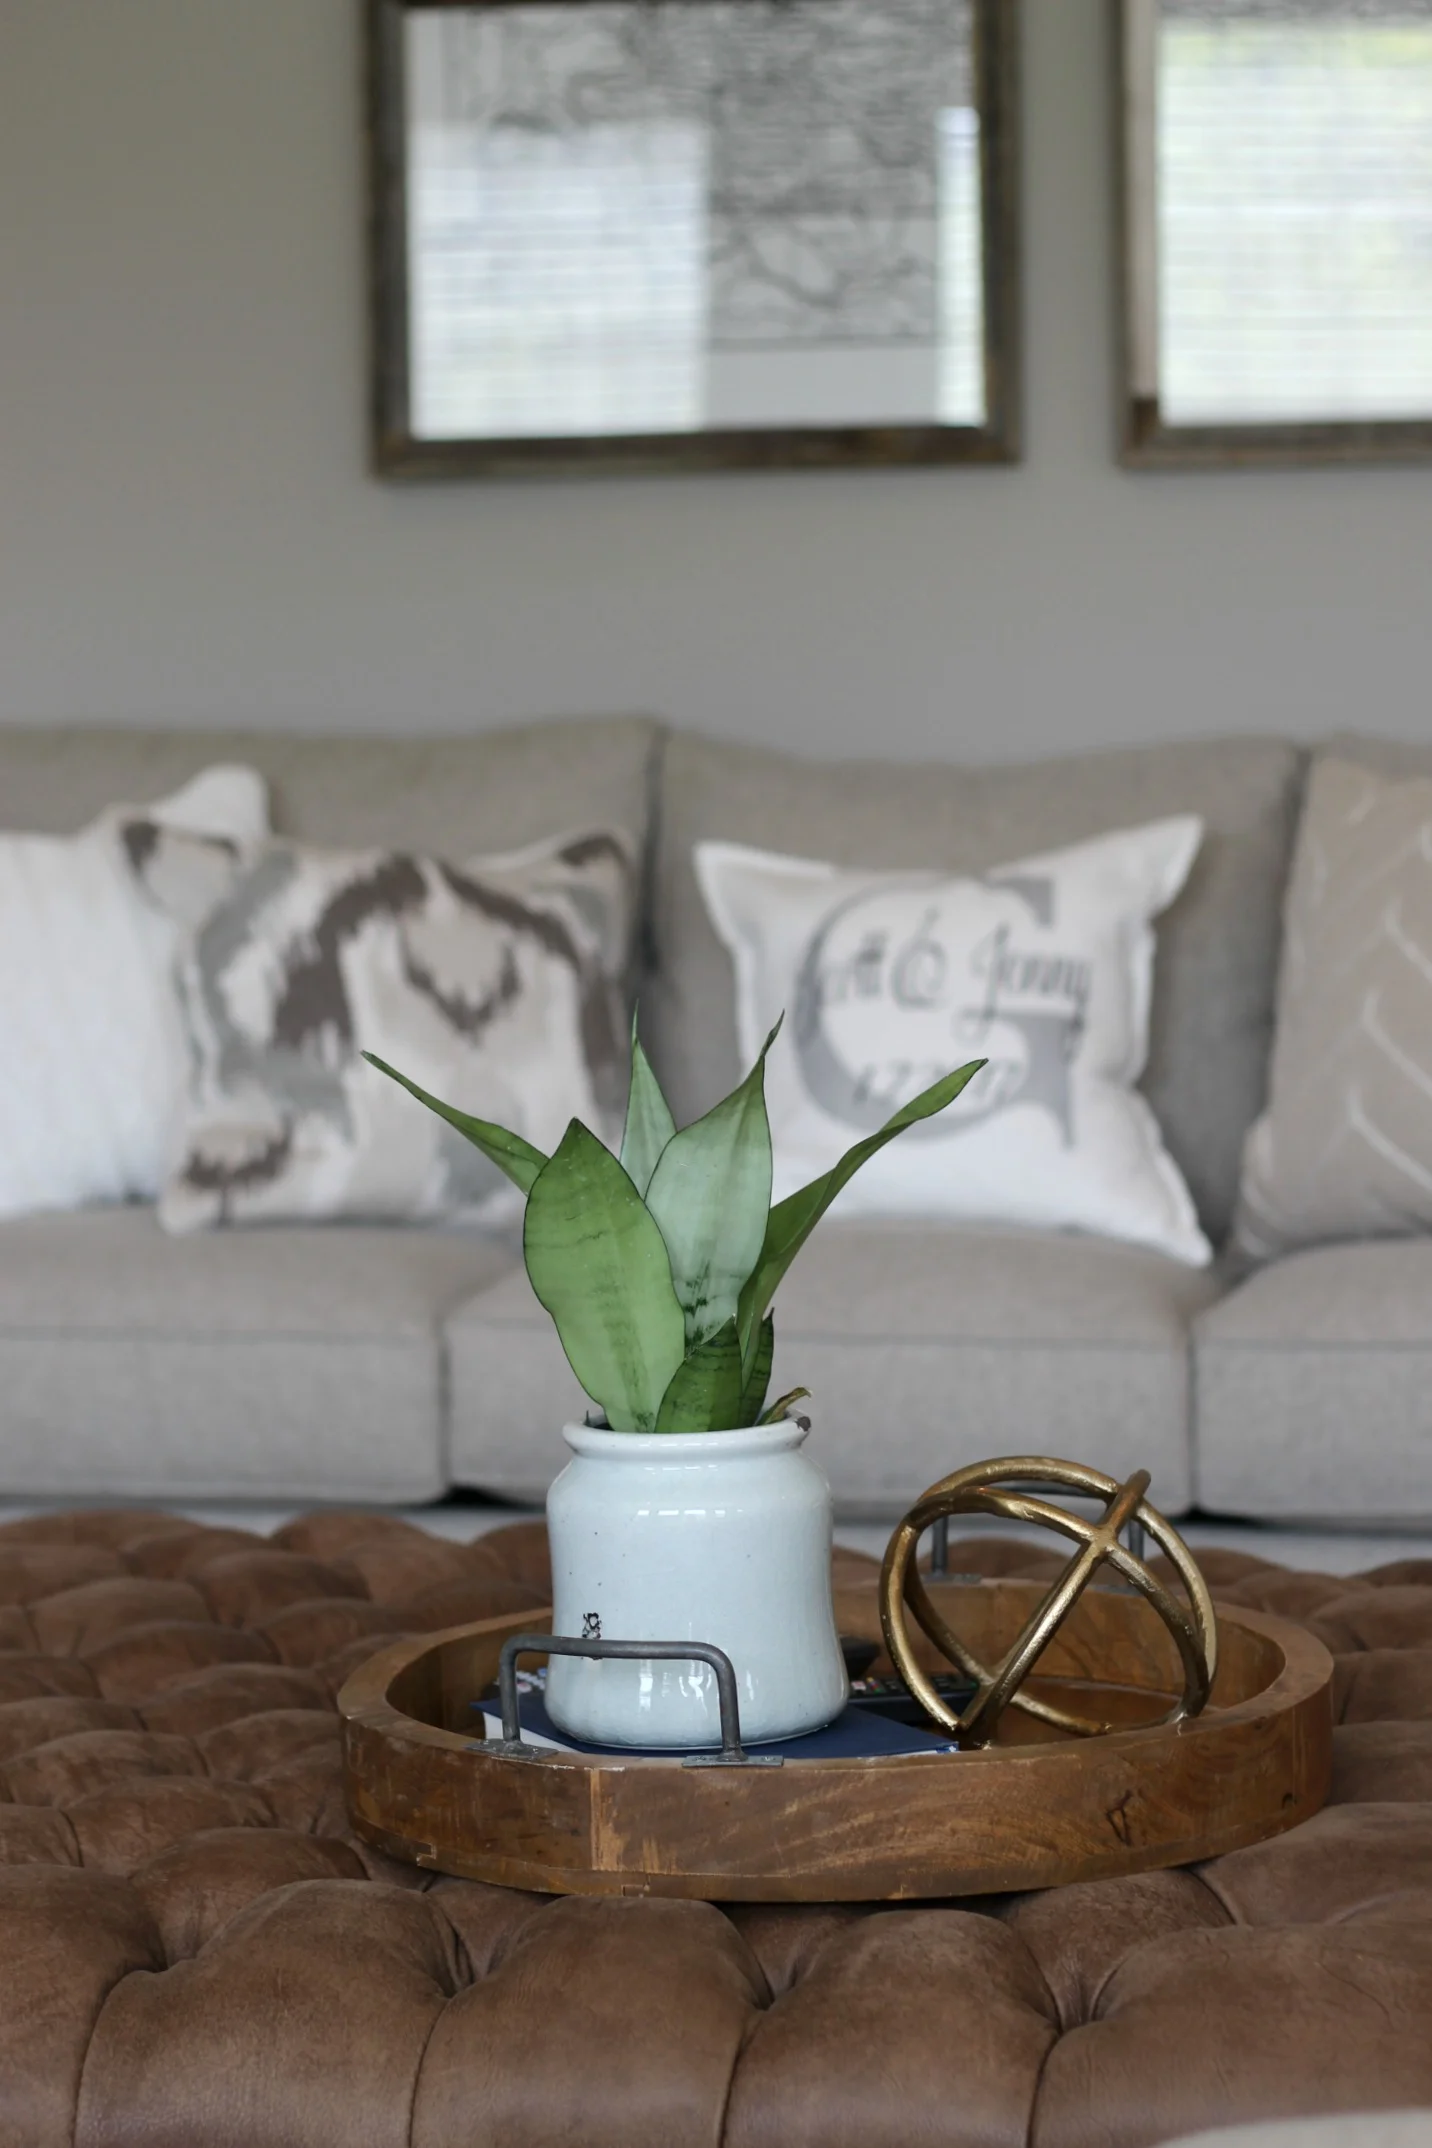
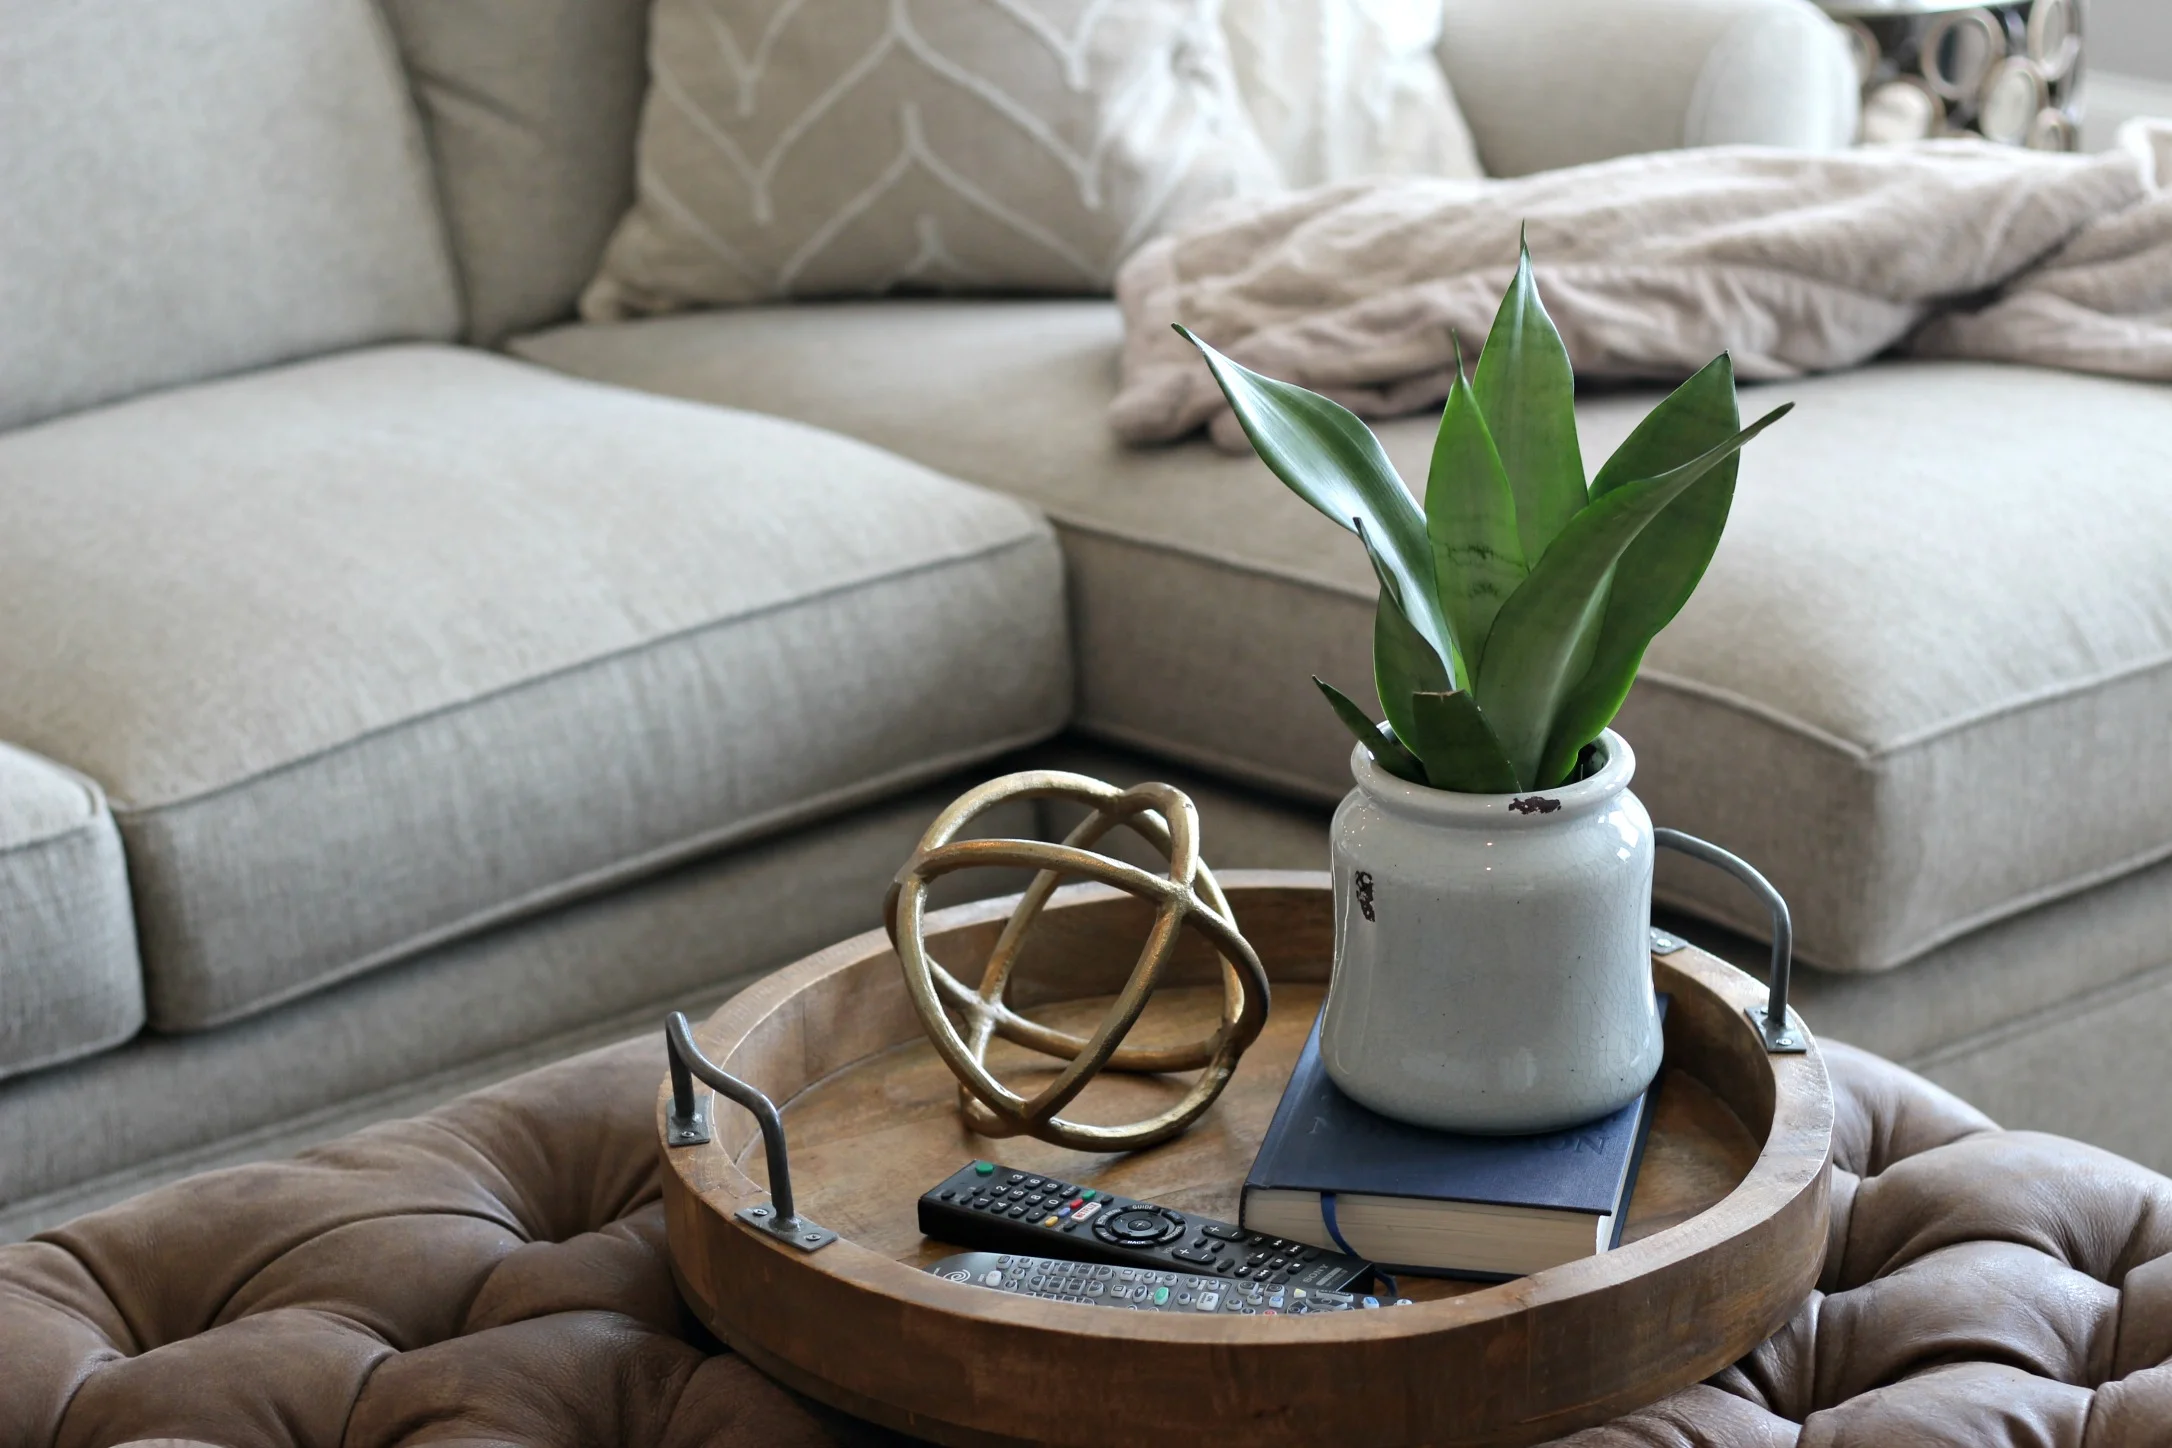
Another favorite accessory would be this giant wood tray I picked up at HomeGoods. It is the perfect size for this oversized leather ottoman and I love that it has the industrial metal handles too. A plant and old book add a pop of color in the center of the room and make the sitting area feel complete + cozy.
I just love the timeless, cozy, and refined feel of this space and I know that this couple will be able to enjoy it for years to come. They chose so many pieces of the highest quality that will last forever, and the neutral color scheme will allow them to add in pops of color whenever they want to. It is amazing how much of a difference a few accessories and finishing touches can make to a room (which is why that's probably my favorite part of the entire design process)! I have linked most of the furniture and accessories that I used in this space at the end of this post for you to shop, but if you have questions about anything I didn't mention, just ask! If you would like more information on any of our design services, just head to our Design page and fill out the inquiry form there.
xoxo
Emily


Girl's Room Before + After
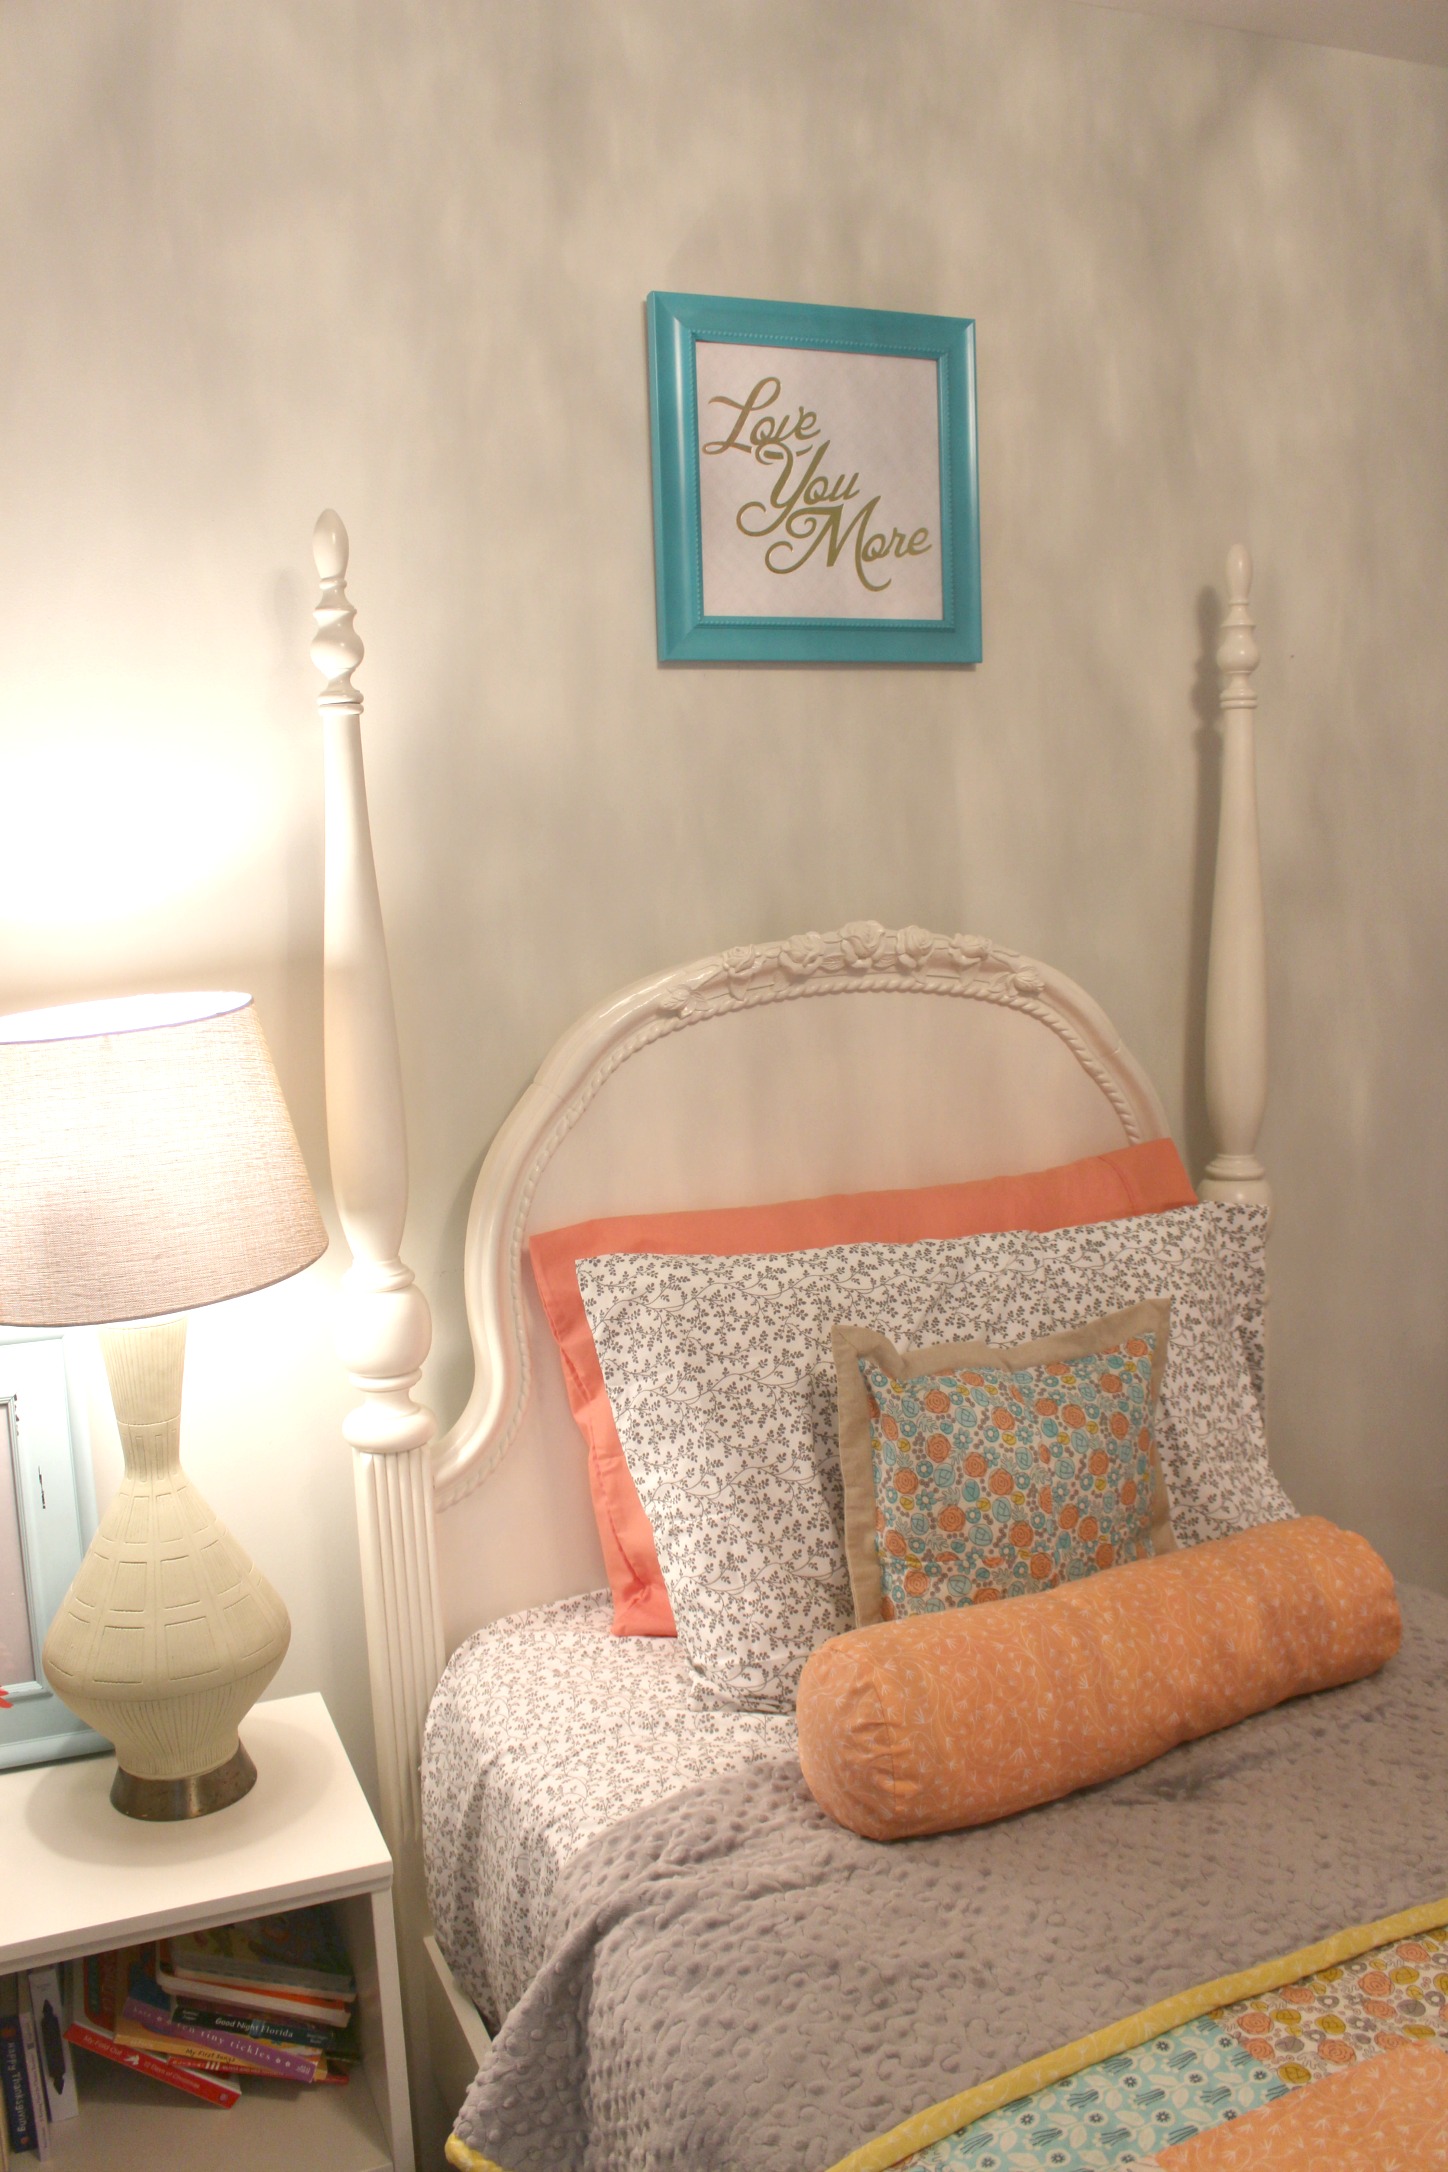
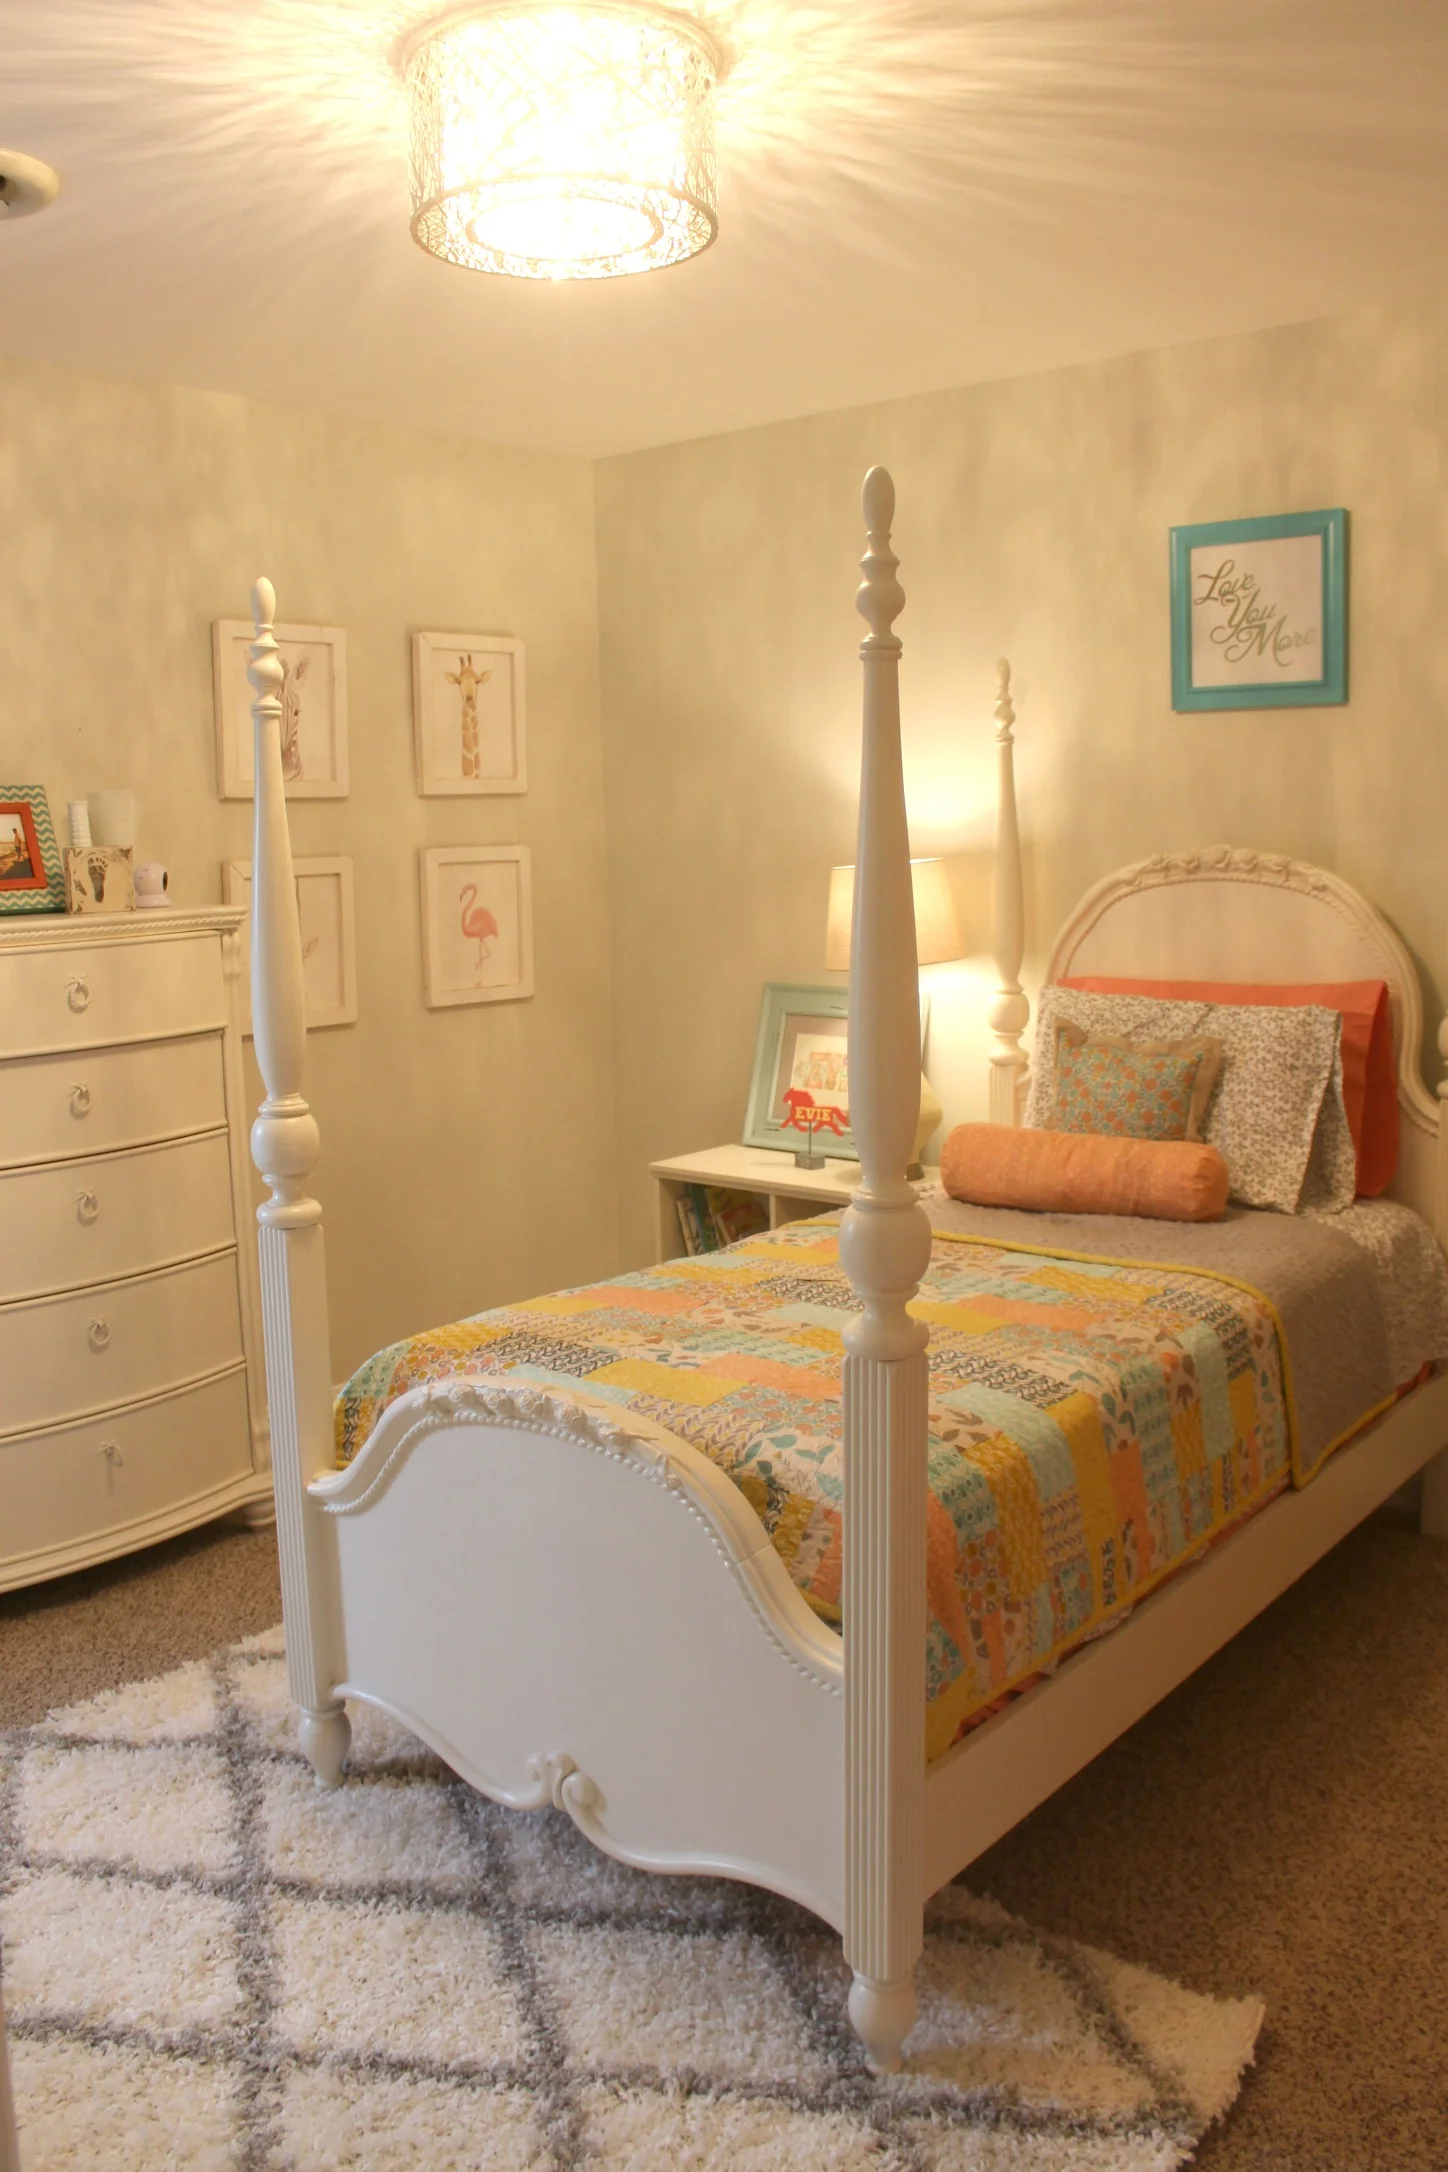
Last week I finished up one of my first kid's room projects, adding some finishing touches to this adorable little girl's room! For this project I rearranged all the furniture in the room, added a fun chalkboard wall on one side, rearranged and added new wall art, as well as adding a printed rug and new window treatments. This client already had the cute bedroom furniture and bedding but needed some help tying everything together and filling up the walls to make the room feel complete. Take a look at the before + after photos below:
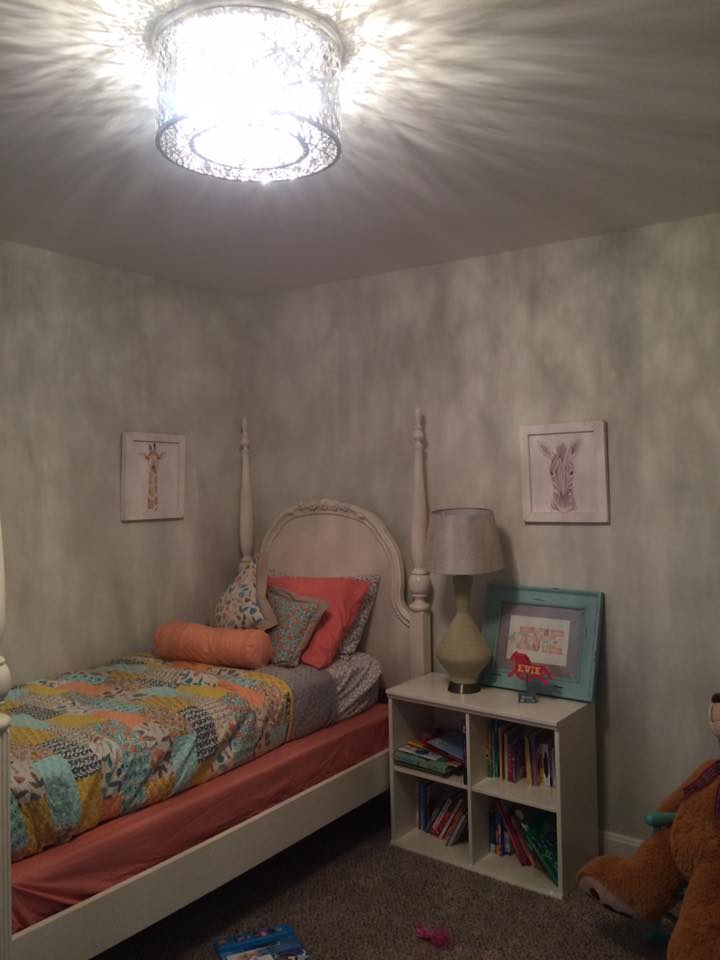
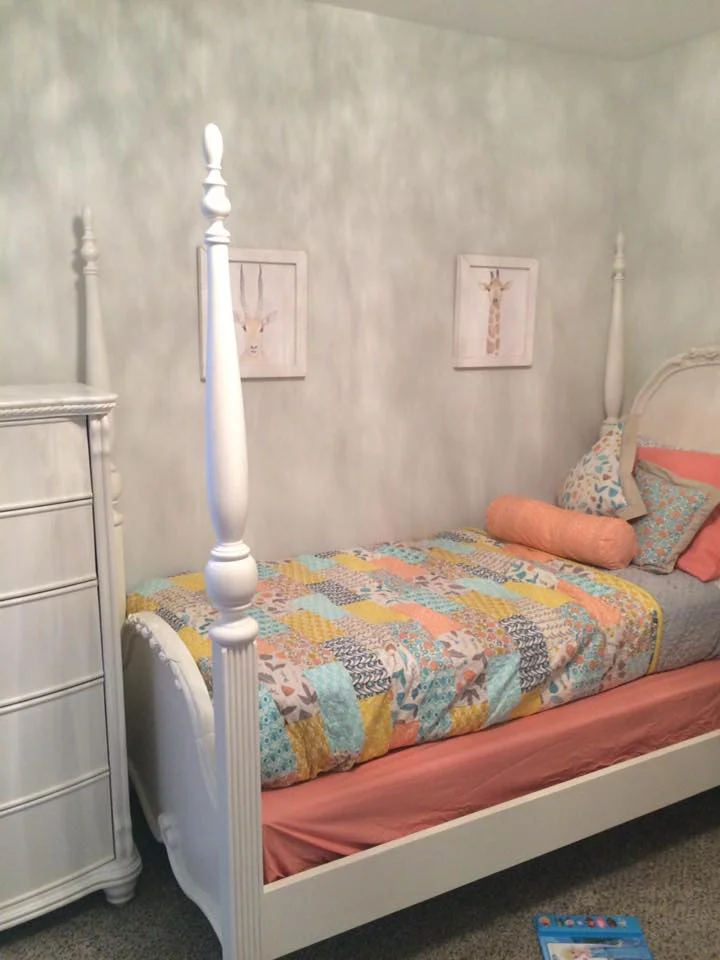
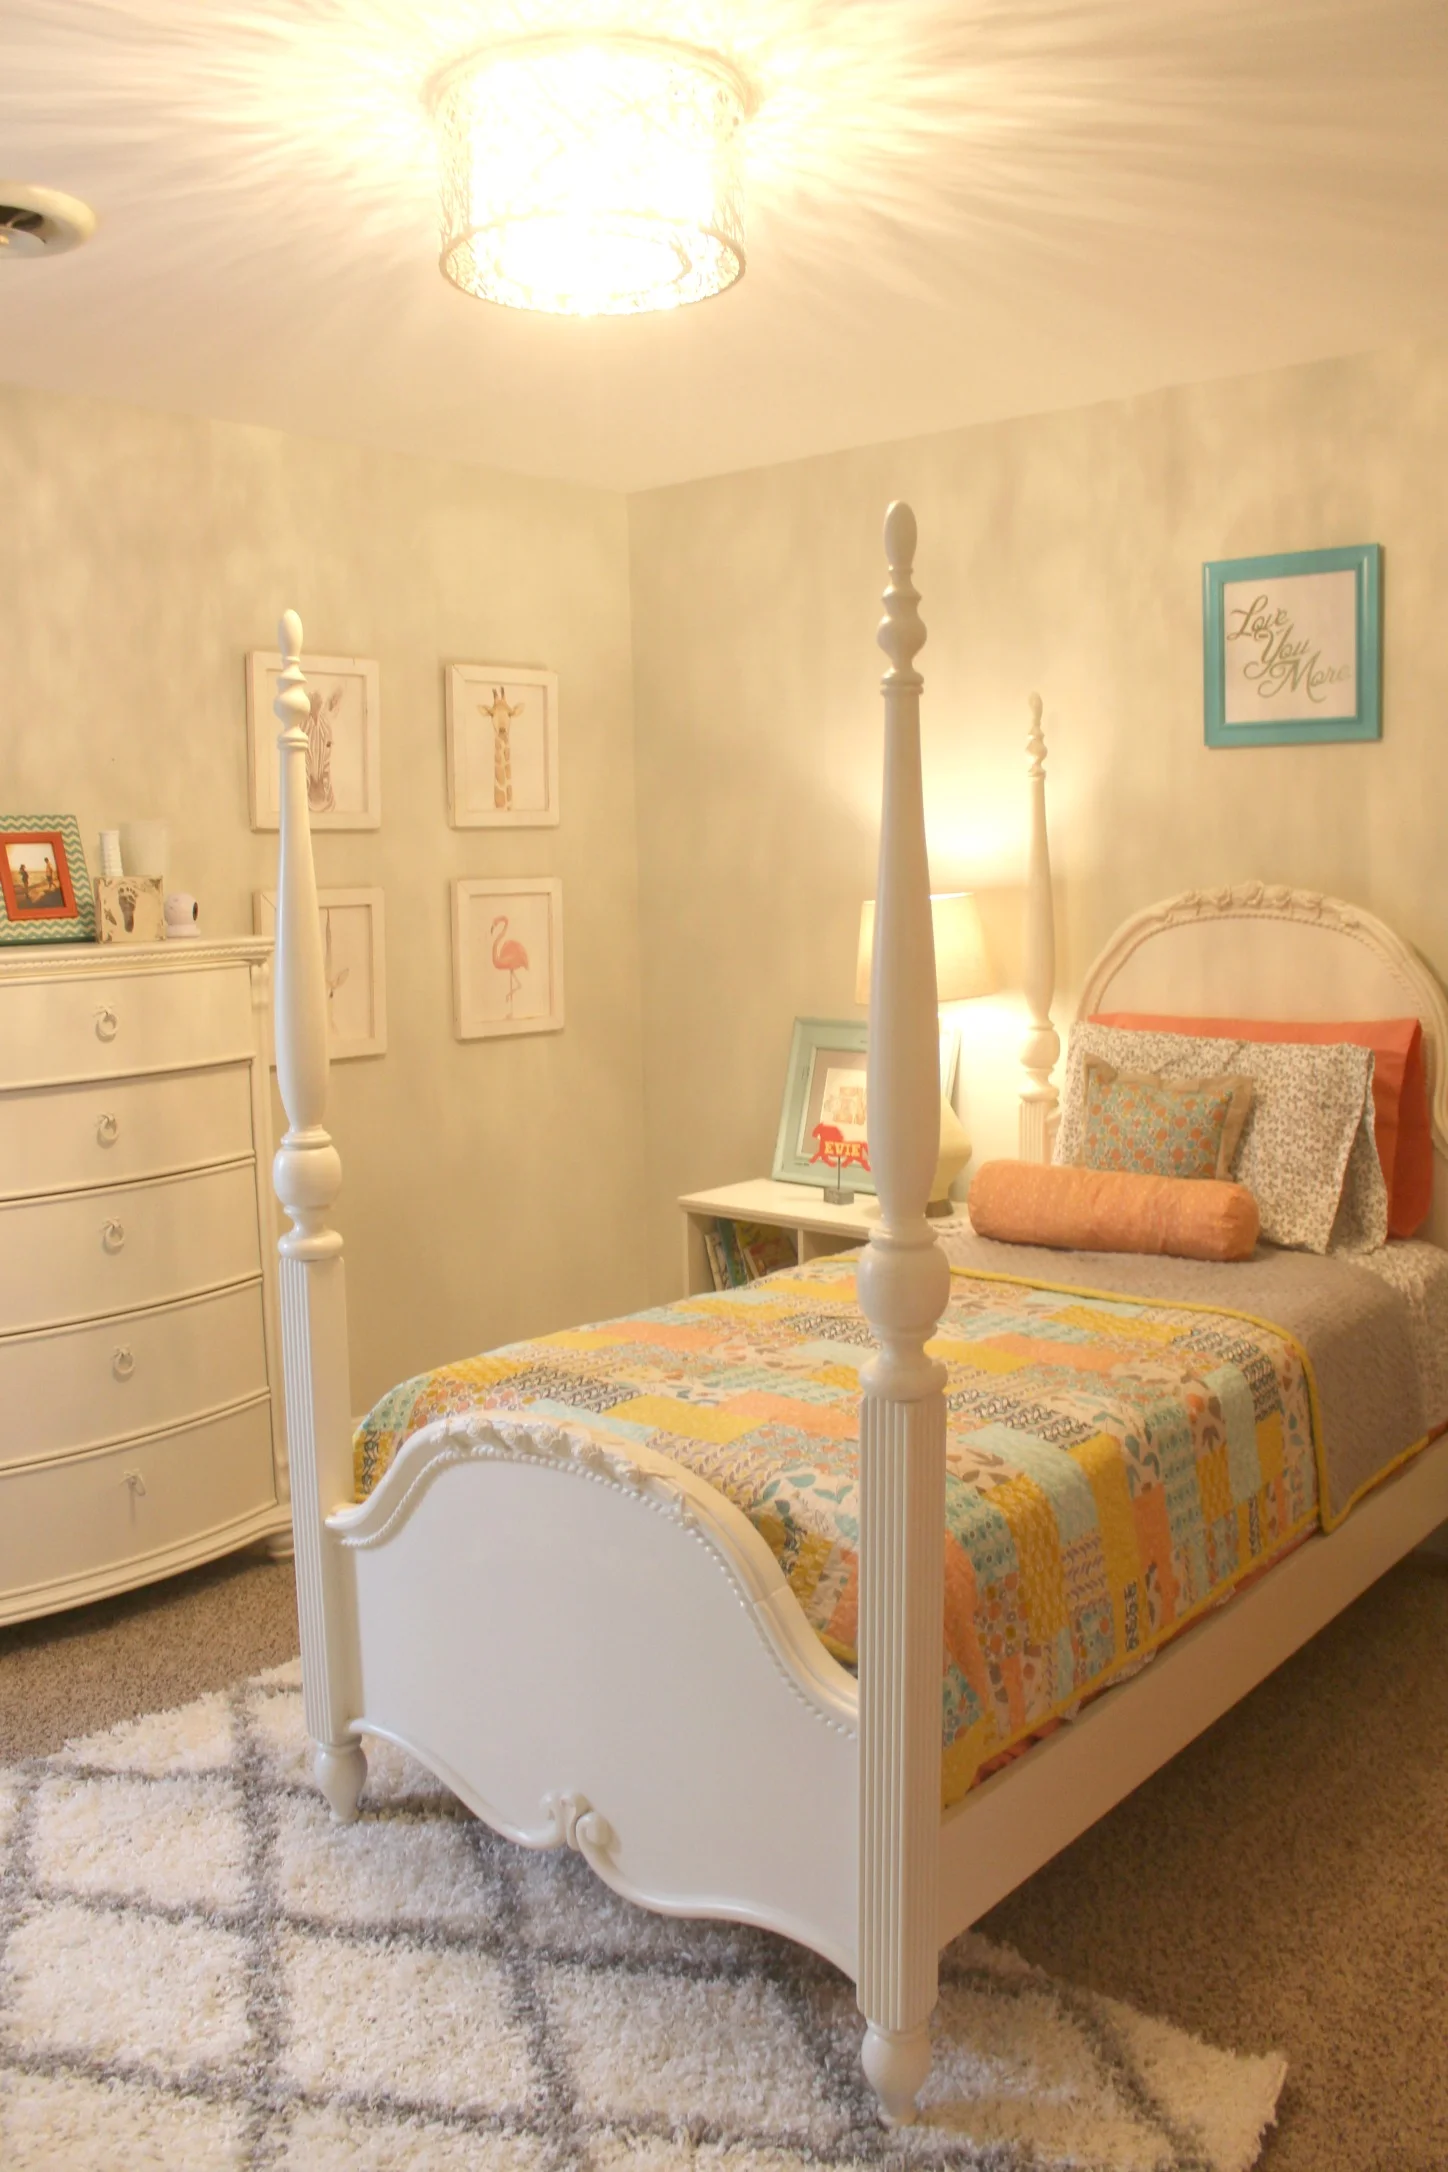
The biggest impact in the room came from moving the bed away from the corner and centering it on the wall. This opened up the room and anchored the entire space. I placed the new gray and white patterned rug at the foot of the bed, slightly tucked underneath the base. The animal pictures on the left wall were spread out throughout the room before, but I arranged them together to fill the open wall space in this area.
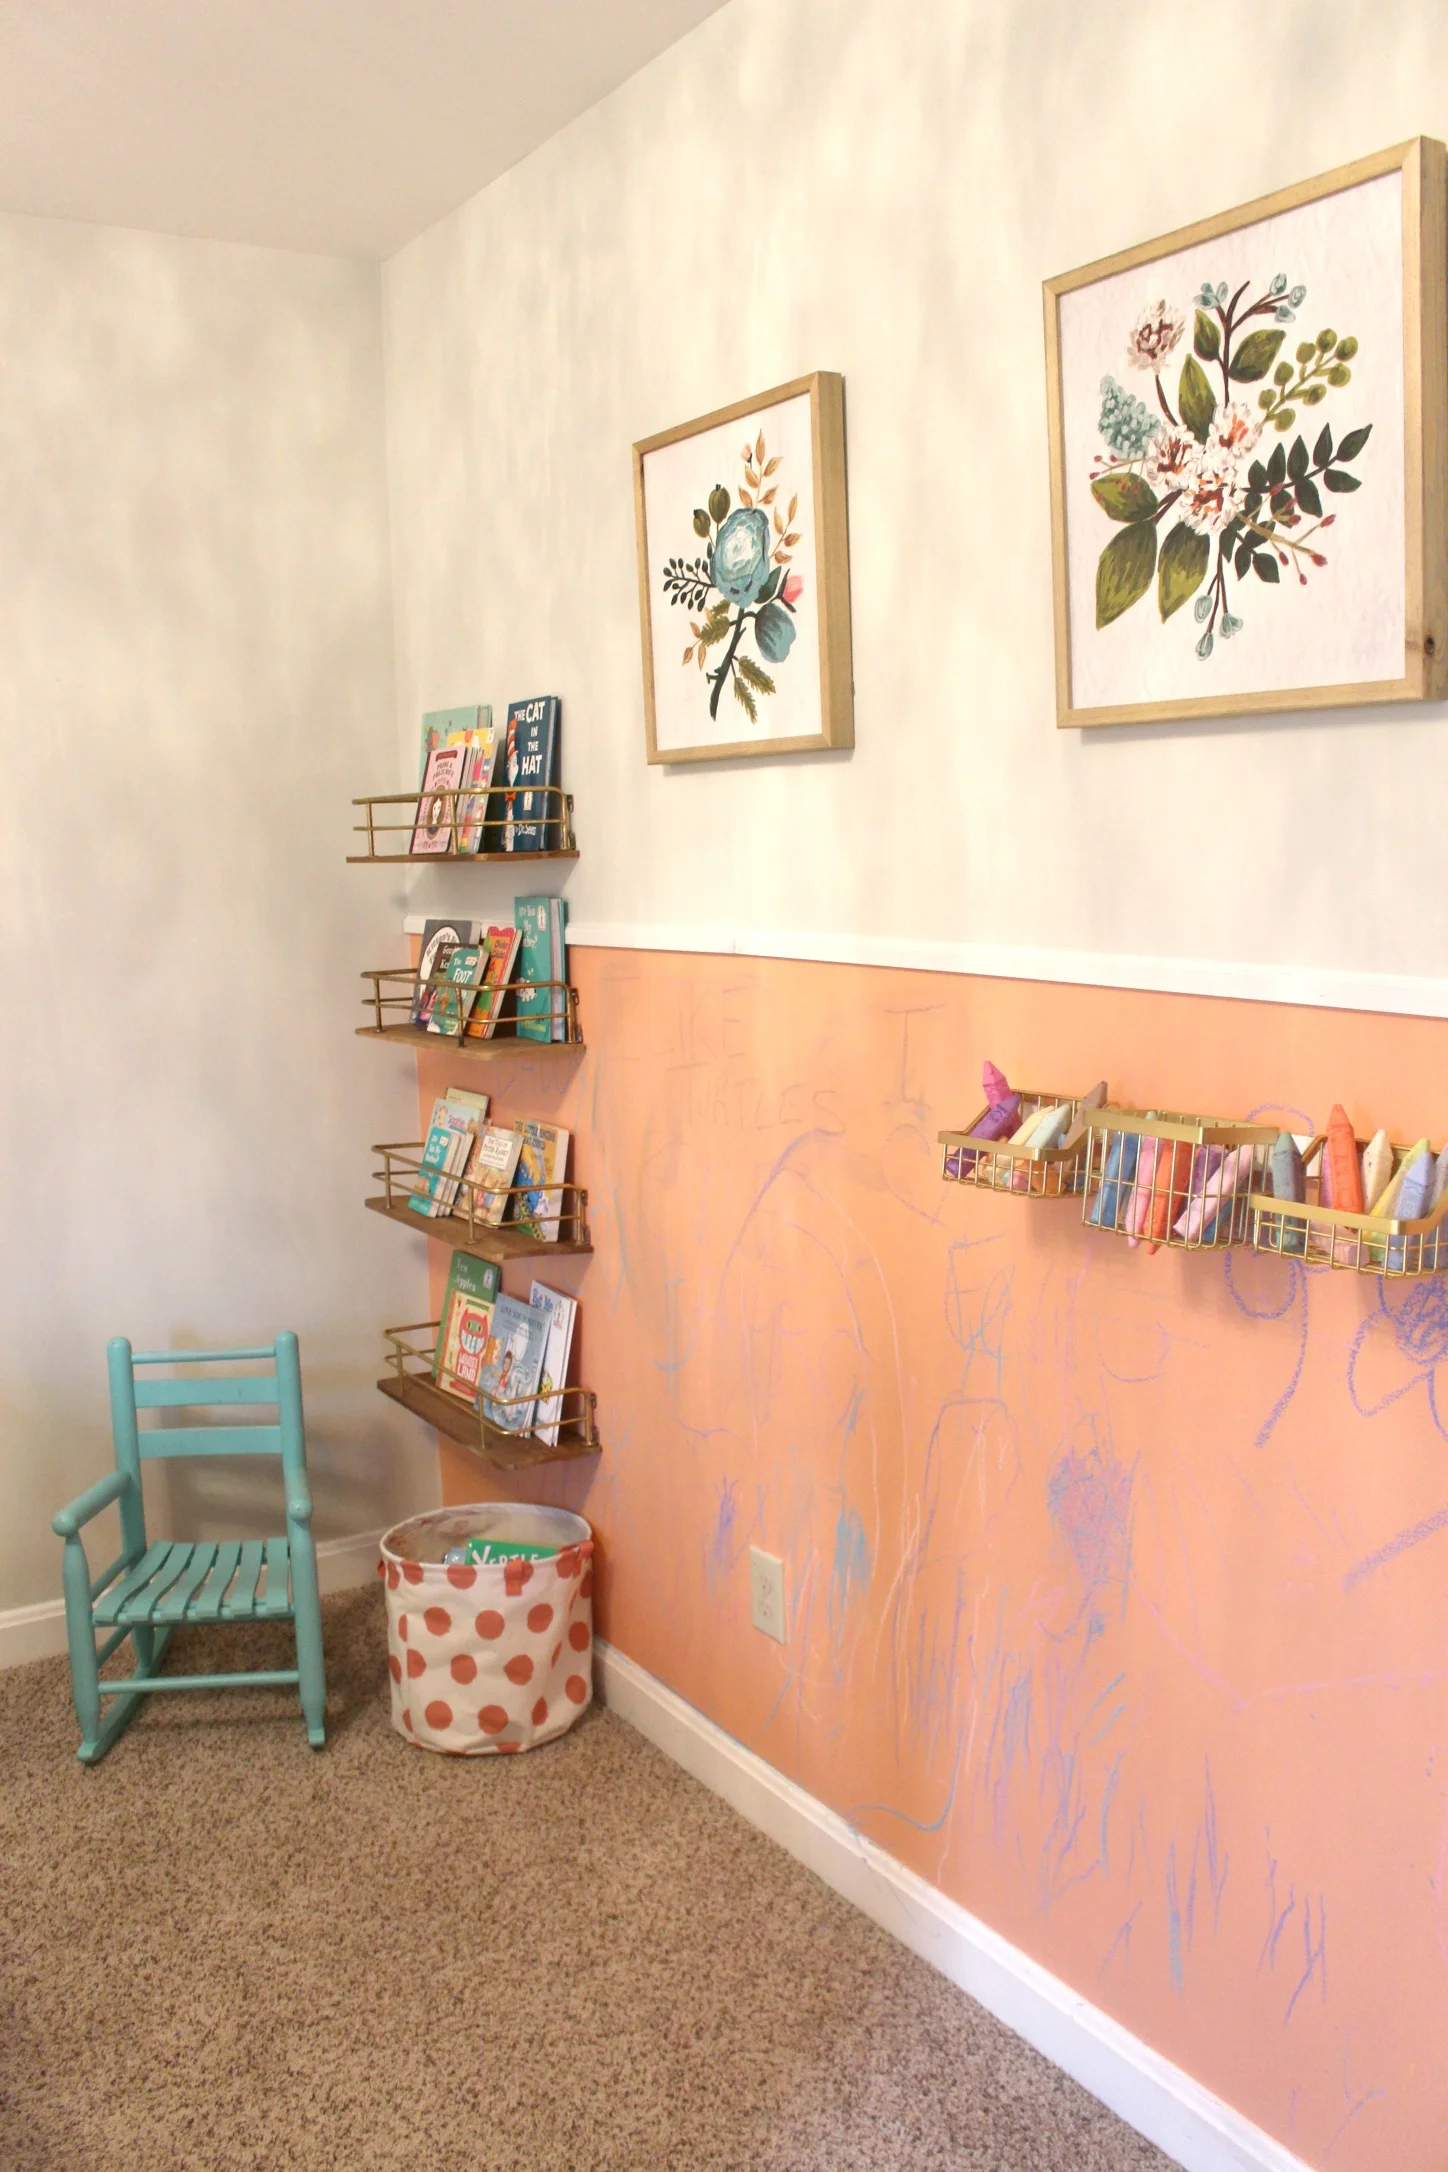
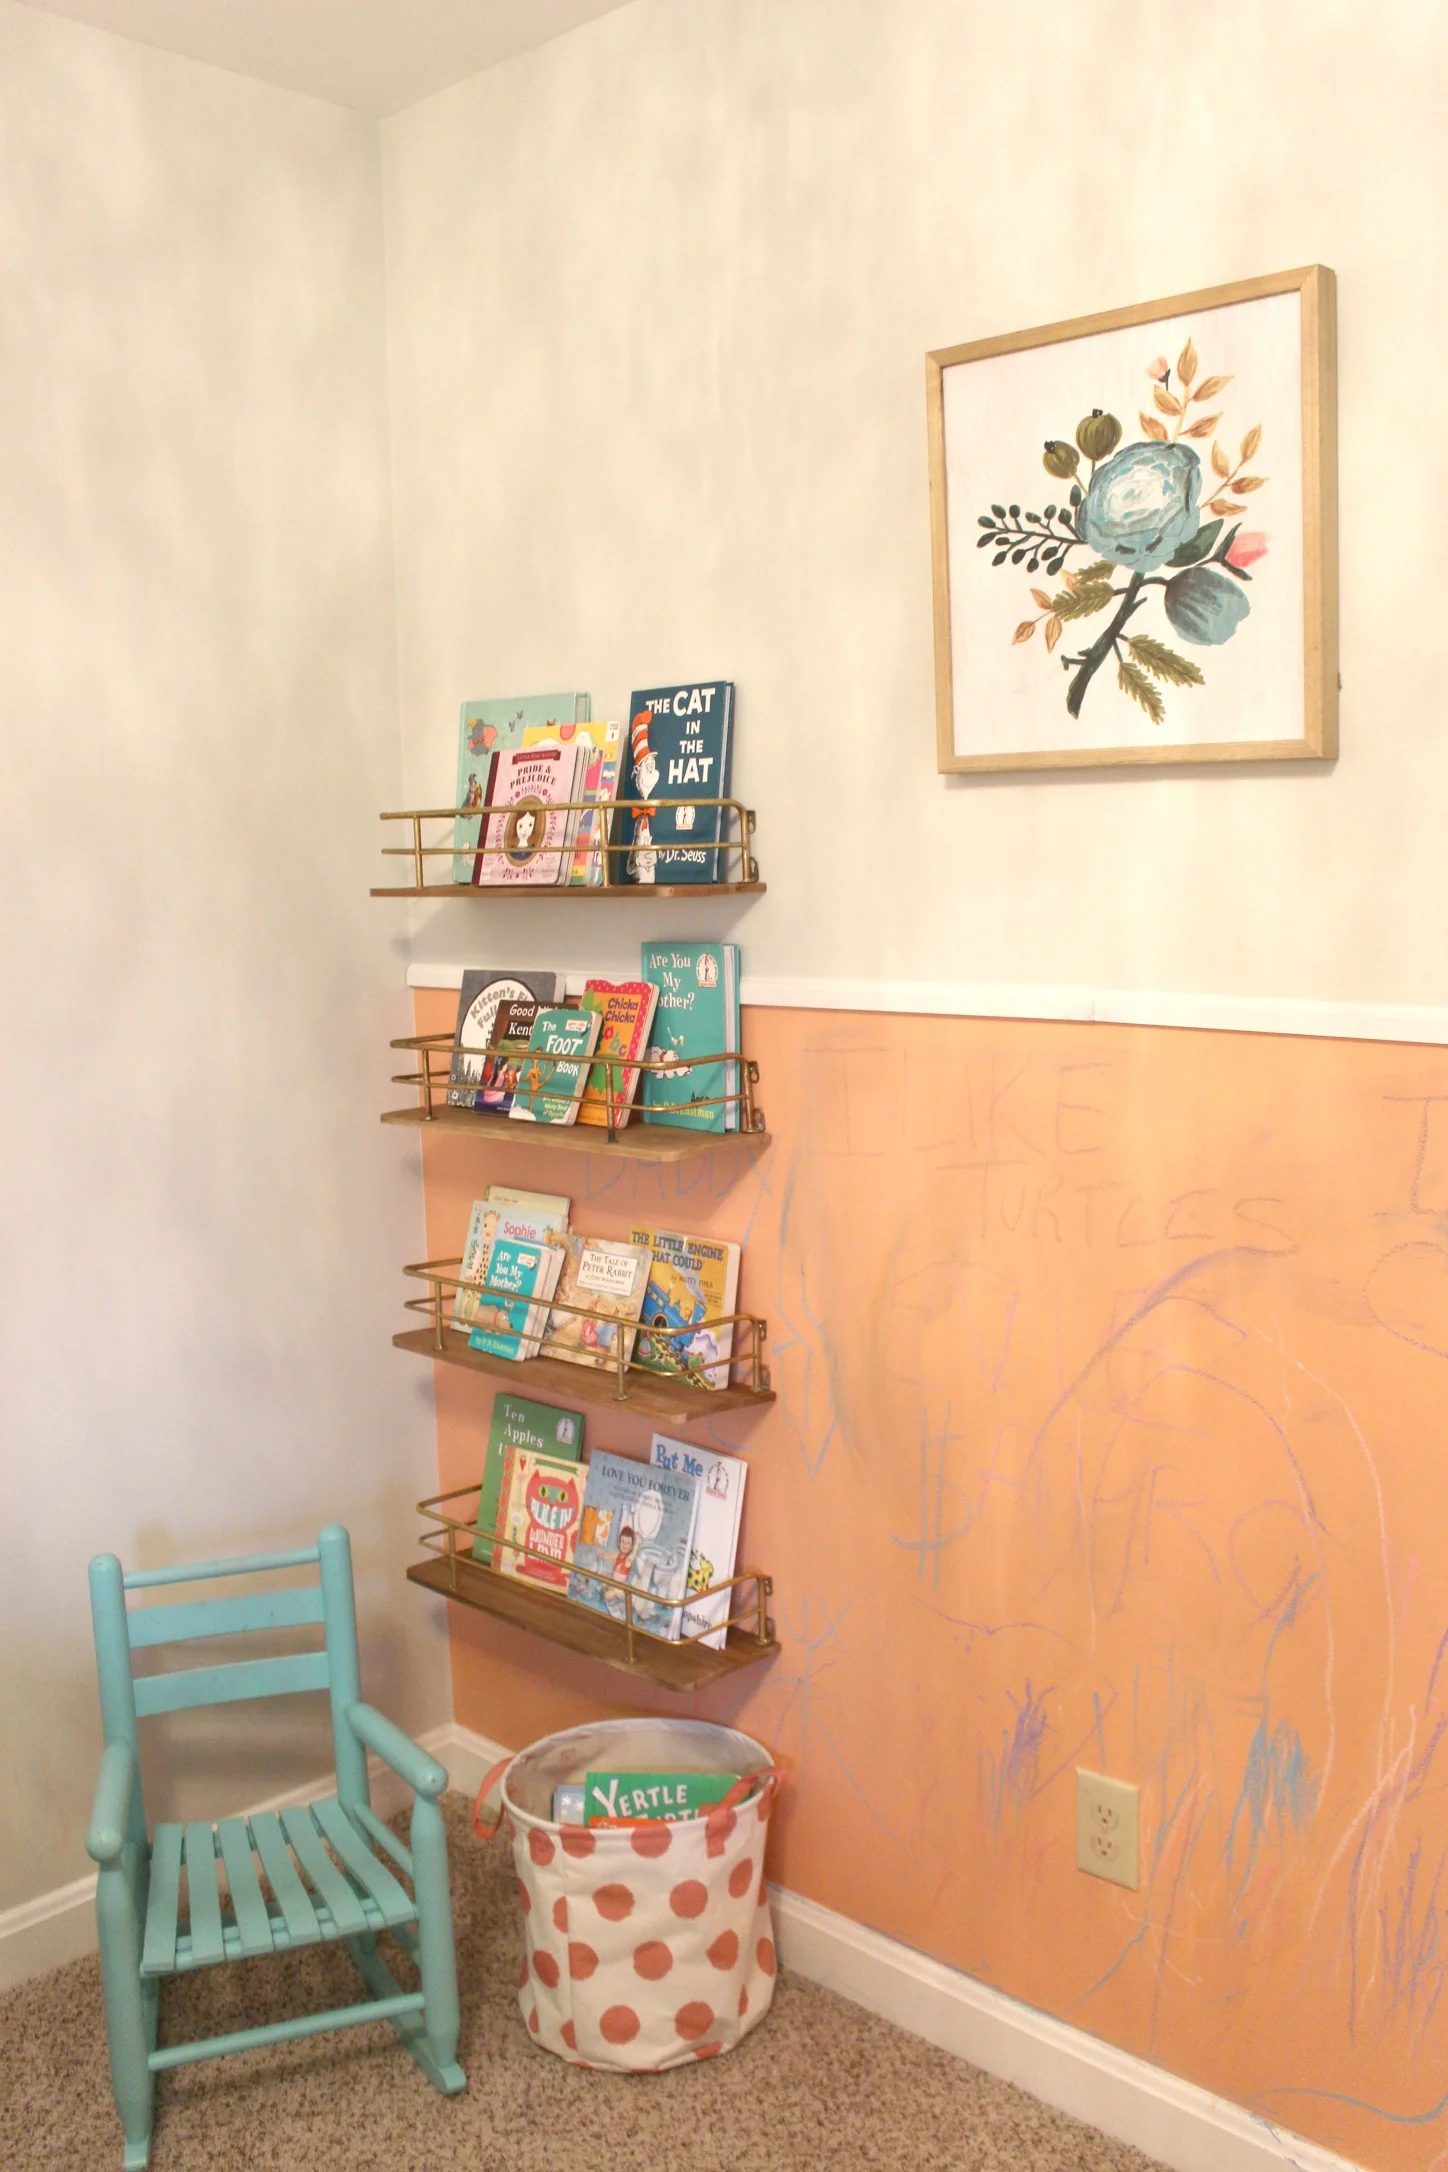
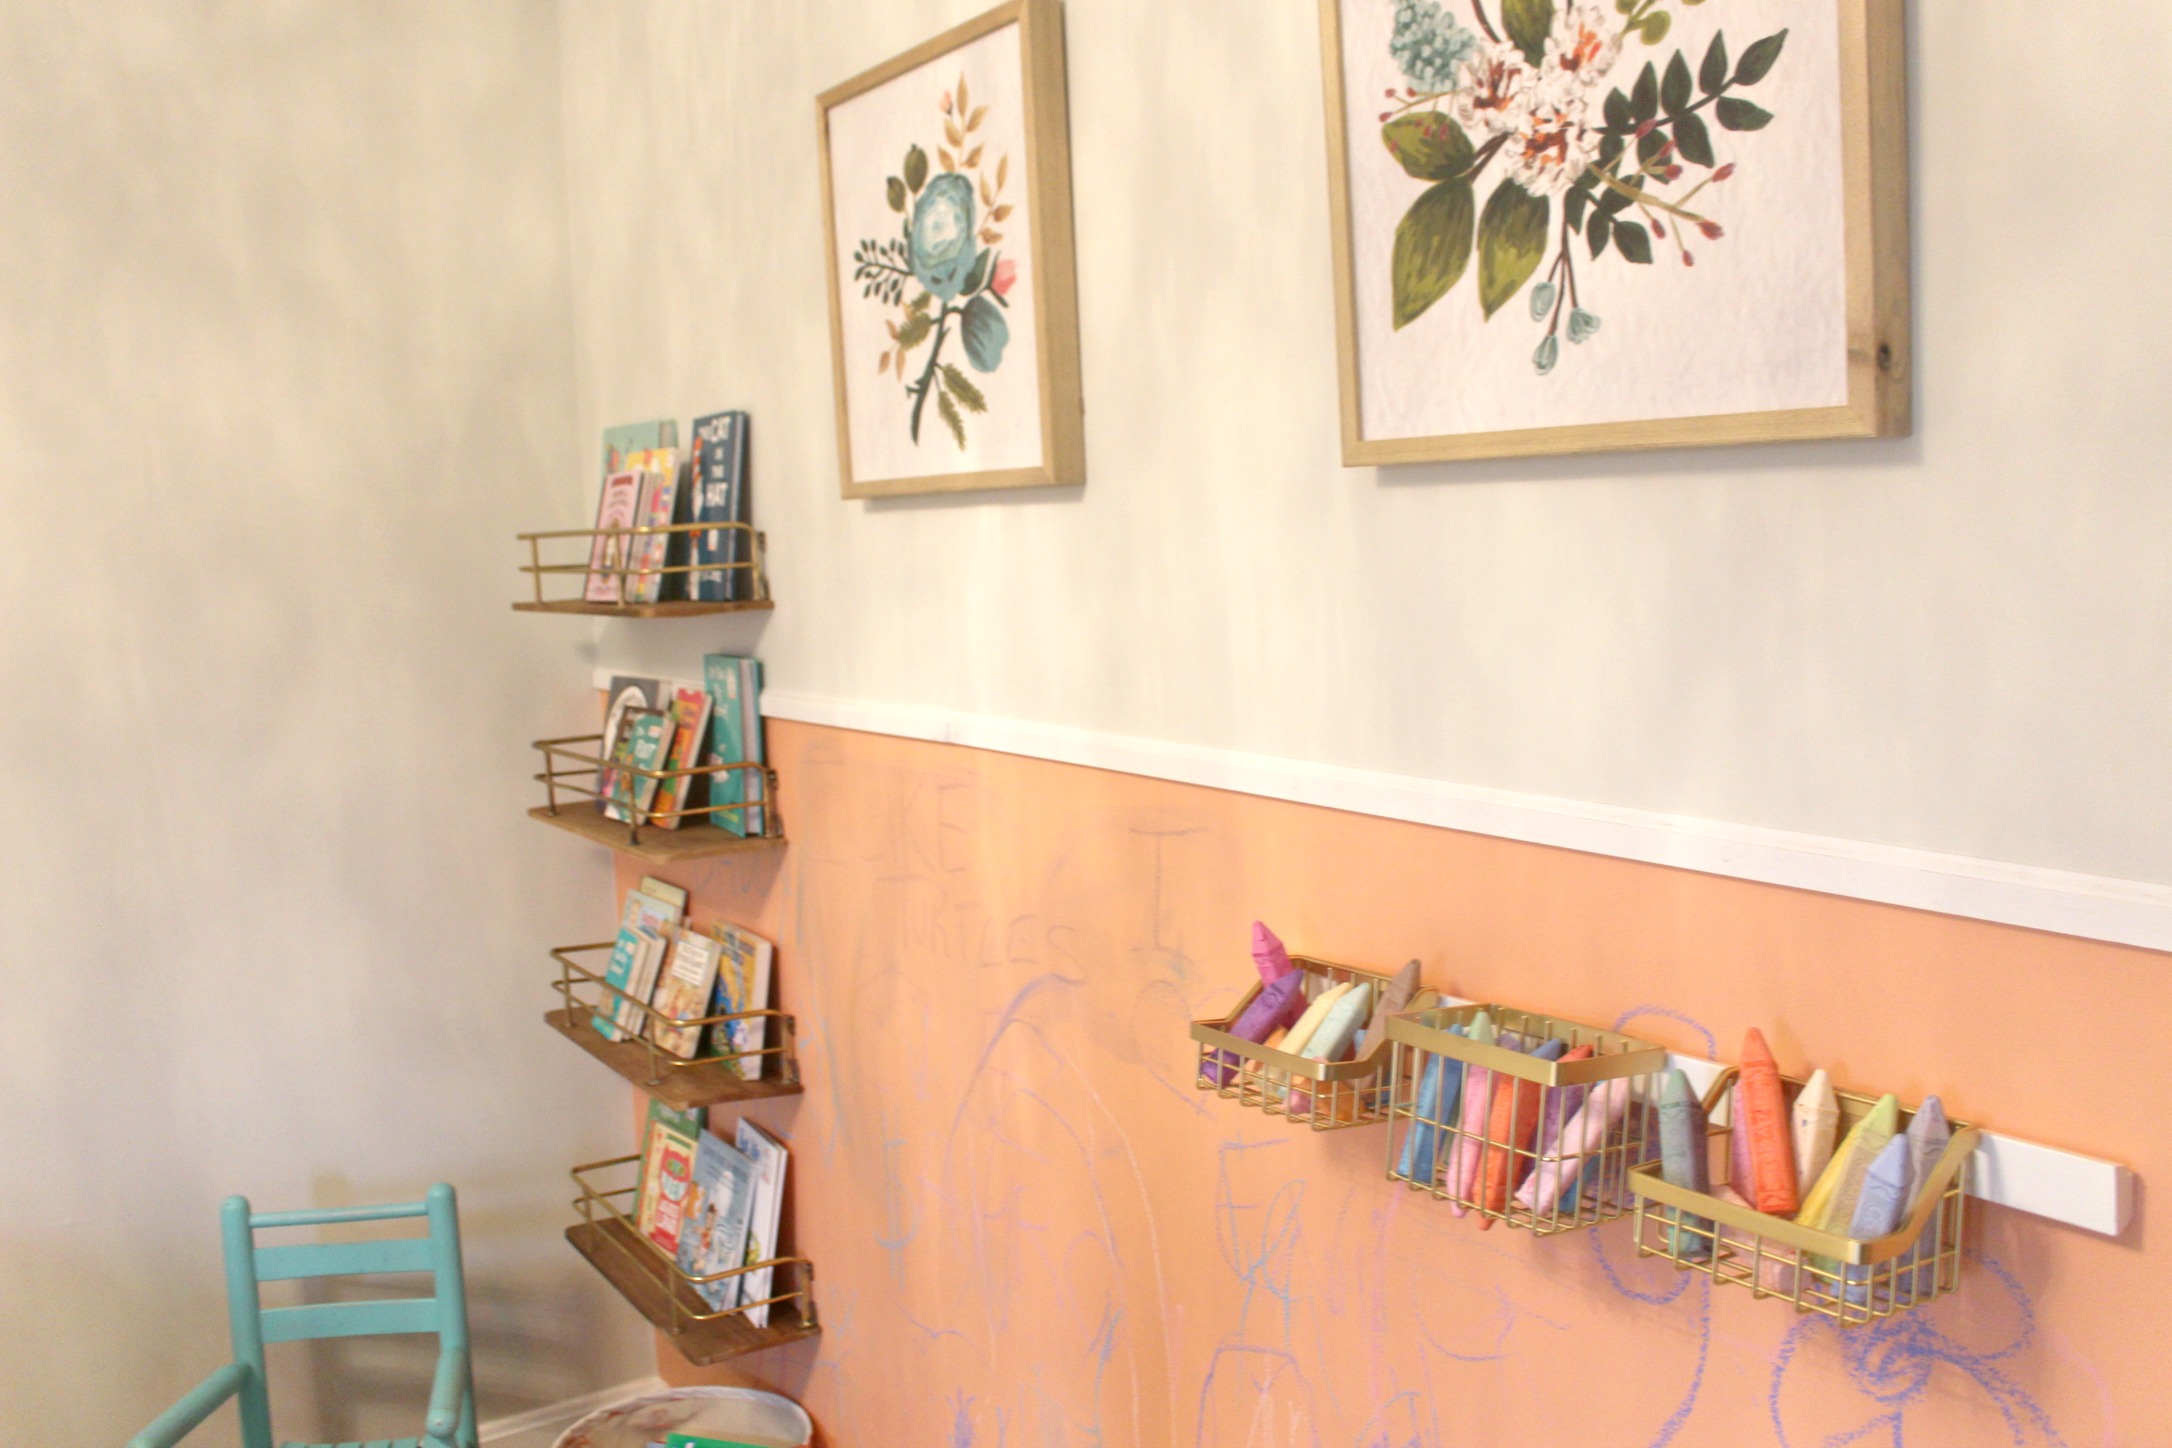
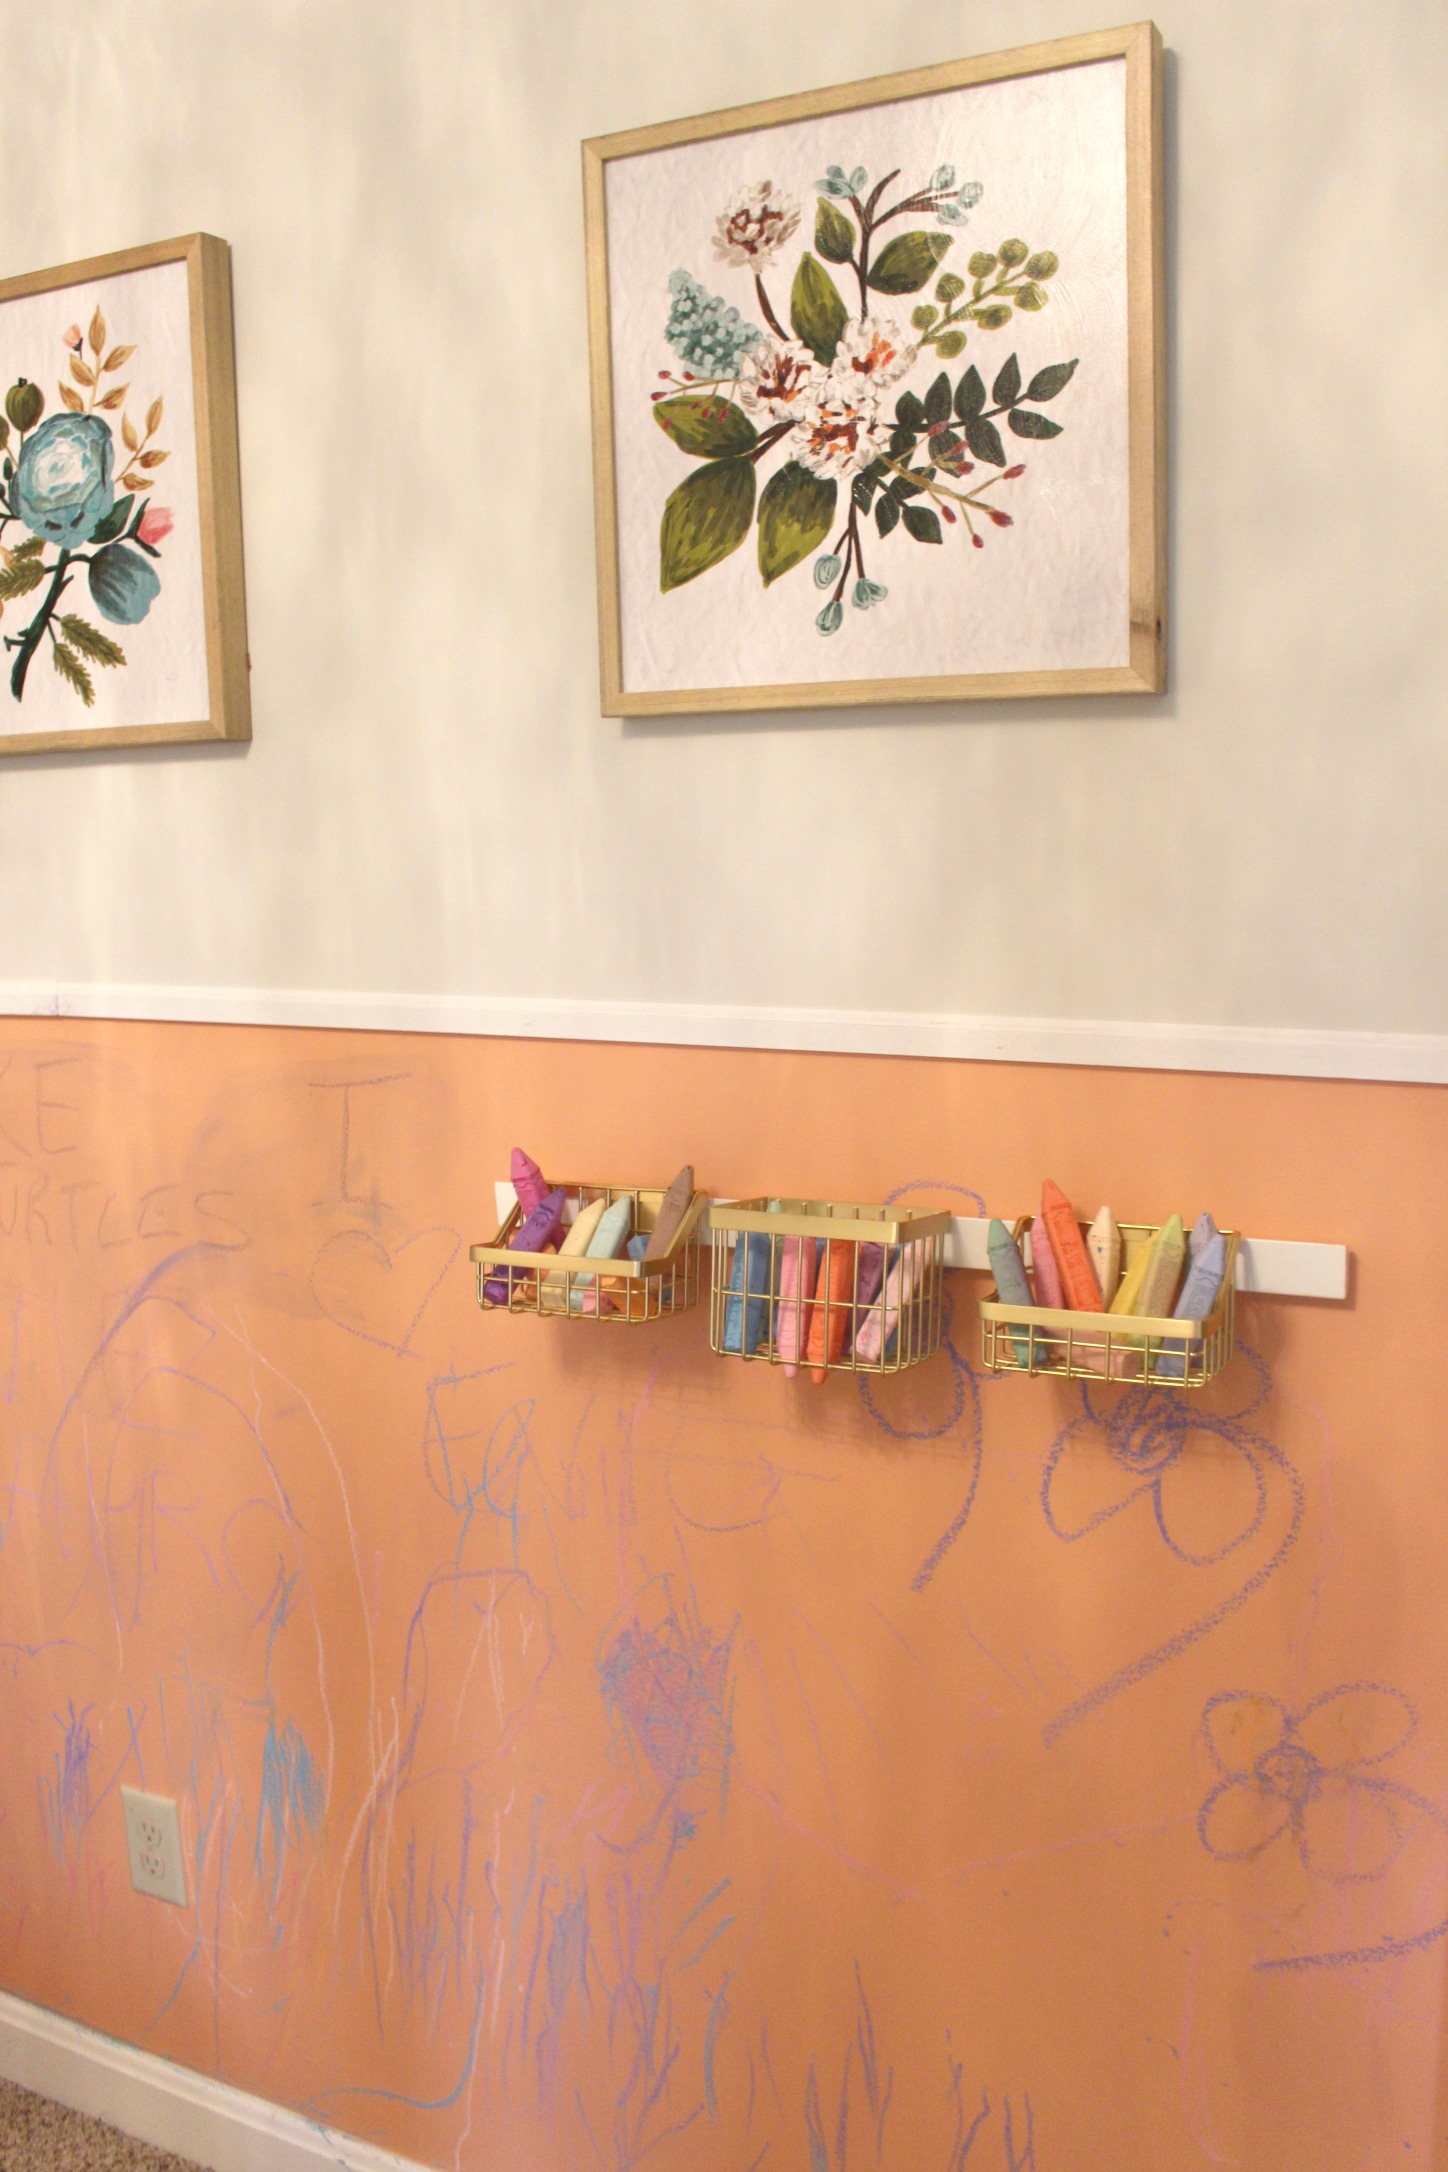
This wall on the right was completely bare and open, so we decided to have some fun with a chalkboard wall and book ledges to fill the space. Since a normal chalkboard tone would have been too harsh with this color scheme, I opted for tintable chalkboard paint in a coral color that matched her bedding. We painted the chalkboard wall just halfway up, and then added a simple piece of white trim to separate it from the top half of the wall.

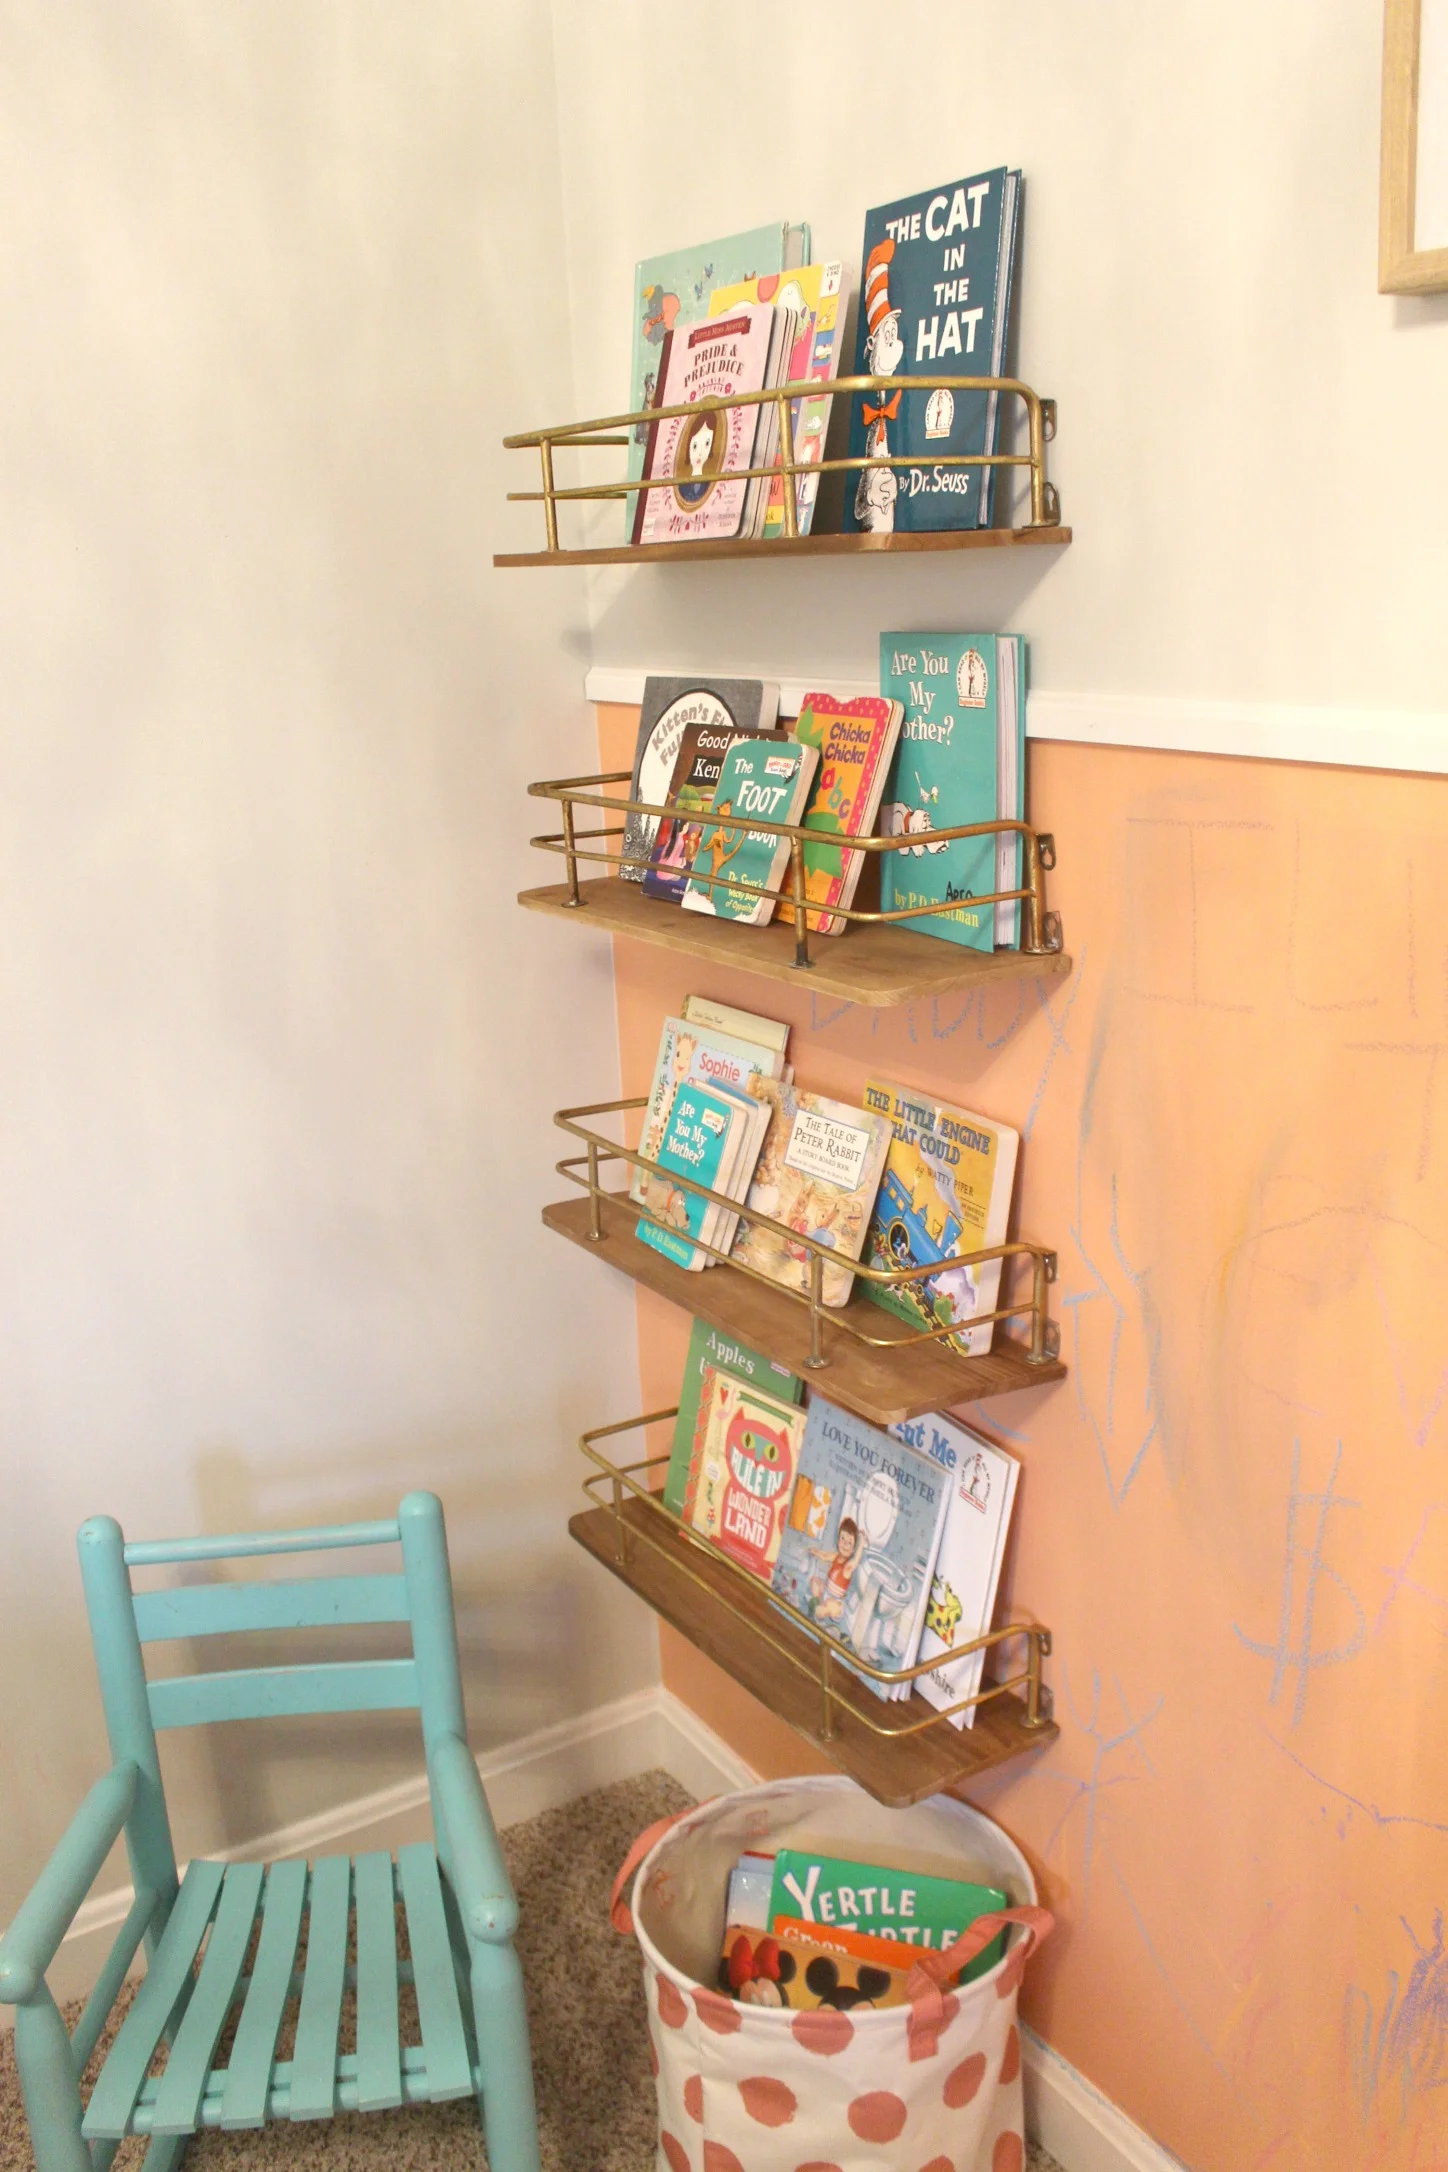
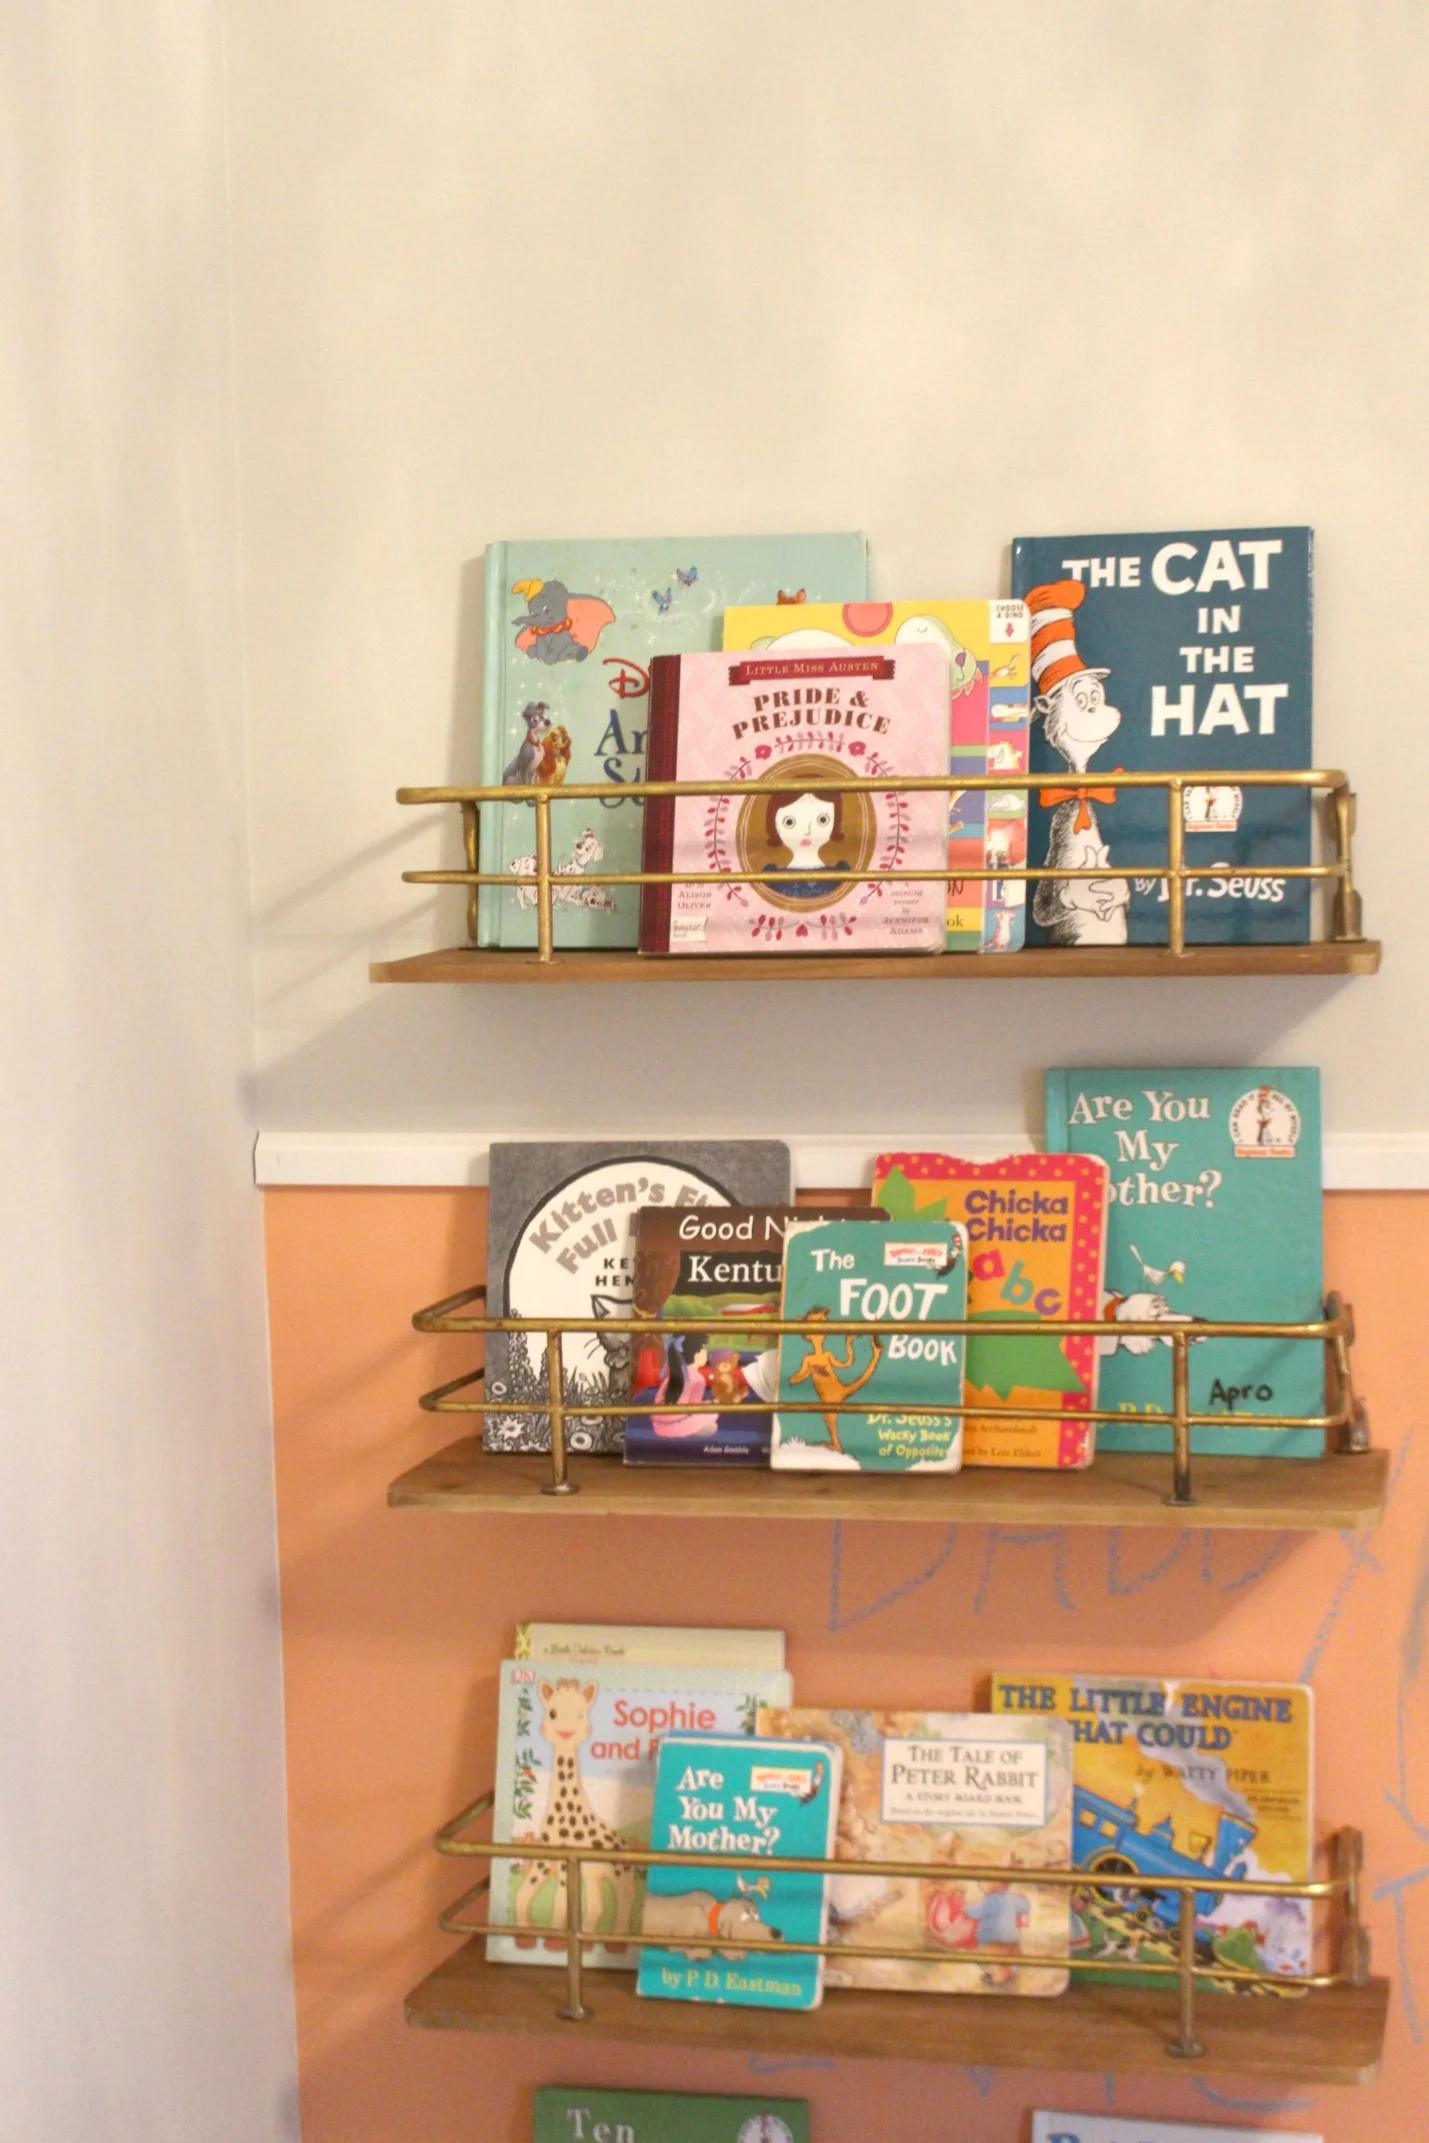
In the left corner, we added four gold + wood shelves to hold books and create a cute little reading corner. These gold and wood shelves from Hobby Lobby are some of my favorite shelving options and they work perfectly as book ledges! I also added these adorable floral prints above the chalkboard wall to tie all the bright colors of the space together.
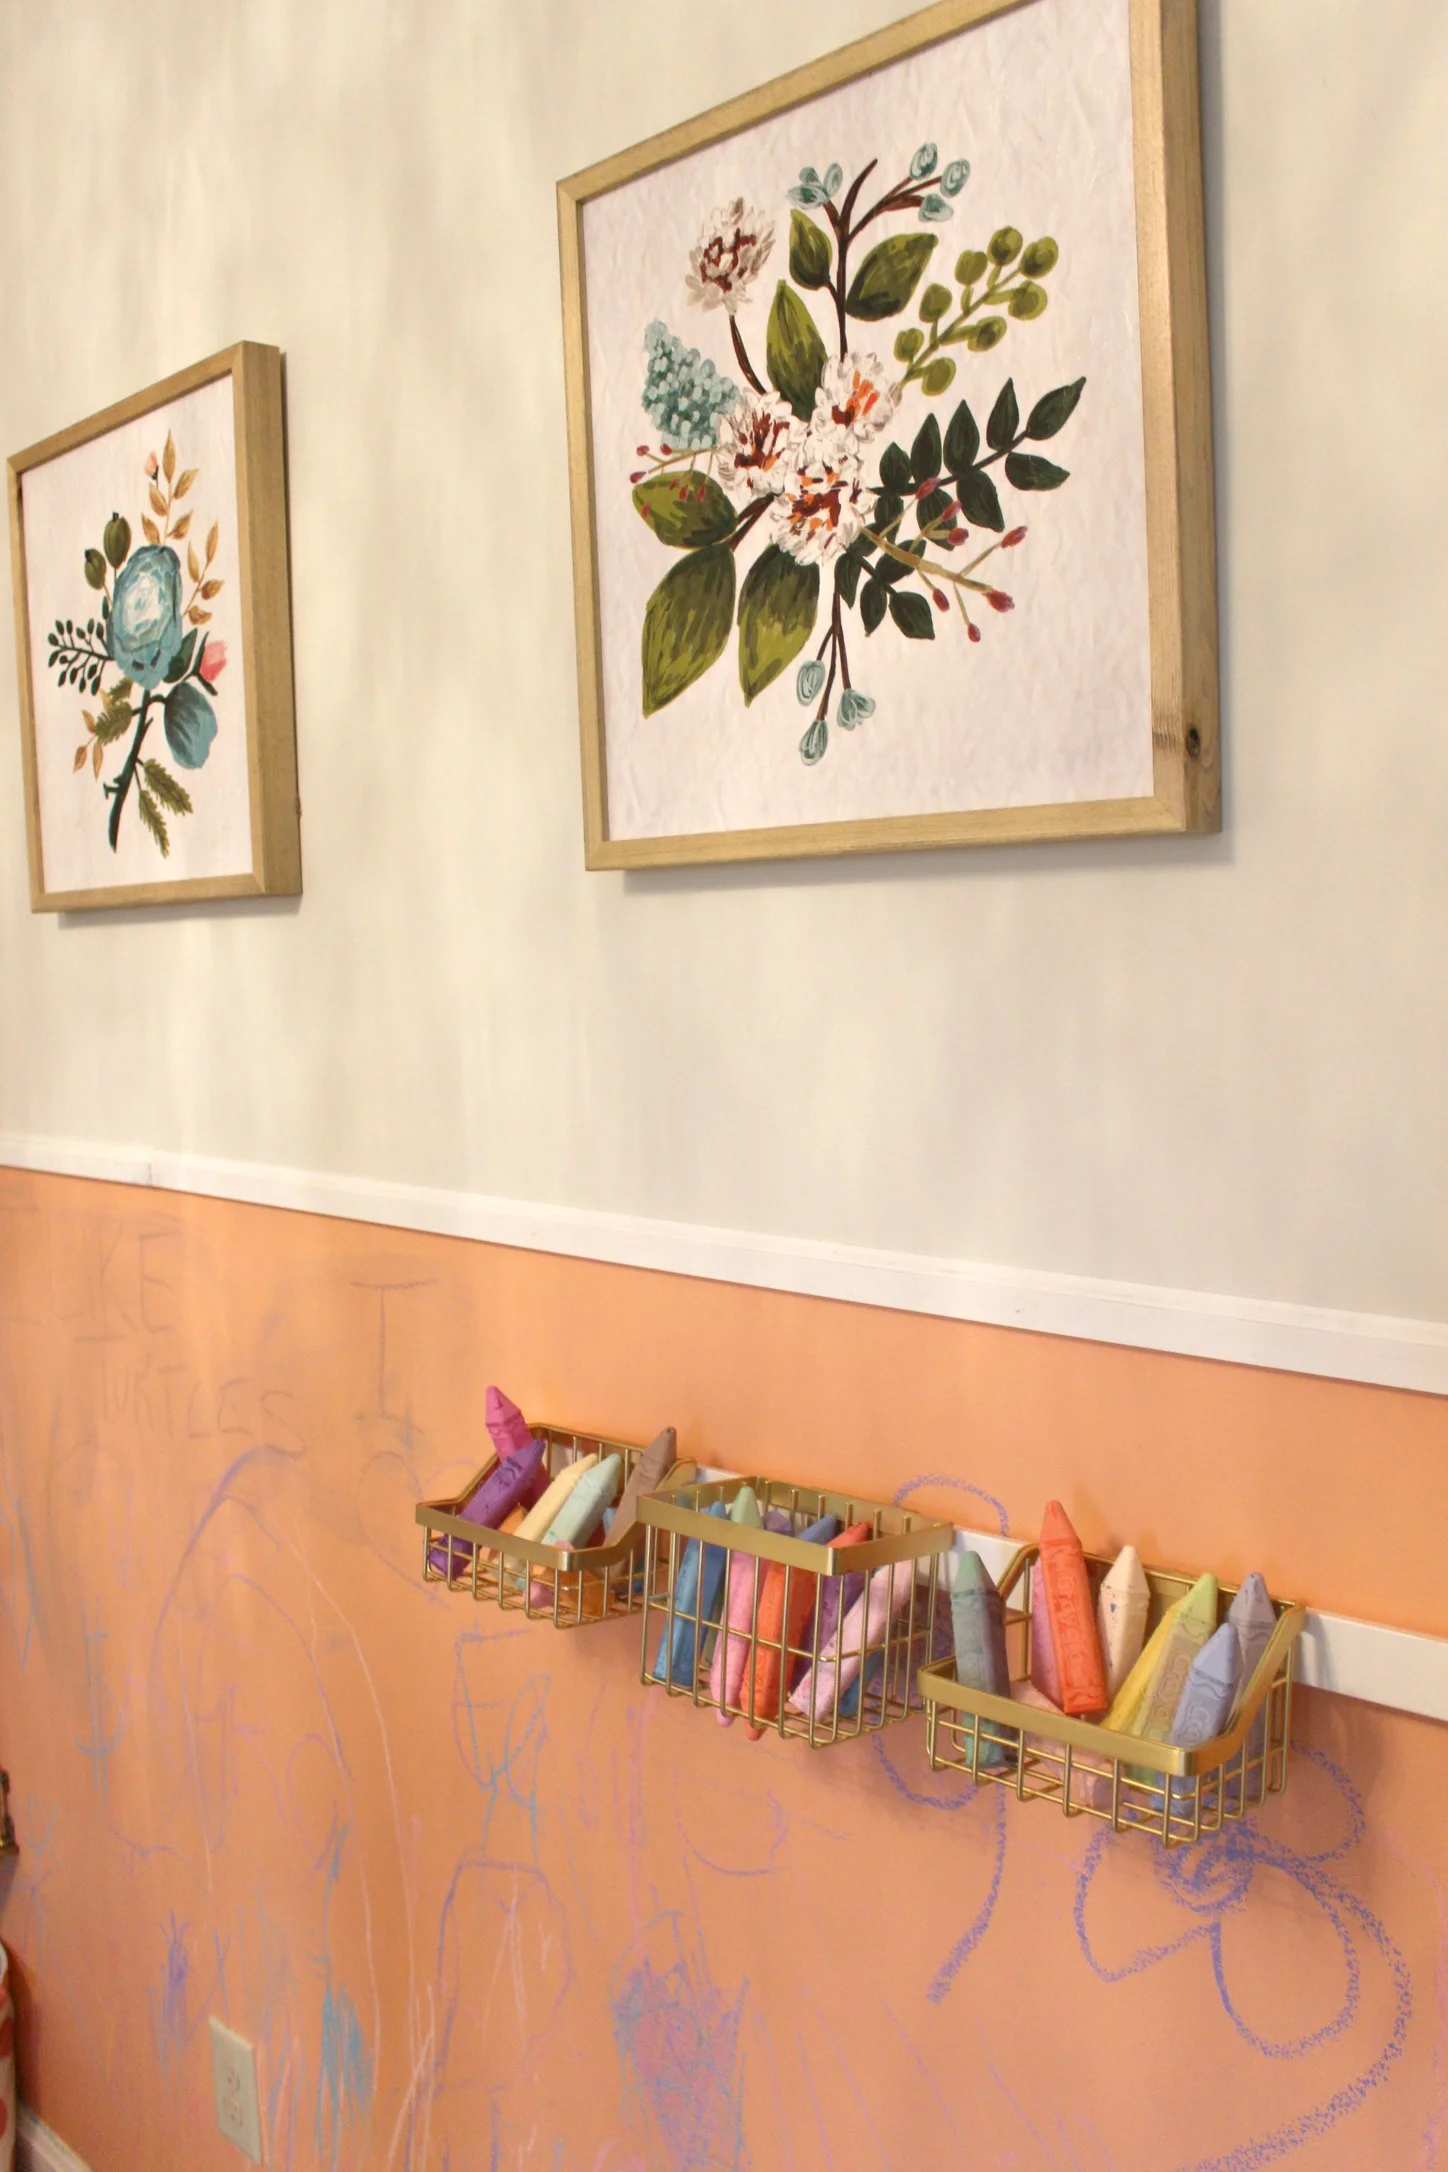
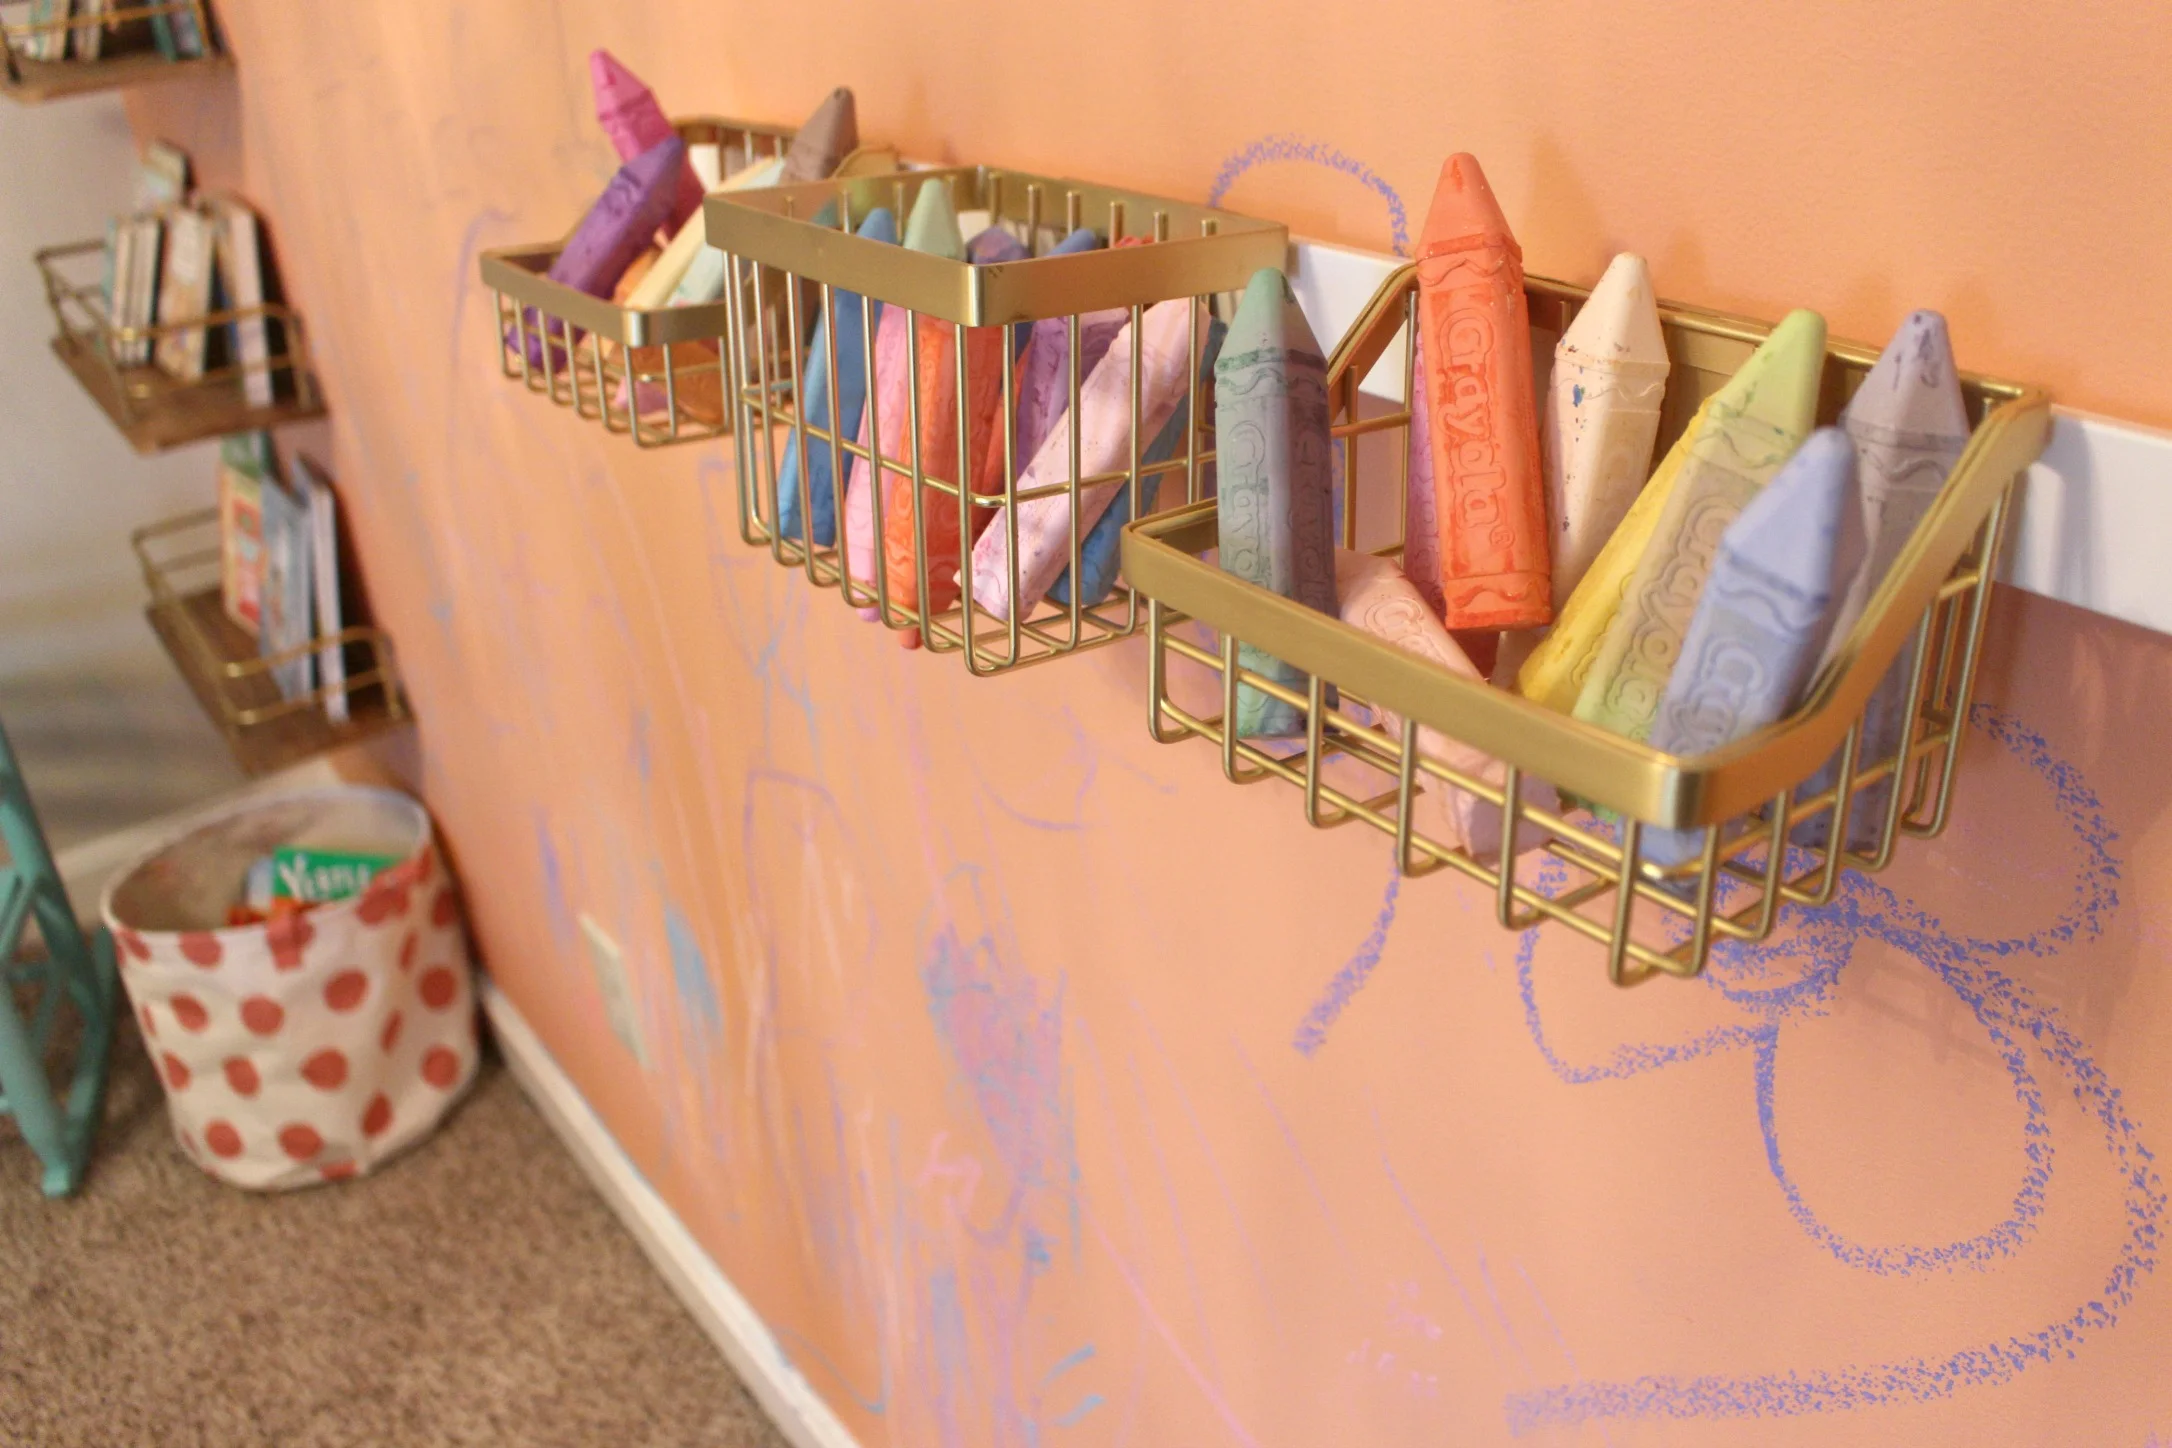
Another fun touch were these hanging gold baskets to hold chalk for the chalkboard wall! These baskets and mounting strip all are sold separately at Target and can be mixed and matched to create custom storage for just about anything! The baskets are removable and can slide along the white strip so that you can adjust it whenever you like!
It's amazing how a few simple changes completely changed this room and made it feel complete! I've linked up all the accessories and decor that I added to this space for you to shop at the end of this post!
xoxo
Emily

Holiday Shelf Styling Before + After
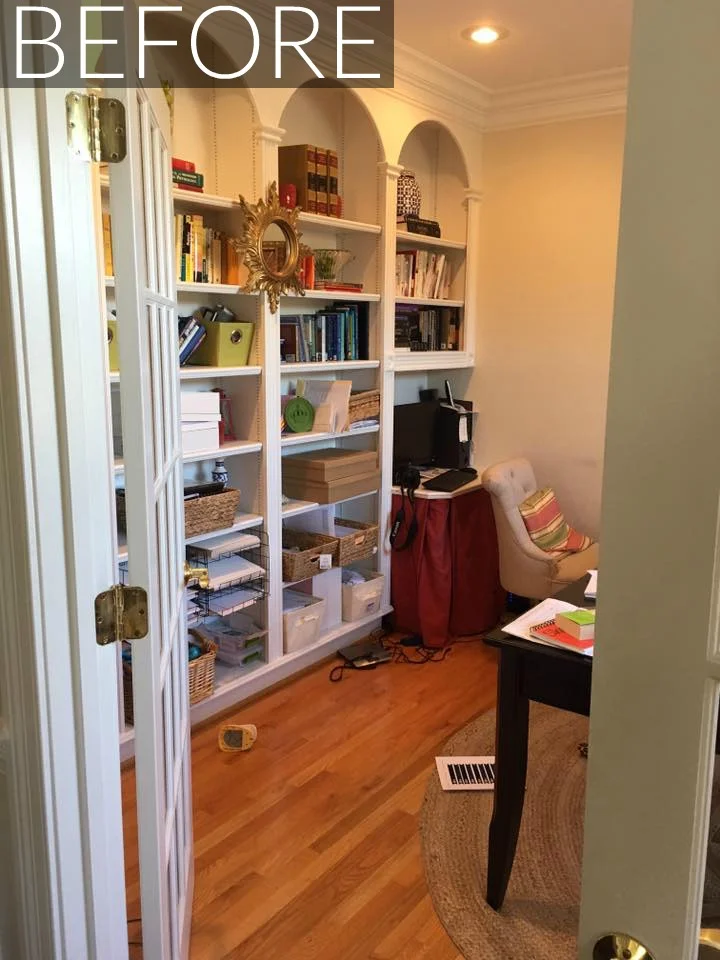
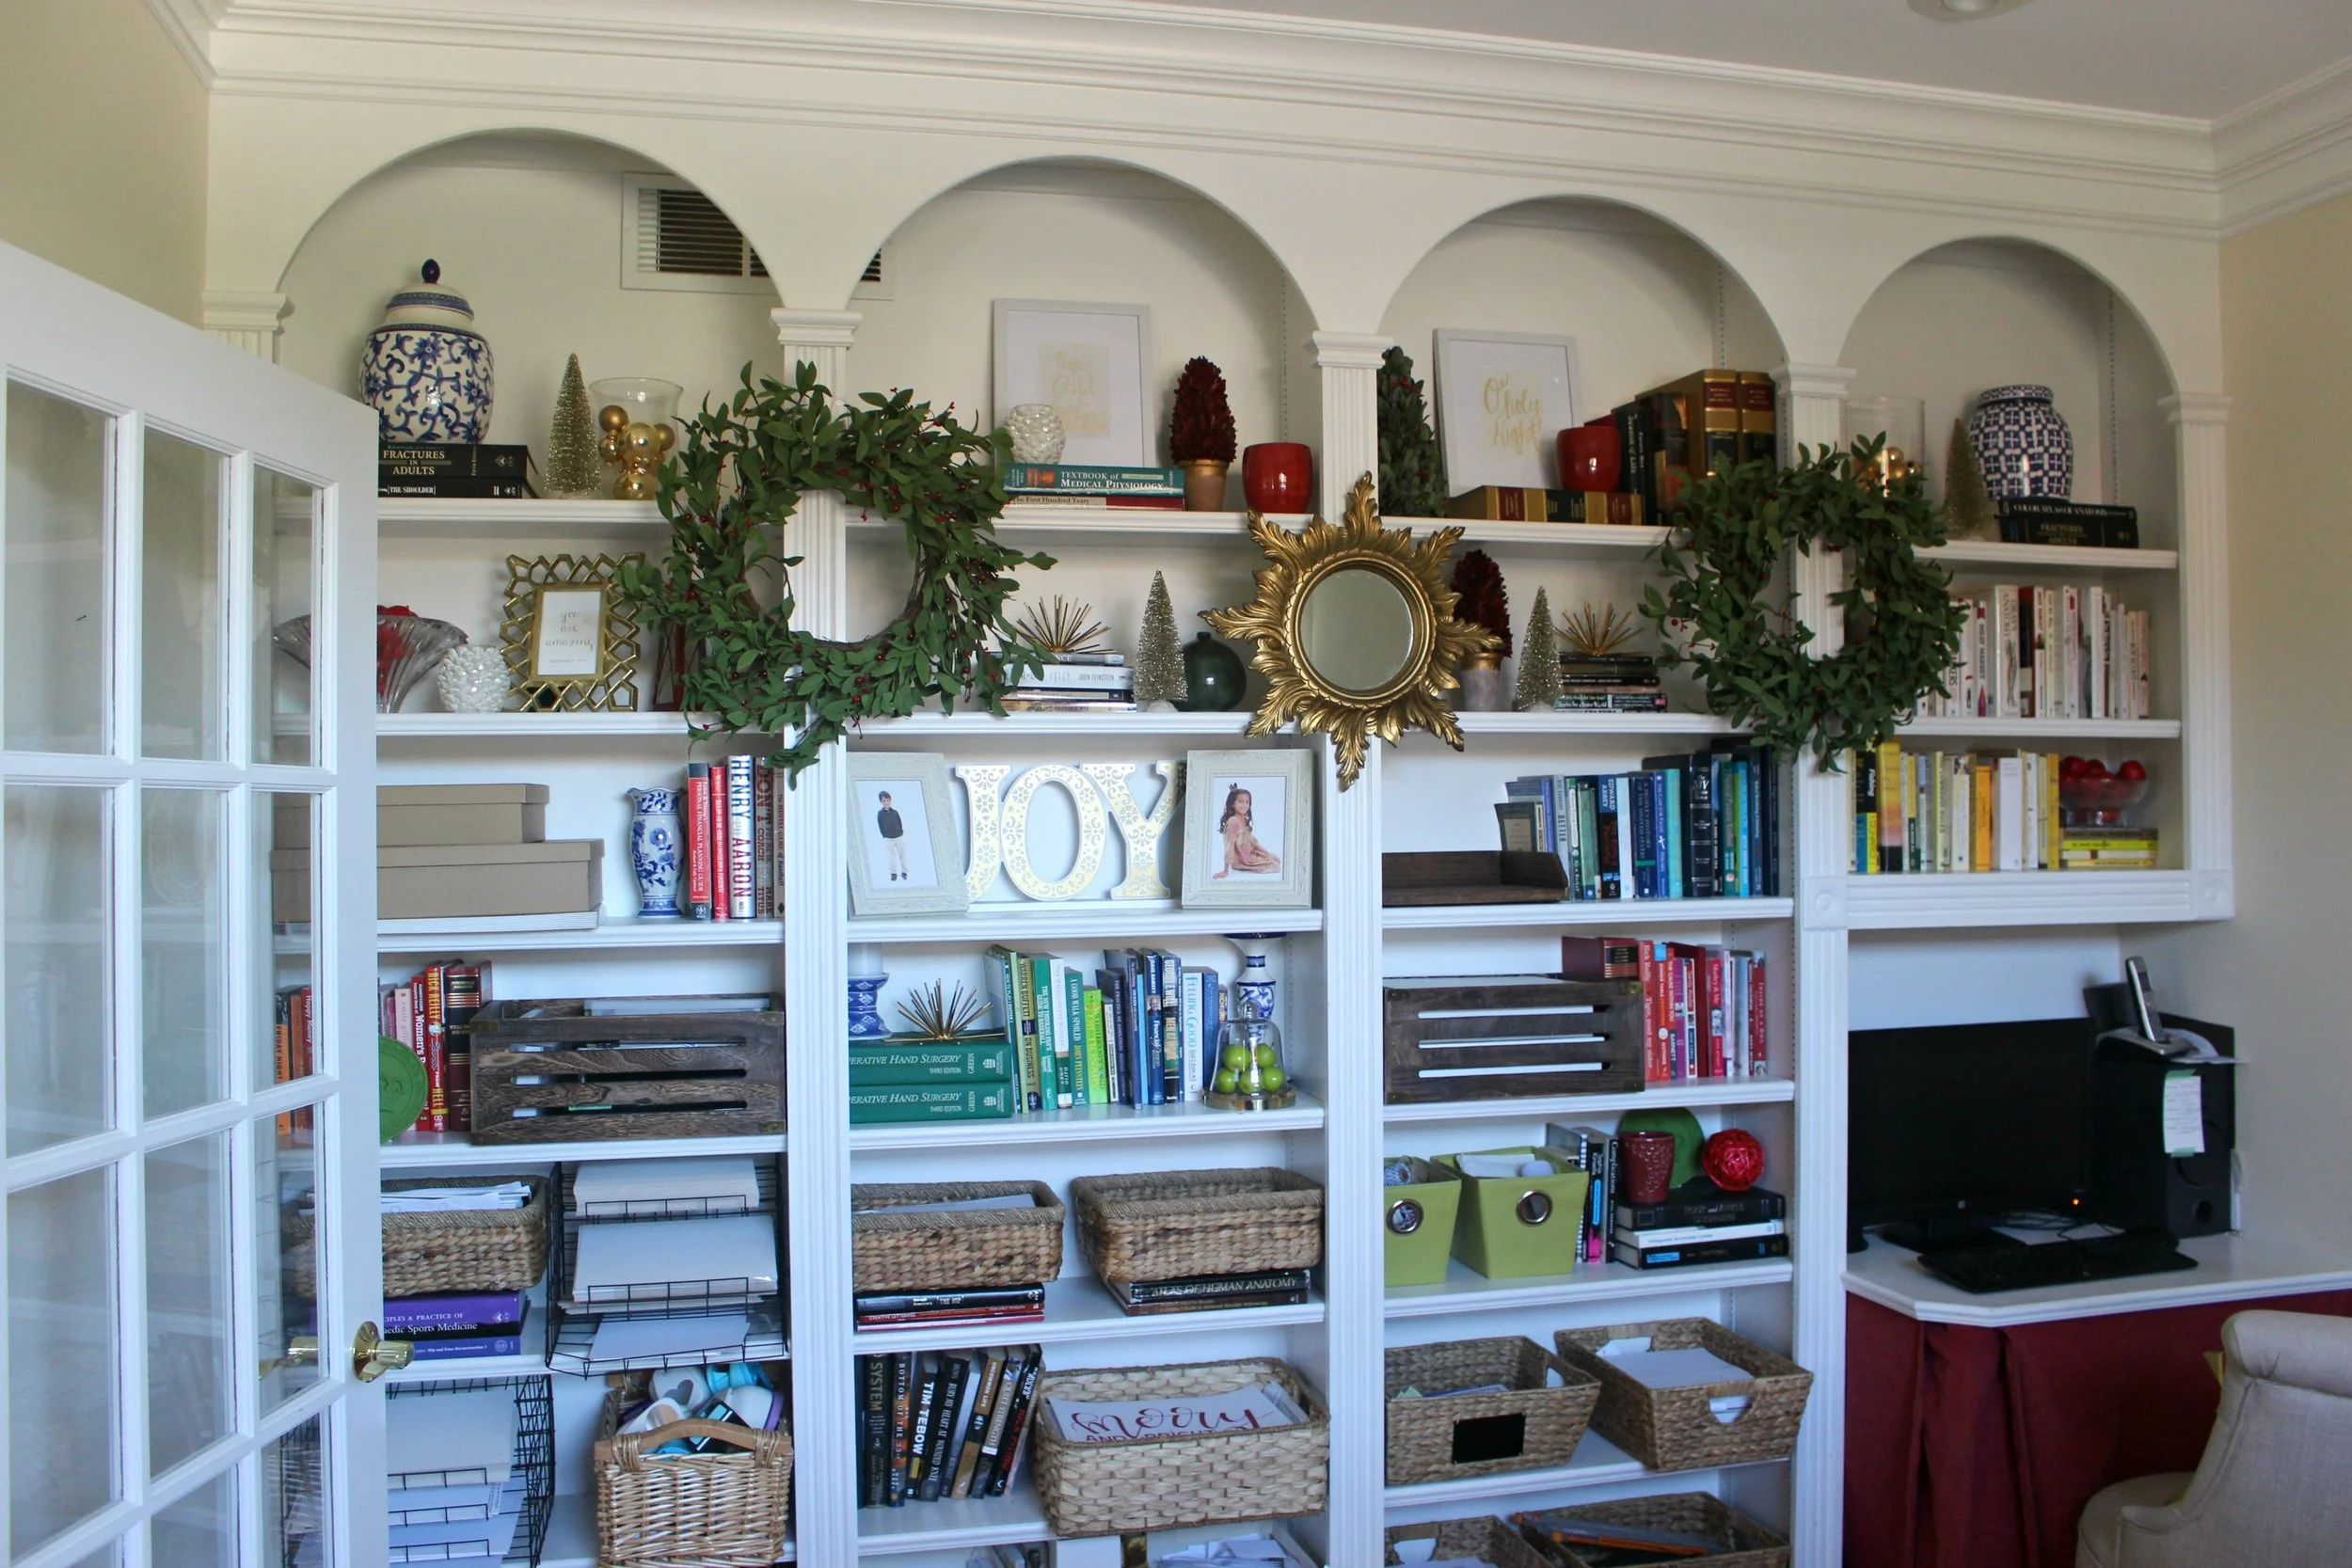
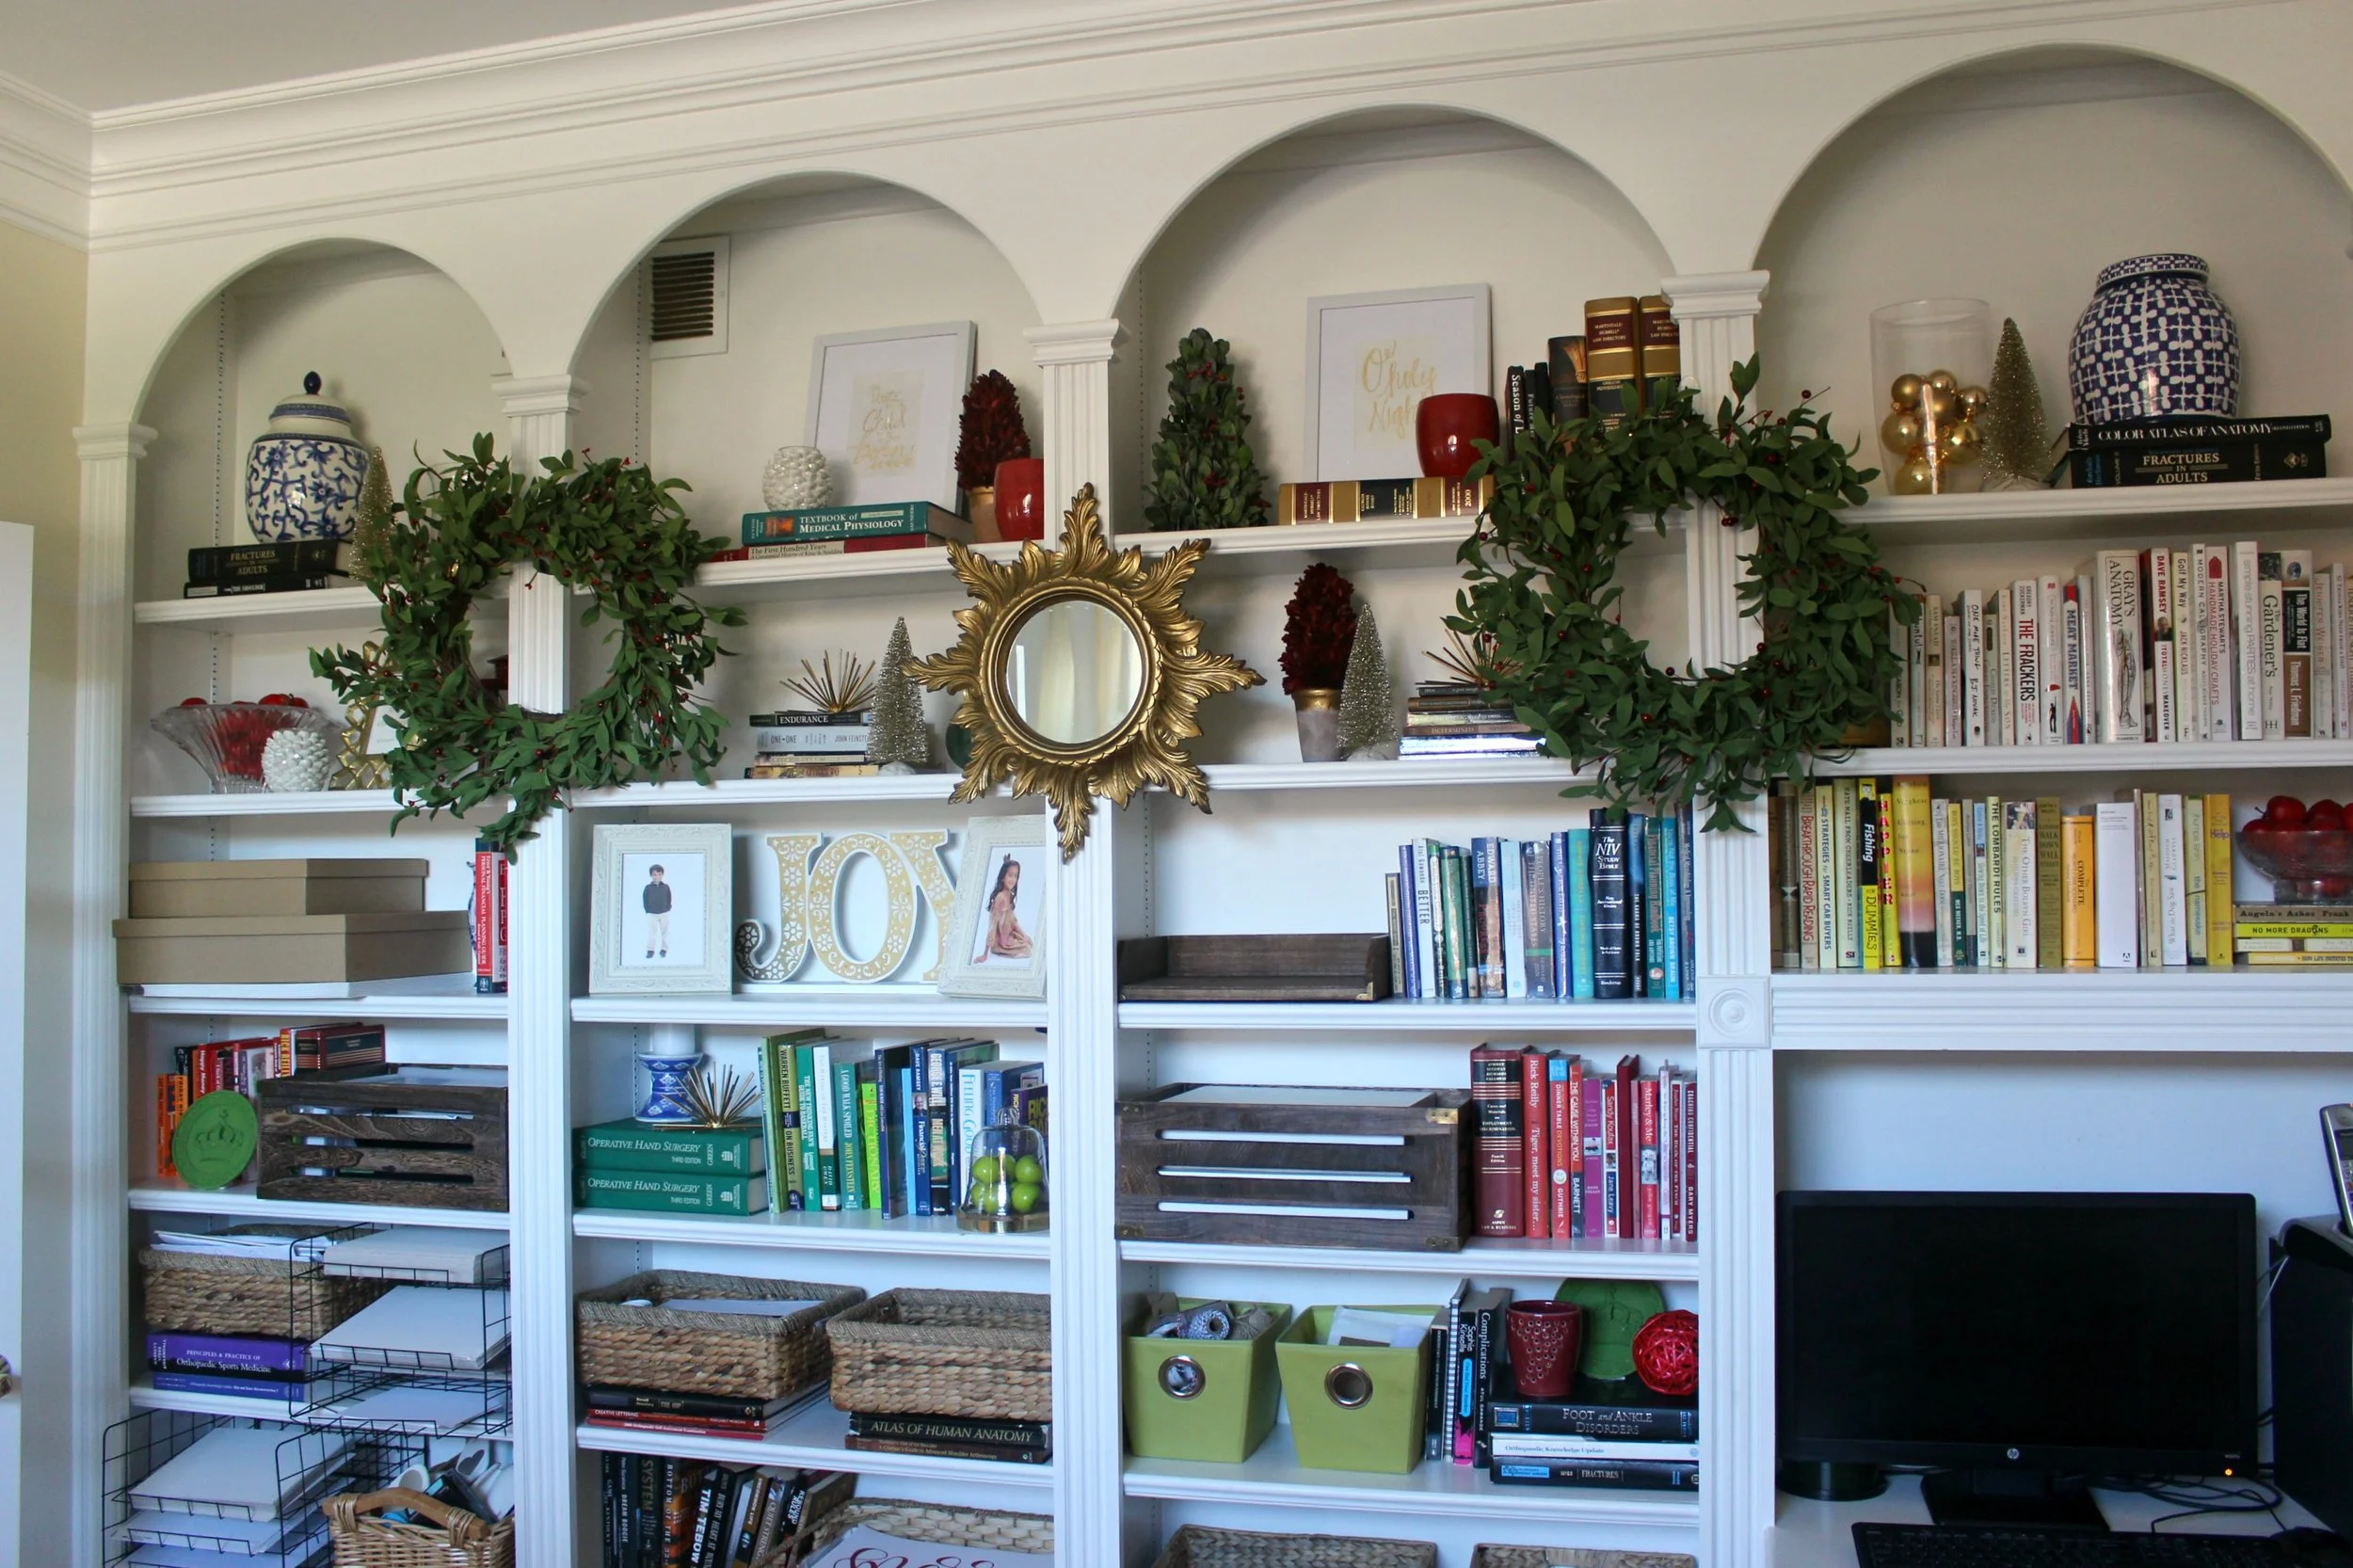
Today I had one of my first design appointments for the upcoming holiday season and it happened to be one of my favorite projects: shelf styling! The project was also extra special because it was for another local business owner and blogger, Deanna of Mirabelle Creations. I met Deanna through the Market 301 and she reached out to me about helping to spruce up her bookshelves in her office. This space is used by the entire family and the bookshelves are really the focal piece of the entire room. They also housed all of Deanna's supplies, files, and work materials. The challenge was to keep everything on the shelves contained in this area but make it look clean + organized. This is also the first room you see when you walk in the front door, so we wanted to be sure it looked tidy and had a little Christmas cheer.
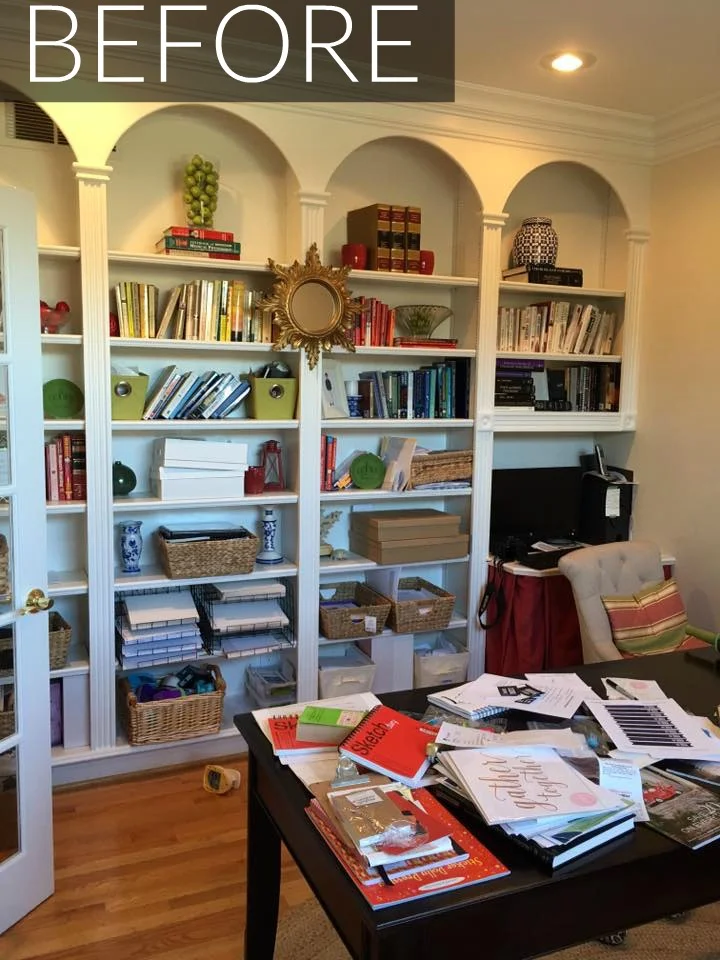
Deanna's home is beautiful and she already had a lot of great items to work with. Most of her supplies and papers were contained within baskets or containers, which is key for having nice looking shelves. I added a few more crates and trays and rearranged and straightened her existing organizers.
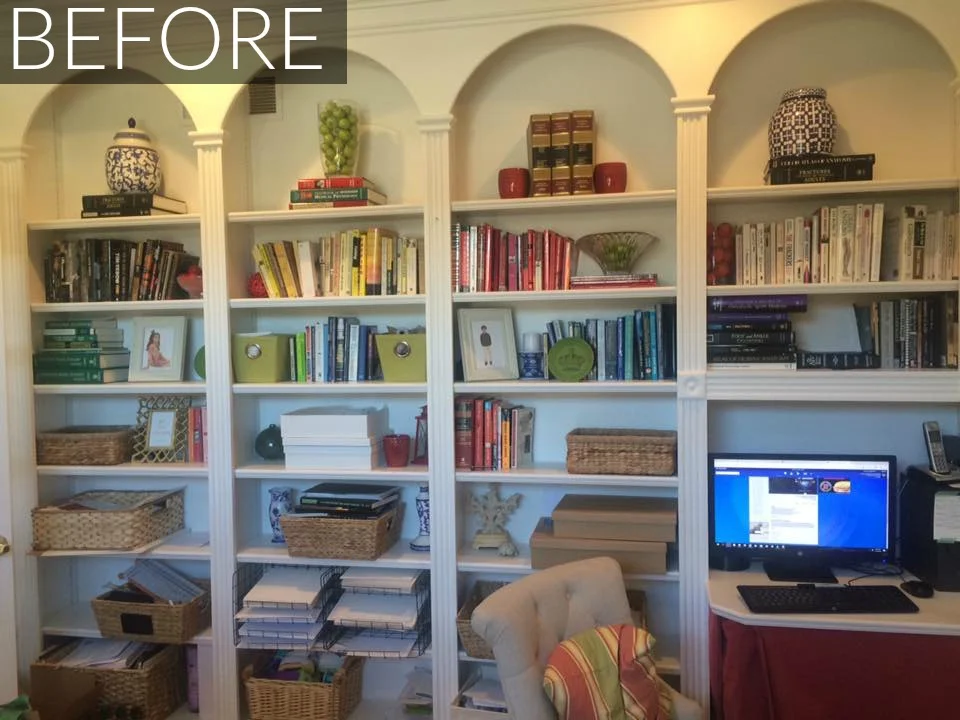
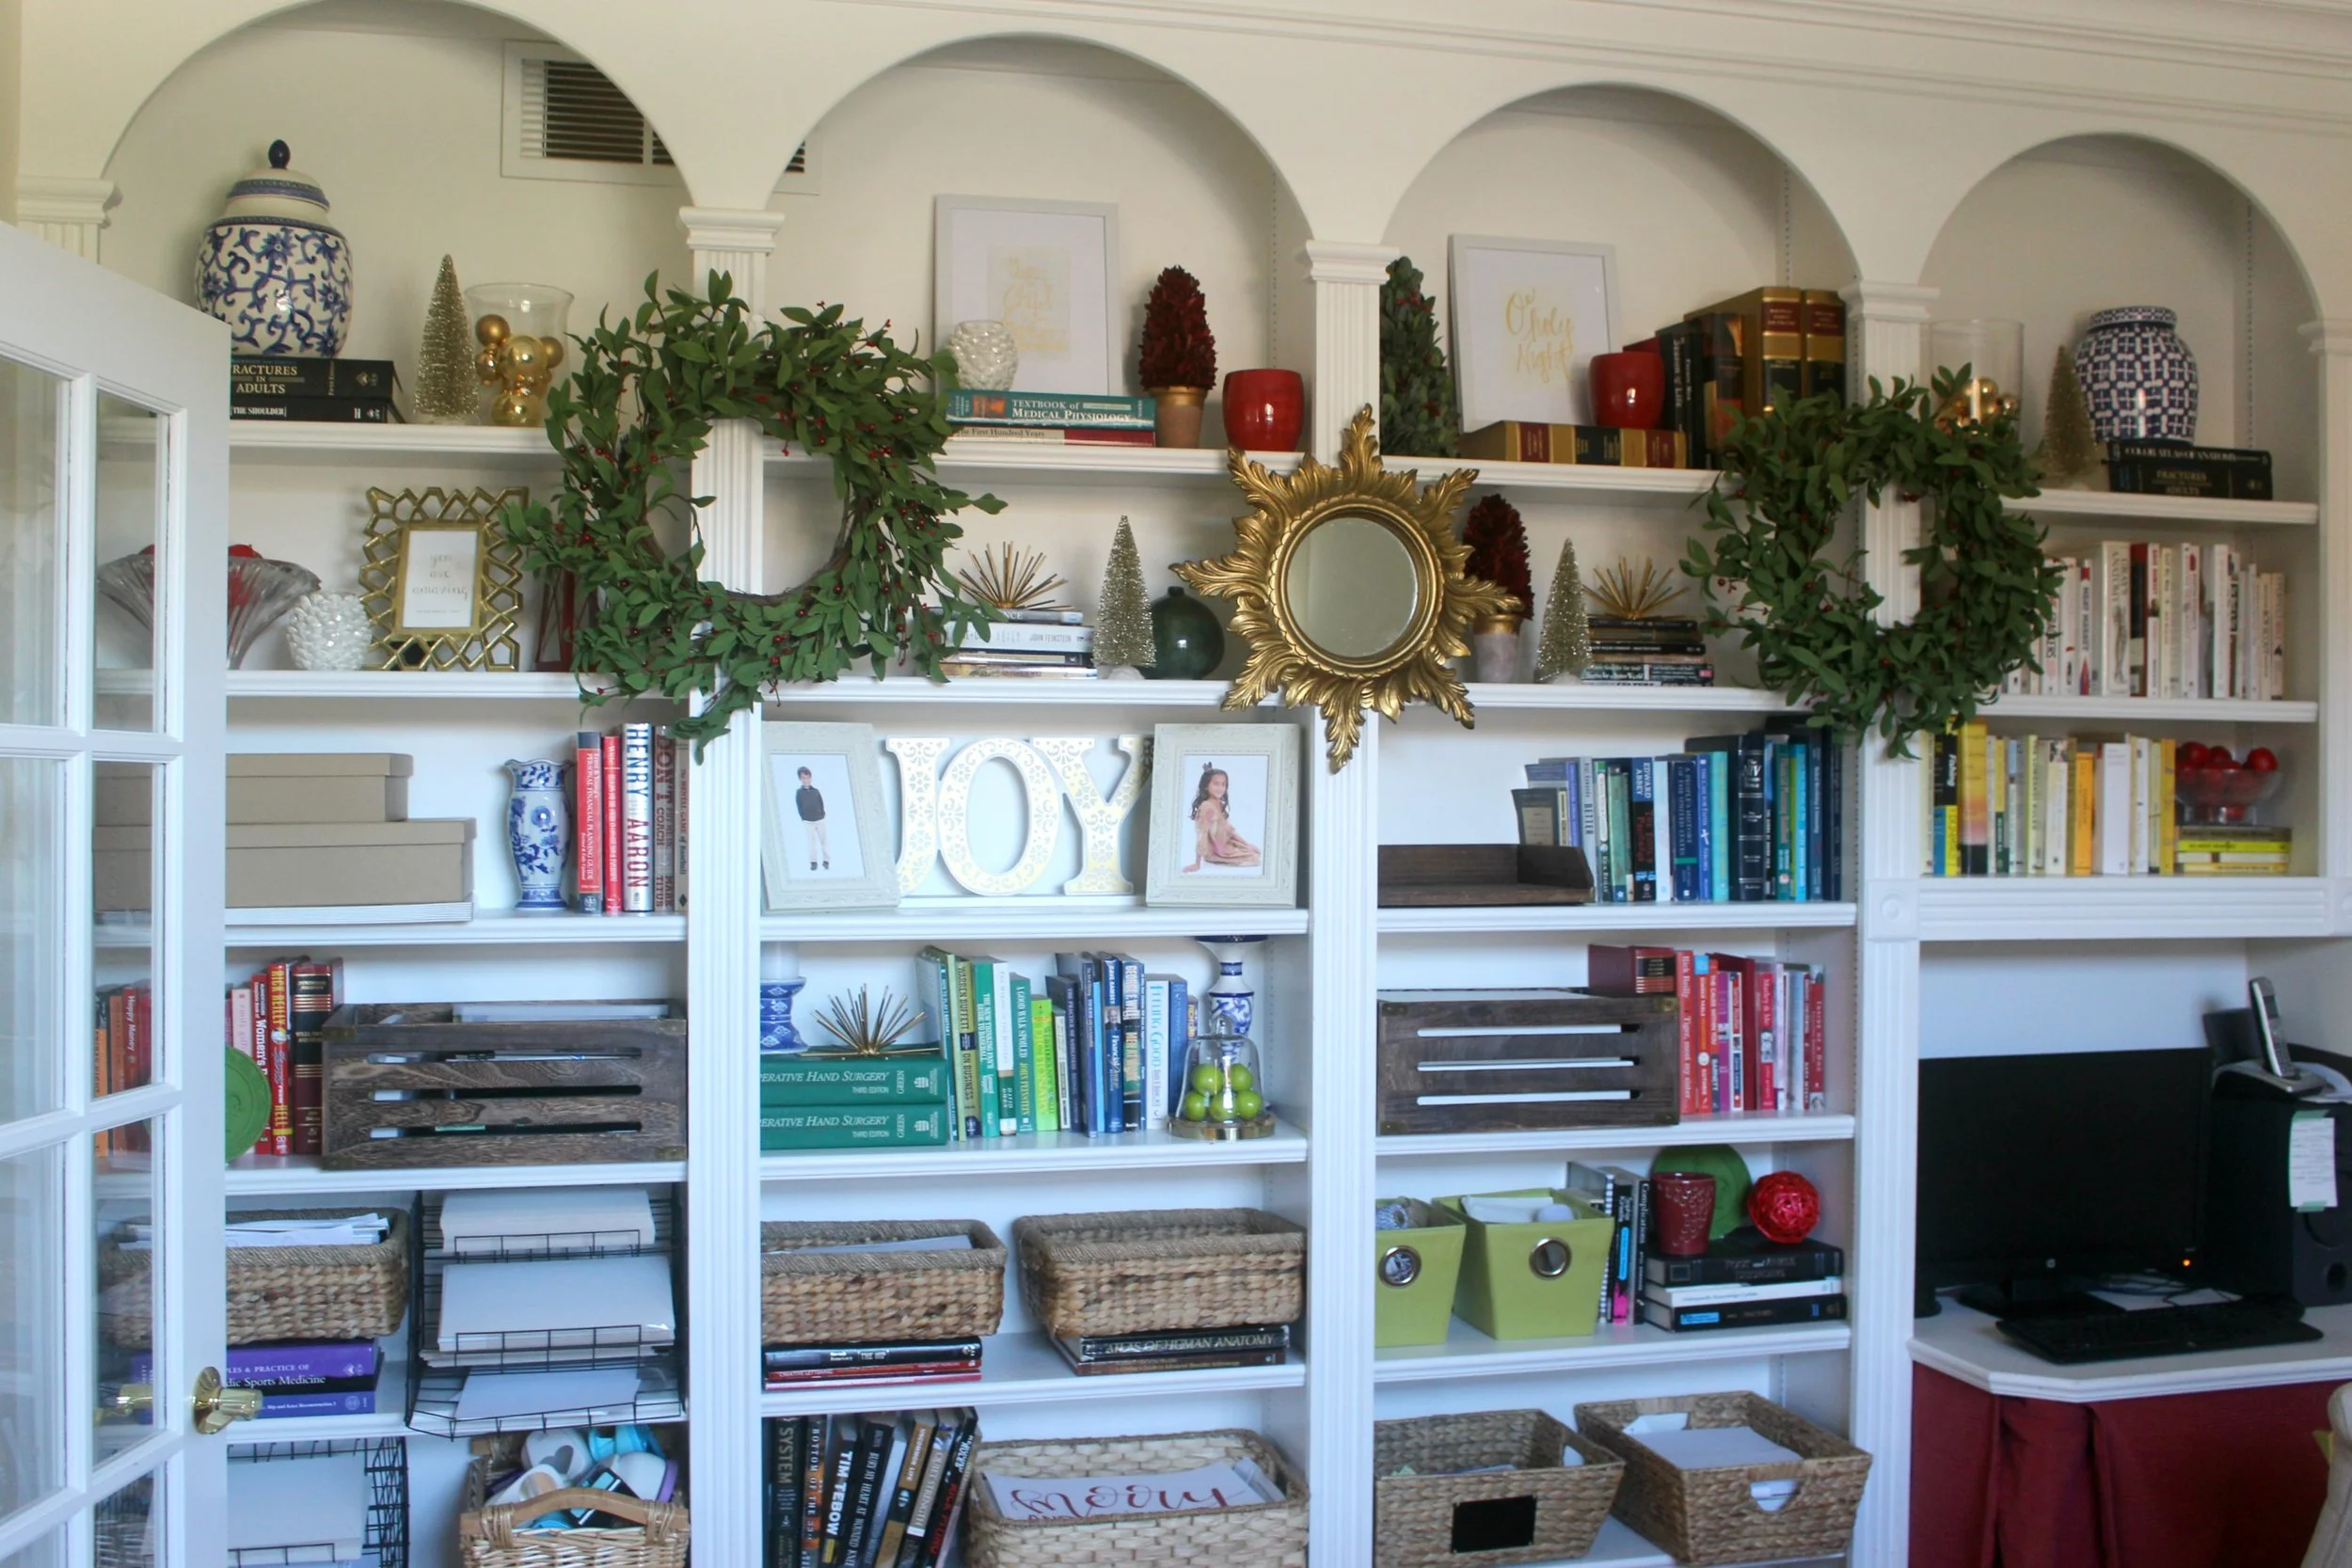
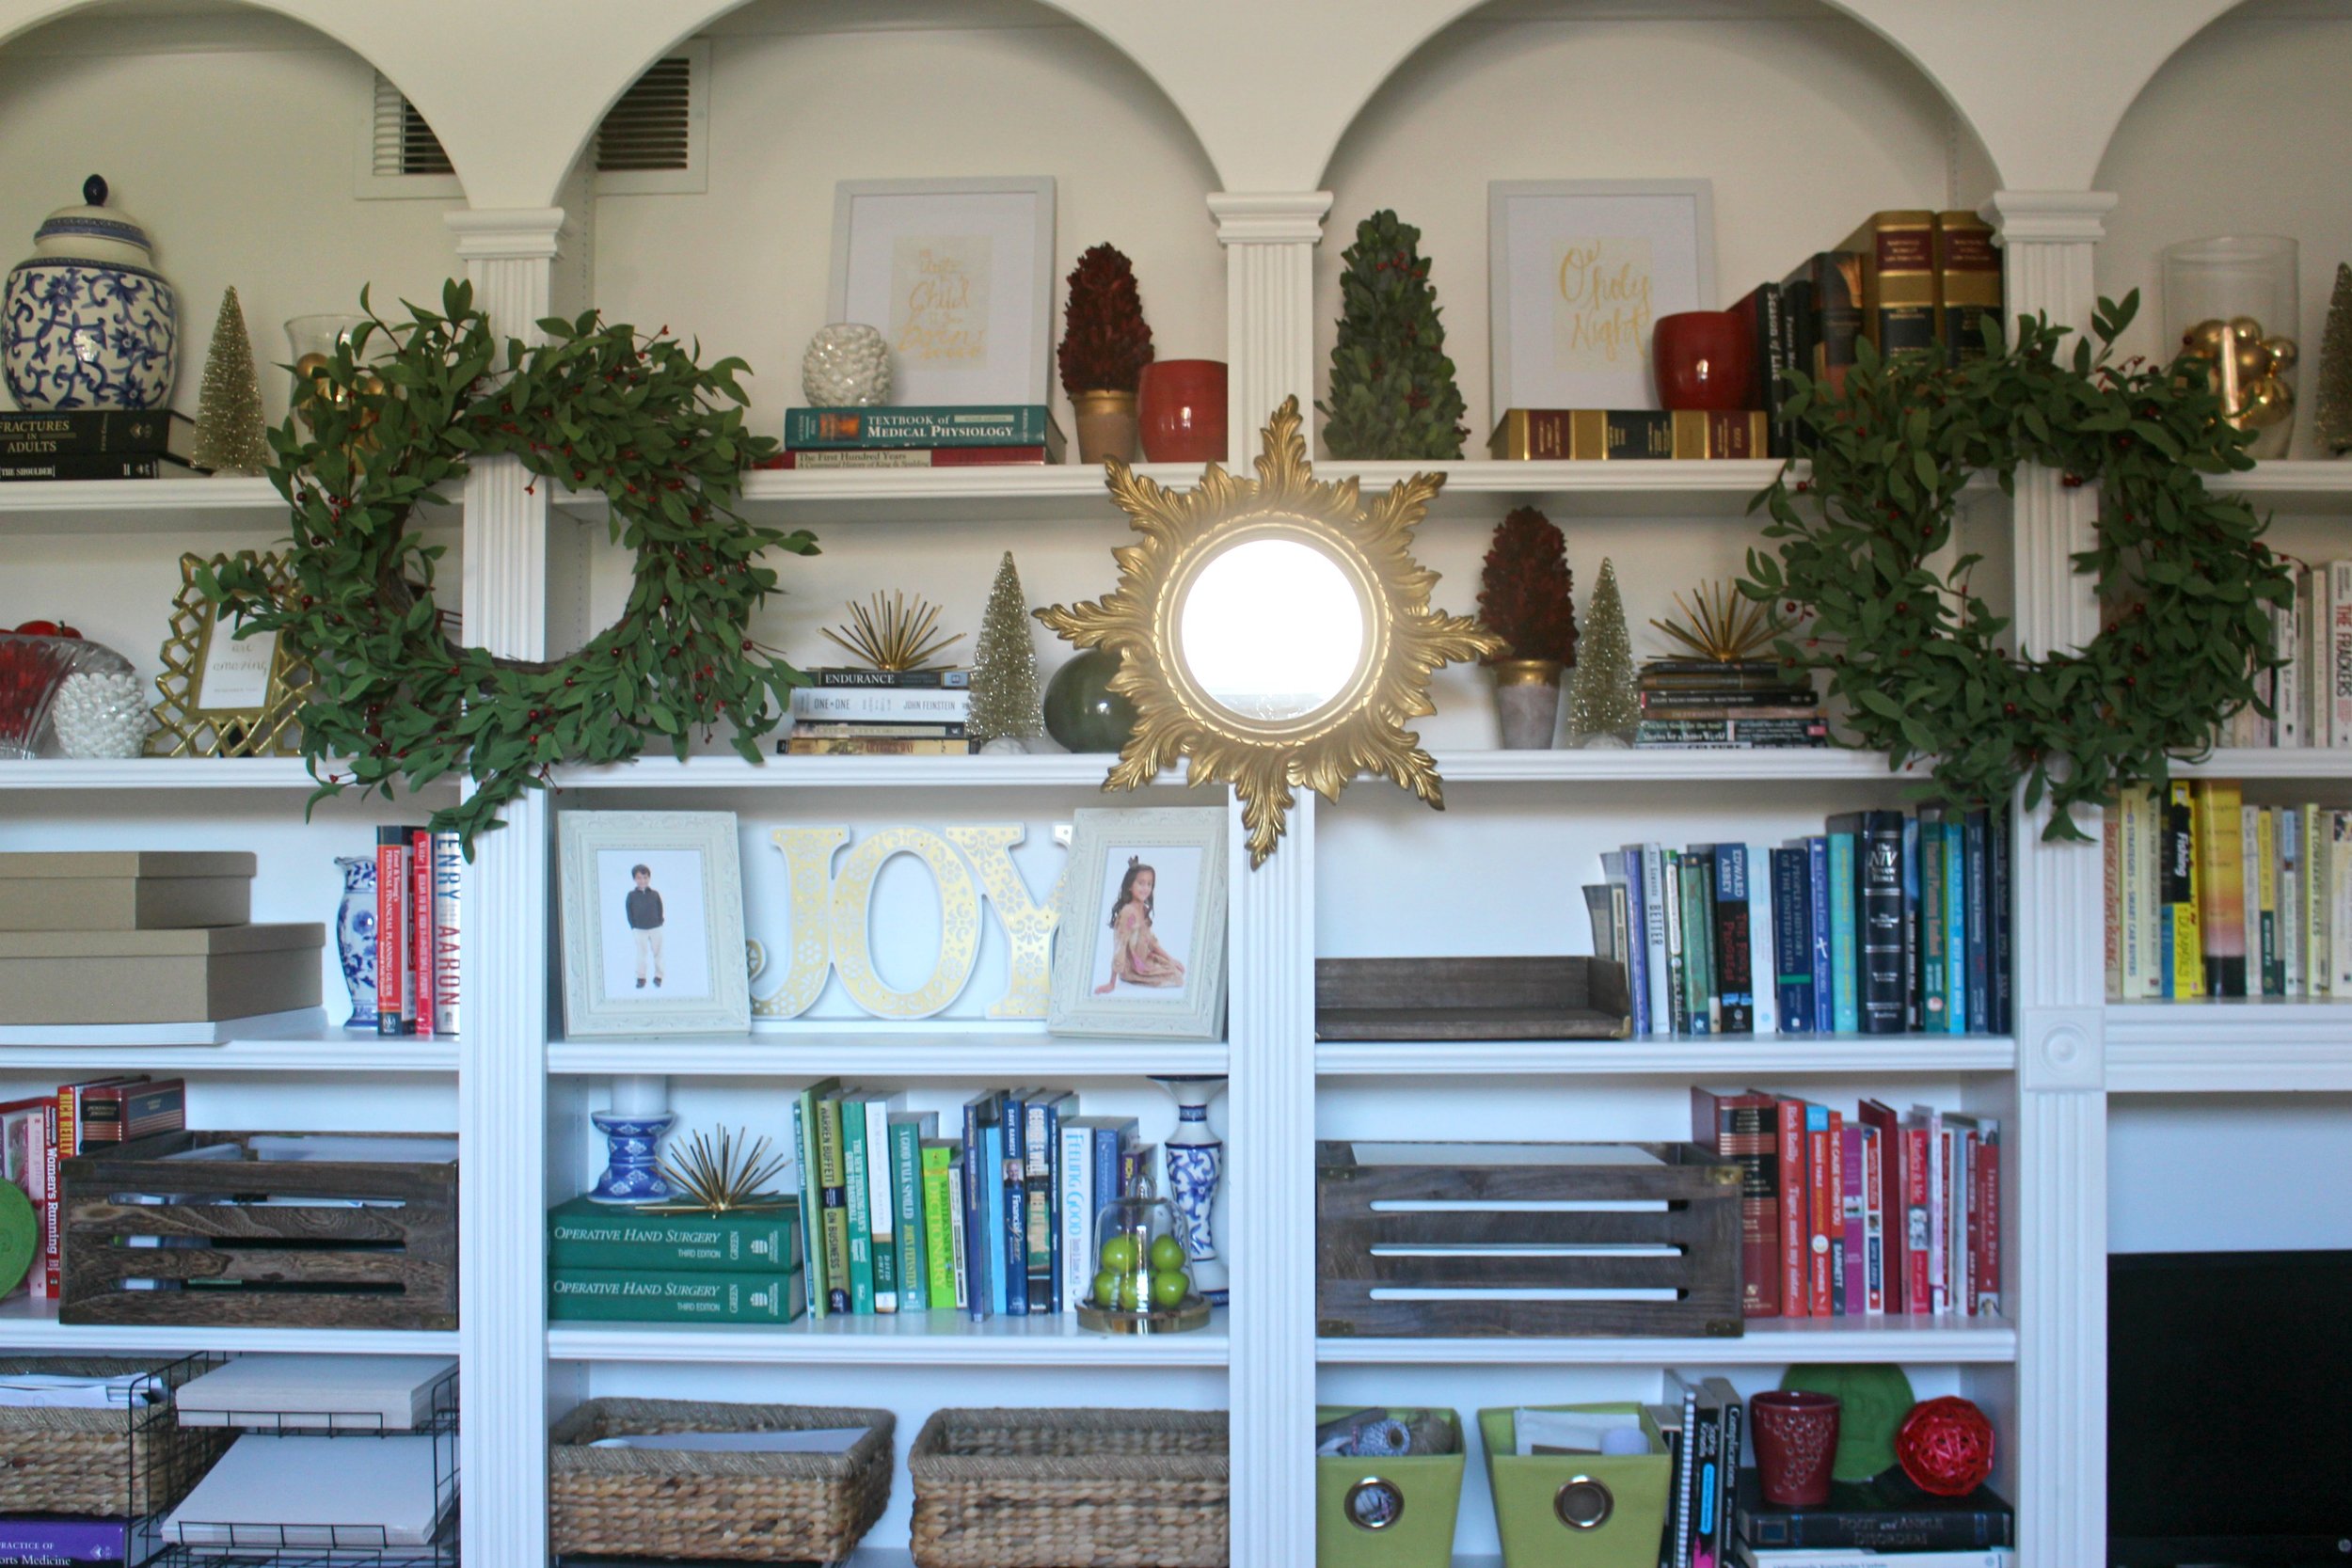
One key to styling shelves in a work space is to put the least appealing looking items at the bottom and corners. That is the last place your eye will travel and you want to keep your prettiest items at the top and center. Baskets and crates always look better than stacks or piles, it creates a clean look and makes everything seem organized.
Deanna also had a lot of books on these shelves and I loved how she had organized them by color. I kept this theme going but separated them a bit, and stacked them both horizontally and vertically on many of the shelves to create more interest.
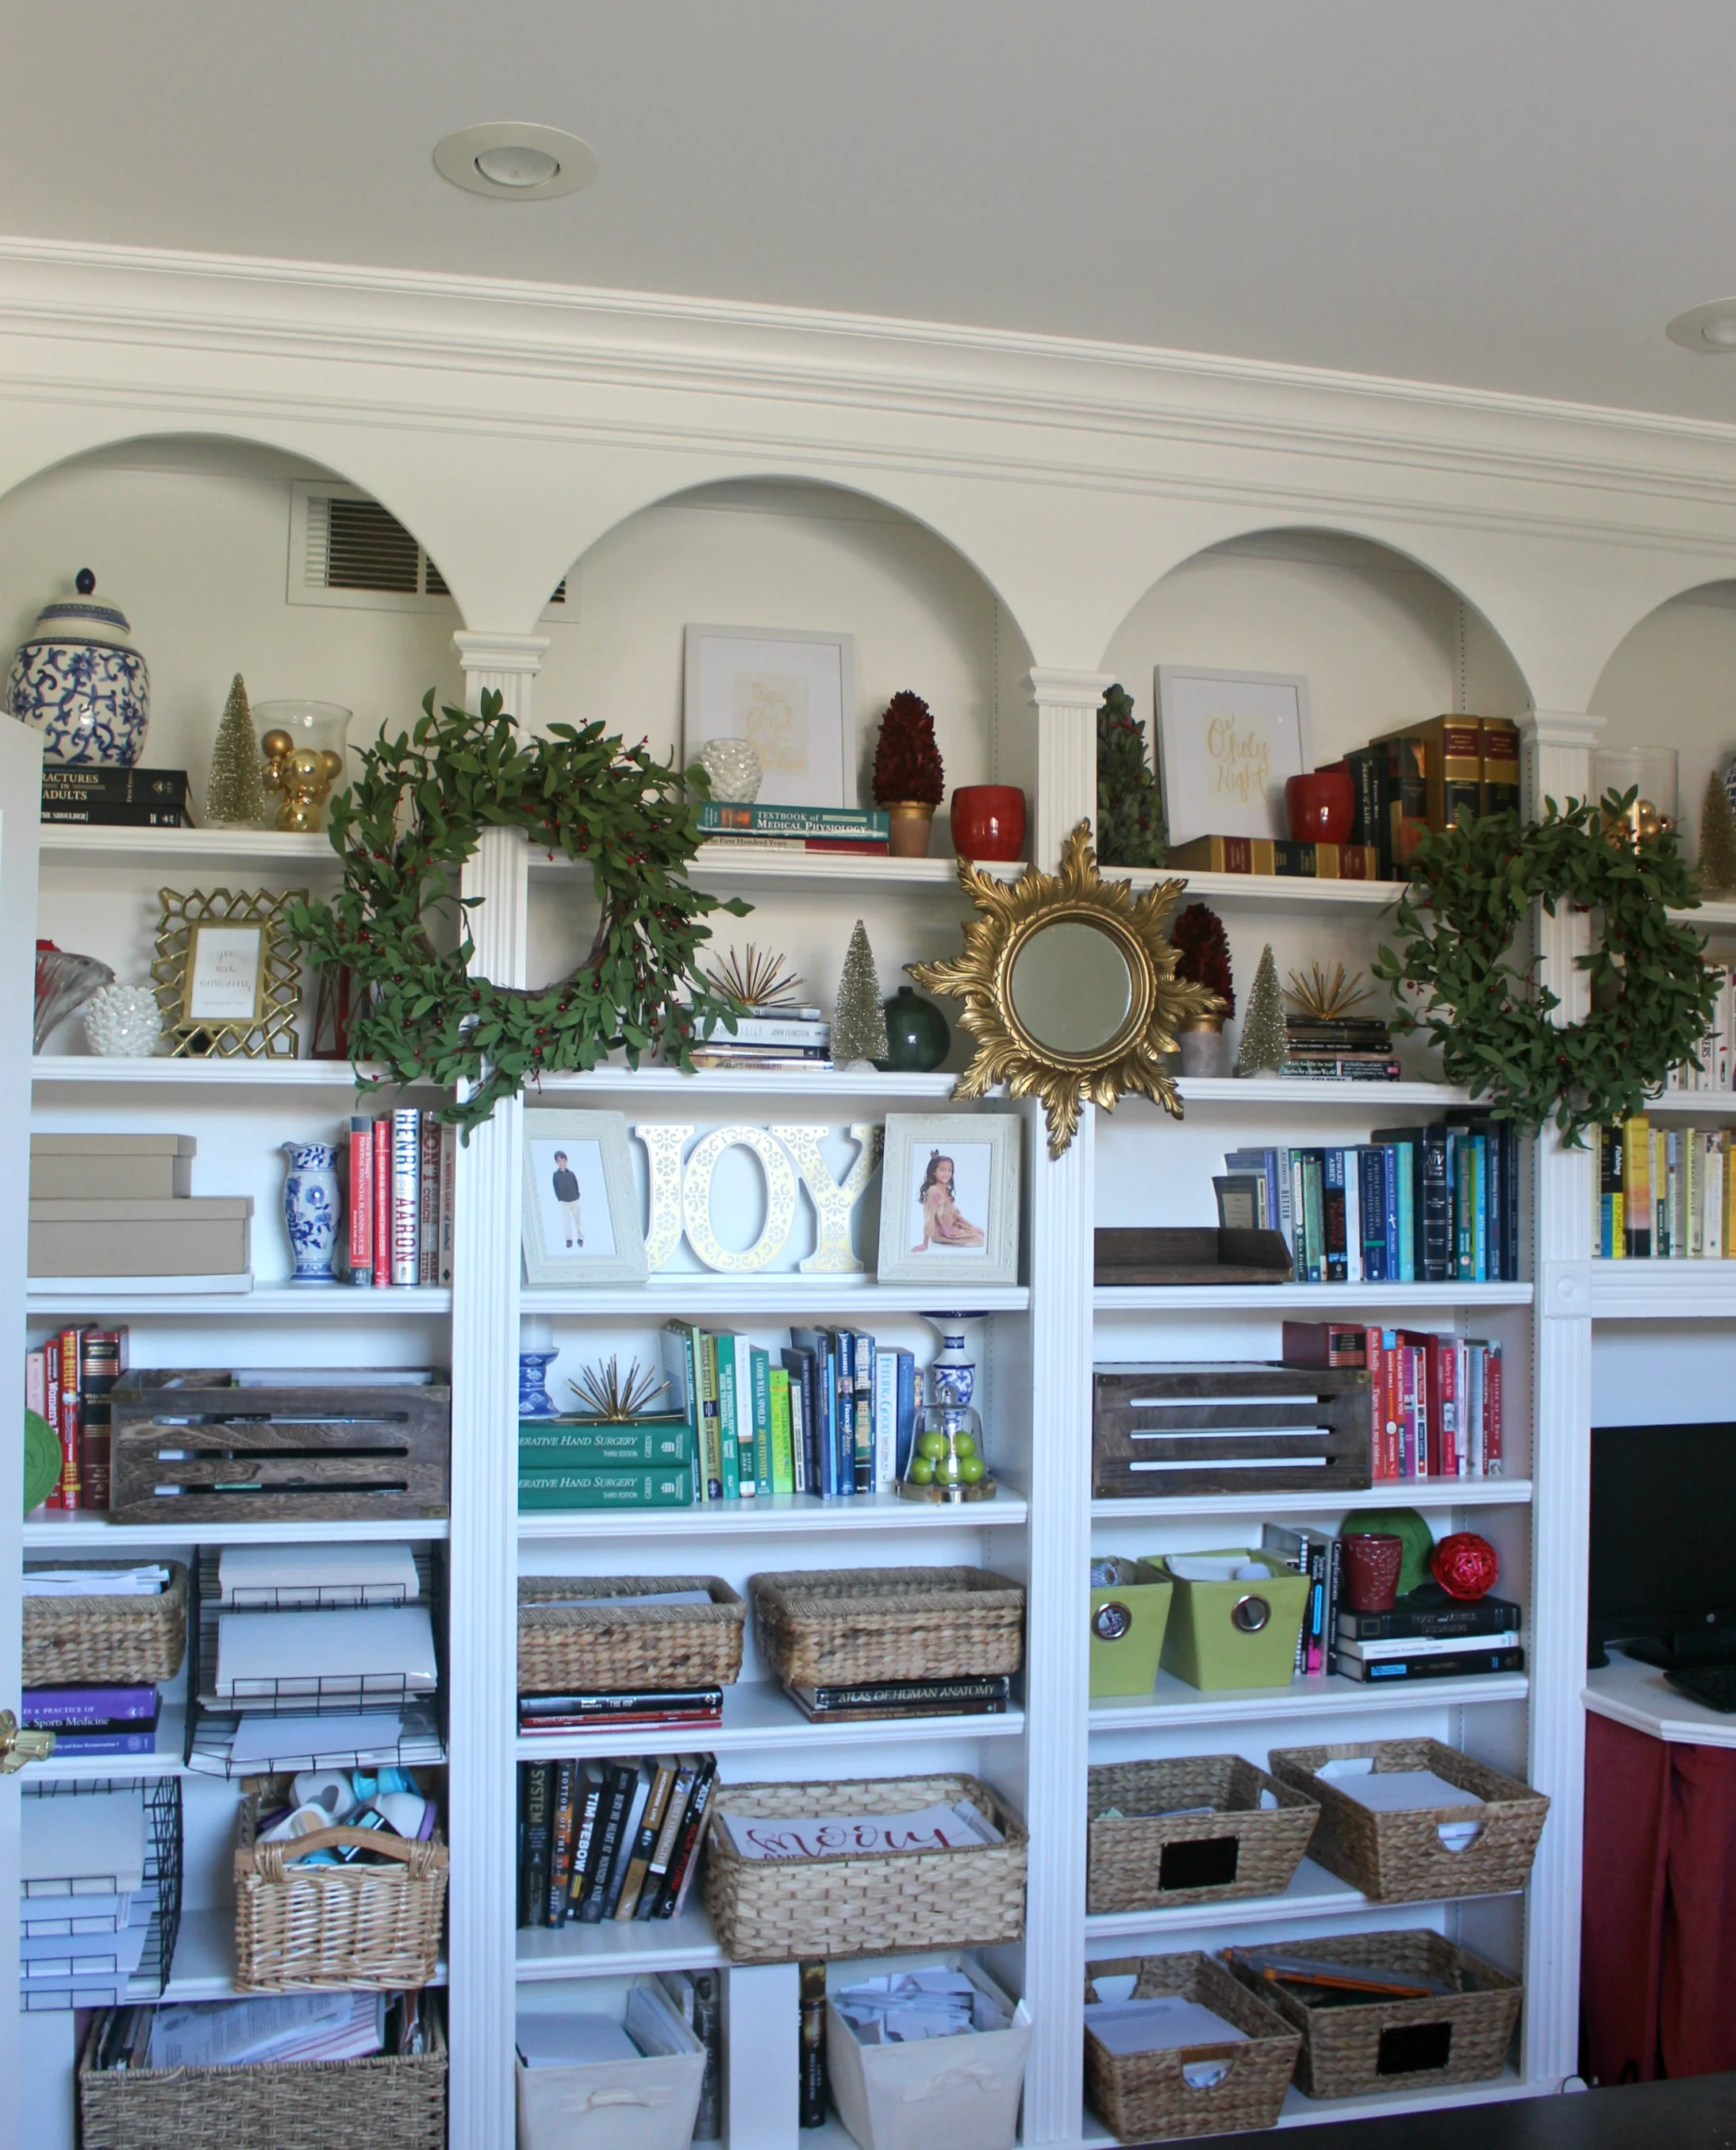
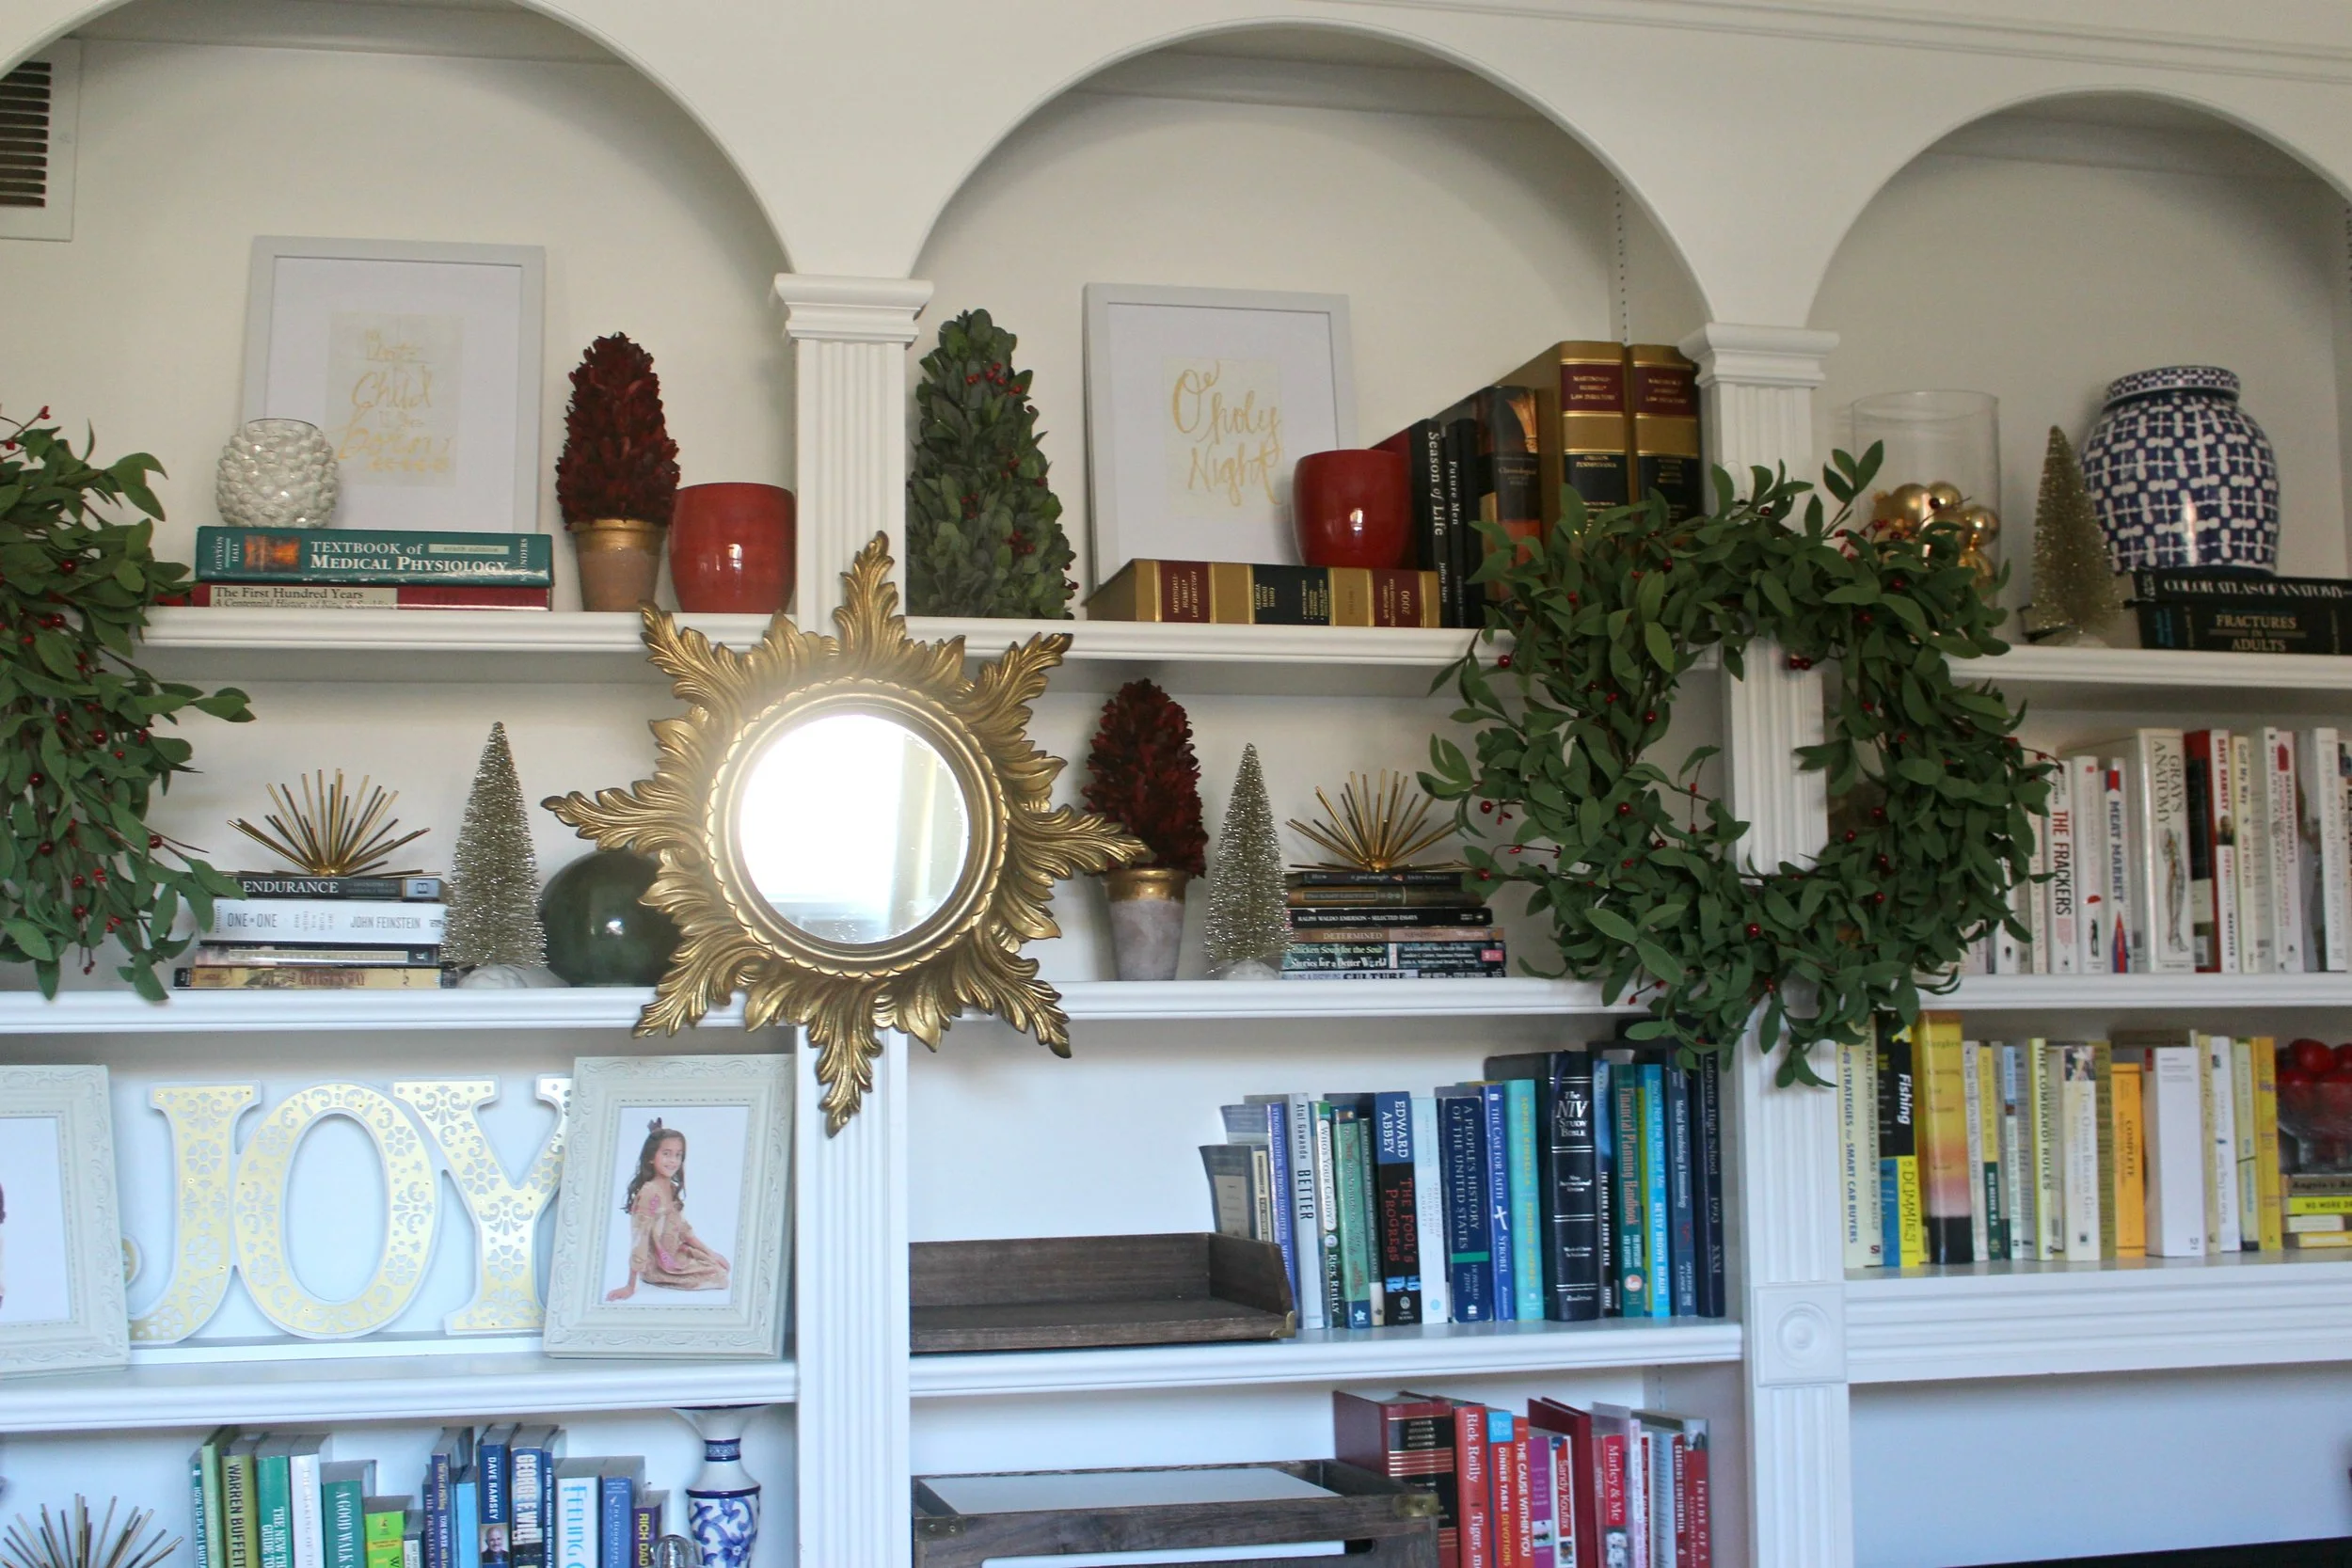
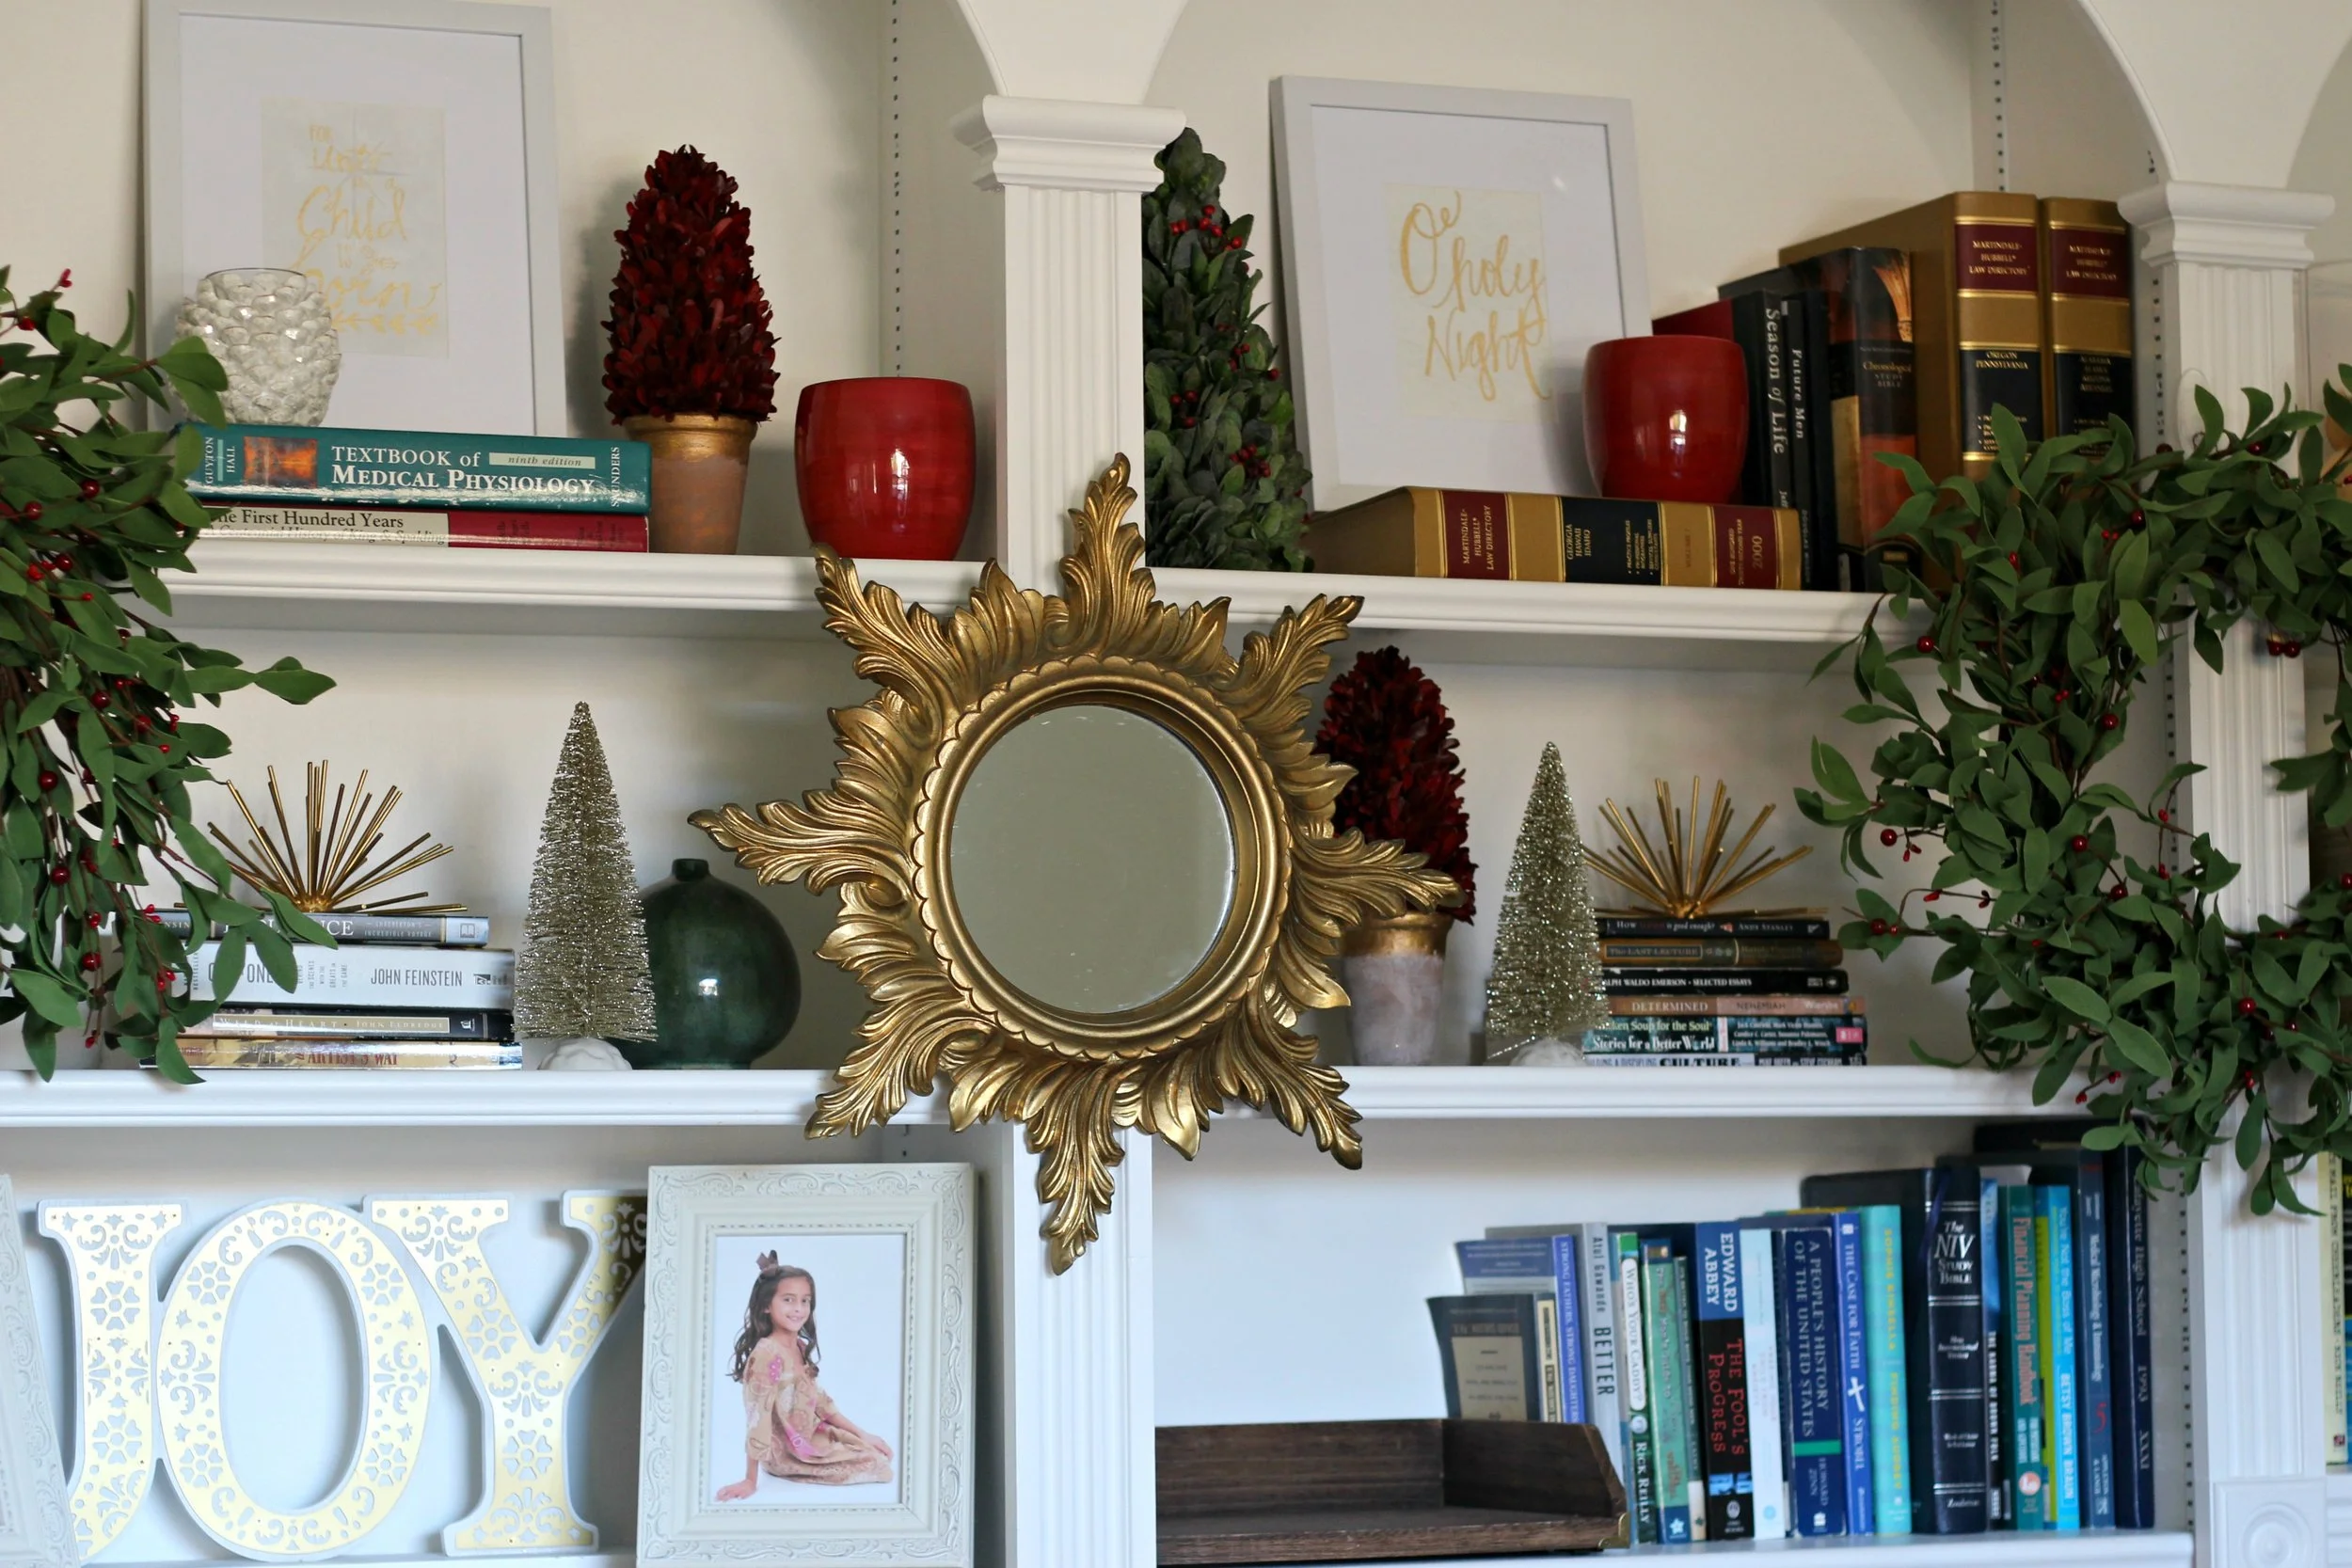
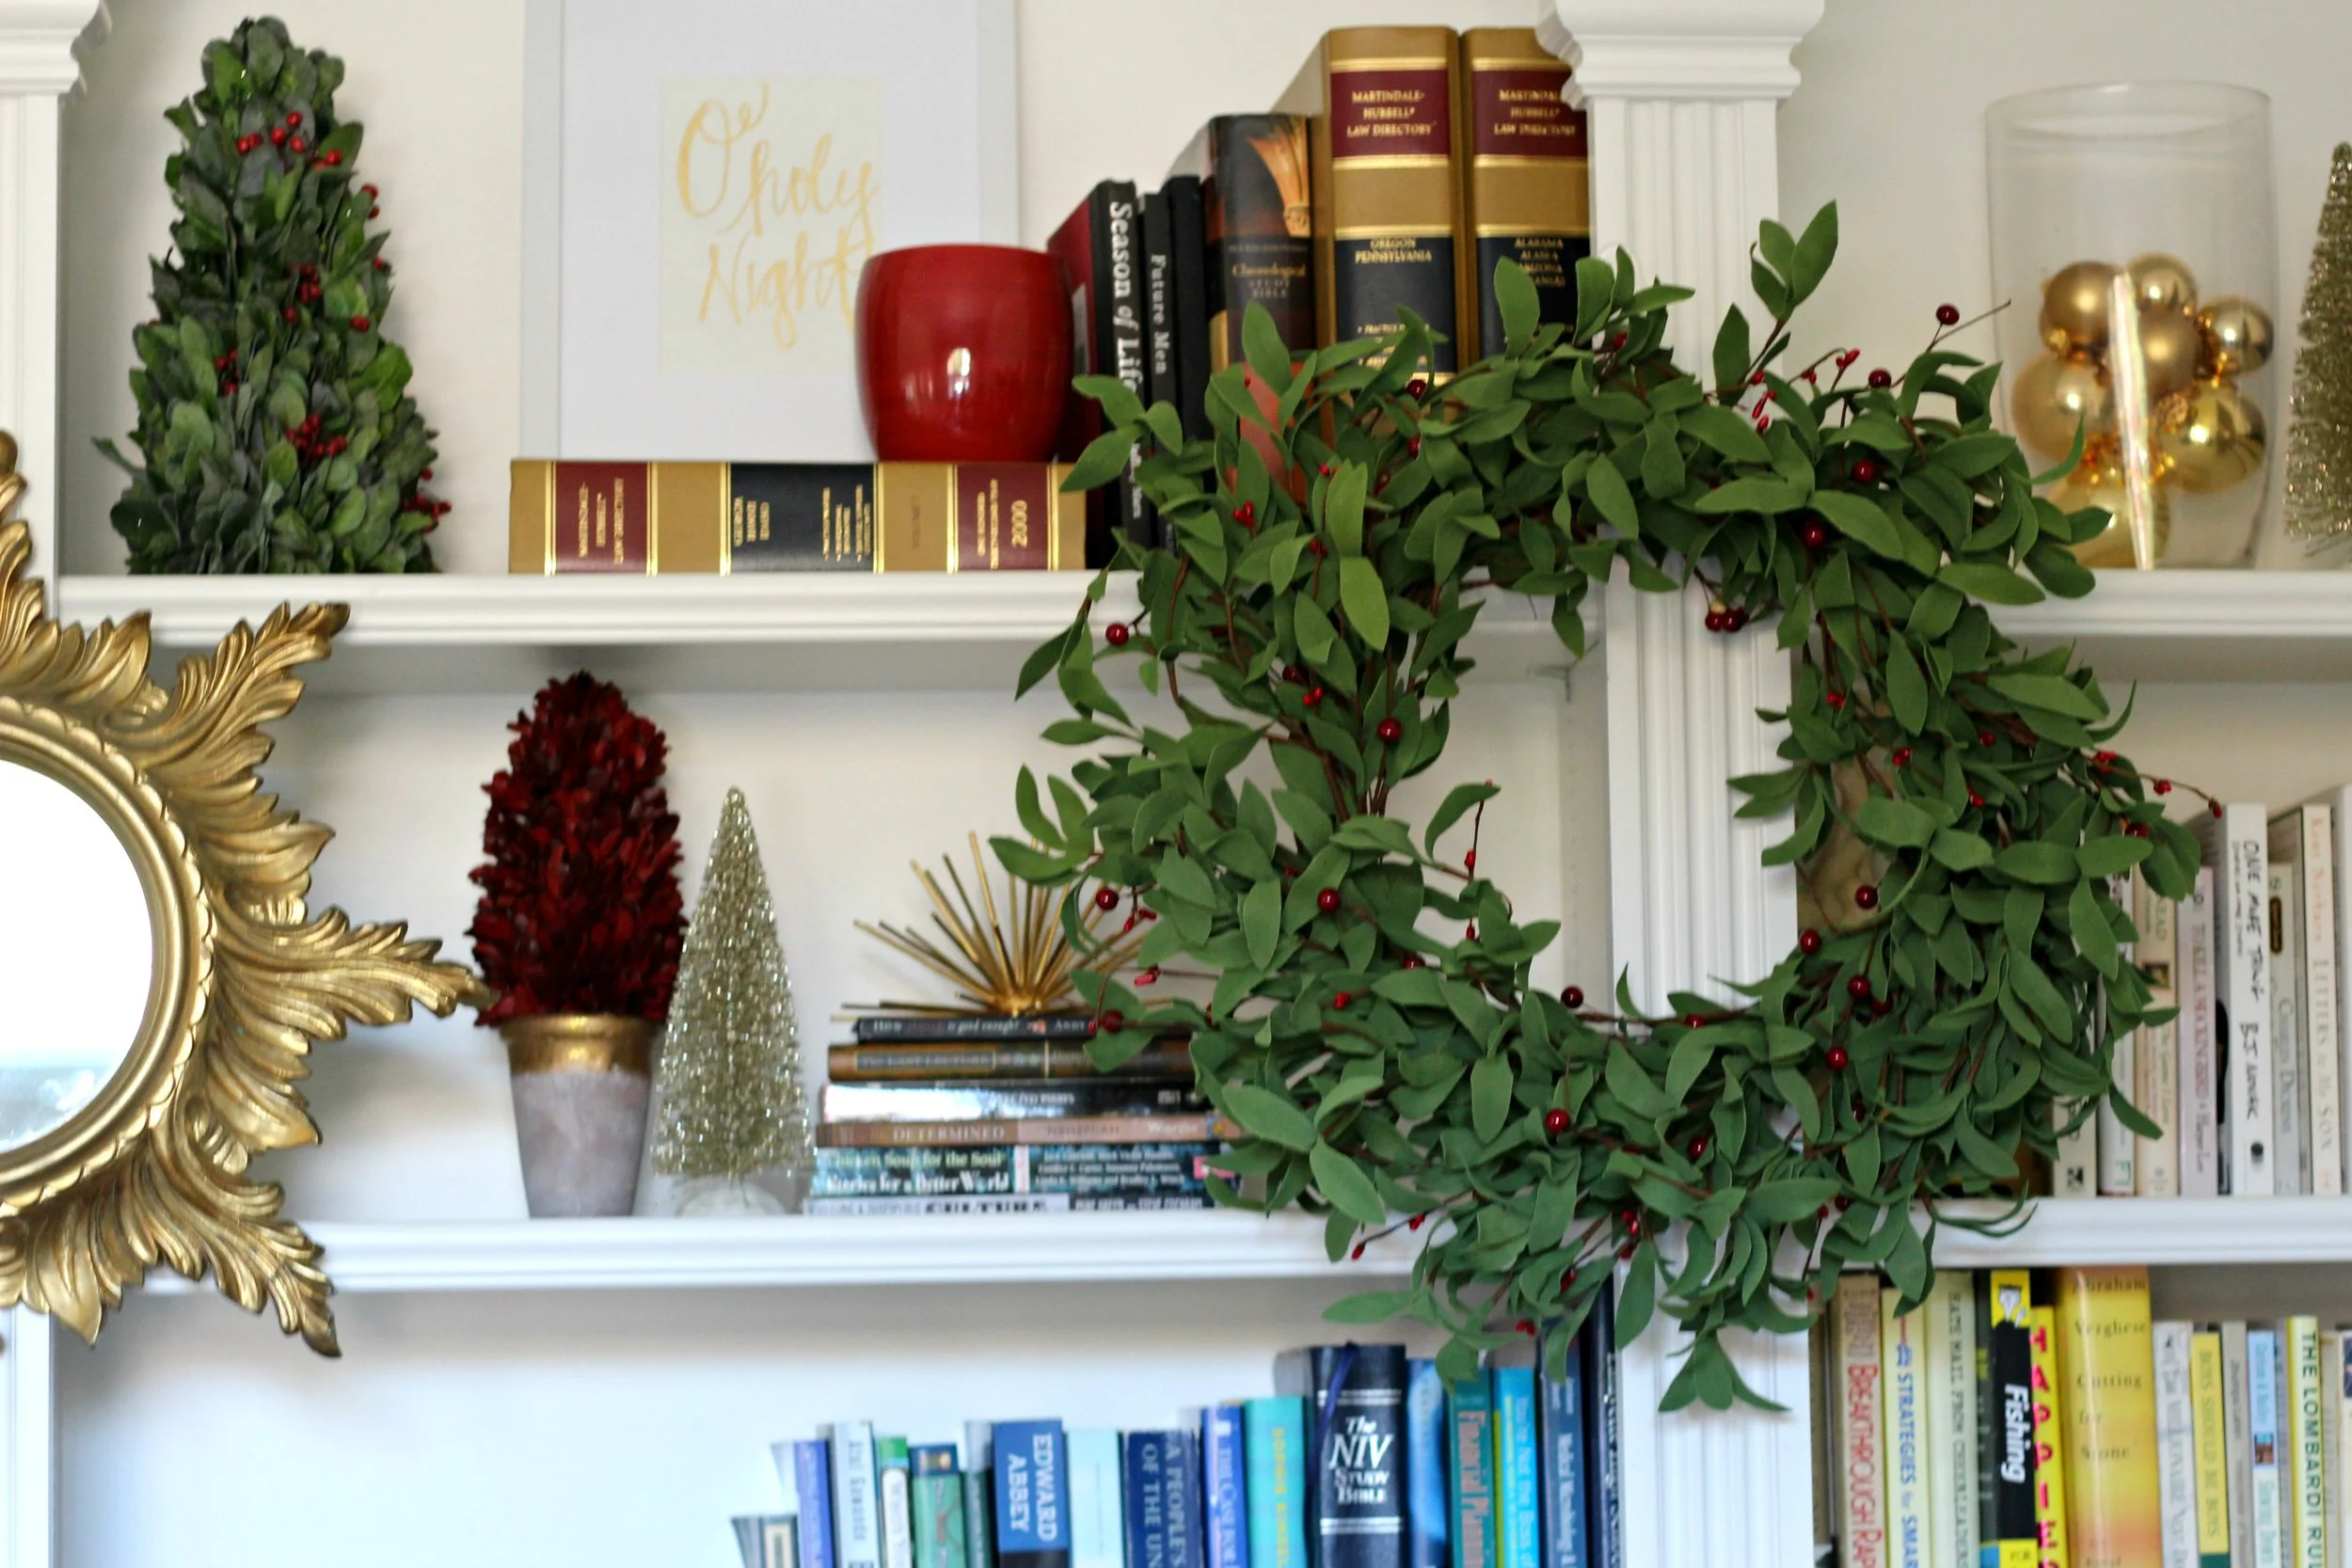
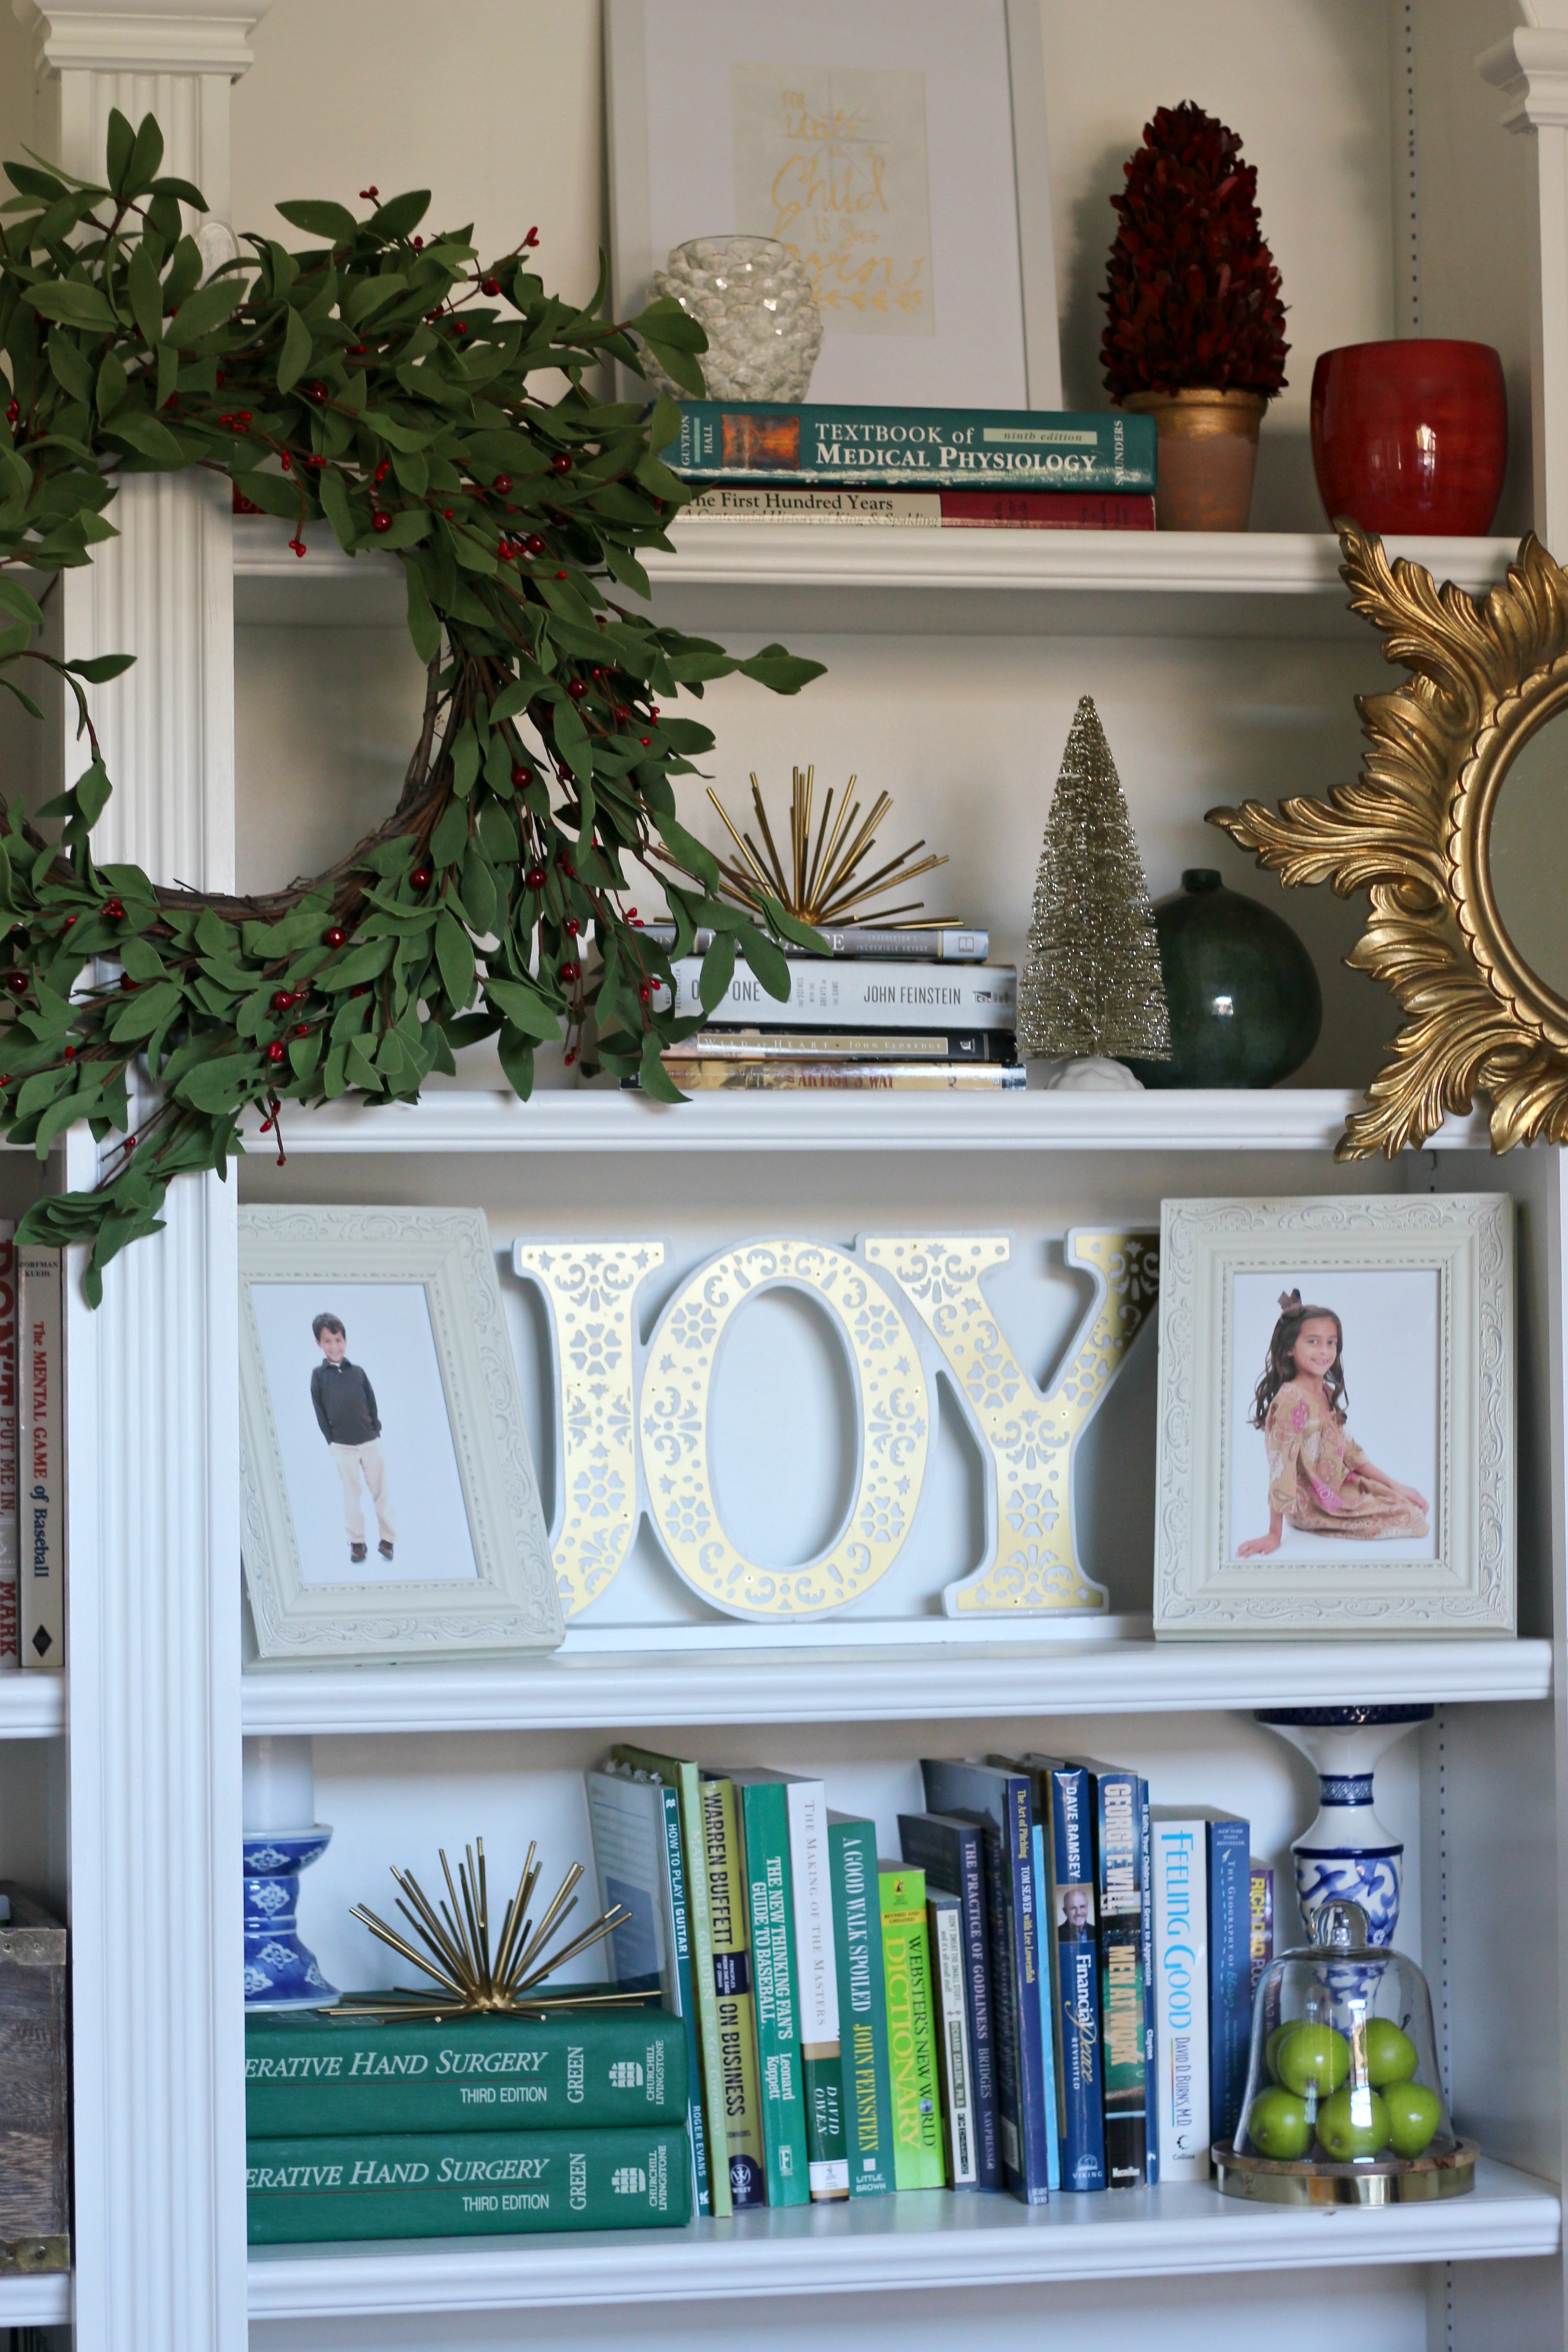
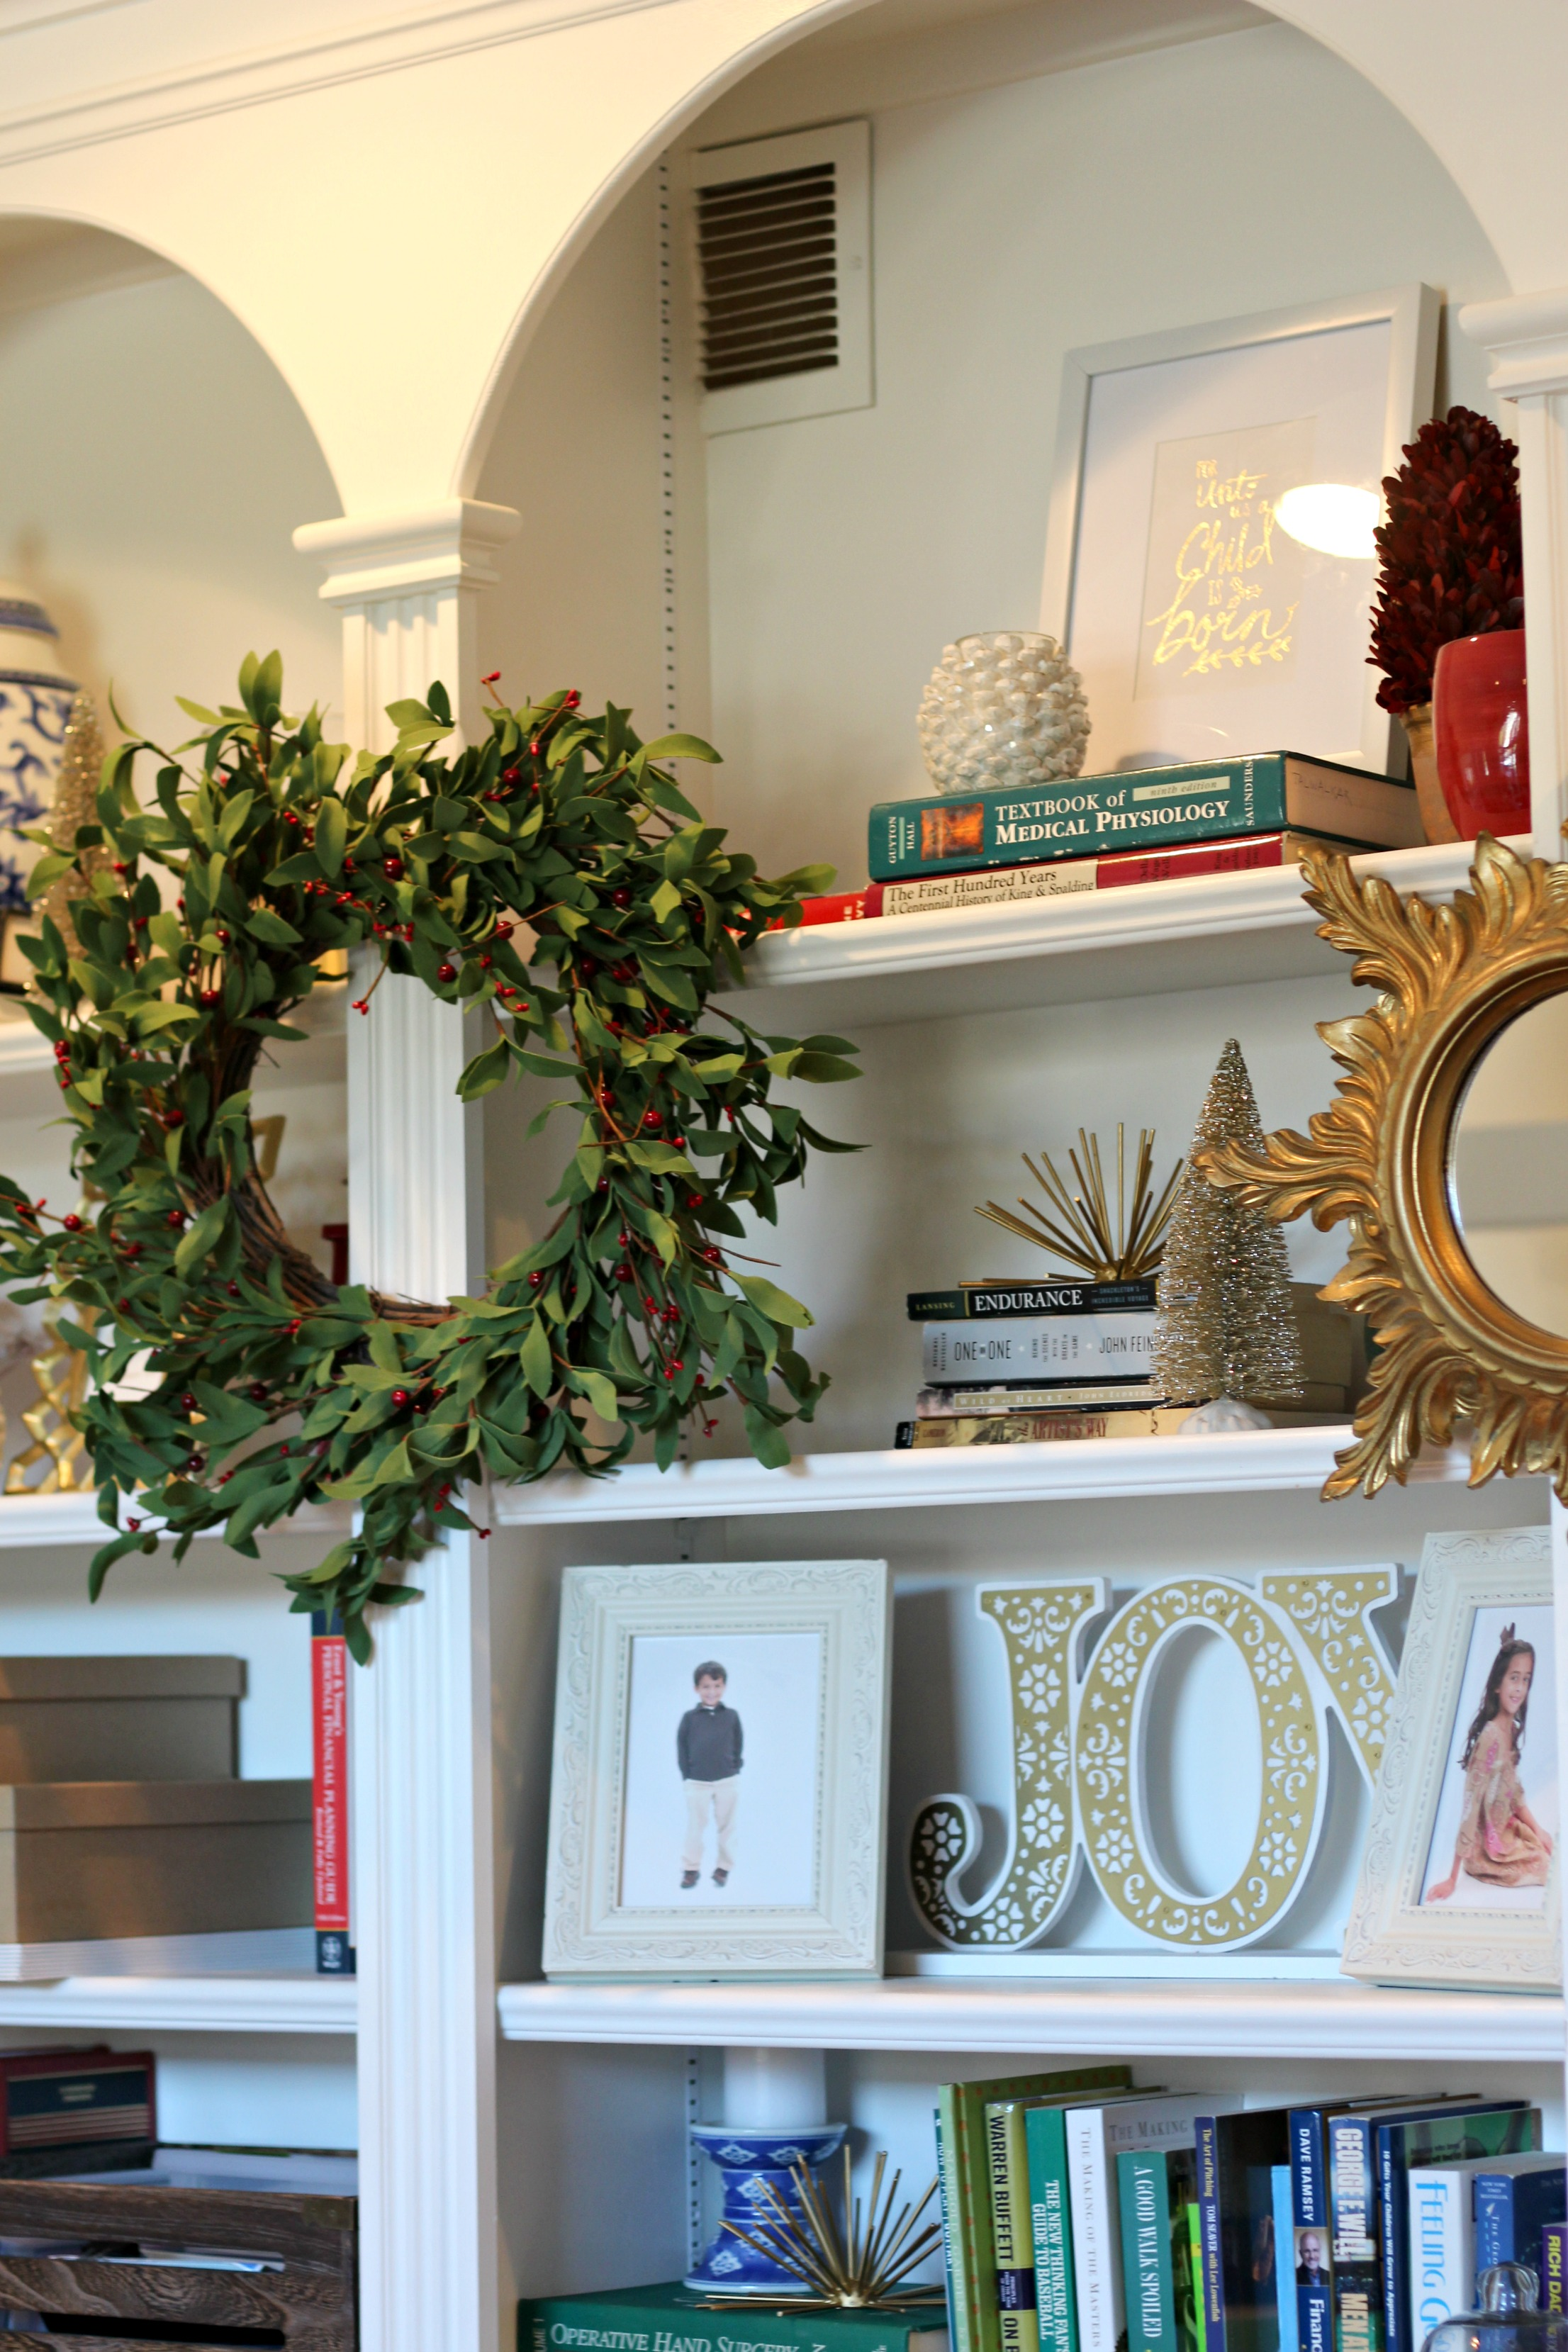
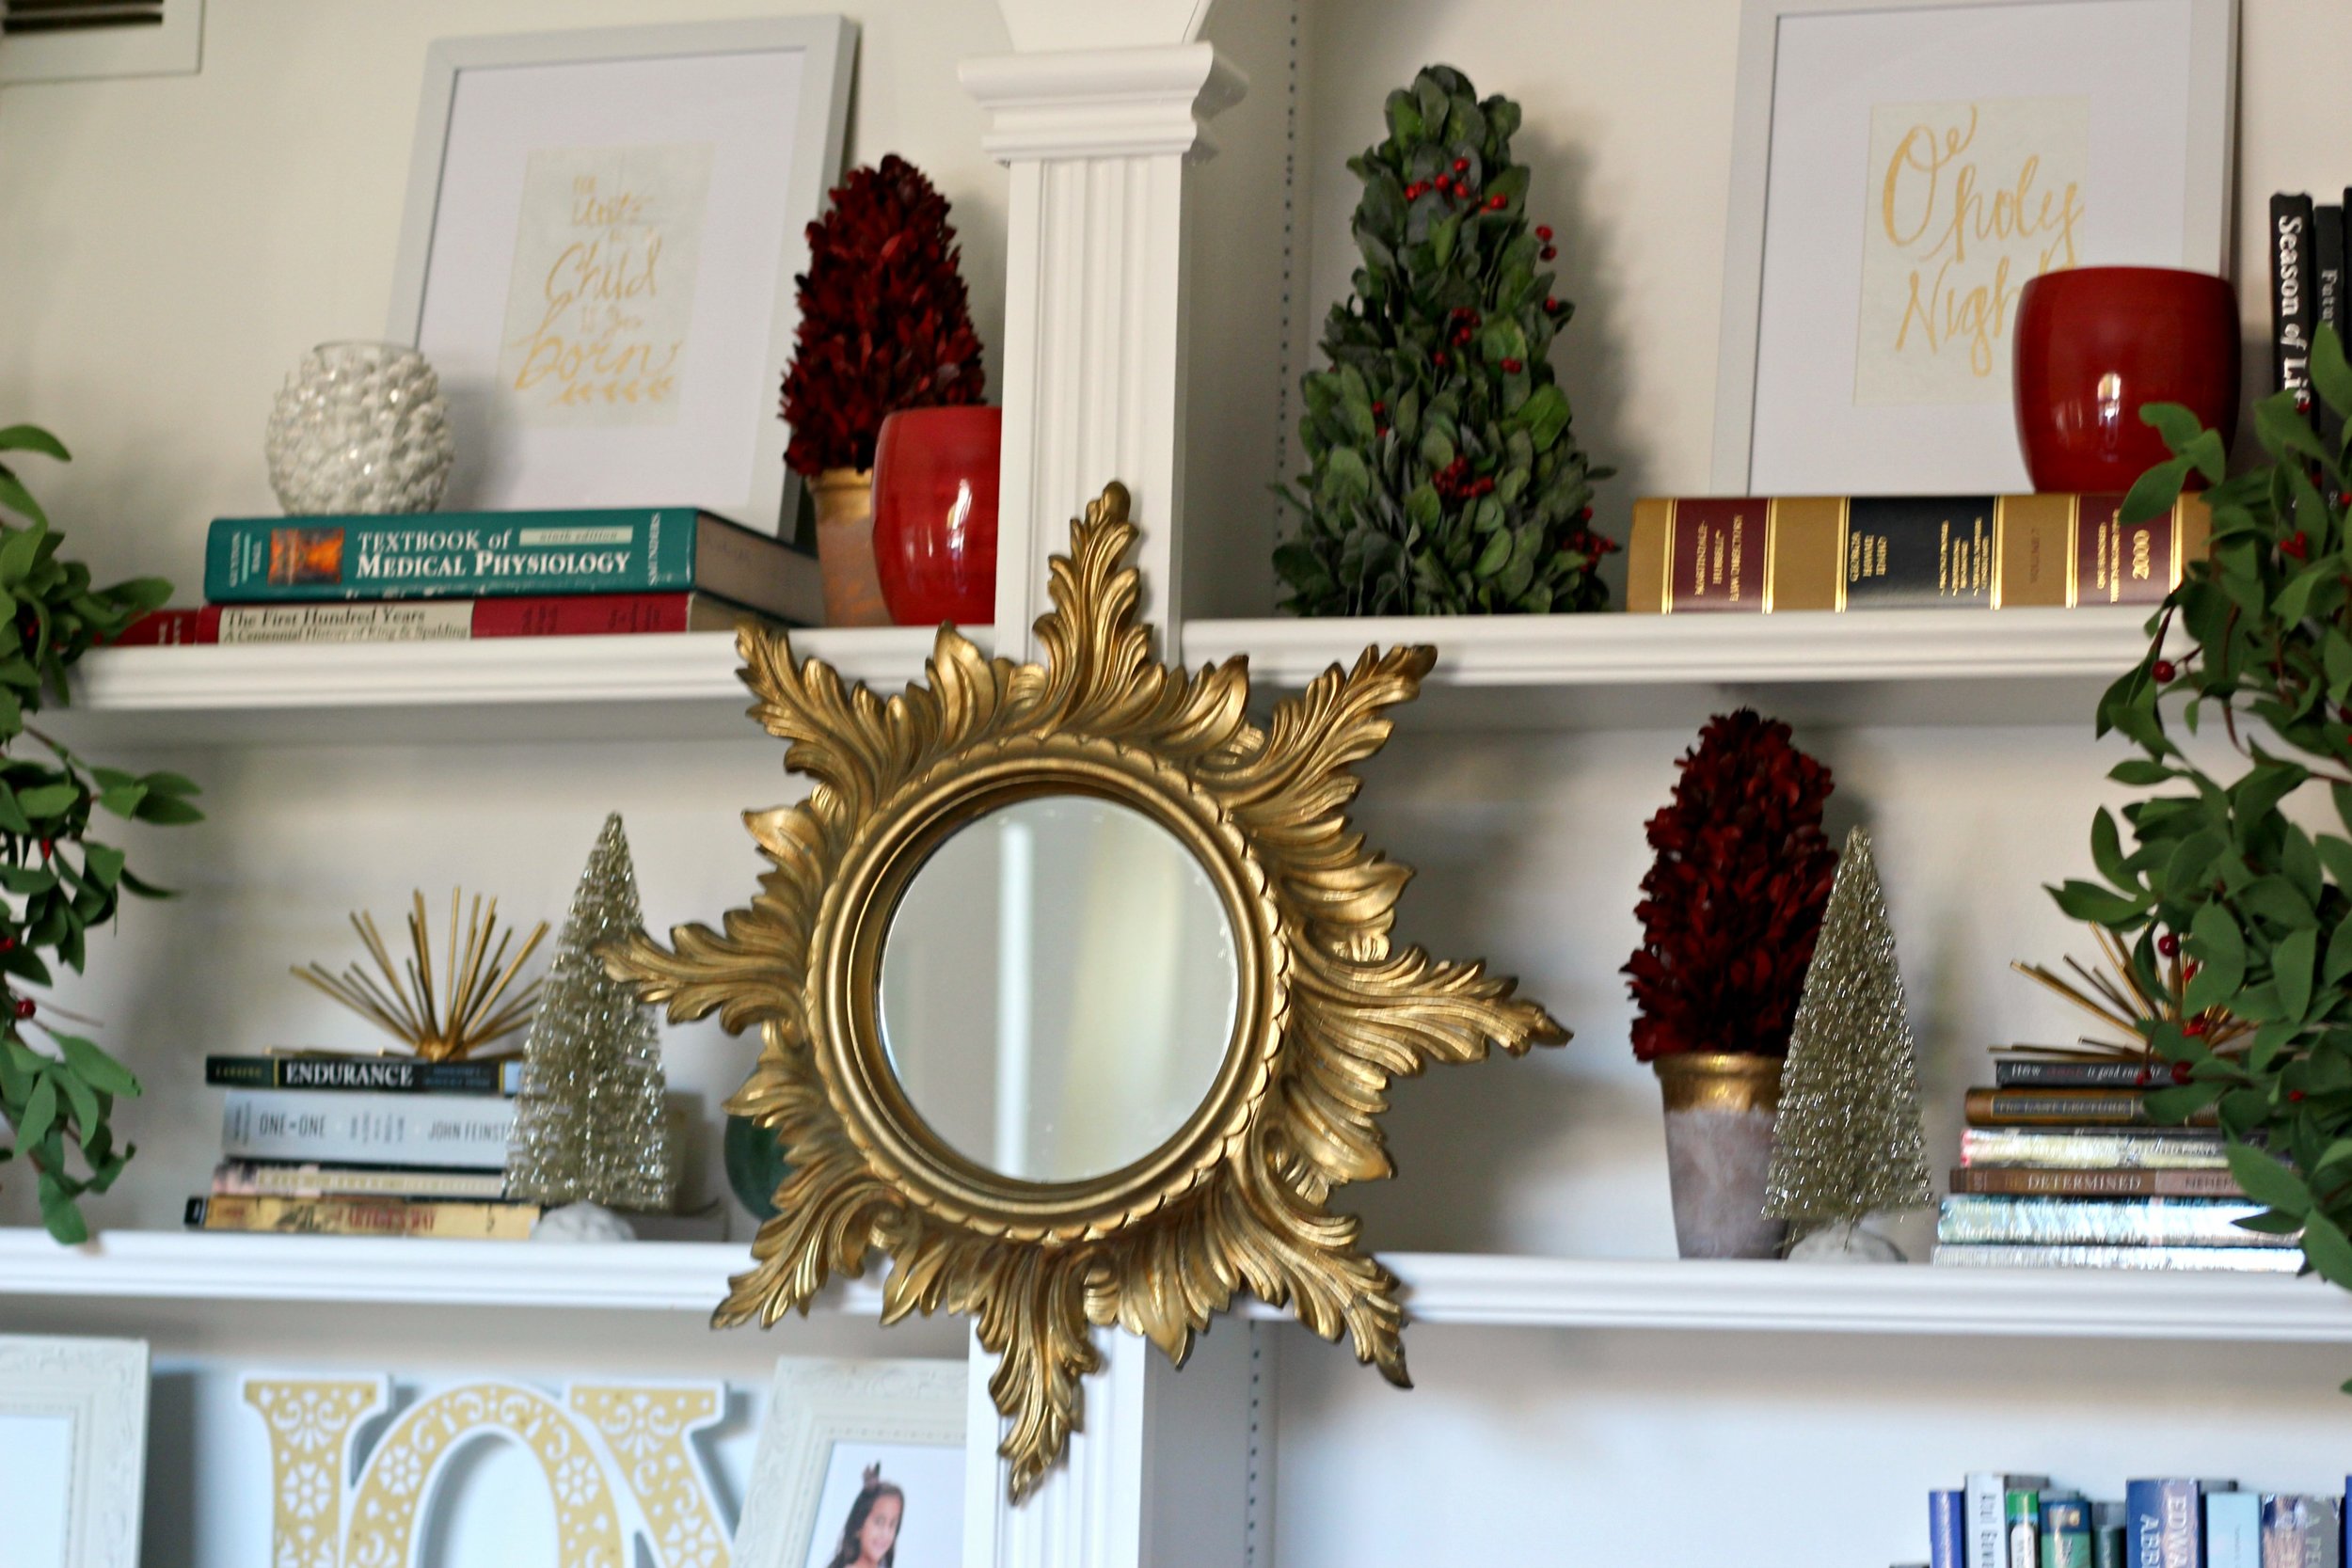
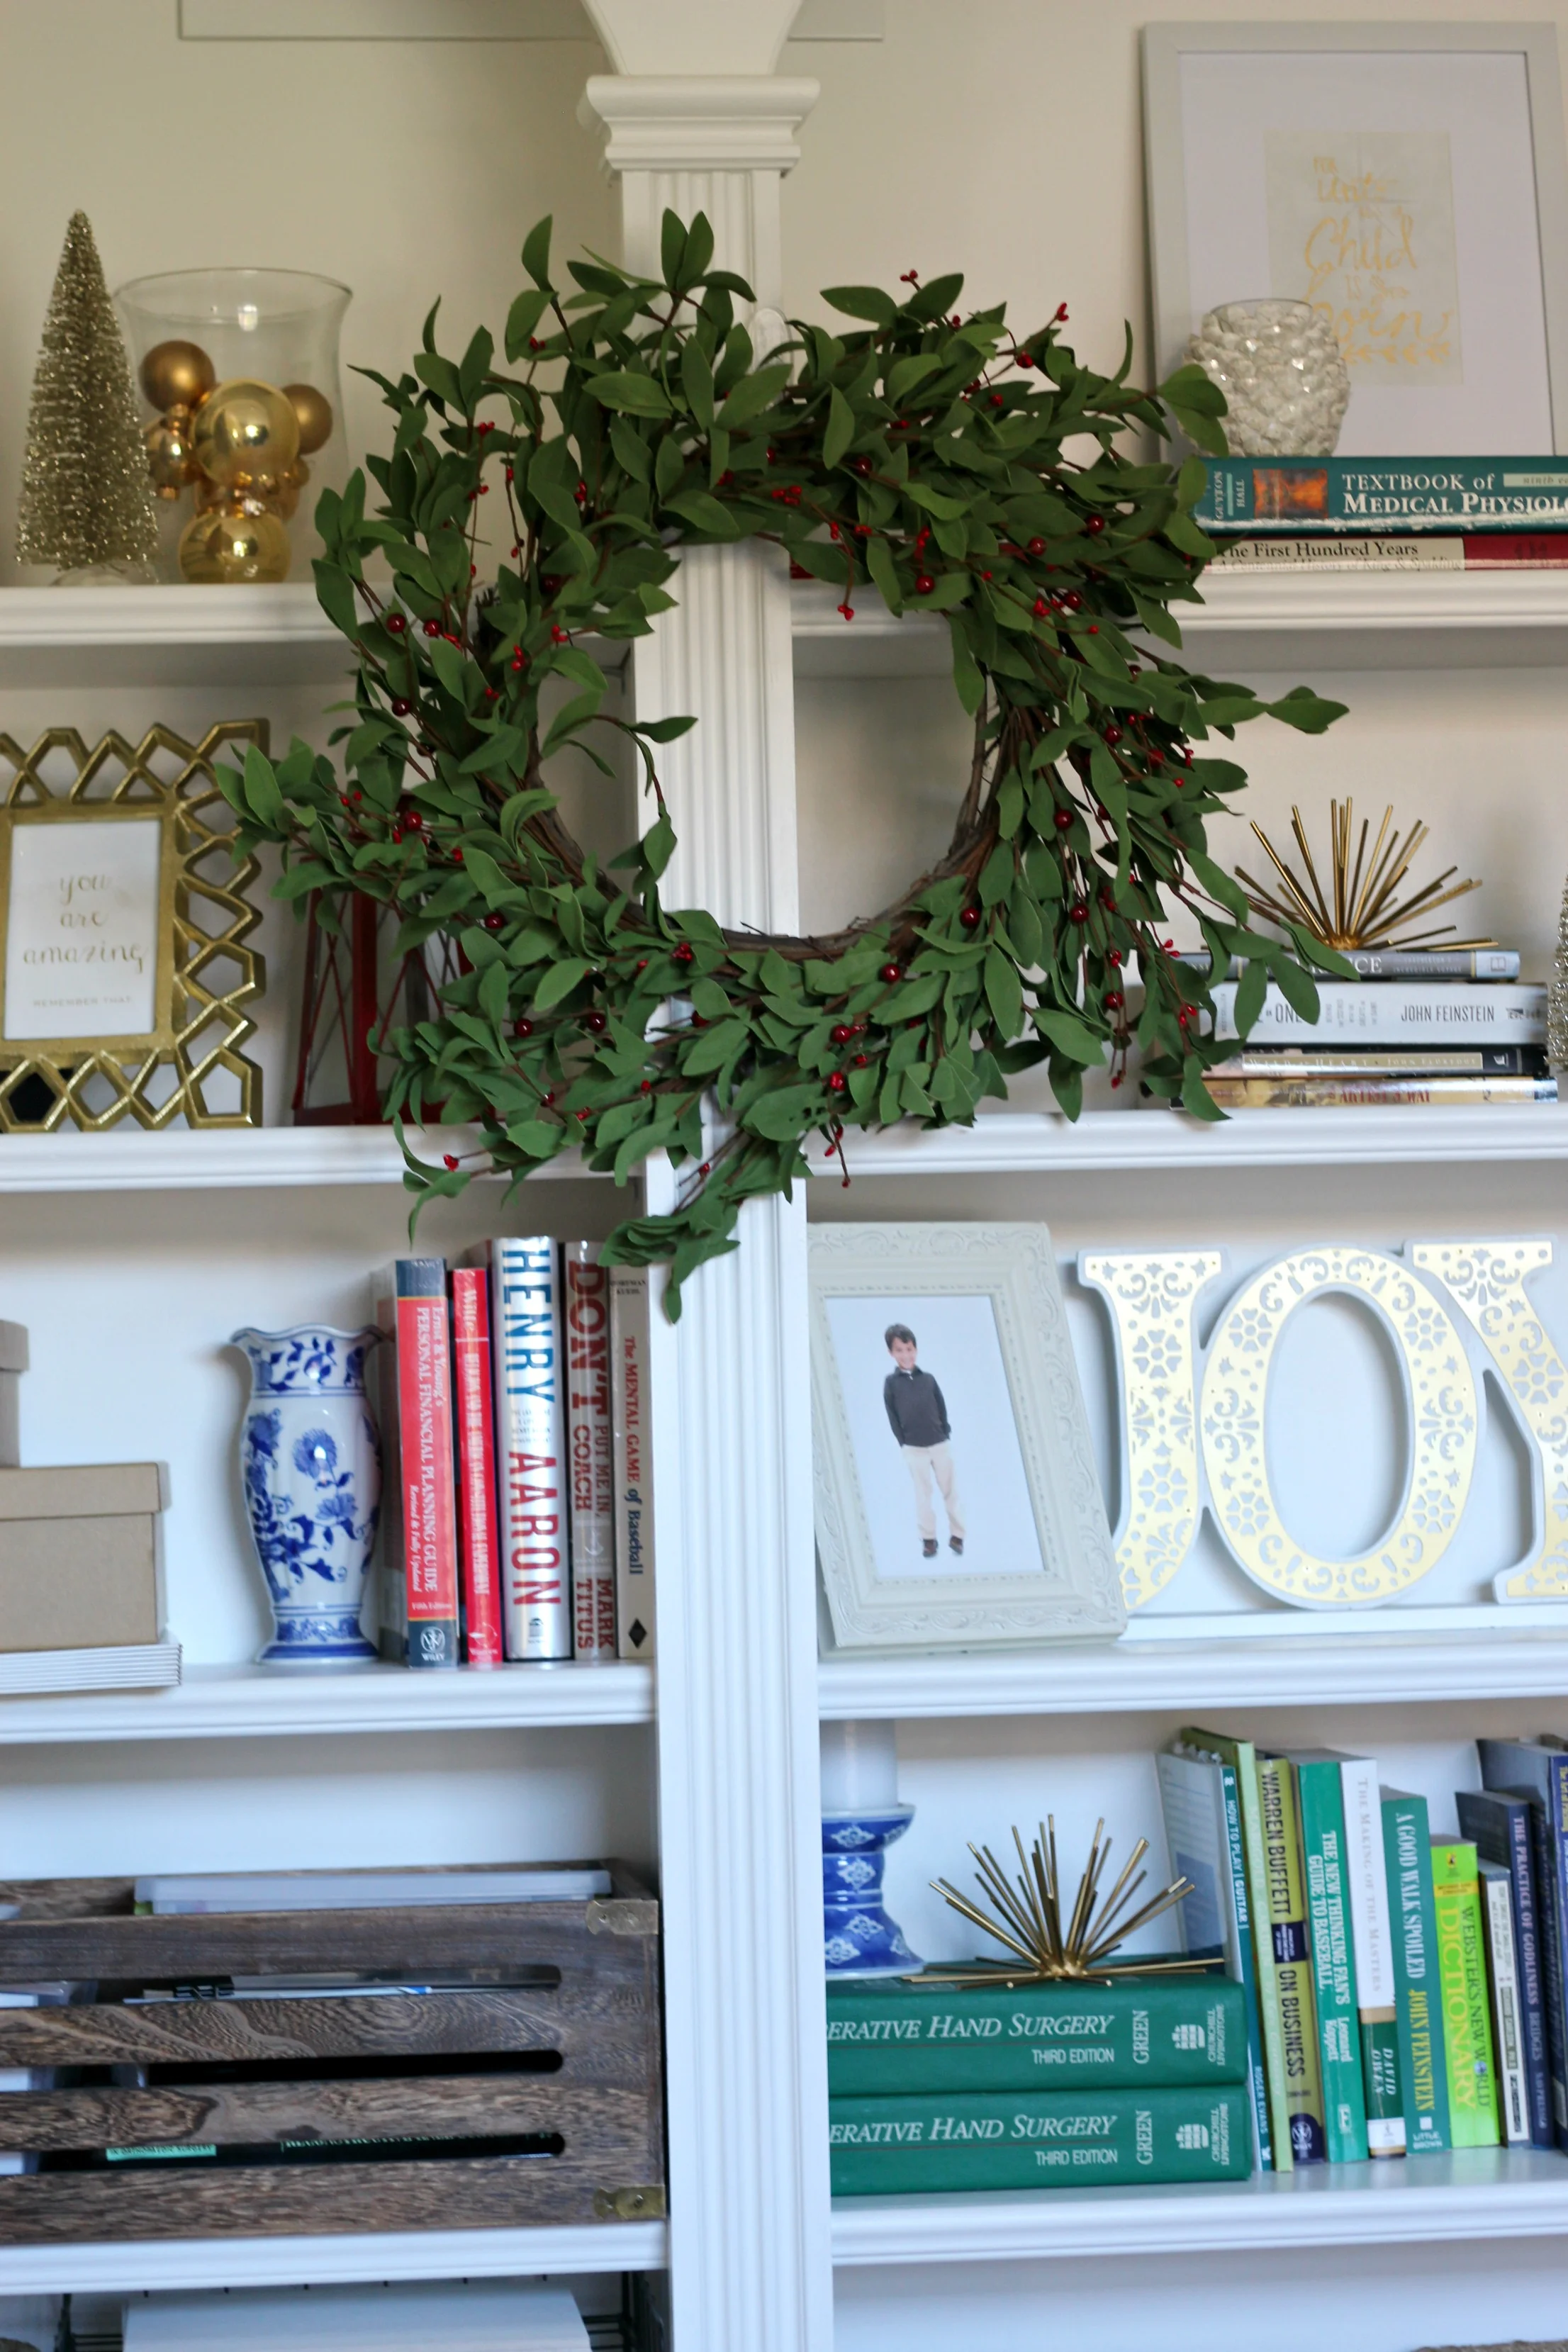
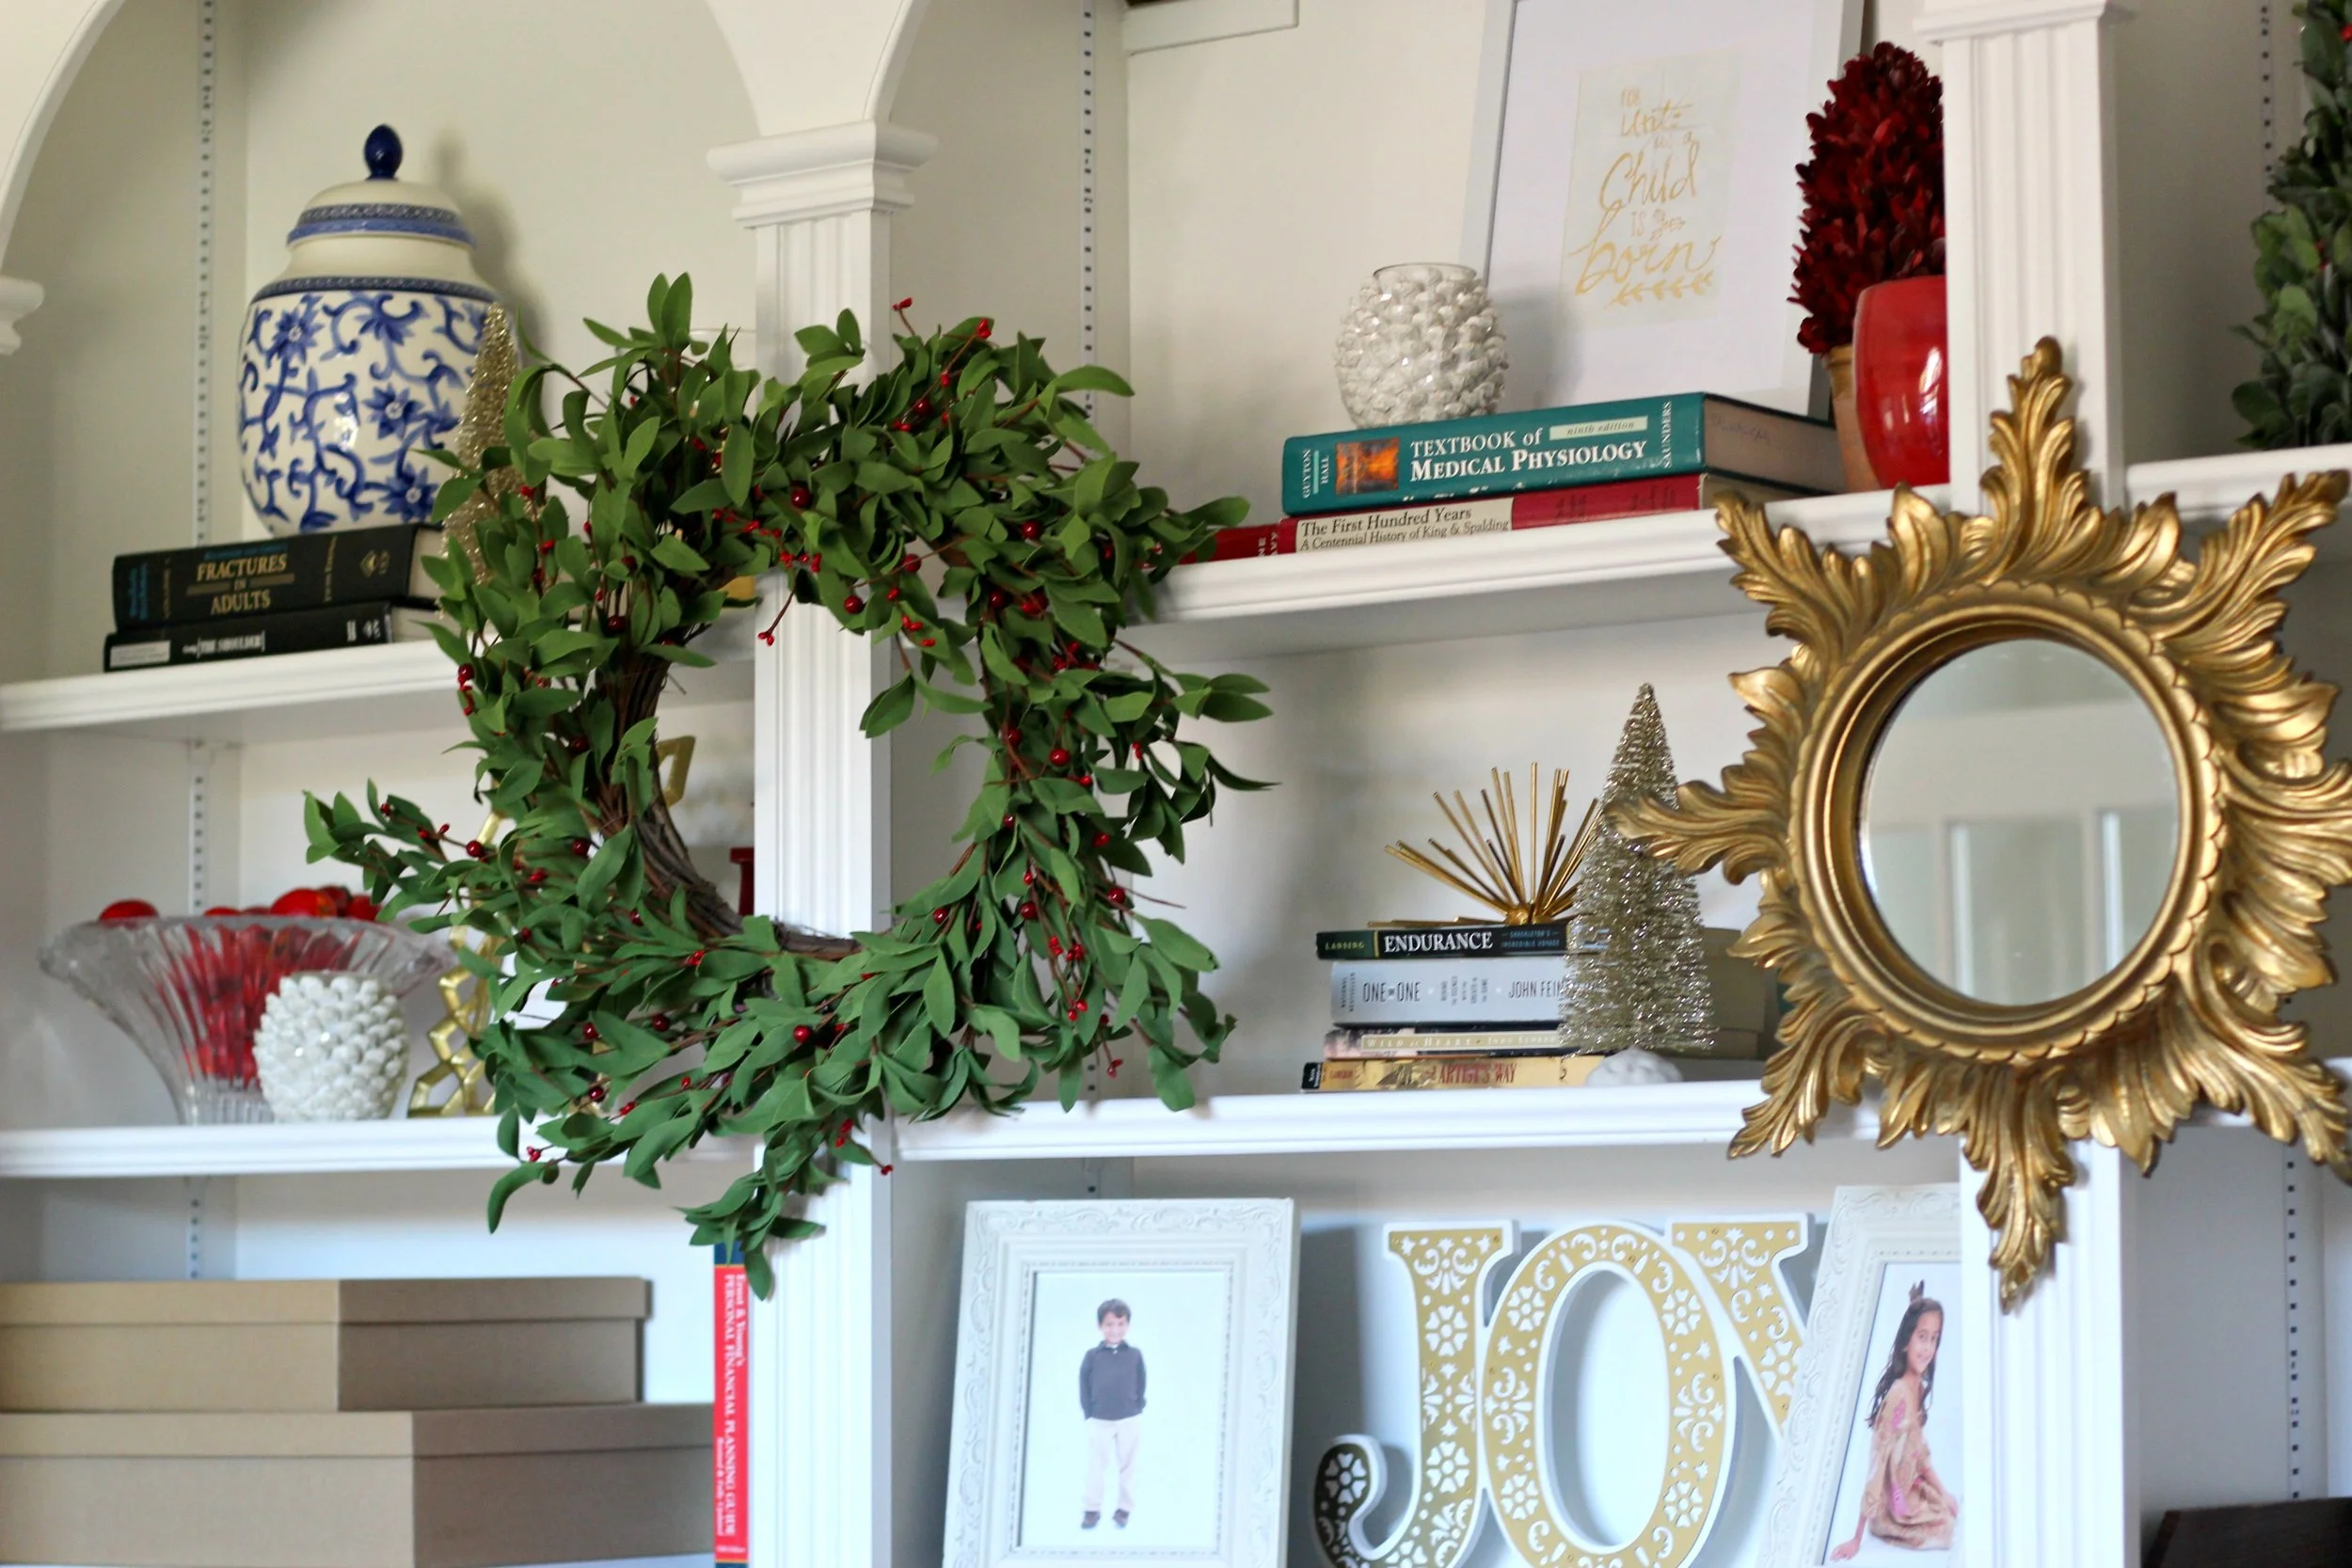
Here is the final result! All of Deanna's work supplies are contained on the bottom 3-4 shelves: easy access and everything has a place. I tried to place matching/similar shaped containers side by side for a cleaner look and I mixed in some books with some of them. The most exciting part was adding some holiday trims! When I saw the shelves, I knew instantly I wanted to hang wreaths on the outside on each side of the mirror. Hanging pictures or items on the outsides of your shelves is a great way to add depth and create a focal point.

While shopping for this project, I kept an eye out for smaller items I could mix in easily. I found several little trees, candle holders, and accessories that added a little color + Christmas cheer to the shelves. Our gold spikes are one of my must-haves for shelf styling and I used several on these shelves (stacked on books or alone). These are perfect year 'round and always add a chic touch to any space. I also noticed Deanna had several glass vases/bowls, so I brought some gold ornaments to fill them.
Finally, I always try to layer pieces when styling shelves, so I picked up some holiday-themed framed pictures and signs too. Flat pieces like this can lean on the back of the shelves (and also stack on top of books) and then you can place smaller items in front to create depth and interest.
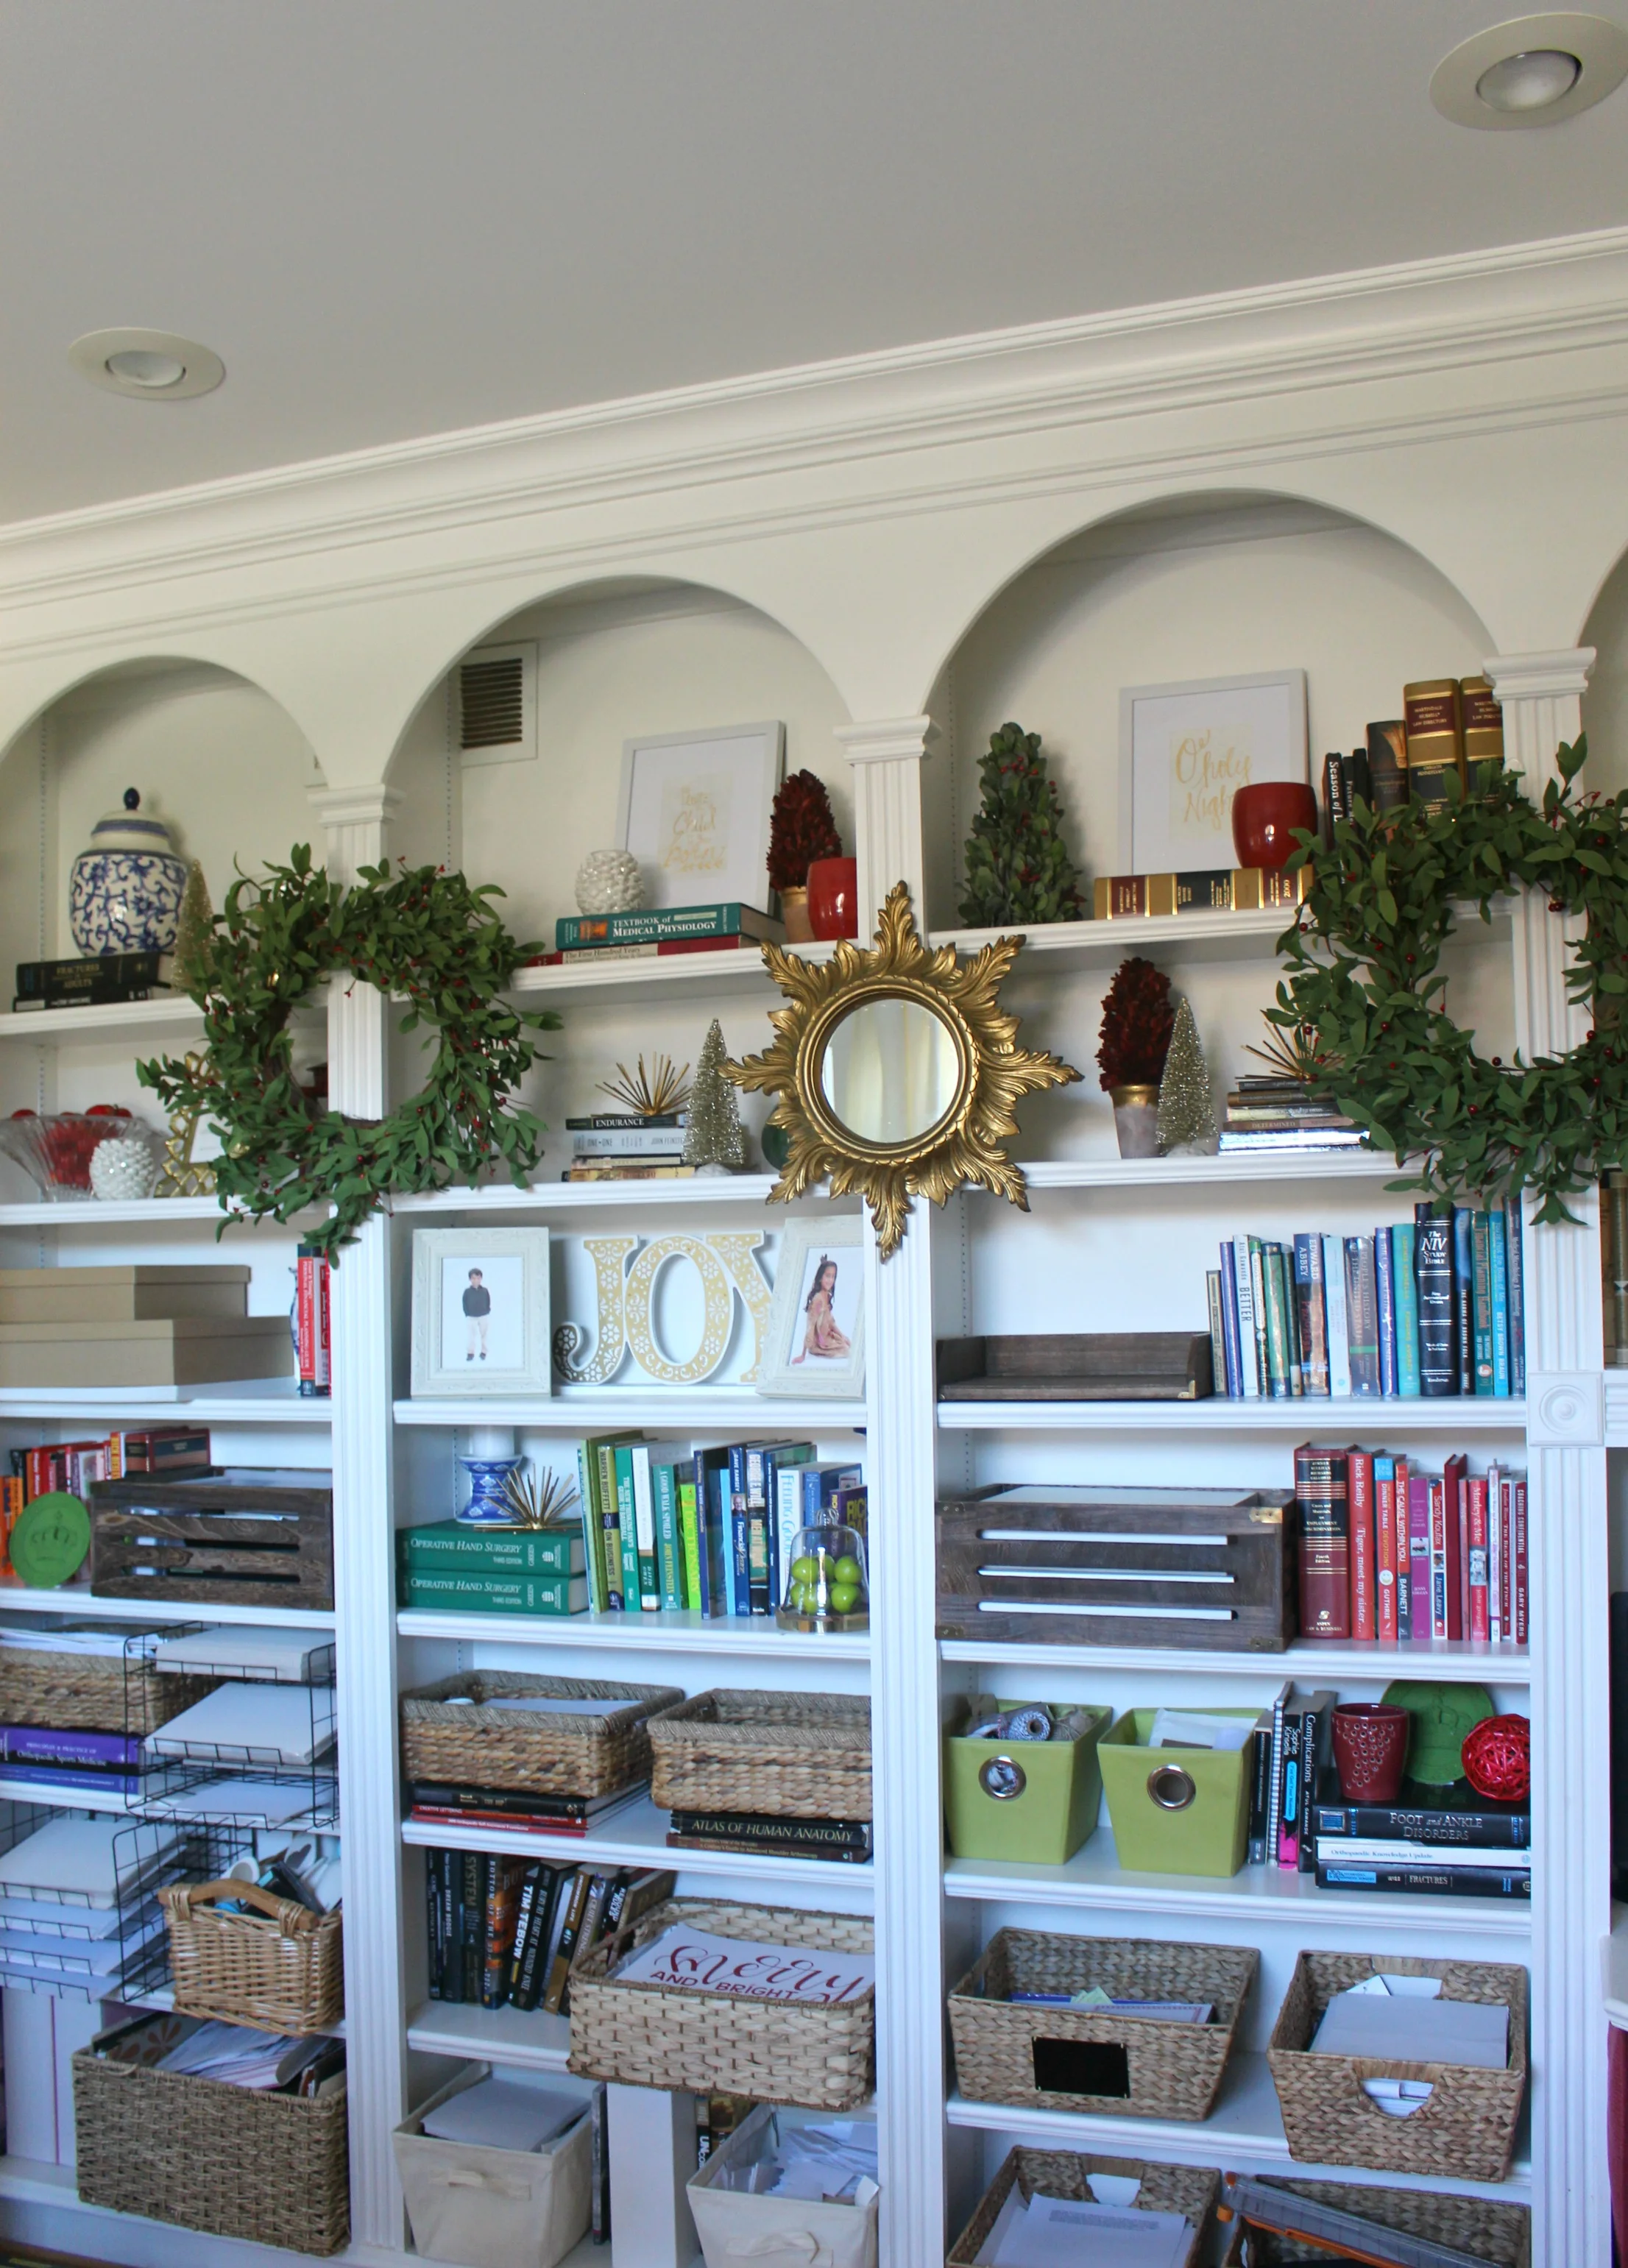
The finished shelves look completely organized and holiday ready. Every shelf is being used and the entire space is practical and functional, but still beautiful! I love the mix of colors, textures, and timeless style. I've linked all the new items I purchased for this project at the end of this post for you to shop! If you would like more information on our design services or to sign up for our own consultation, click here. I was thrilled to have the opportunity to work on this project for such a sweet family and I hope they enjoy it!
xoxo
Emily


Style It: The Gallery Wall

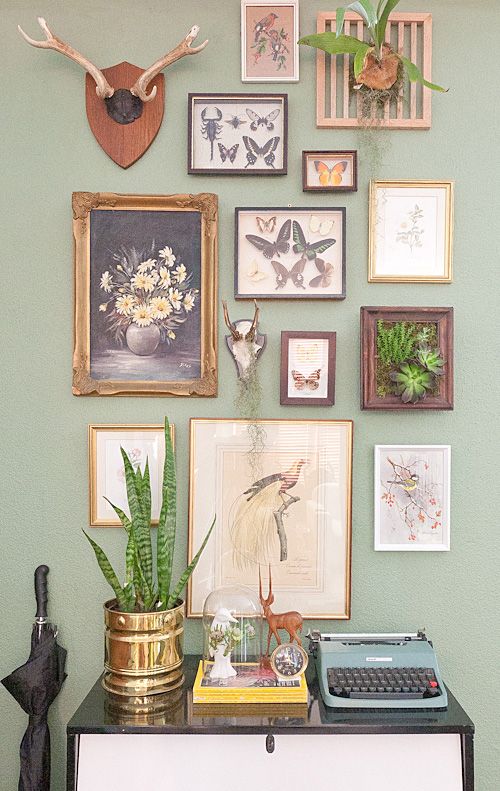
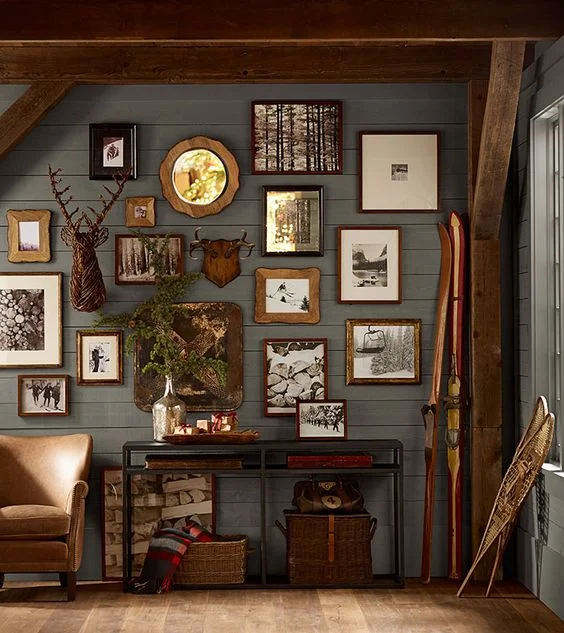
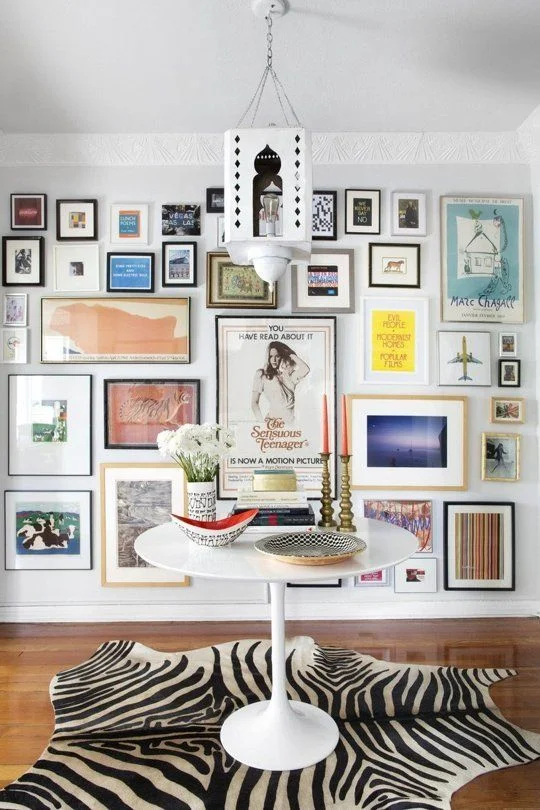
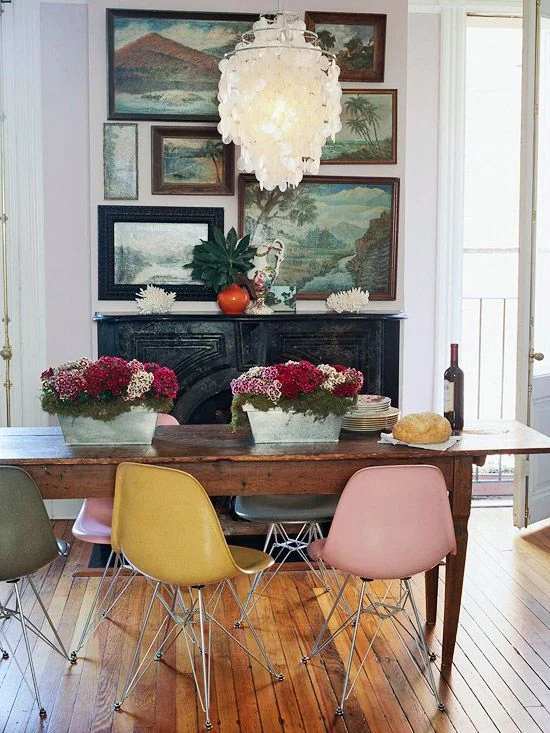
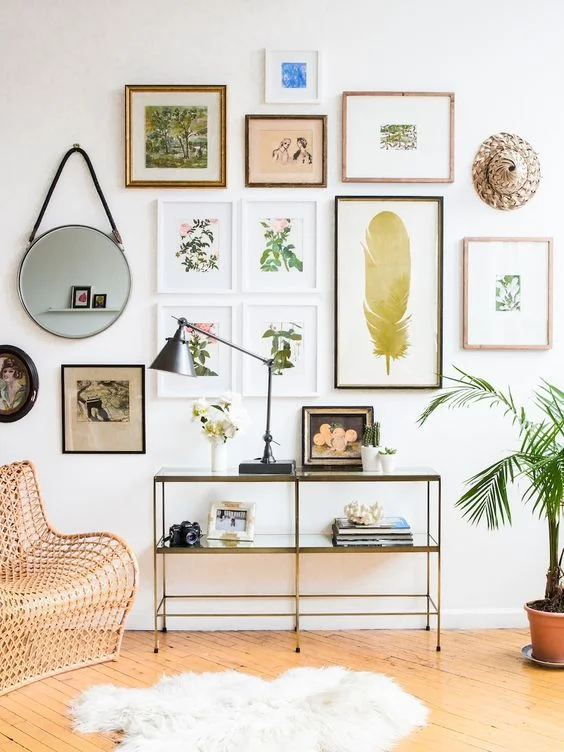
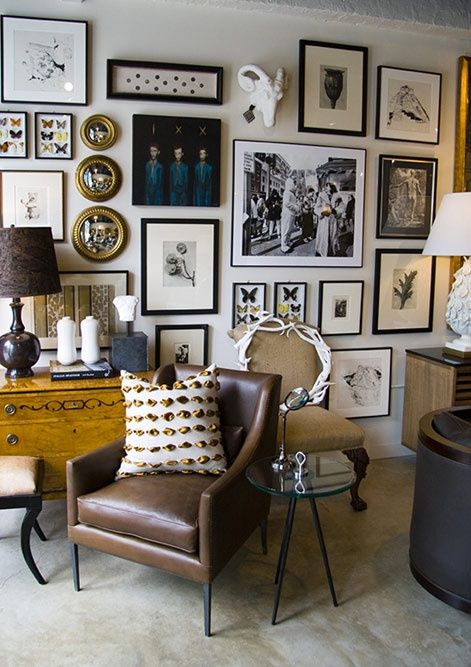
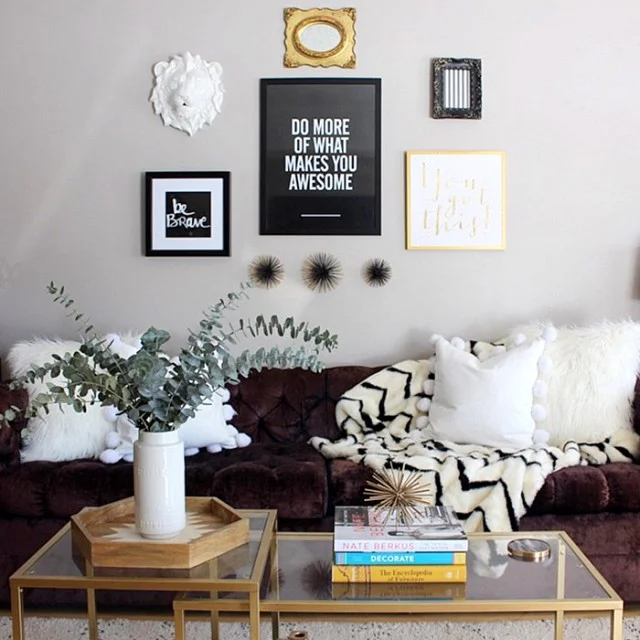
Gallery walls are the perfect way to cover any bare space while also adding interest, creating a focal point, and instantly giving a room a finished, pulled together look. I love gallery walls because I love collecting things, and this is such a beautiful way to display a collection or grouping. My favorite gallery walls are those that mix vintage and new items for a cool and eclectic look. Below, I've put together a quick guide to creating your own gallery wall with some of my favorite inspiration photos.
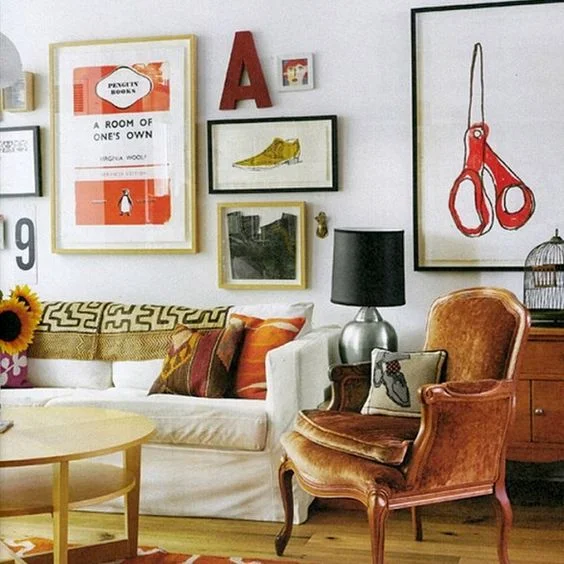
via My Domaine
-
1. GATHER YOUR COLLECTION
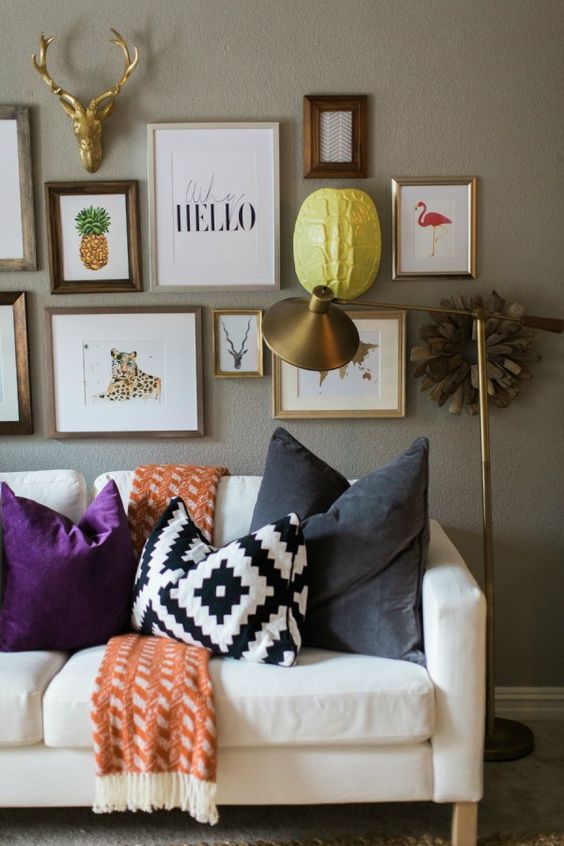
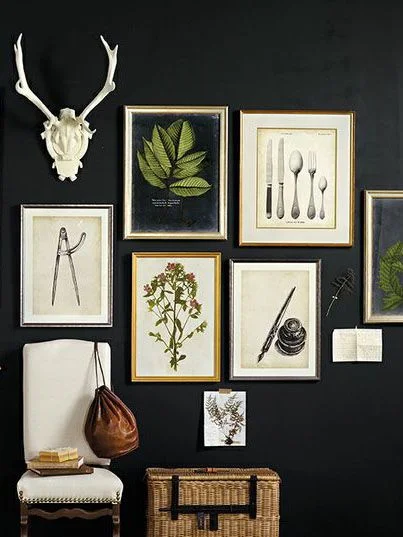
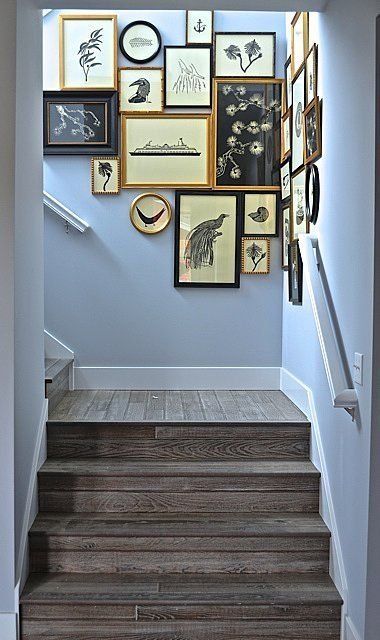
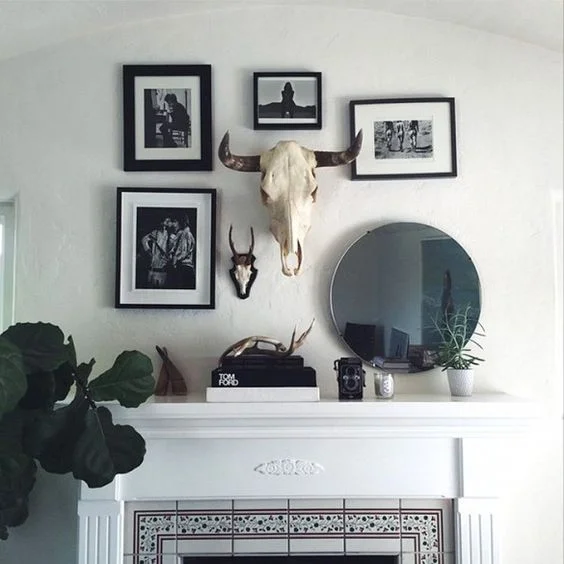
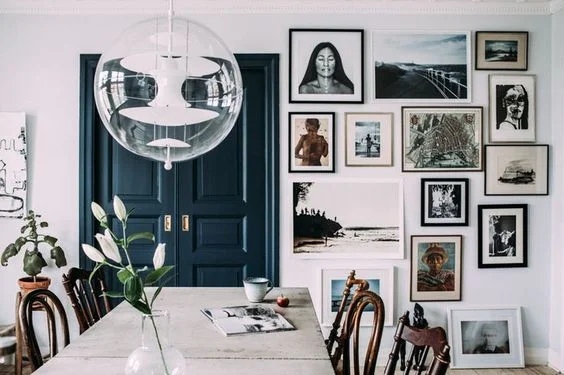
Most gallery walls begin with some artwork. Collect prints that you love, vintage paintings, photographs, and artwork of all sizes and shapes. You can stick to a very specific color scheme or theme (for example: all black and white prints, or all equestrian themed art), or just pick things that you love and throw them together. It really depends on the overall style and mood of your space. If you're going for a minimal and modern feel, consider a very limited color scheme with clean-lined matching frames; but if you are going for an eclectic, collected look you can mix and match tons of different colors and styles of art and prints. Adding three-dimensional items like our gold spikes, faux taxidermy, shelving, or trinkets, takes any gallery wall up a notch and really gives it a unique feel.
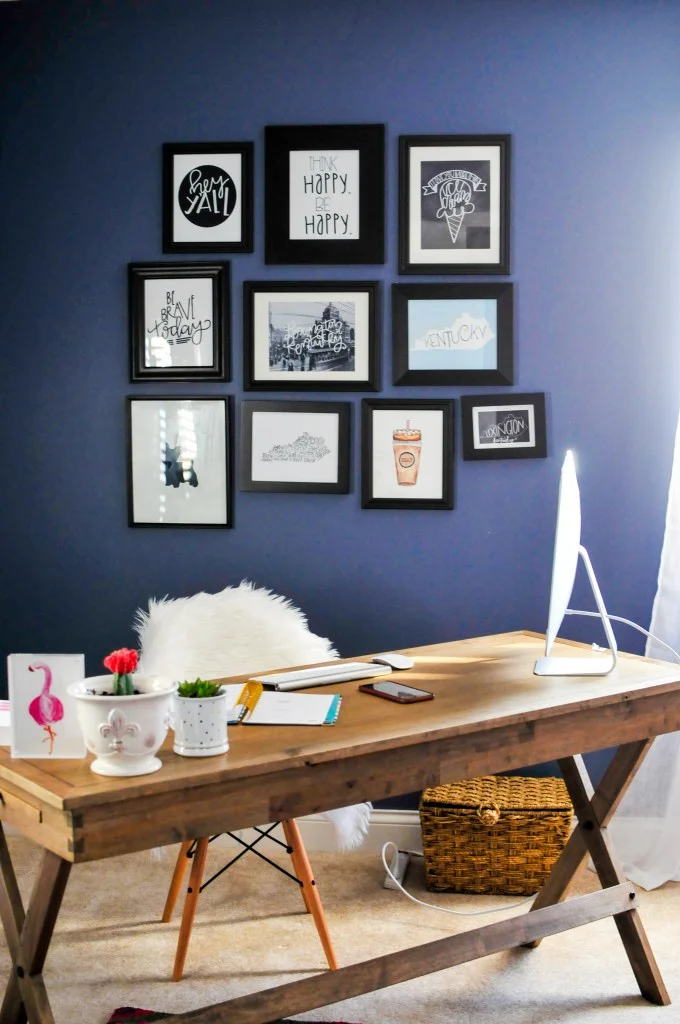
via Love Lexington blog
-
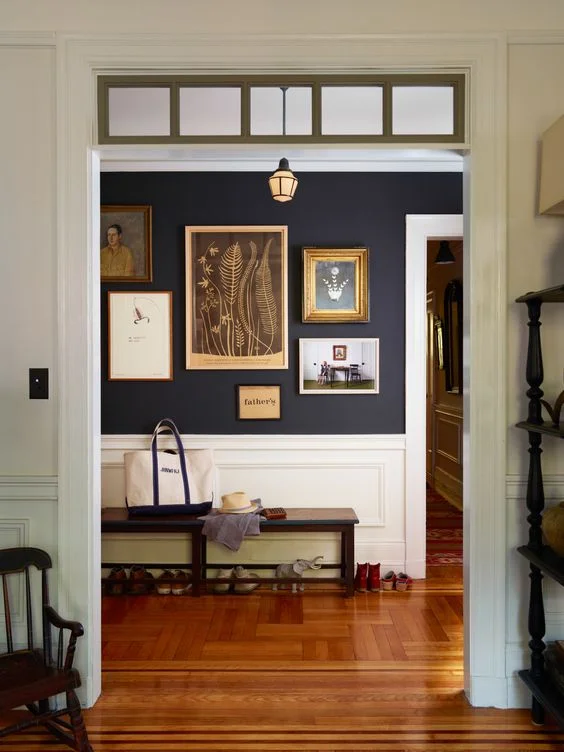
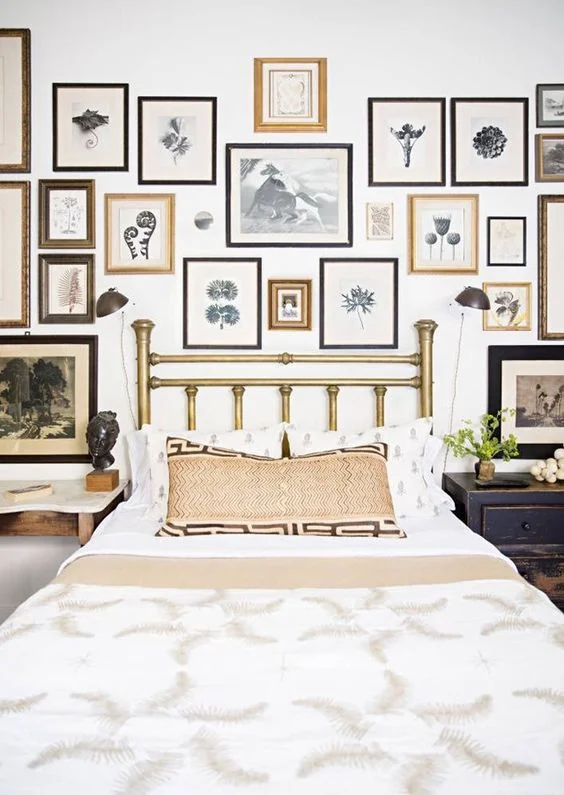
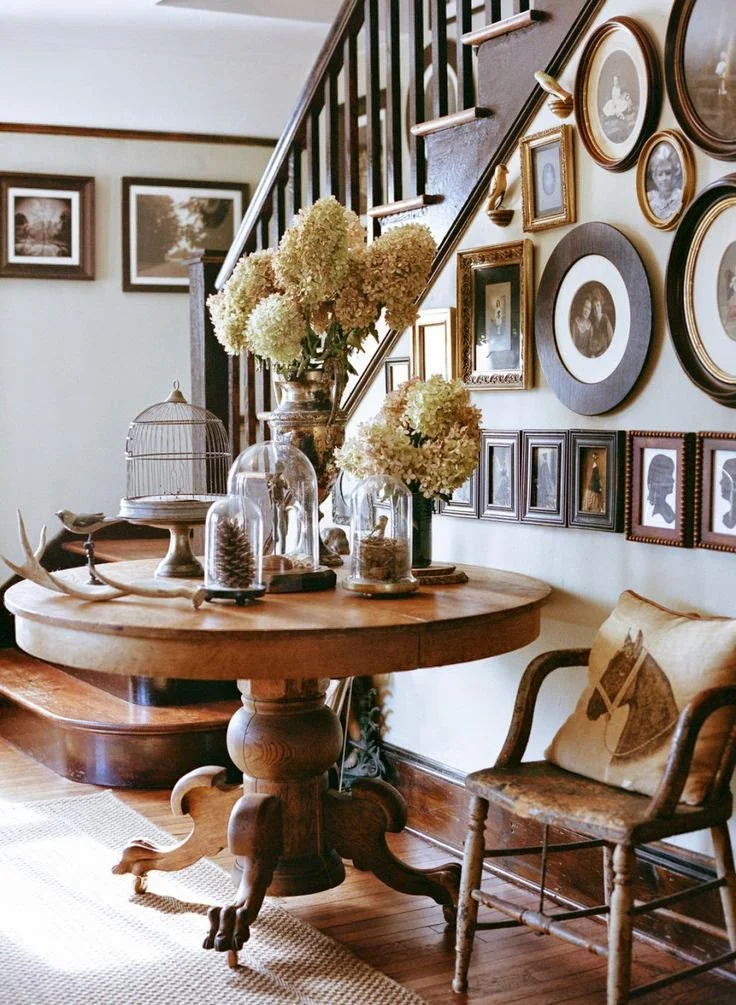
FRAMES + HARDWARE
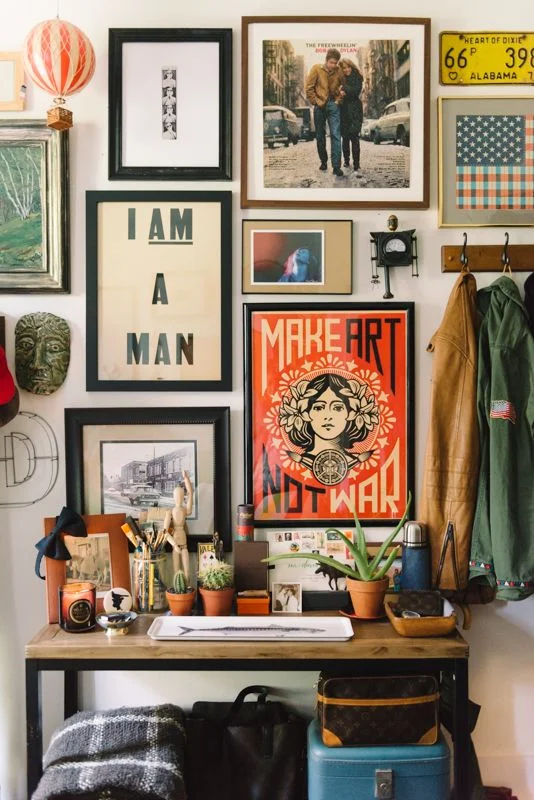
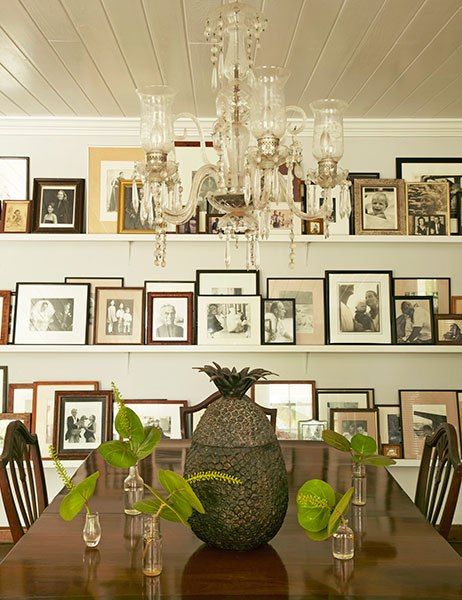
Many of your prints, artwork, or photos may require frames. If you have purchased some vintage pieces they may already have frames and as long as these fit into your overall look, I would keep them! I'm always on the look out for good and inexpensive frames while thrifting, but I also have good luck finding them at Target, At Home, Hobby Lobby, and Home Goods. Depending on the overall style of your space, you can choose to have all matching frames or mix and match. If you would like to use a picture ledge or shelving for some photos, both Target and Ikea have some great, budget-friendly options.
via Curate This Space
-
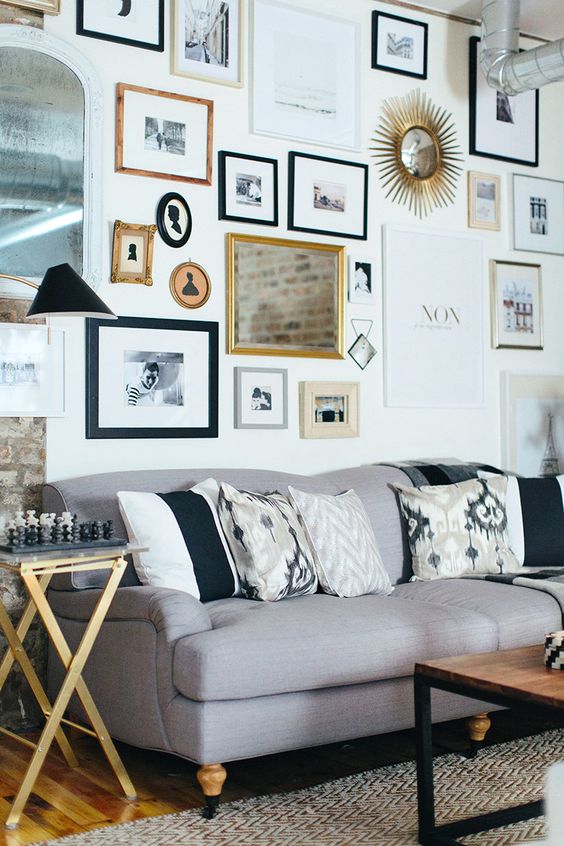
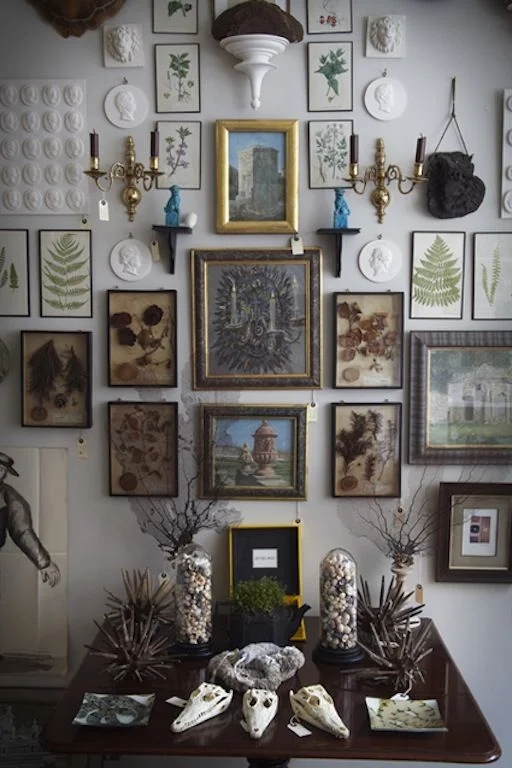
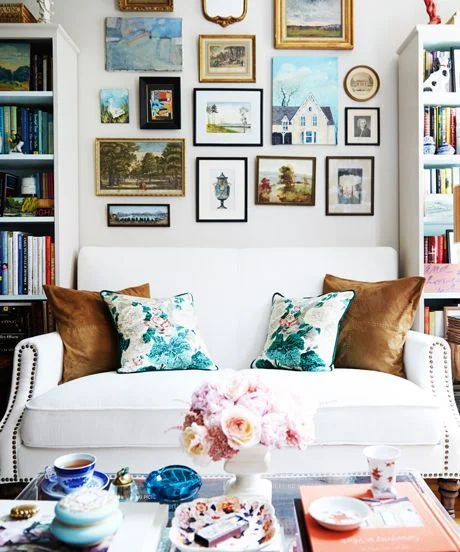
3. LAYING IT OUT
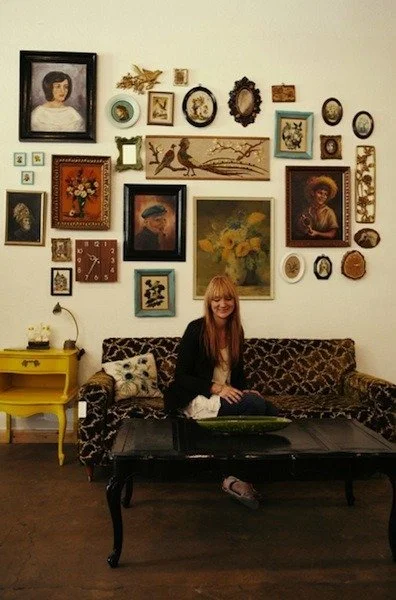
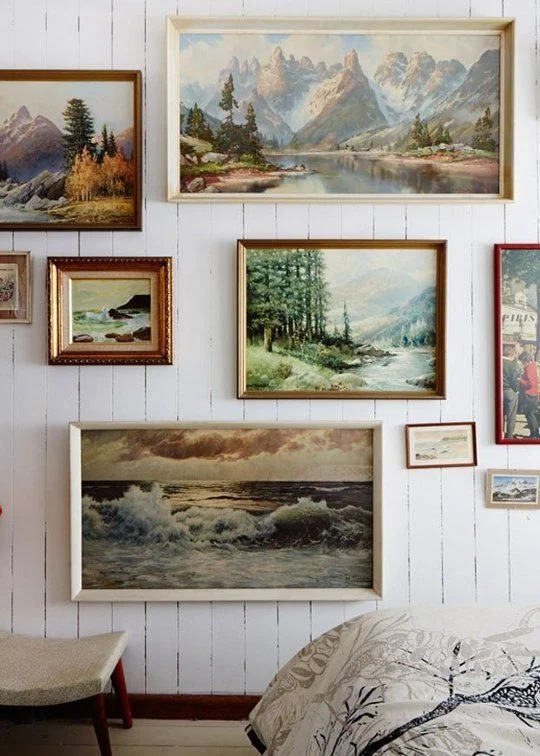
Now comes the most tedious part of creating your gallery wall: deciding your arrangement and hanging all your items. Honestly I am too impatient and usually just eyeball it, but if you want to be sure you like your arrangement before you start hanging, try this super easy method from Momtastic. If you need ideas on how to get started on a layout or how to fit your arrangement into your space, check out layout ideas here and here.
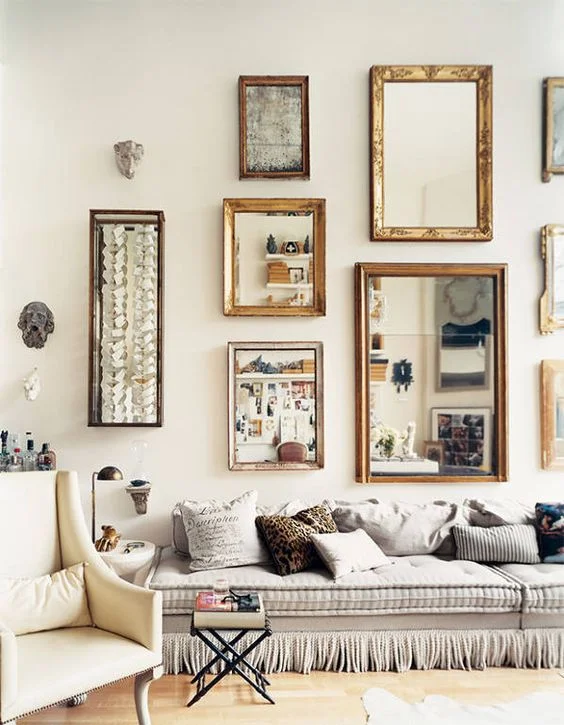
via Claire Brody Designs
-
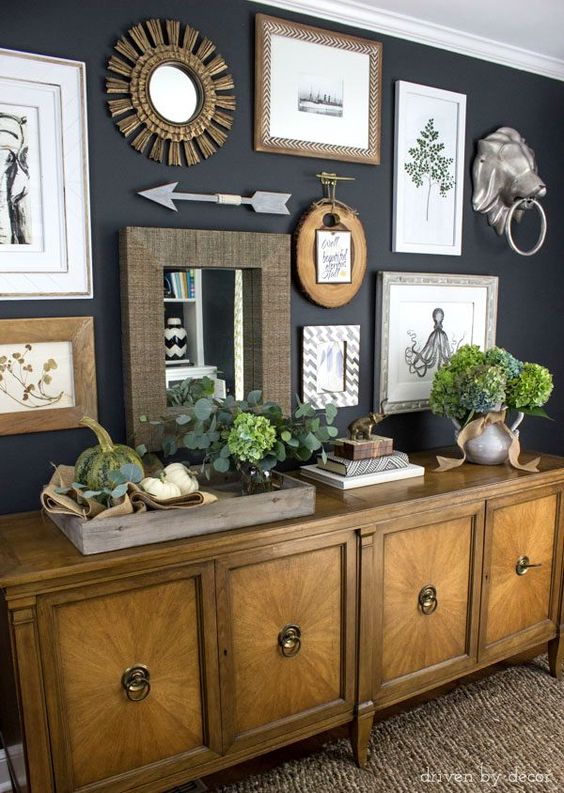
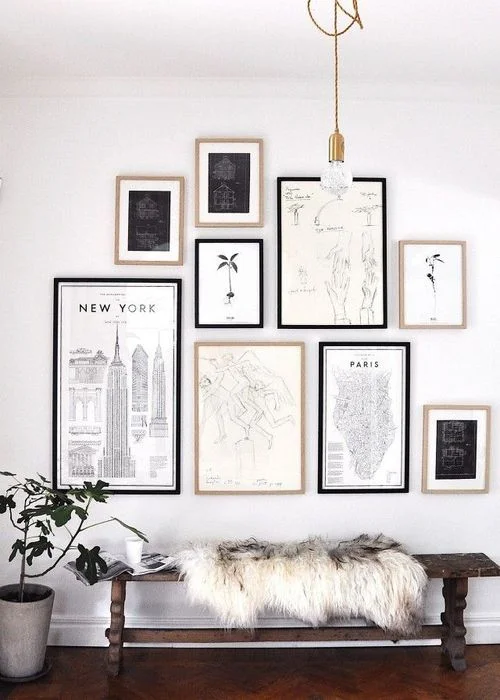
4. ENJOY!
Now you can step back and enjoy your gallery wall which will undoubtedly be the focal point of your room. The best part of creating a gallery wall is that you can continue to collect, restyle, and add to it for years to come! It is such a great way to actually display a collection of special things that you love instead of just having them packed away in boxes or drawers. If you are stumped on where to get started on your gallery wall, check out the "shop the look" section at the end of this post. We have all of prints, art, and unique finds that you need to create a chic, eclectic gallery wall in one stop!
xoxo
Emily


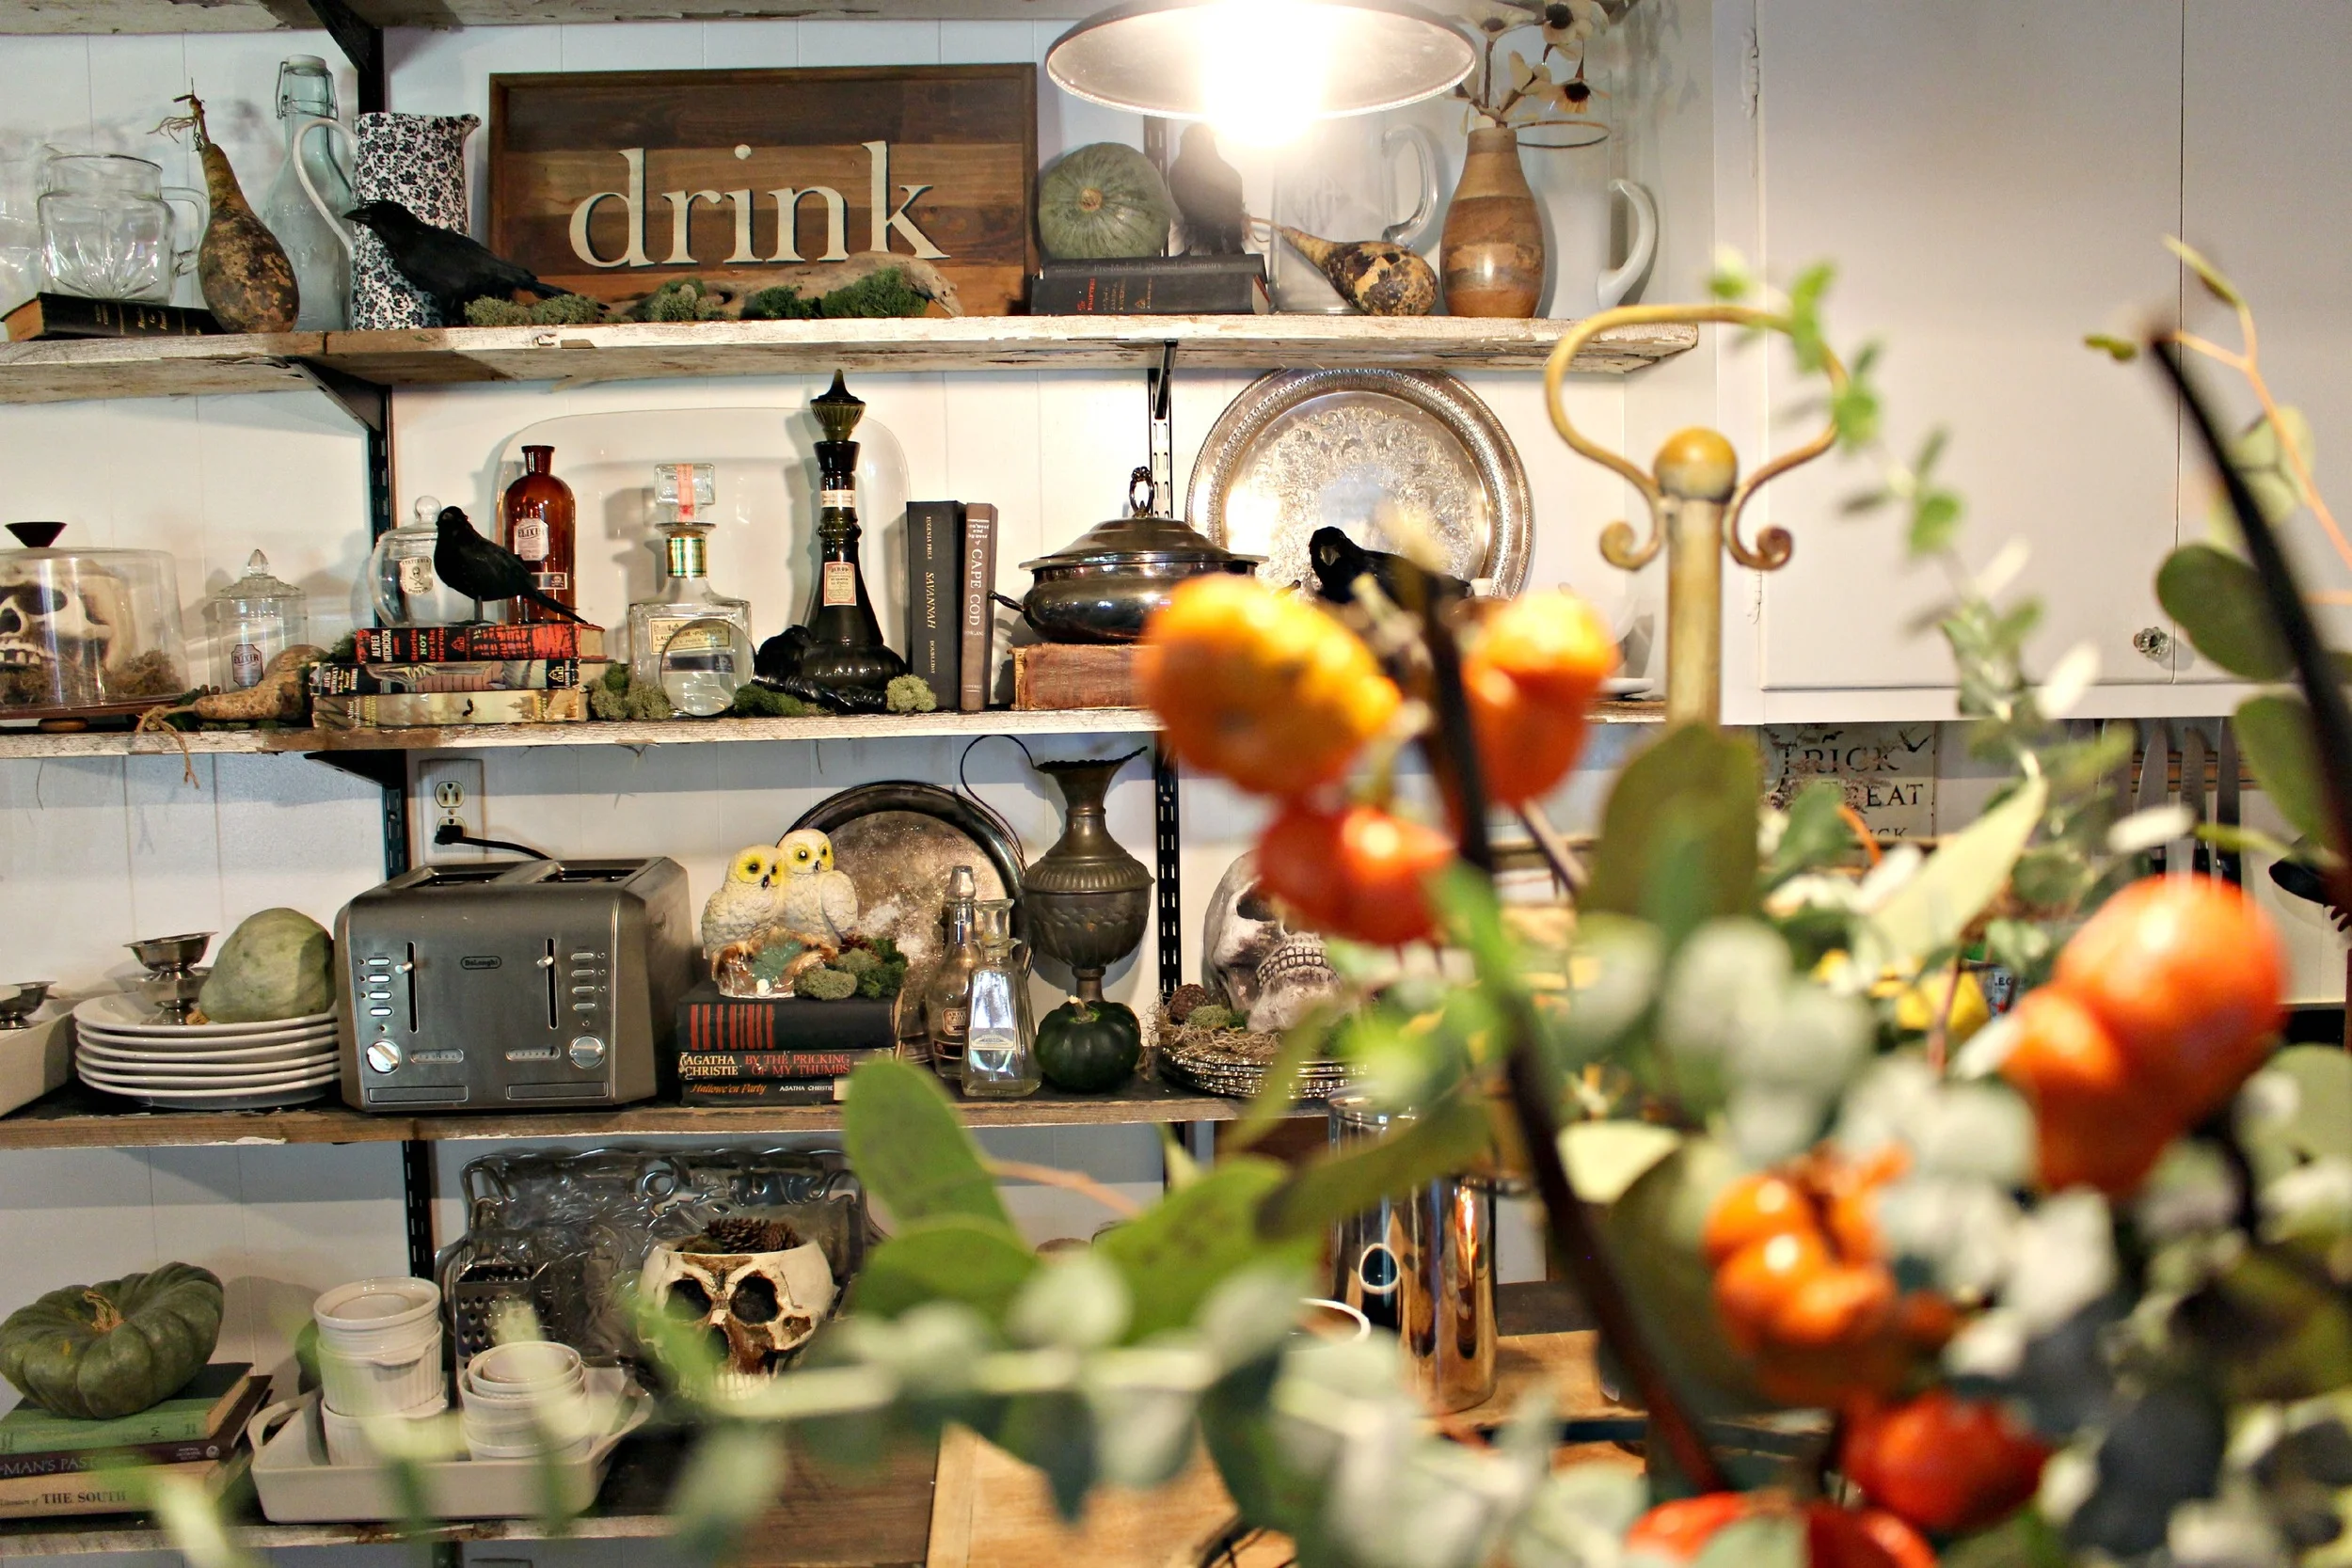
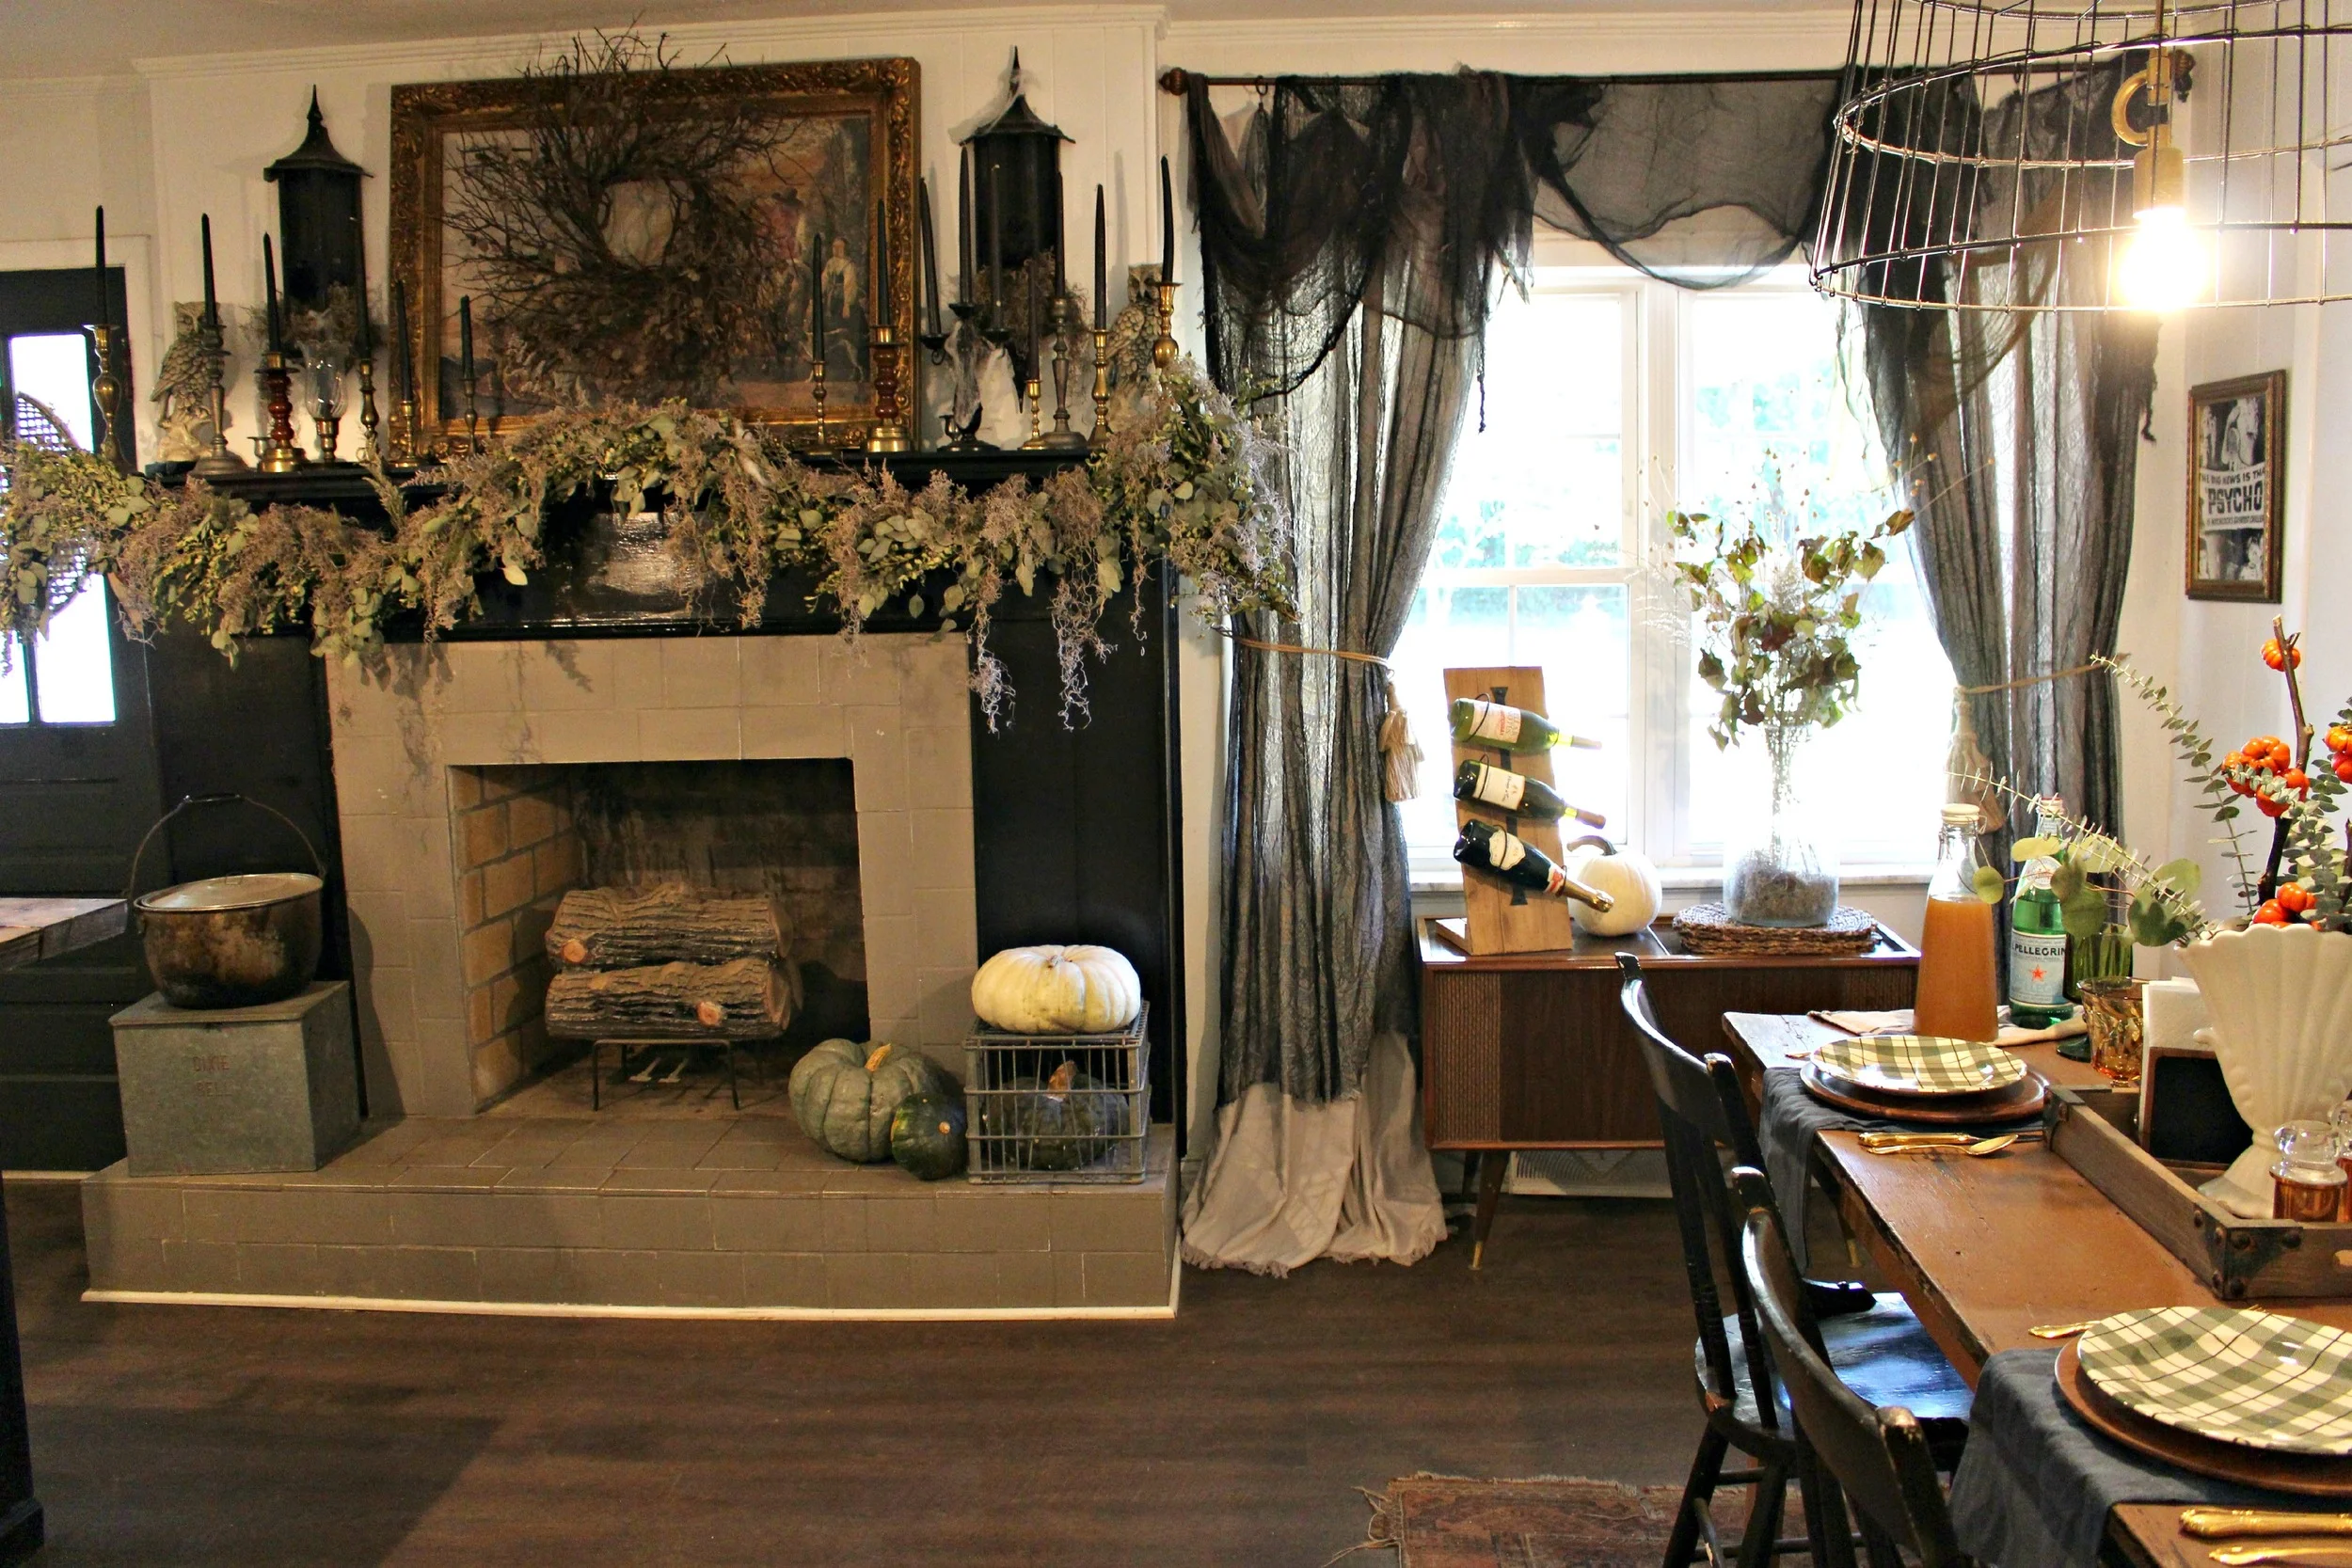
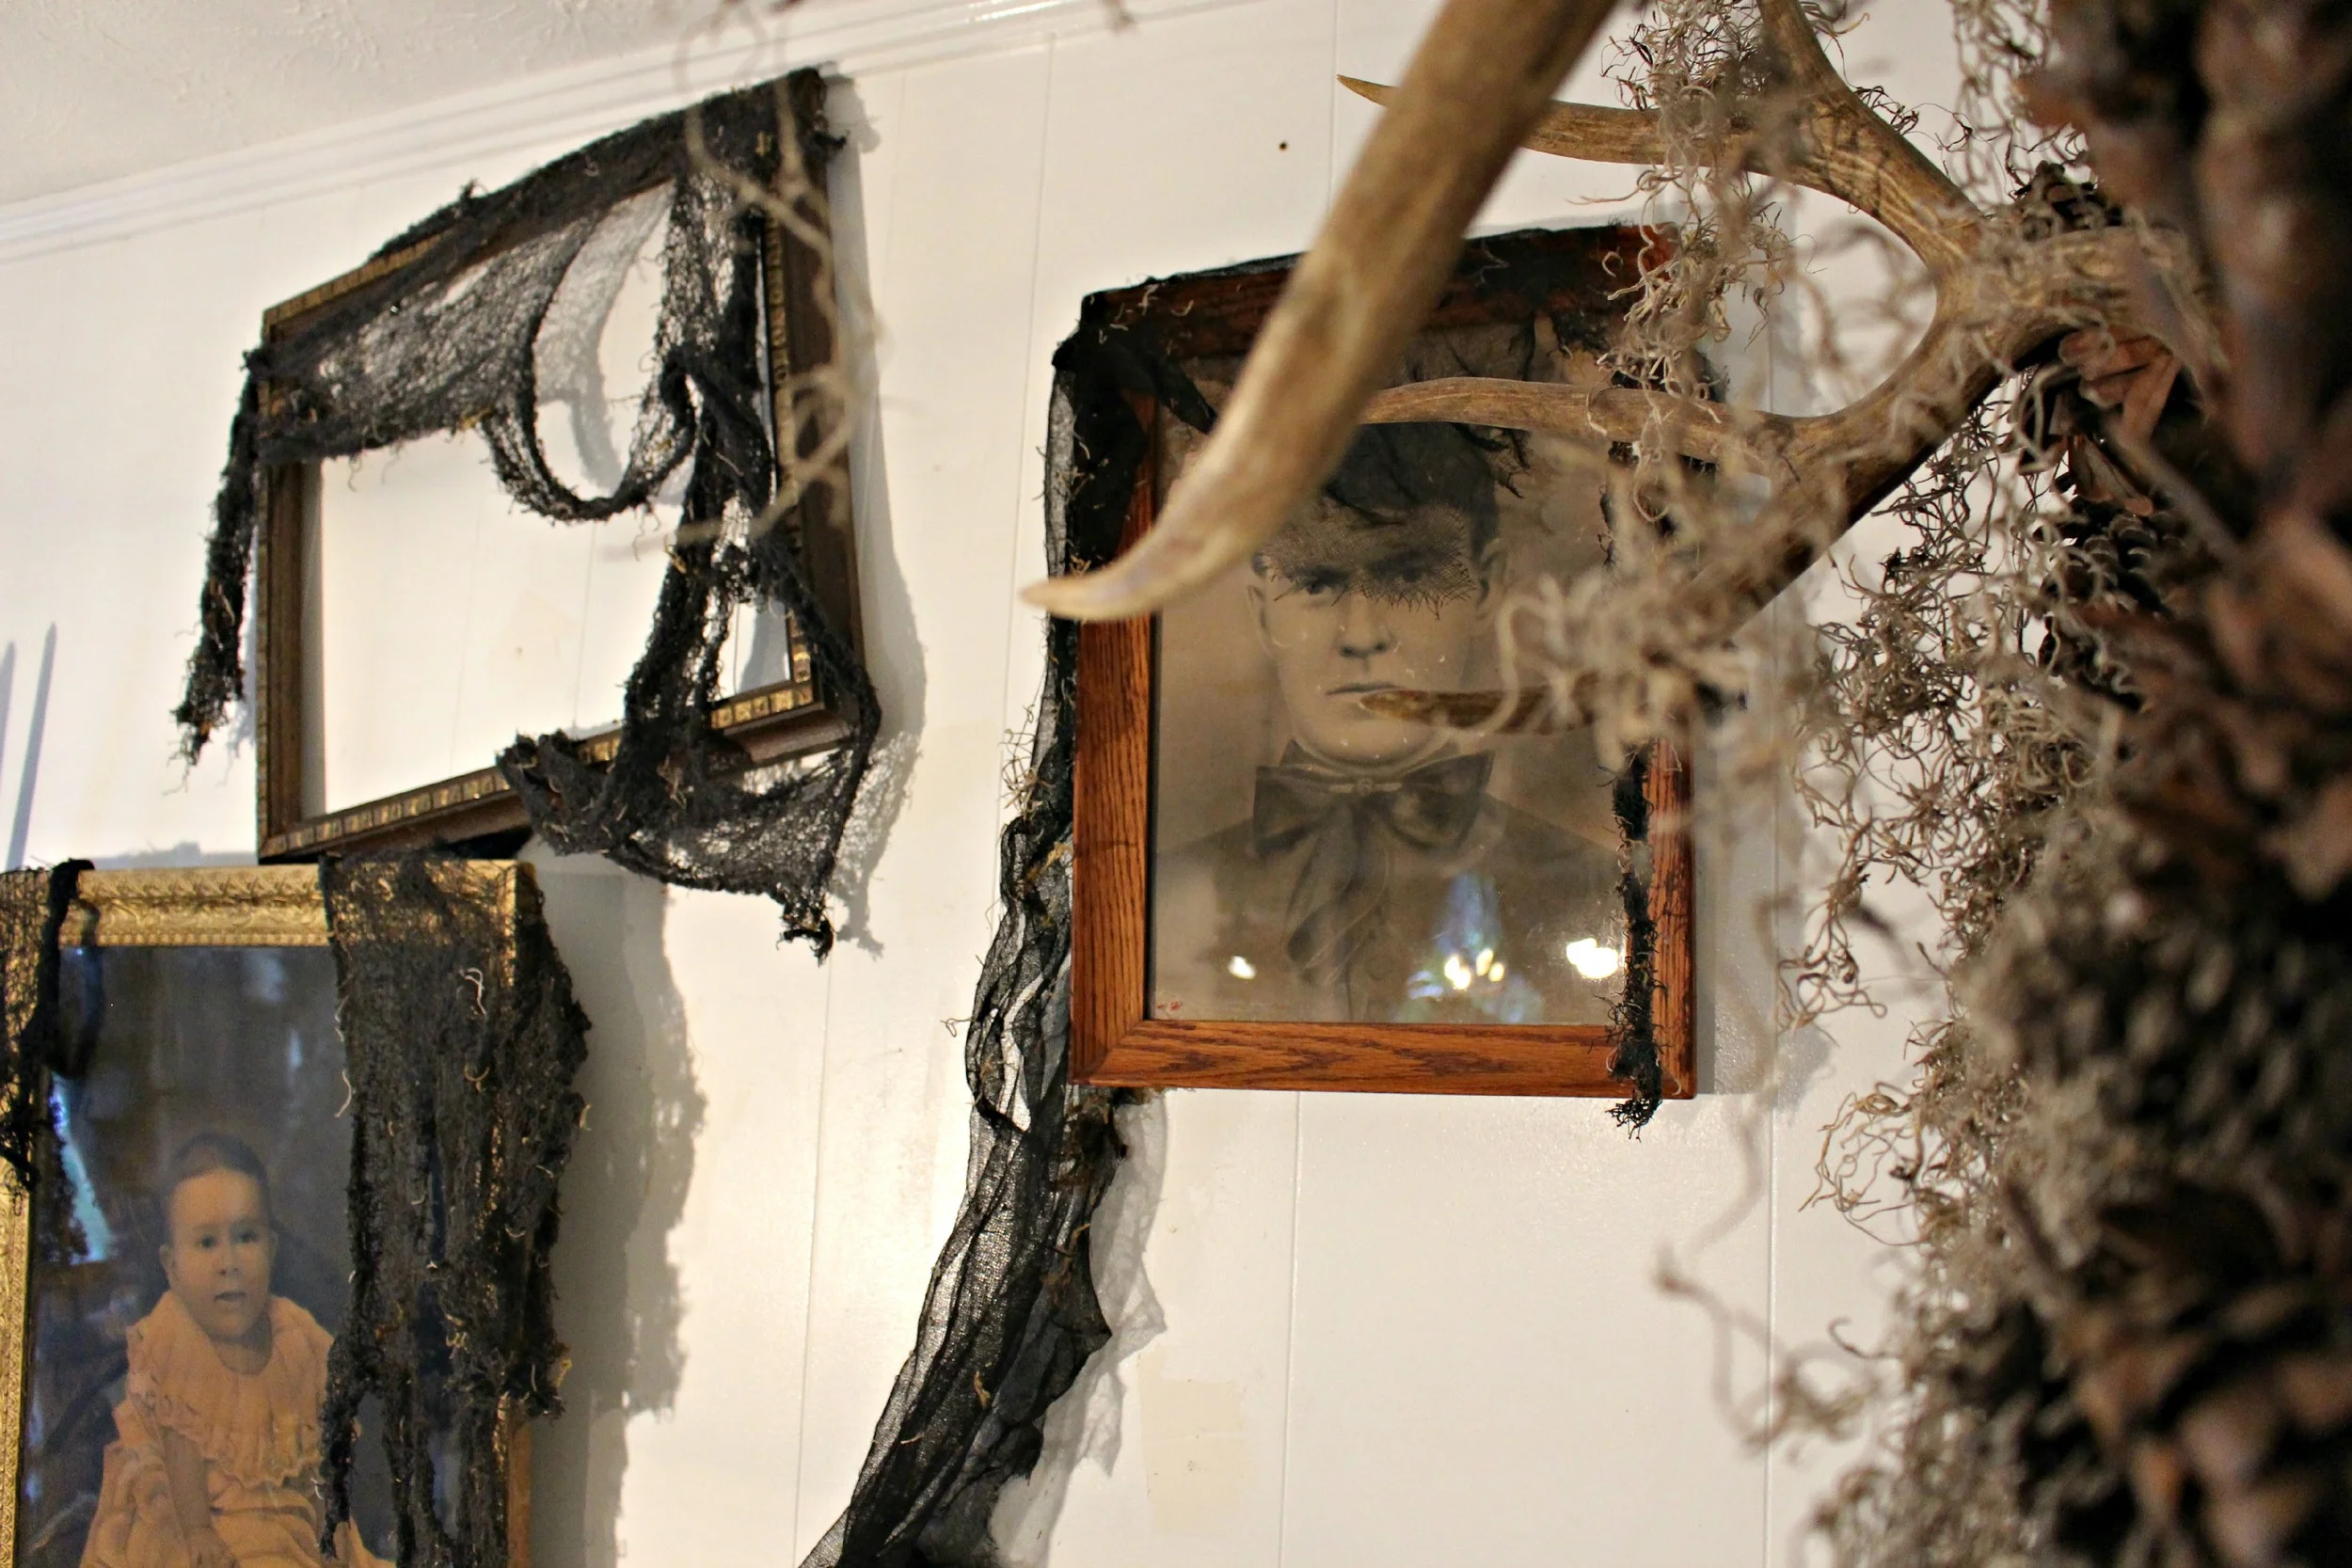
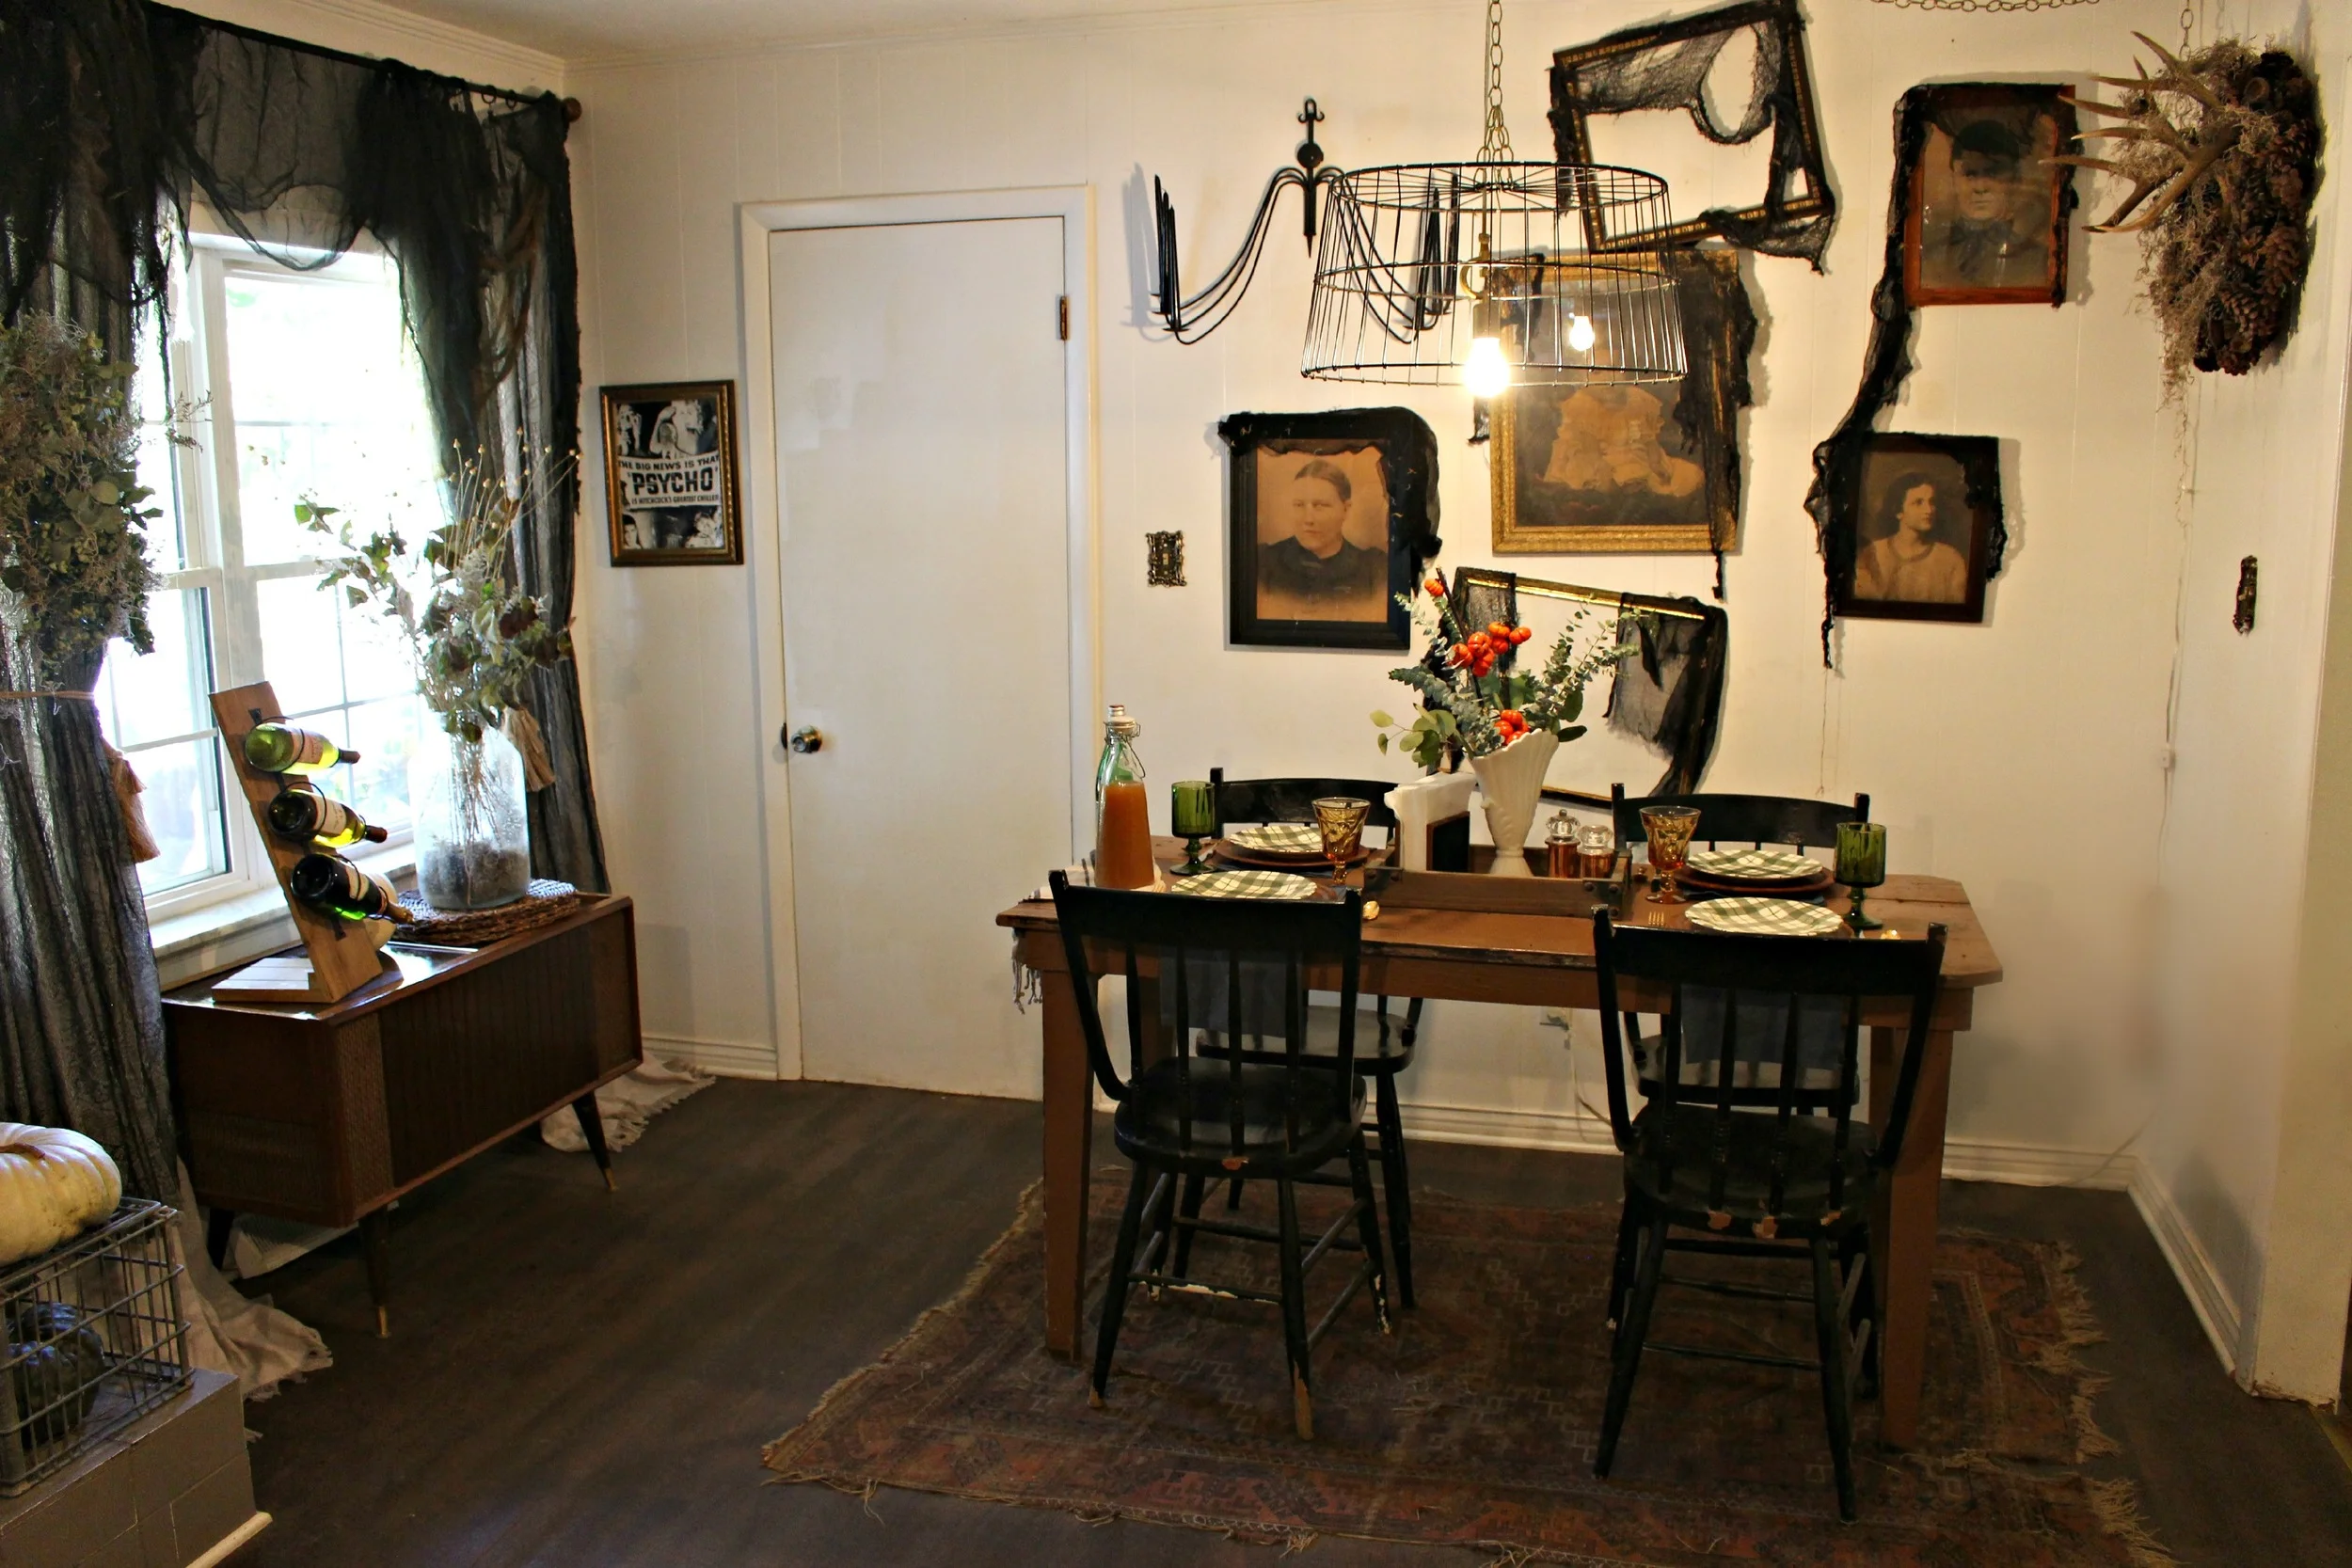
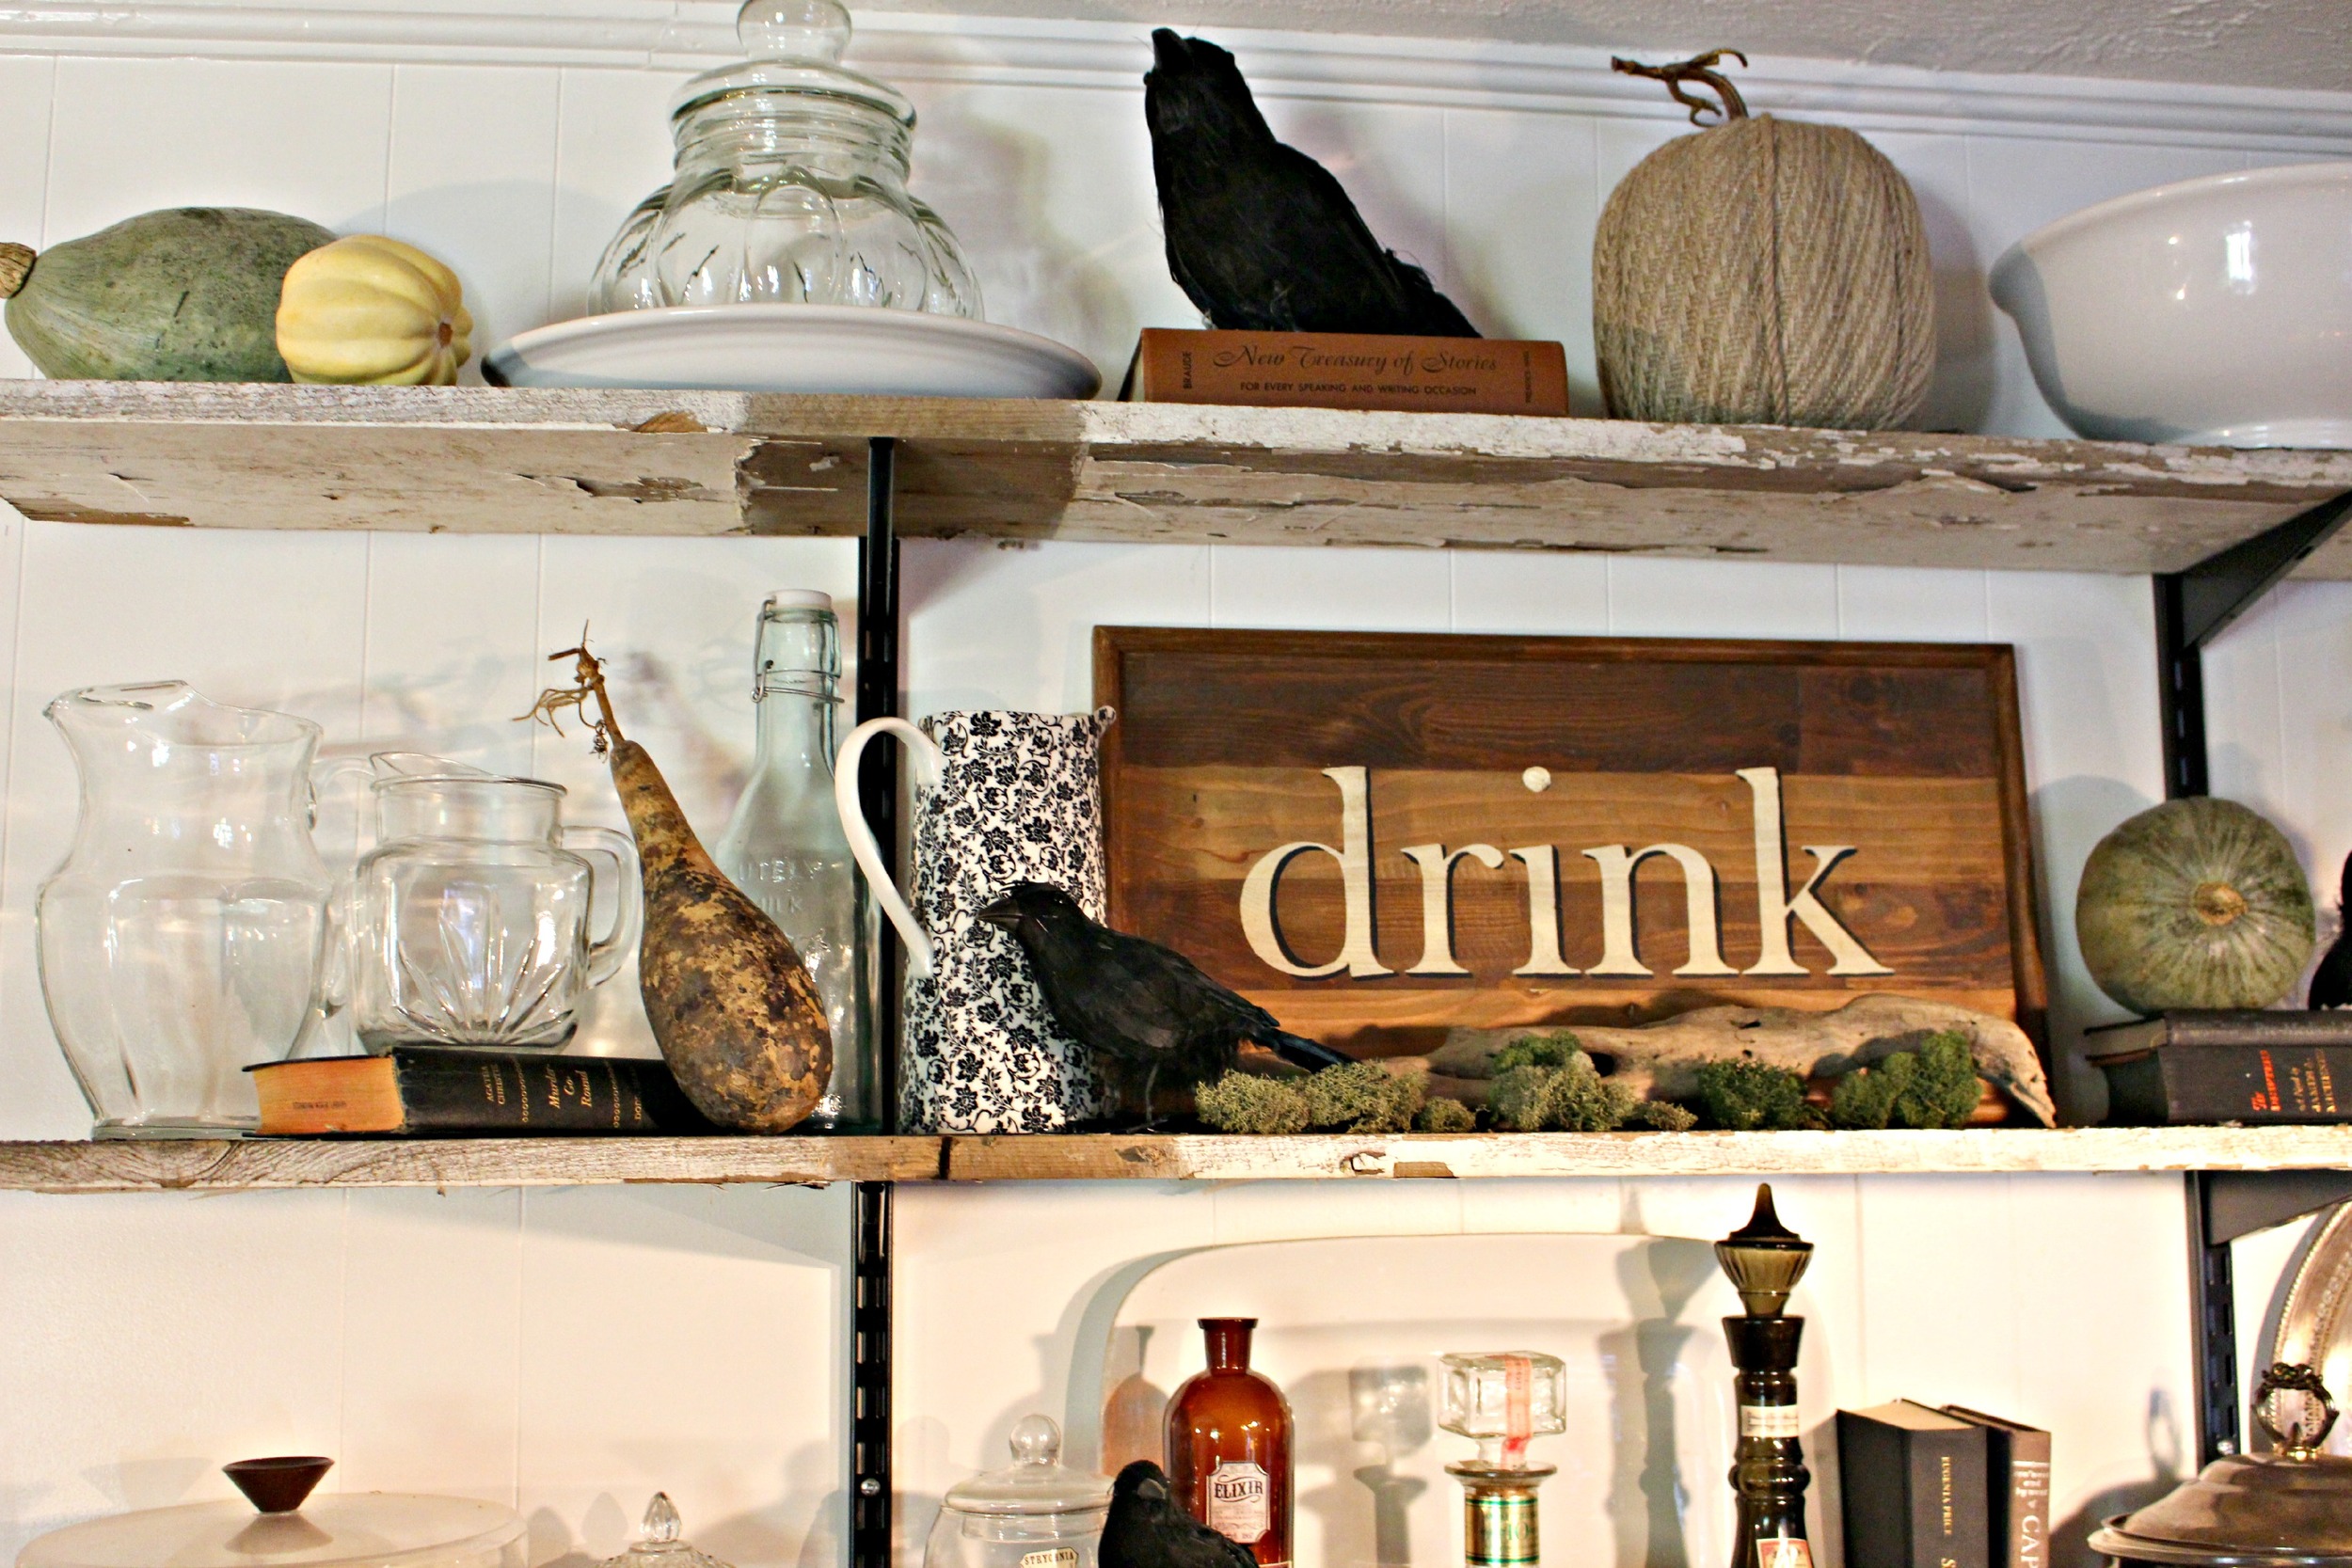
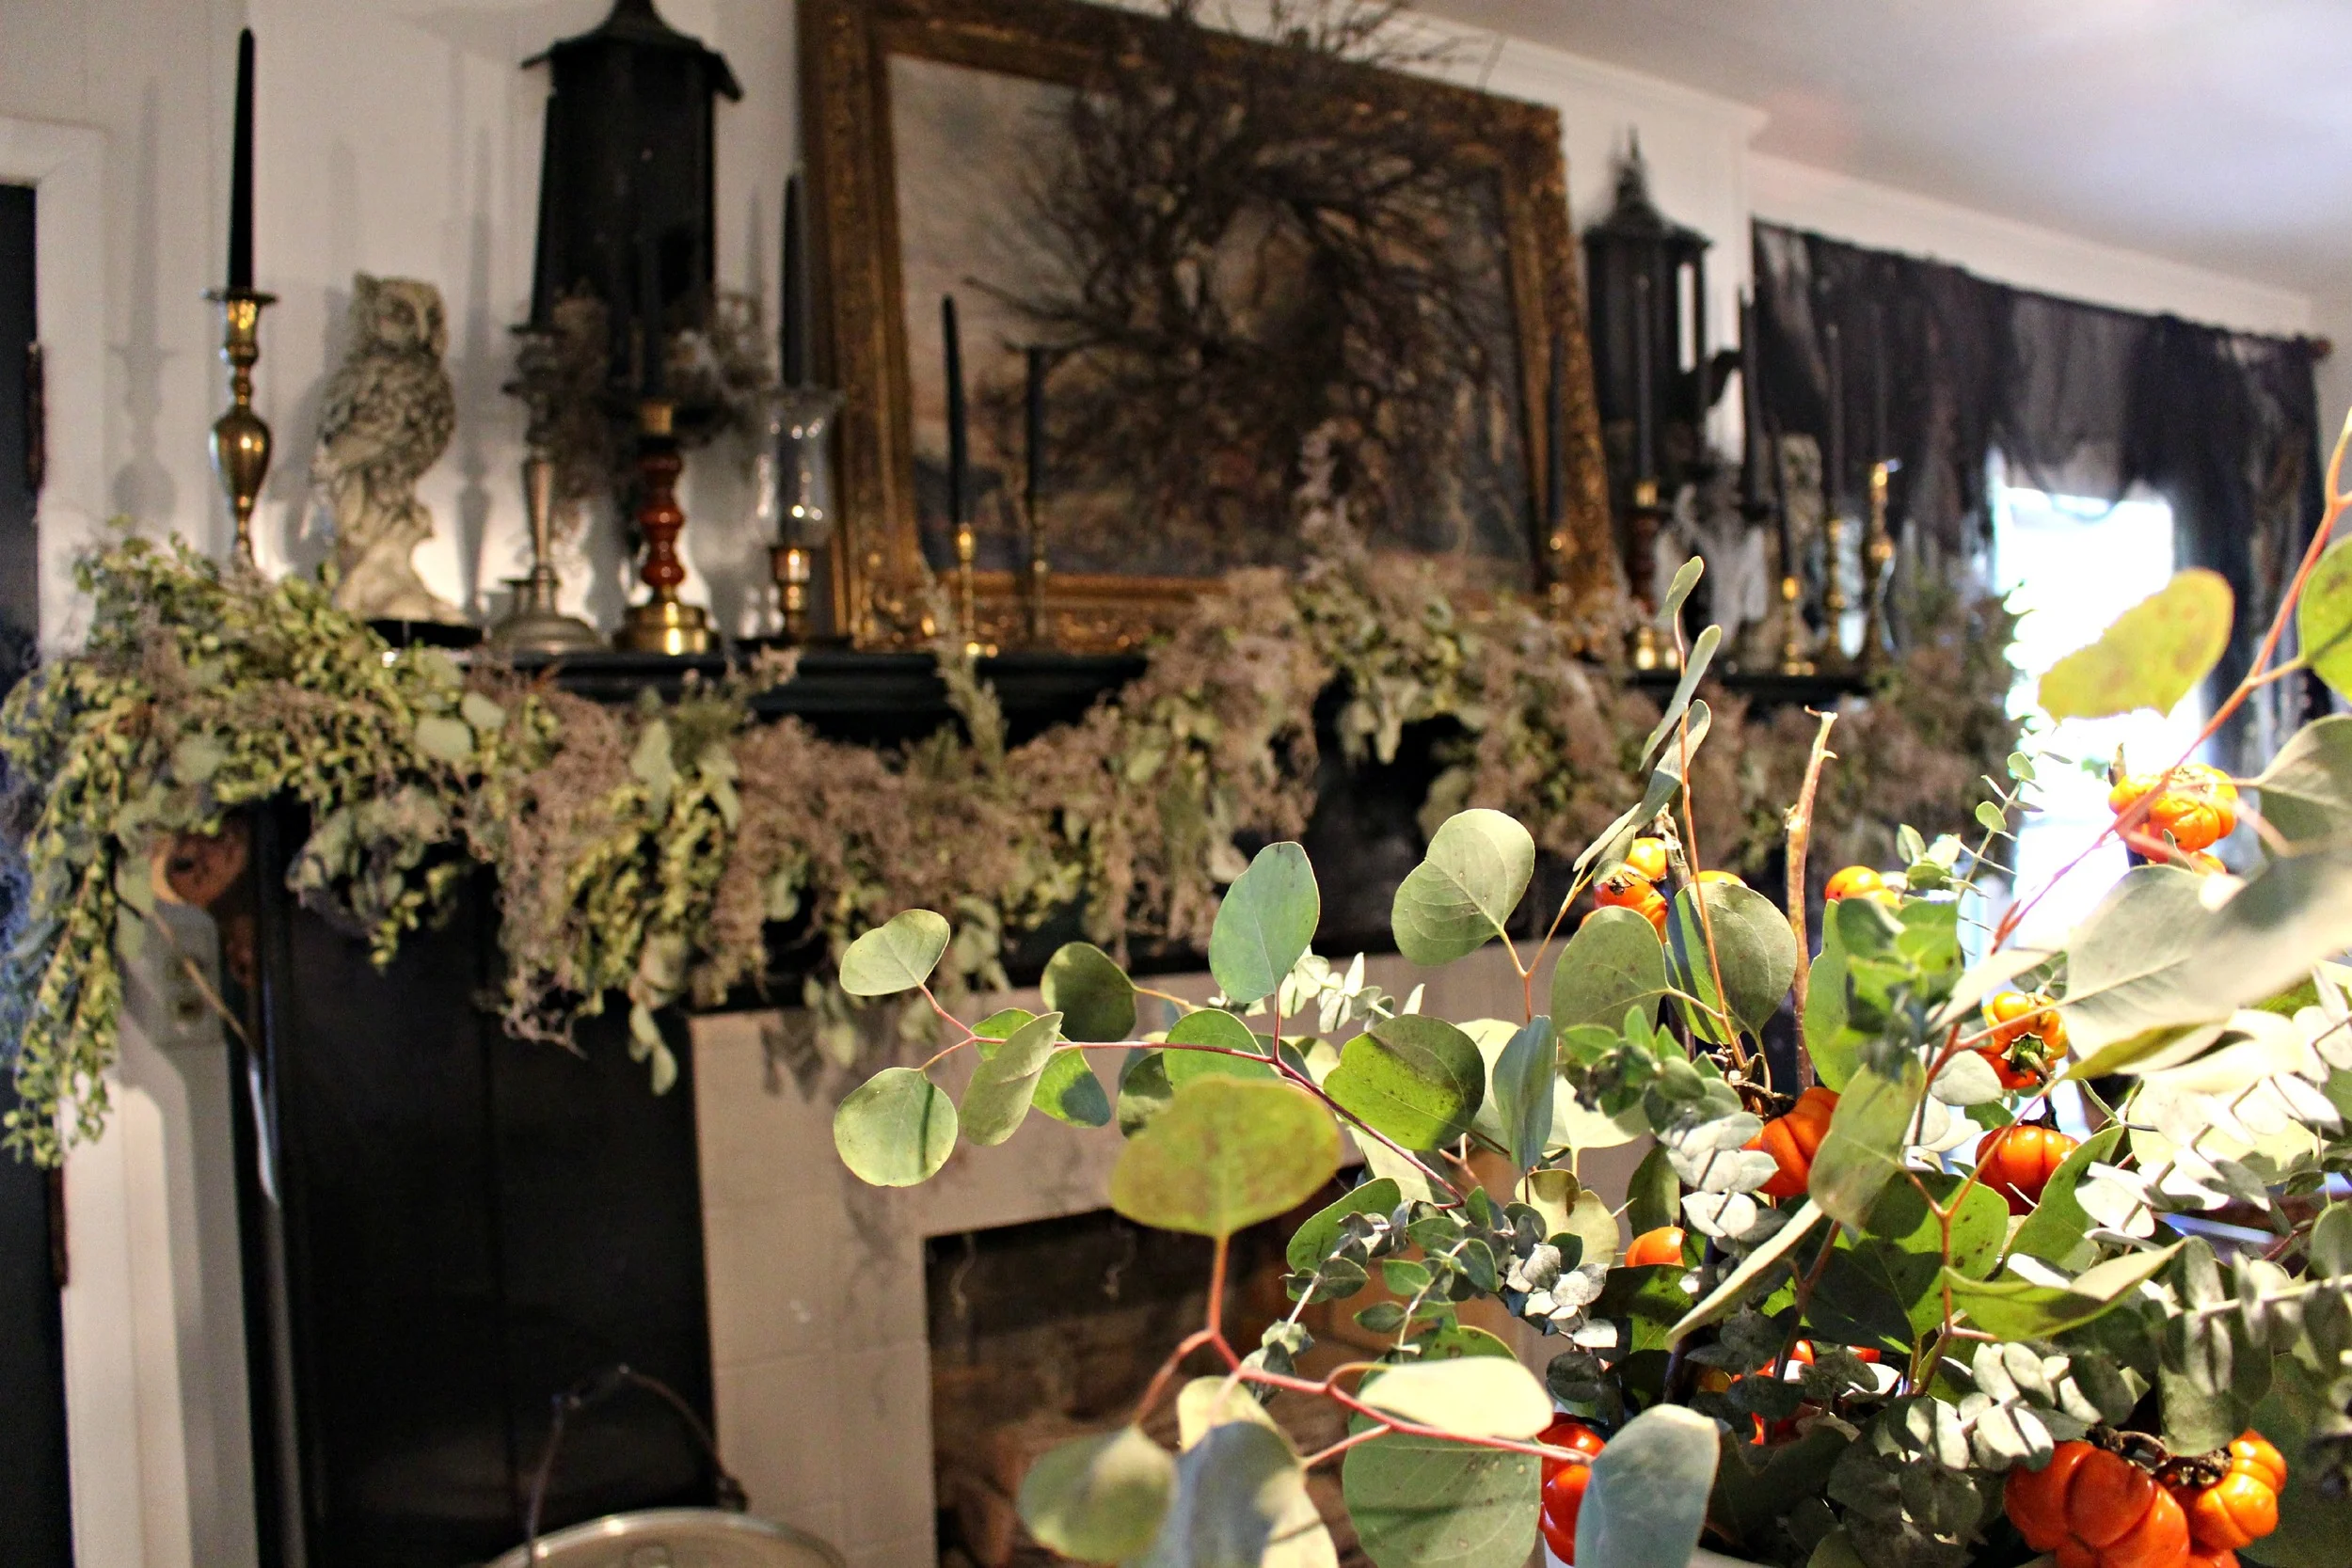
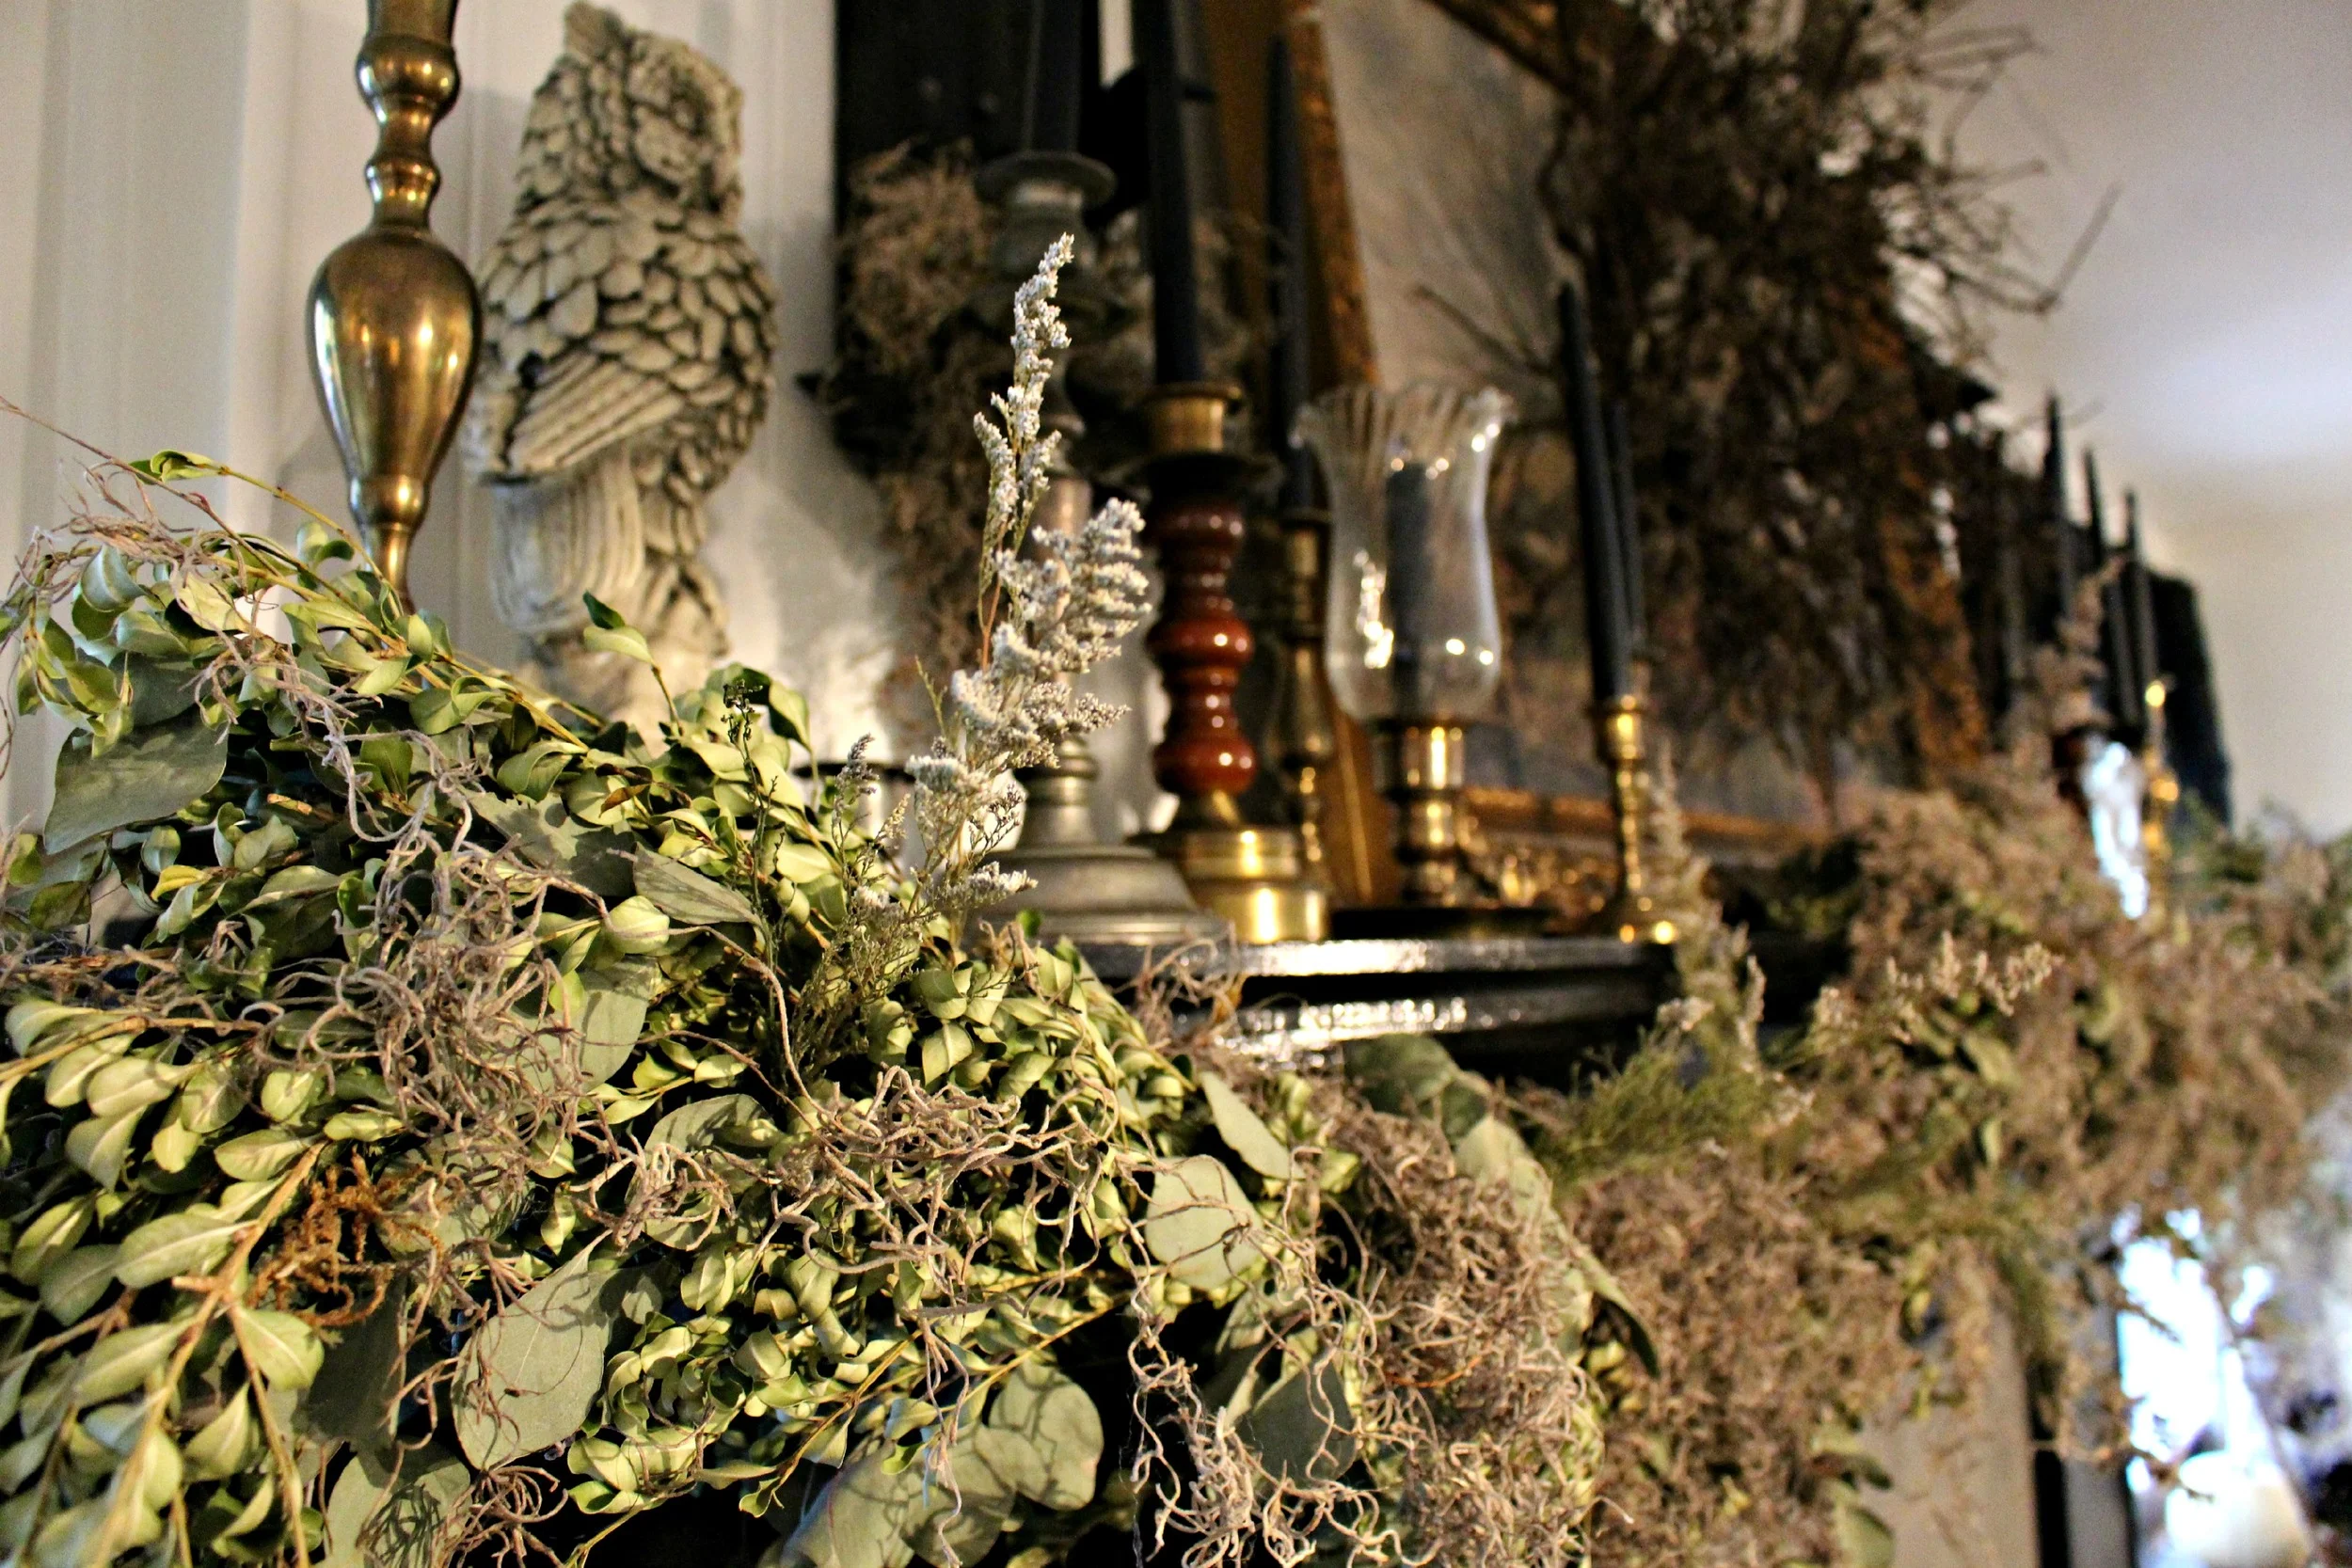
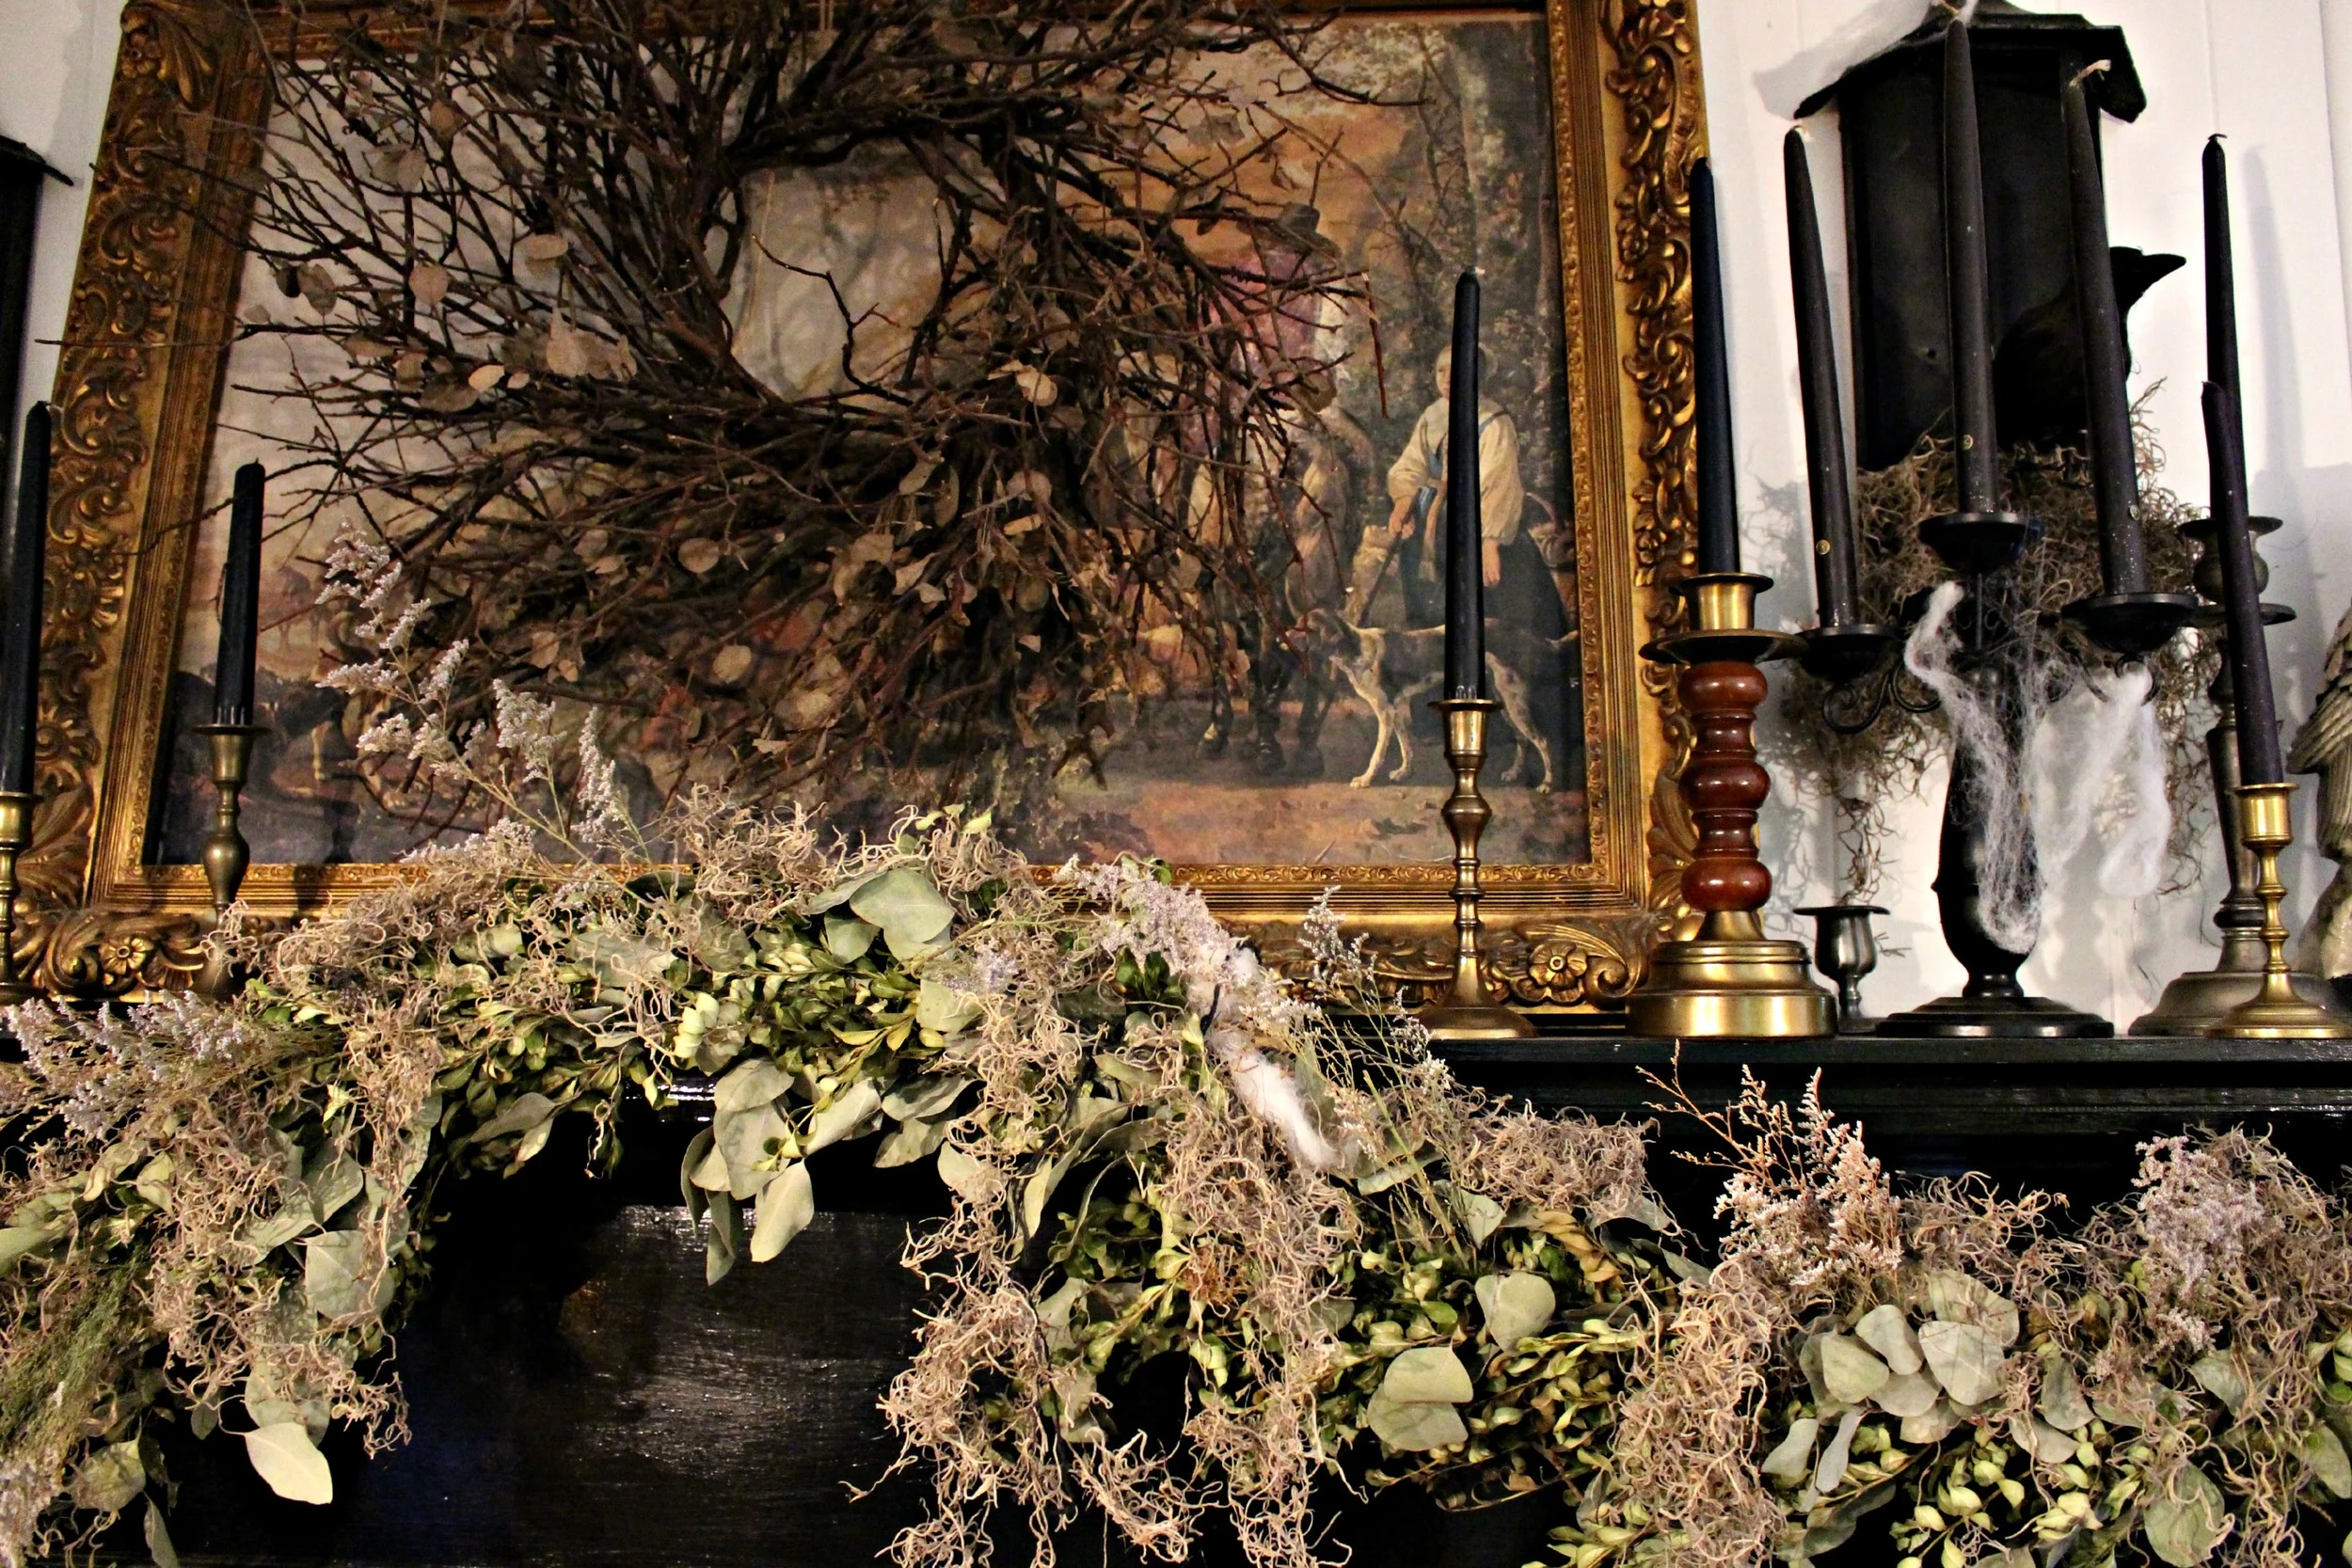
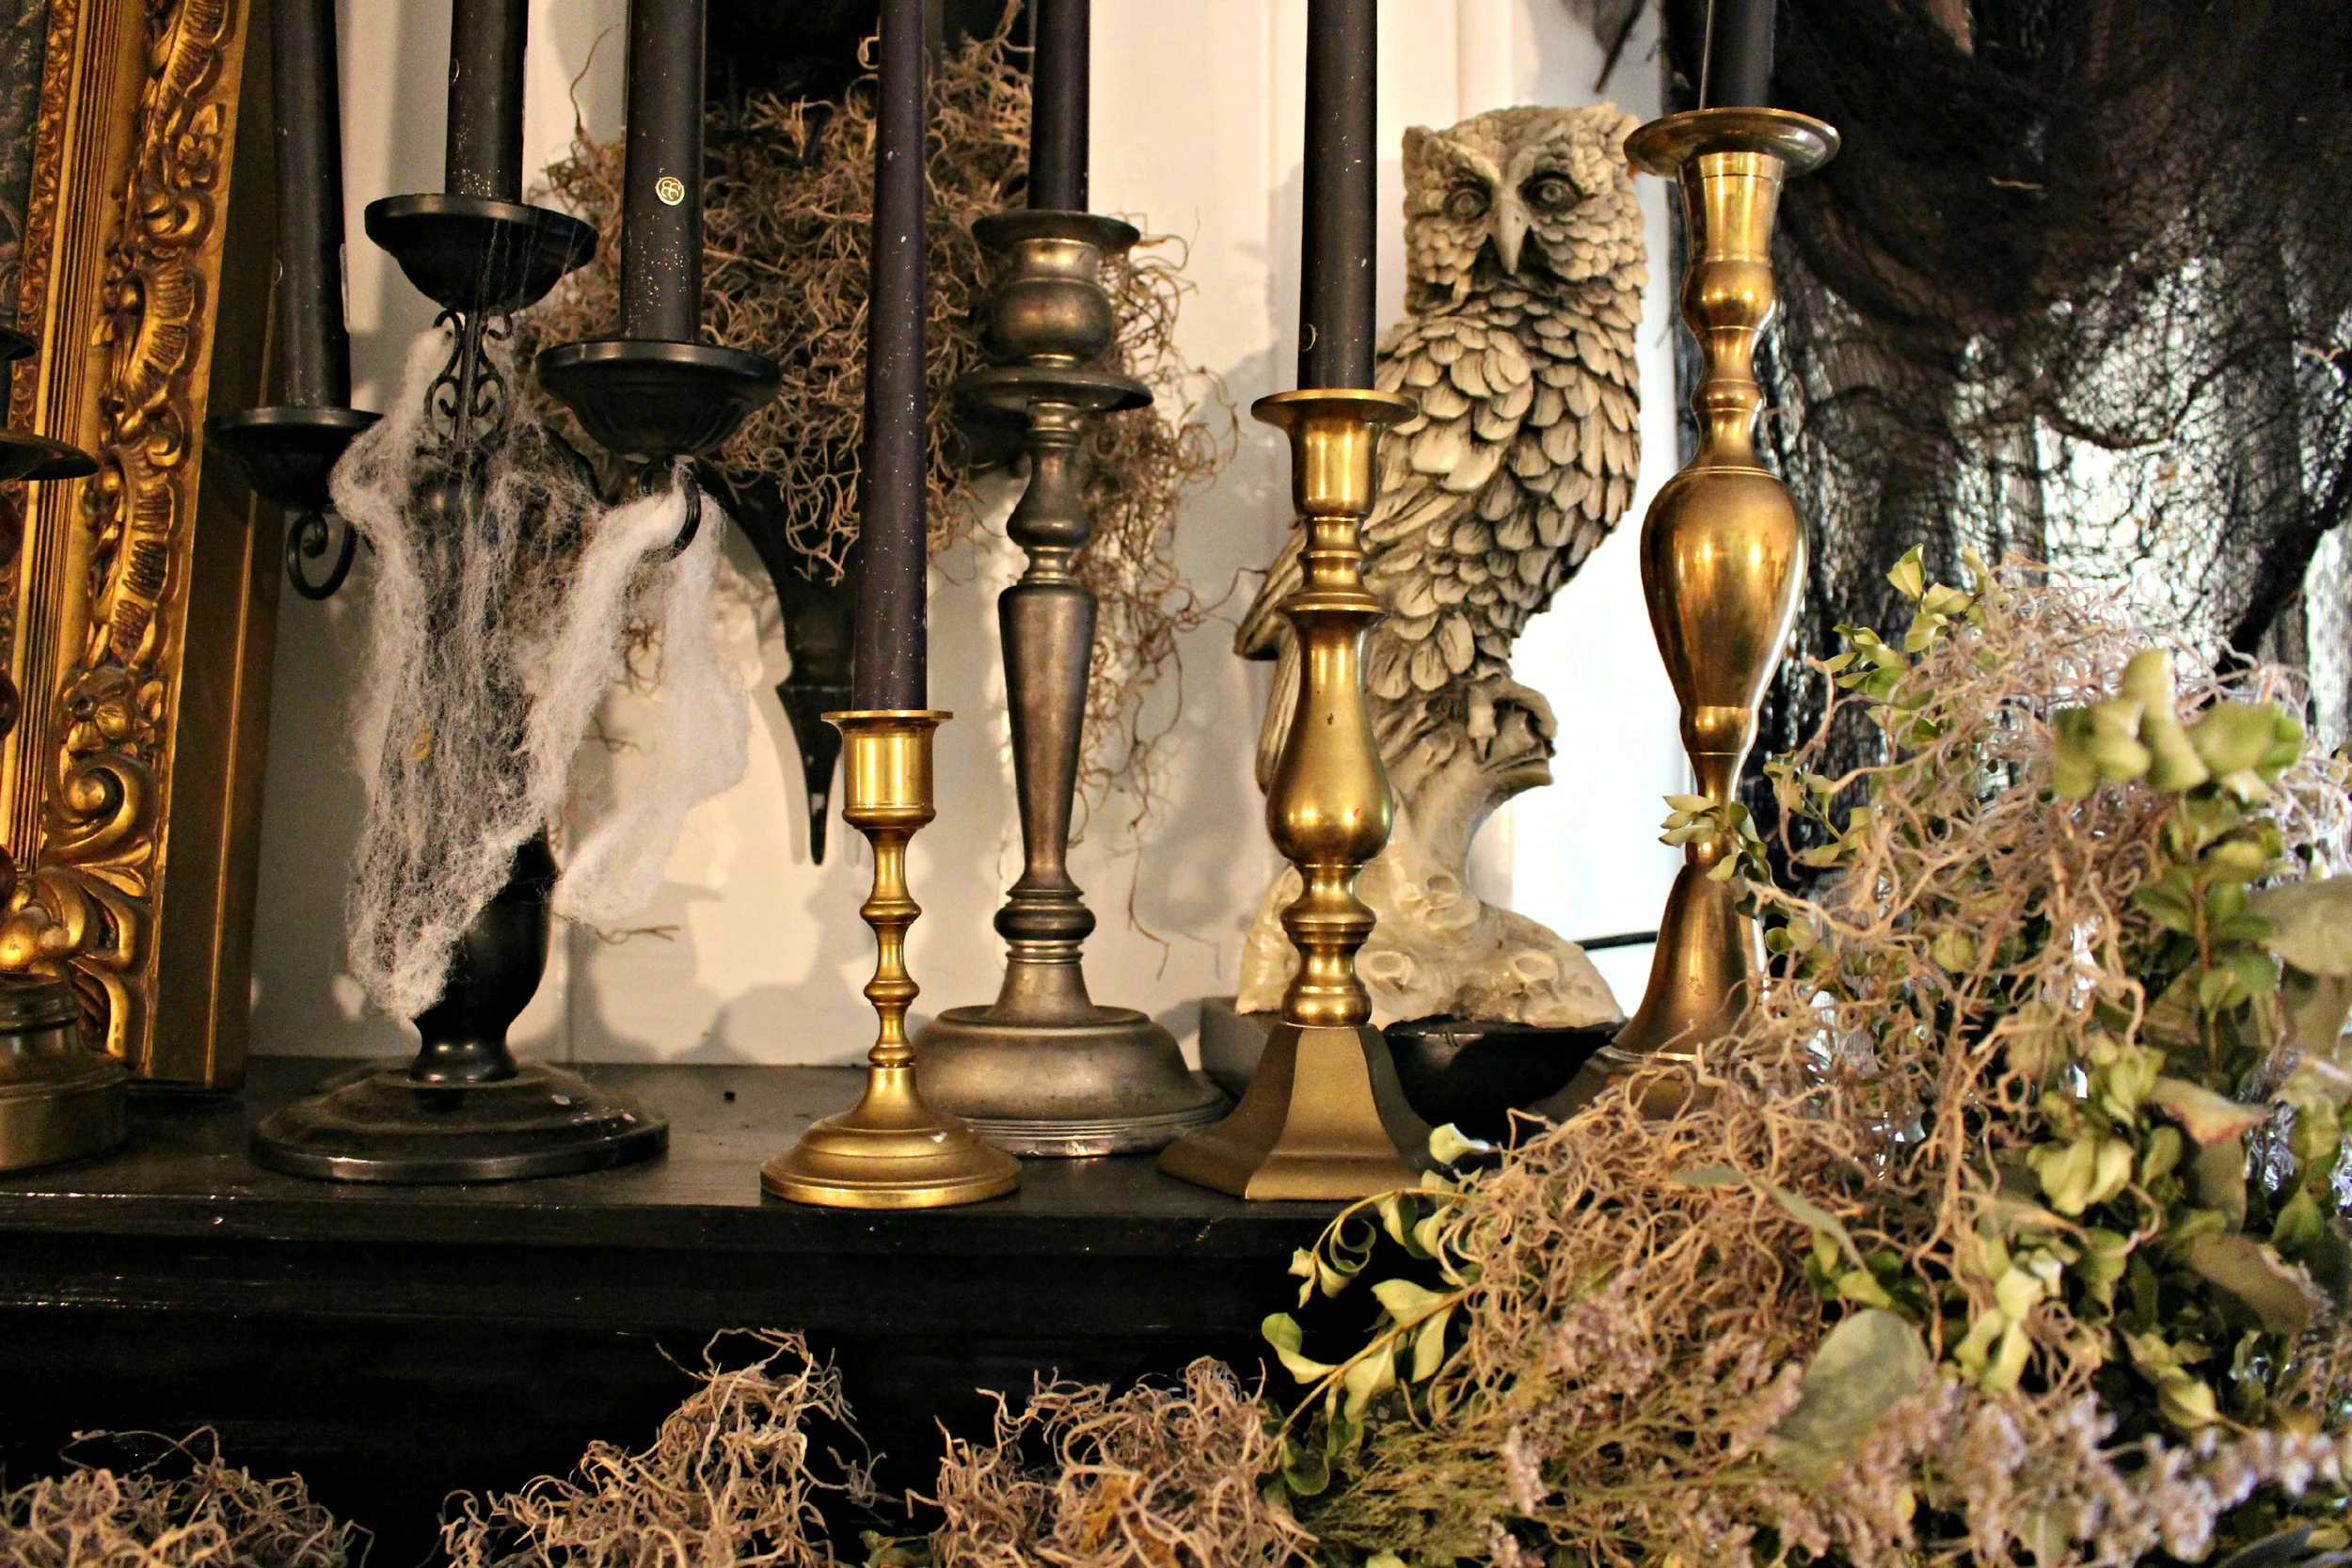
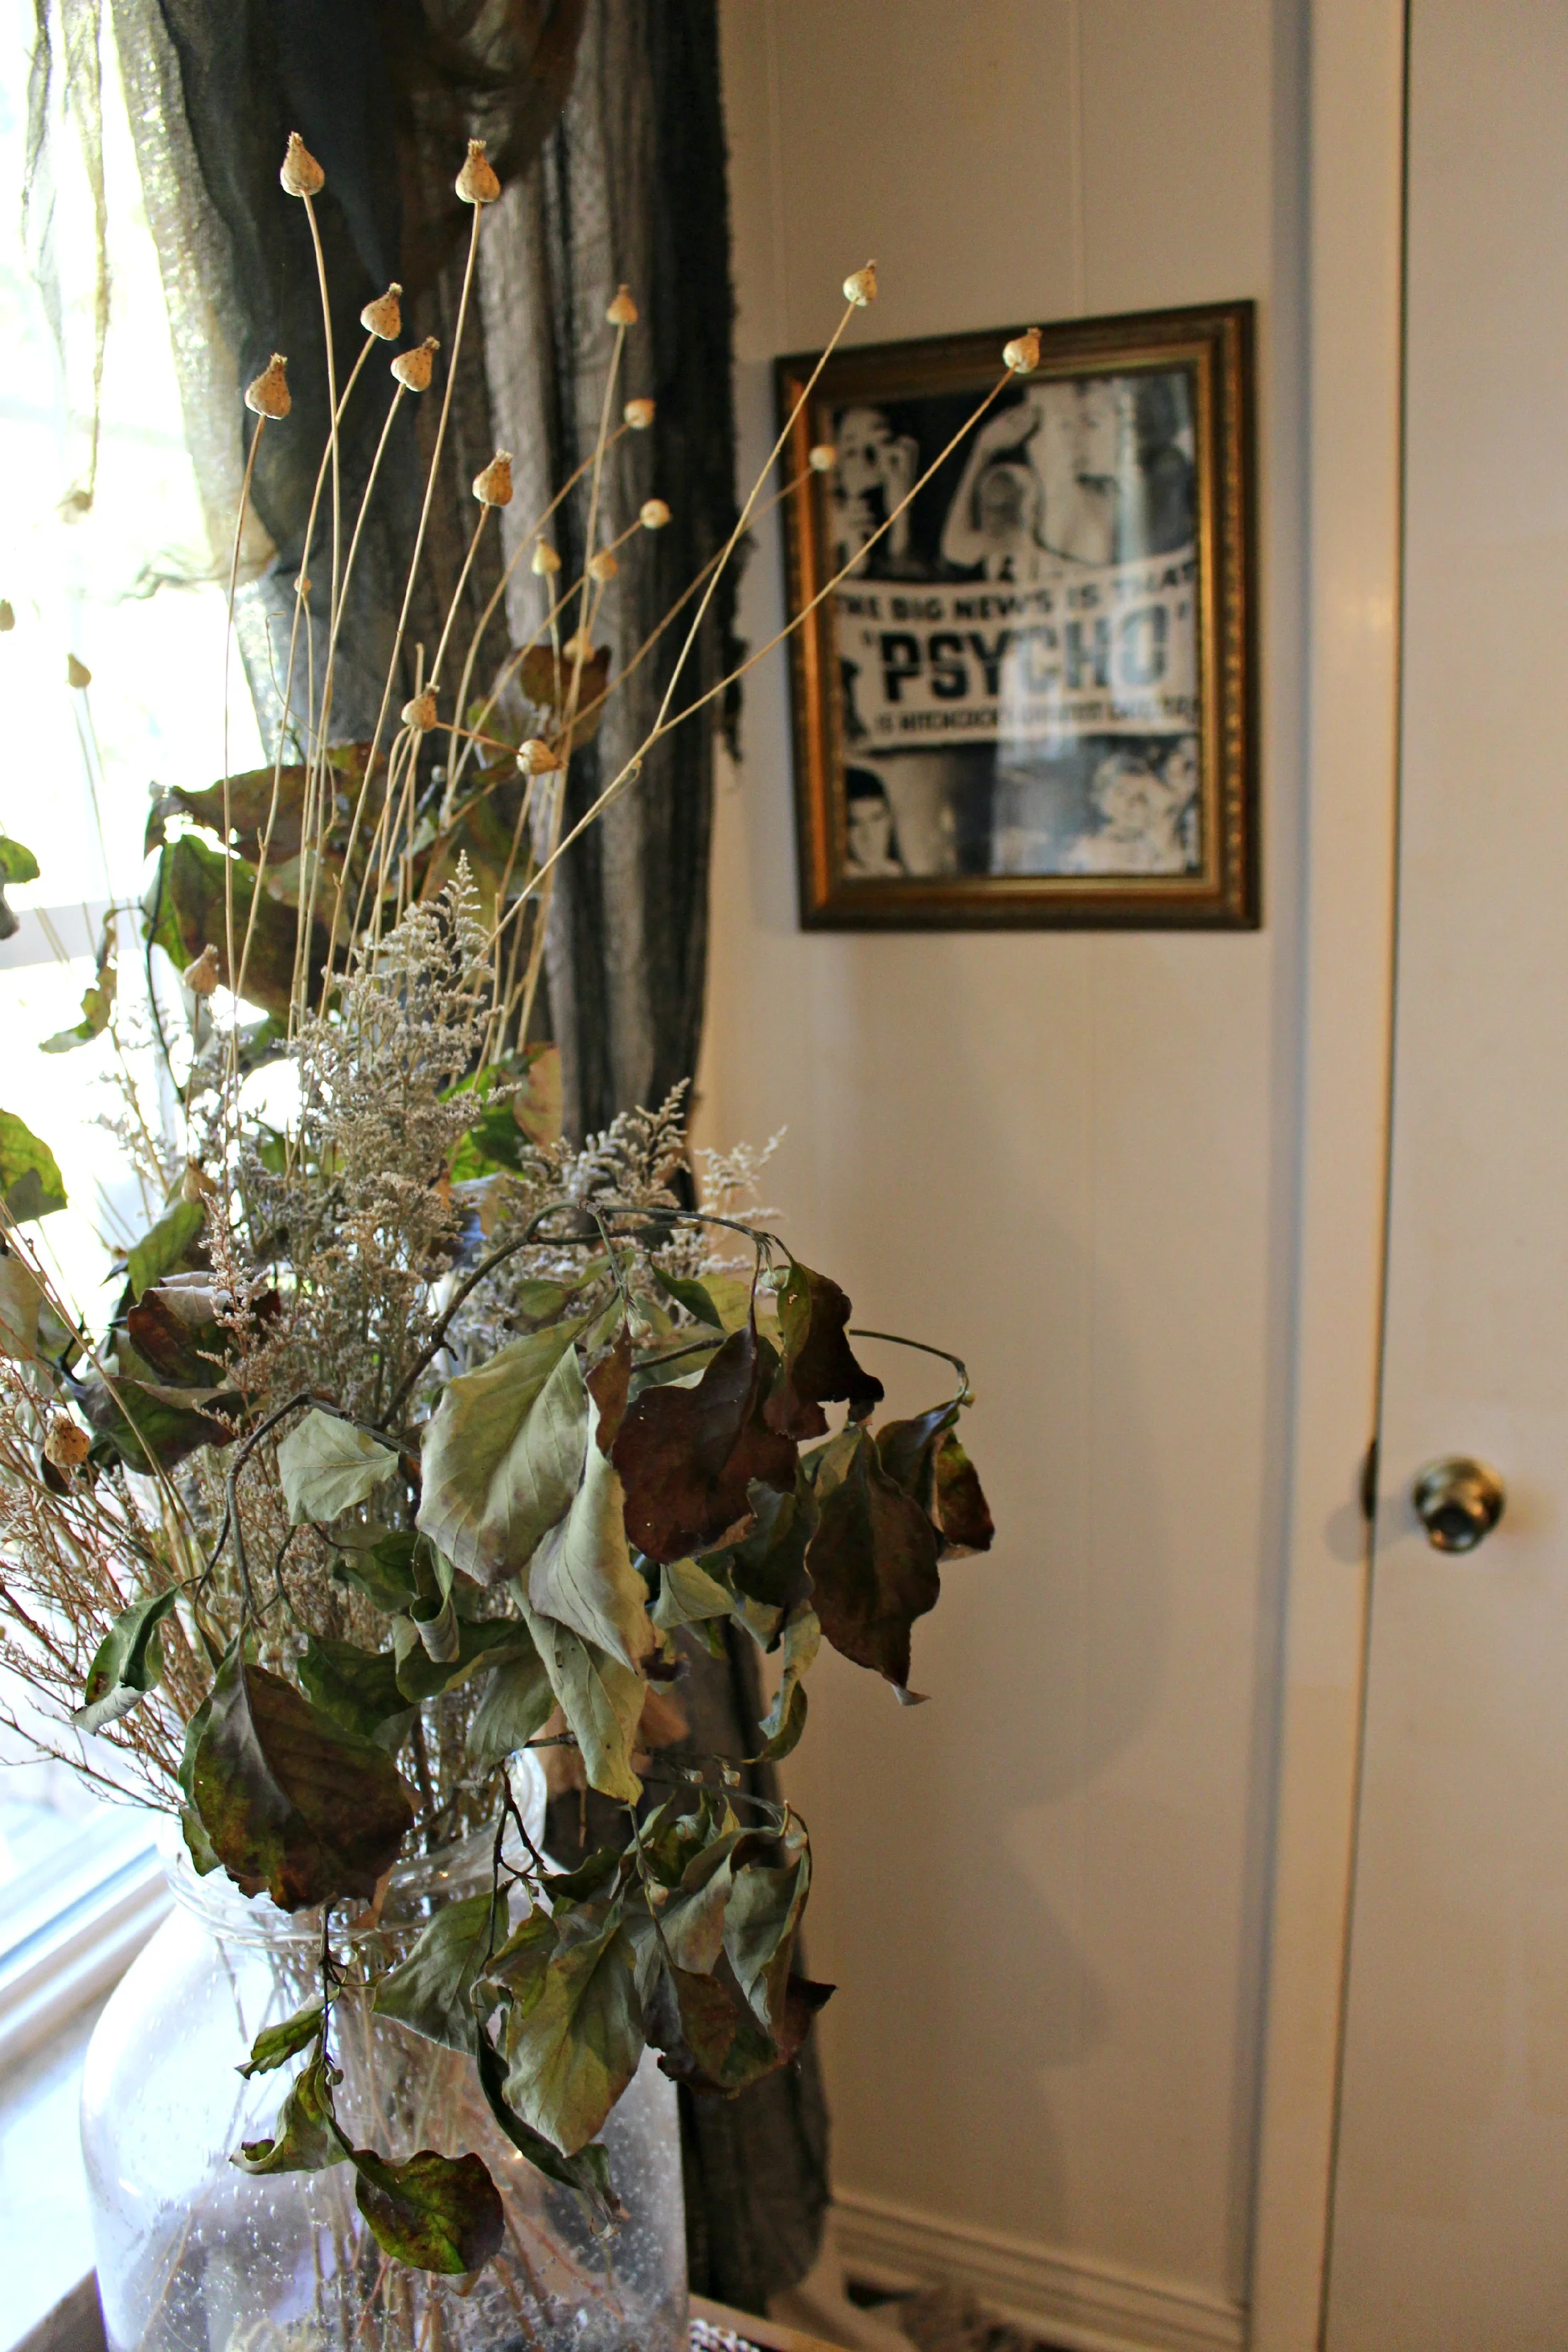
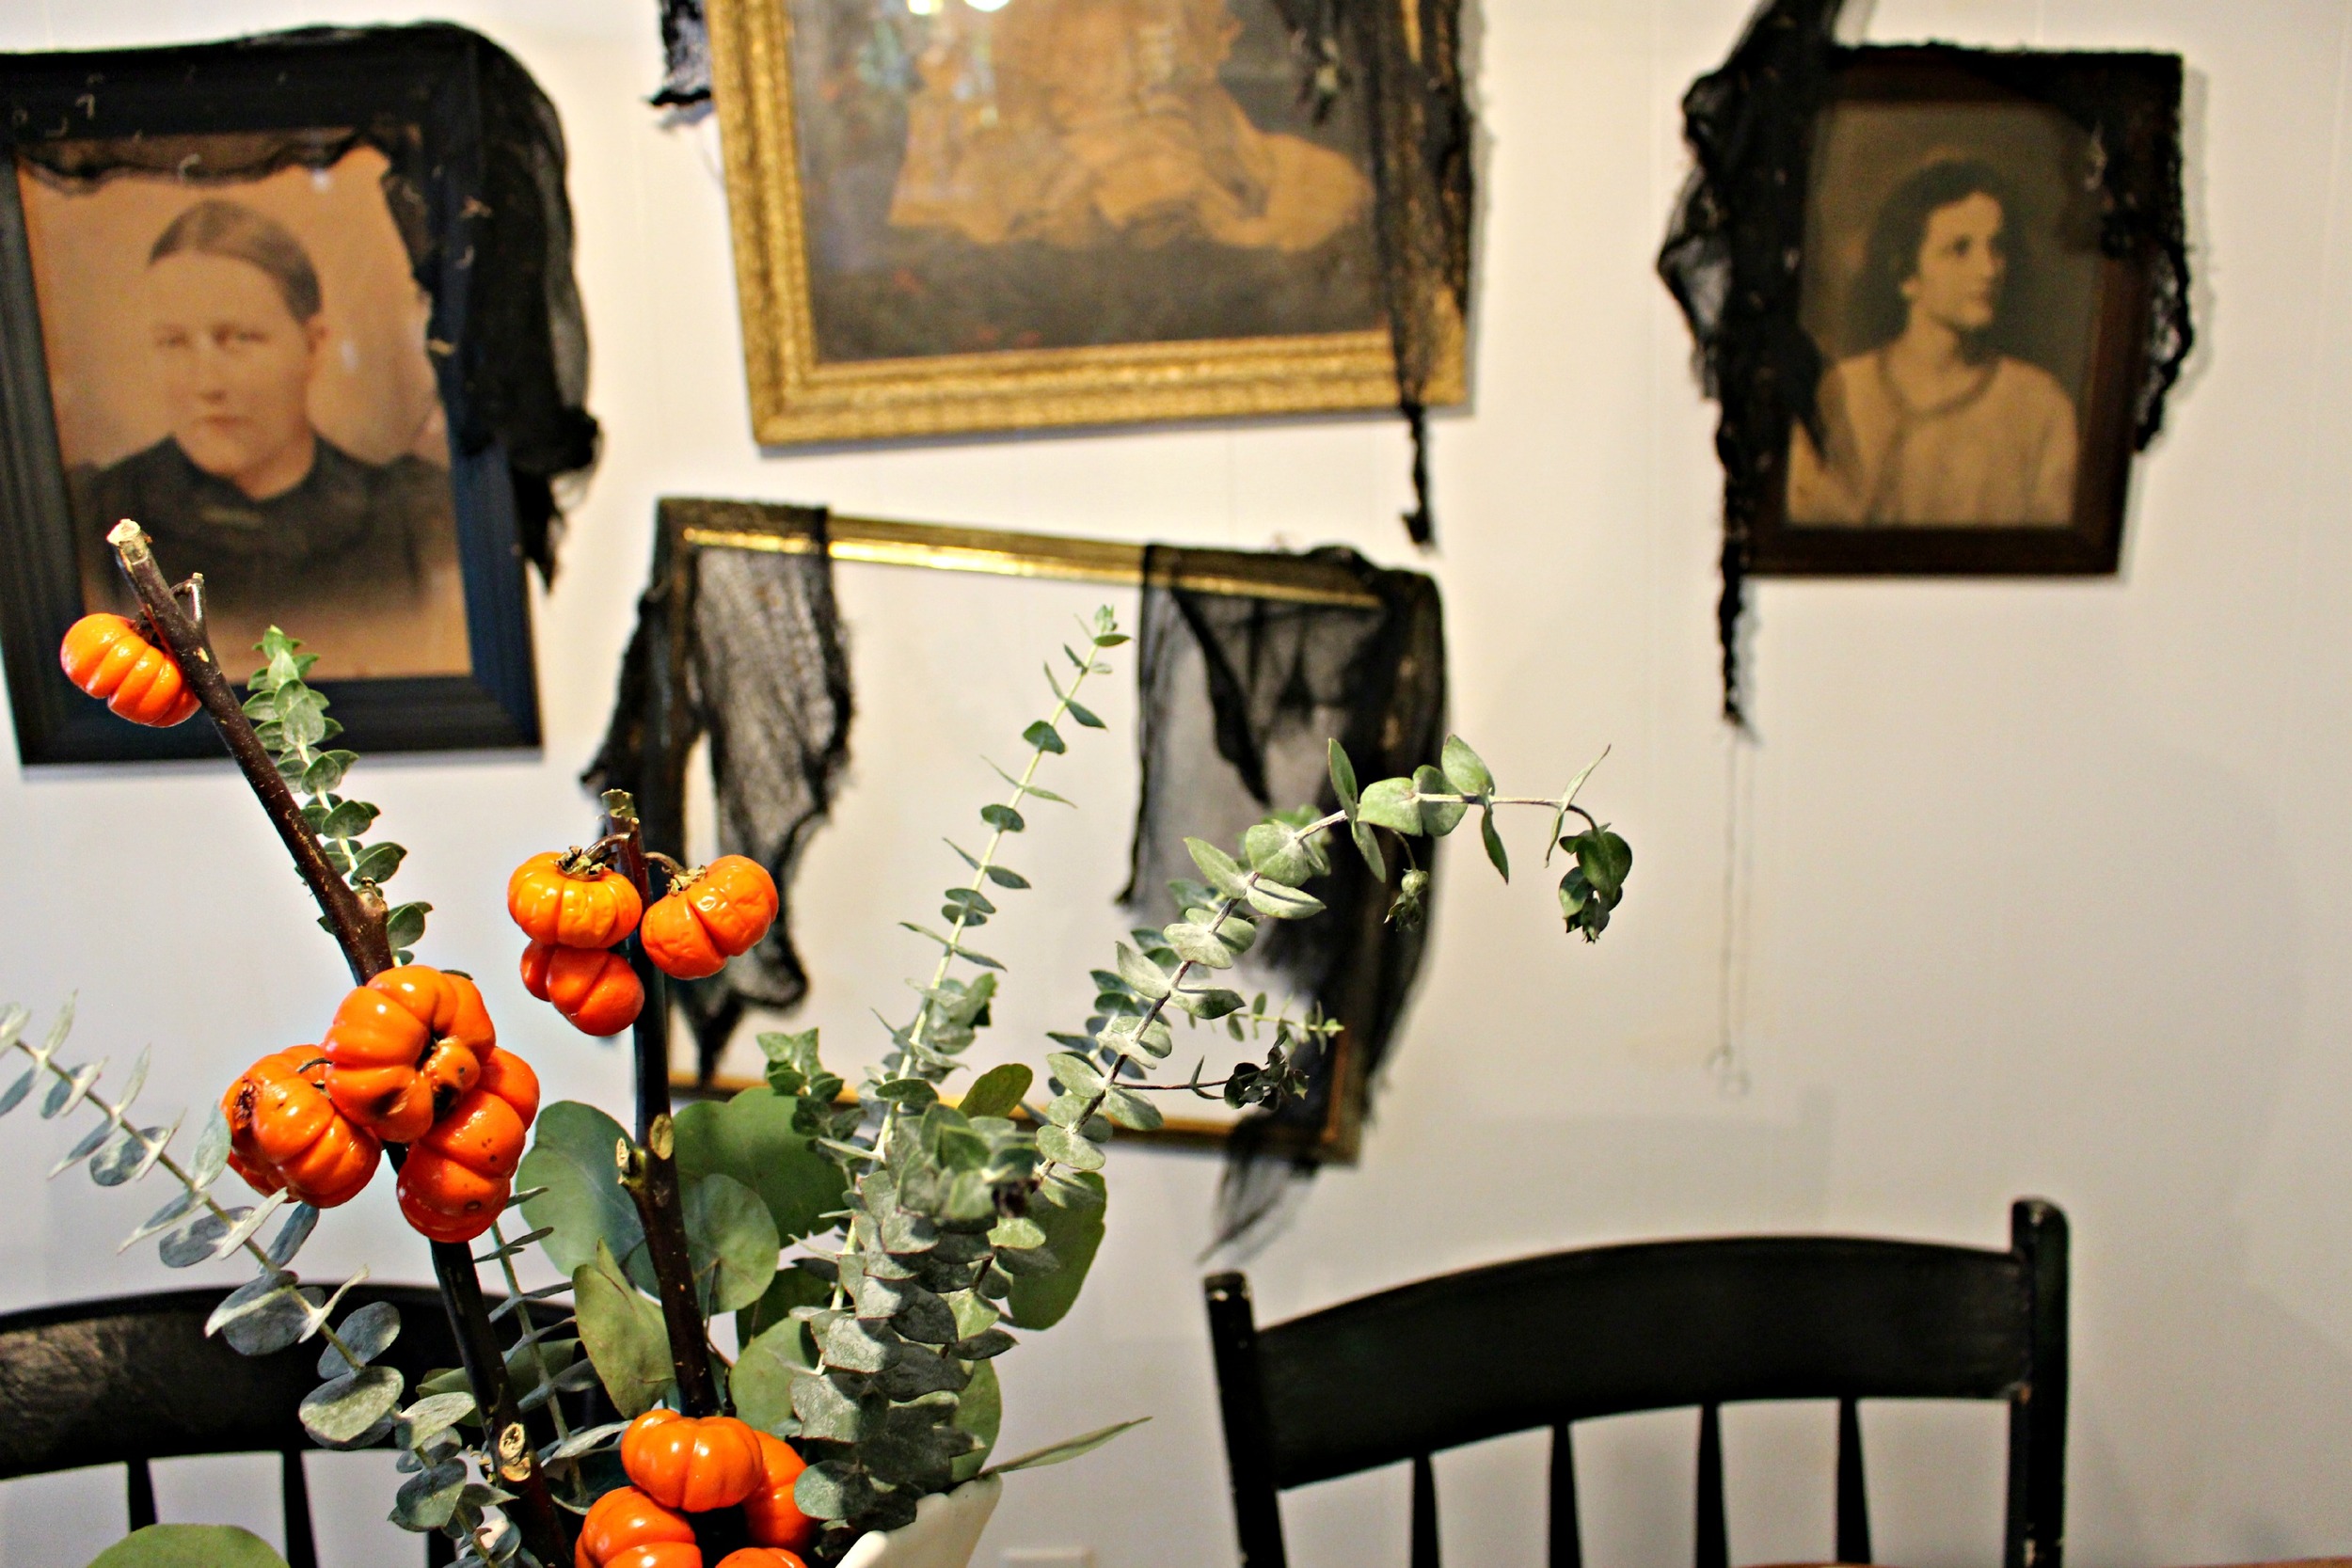
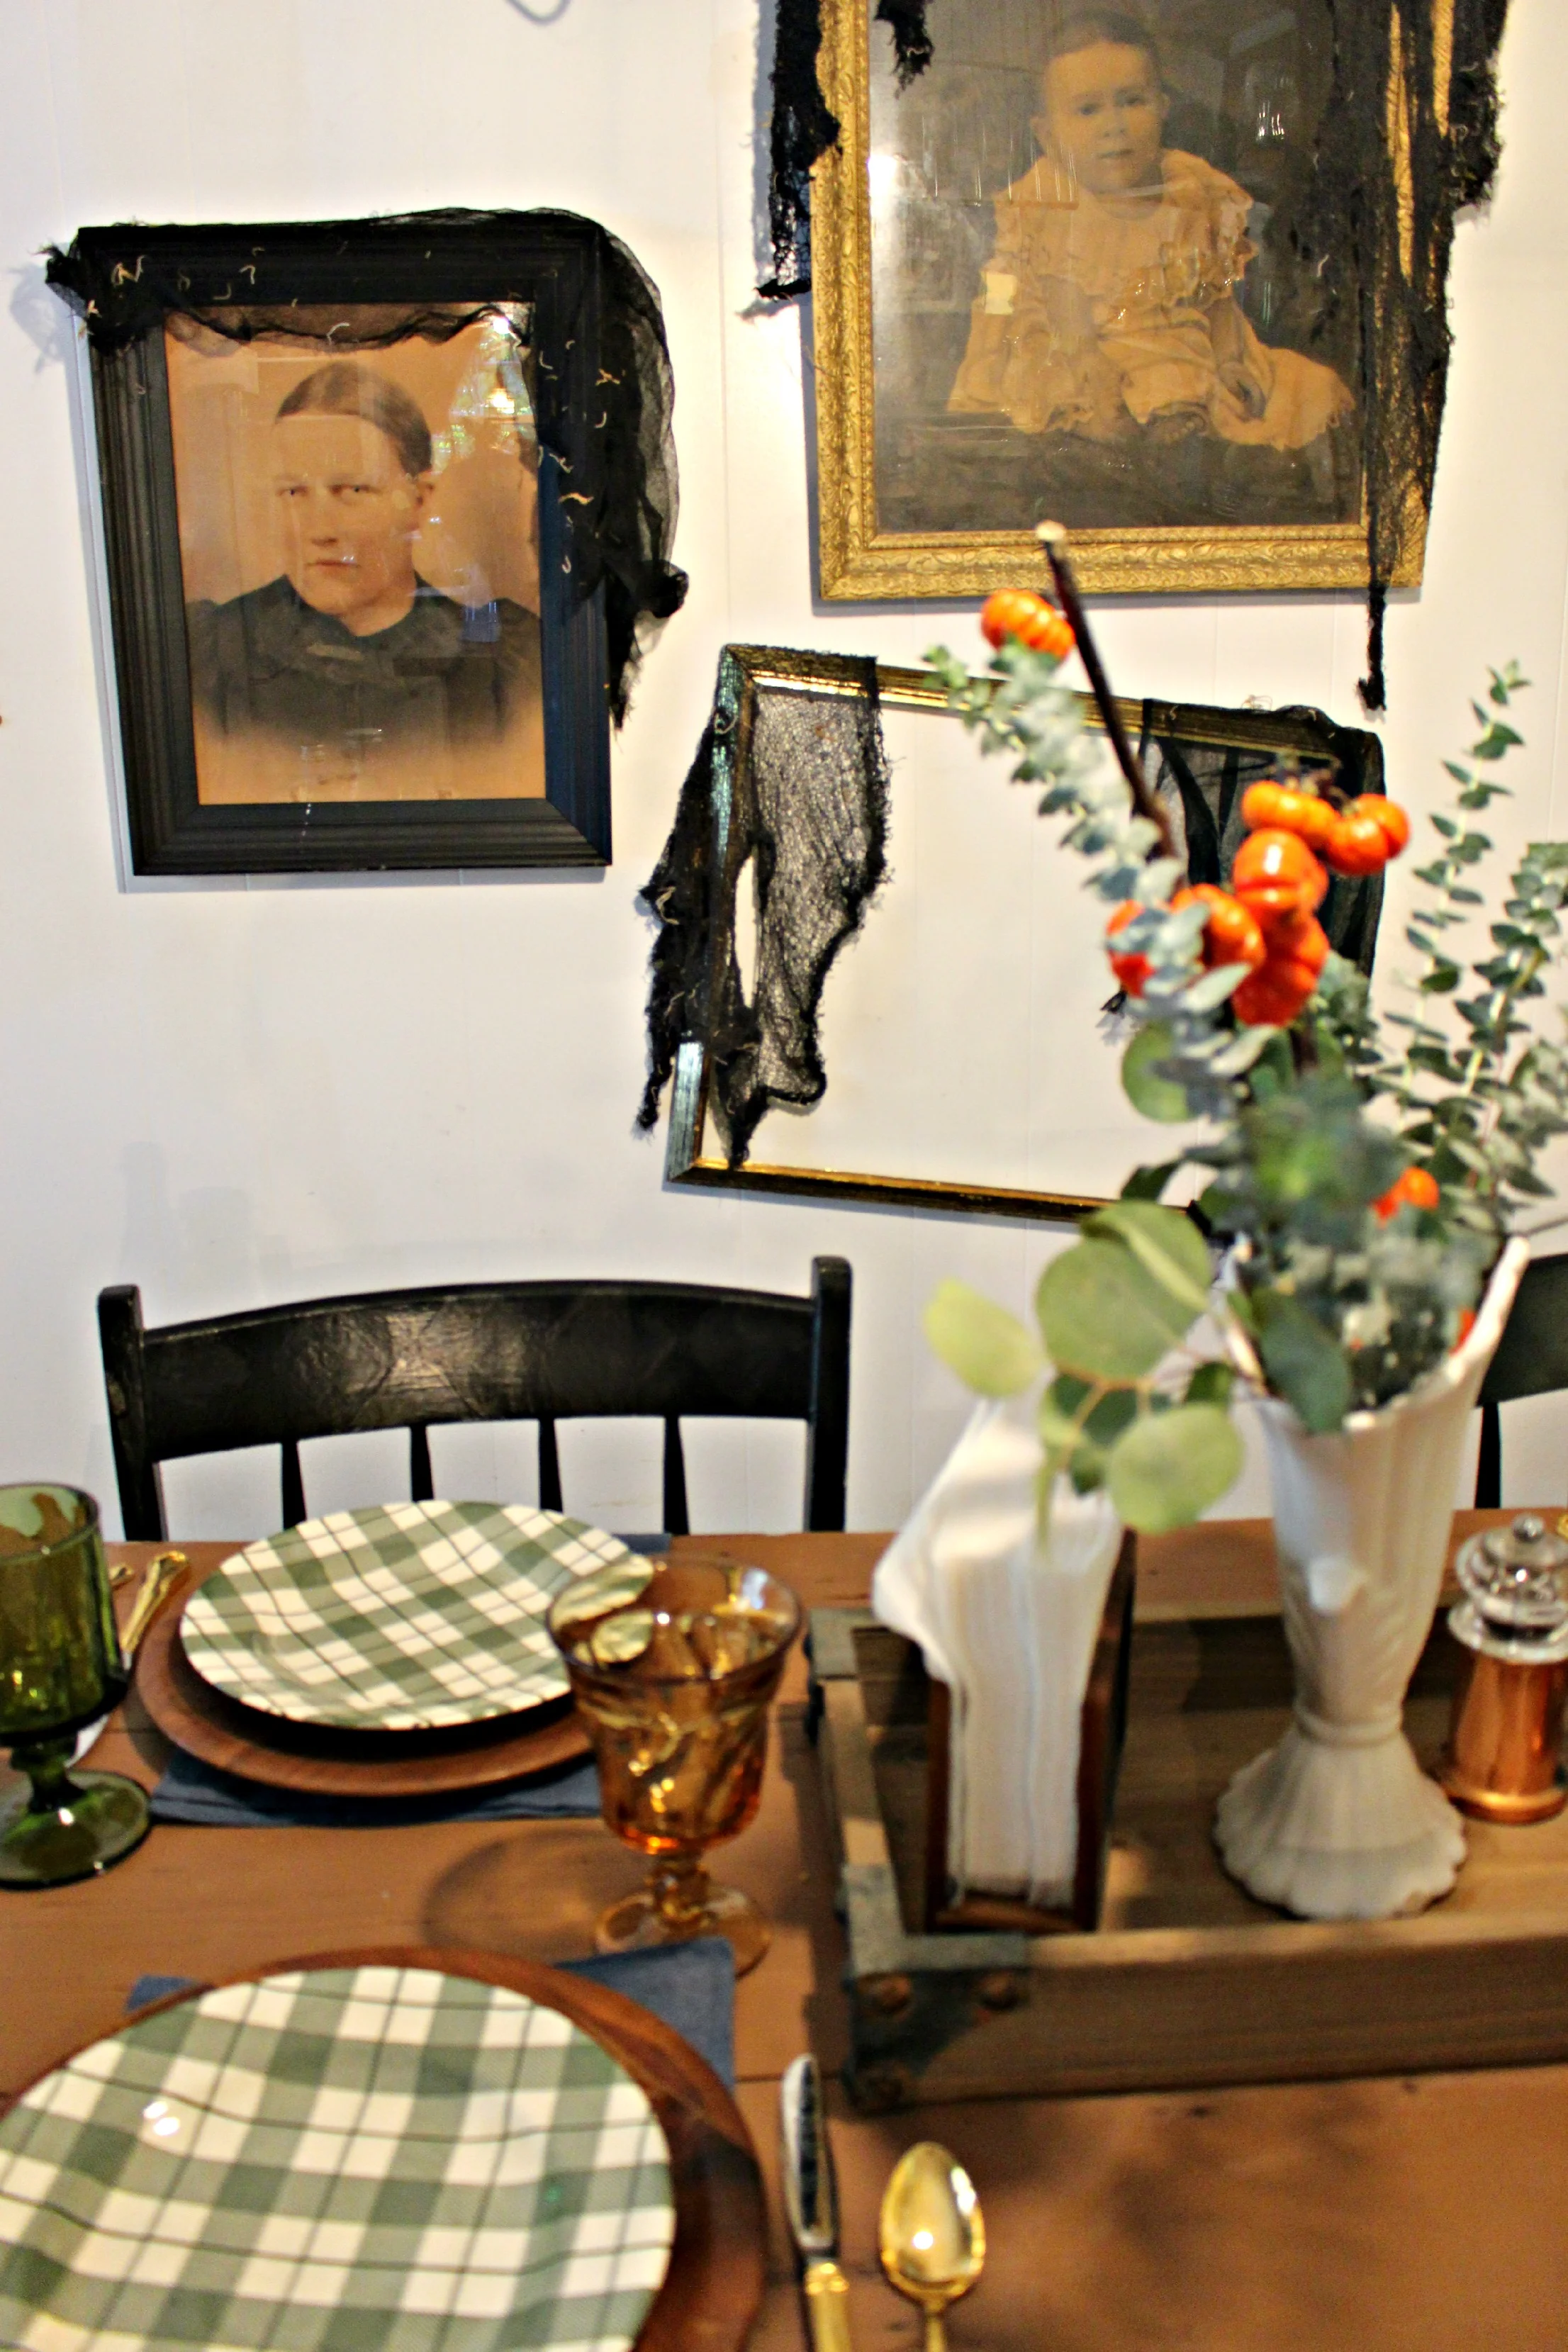
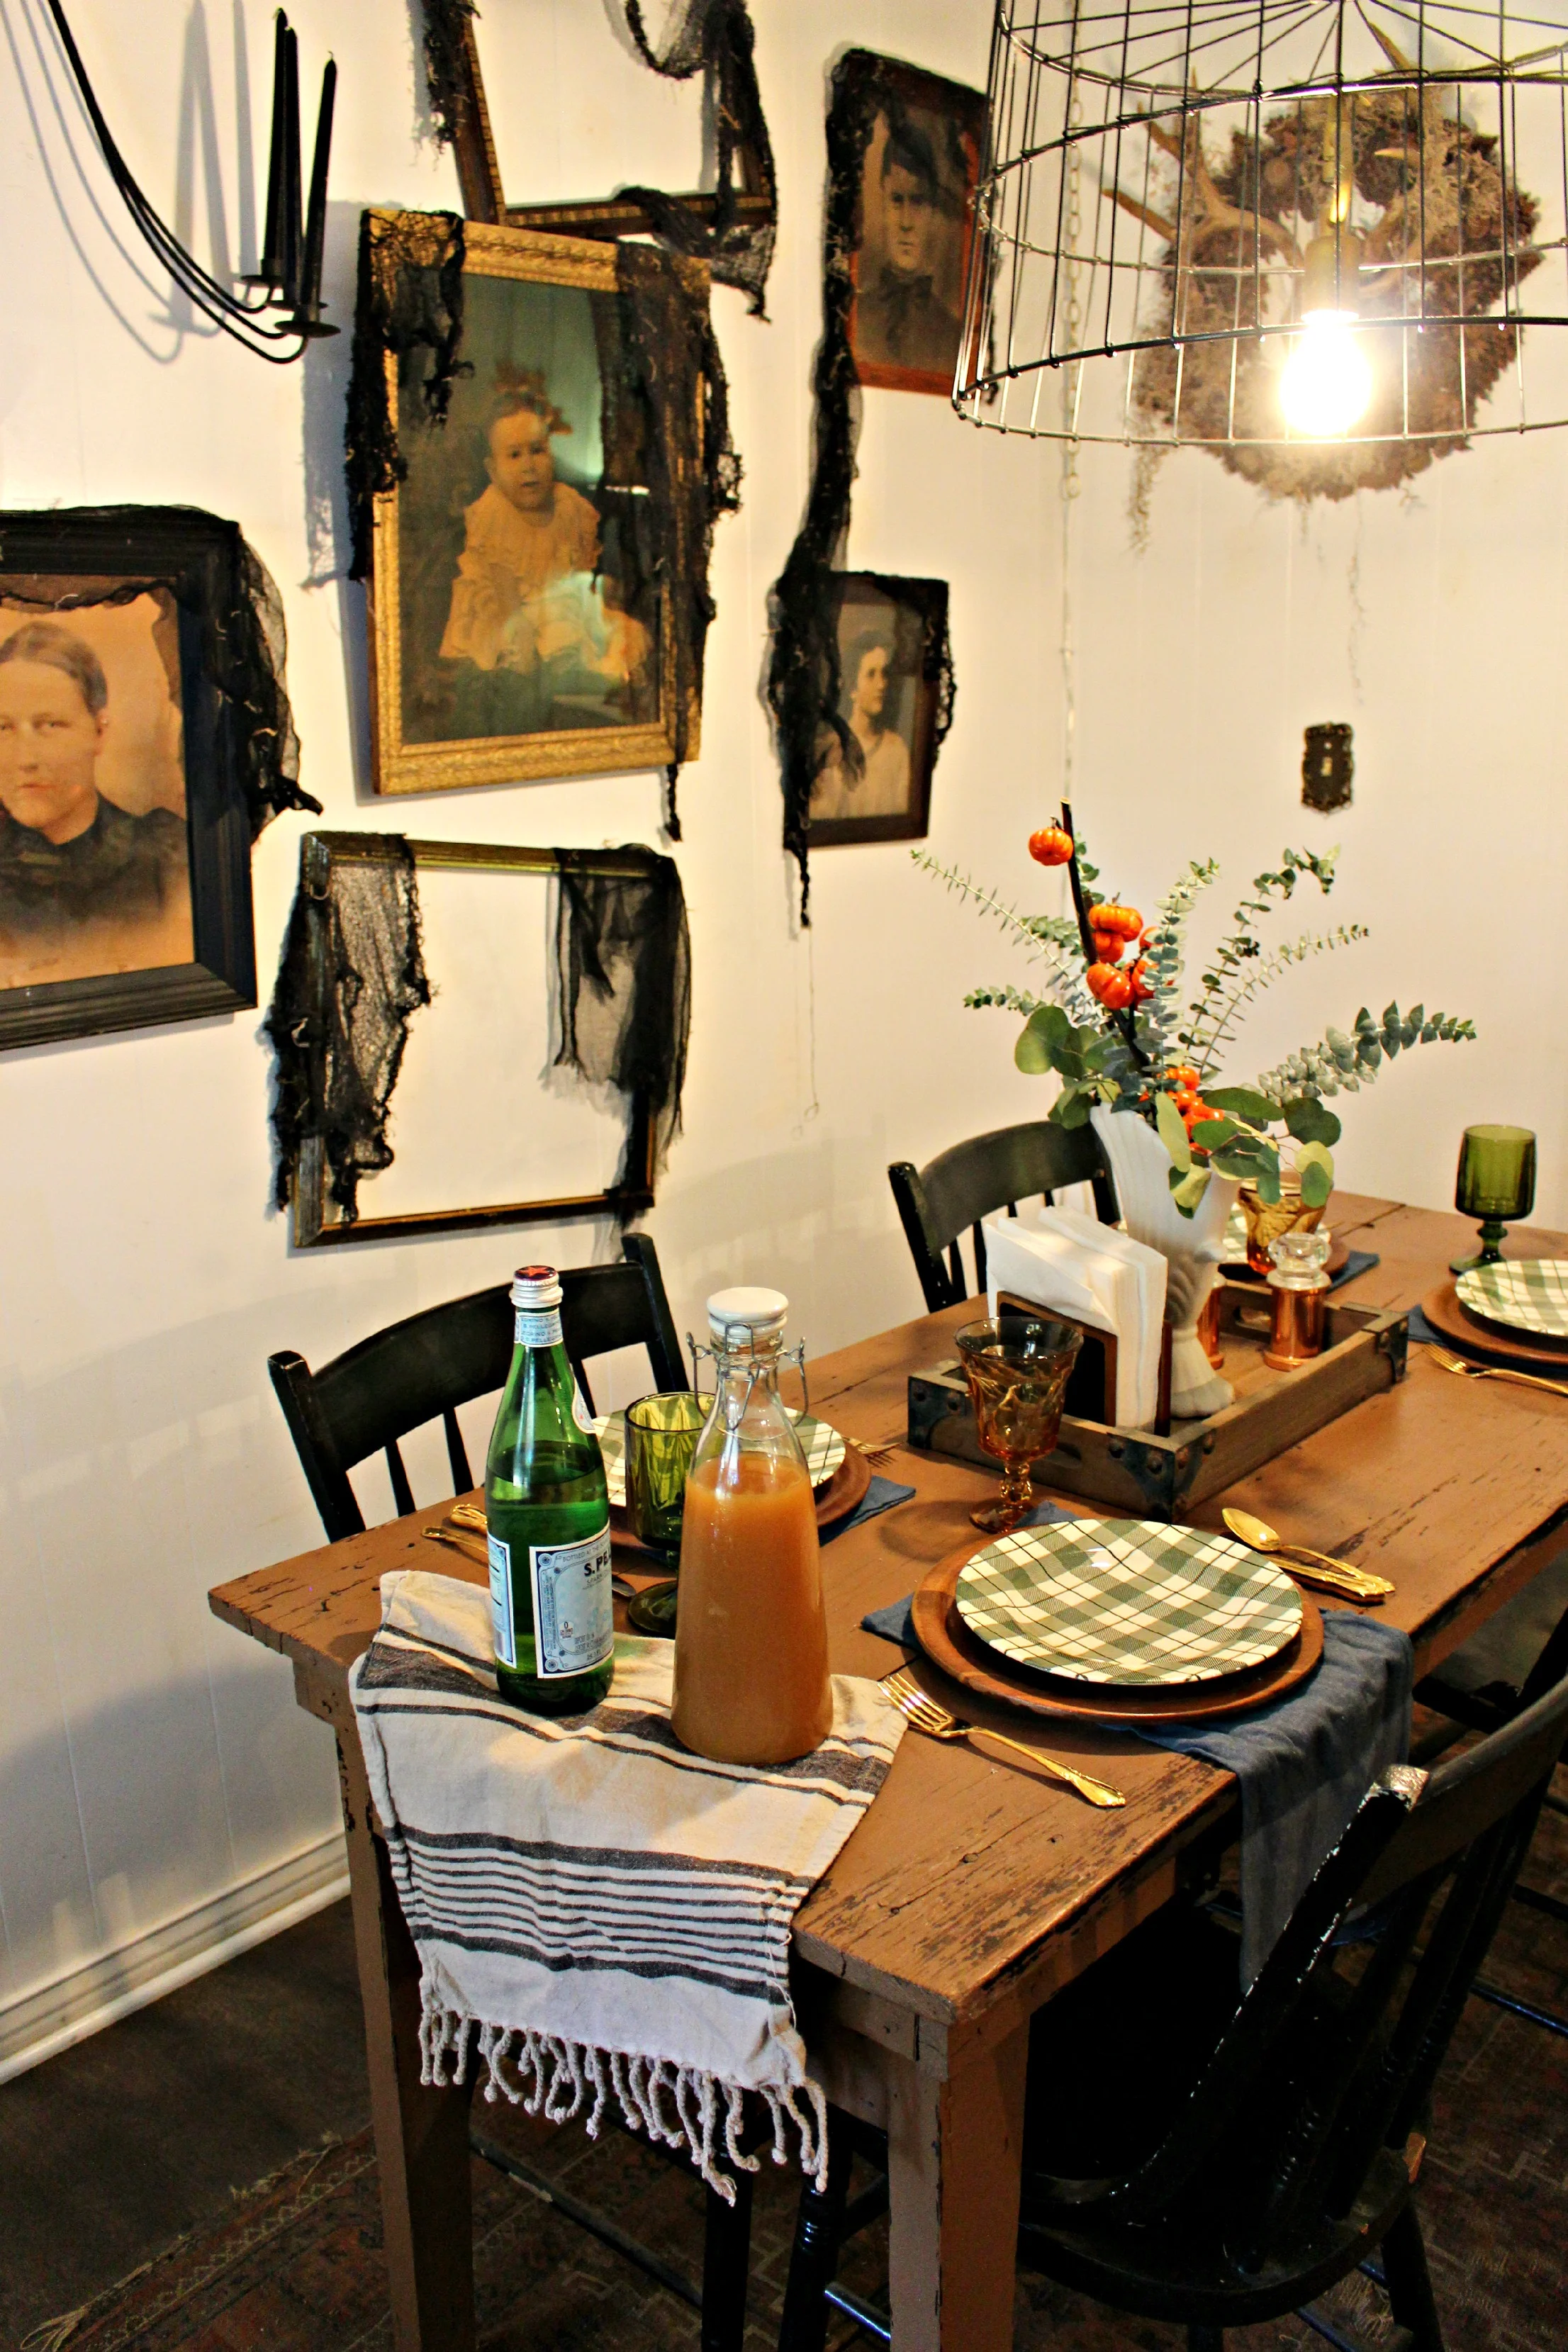
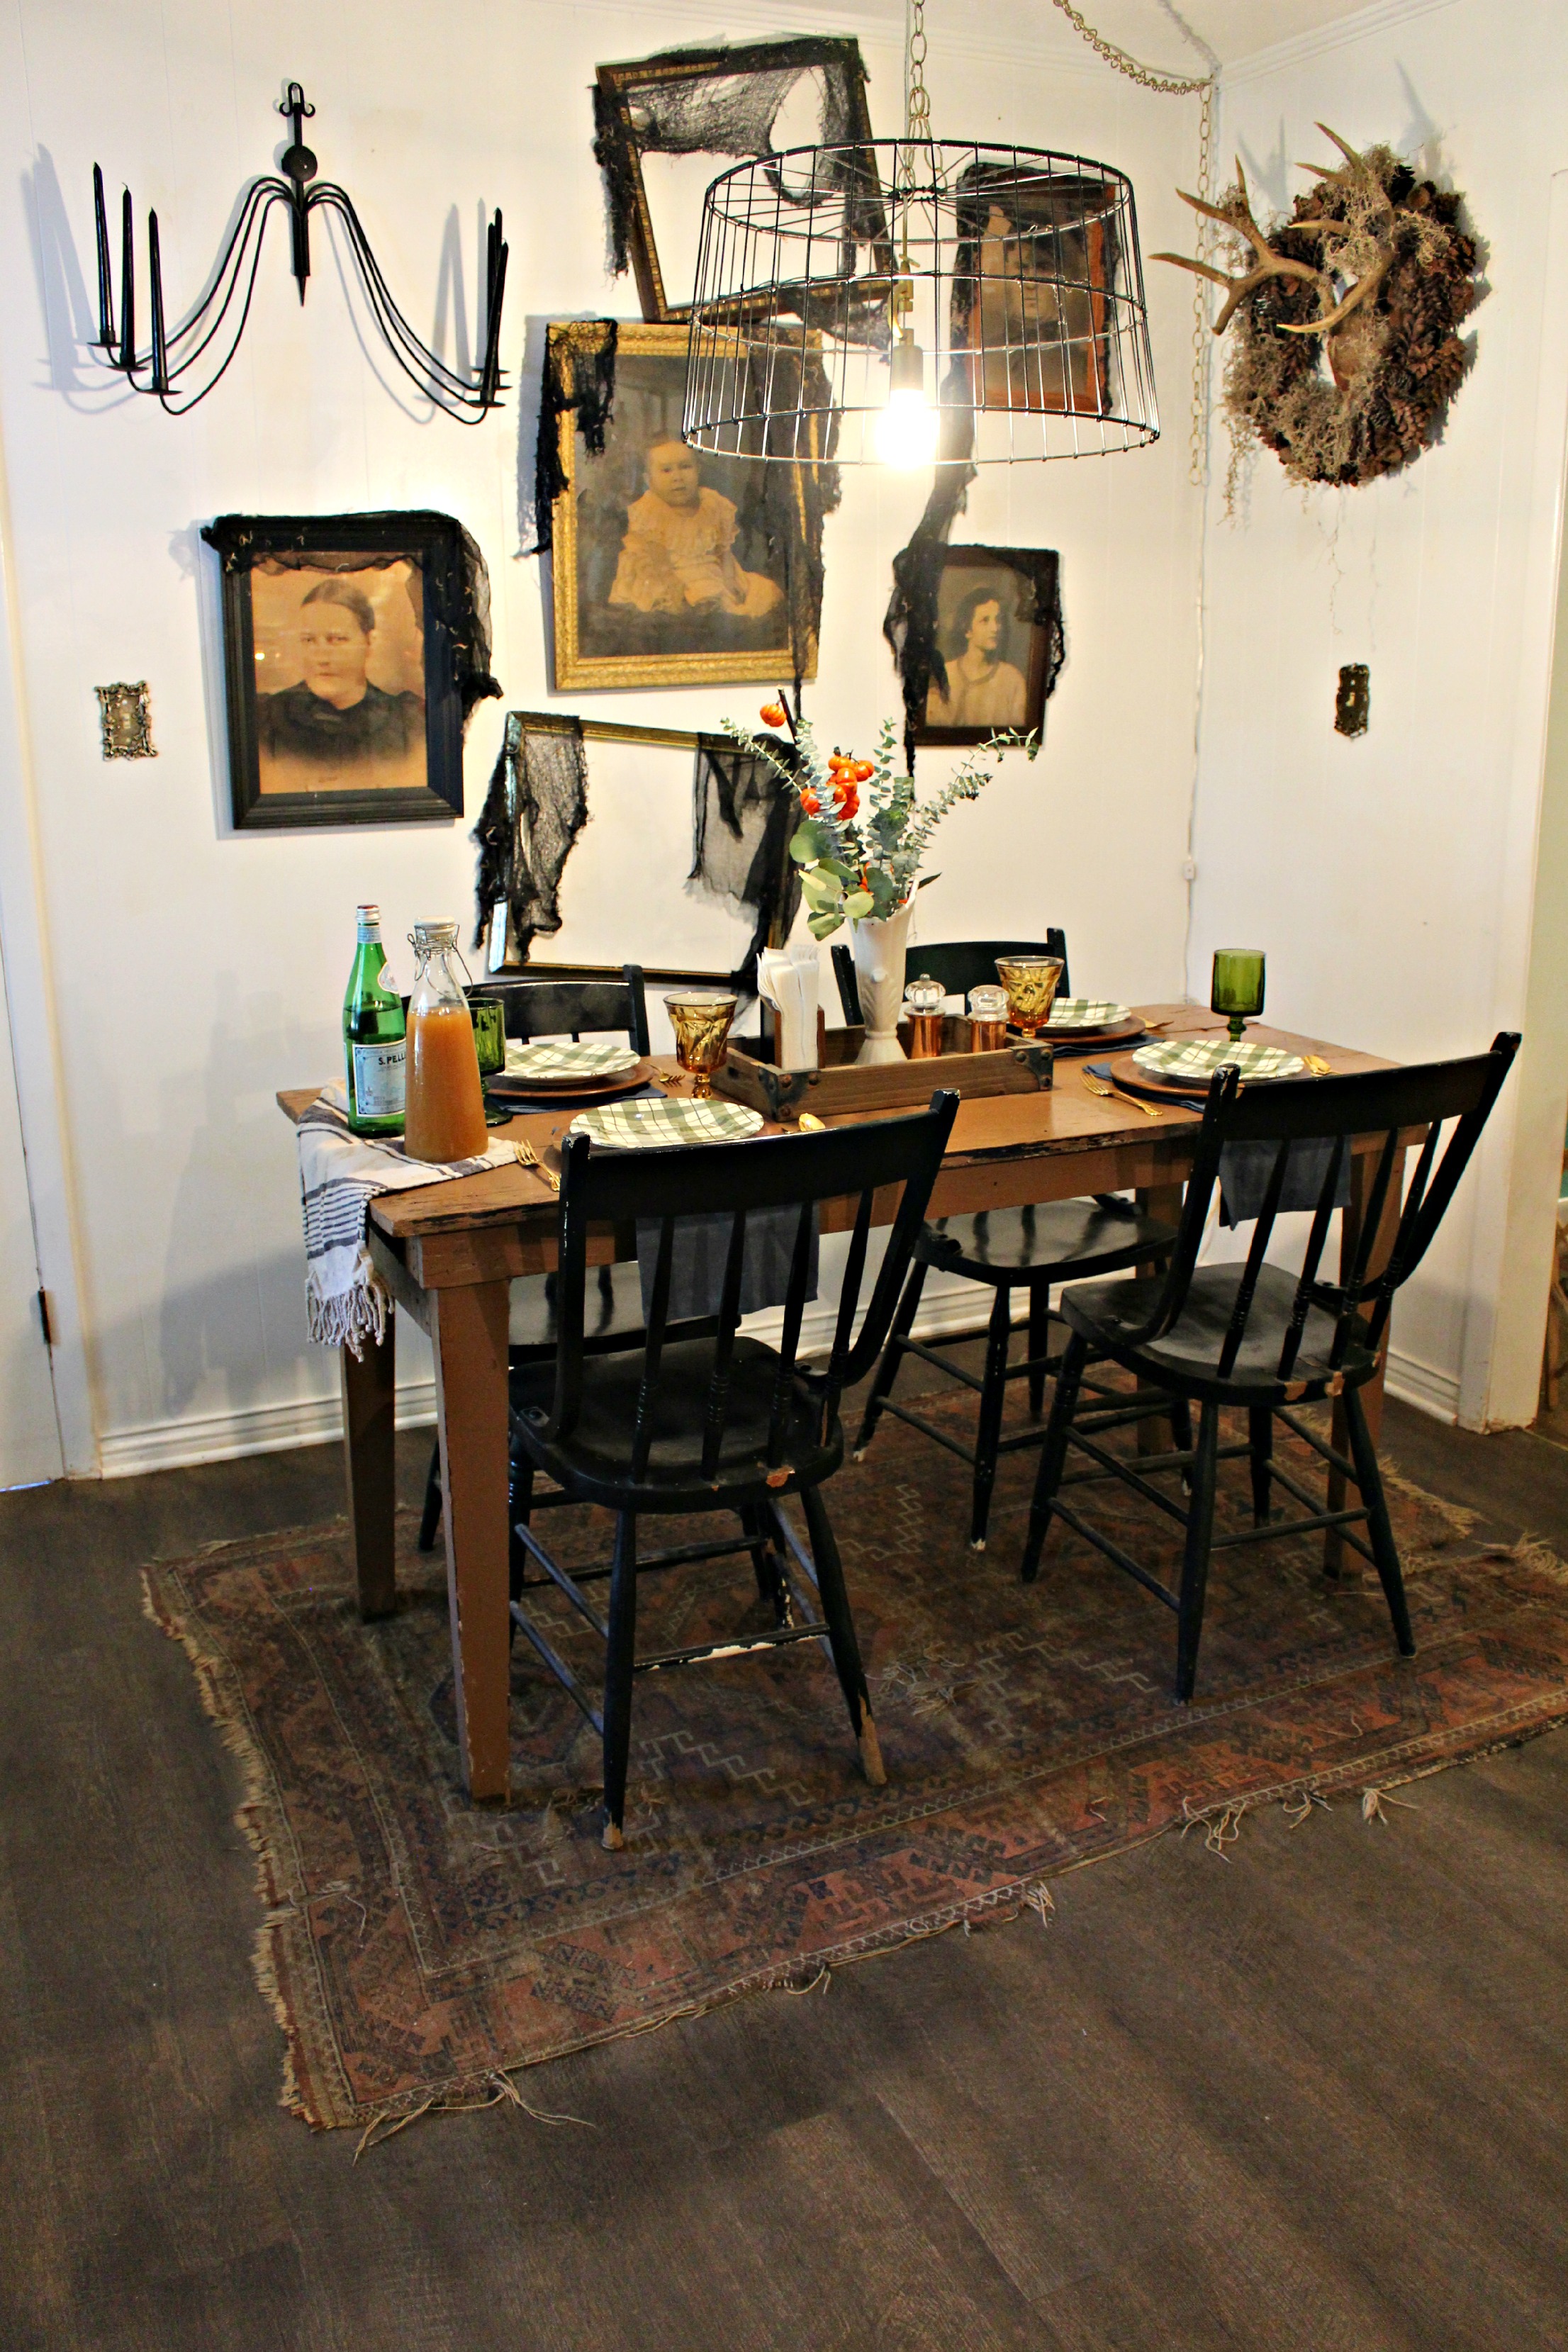
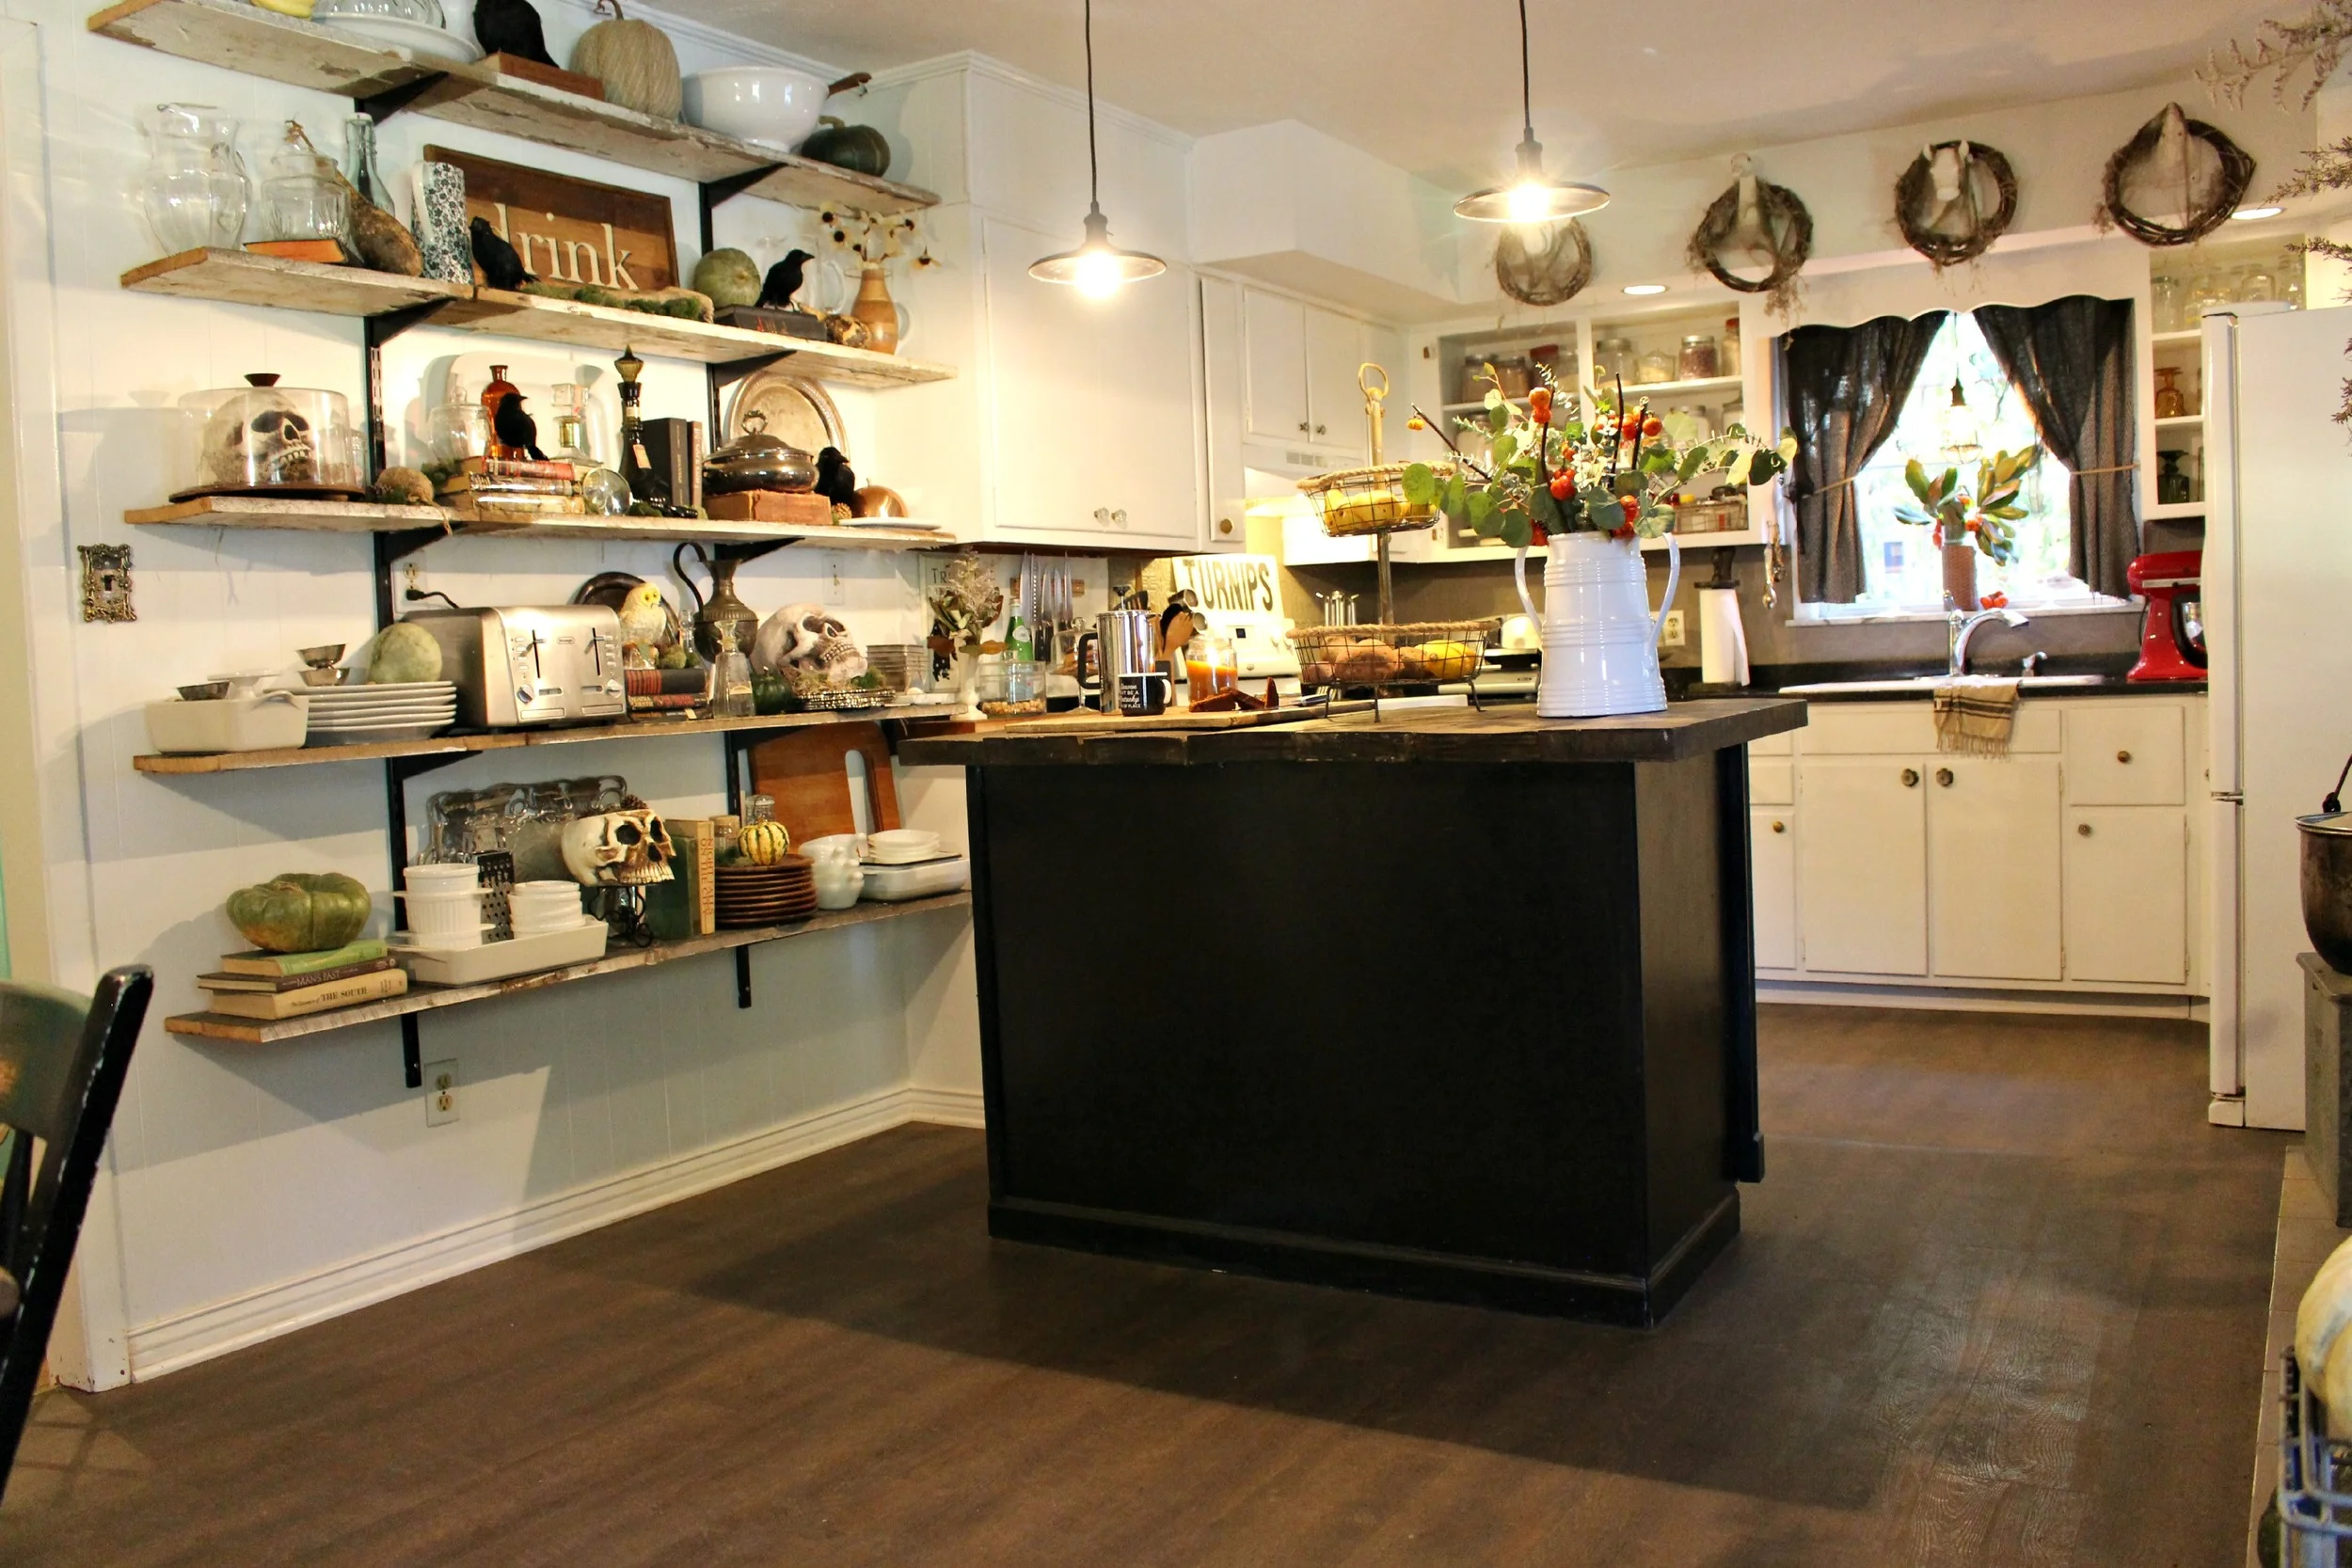
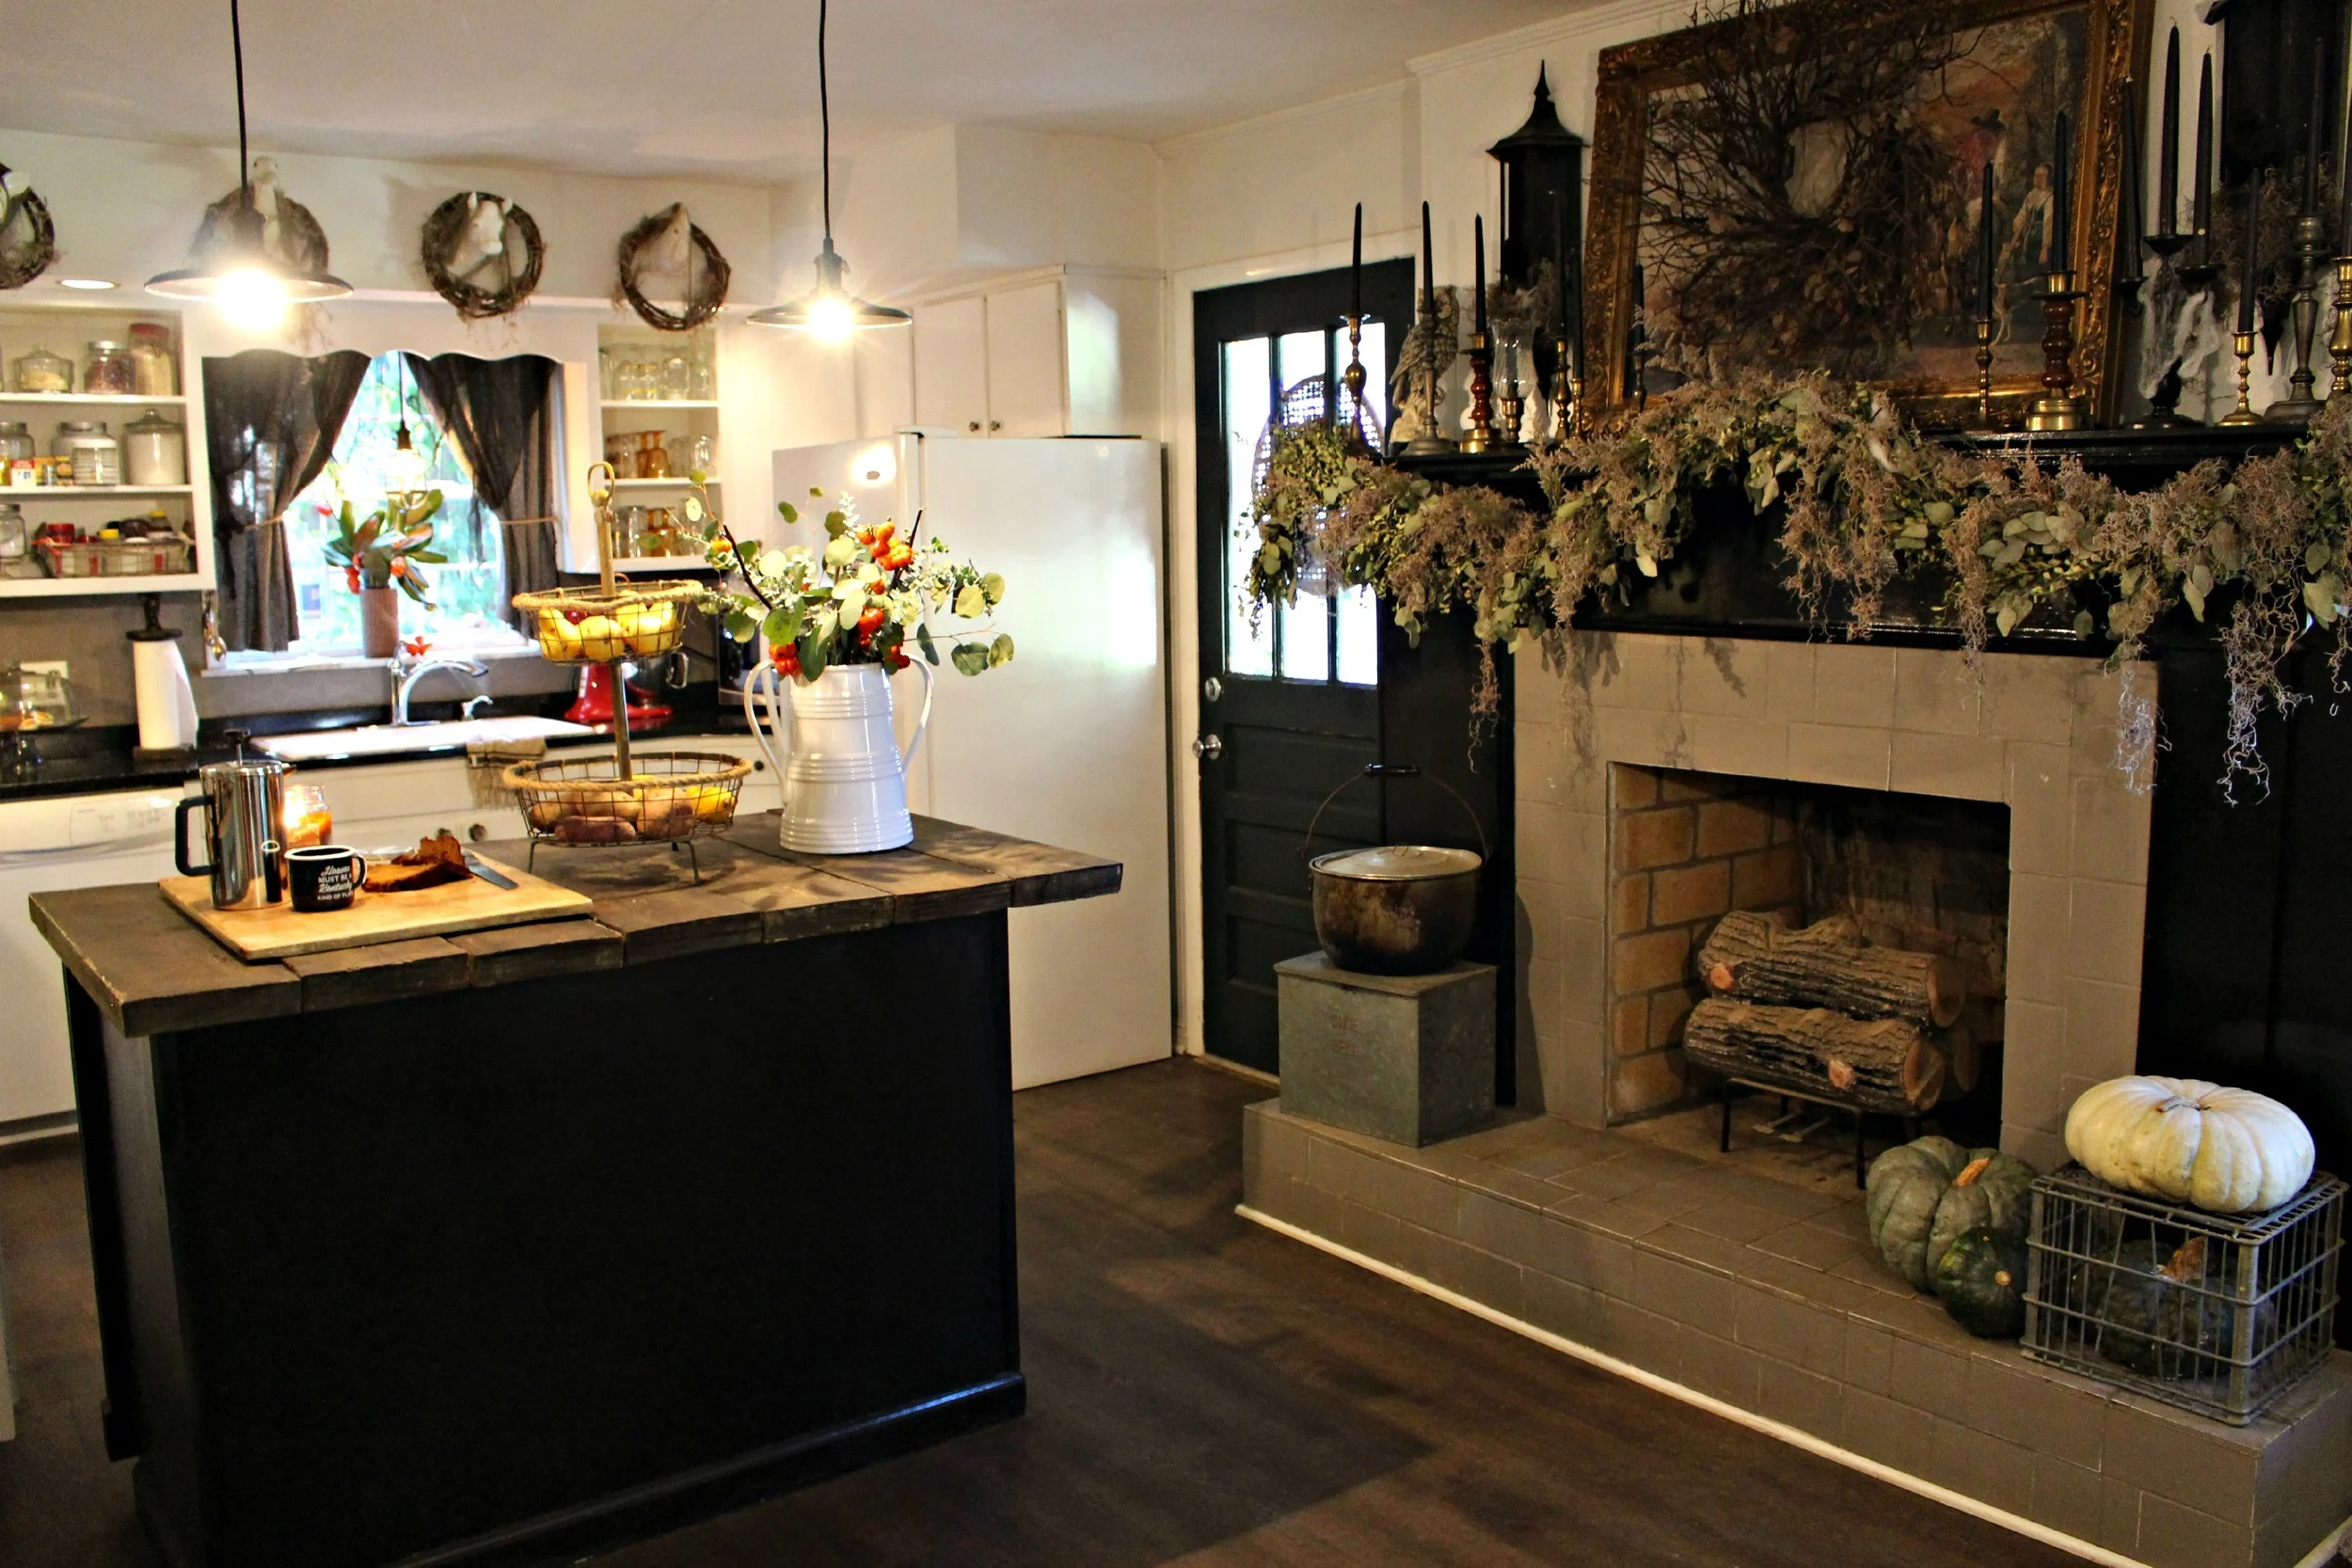
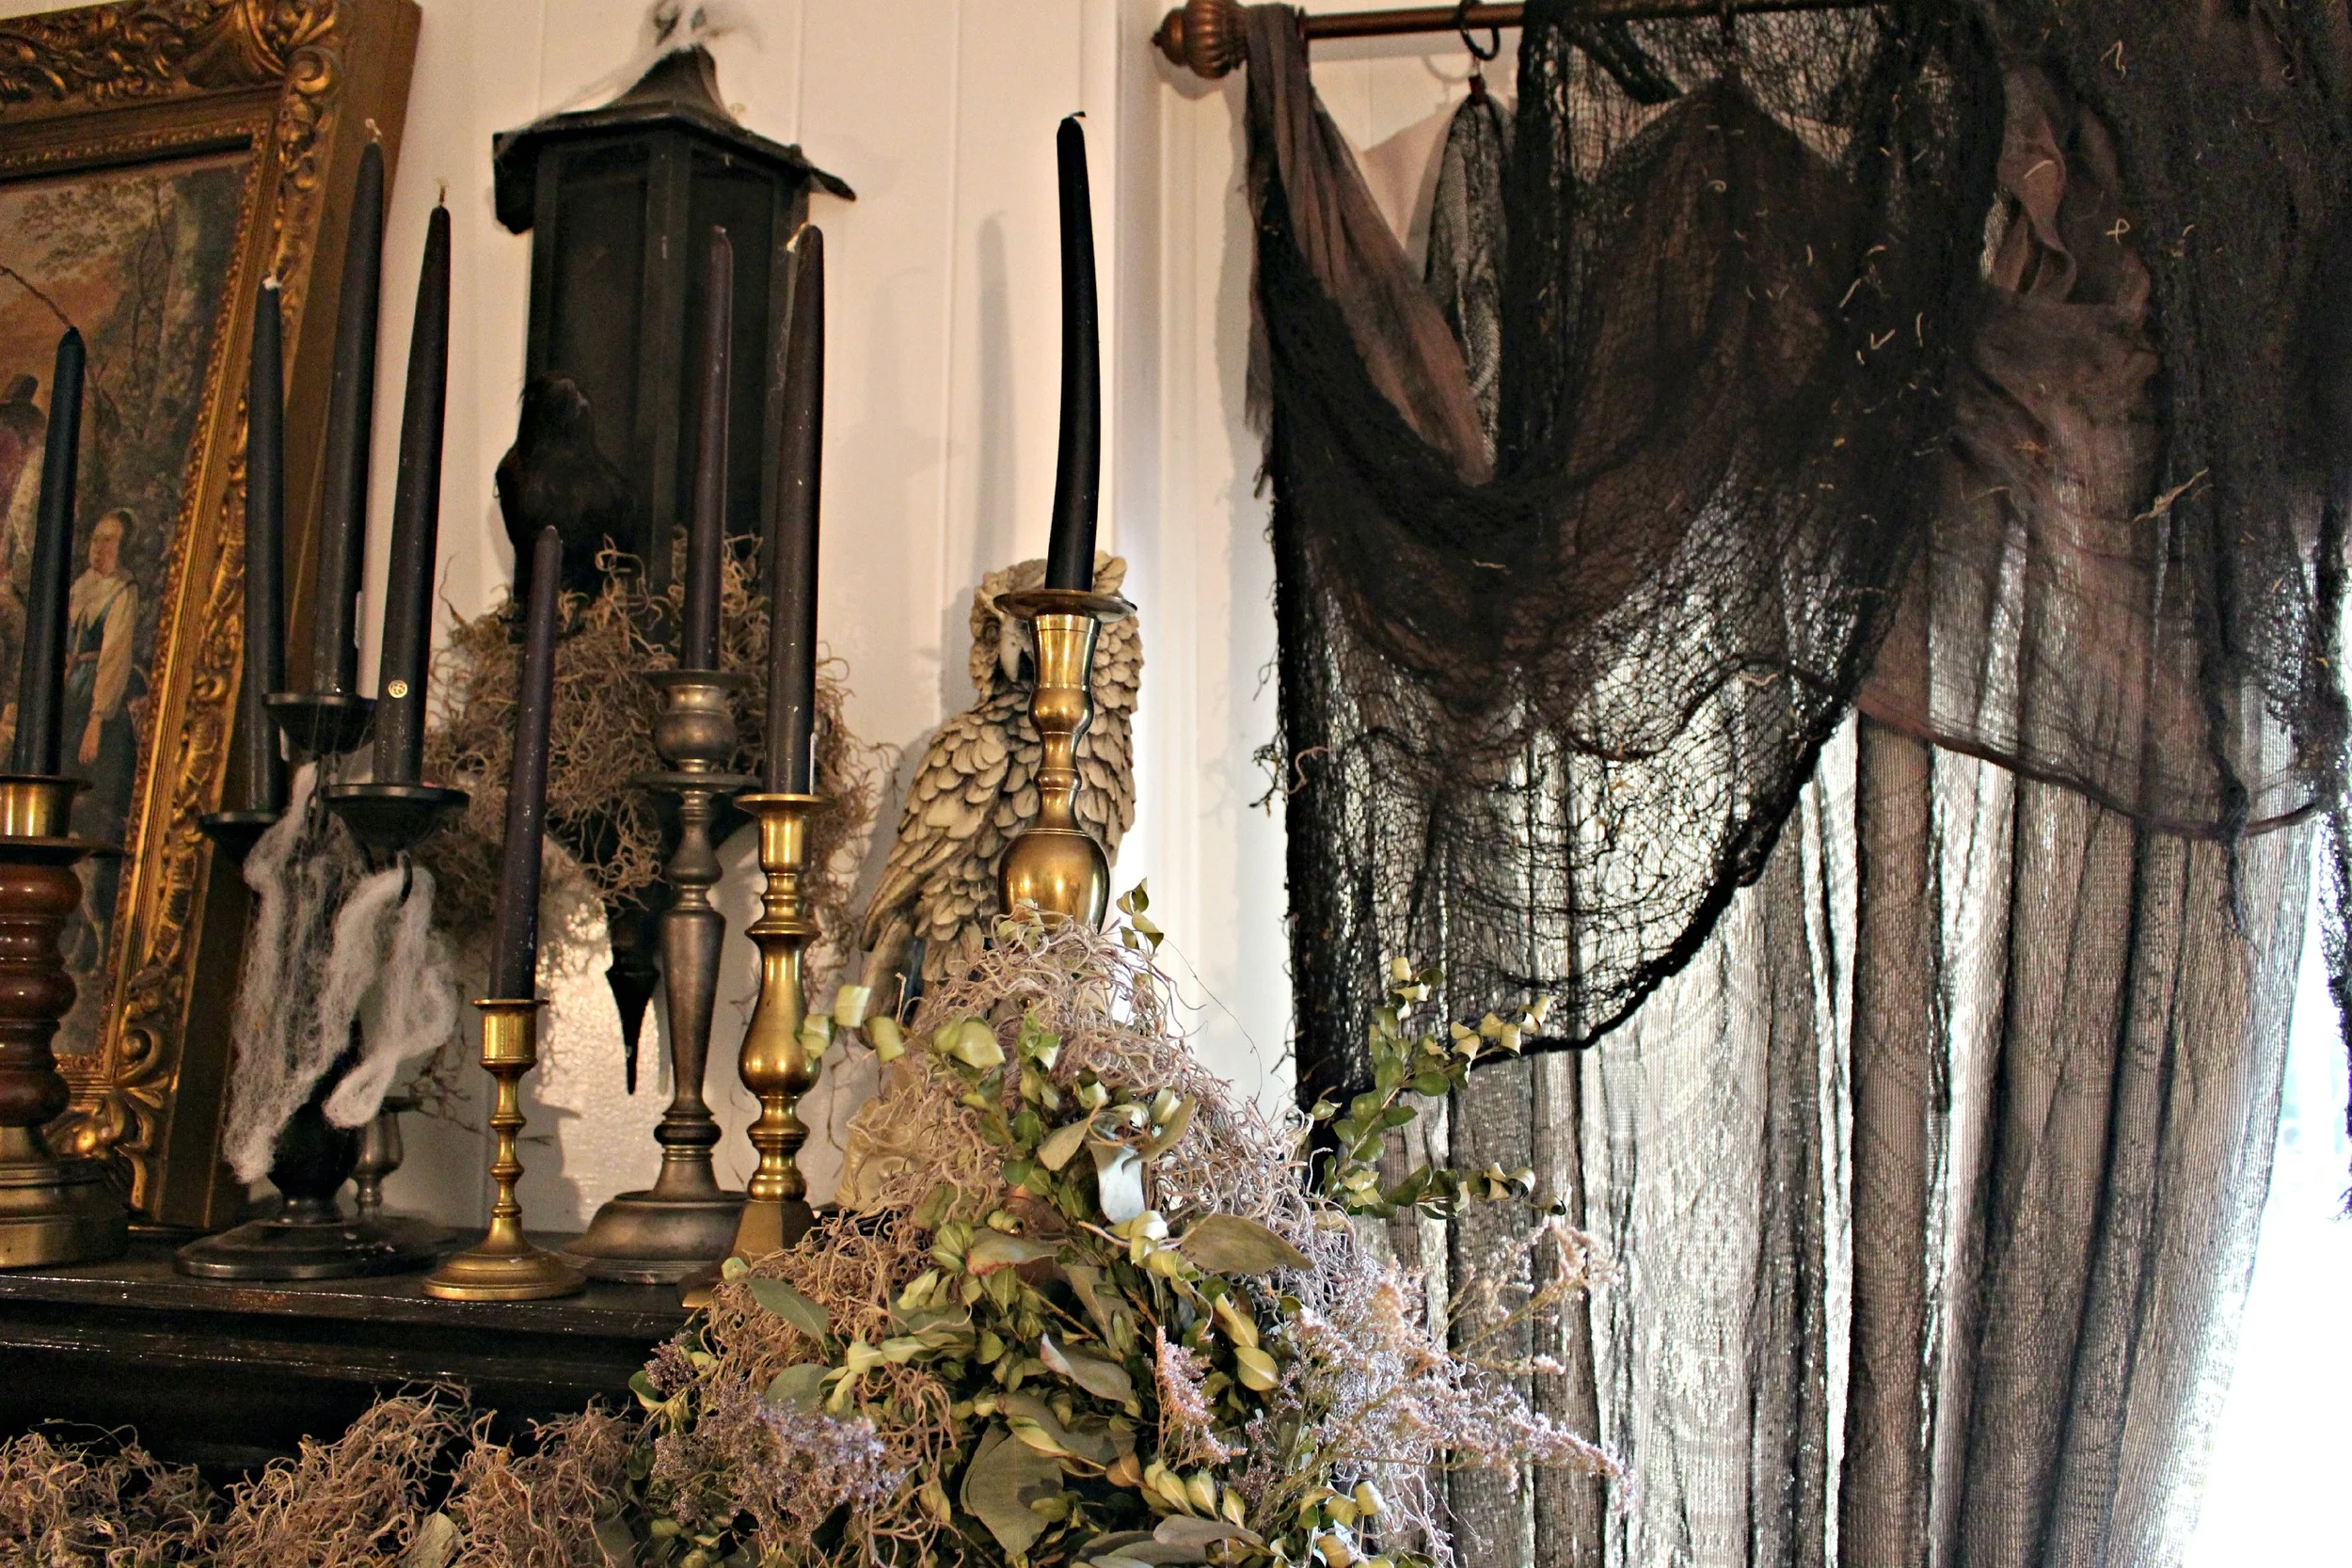
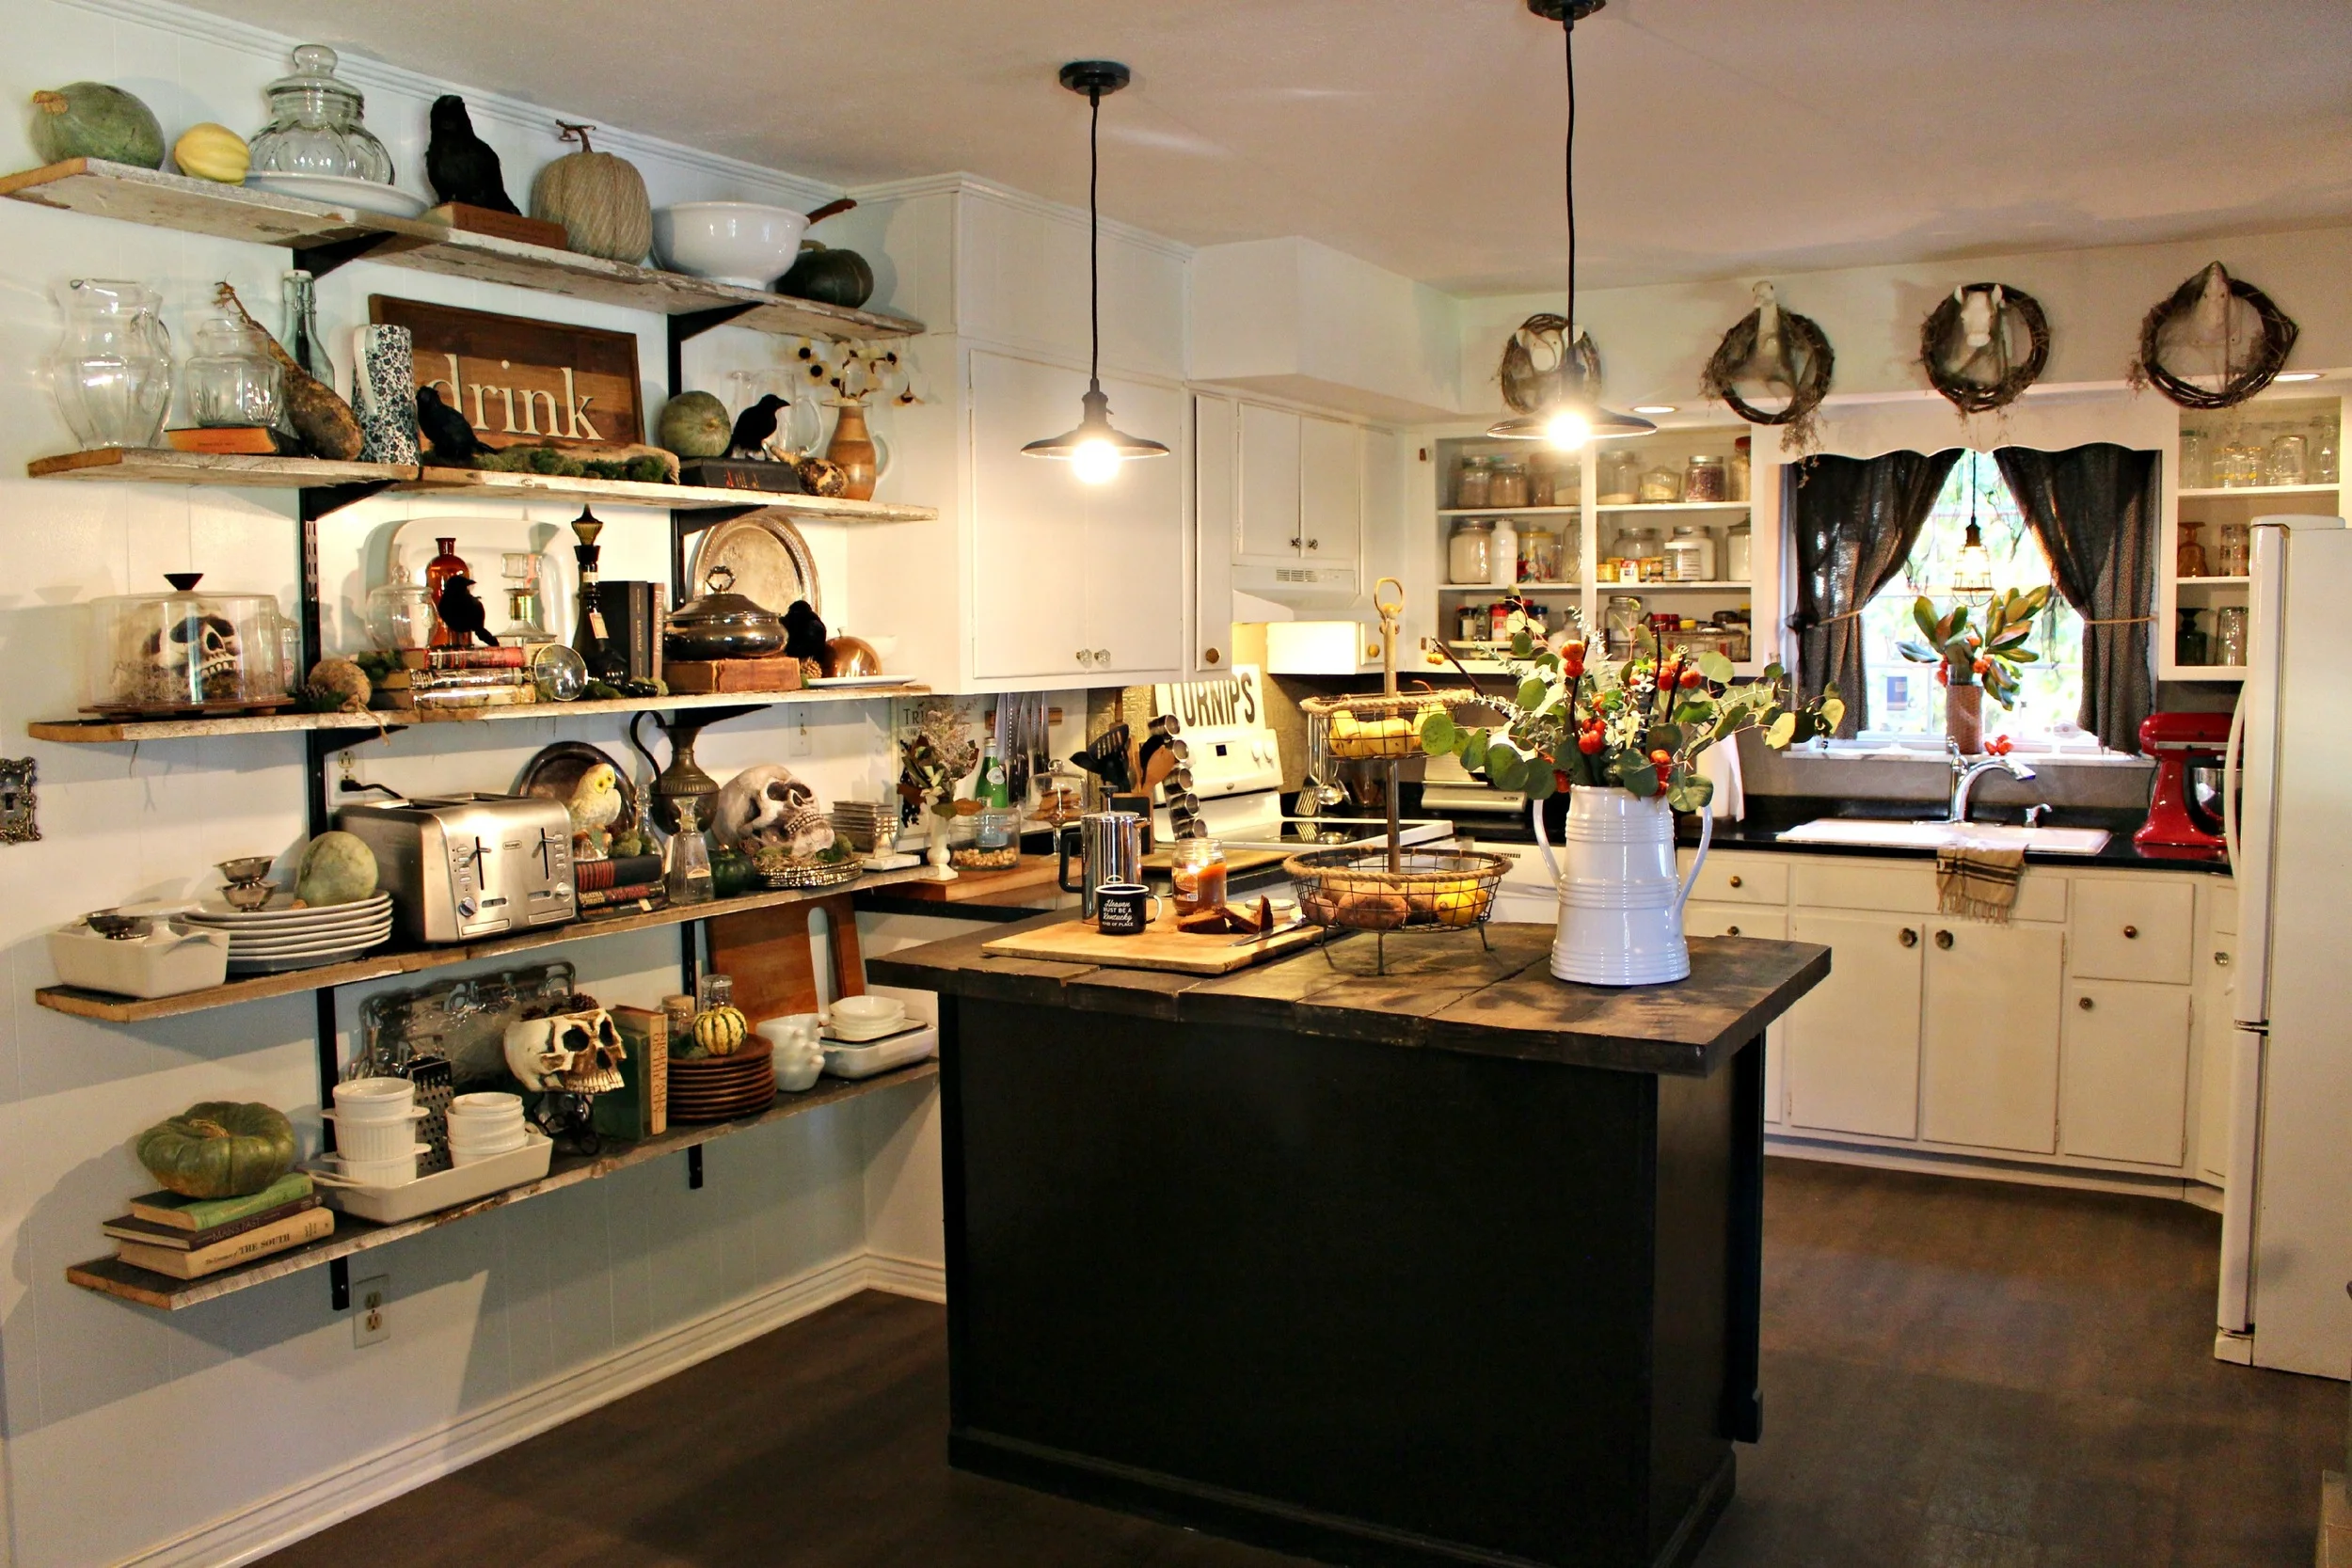
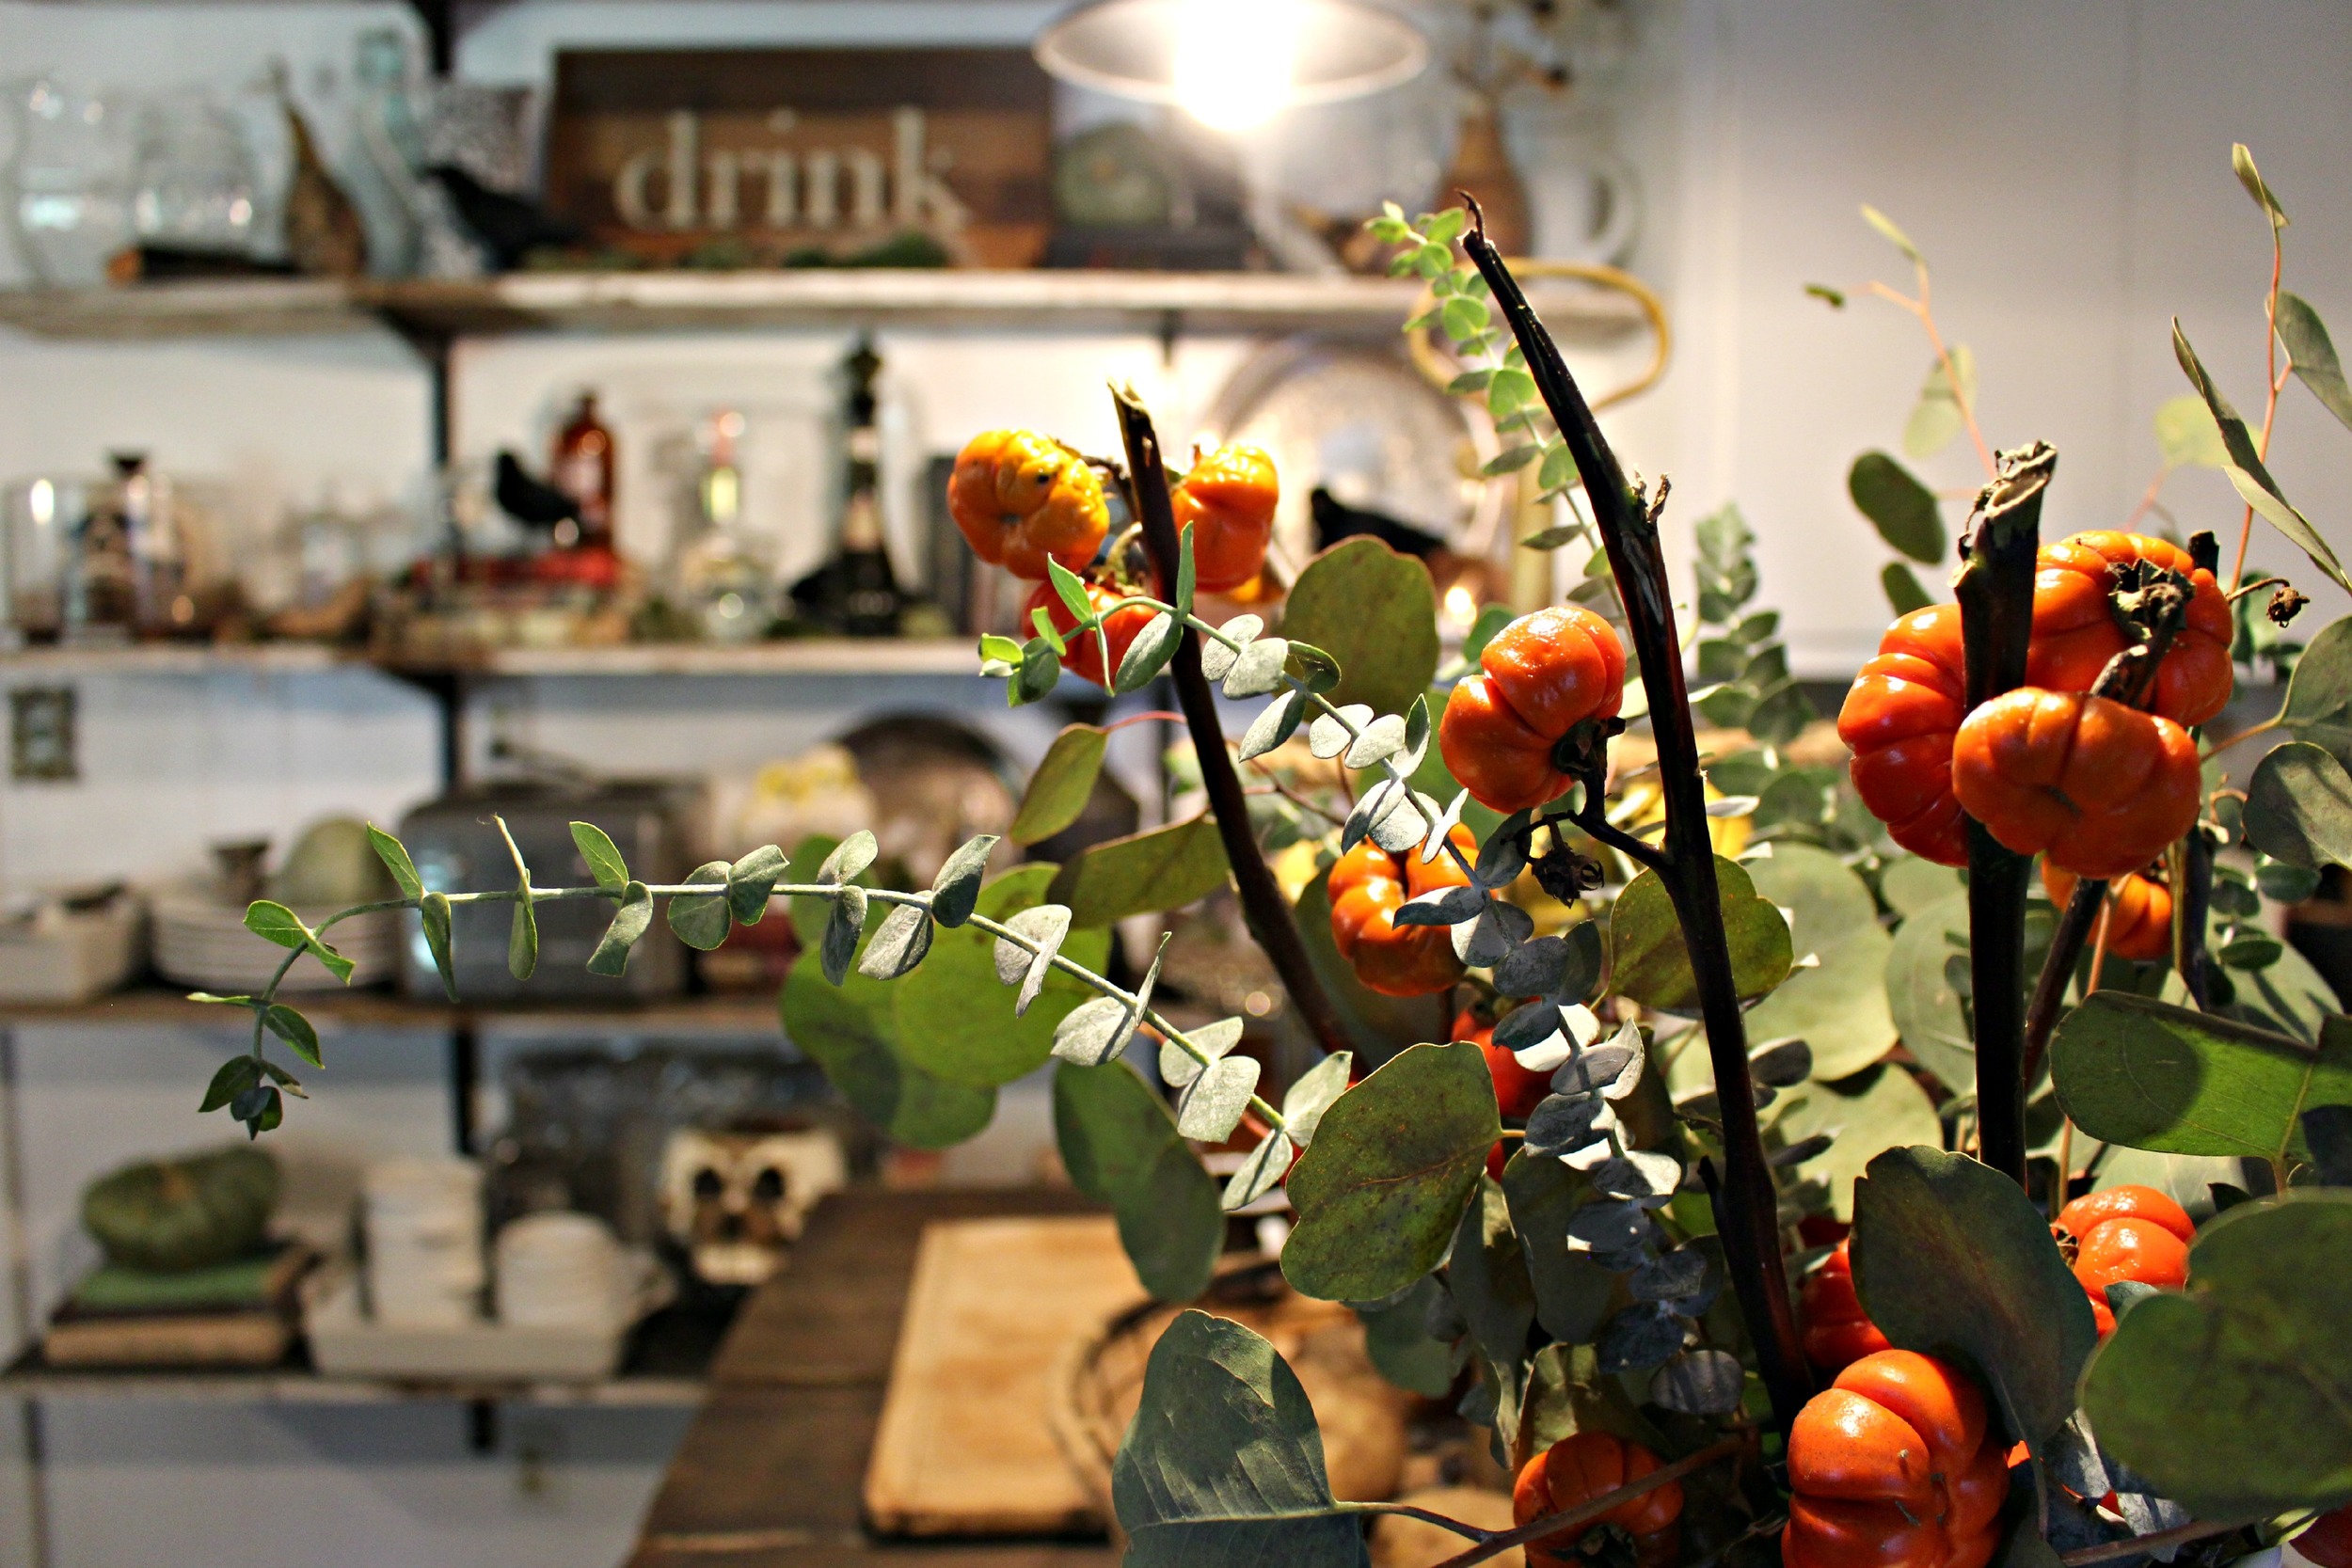
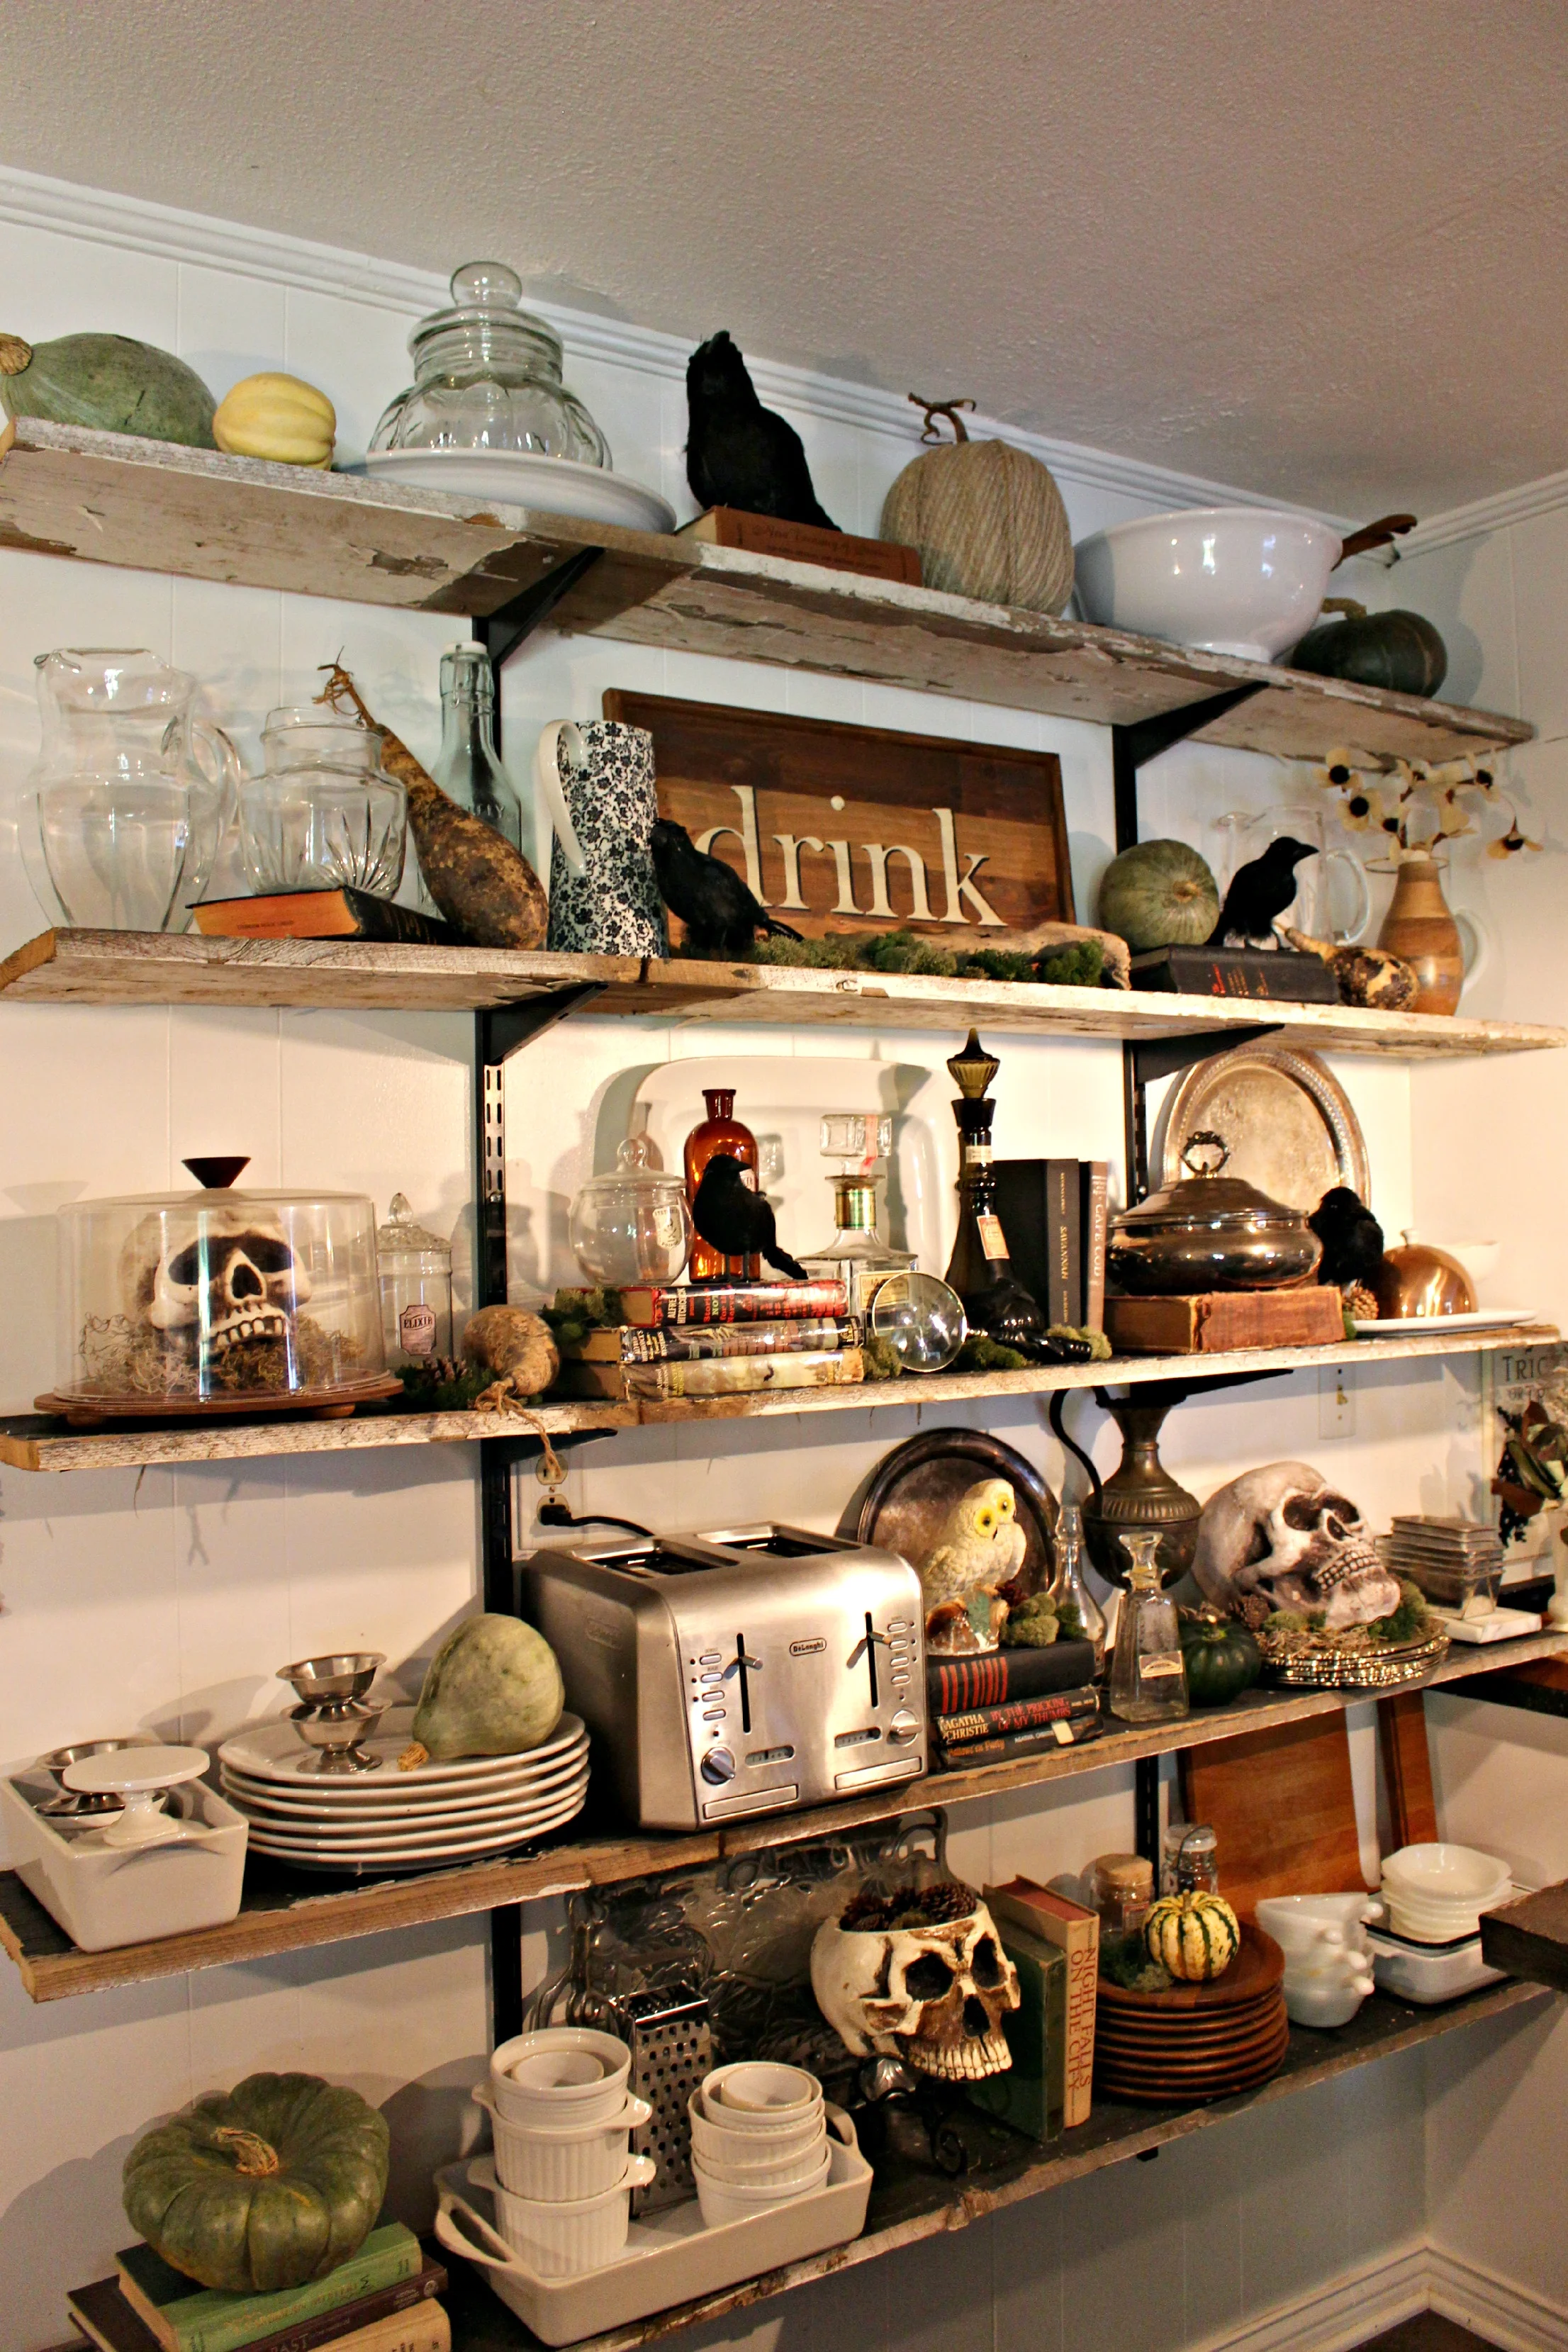
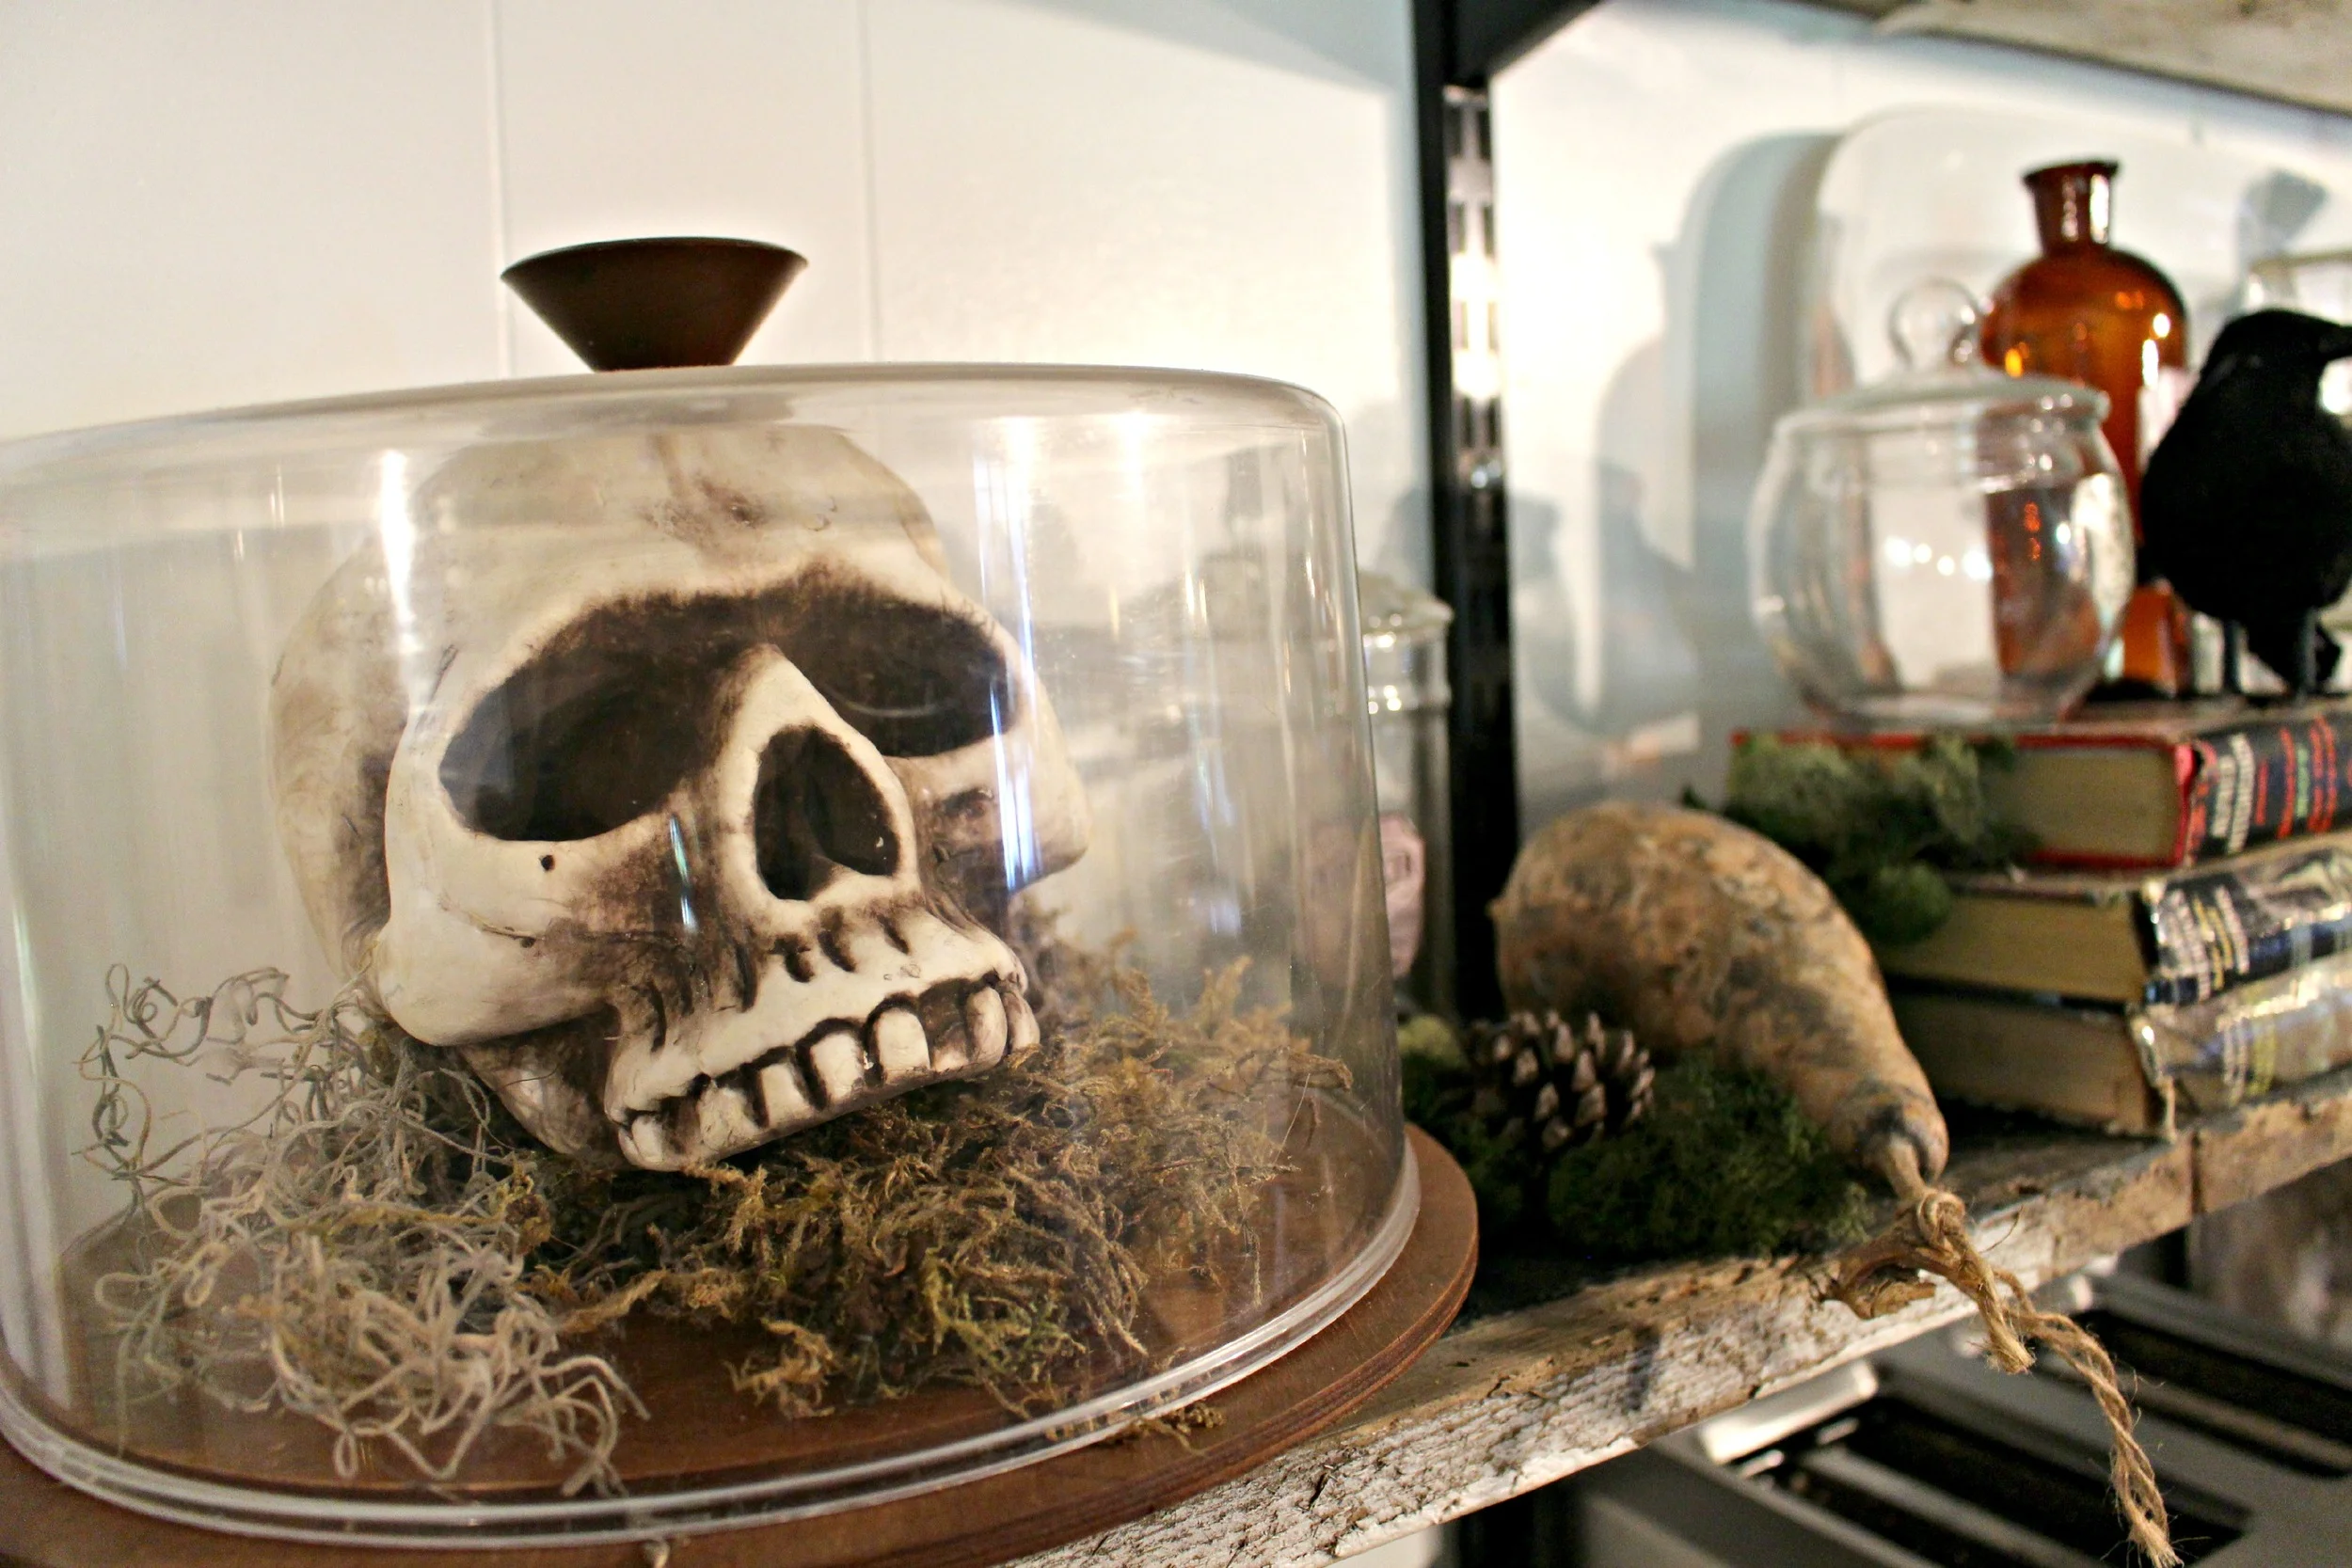
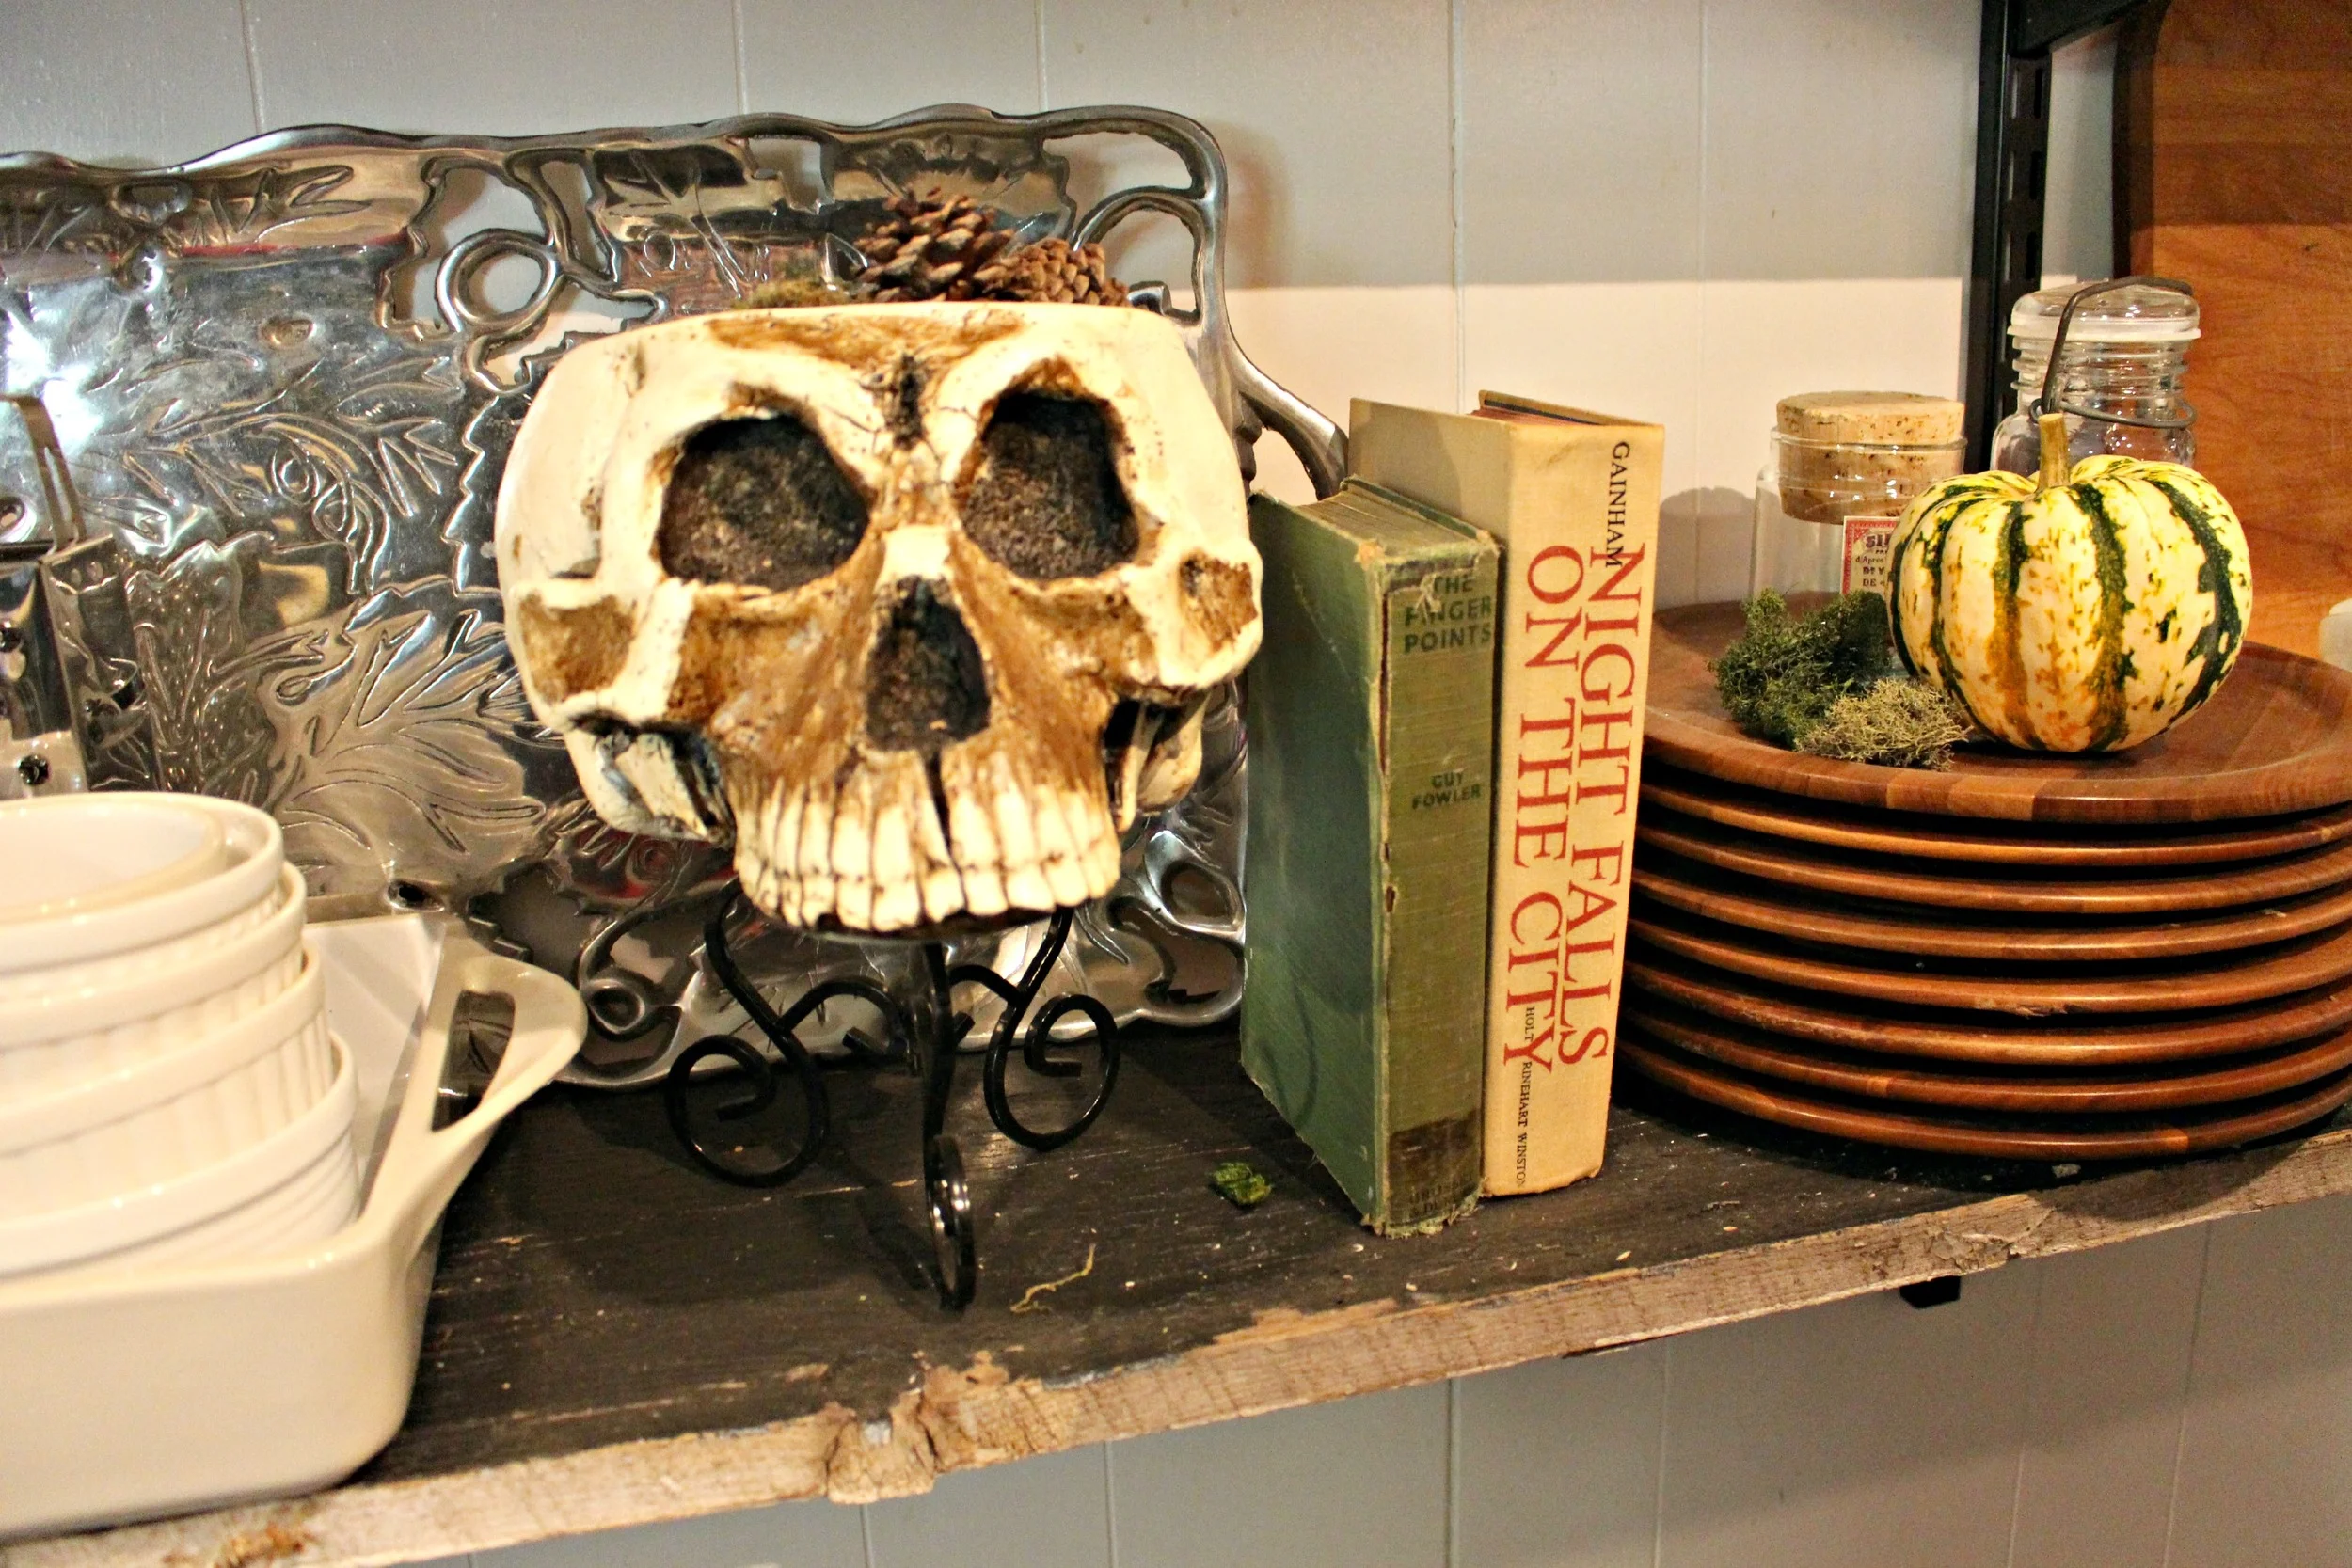
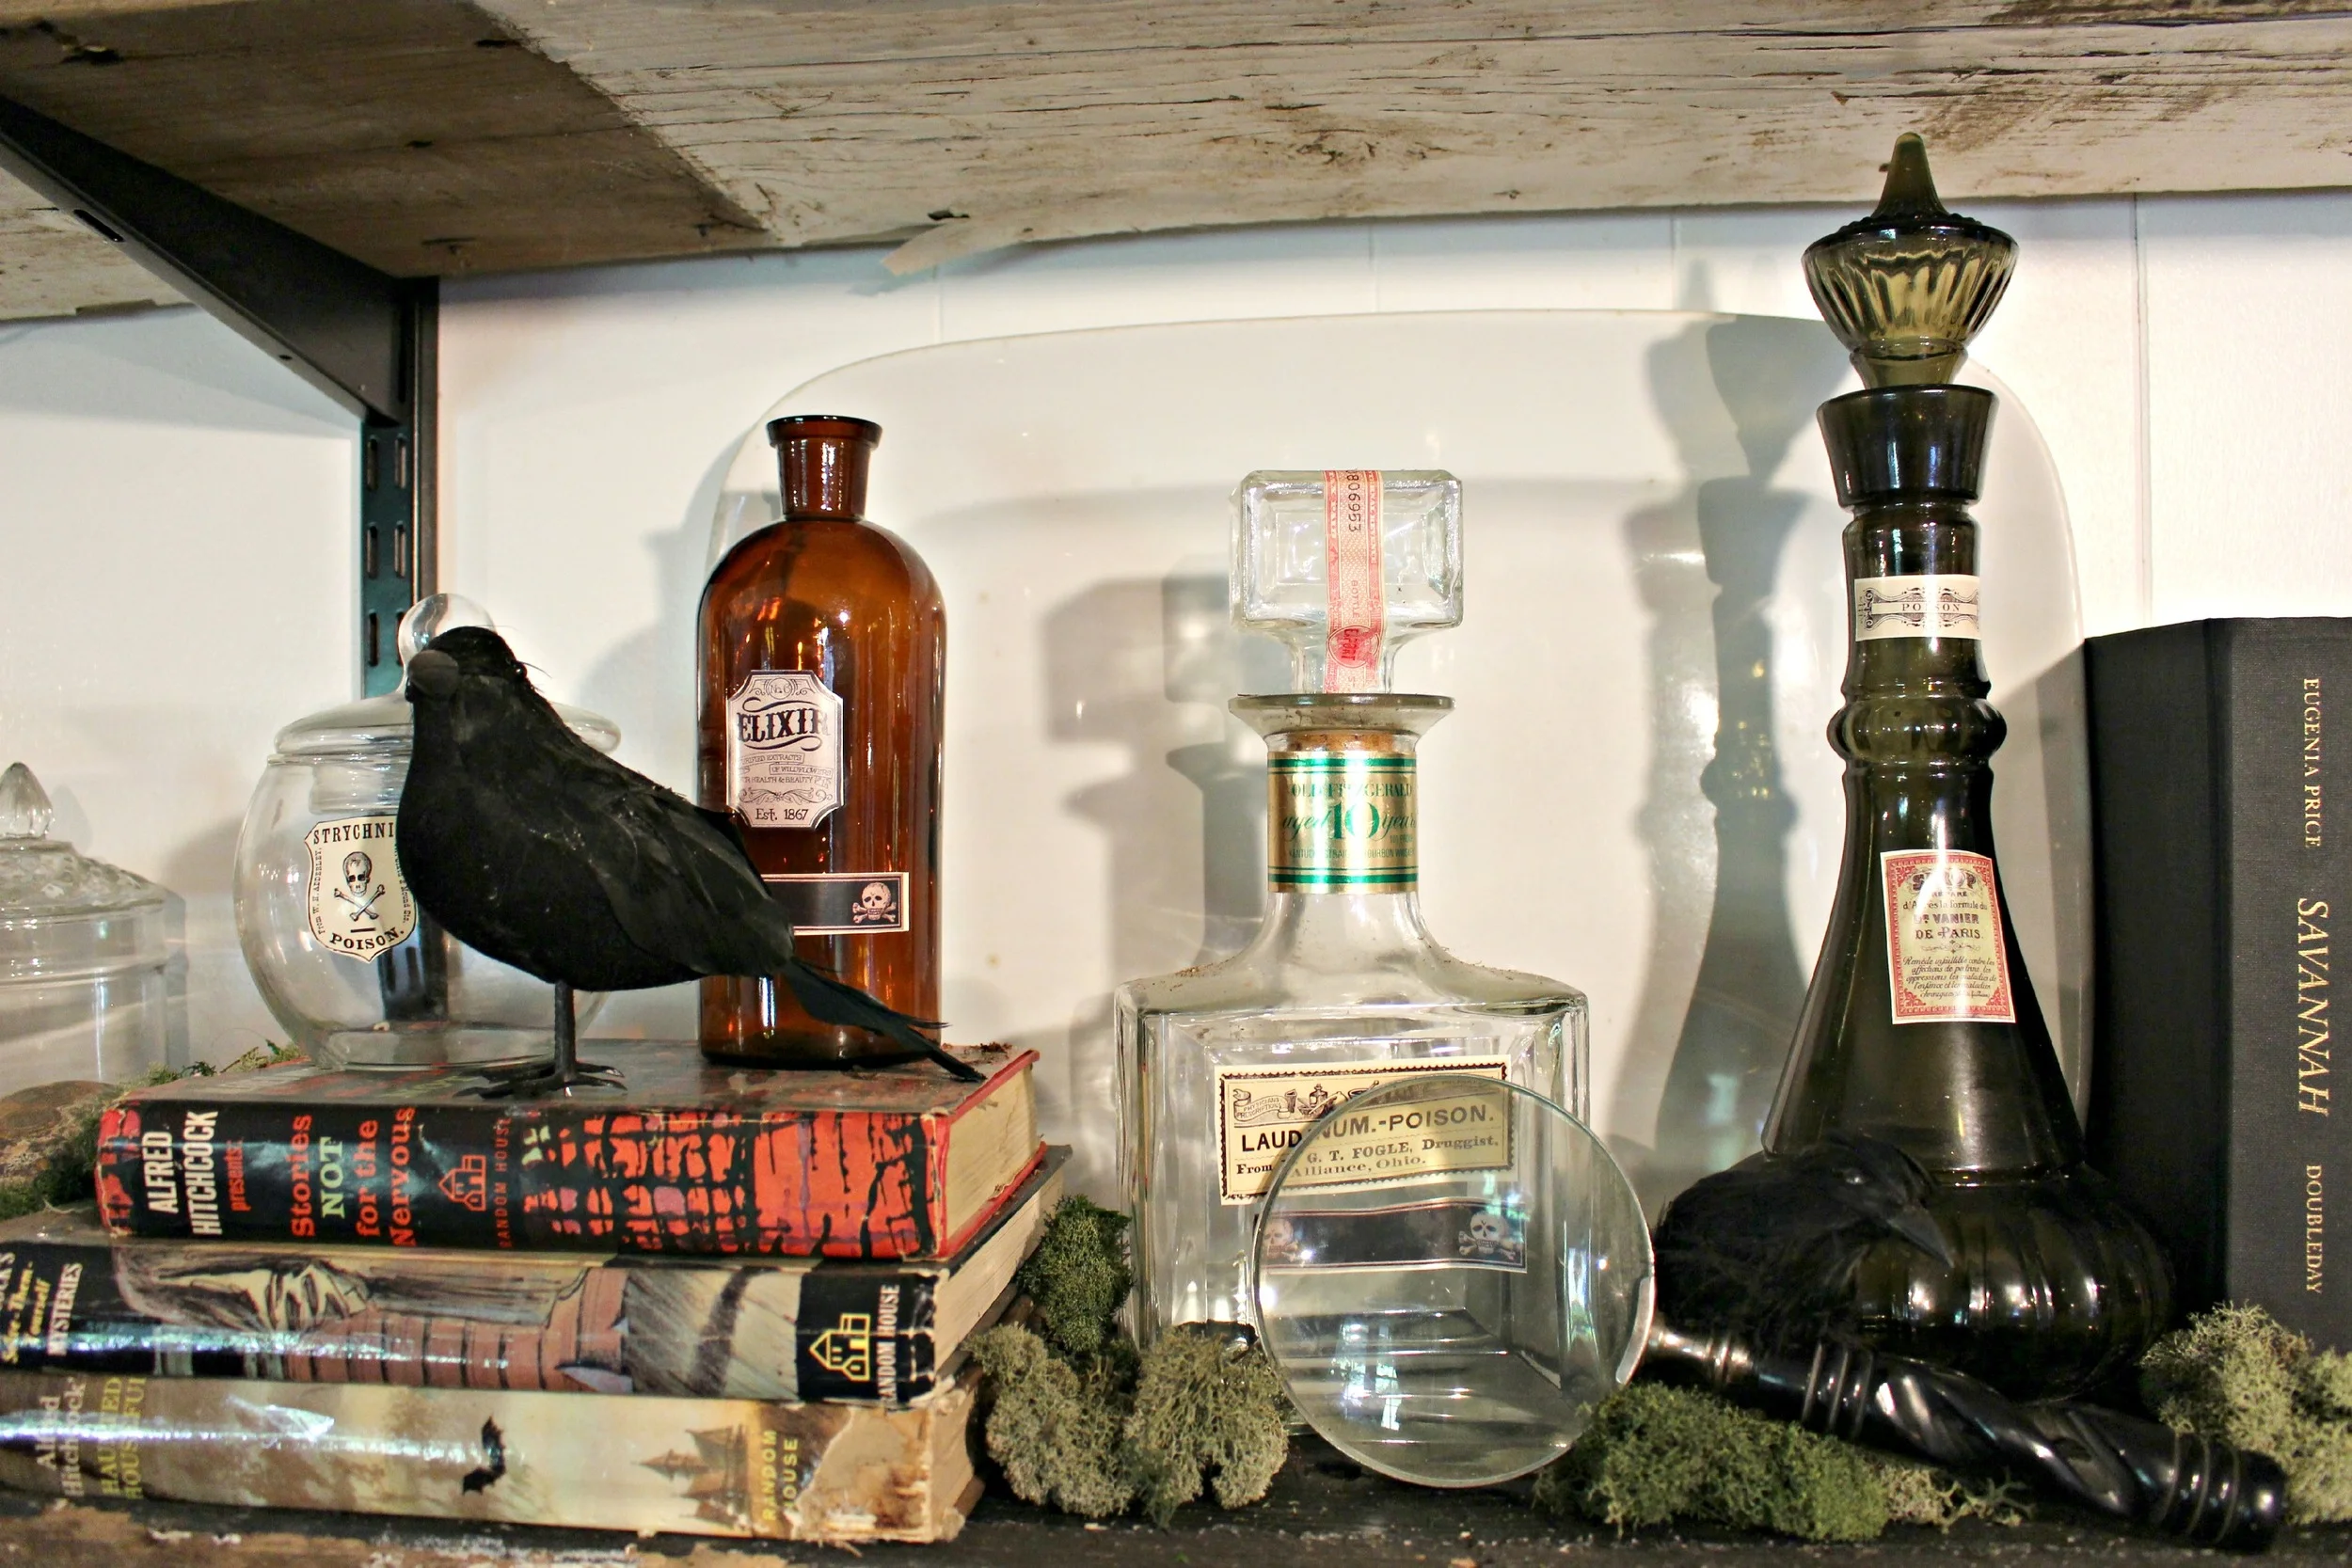
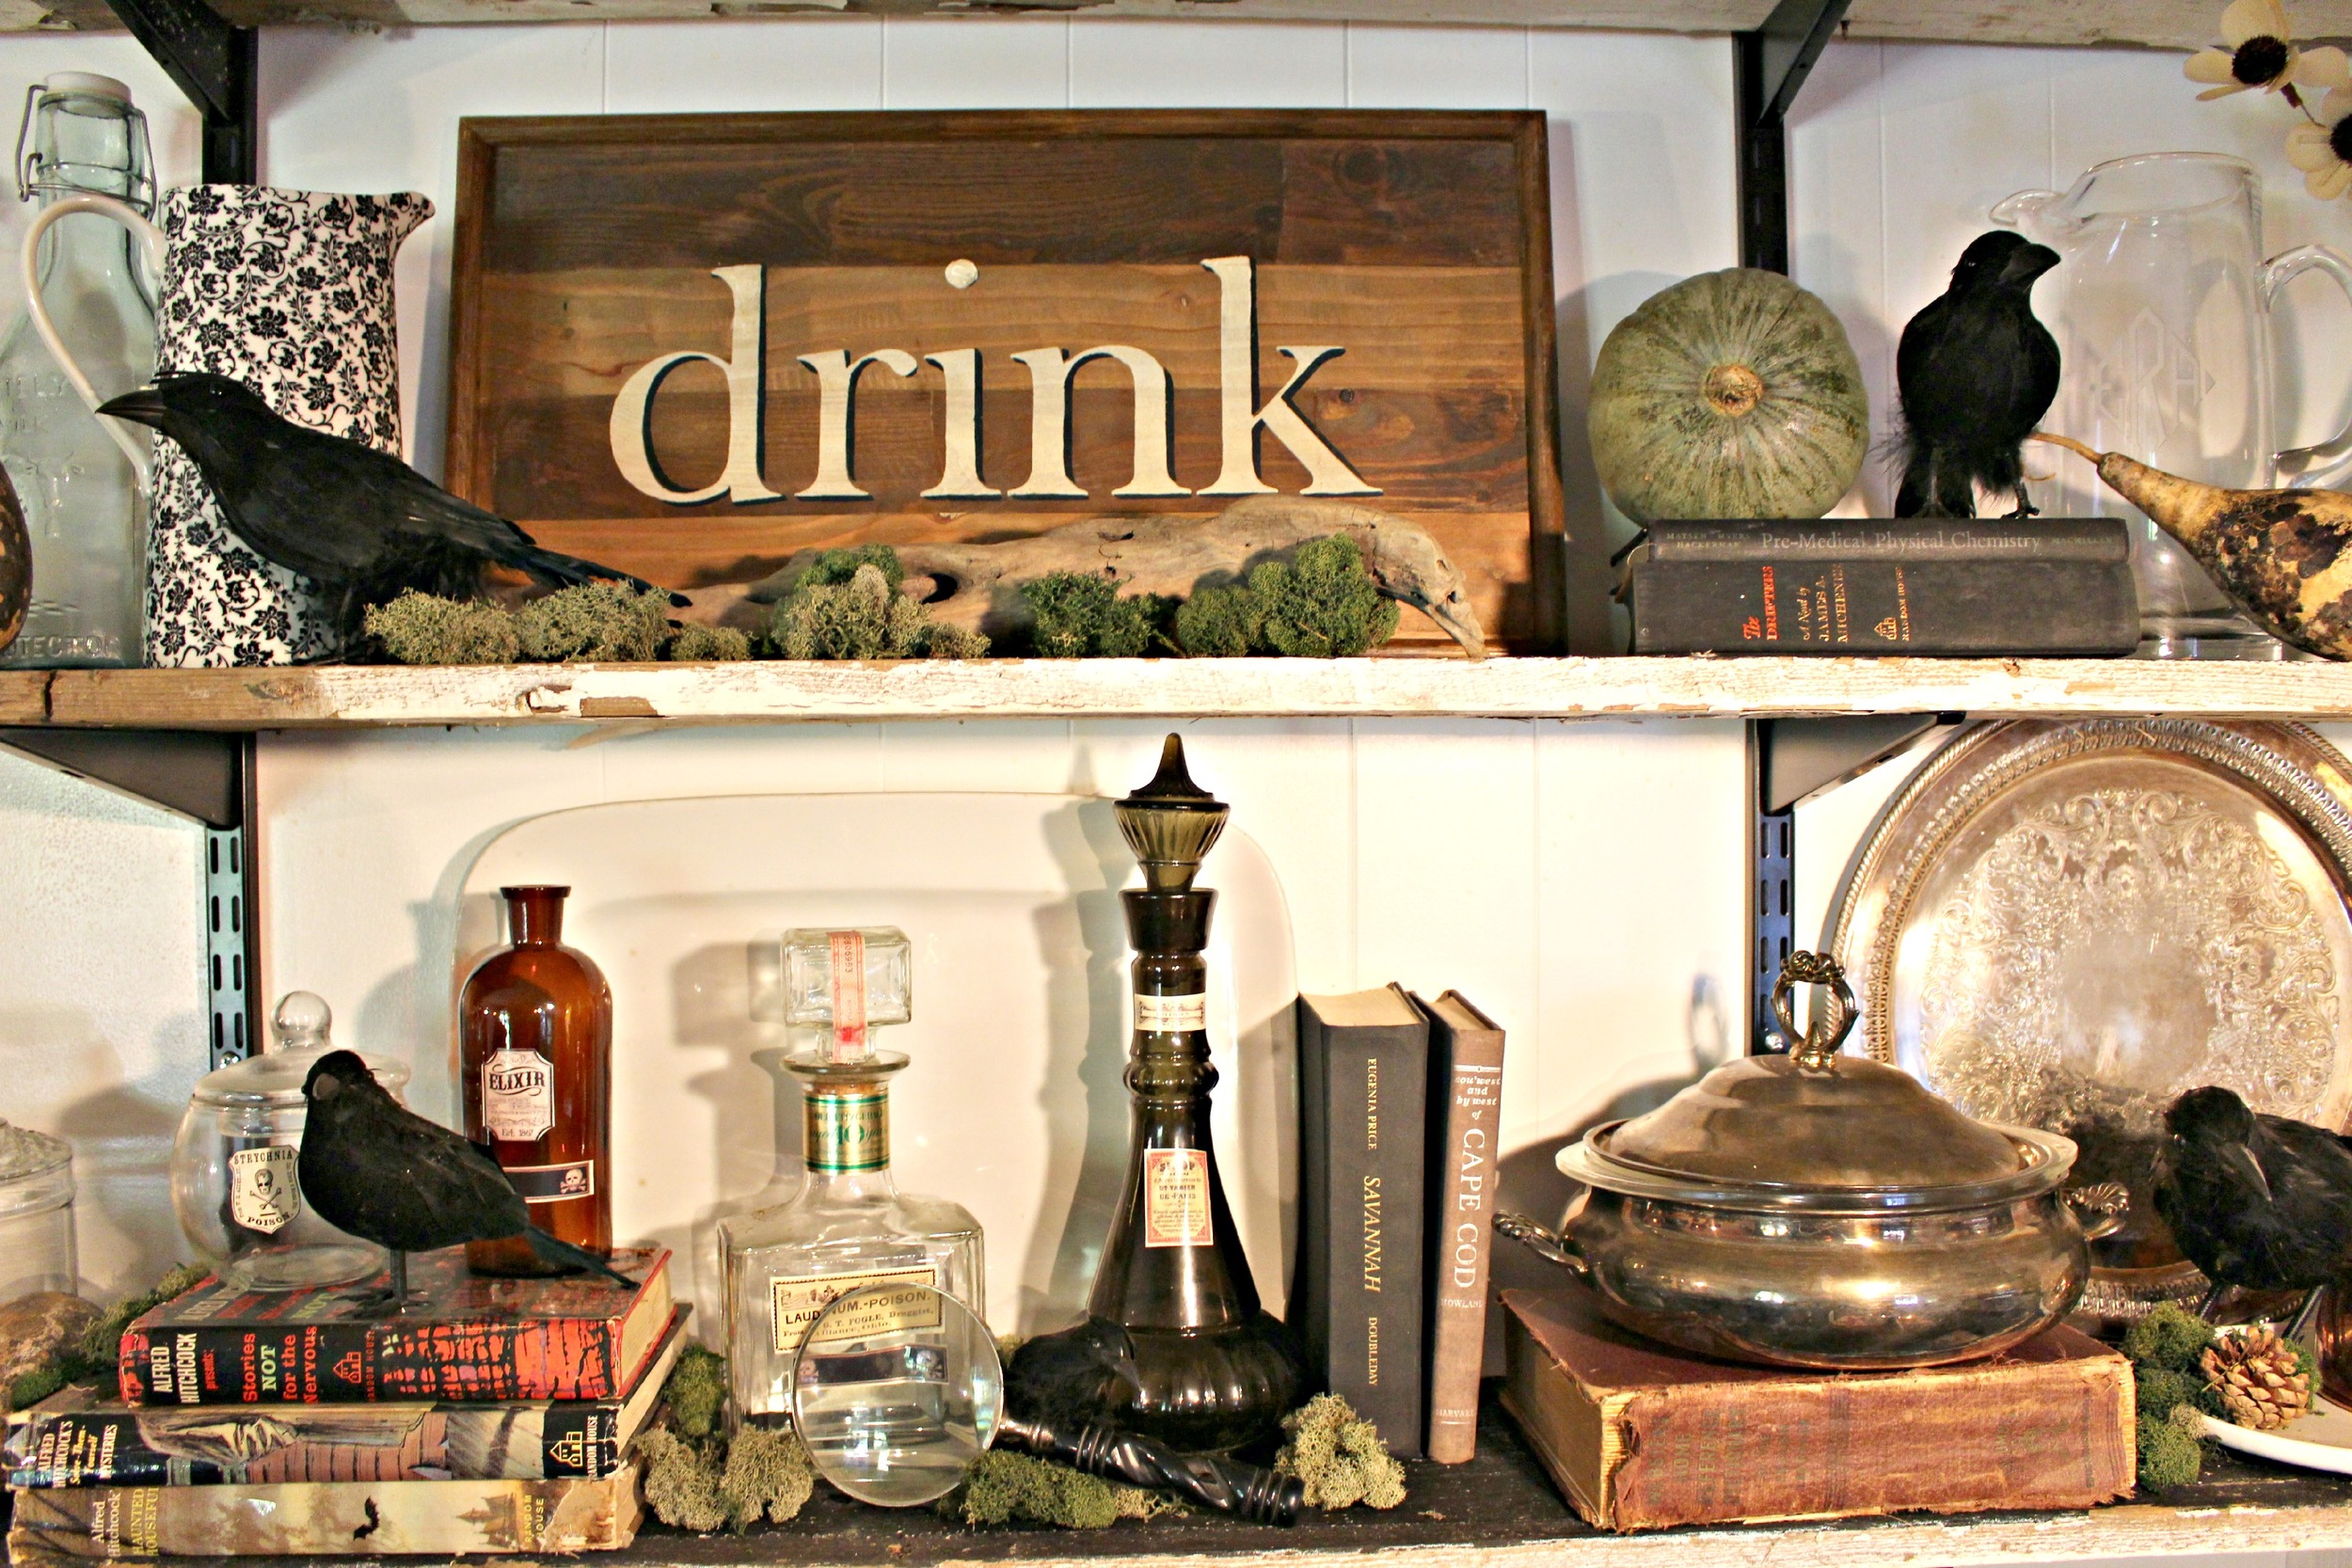
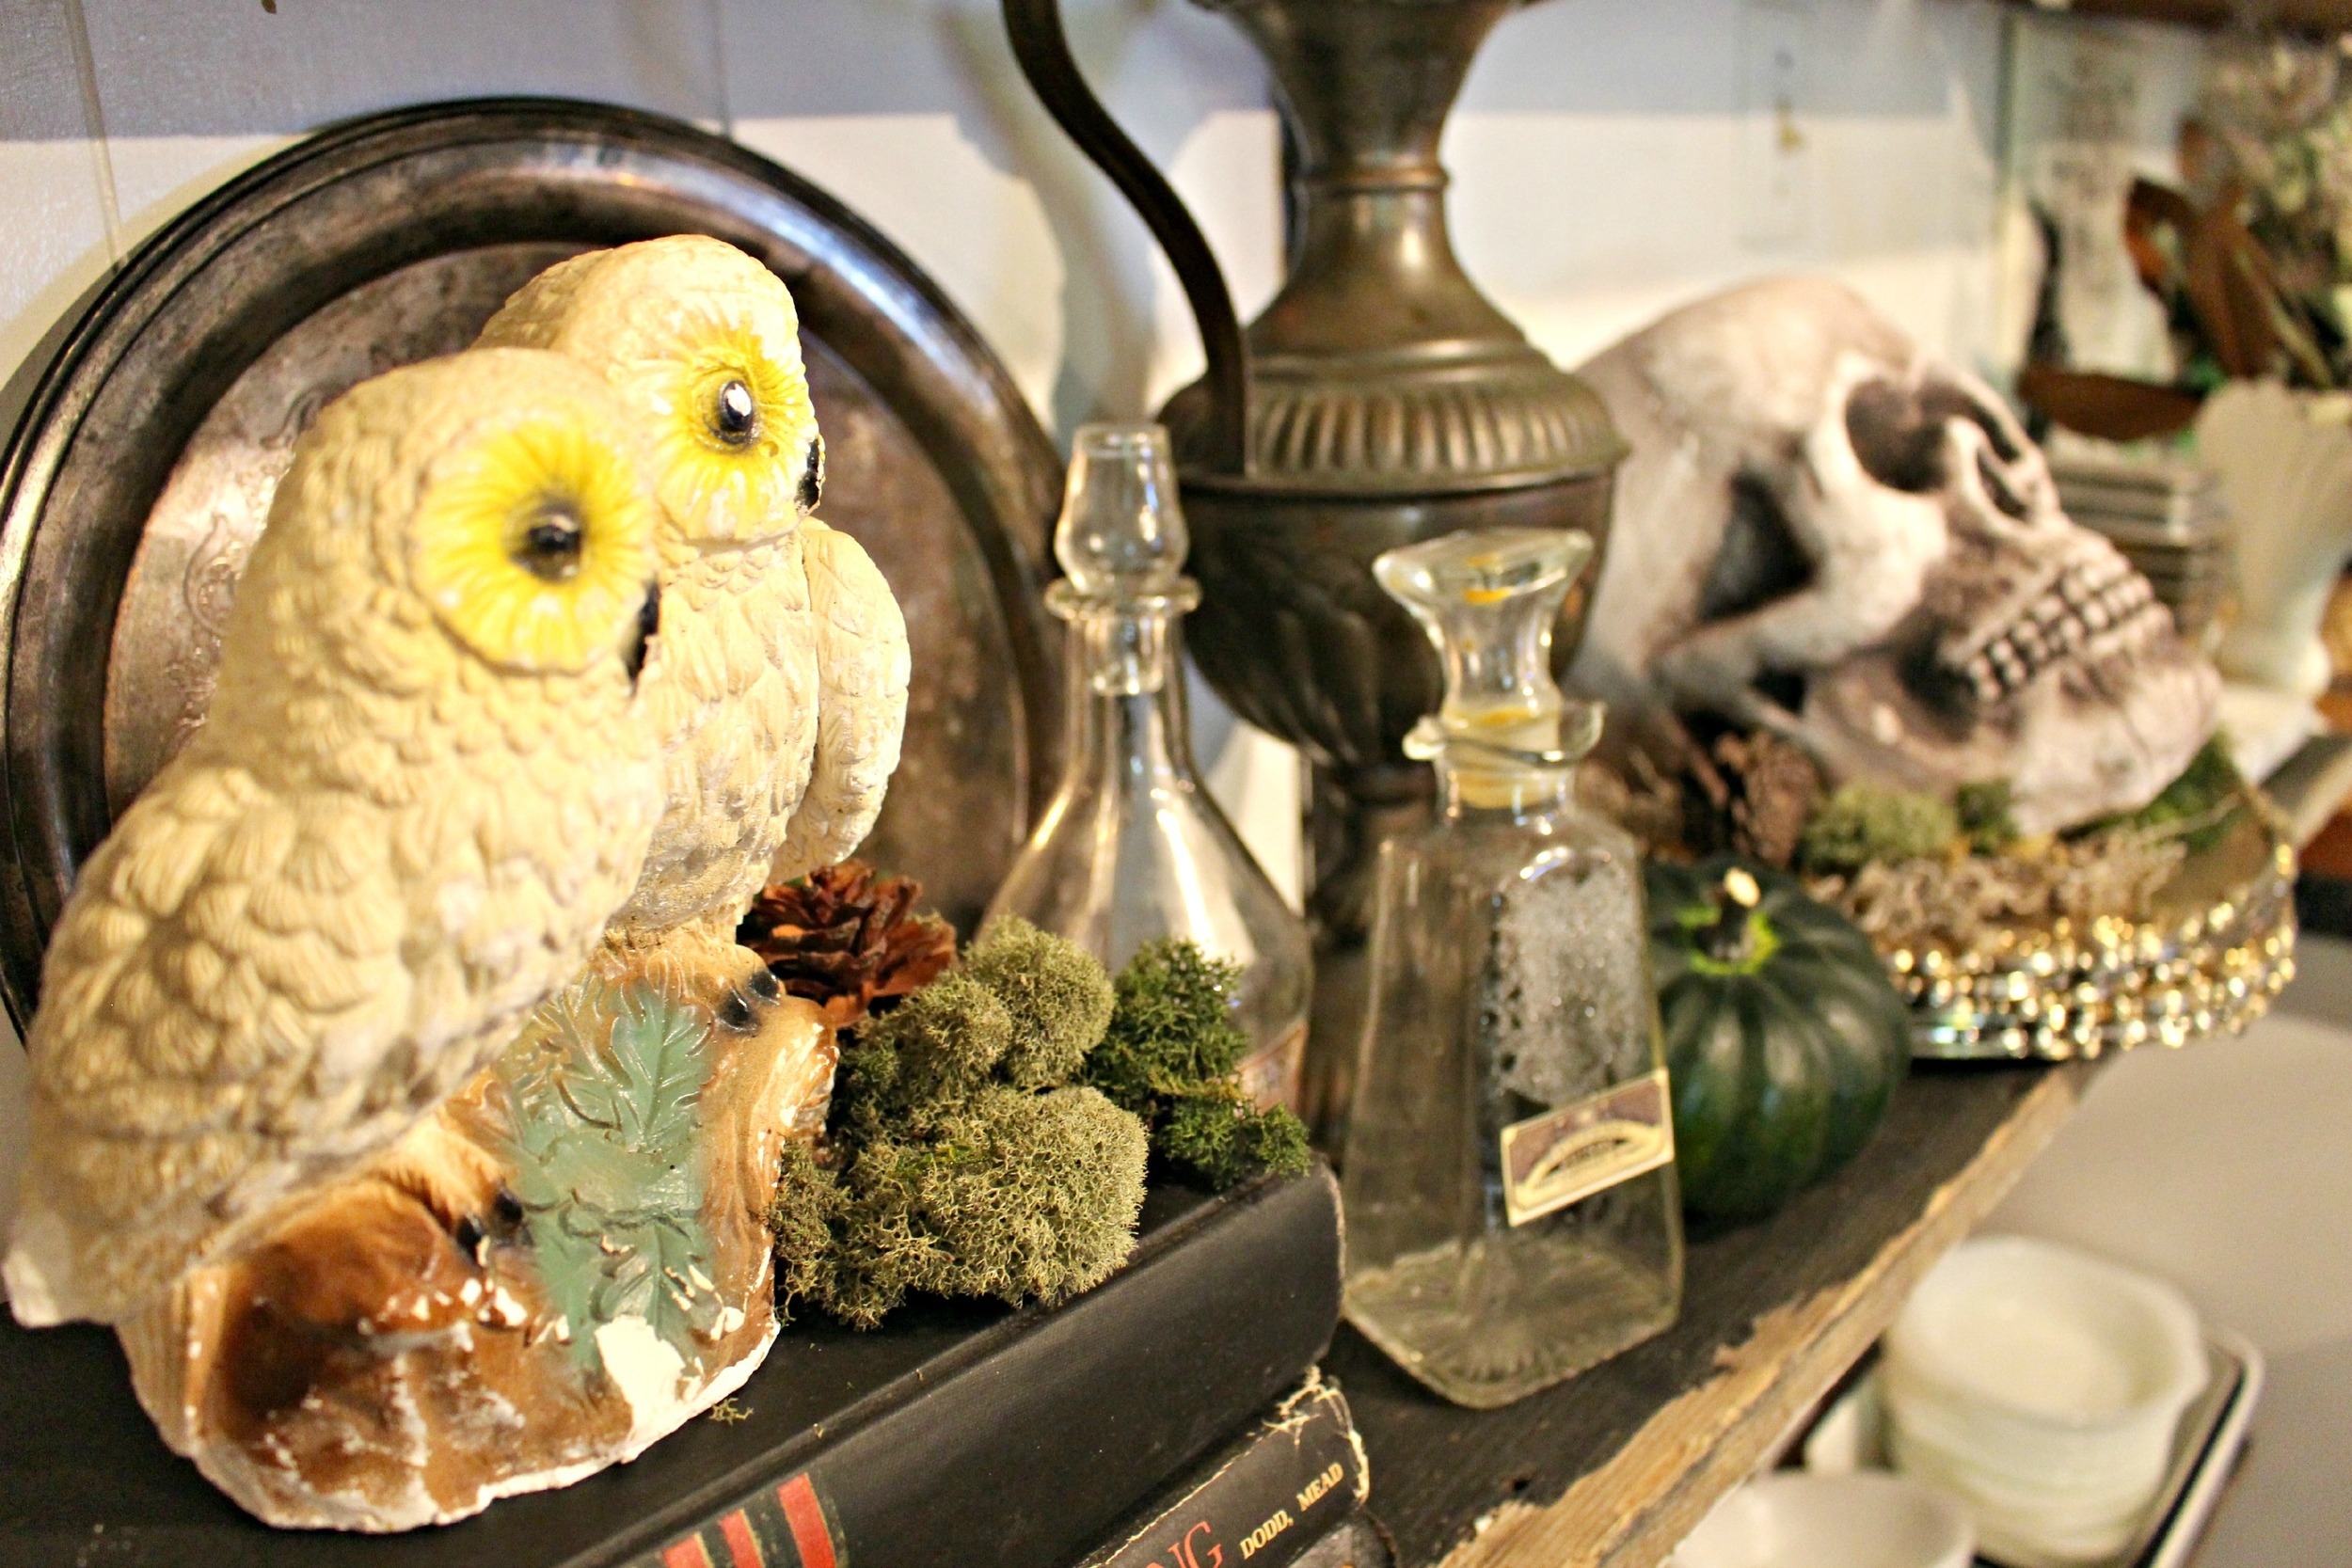
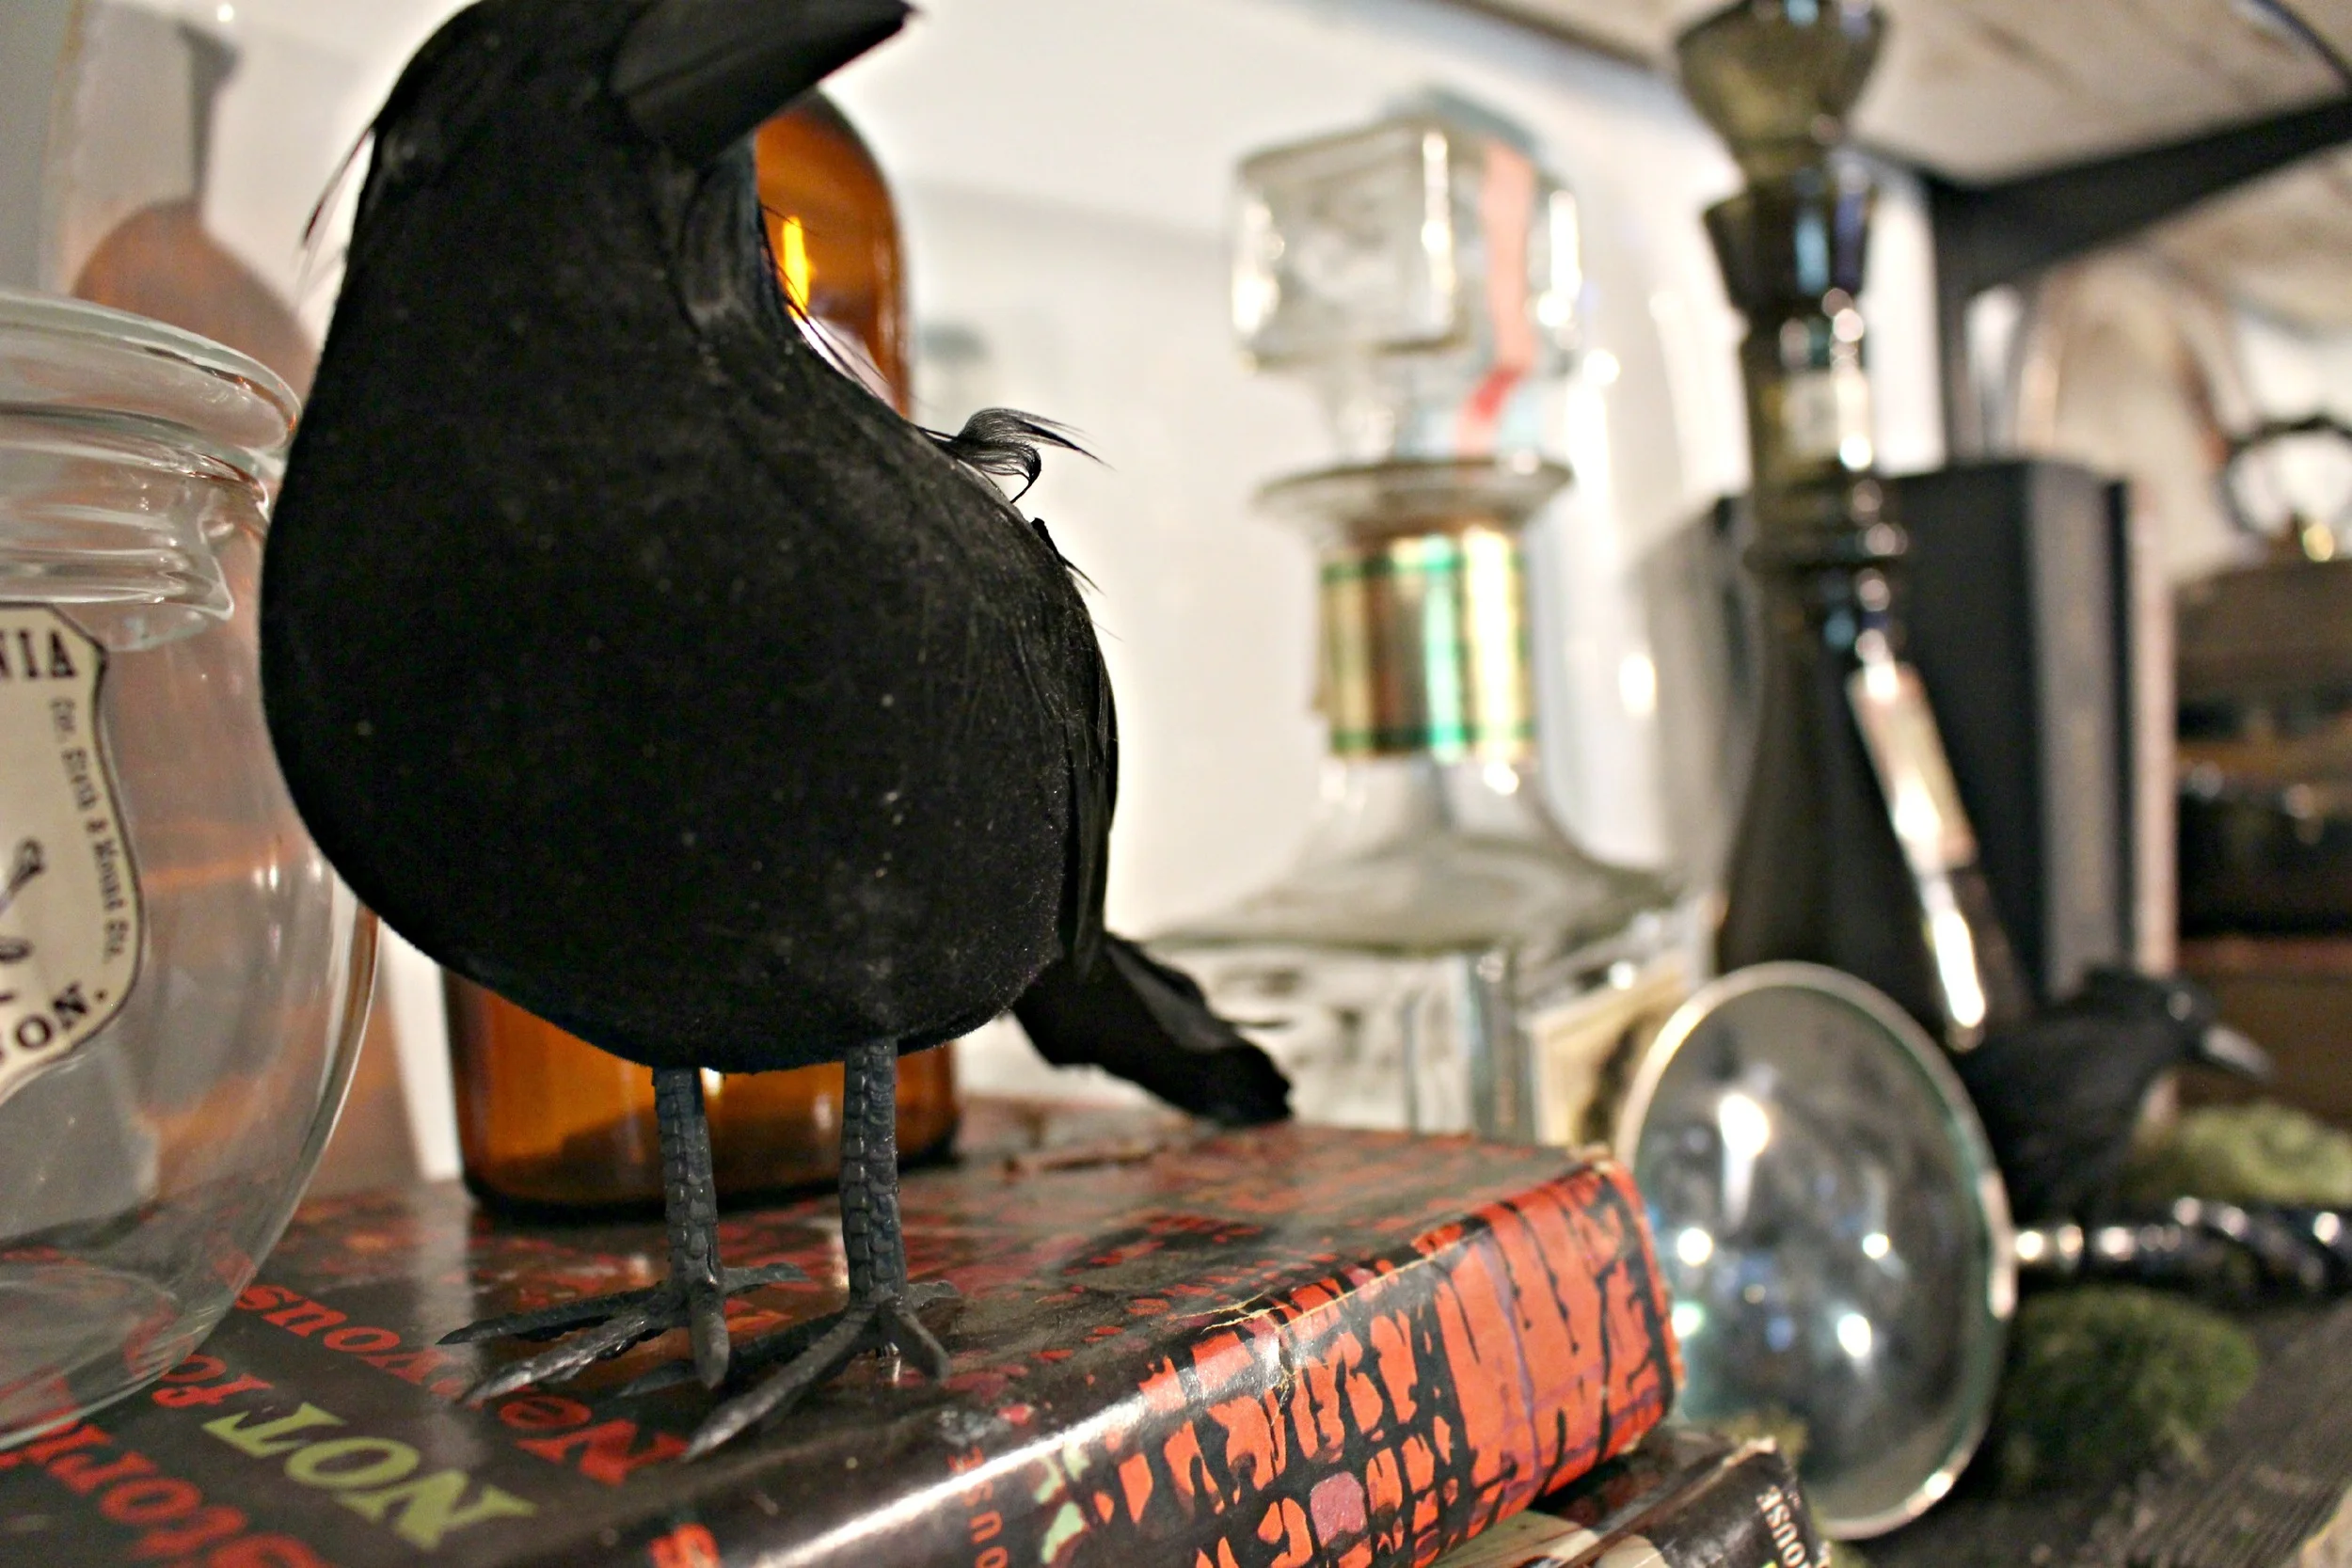
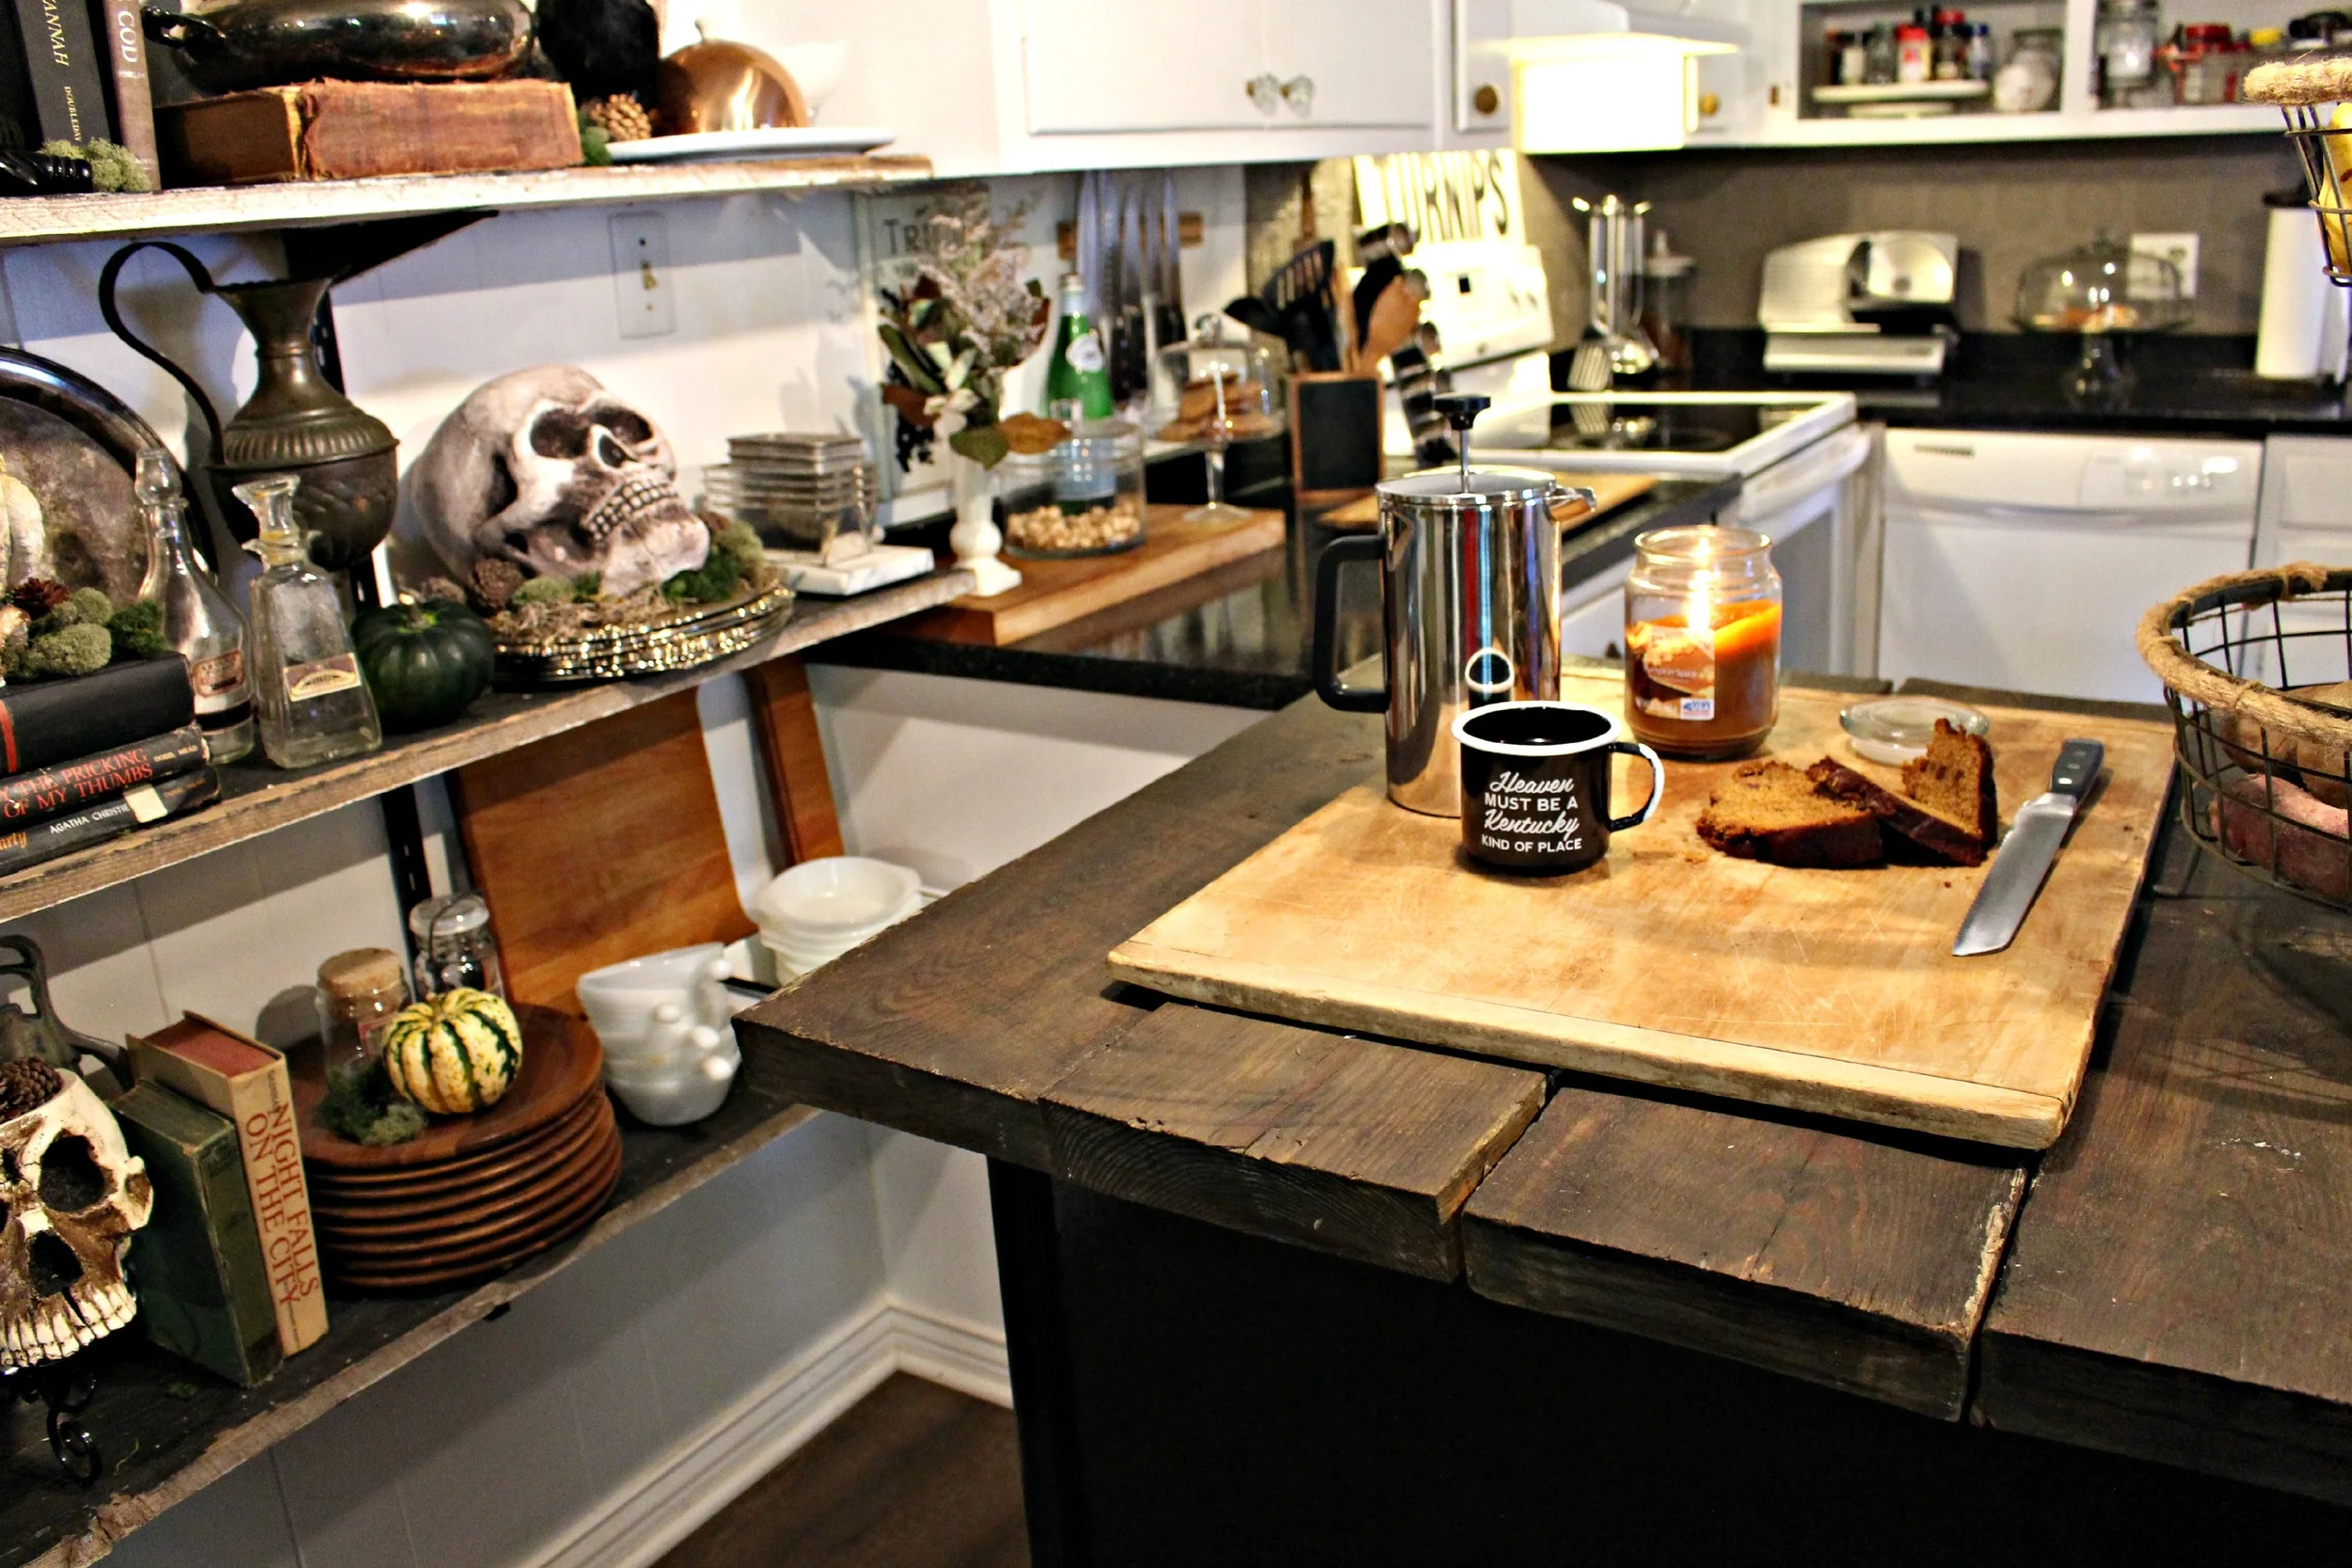
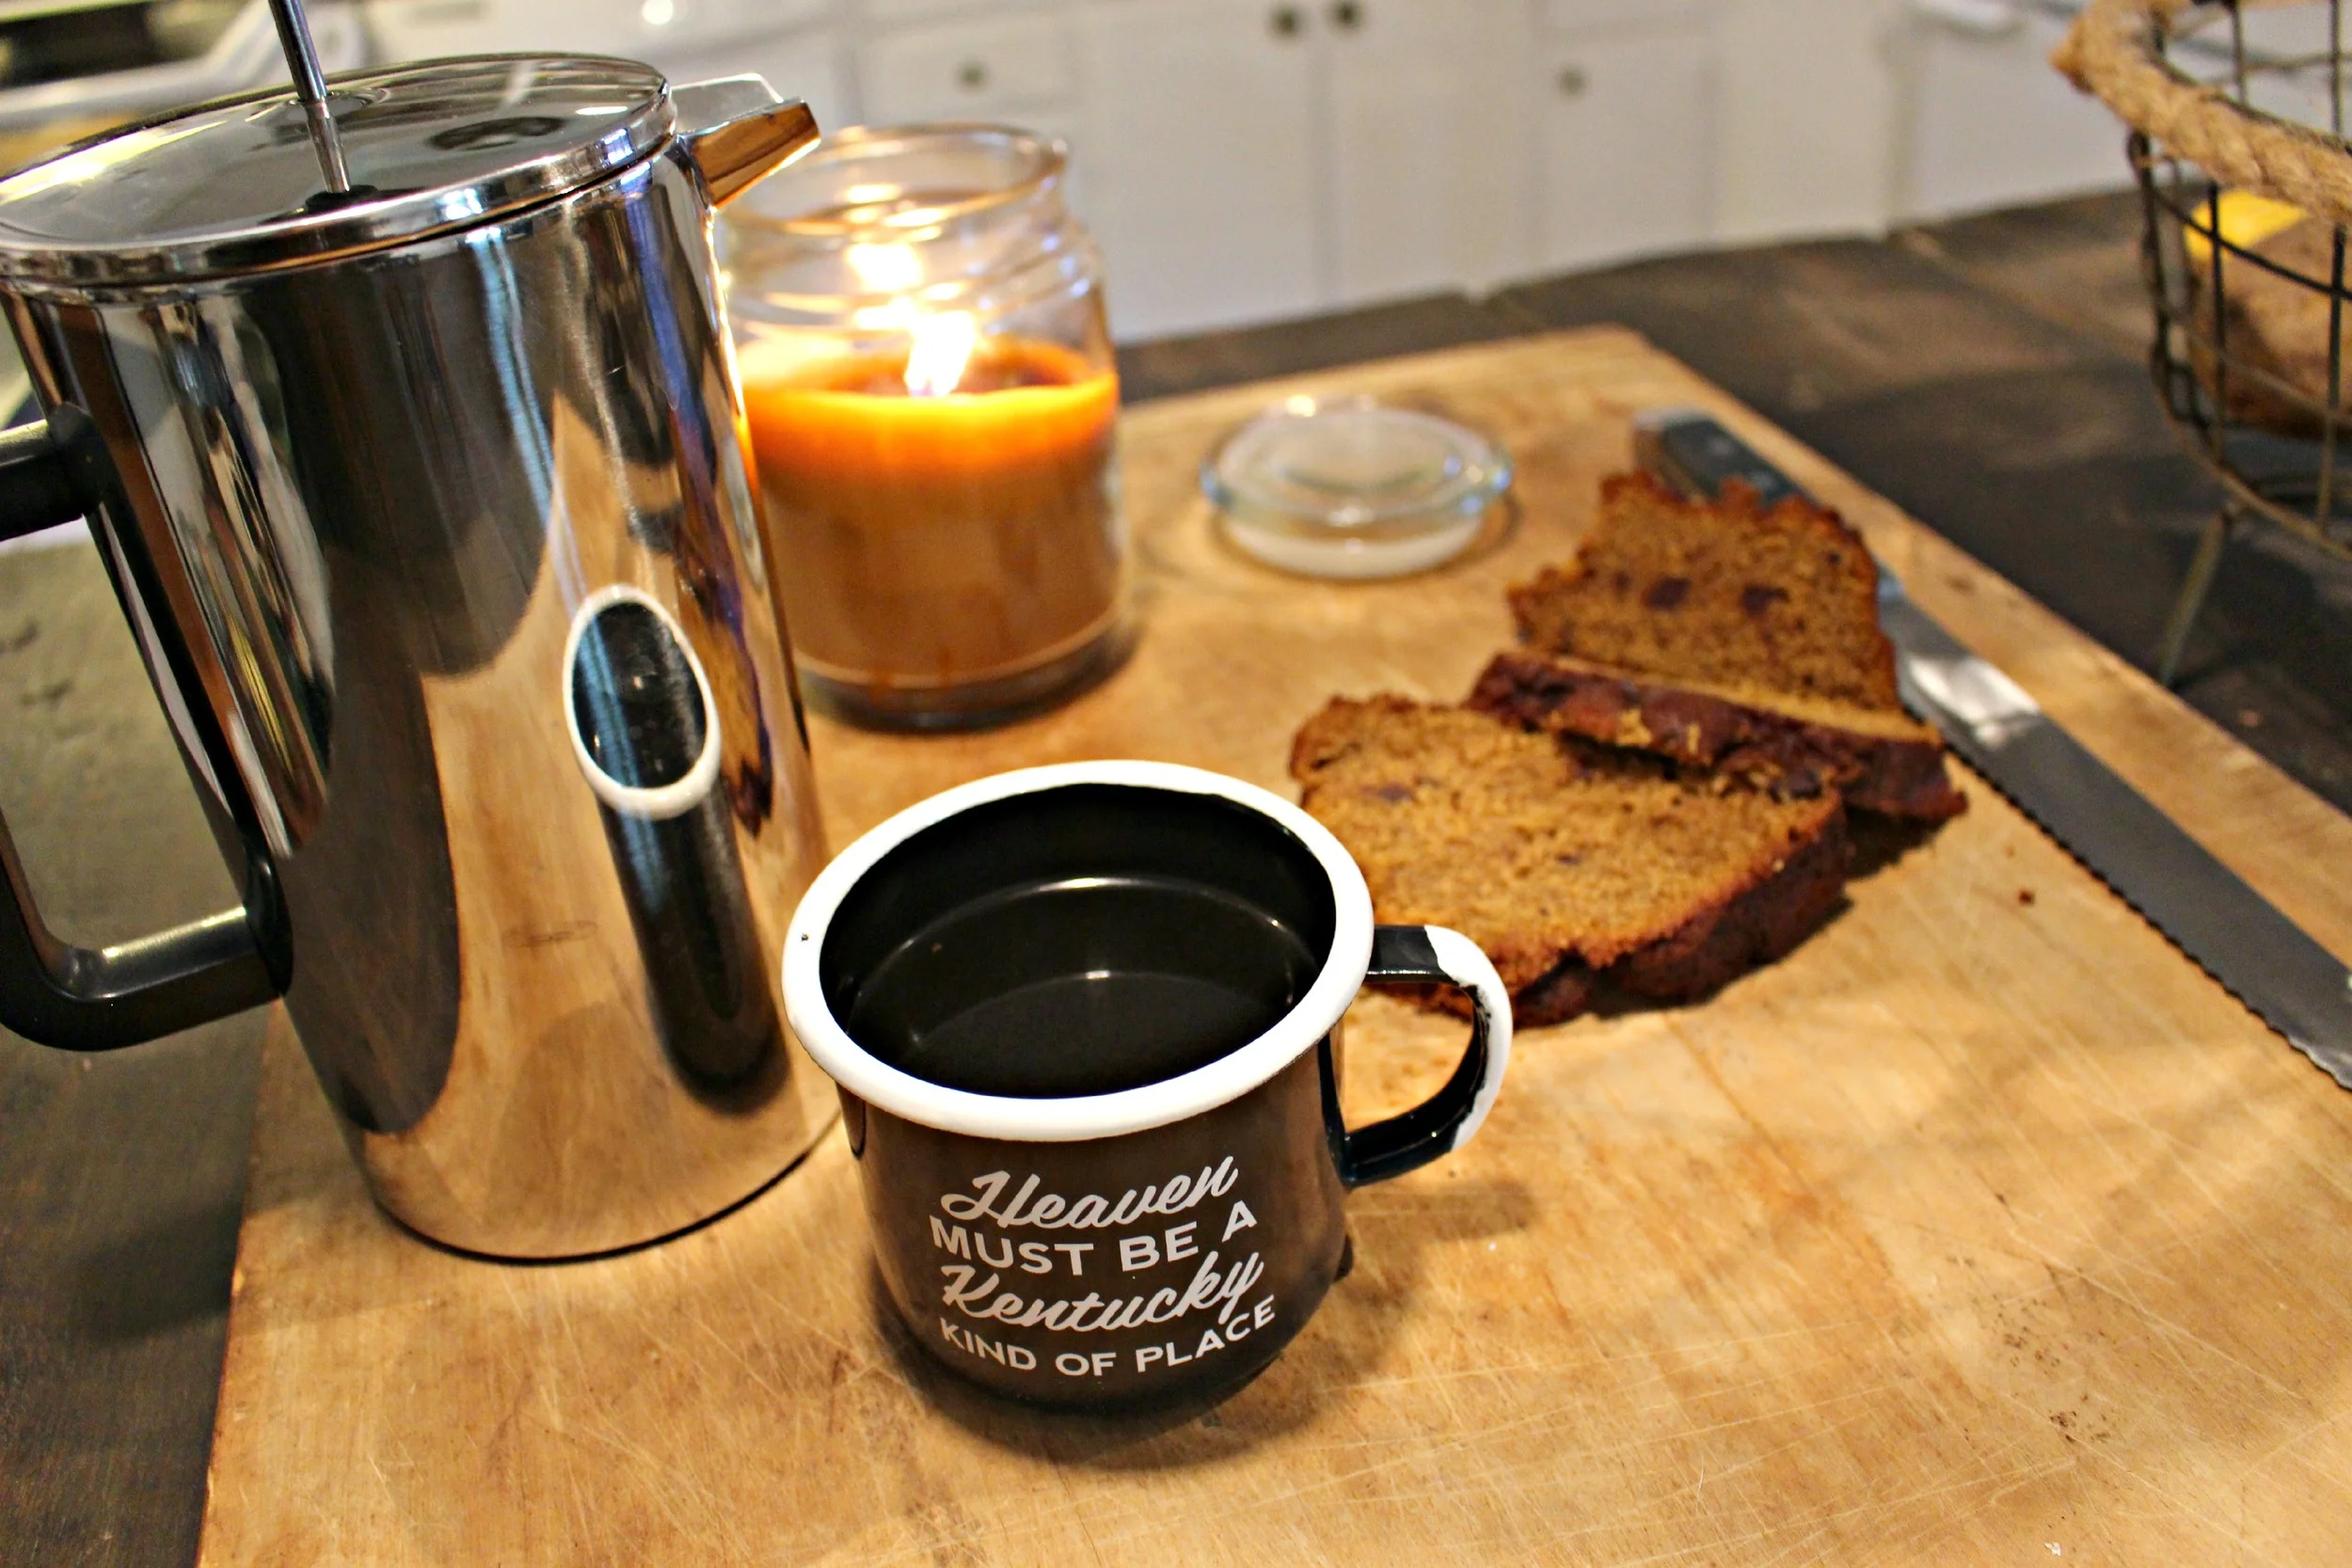
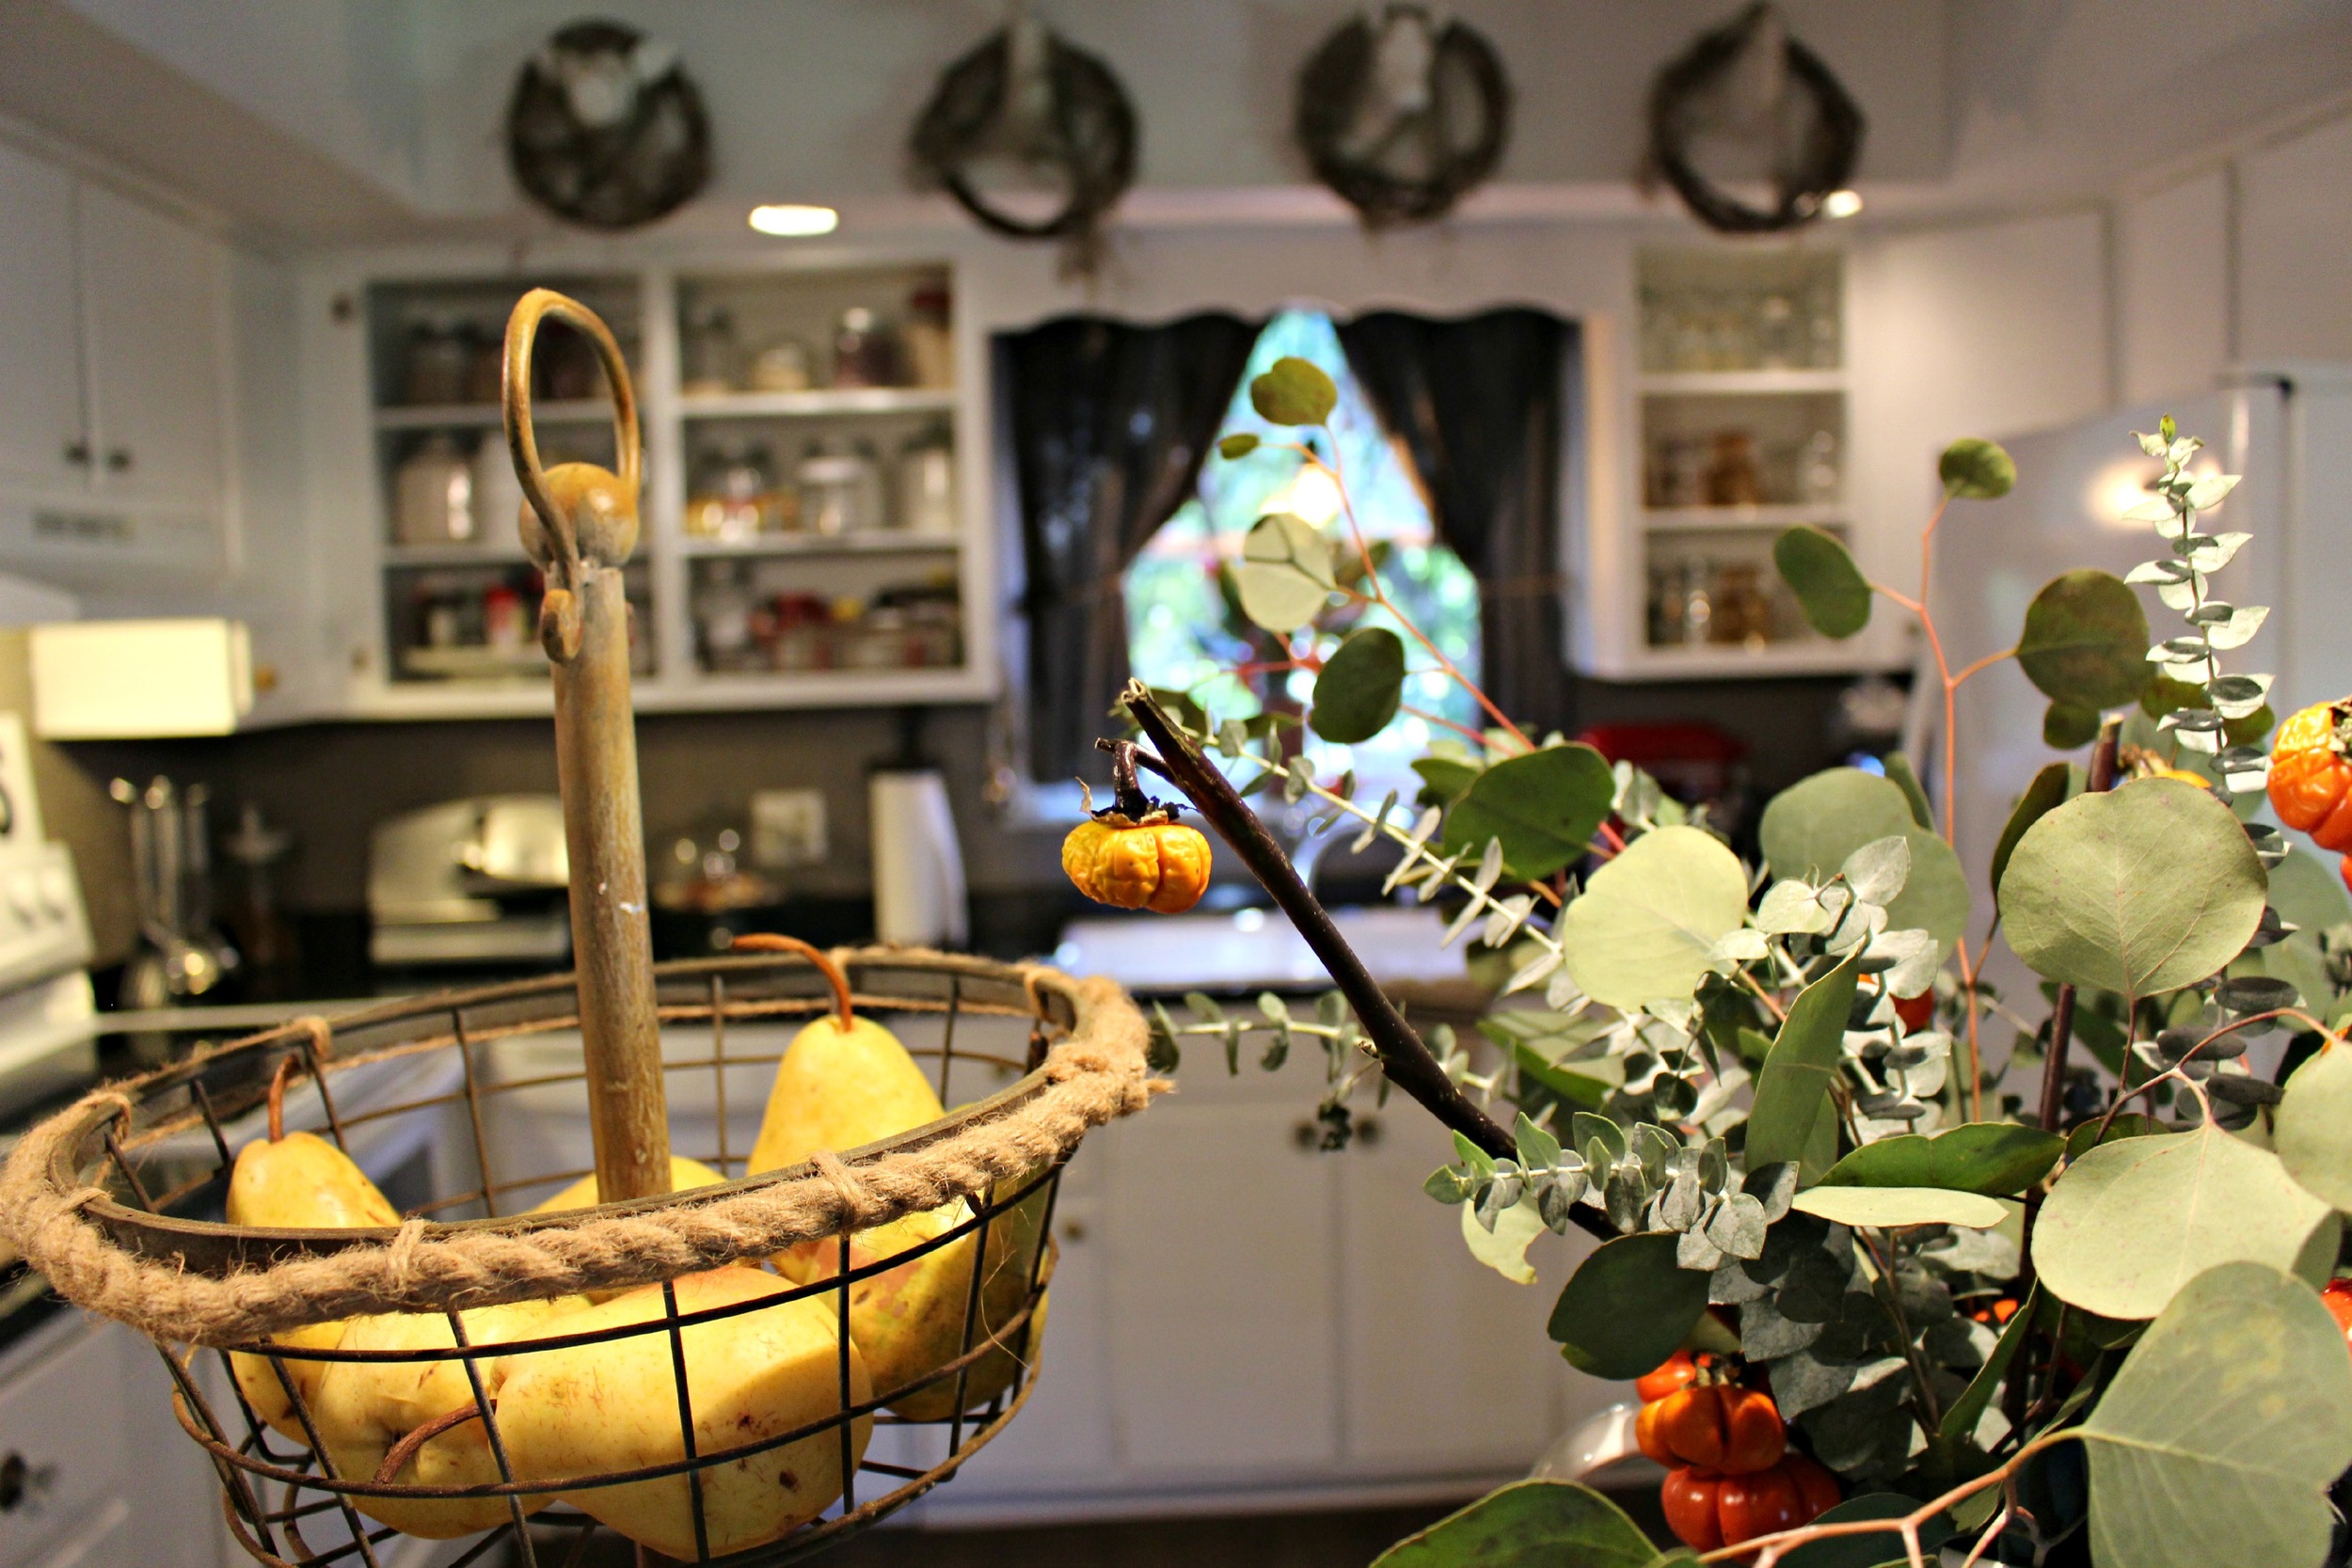
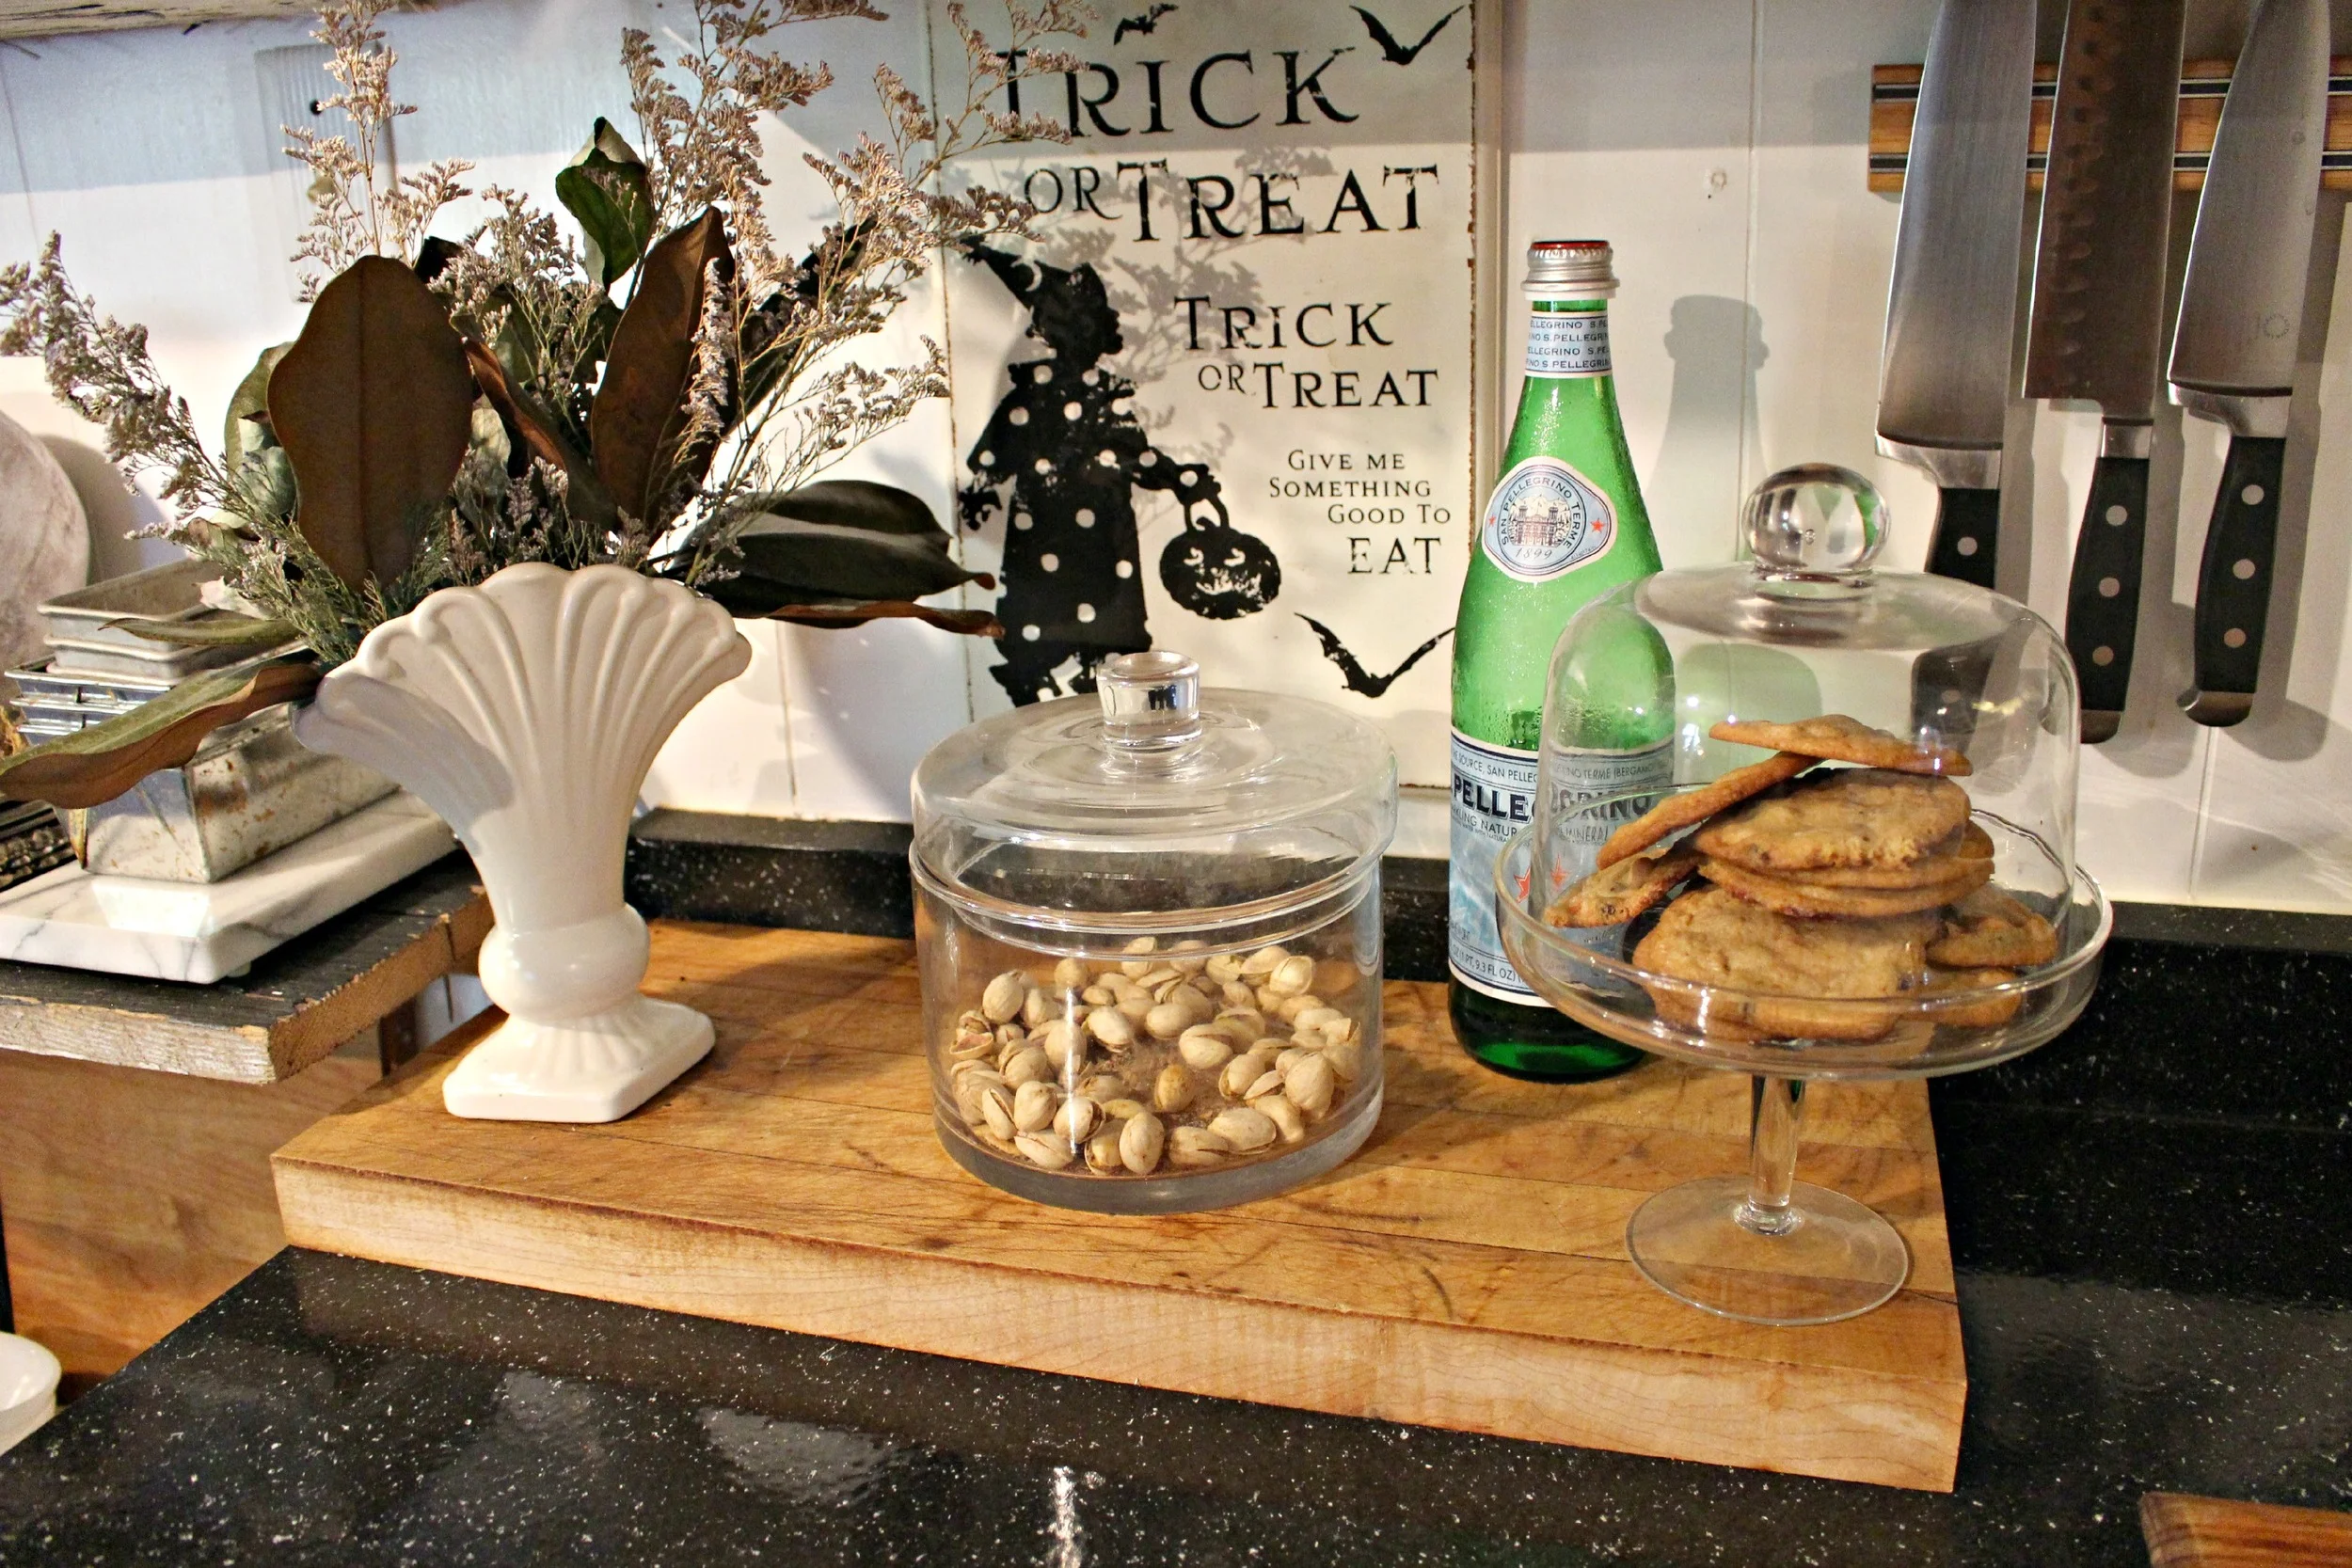
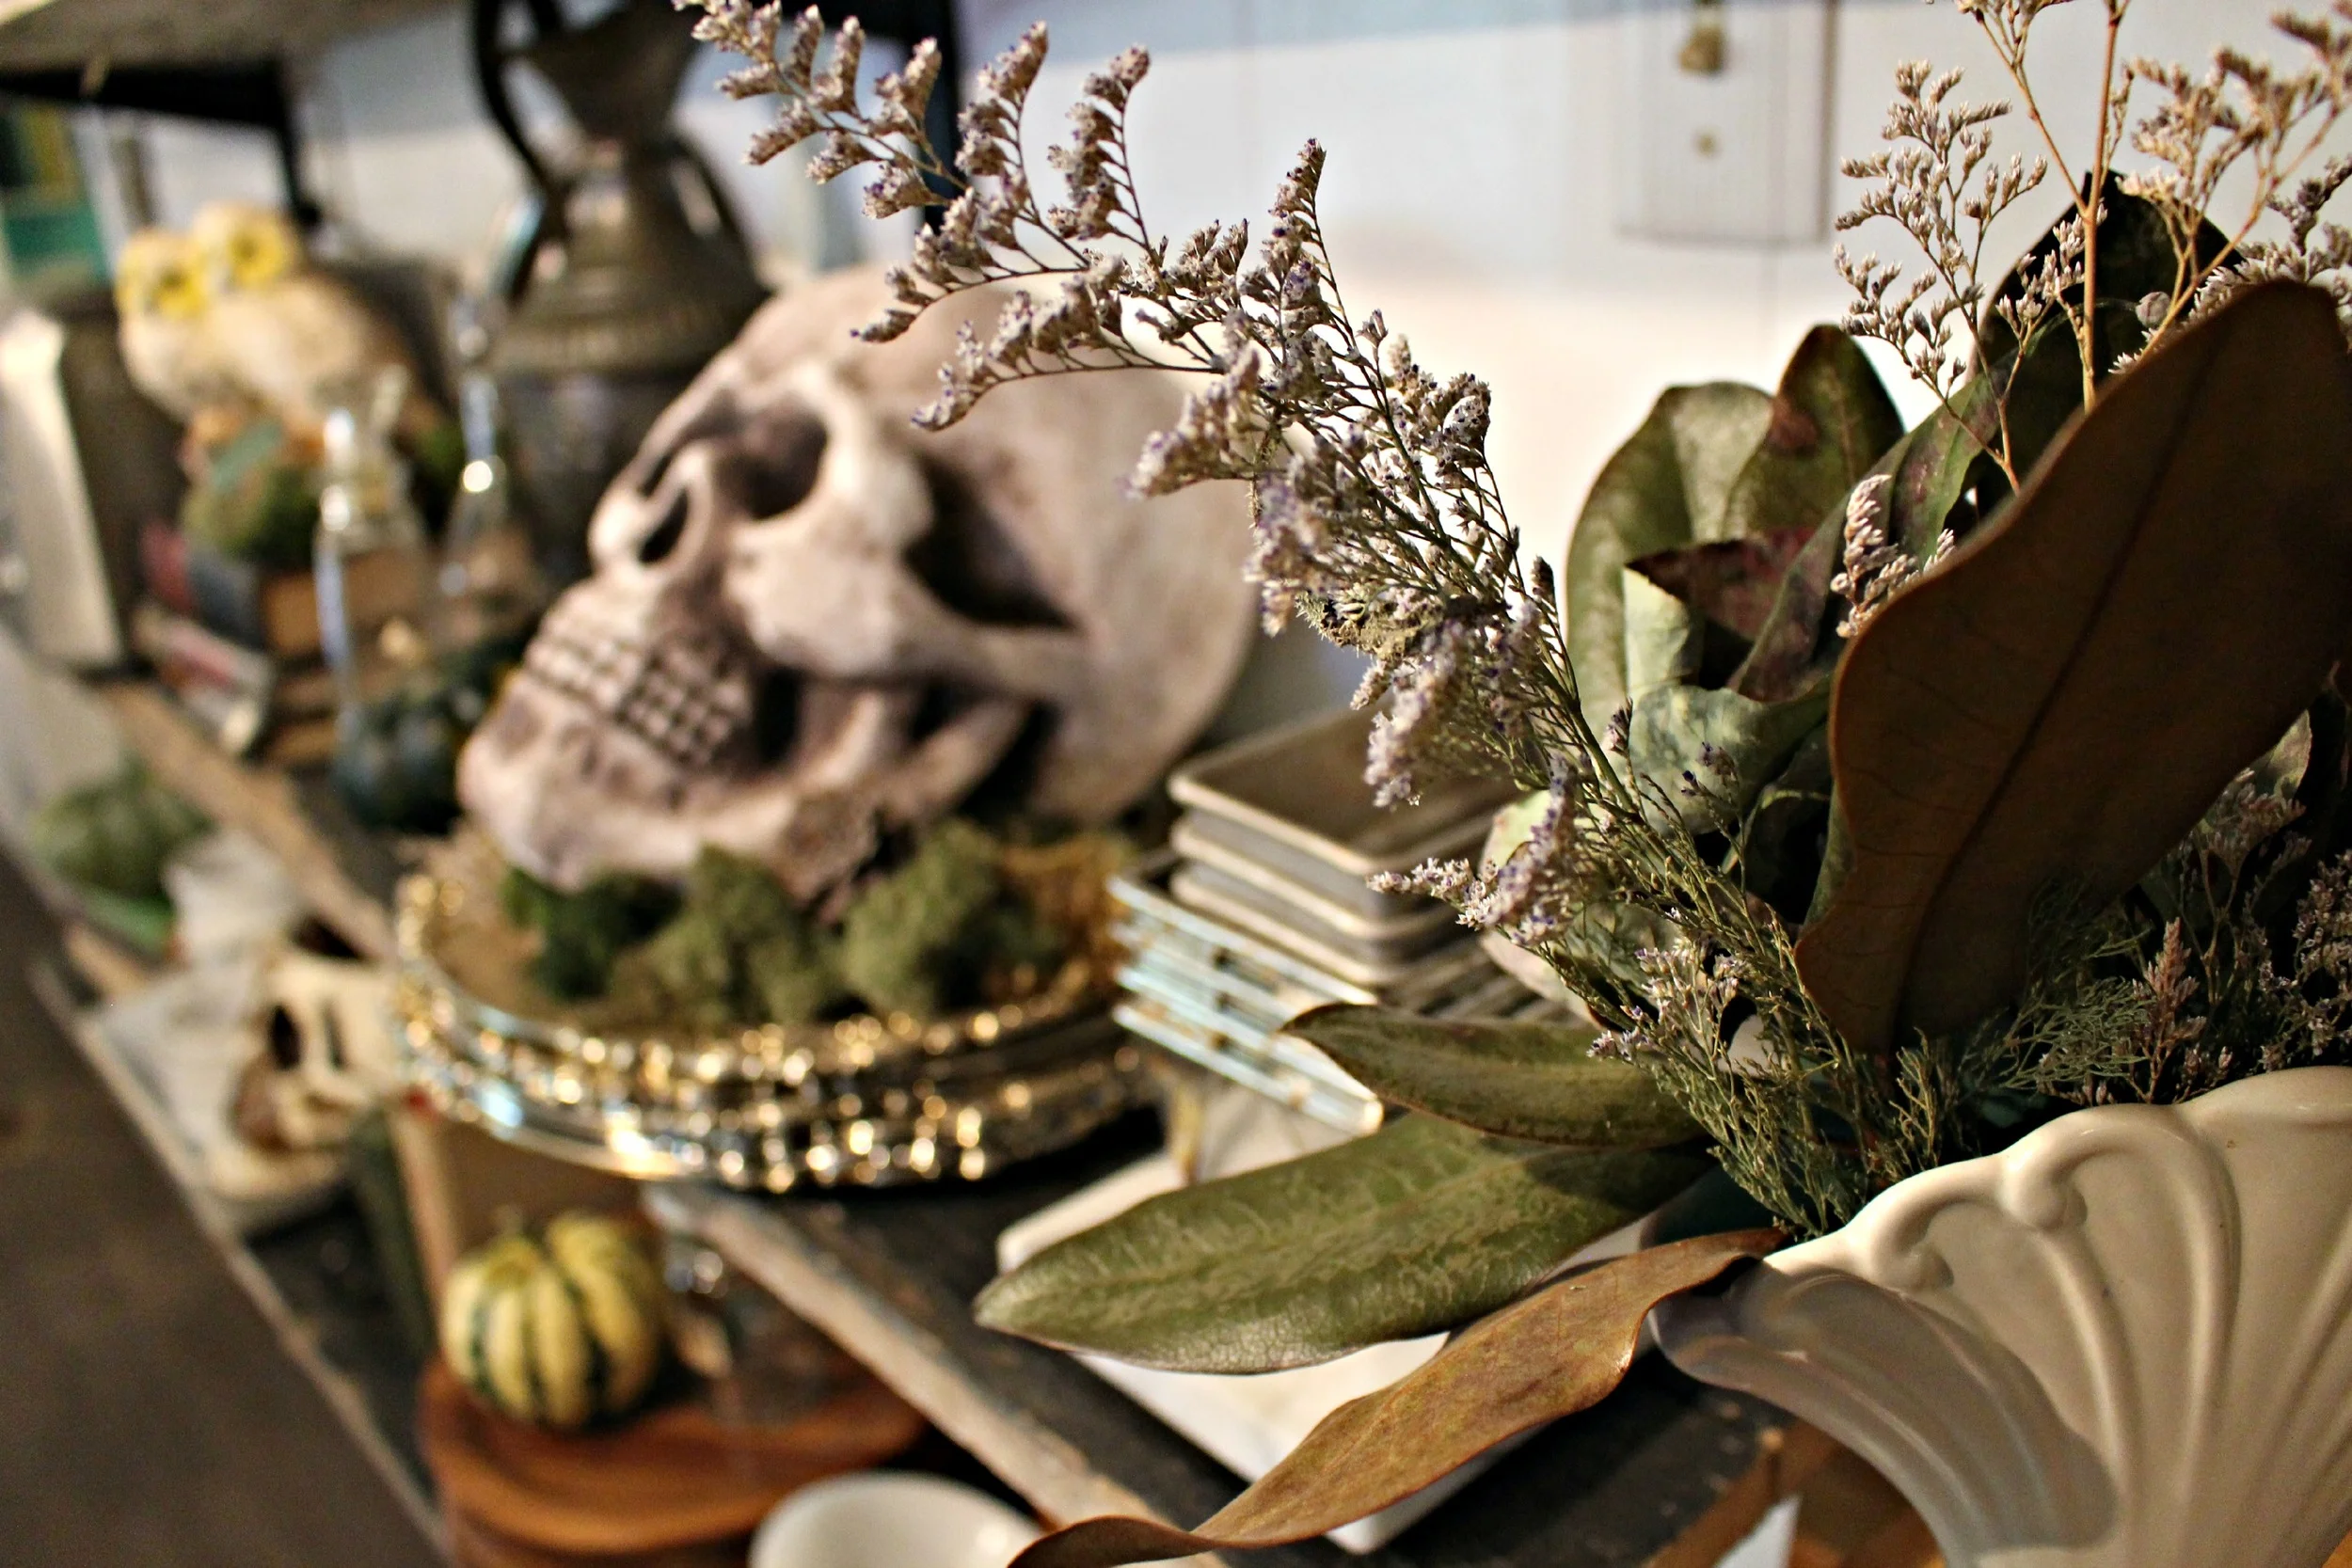
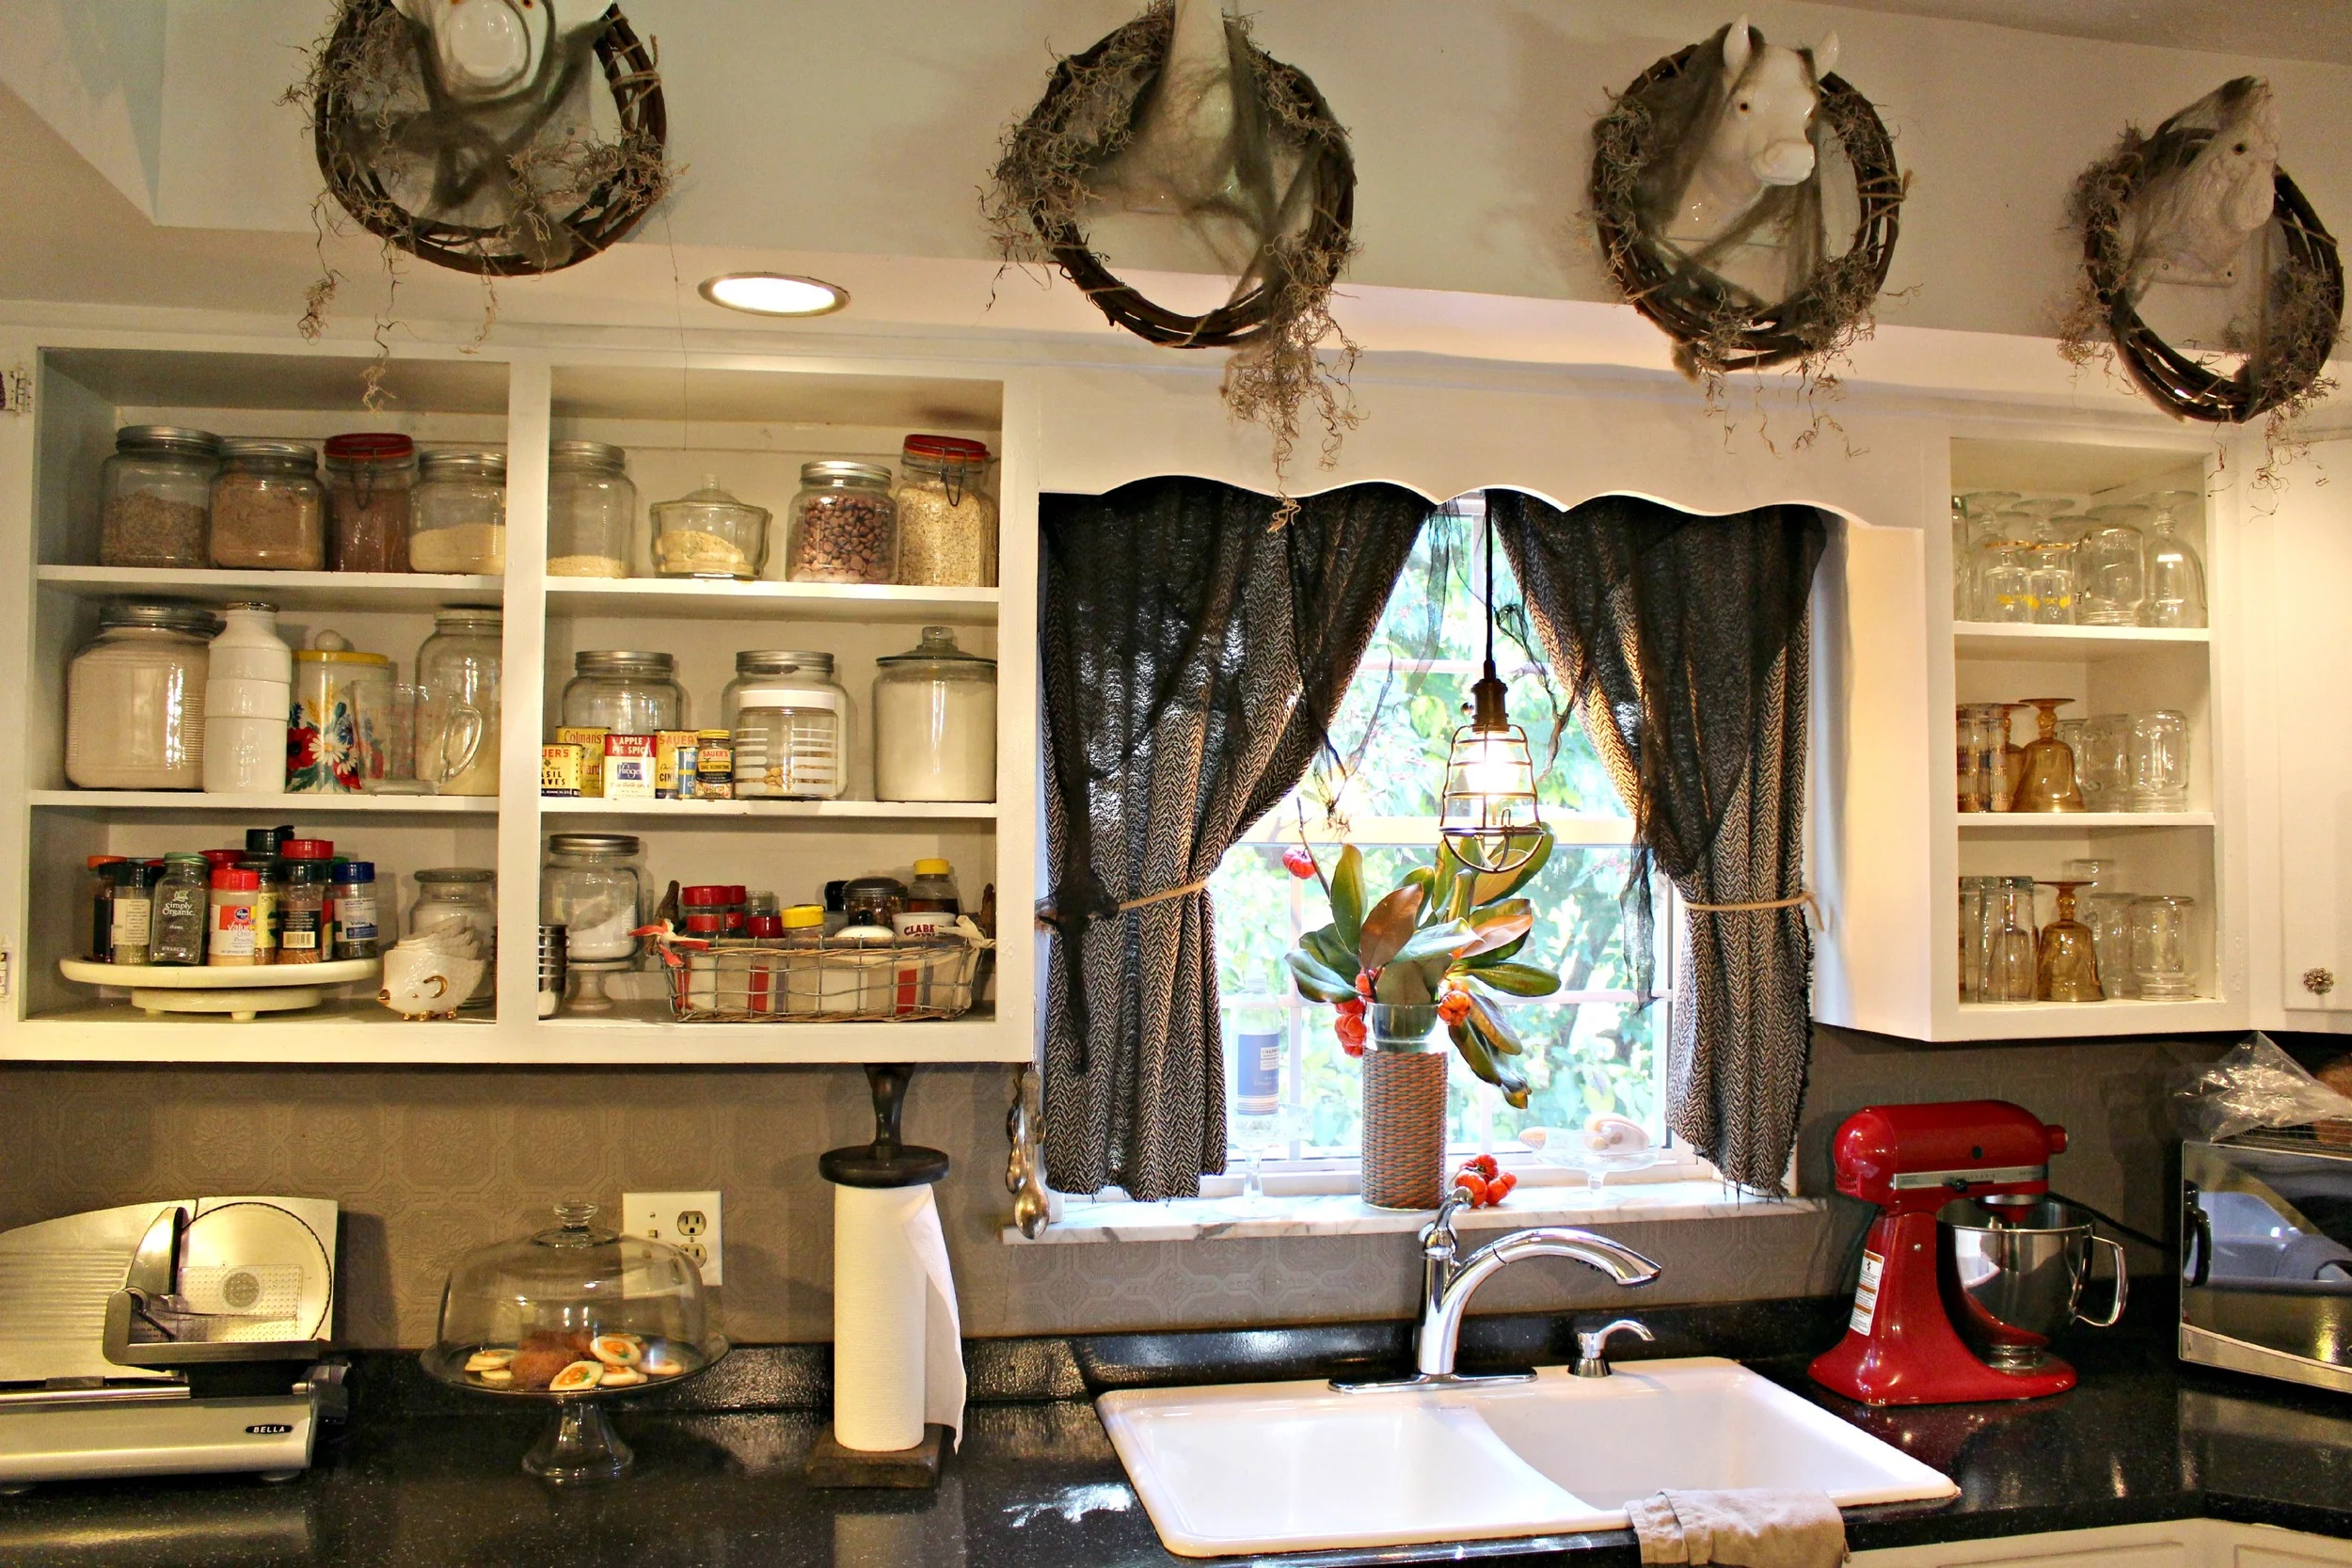
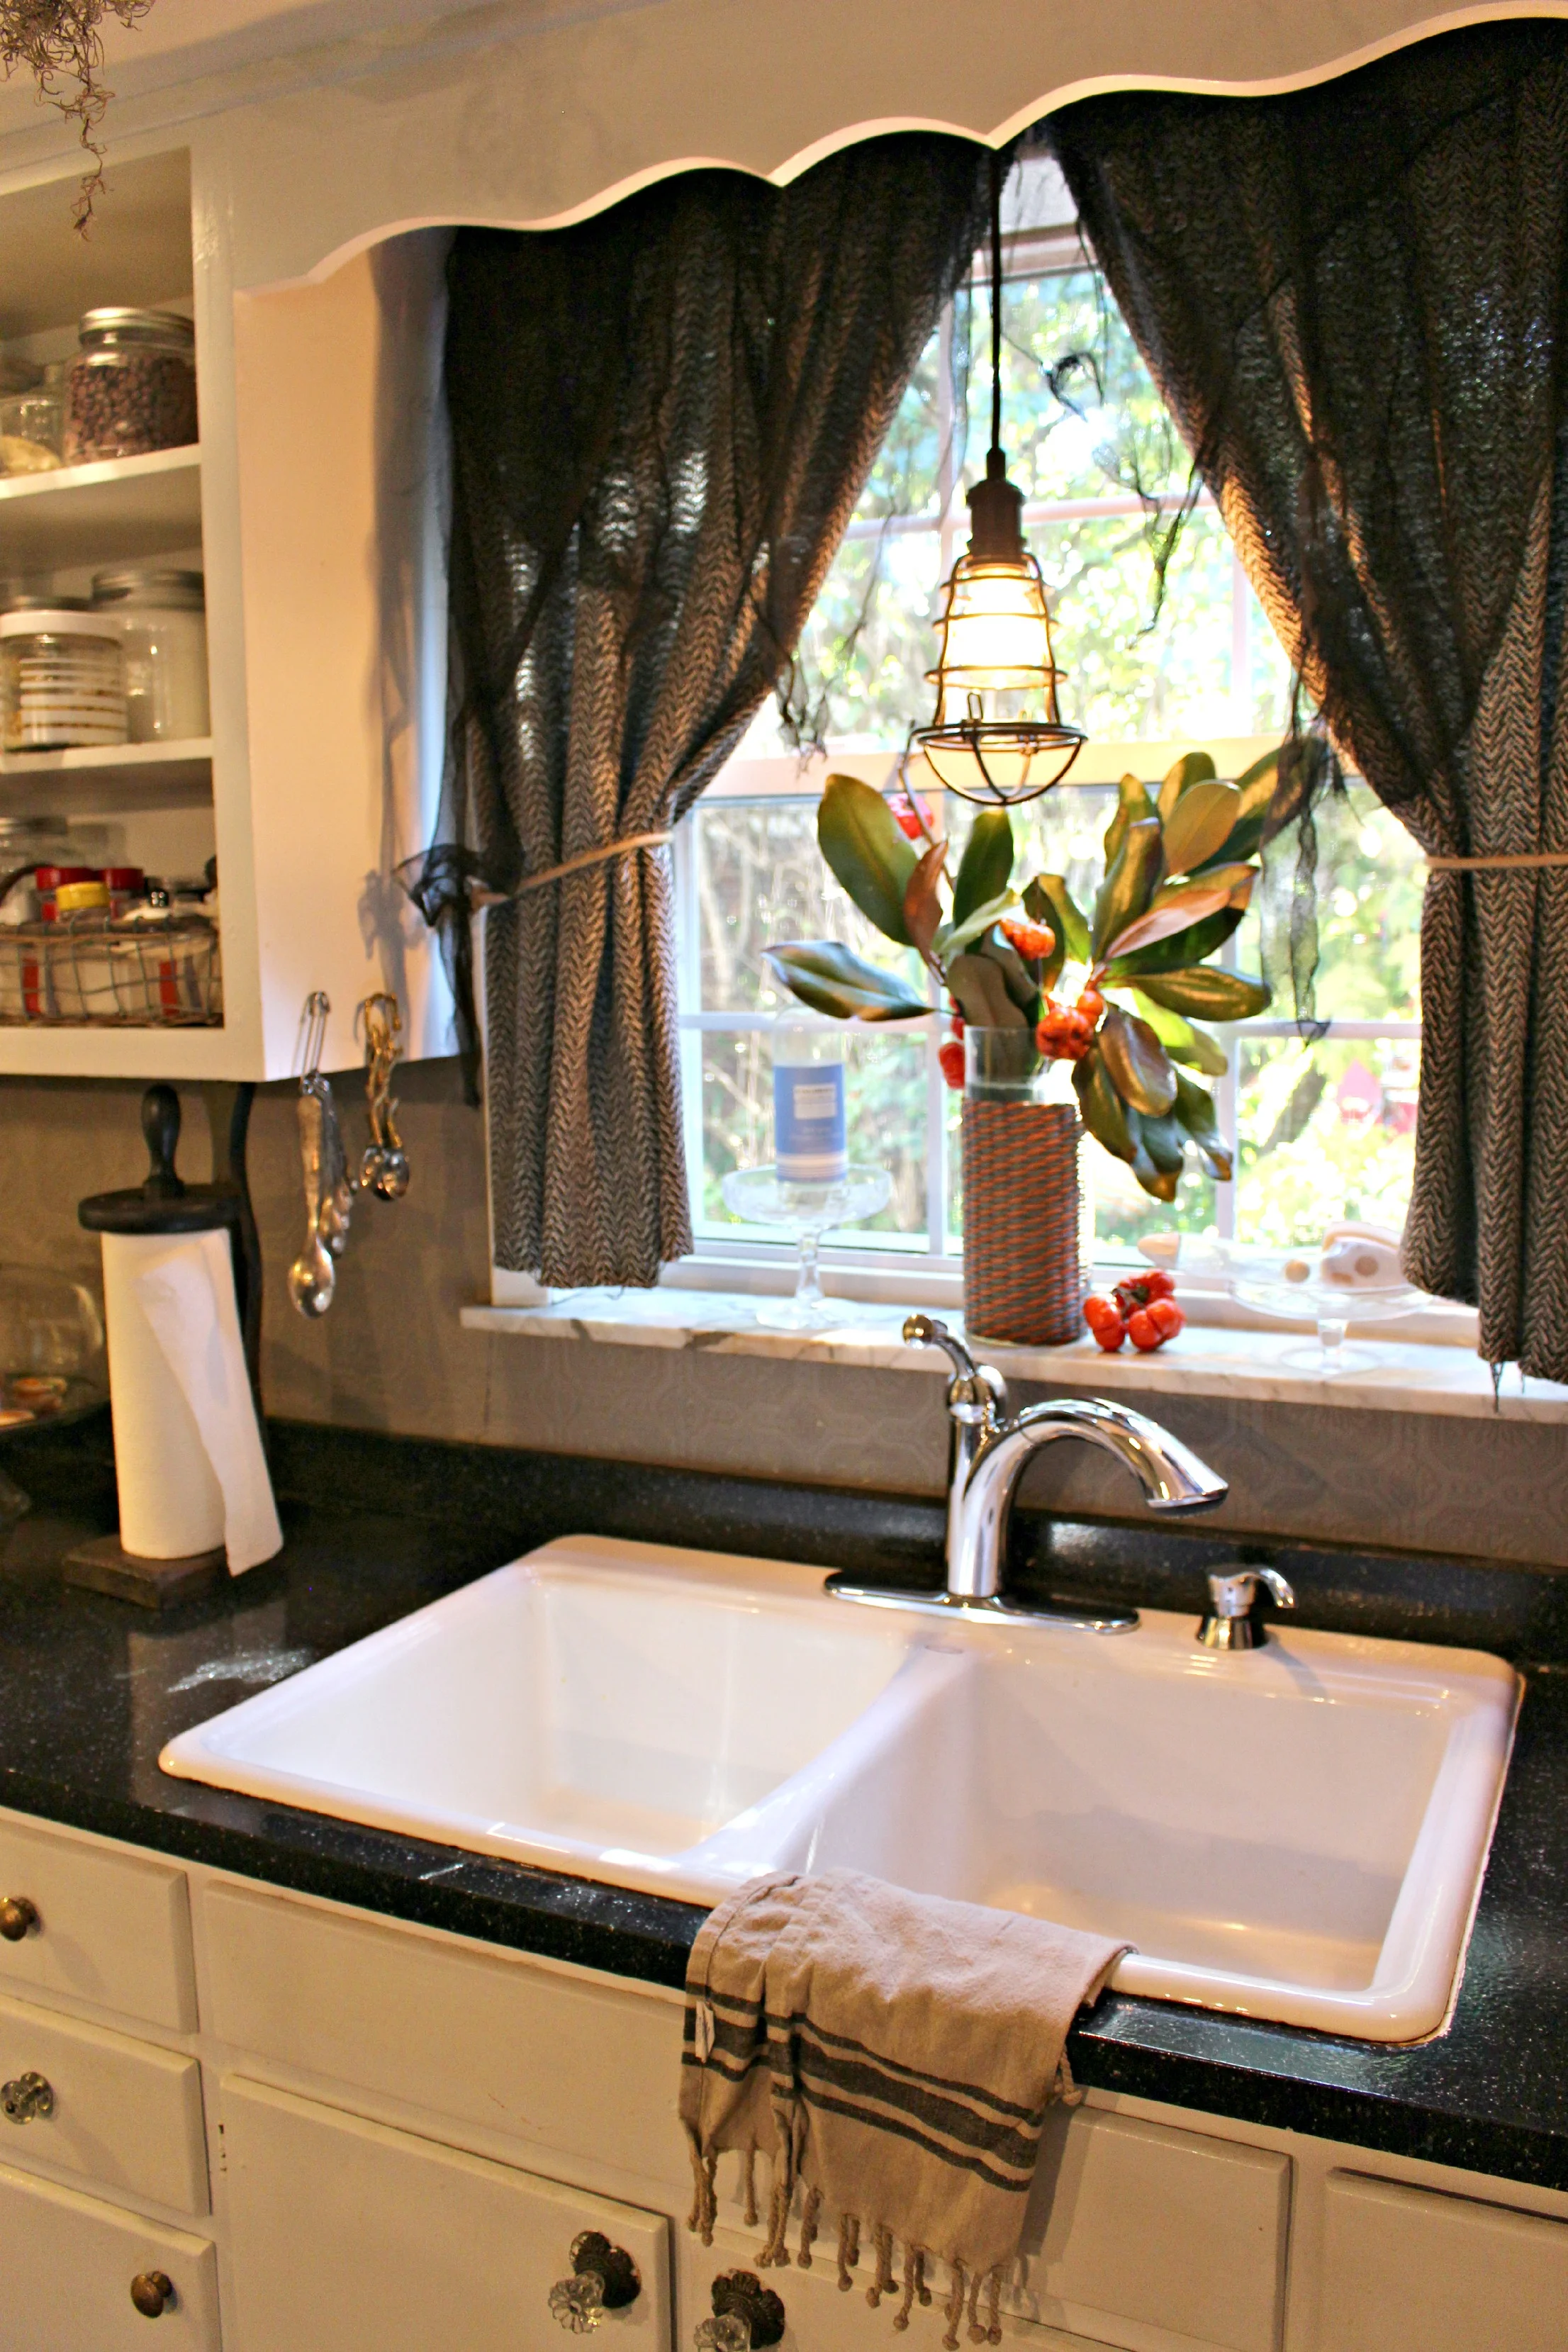
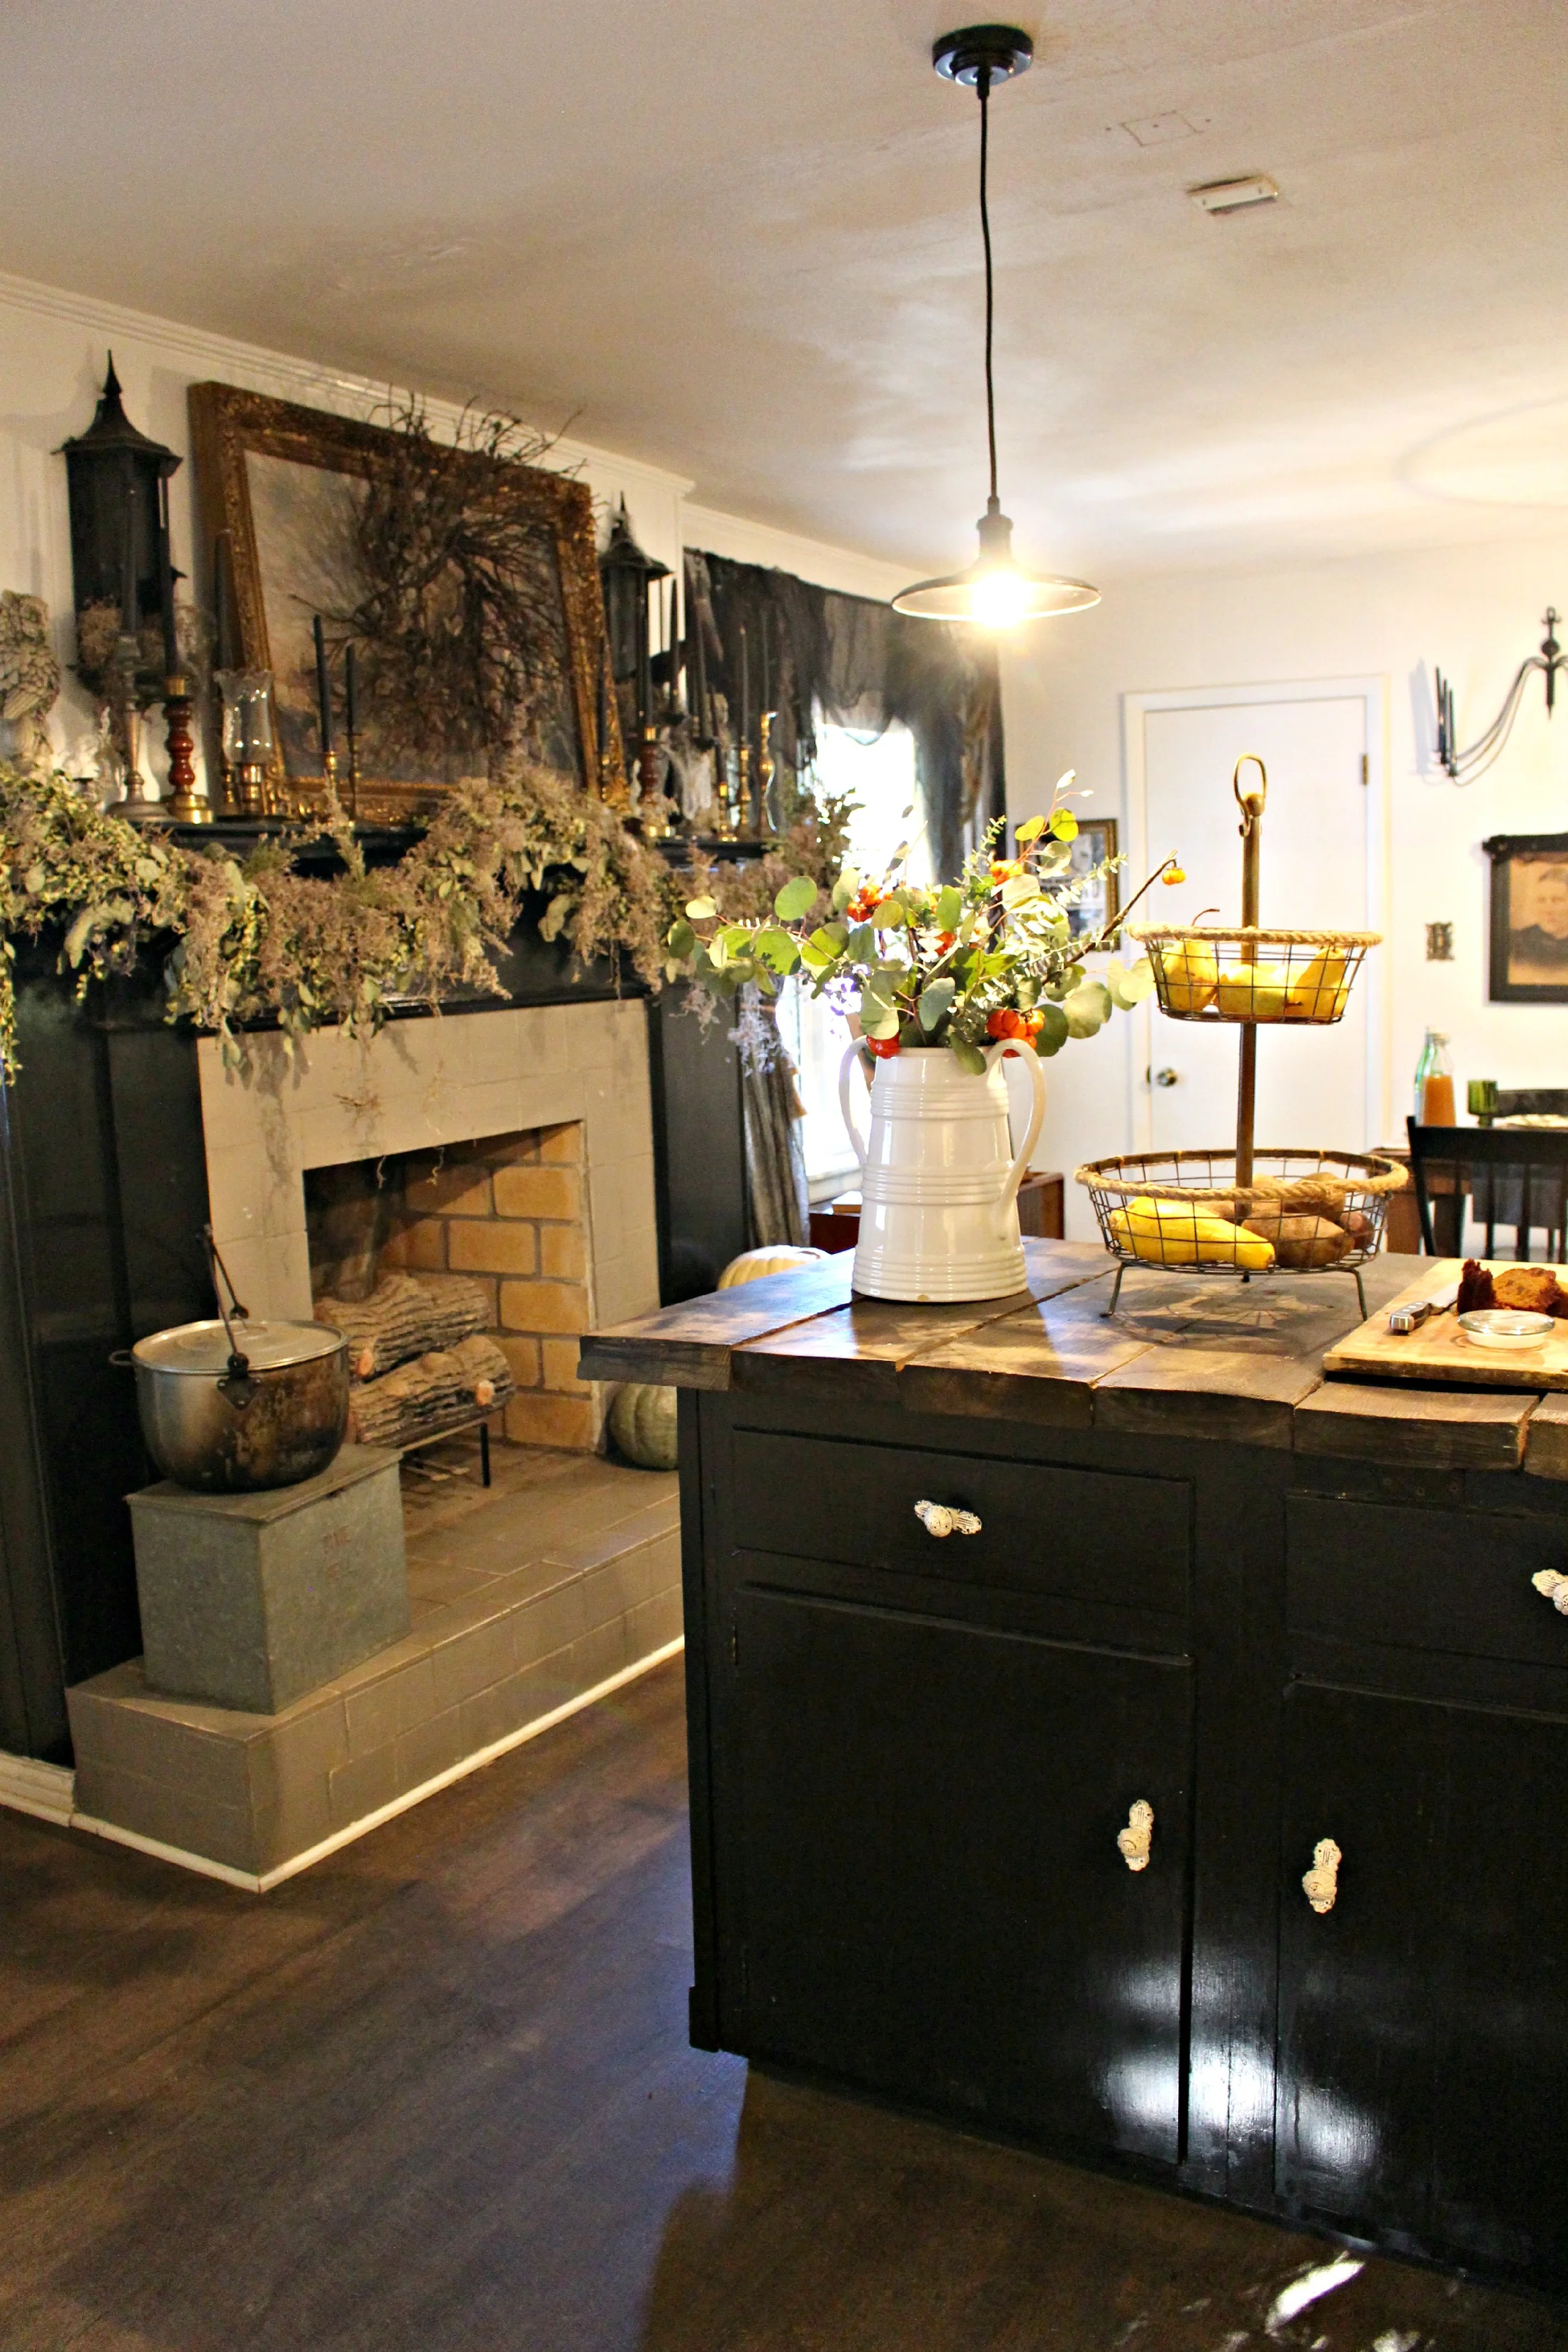
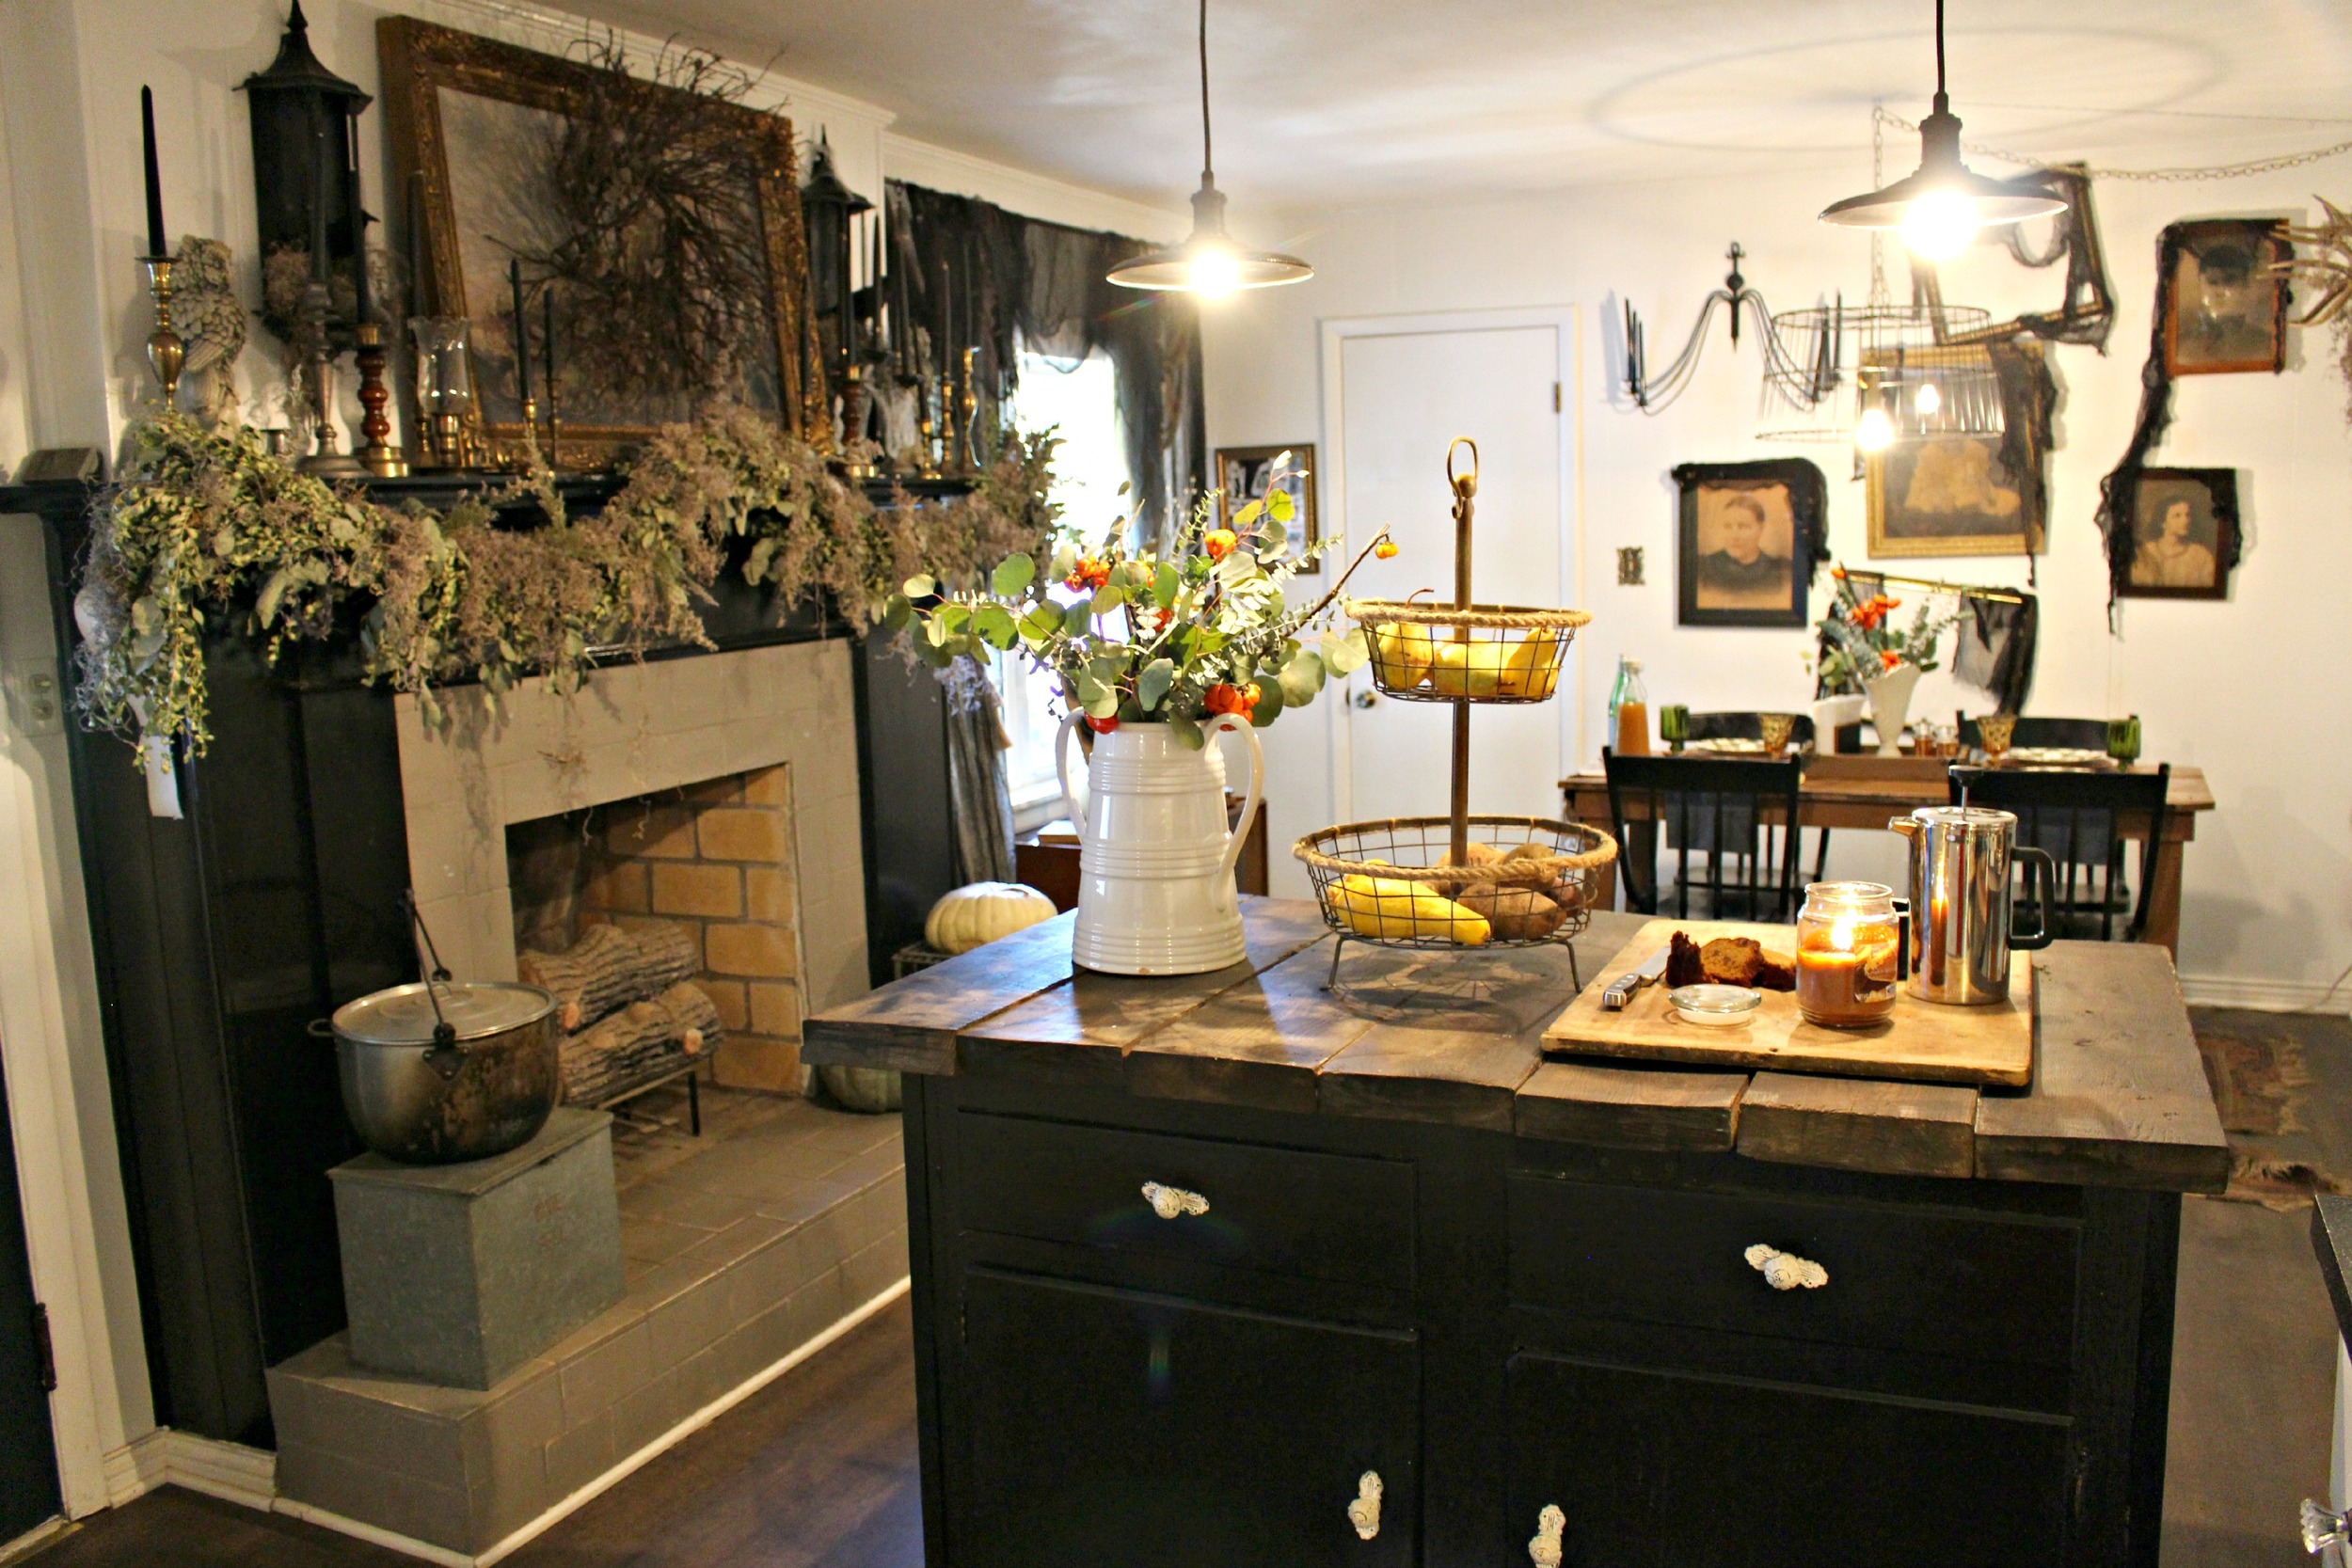
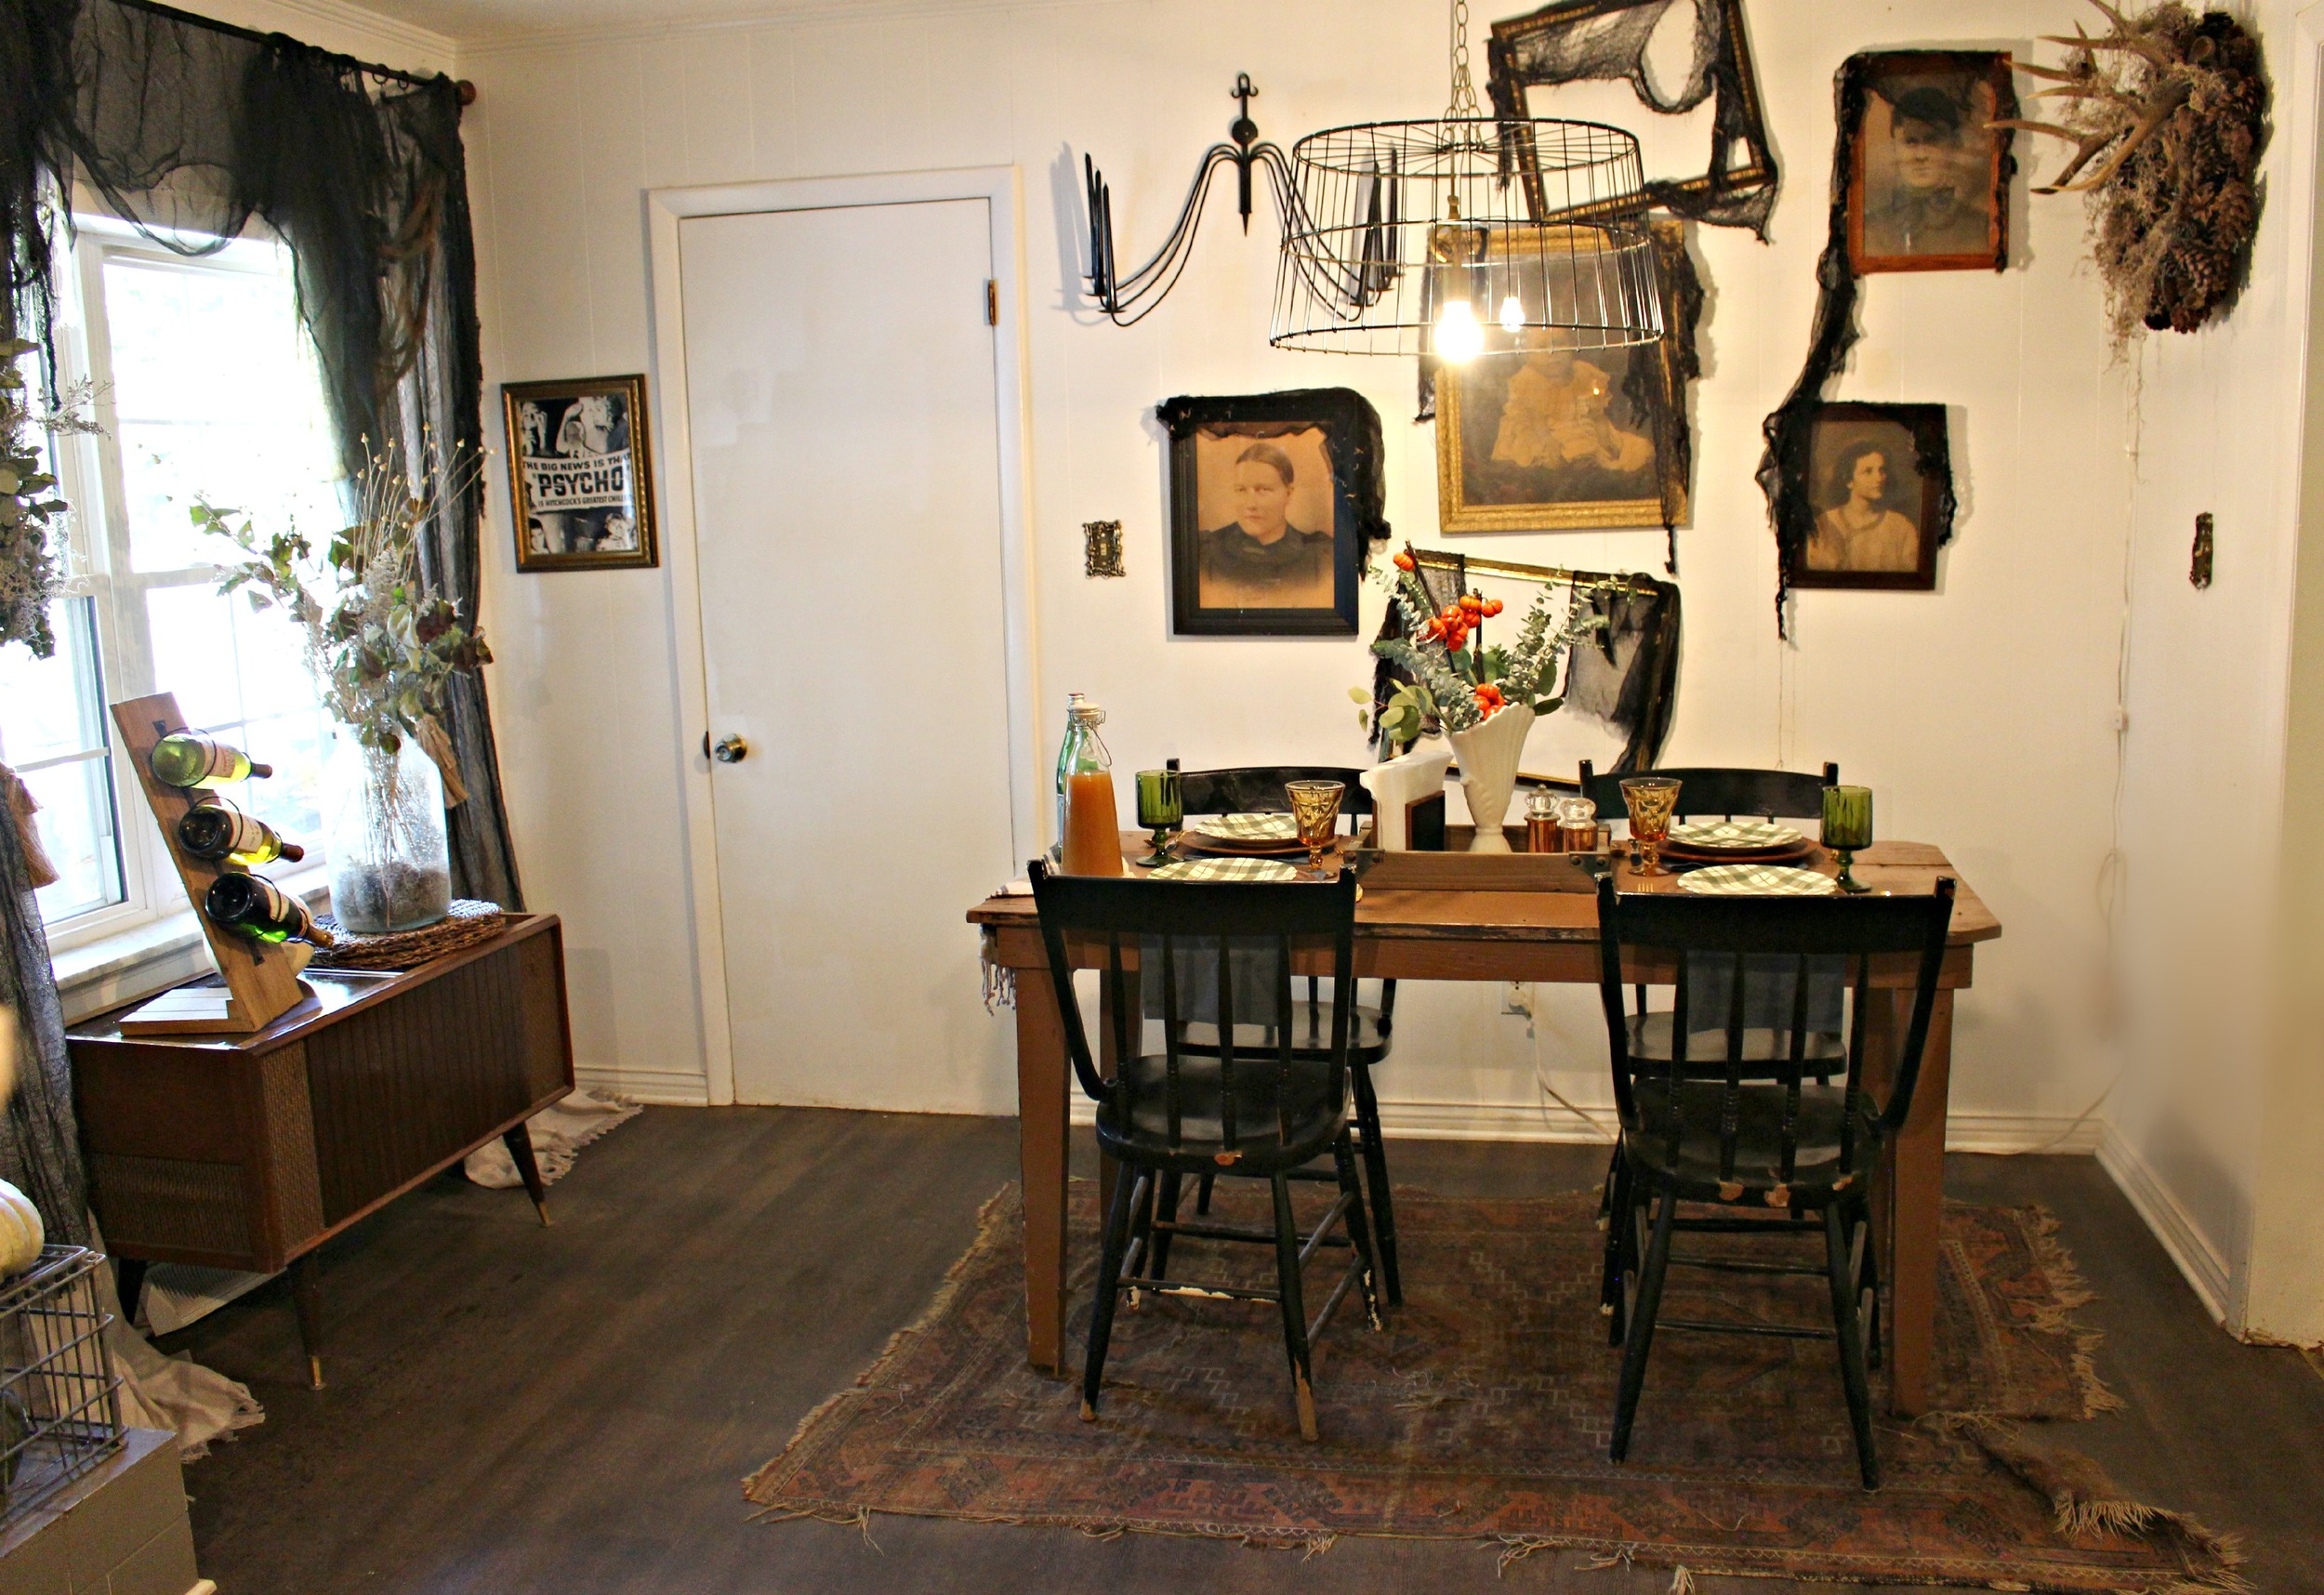
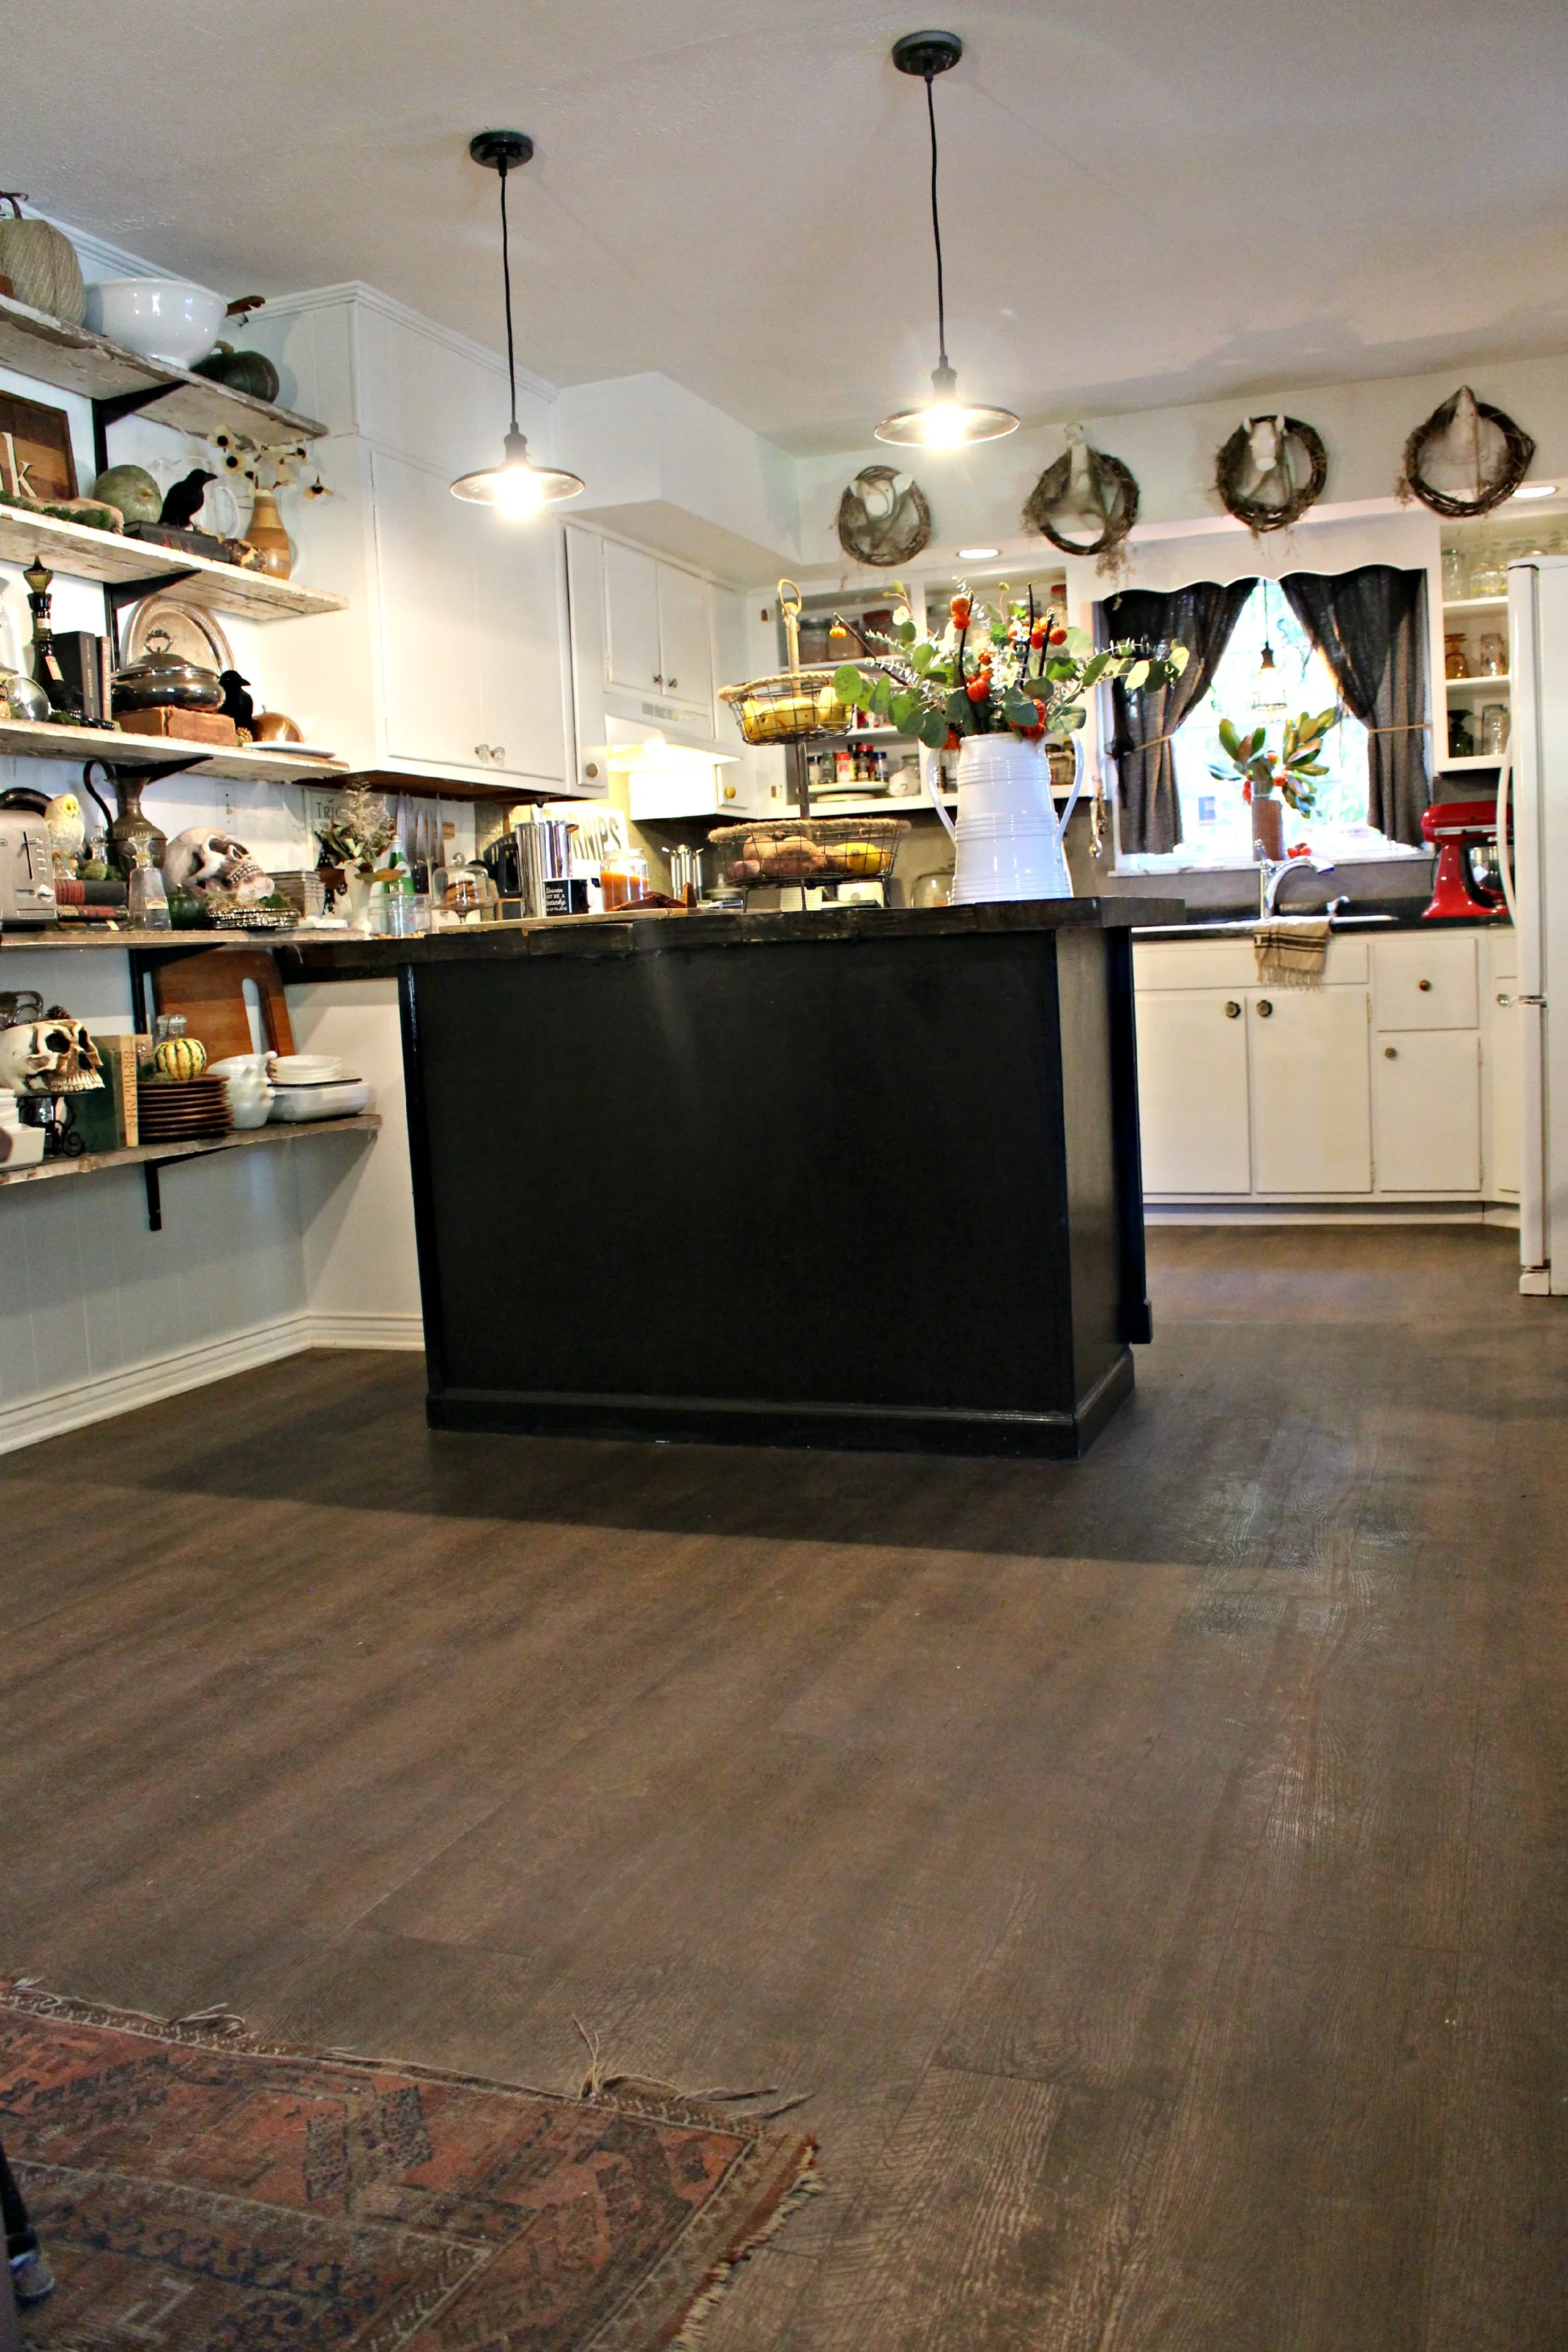
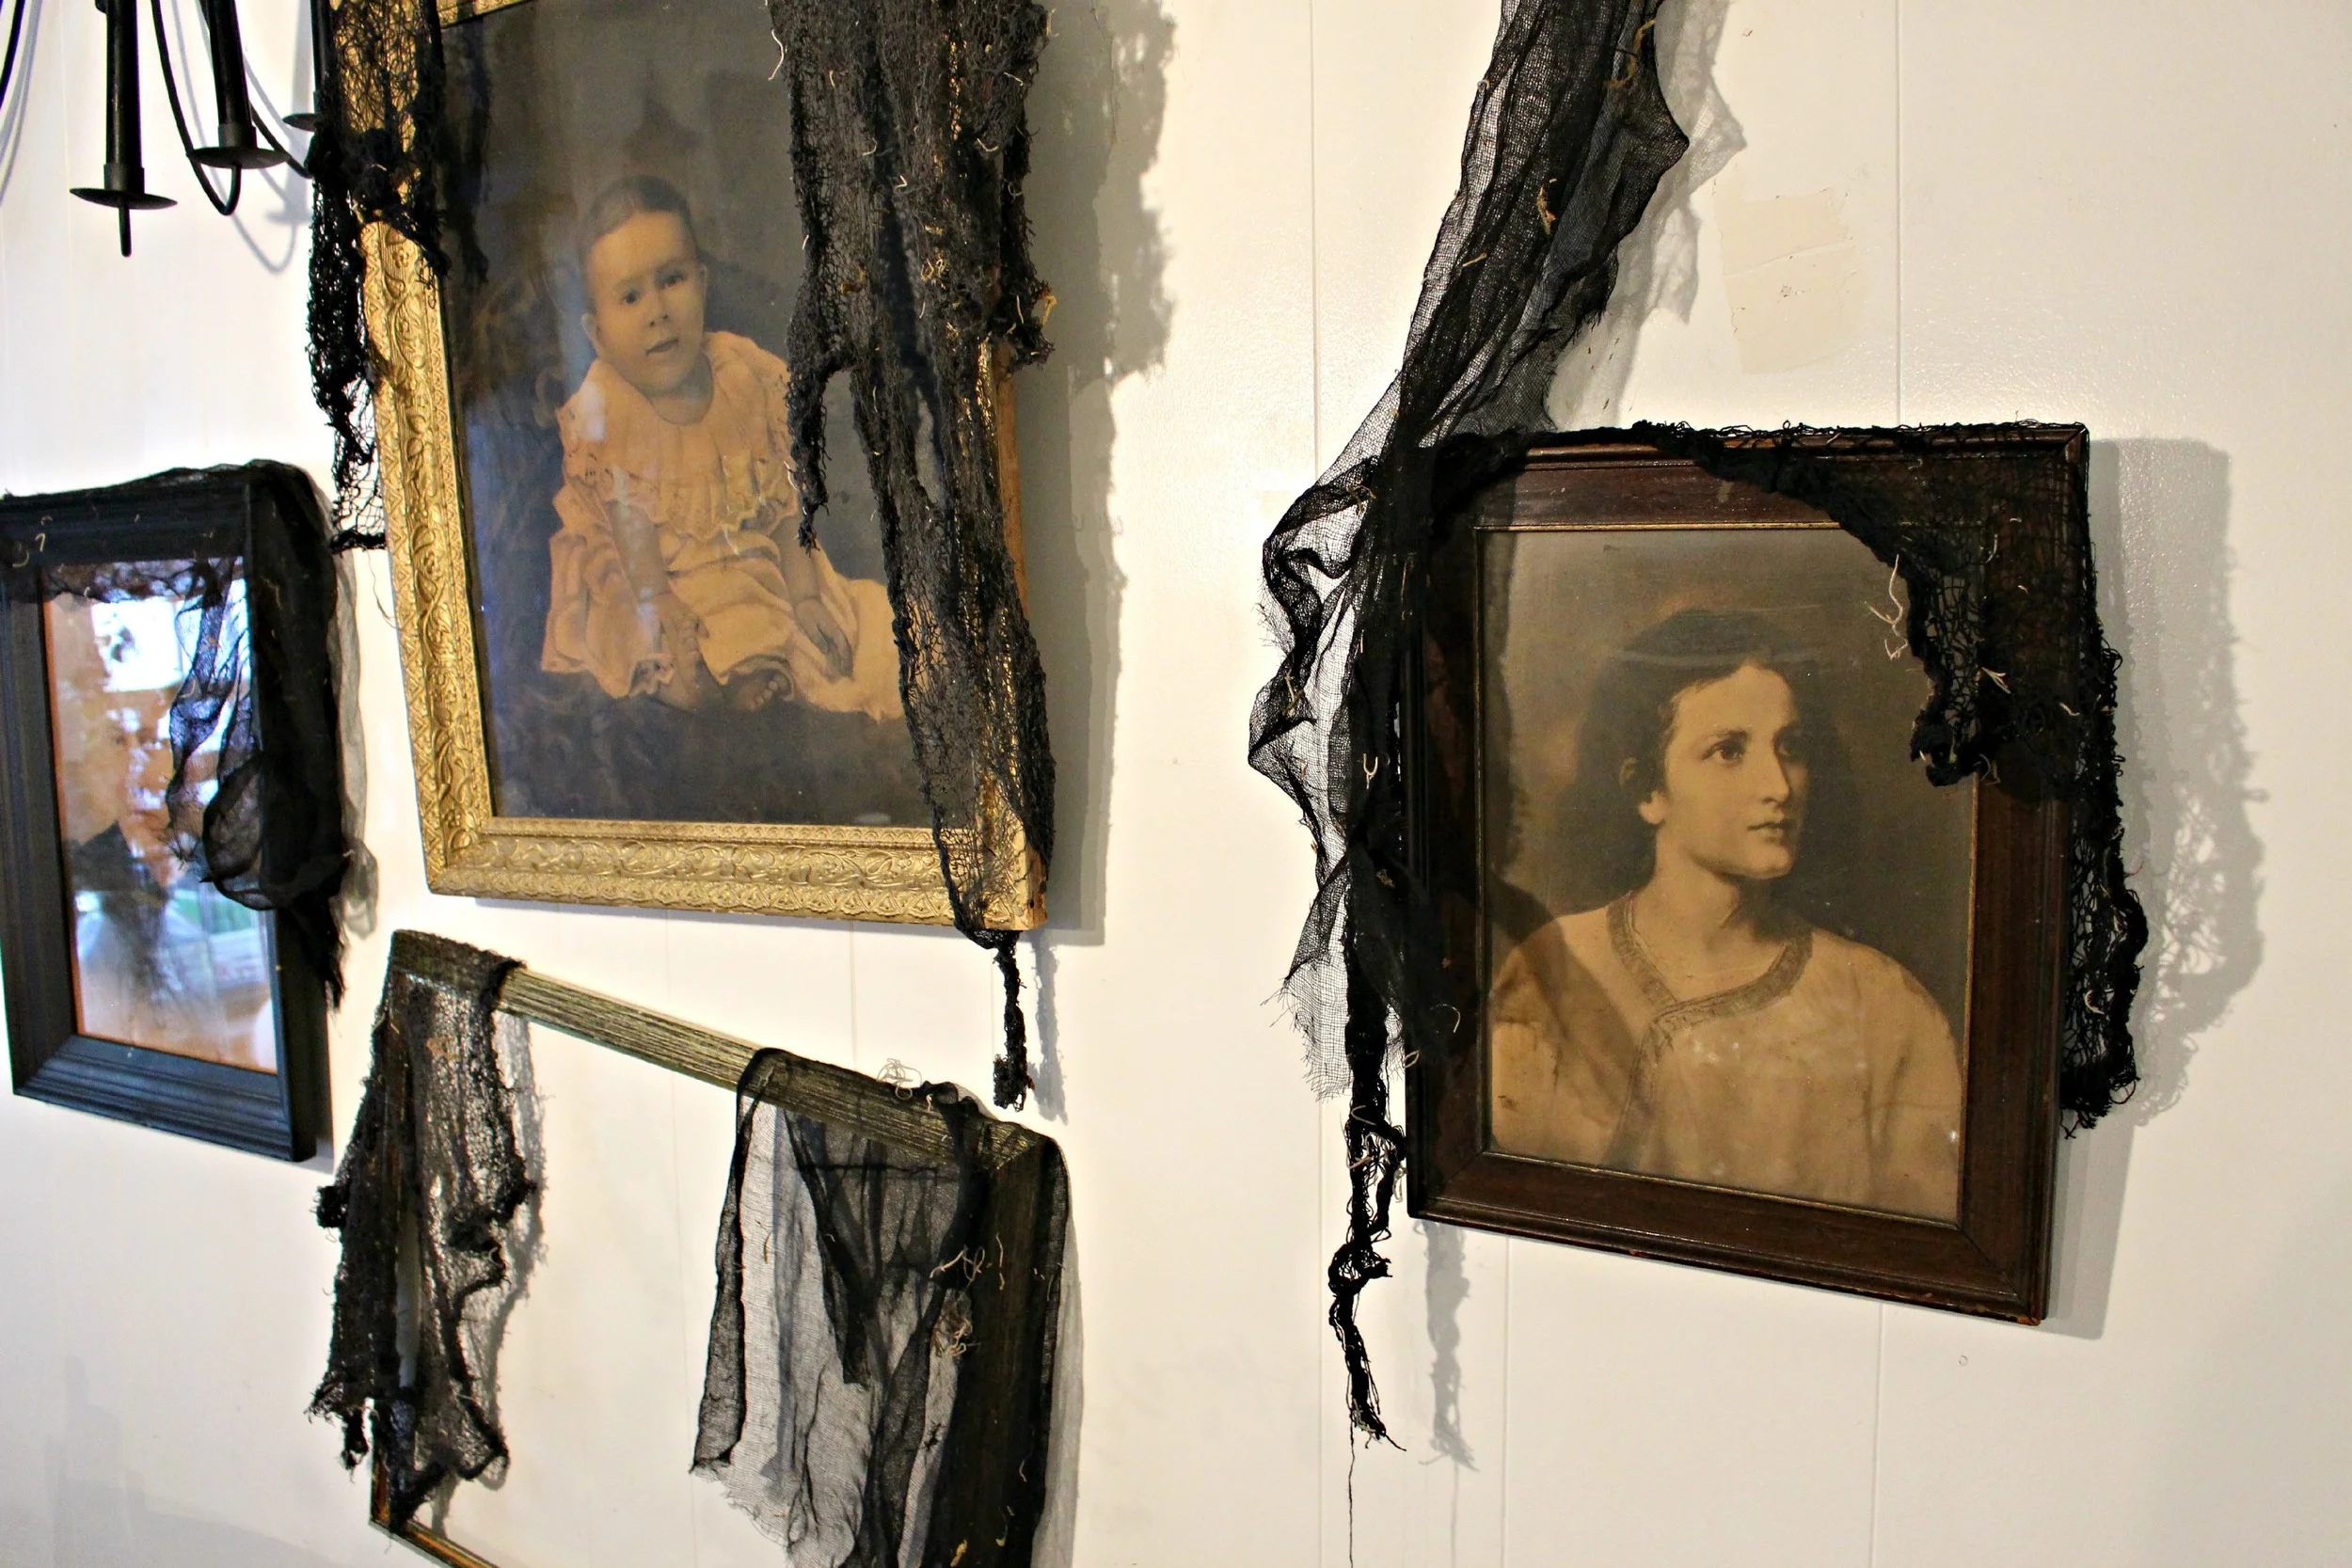
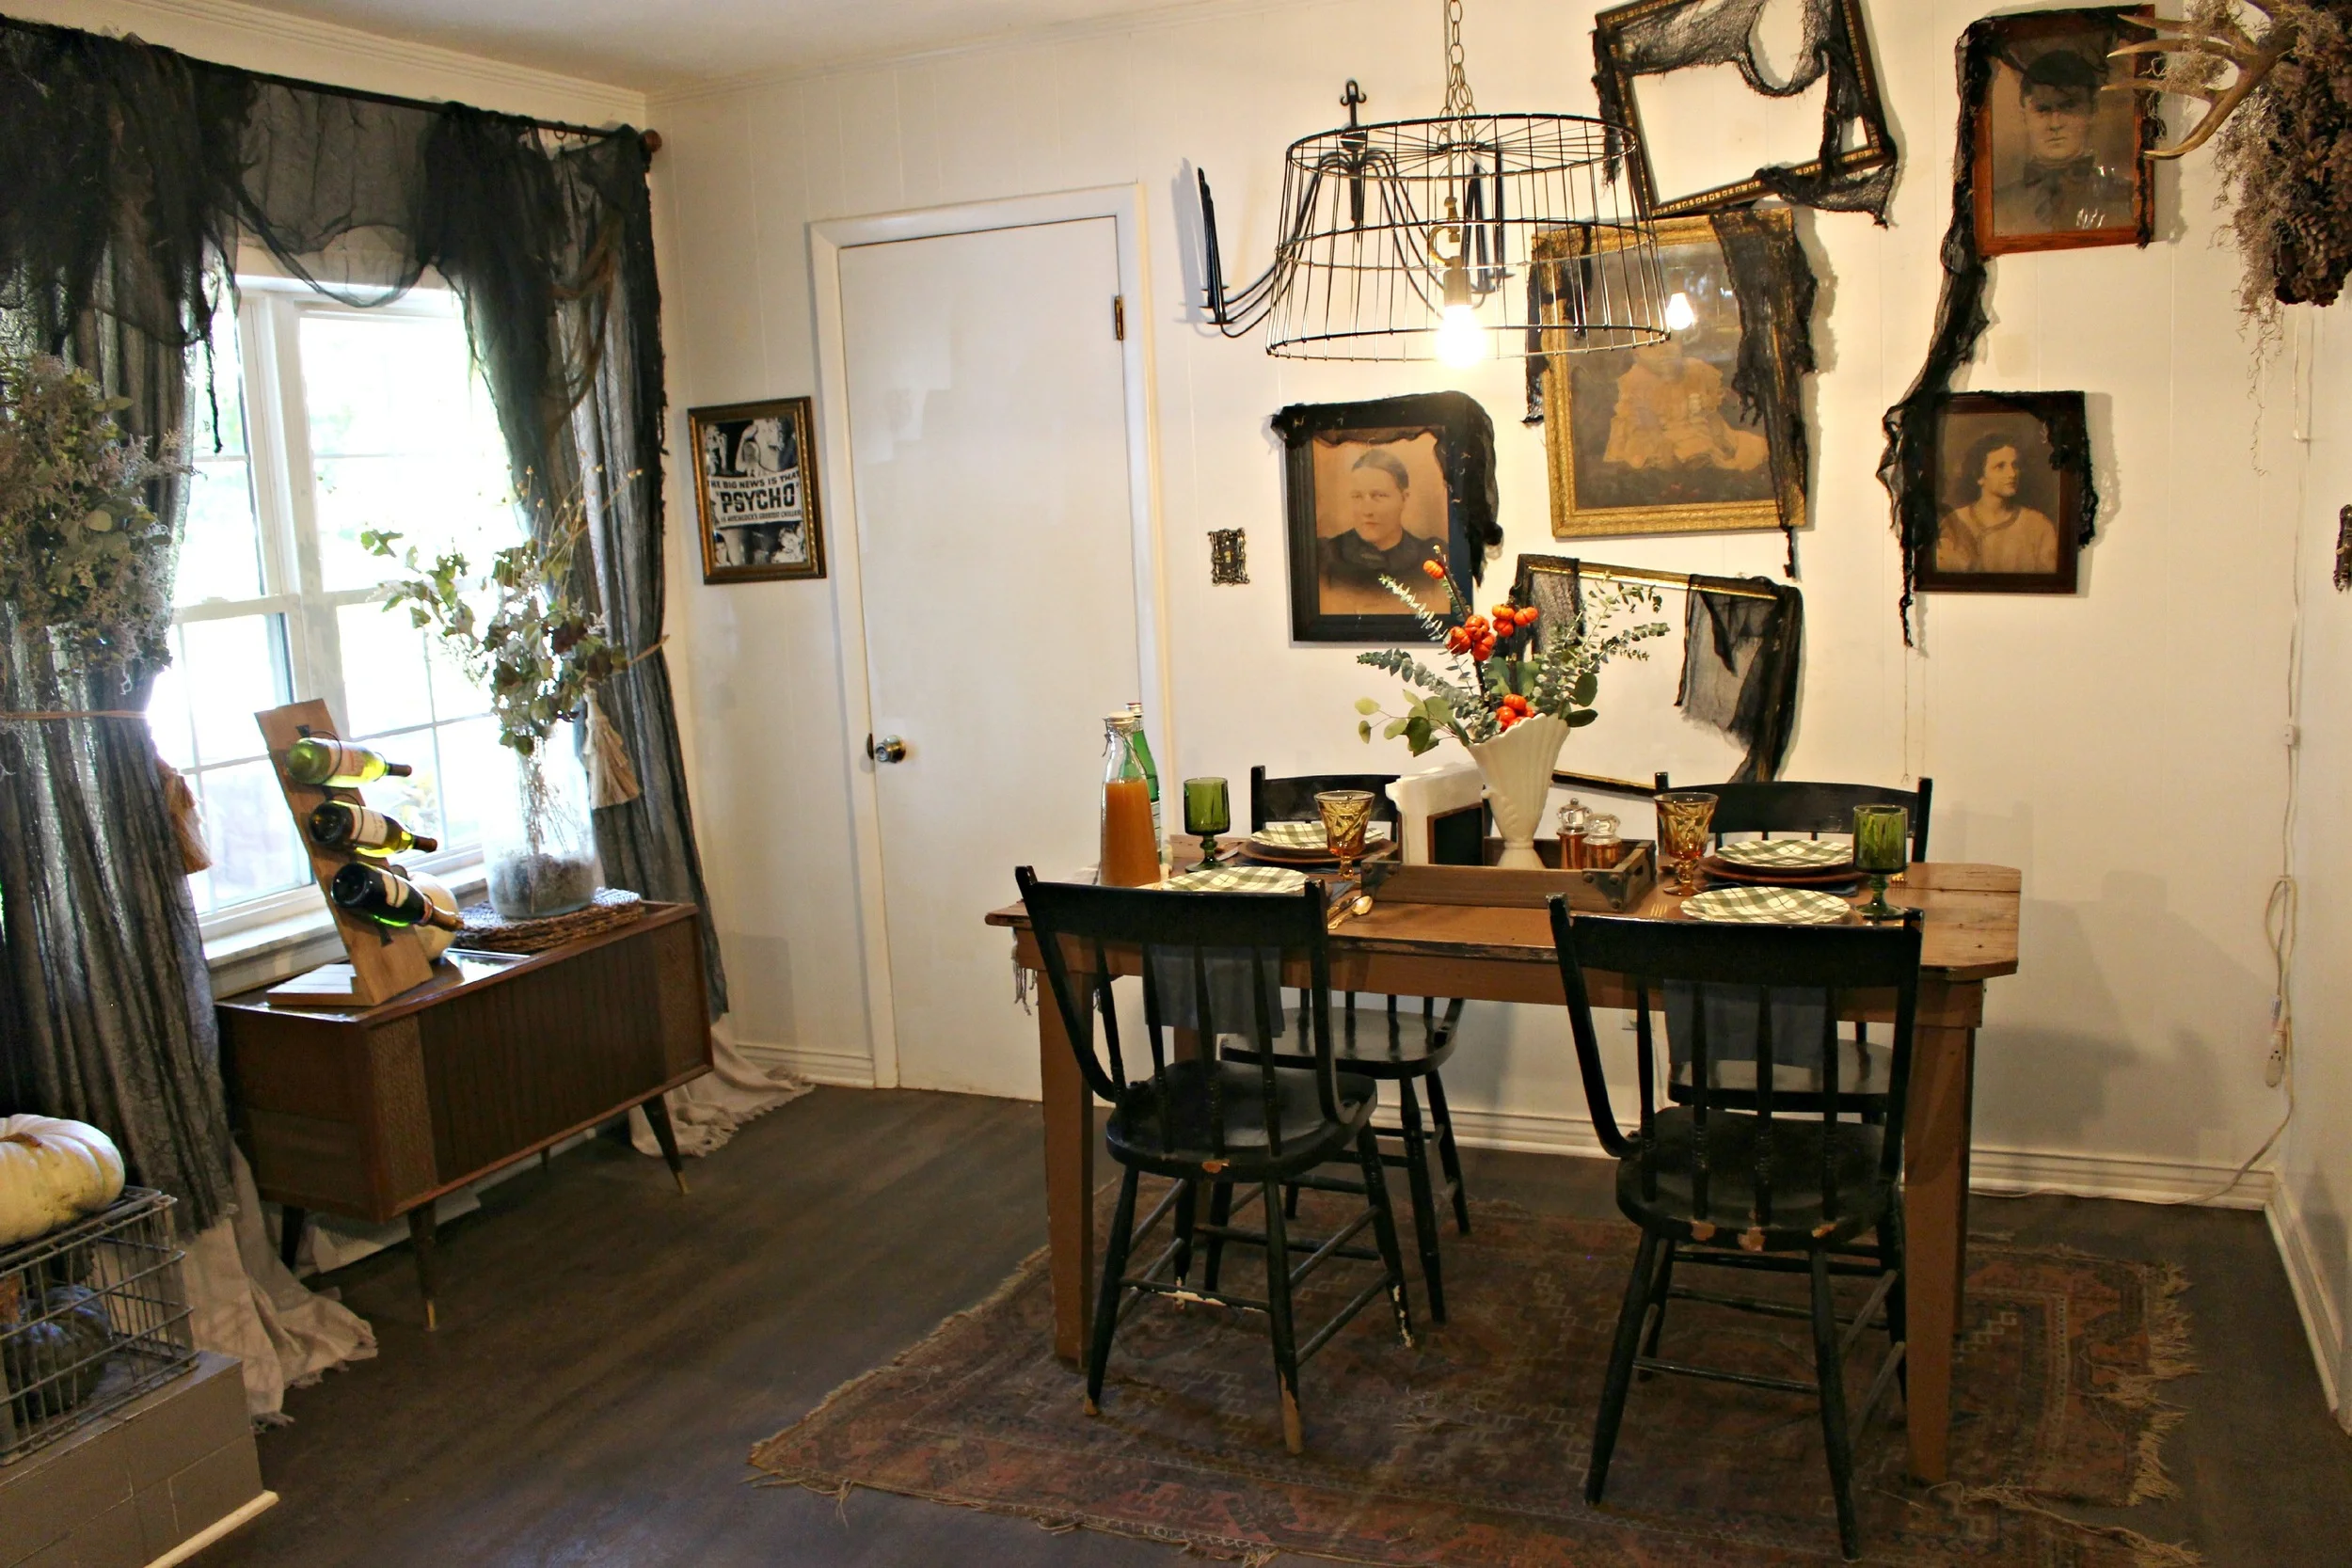
Fall Home Tour: Spooky + Rustic Kitchen
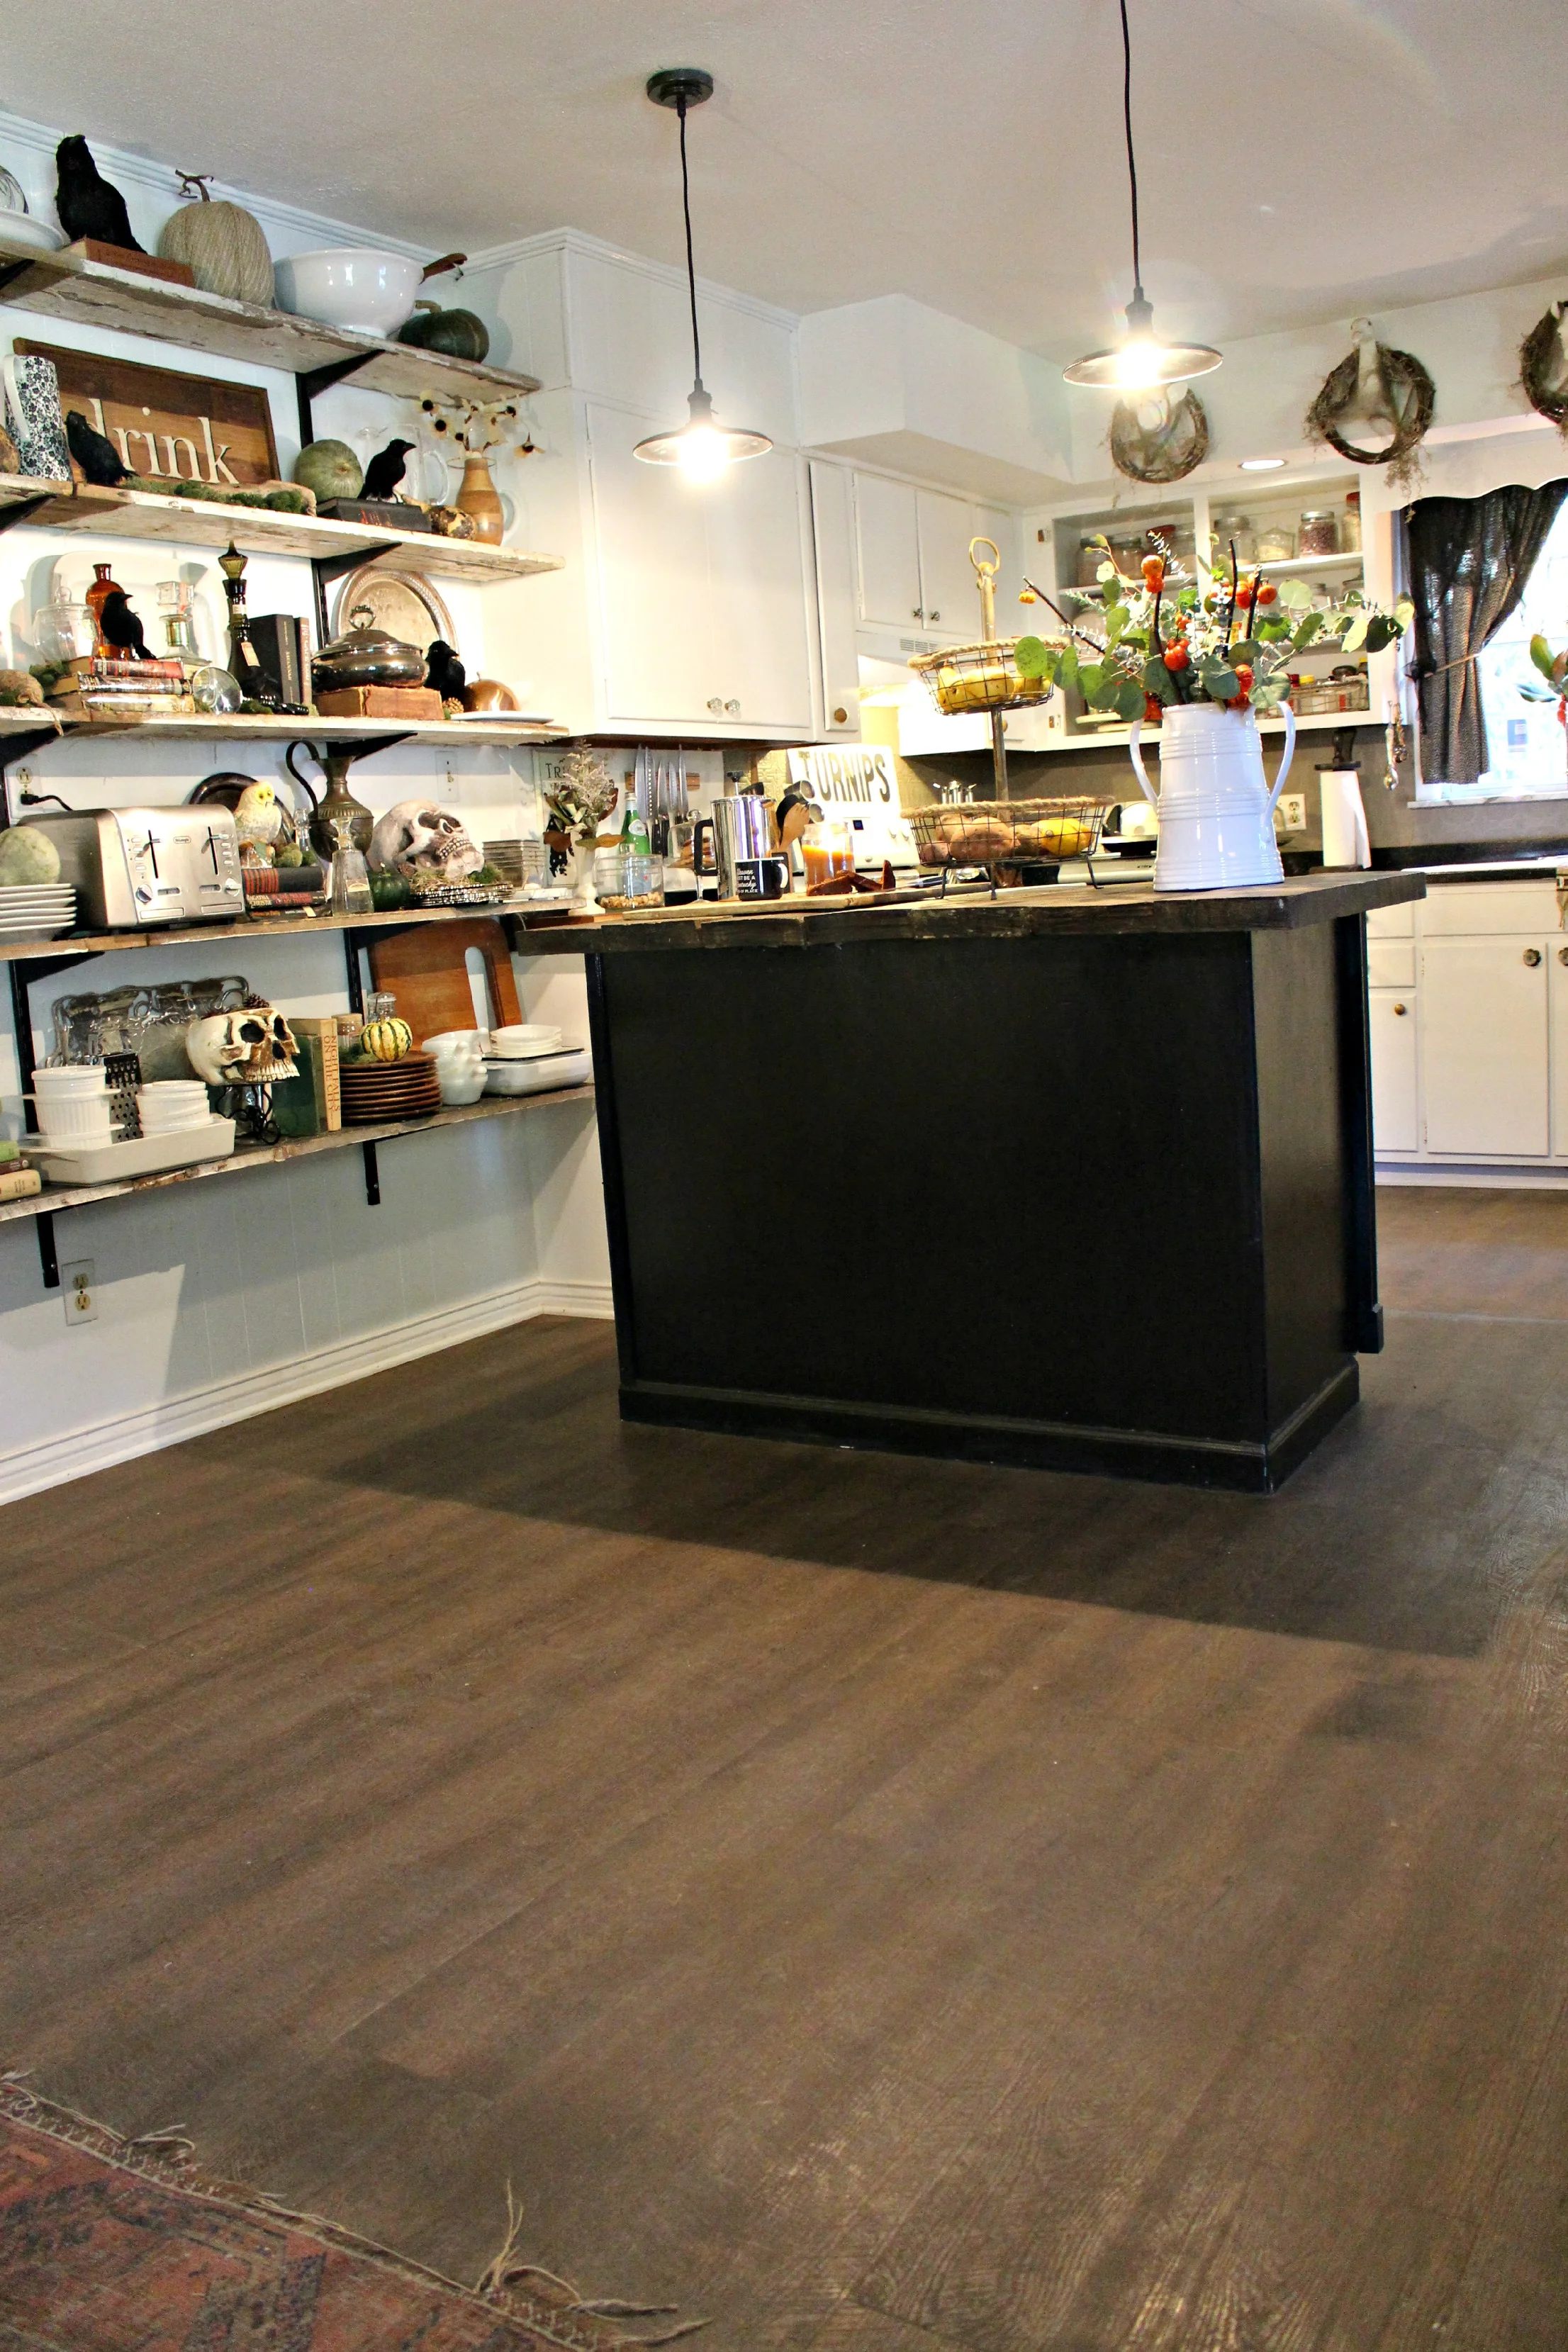
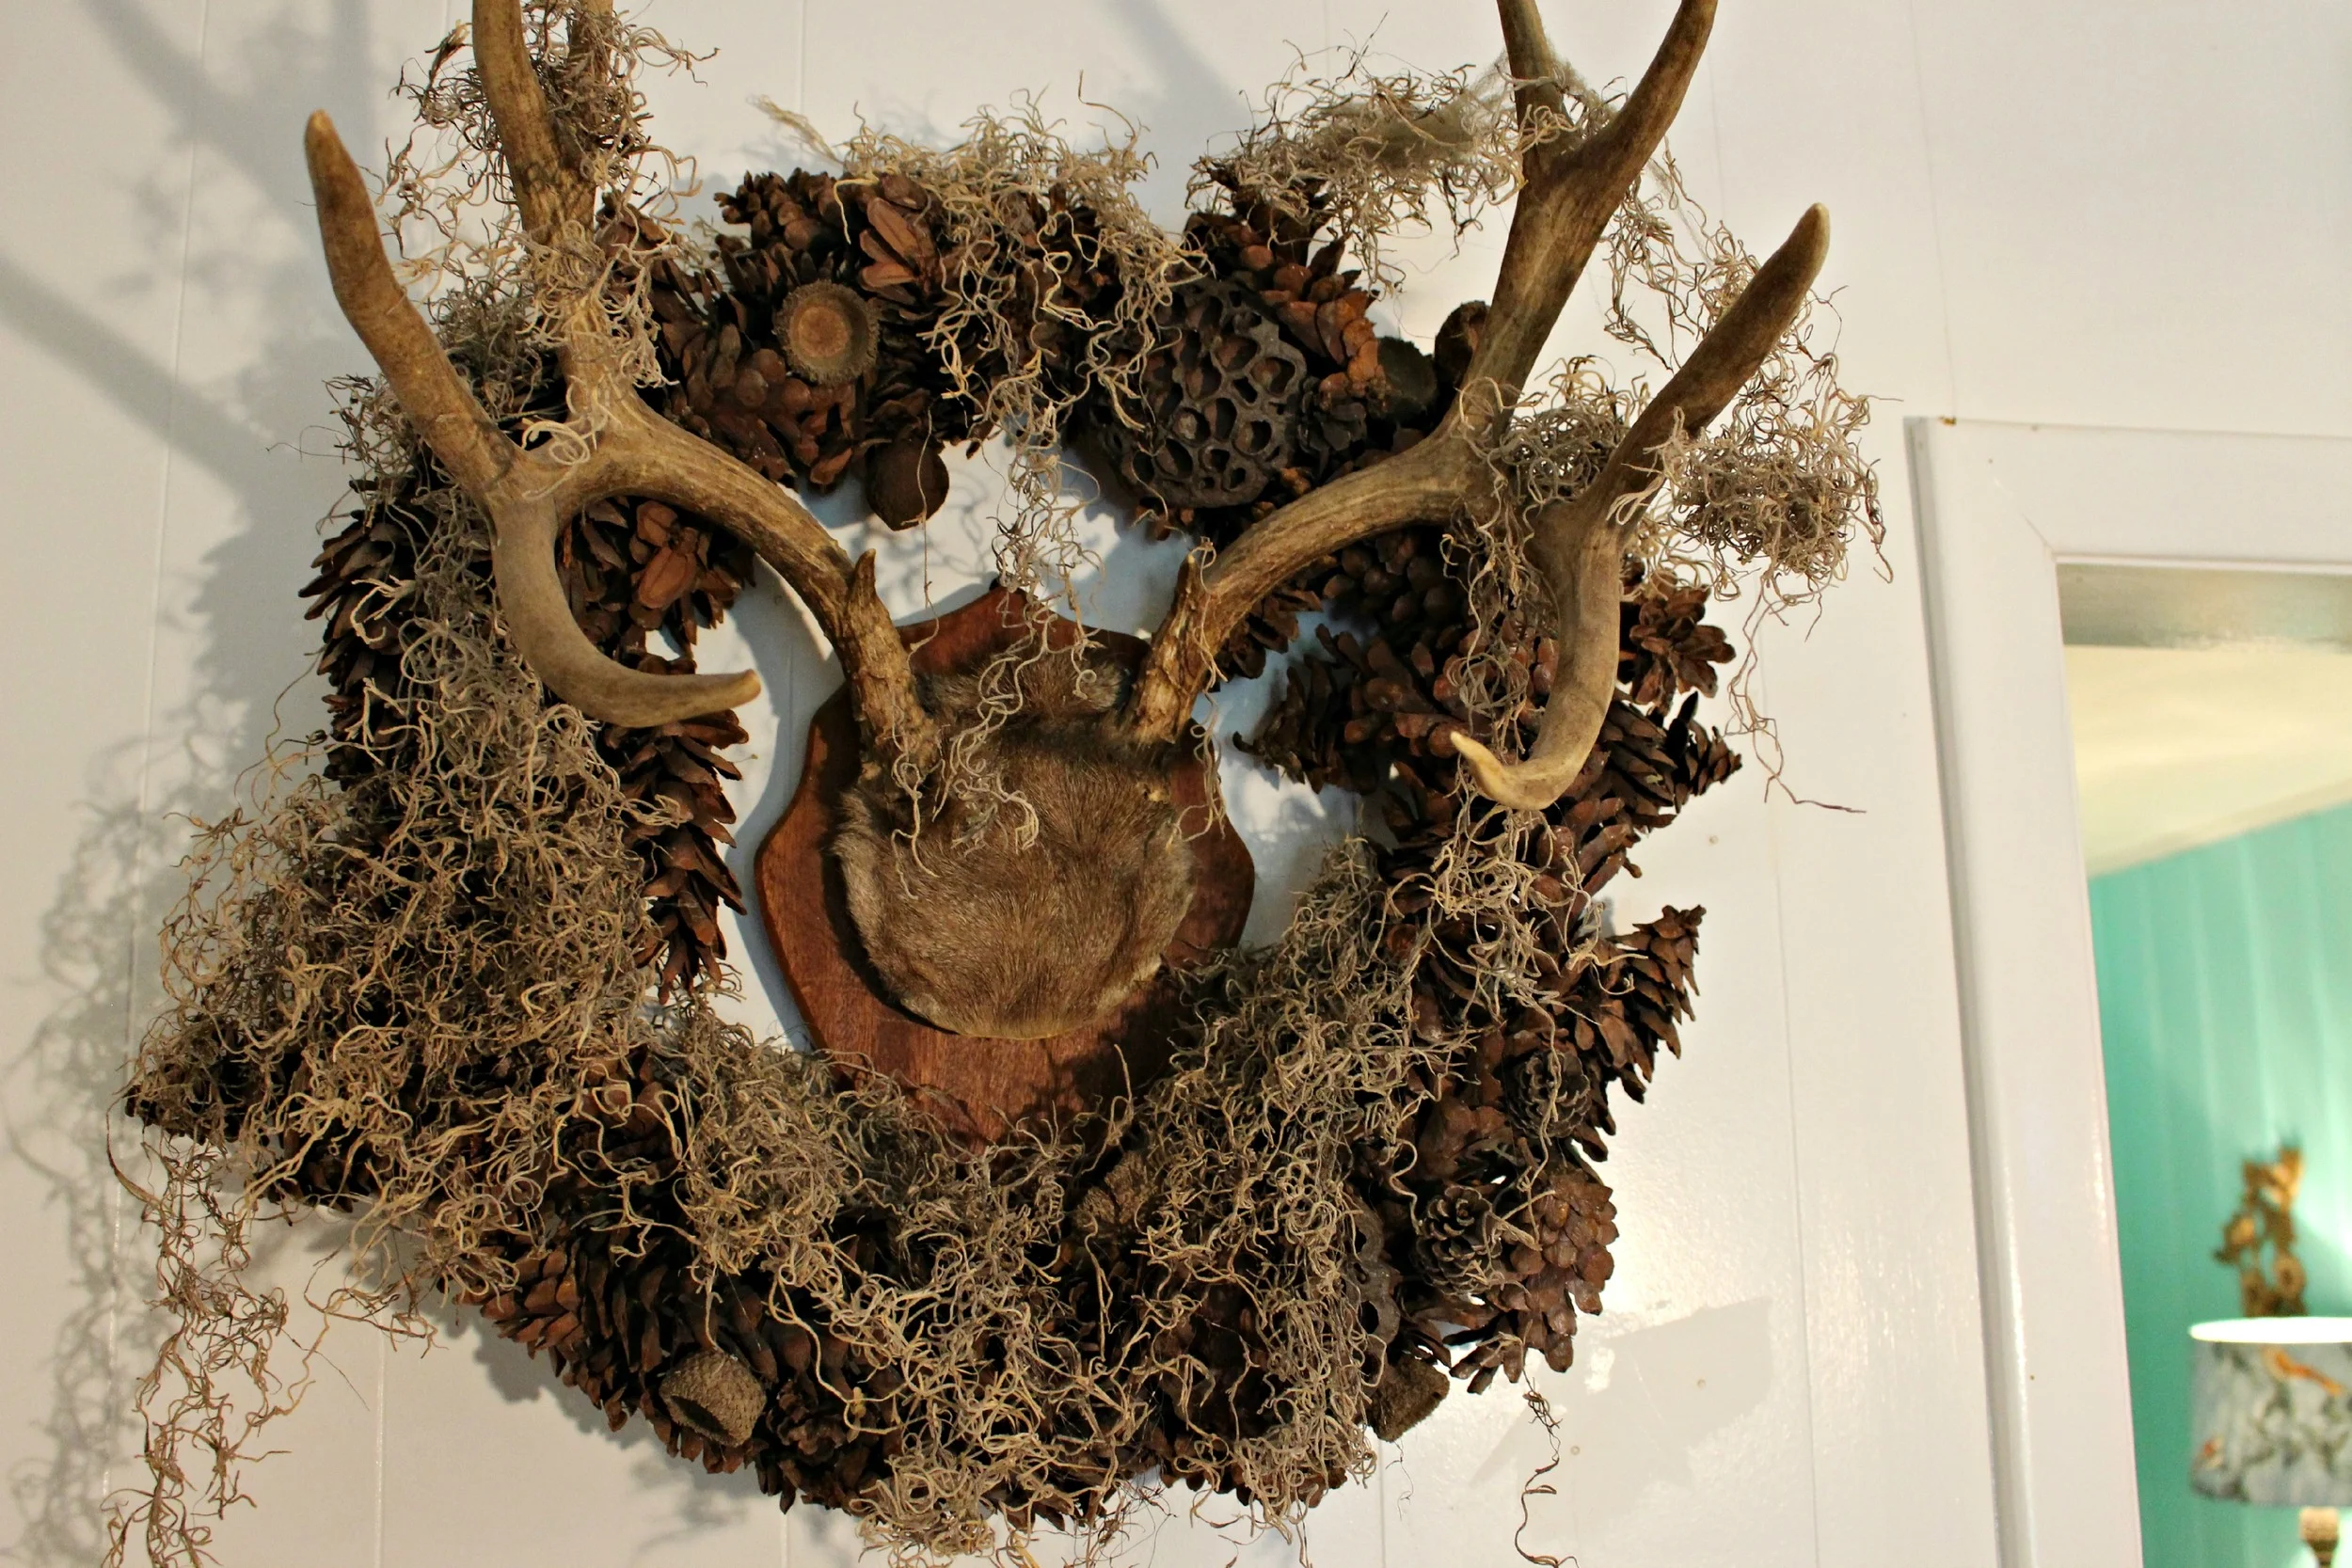
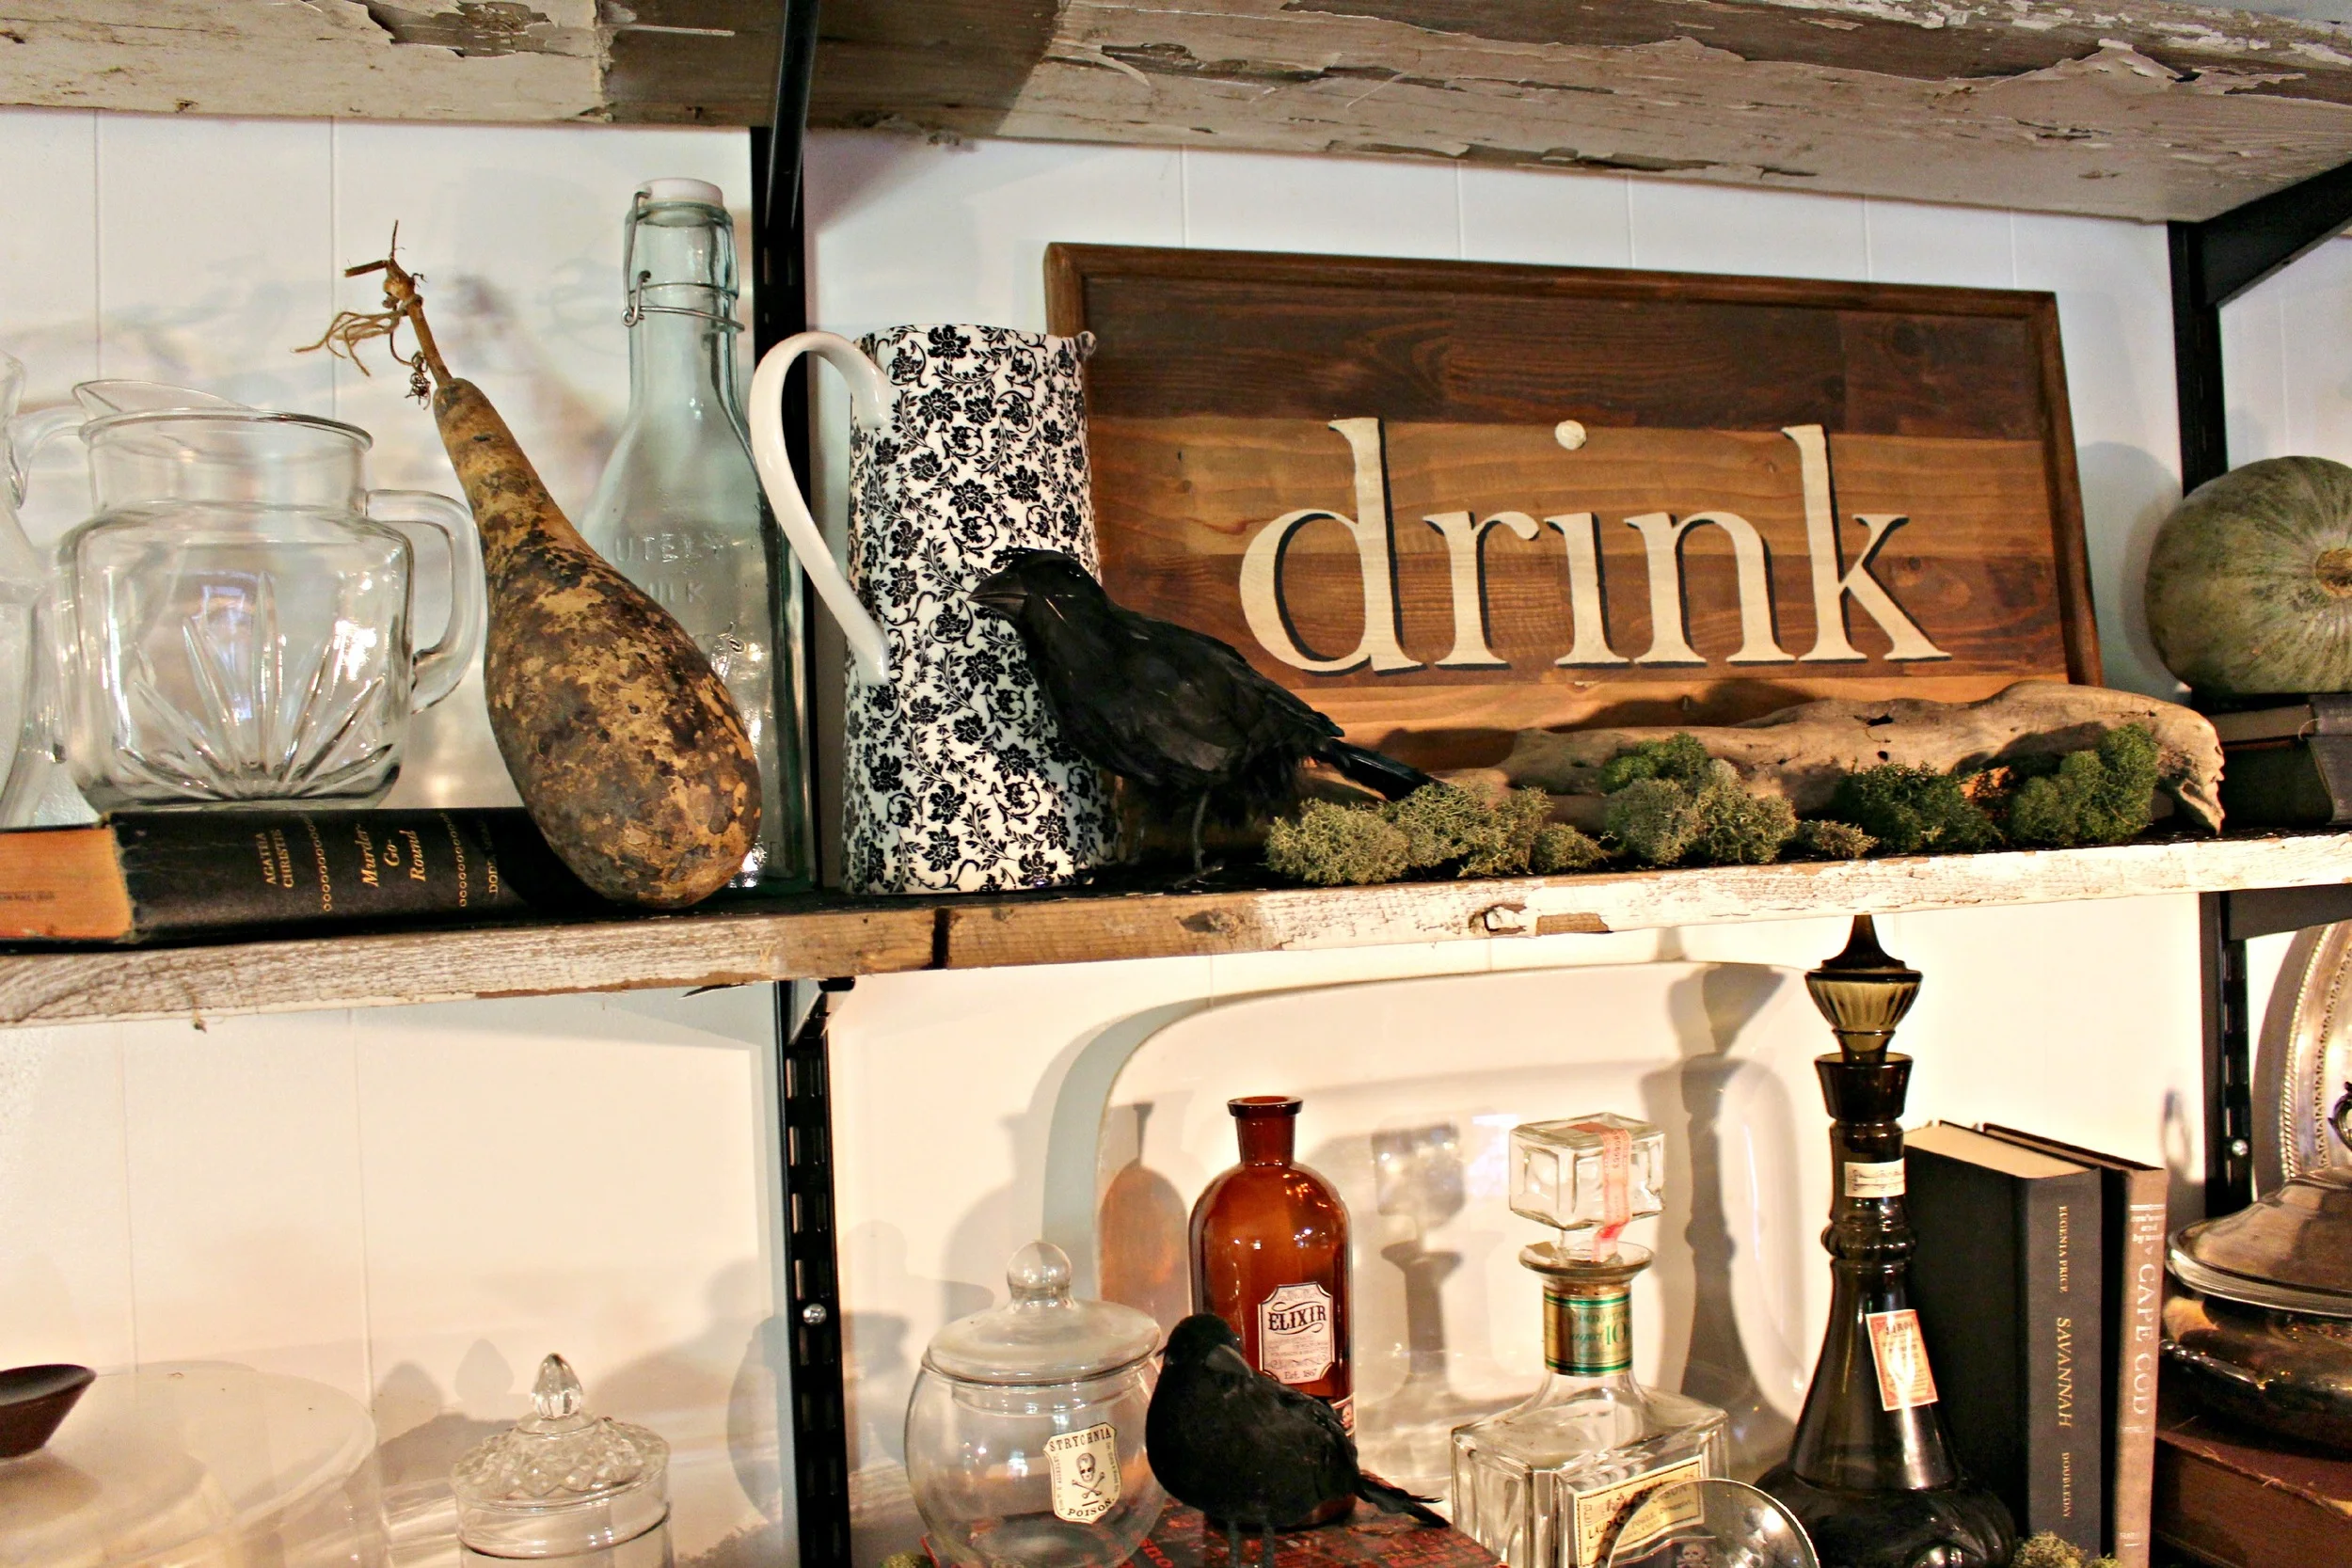
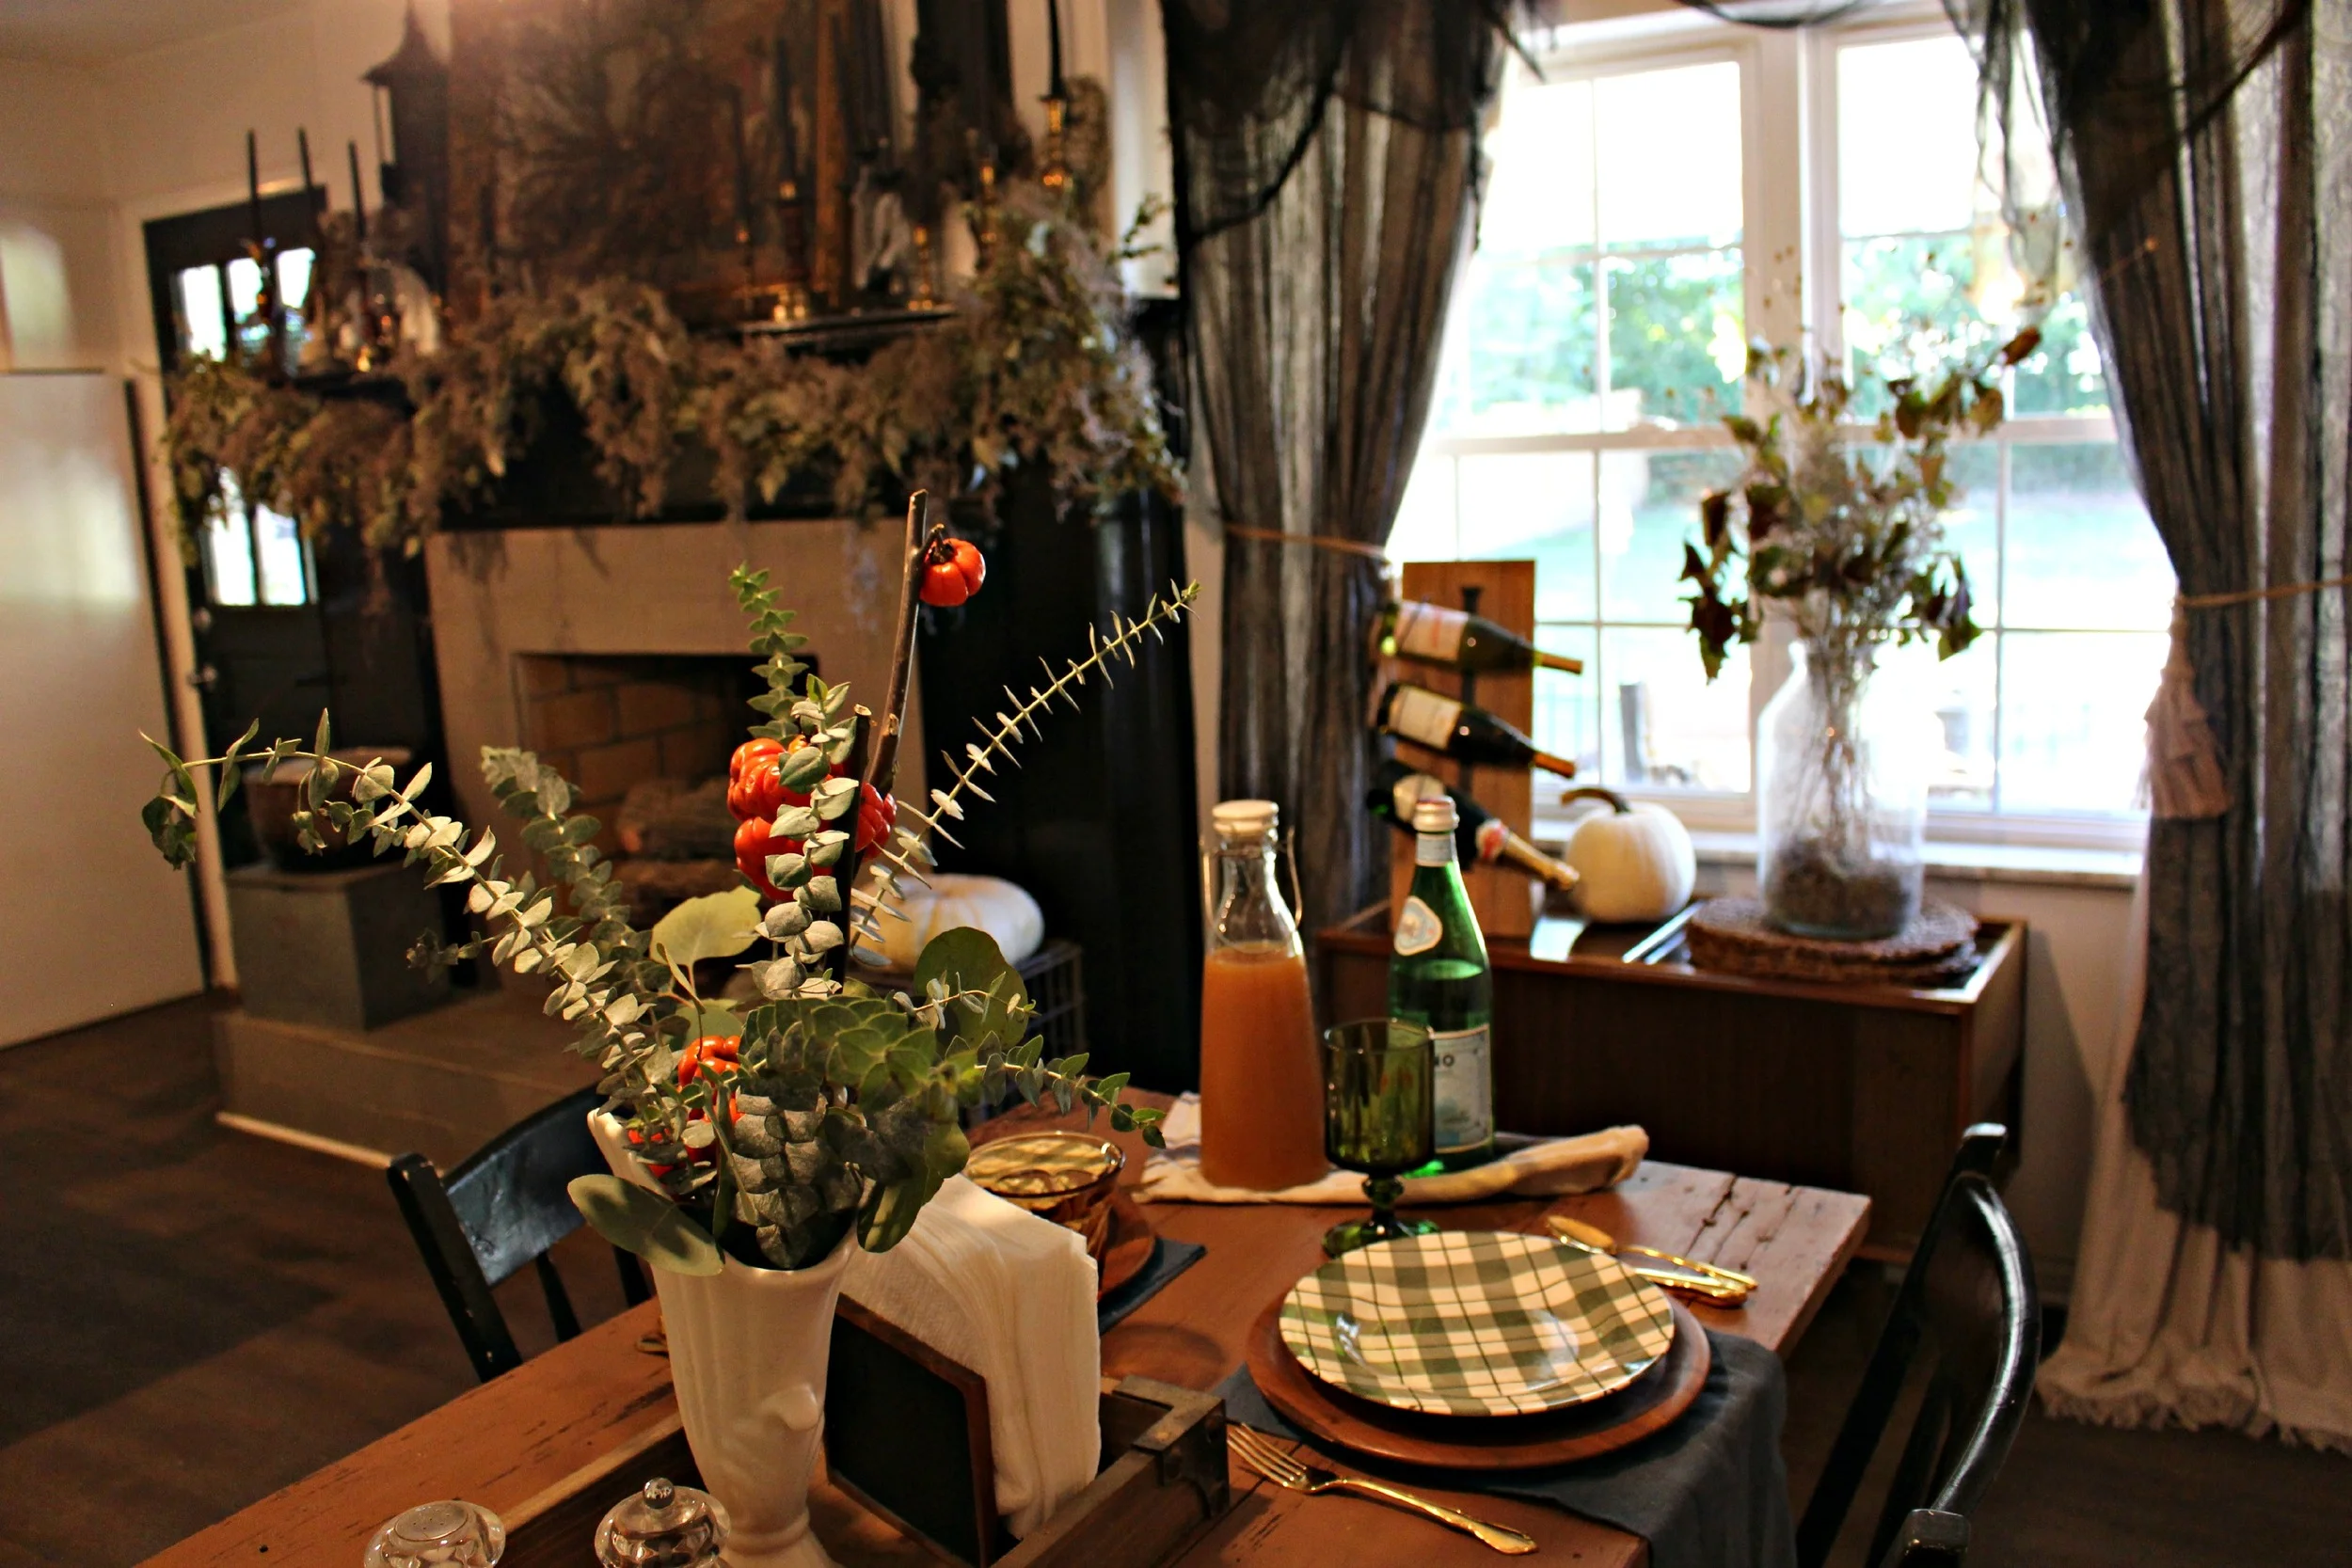
As a classic horror movie fanatic, I always have to fit a haunted Halloween room into my fall decor. I love all the creepy cloth, spider webs, moss, crows, skulls, and all things spooky that go into my space! I'm constantly collecting things that might fit in to my various spooky themes and it really is super easy to create haunted decor even if you are on a budget! There are many staple items you can get for cheap that you will use year after year even if you slightly change your style. Creepy cloth, spider webs, and moss are all items that you can add to just about any decor to make it look instantly creepy! I also use my fake crows and skull heads year after year (both are from Michael's and you can get them super cheap off-season or with their weekly coupons!). Other items that are good for building a spooky look are candlesticks, antique portraits, and old books (all of mine are vintage from various thrift stores, garage sales, or peddler malls). I also added some gray and green pumpkins and gourds to my space because I can't get enough fall produce throughout the house. One of my favorite things is the giant twig wreath above my mantle that I found for a couple of dollars at a garage sale this summer- it is the perfect spooky wreath! I added a pop of color with some simple arrangements using Trader Joe's "pumpkin trees" and eucalyptus bunches. Enjoy my spooky + rustic Halloween kitchen!
xoxo
Emily


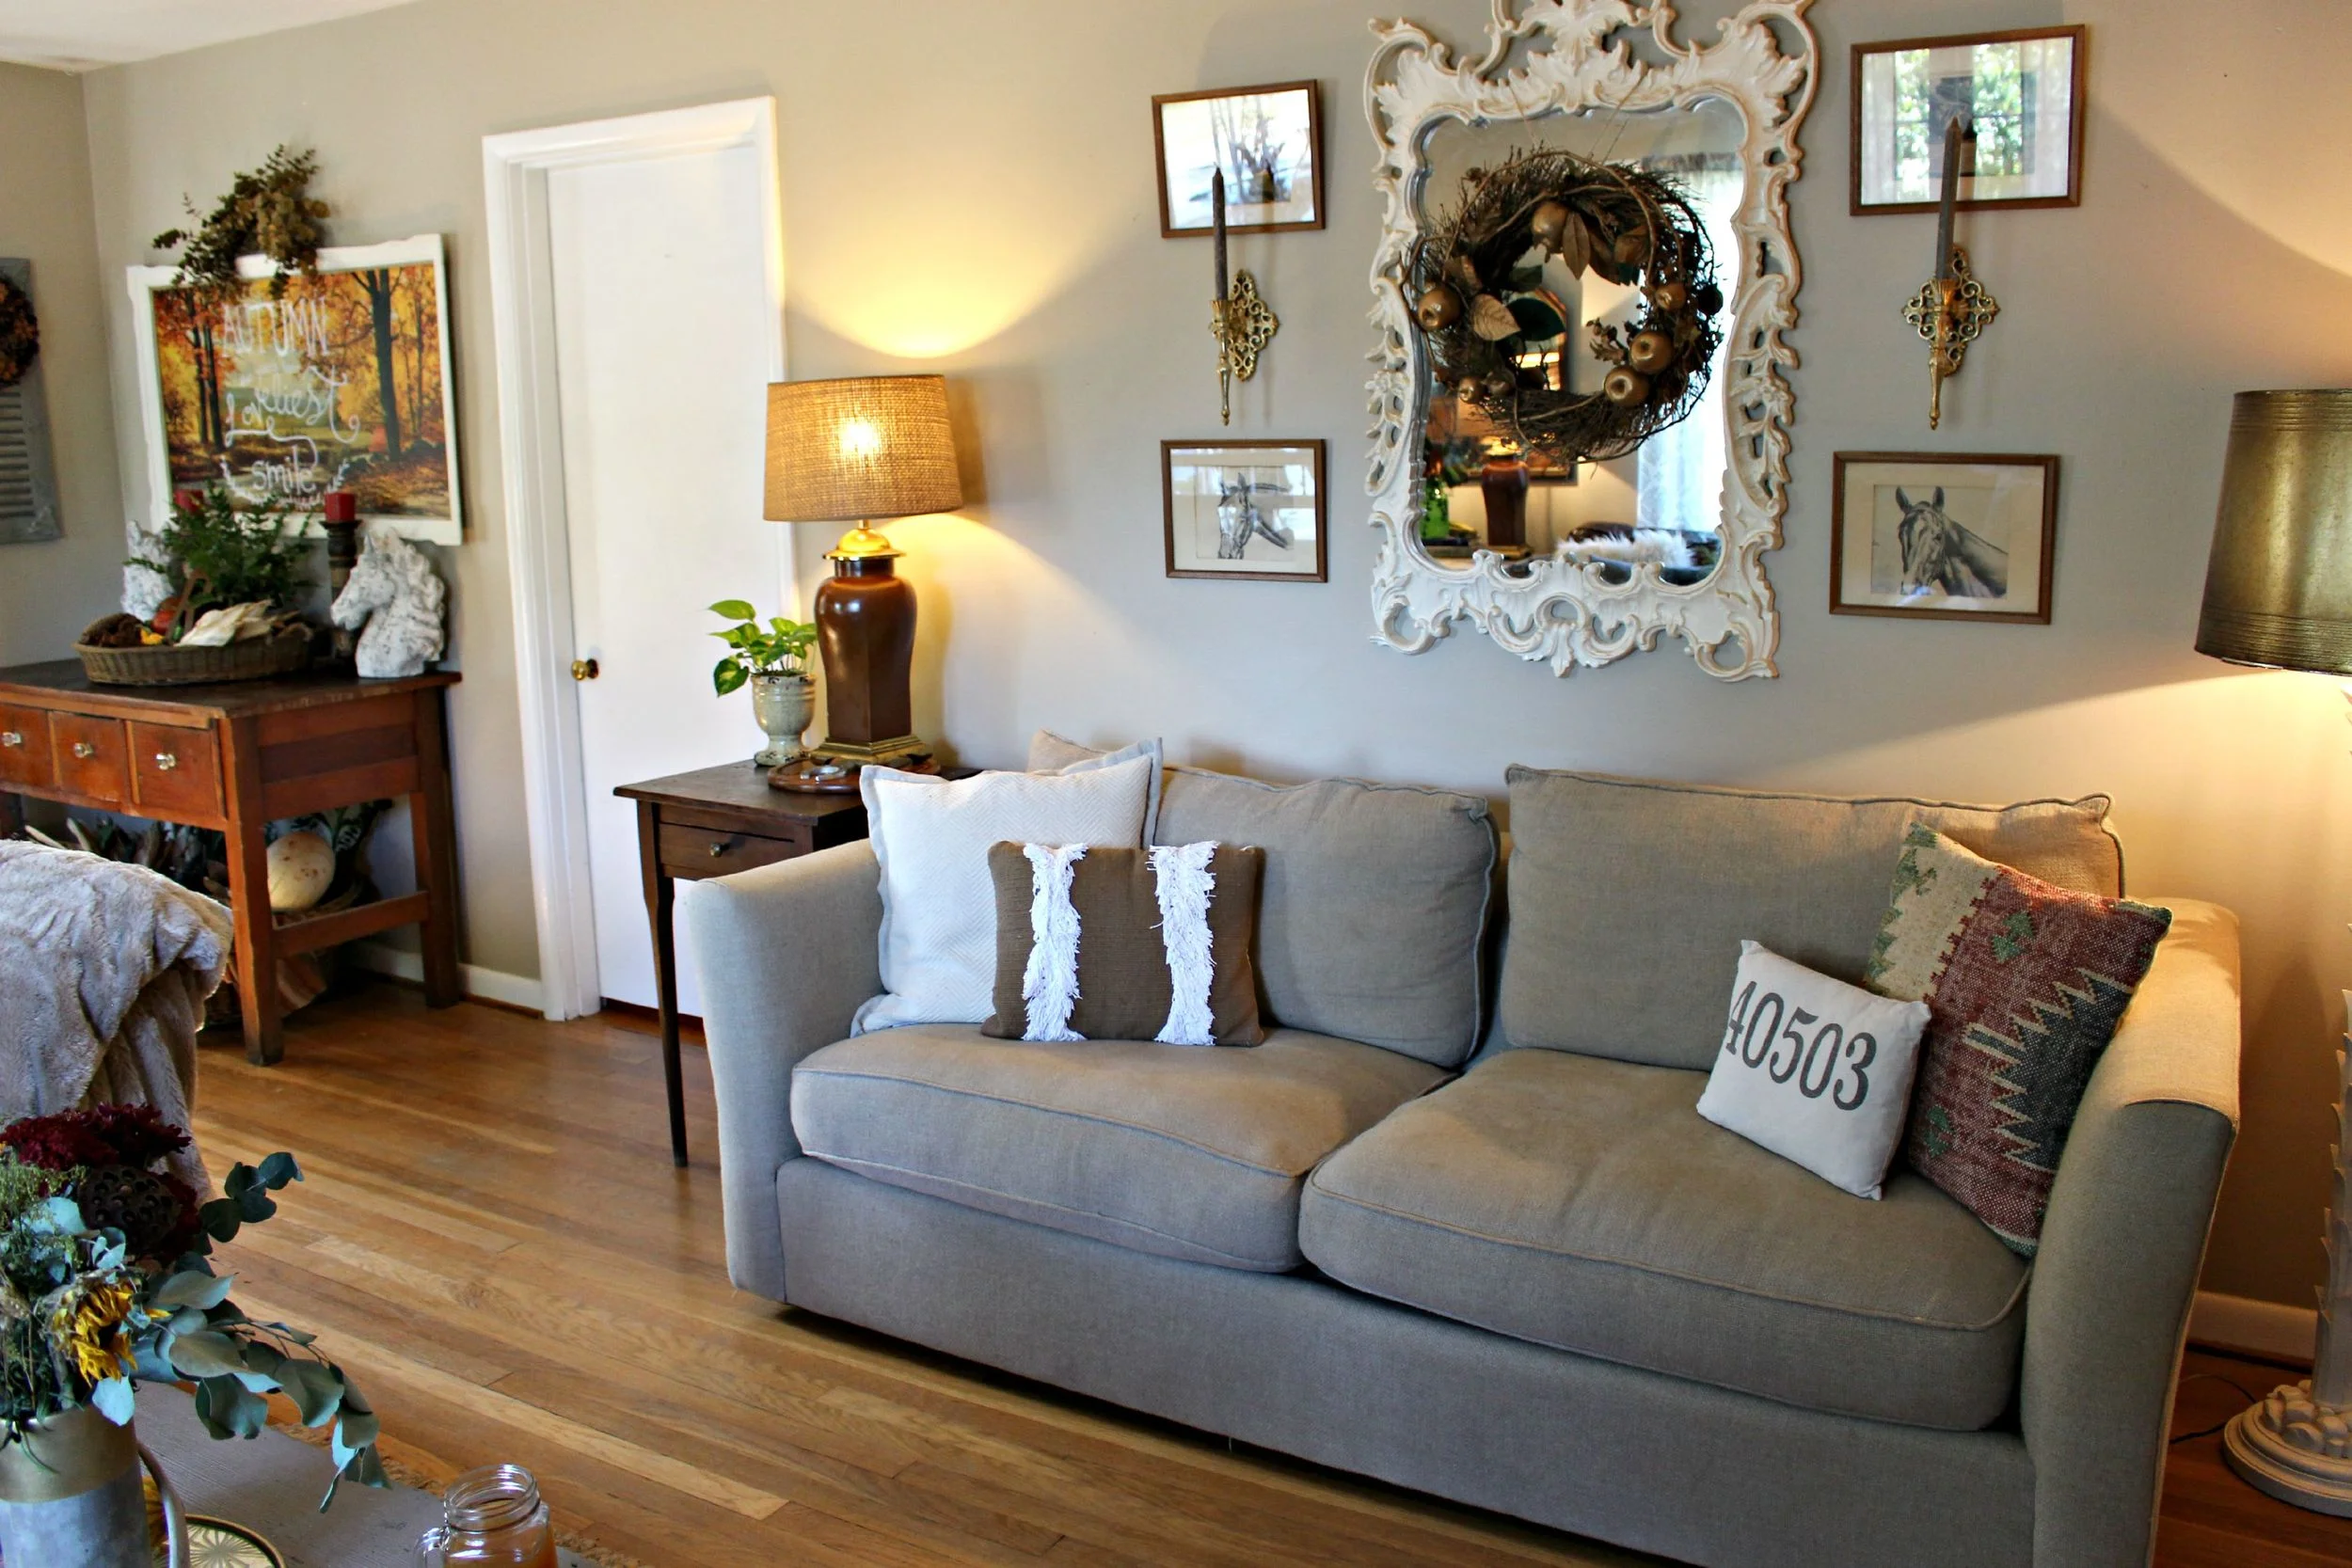
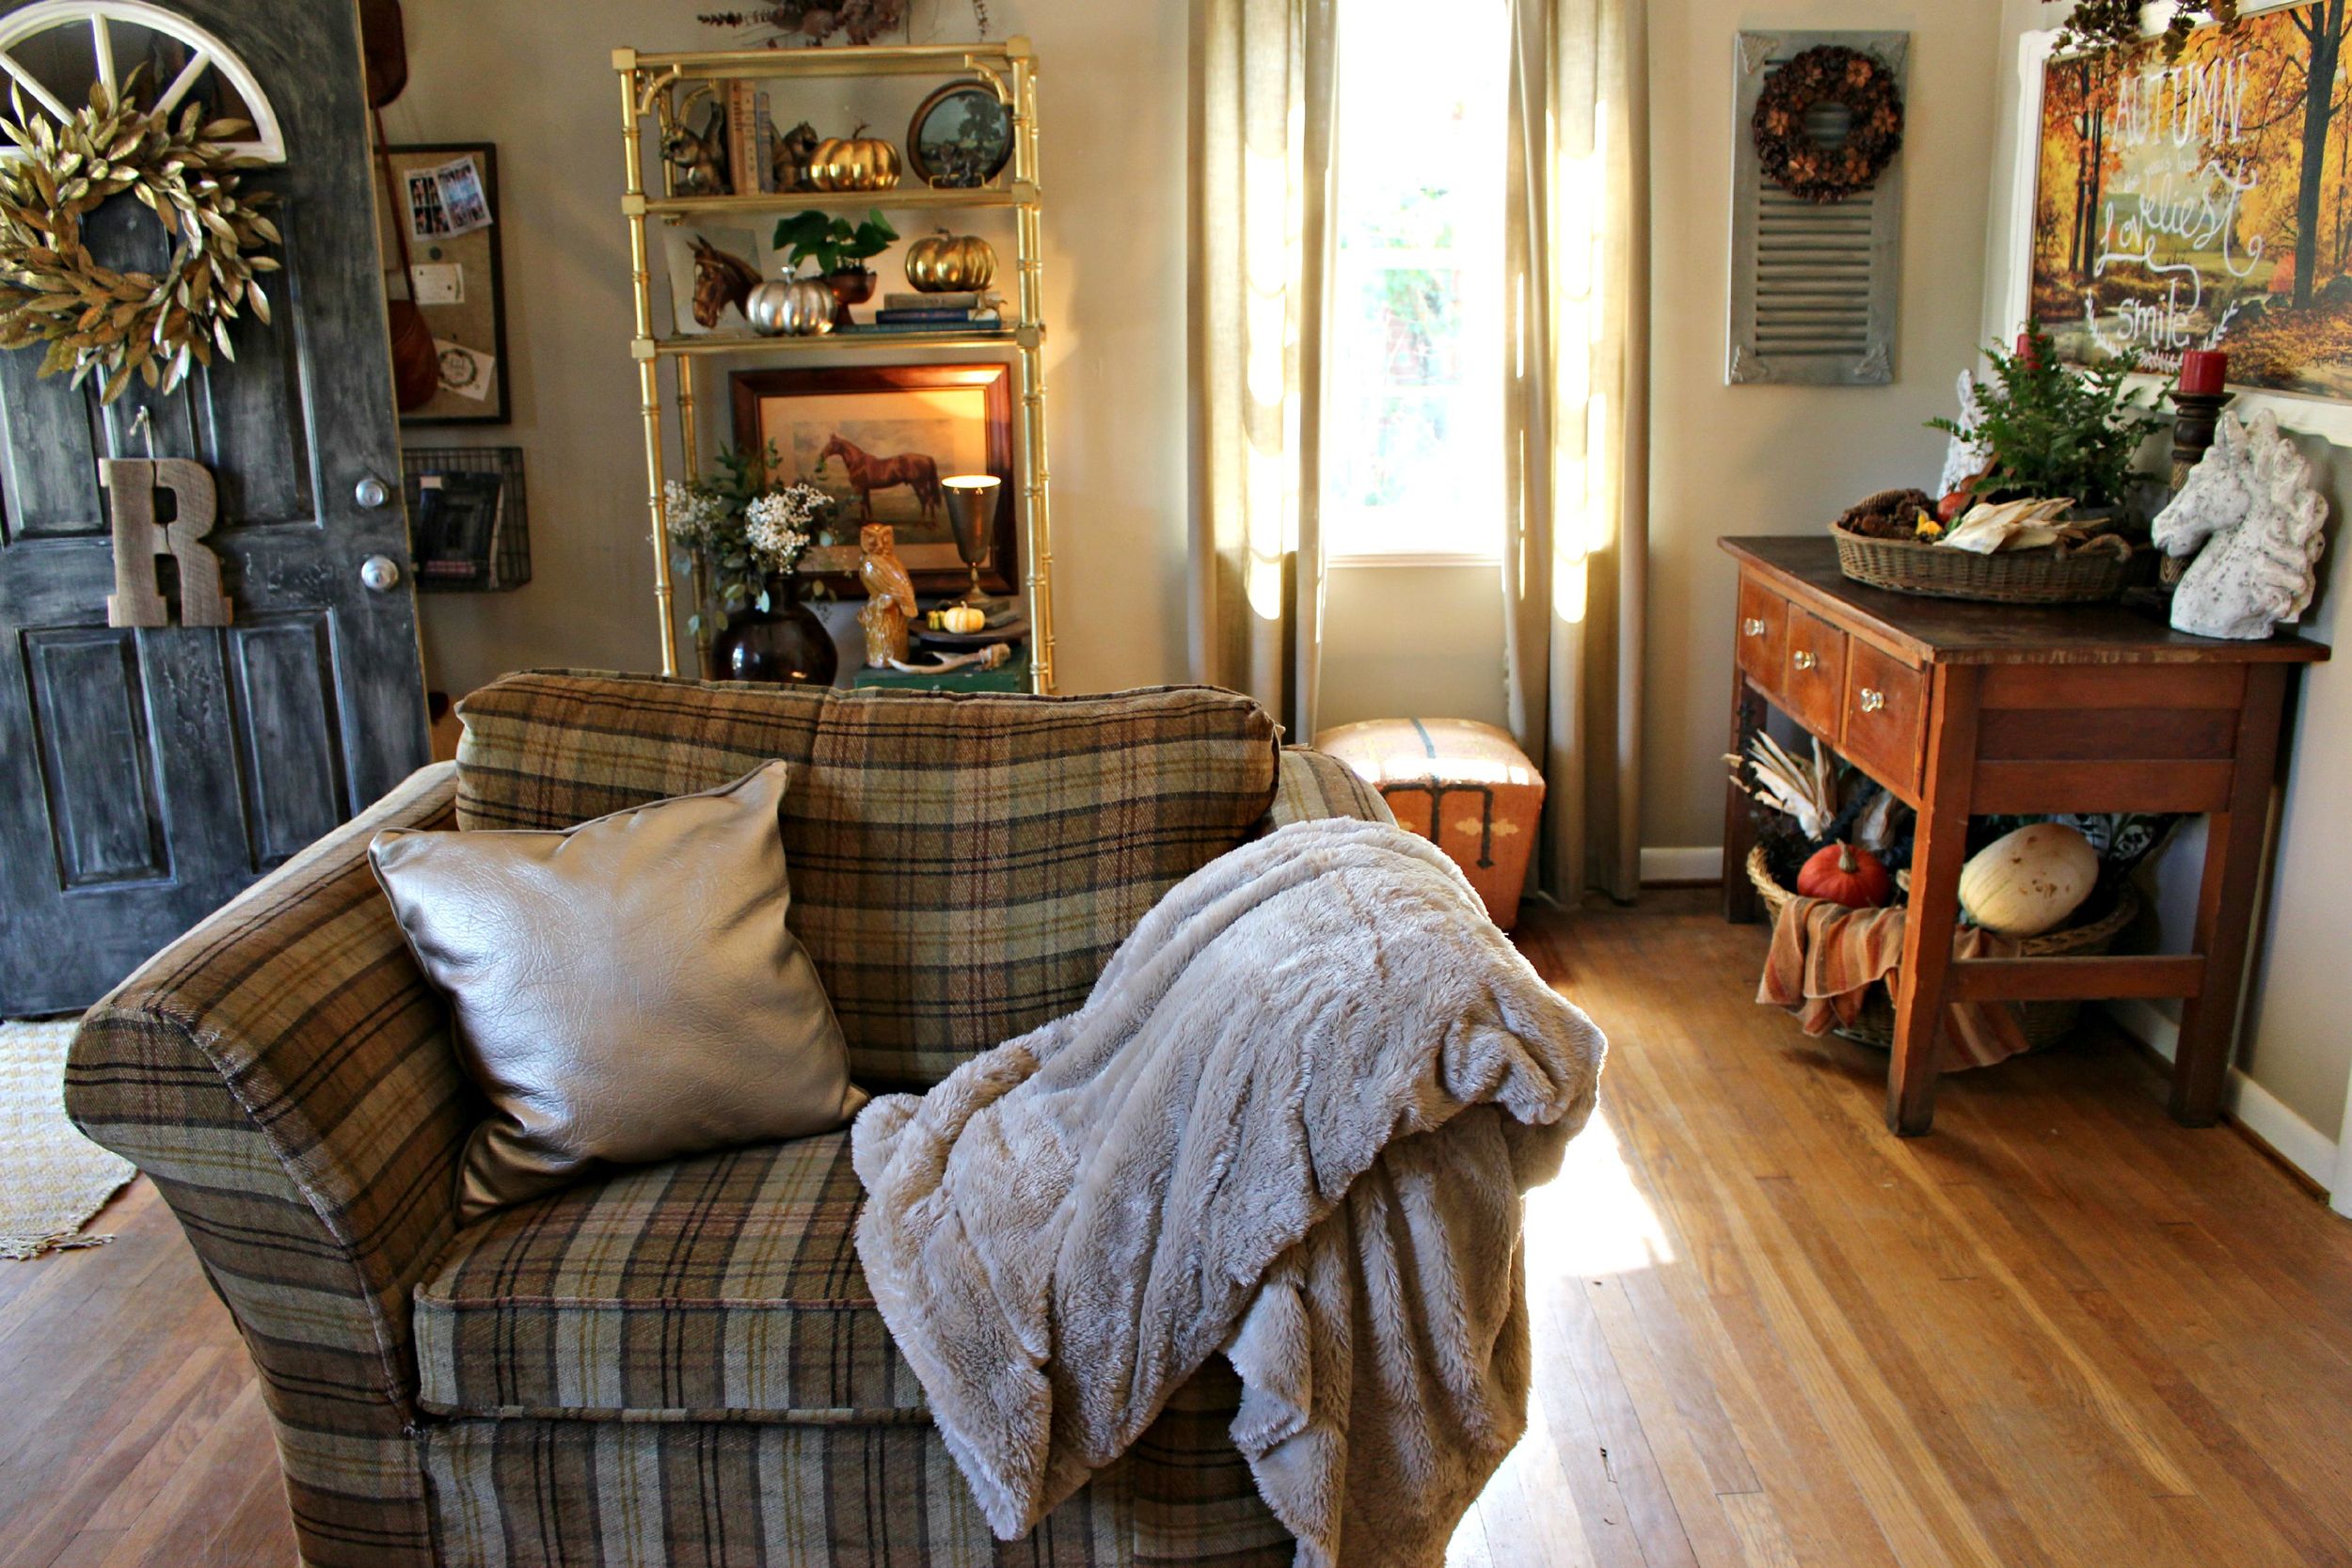
Fall Home Tour: Living Room
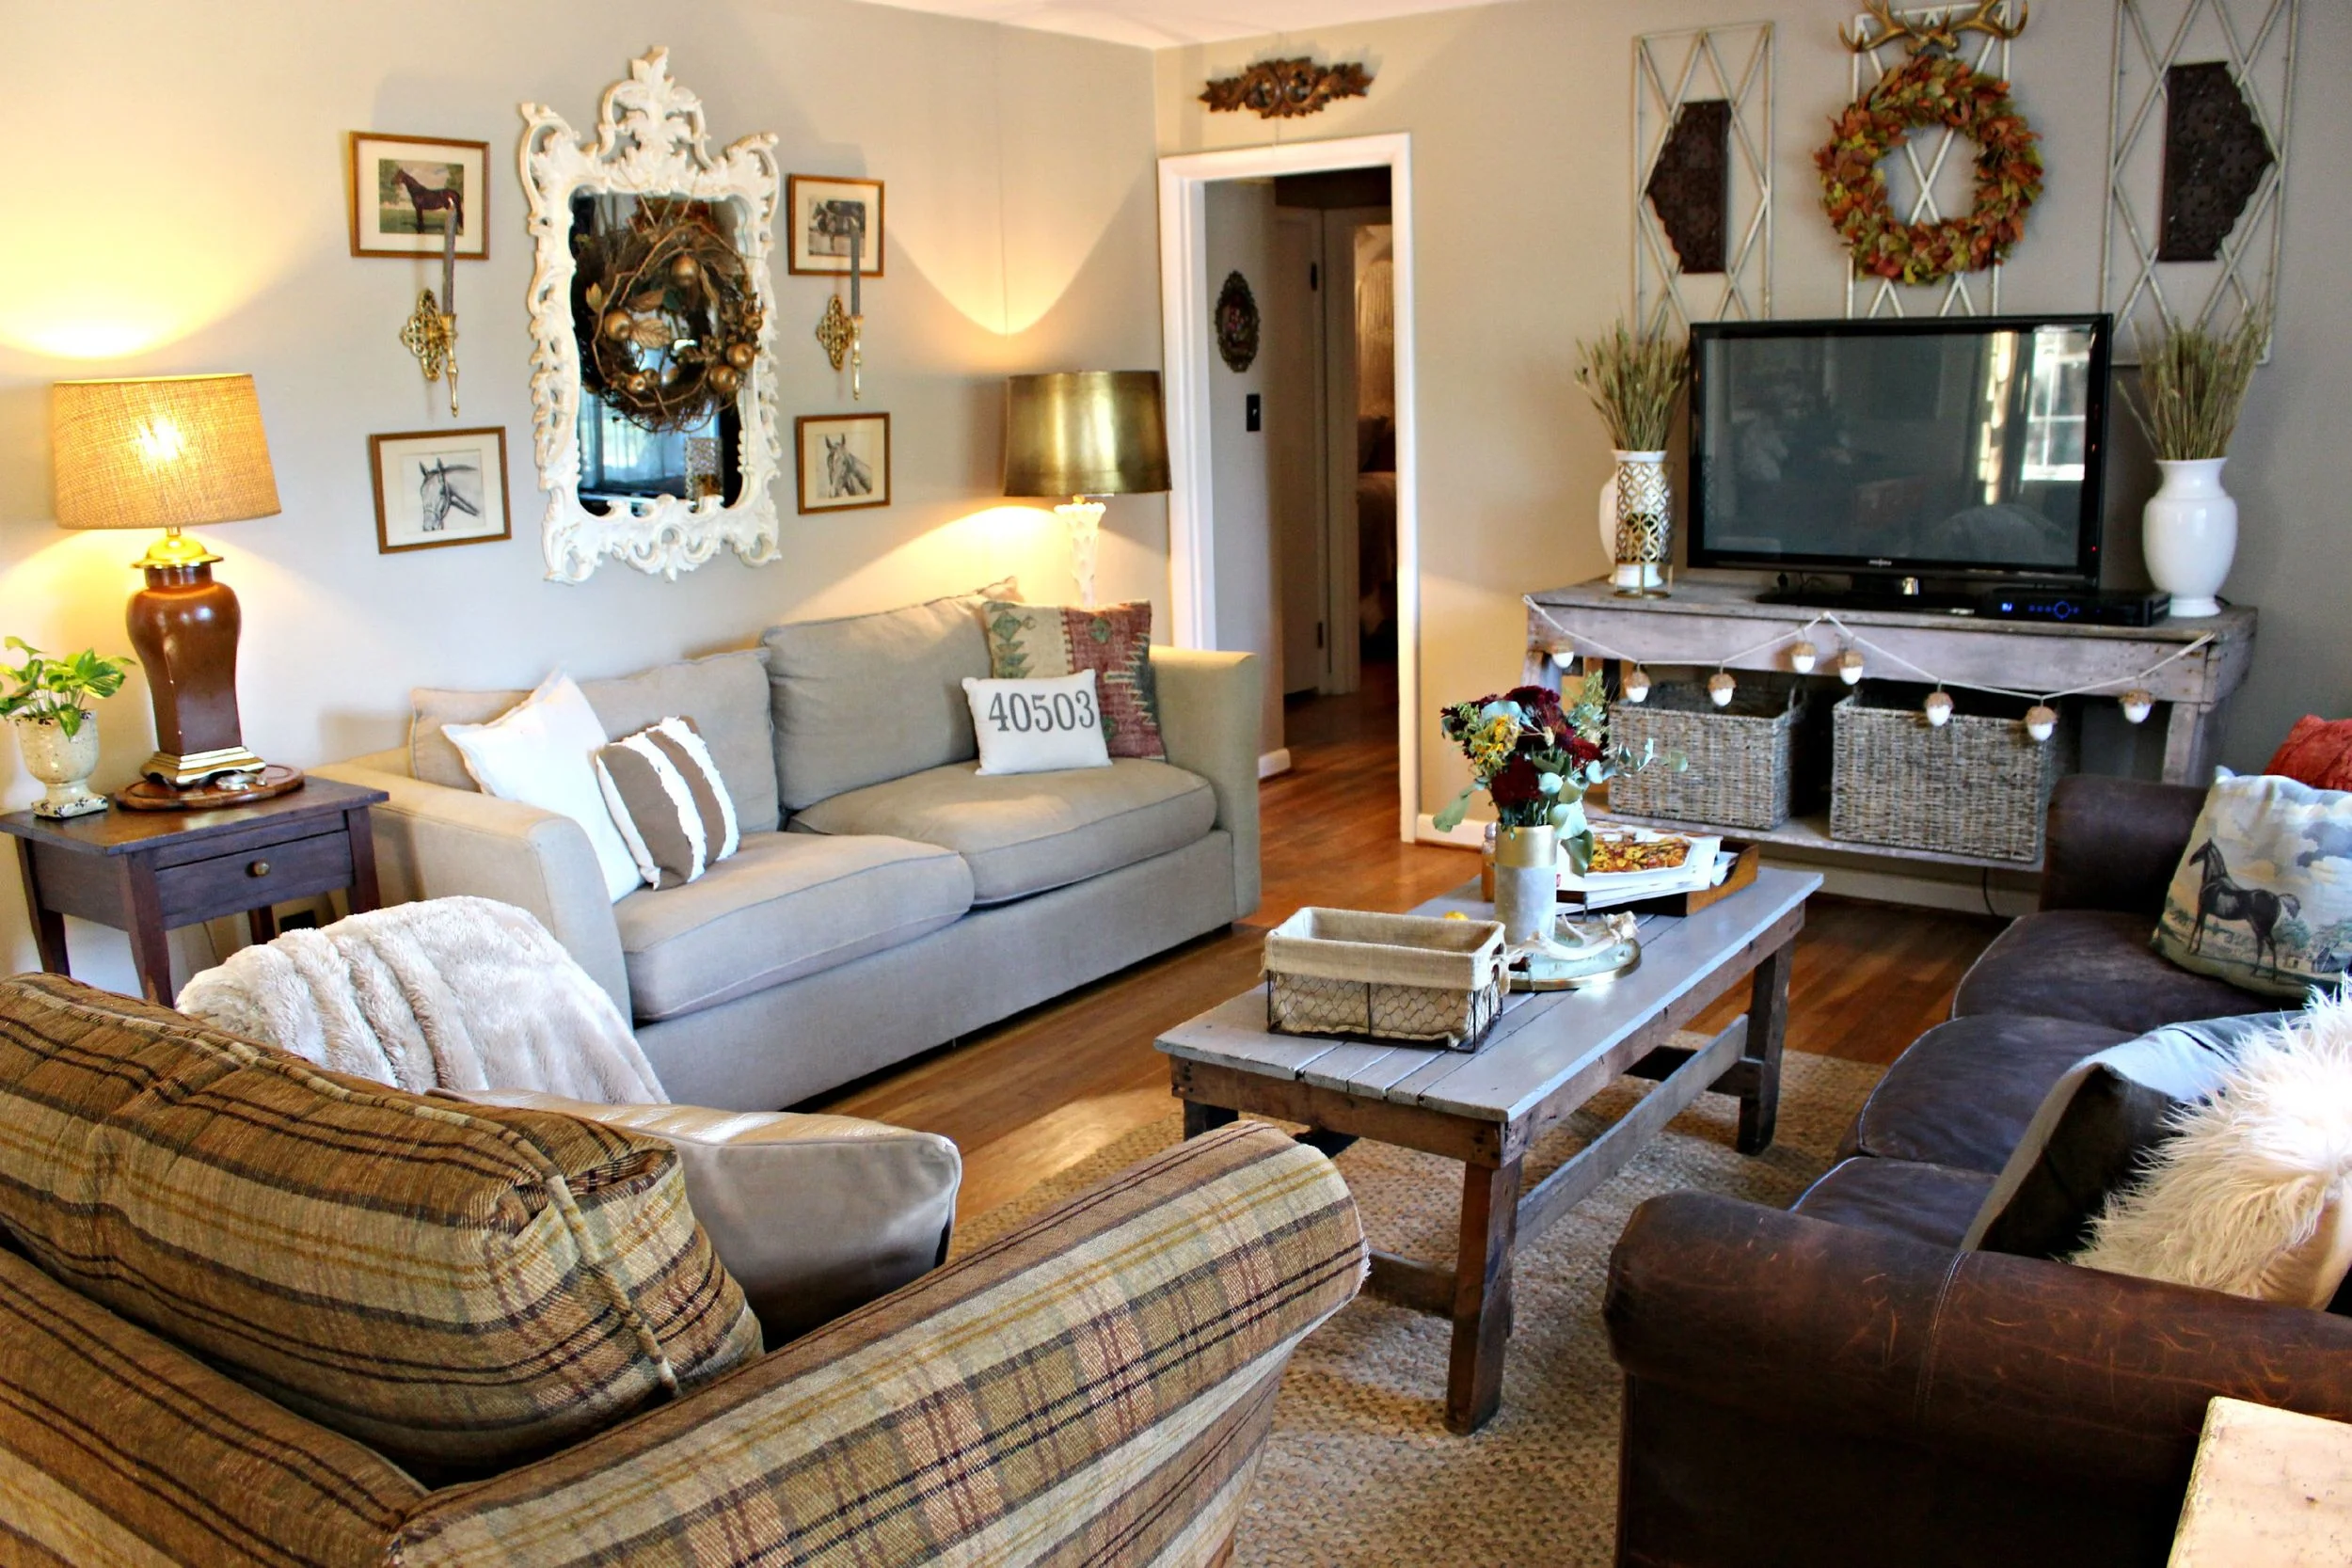
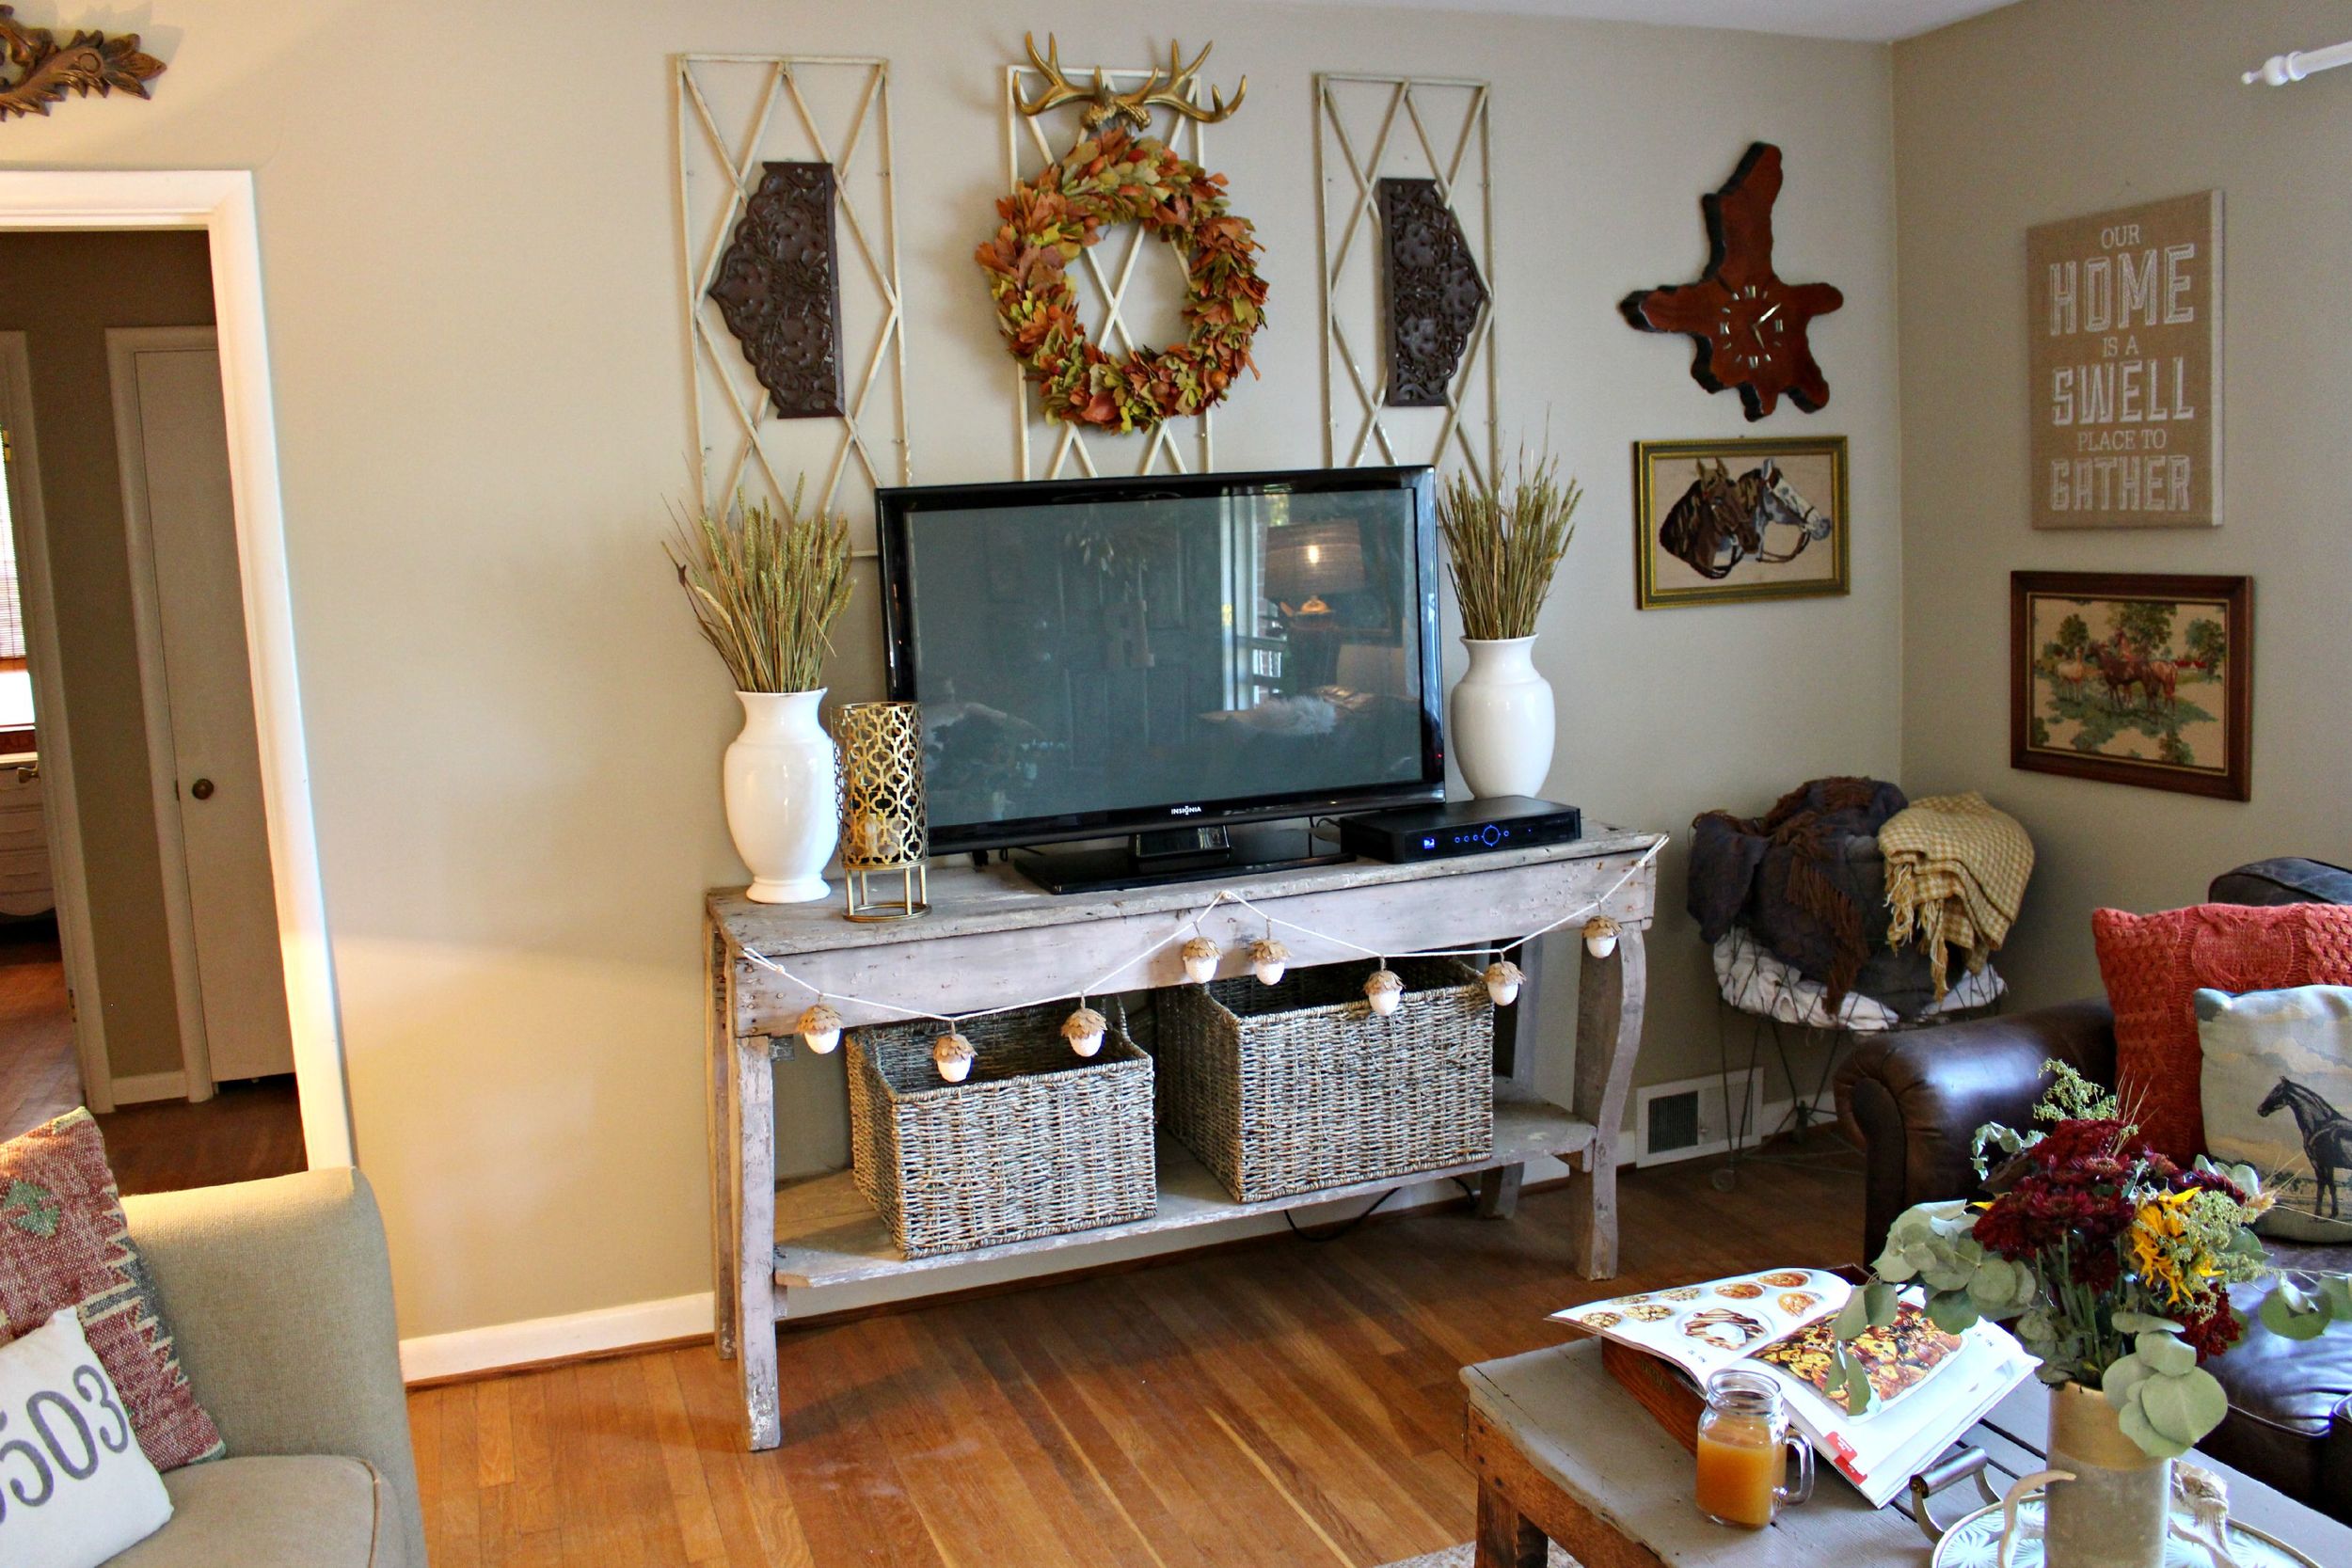
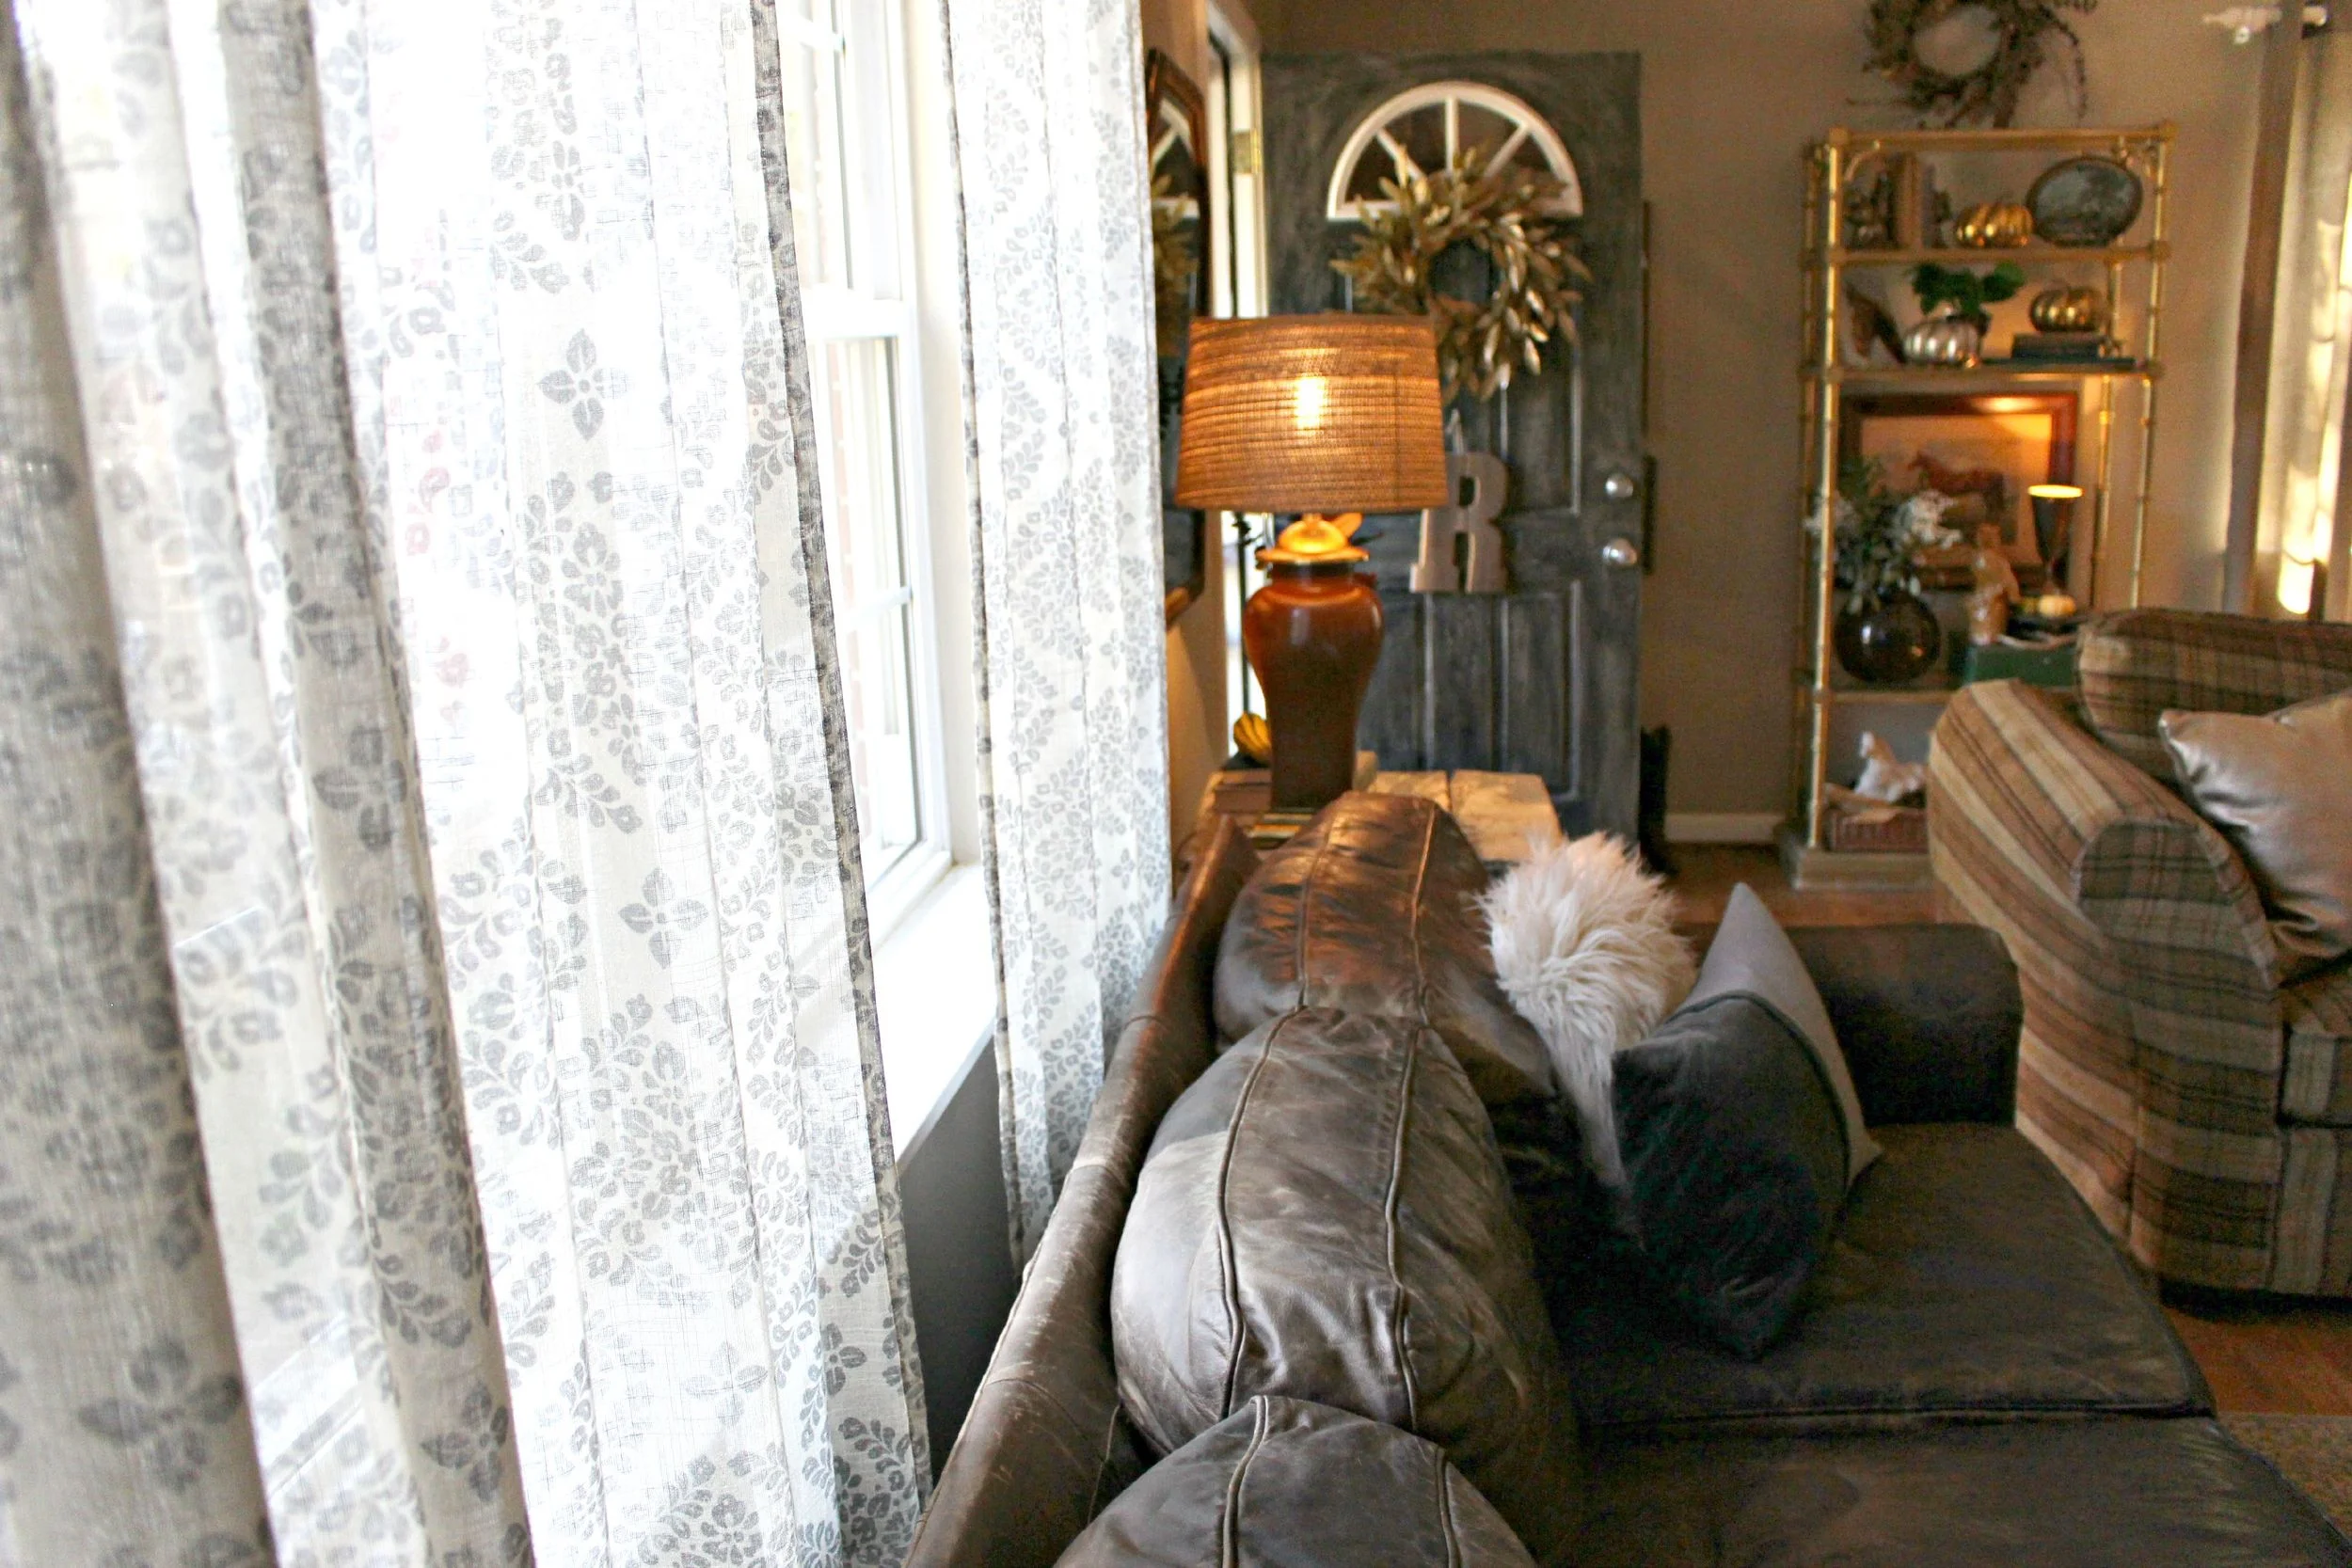
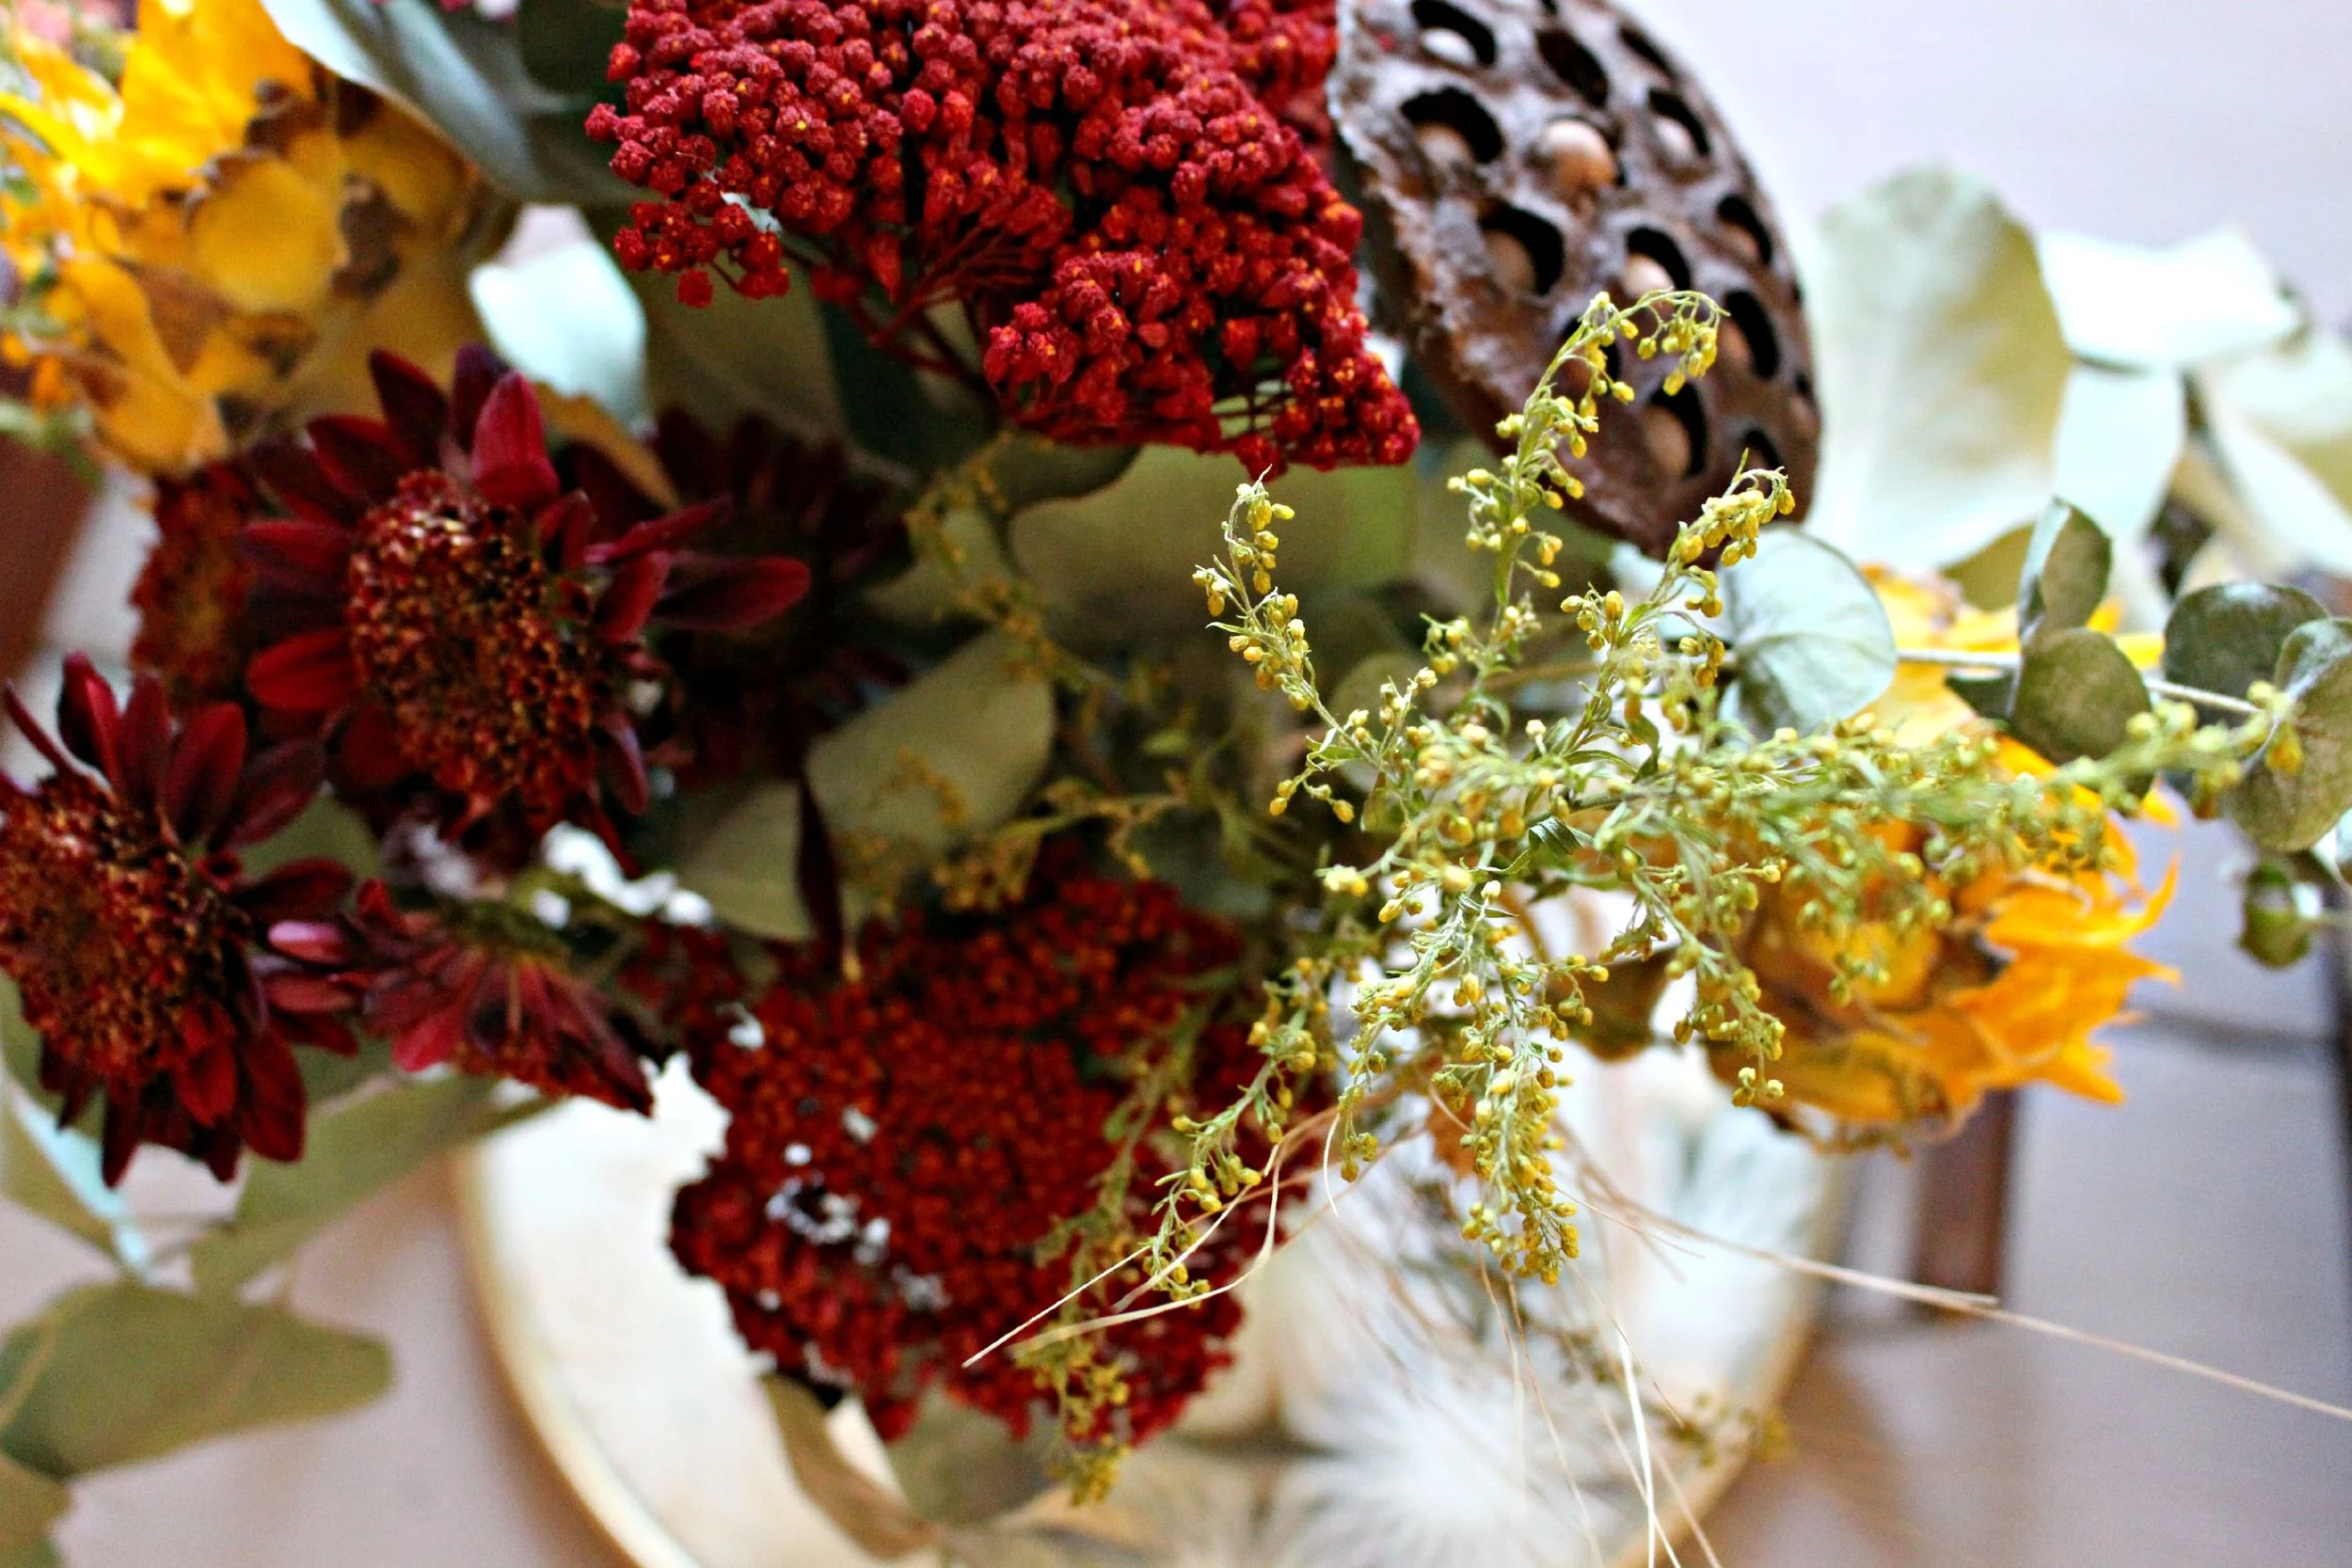
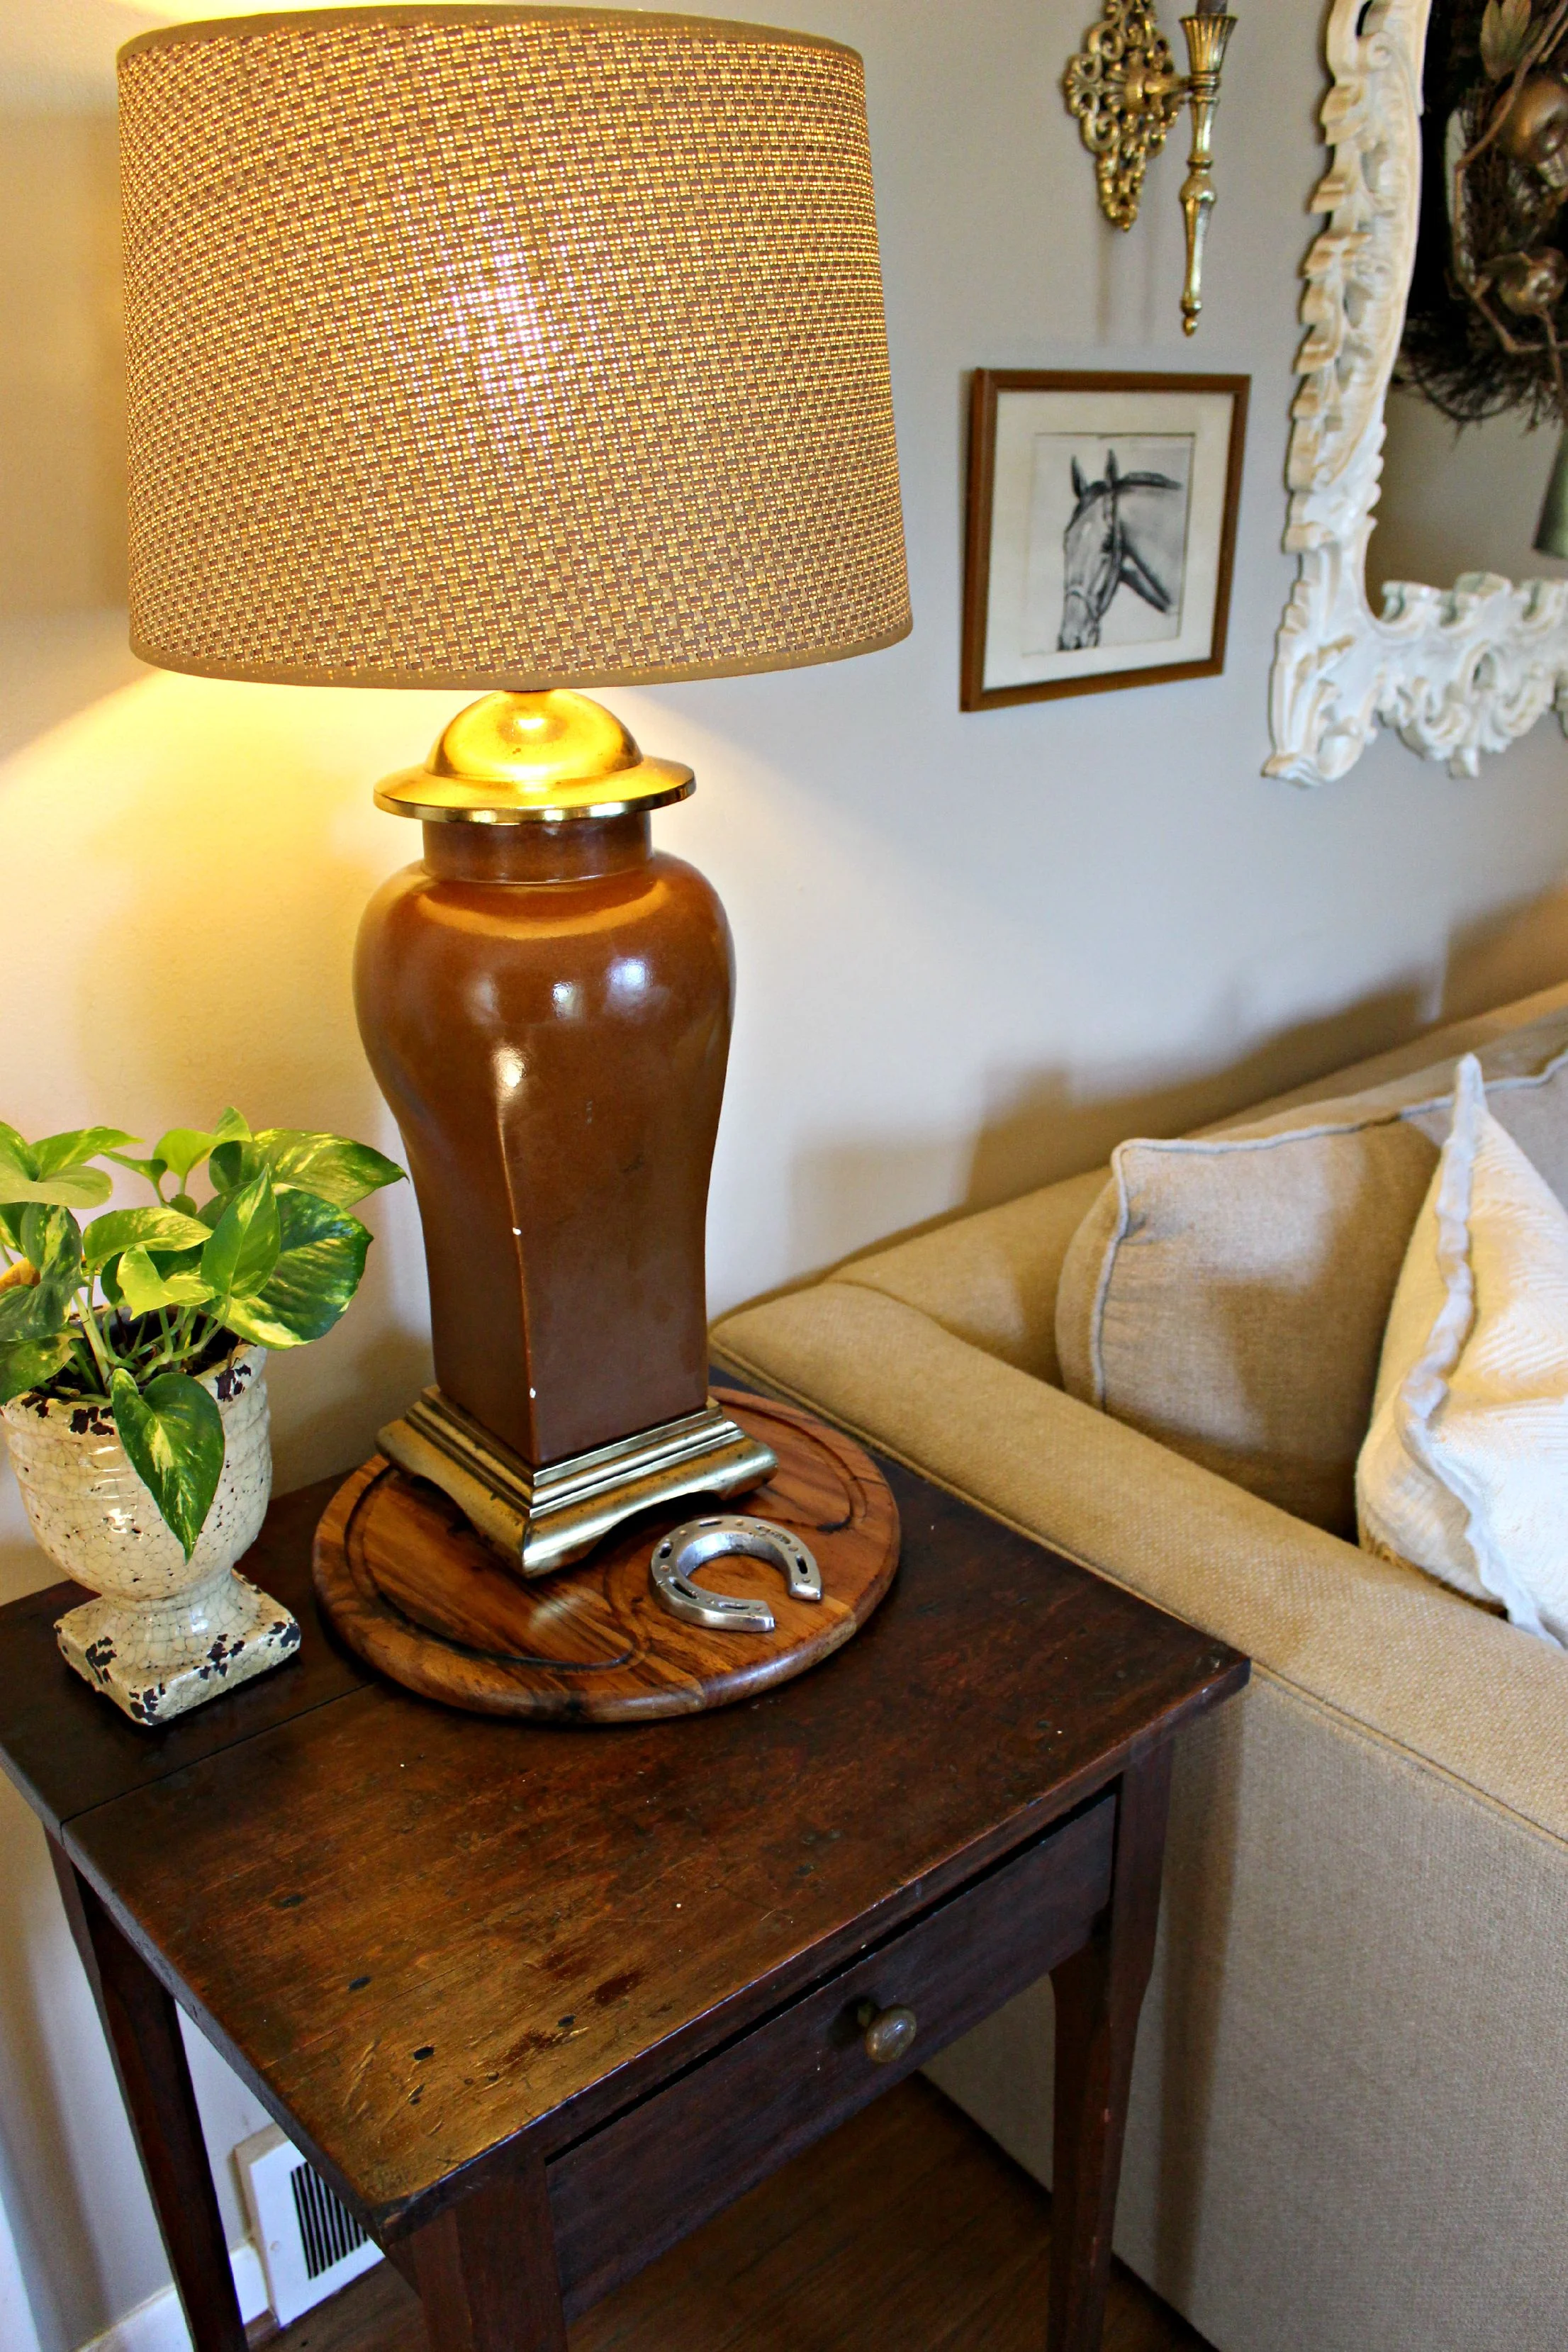
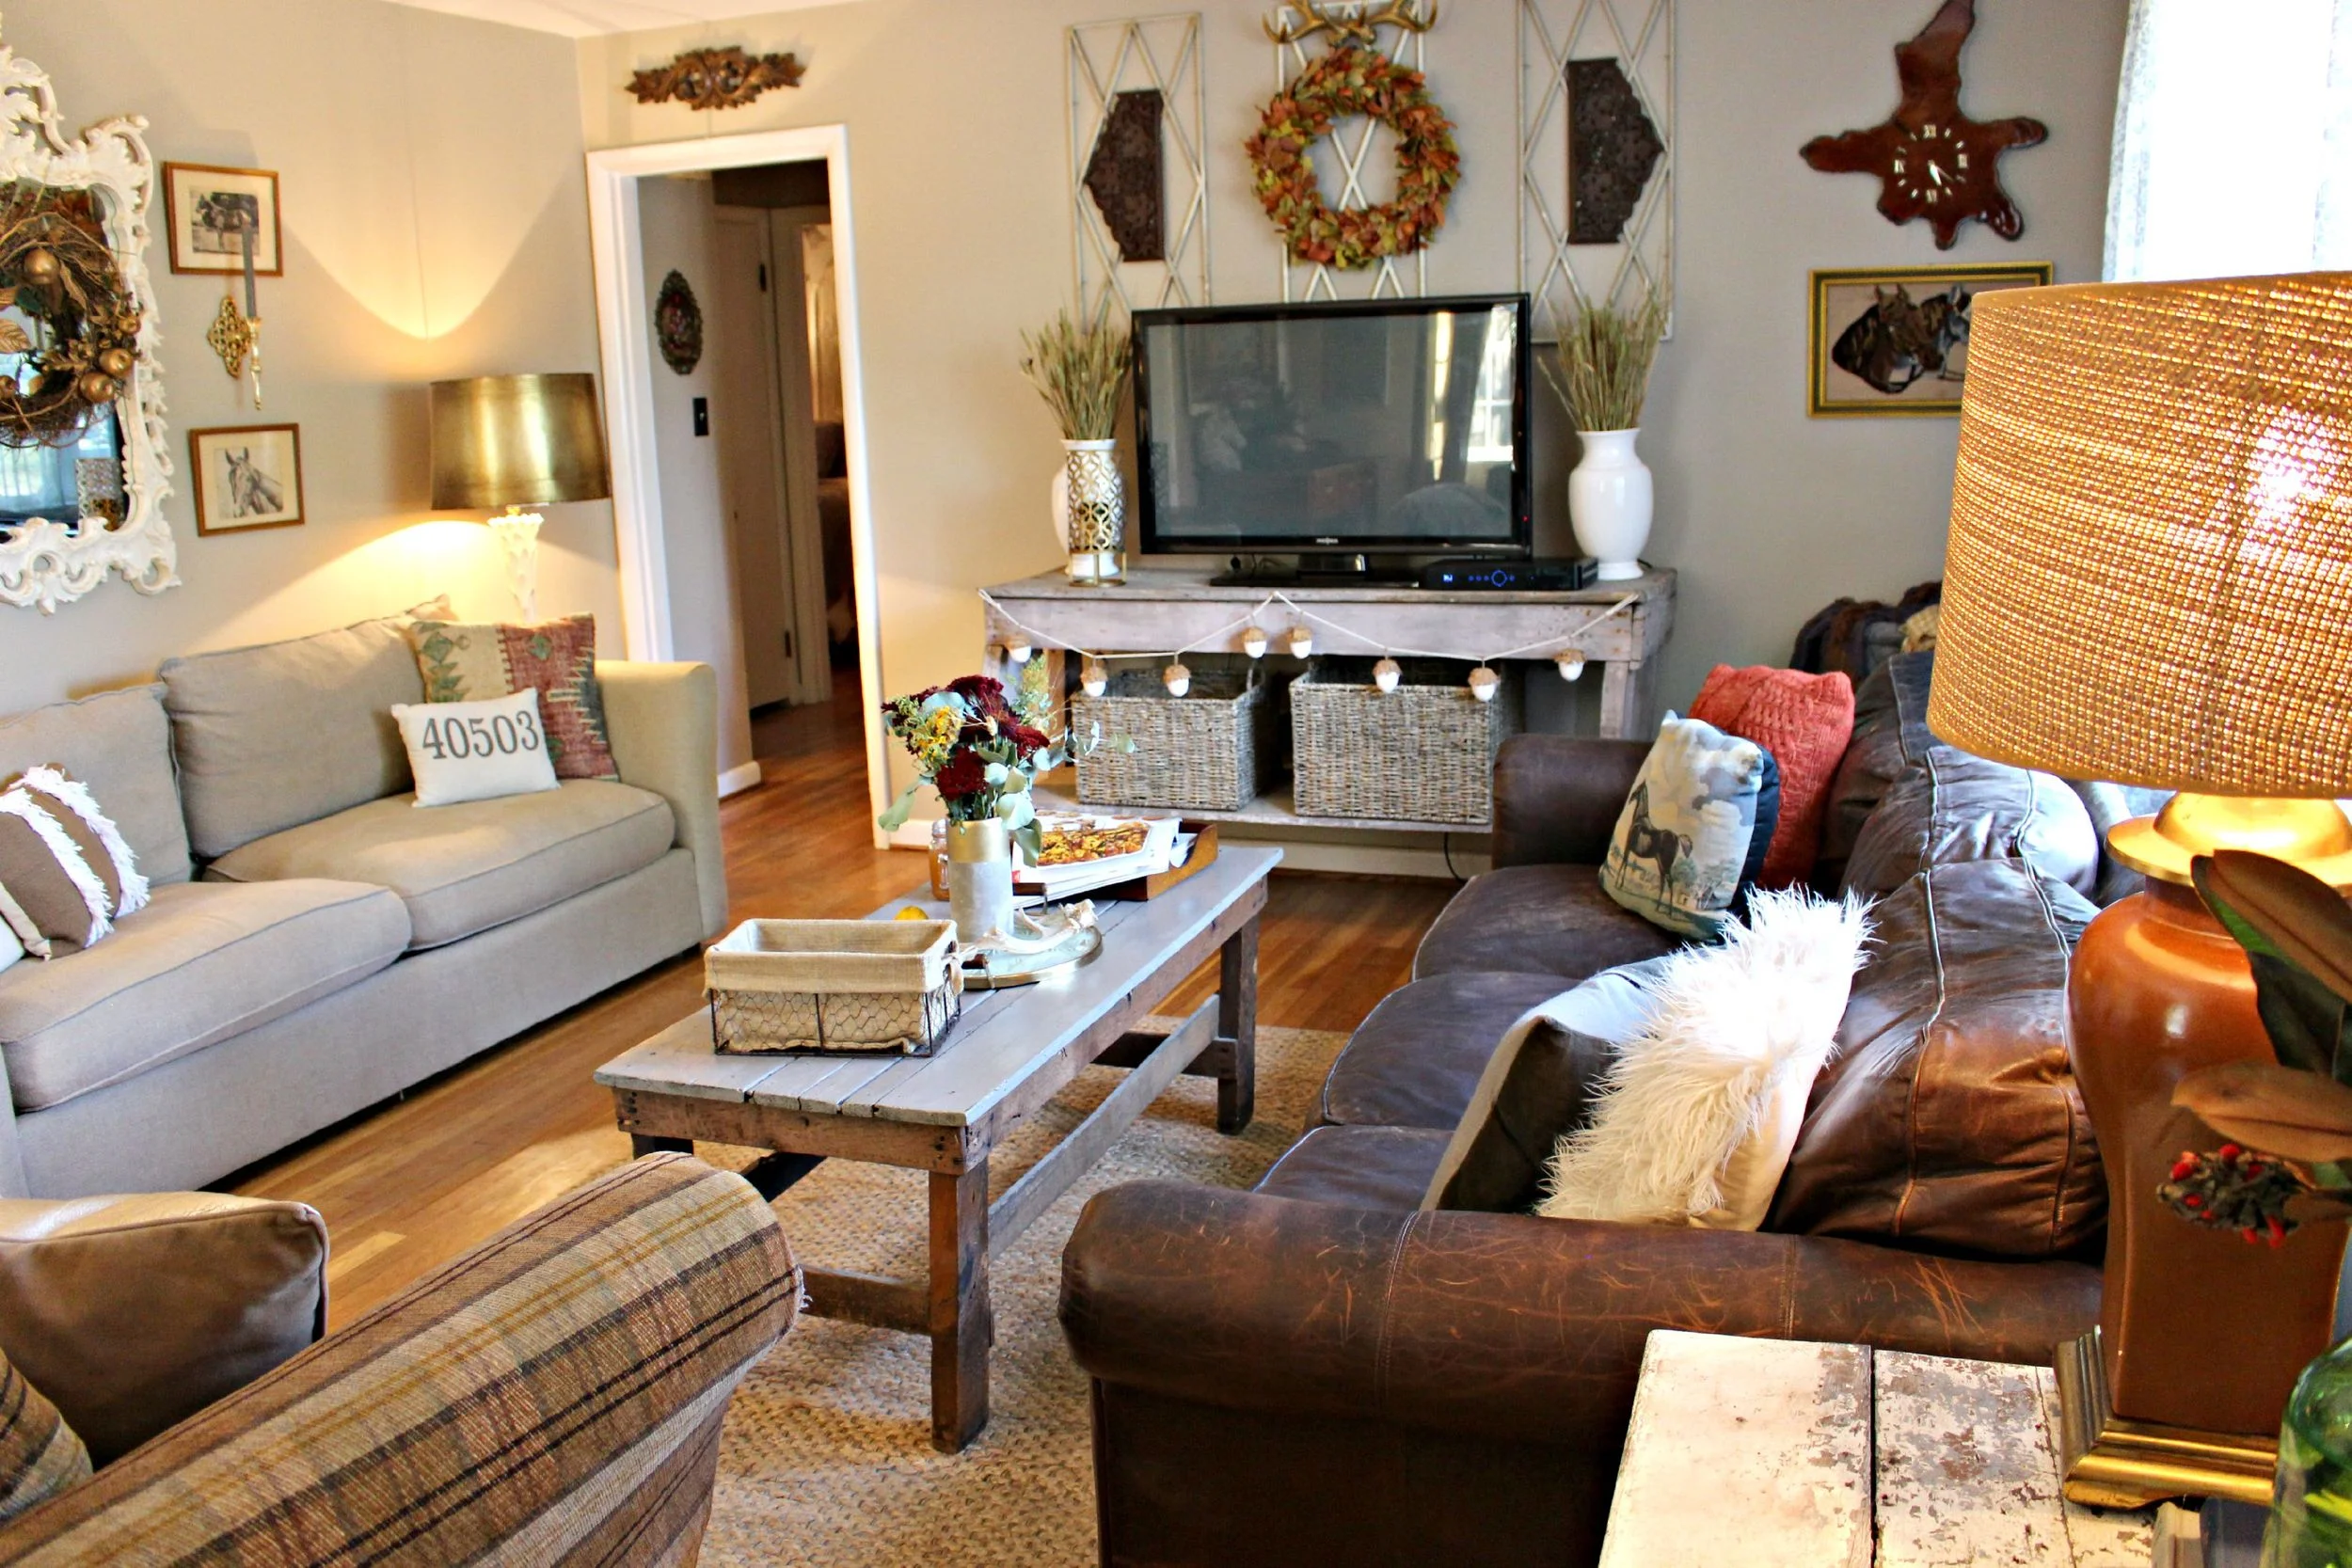
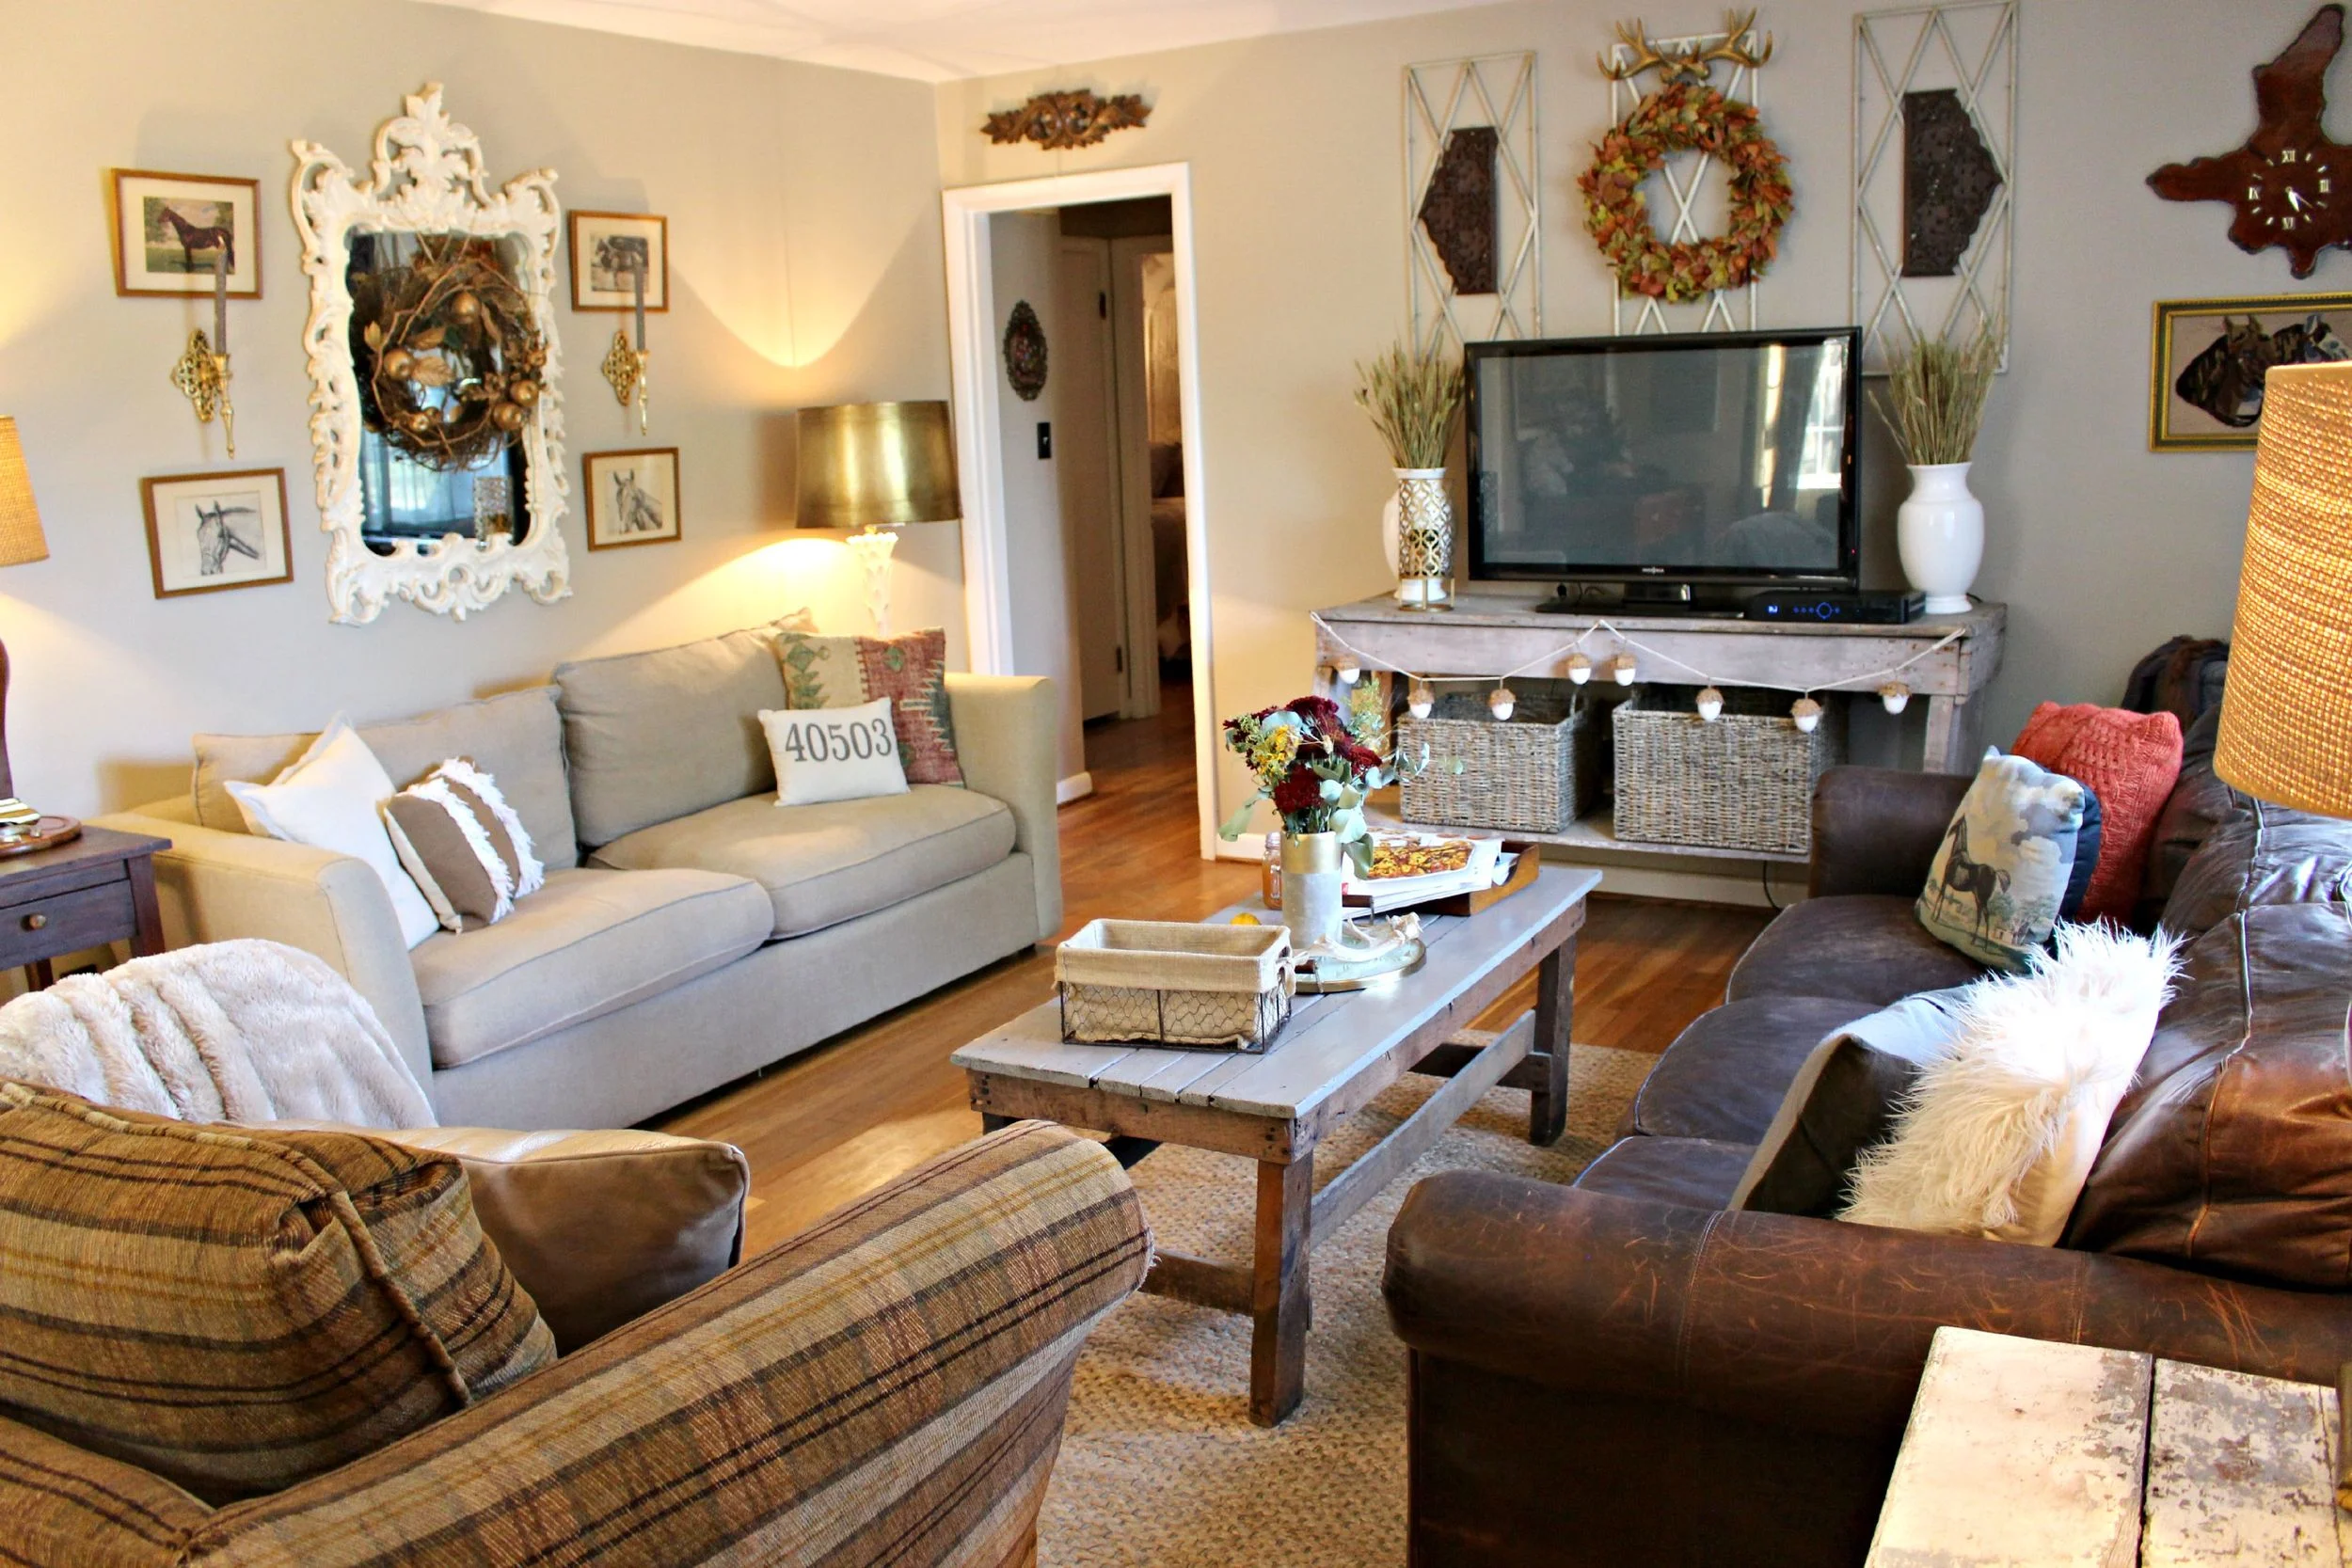
Fall is officially here! I've had my living room decorated for a couple of weeks now, and I just love how cozy it feels this time of year. My living room is full of neutral colors so it's always a breeze to get it decorated for fall. I love adding the pops of orange and tons of texture throughout! I wanted to share with you the complete tour of my fall living room as well as a short rundown of how I do my seasonal decorating for those of you who had asked. I will try to give sources for just about everything I can, but if I forget anything don't hesitate to leave a comment and ask! Happy fall and enjoy!
xoxo
Emily
Storage: All my seasonal decor is stored in our walk-up attic and is organized by holiday. My fall decor is further organized by theme, so I have a couple tubs of "neutral" fall decor, and some tubs for my spooky decor, etc. I have an old spinning purse rack up there to hang all my wreaths from so that they don't get crushed in tubs. This also works out well because I often change out wreaths during the year in between holidays, and this way I can easily access them and see all of them at once.
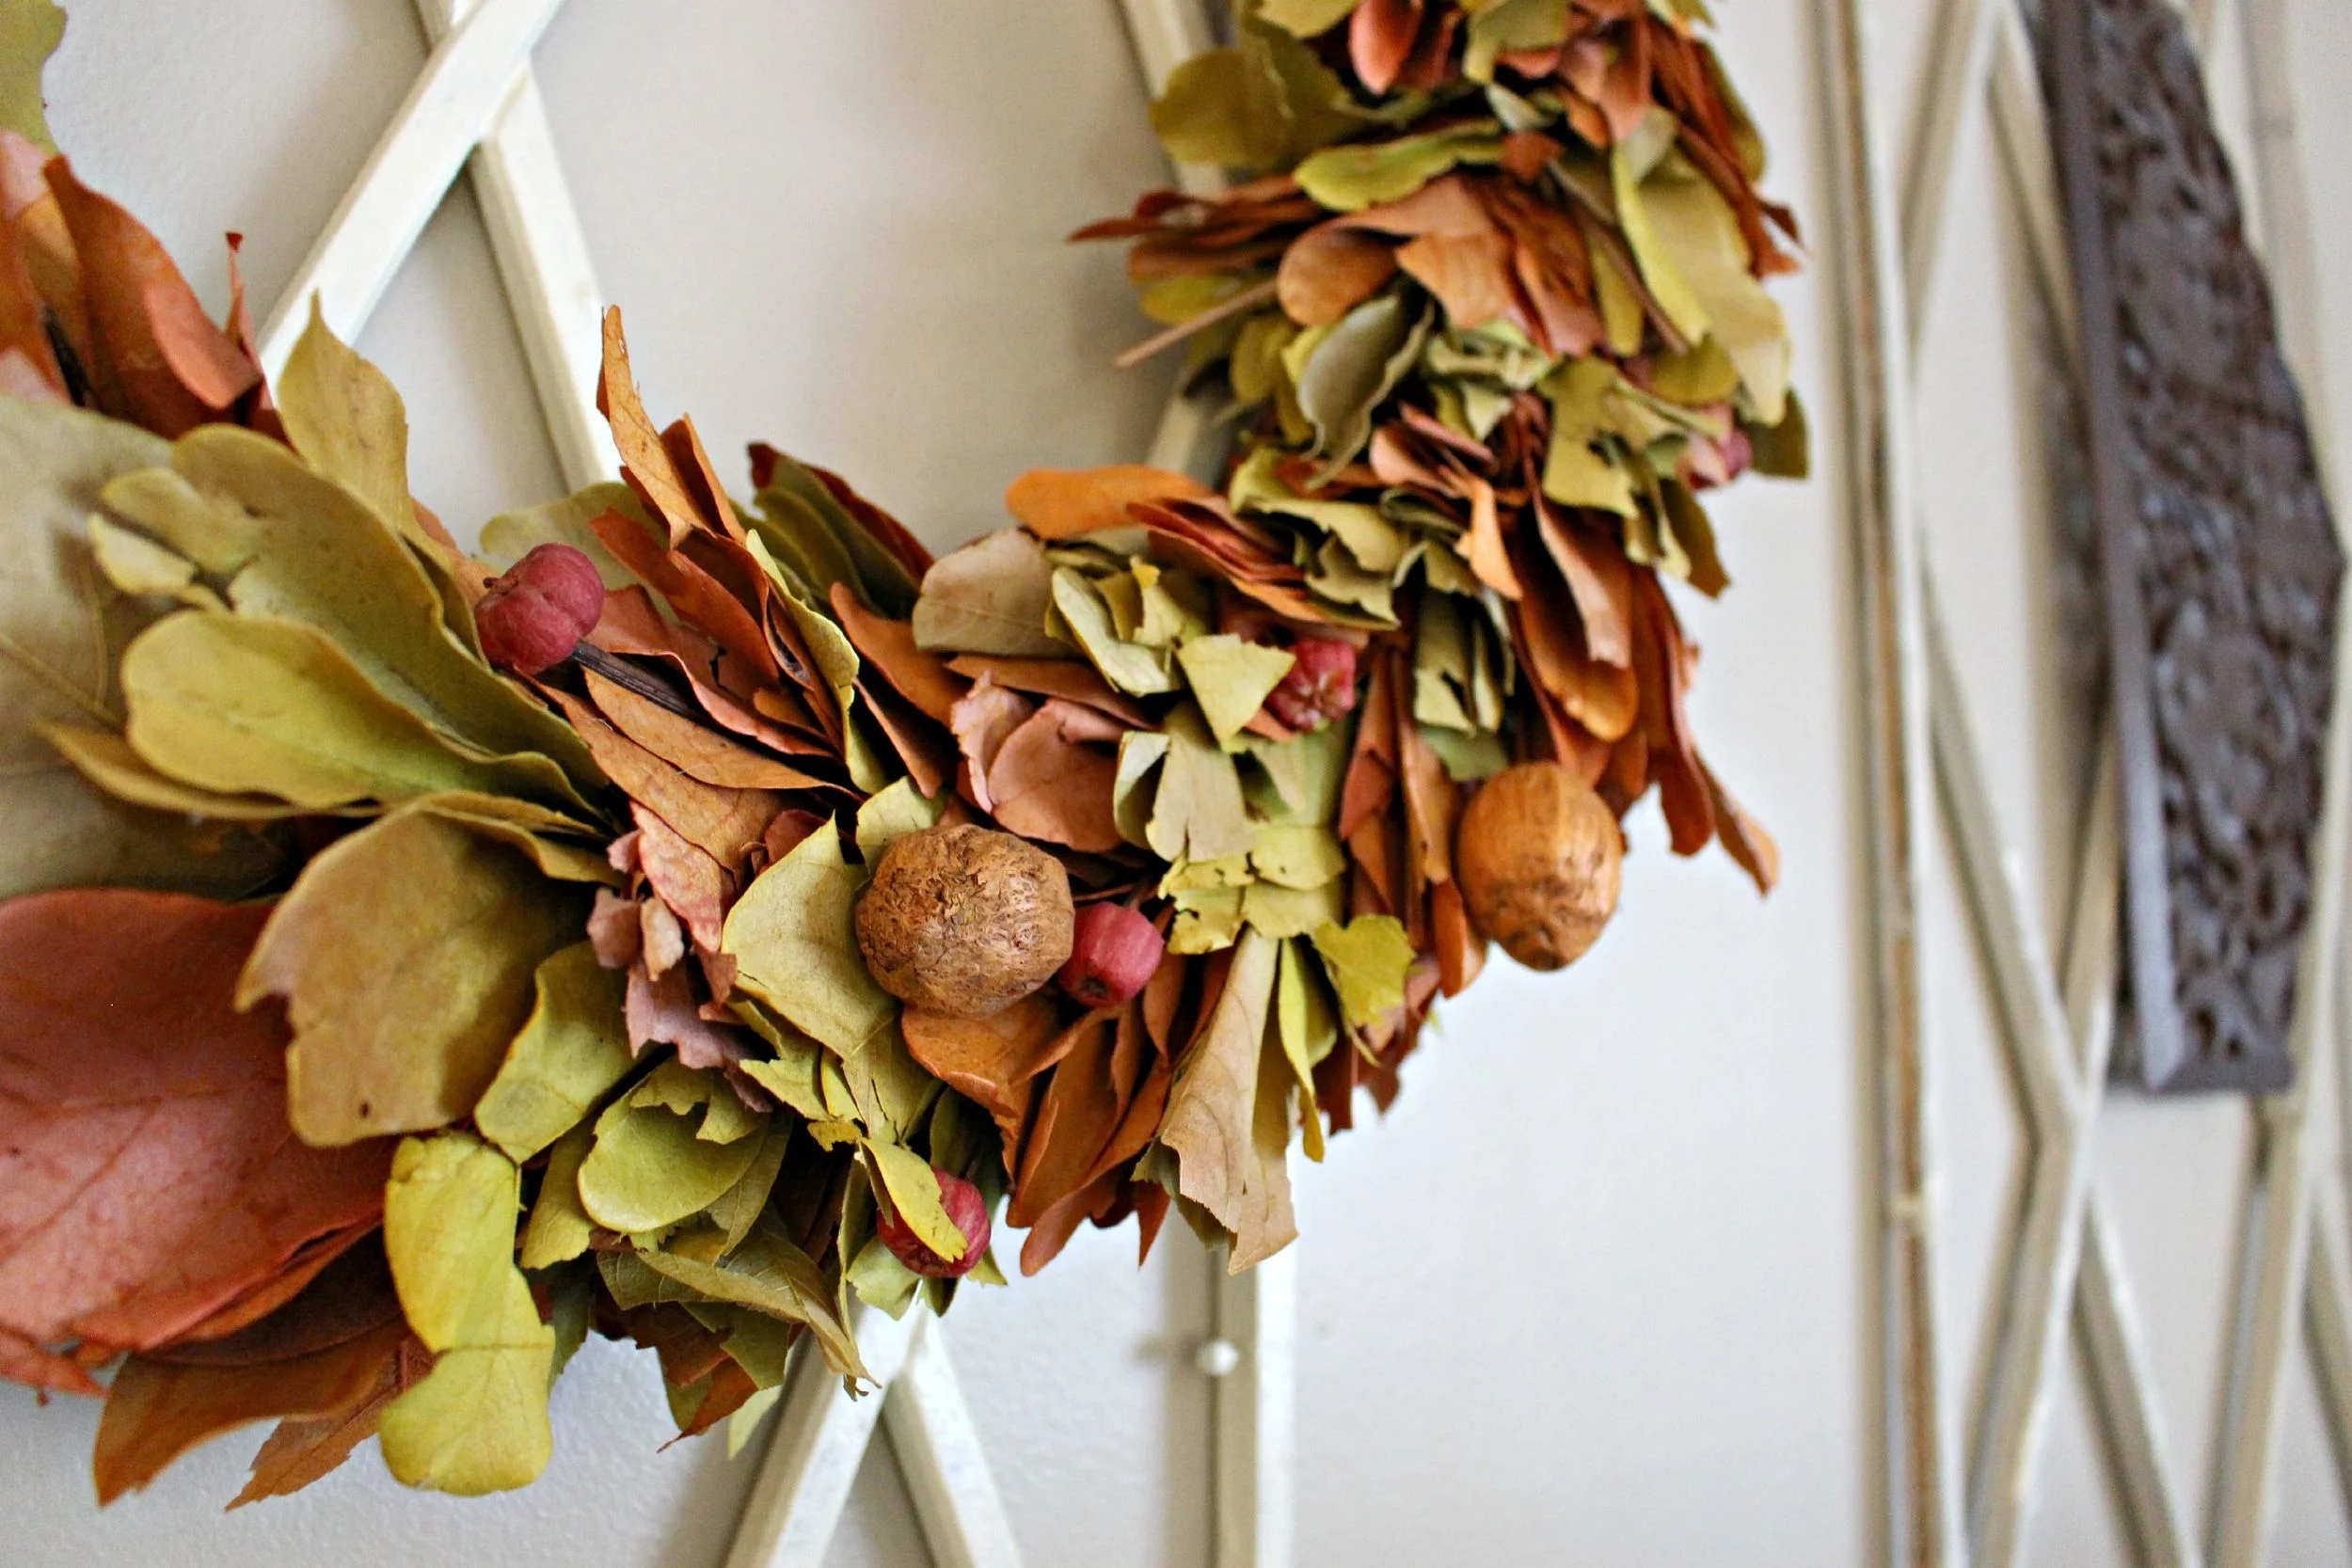
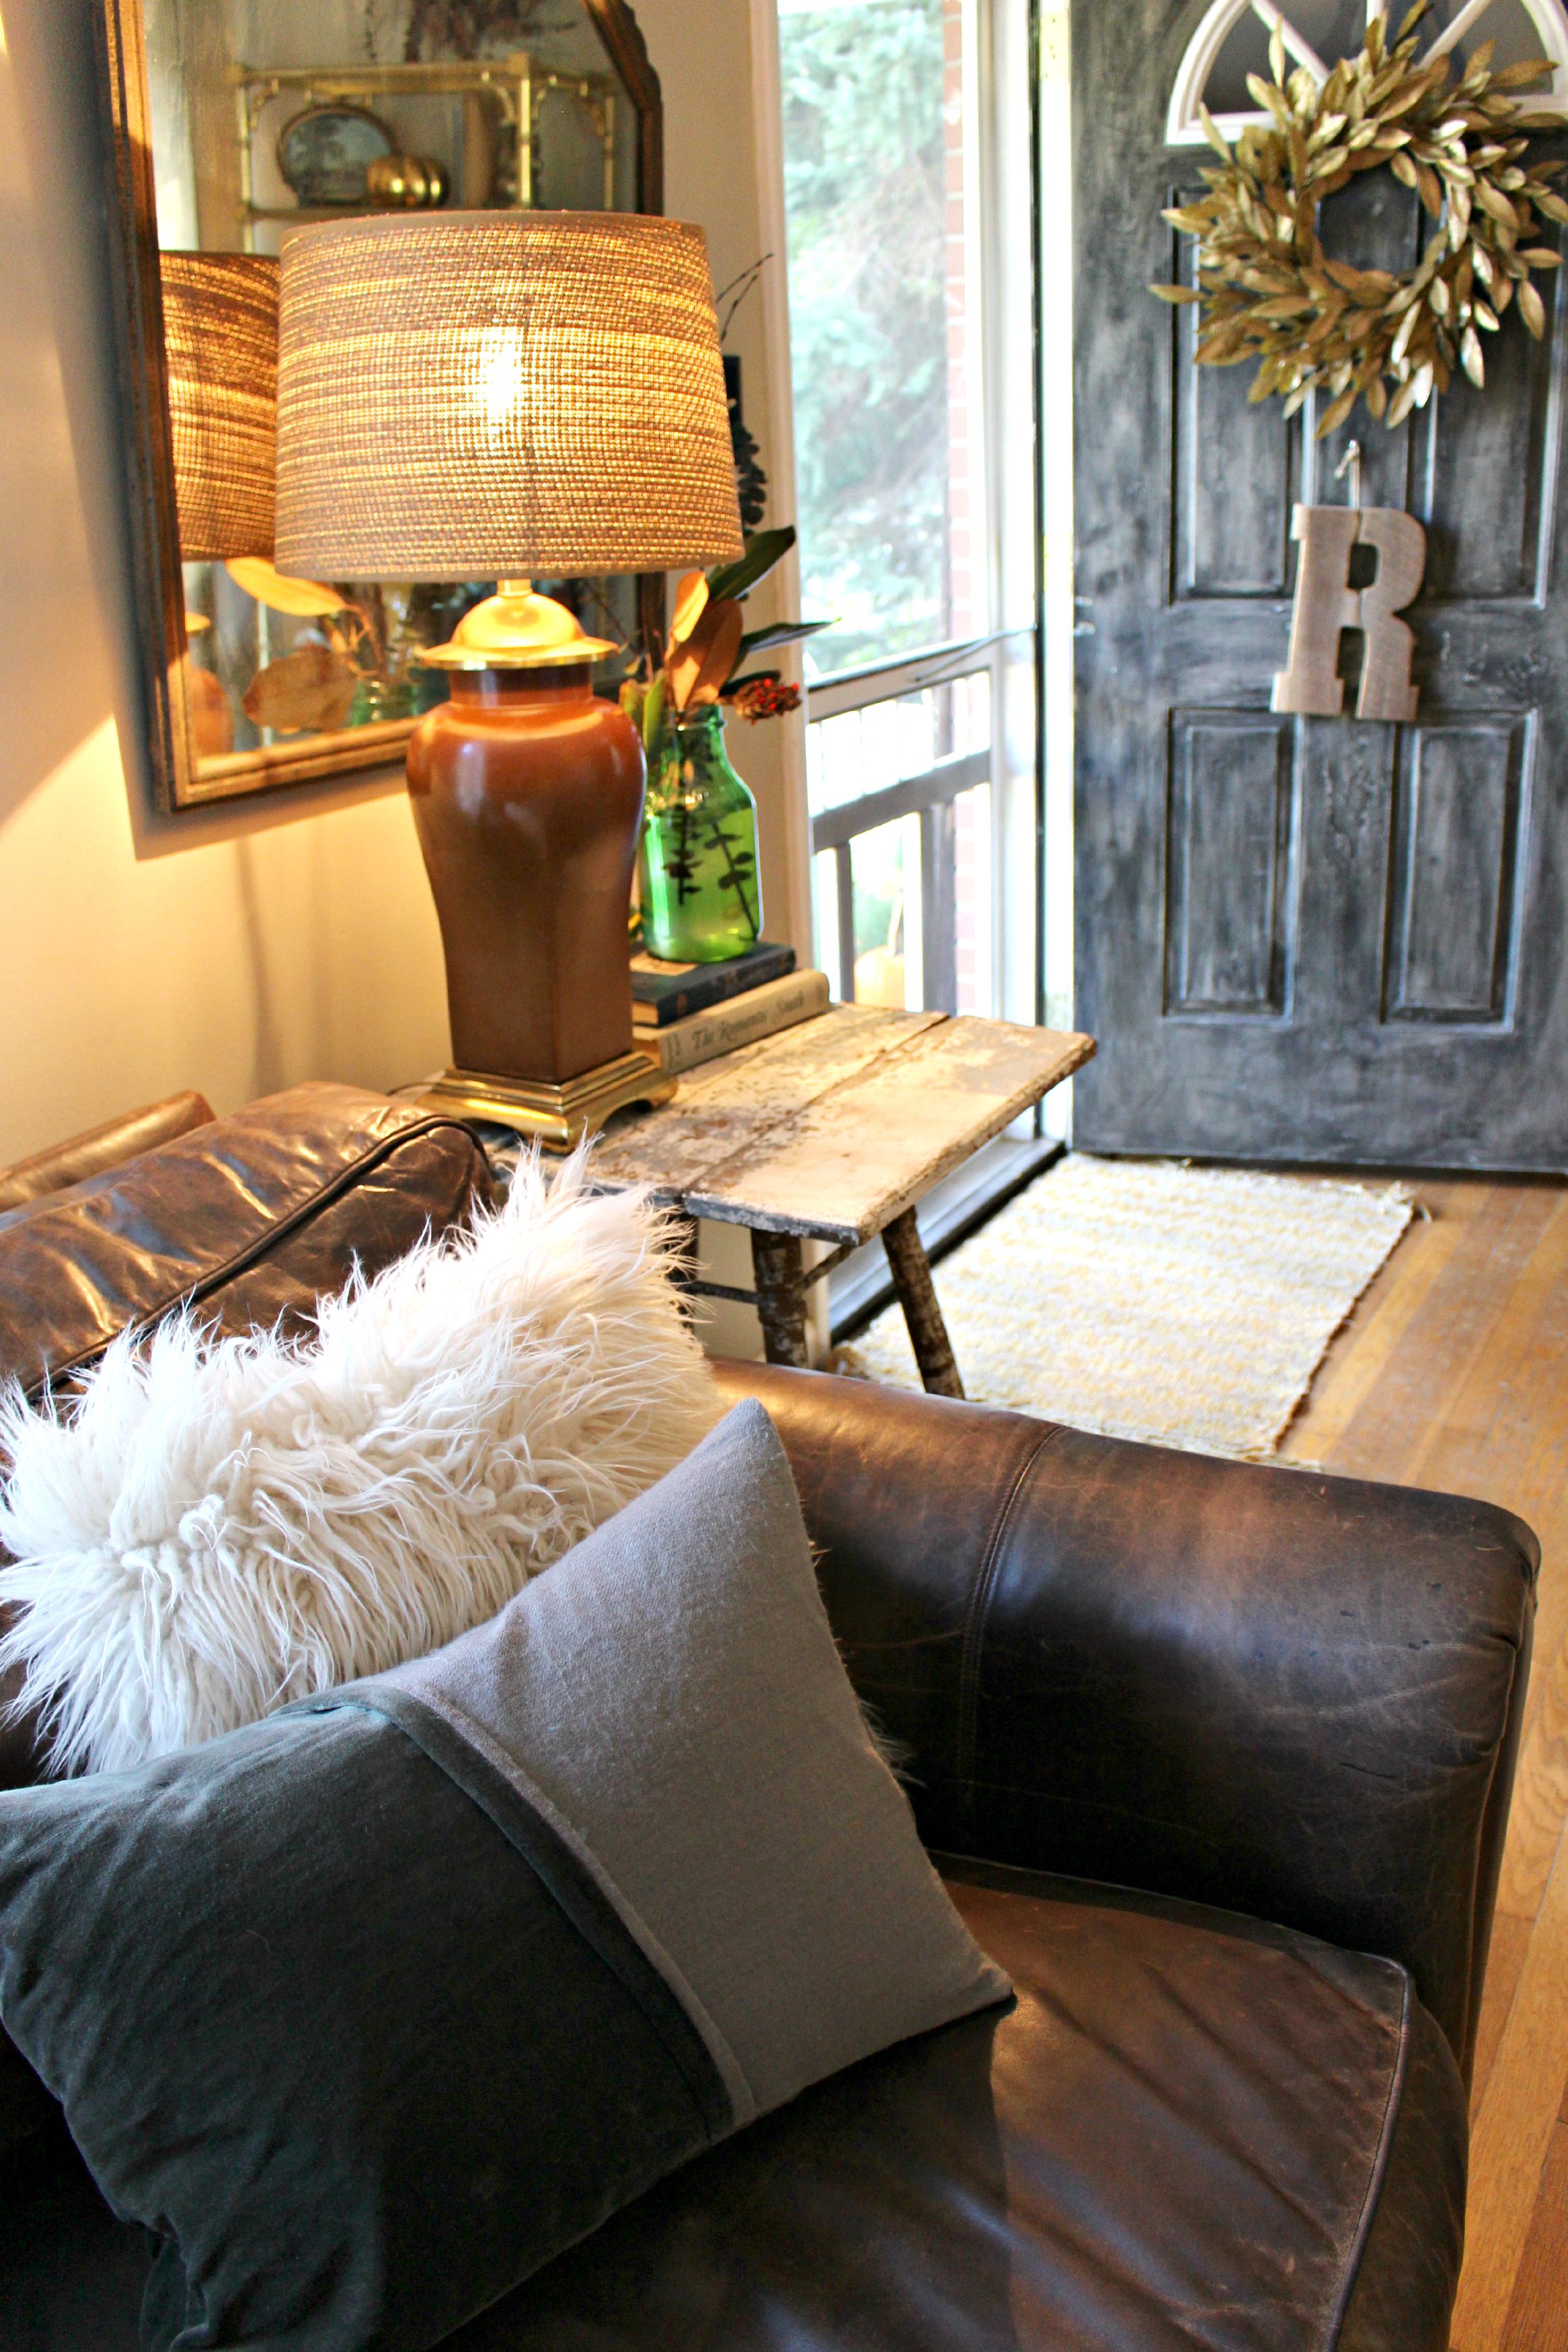
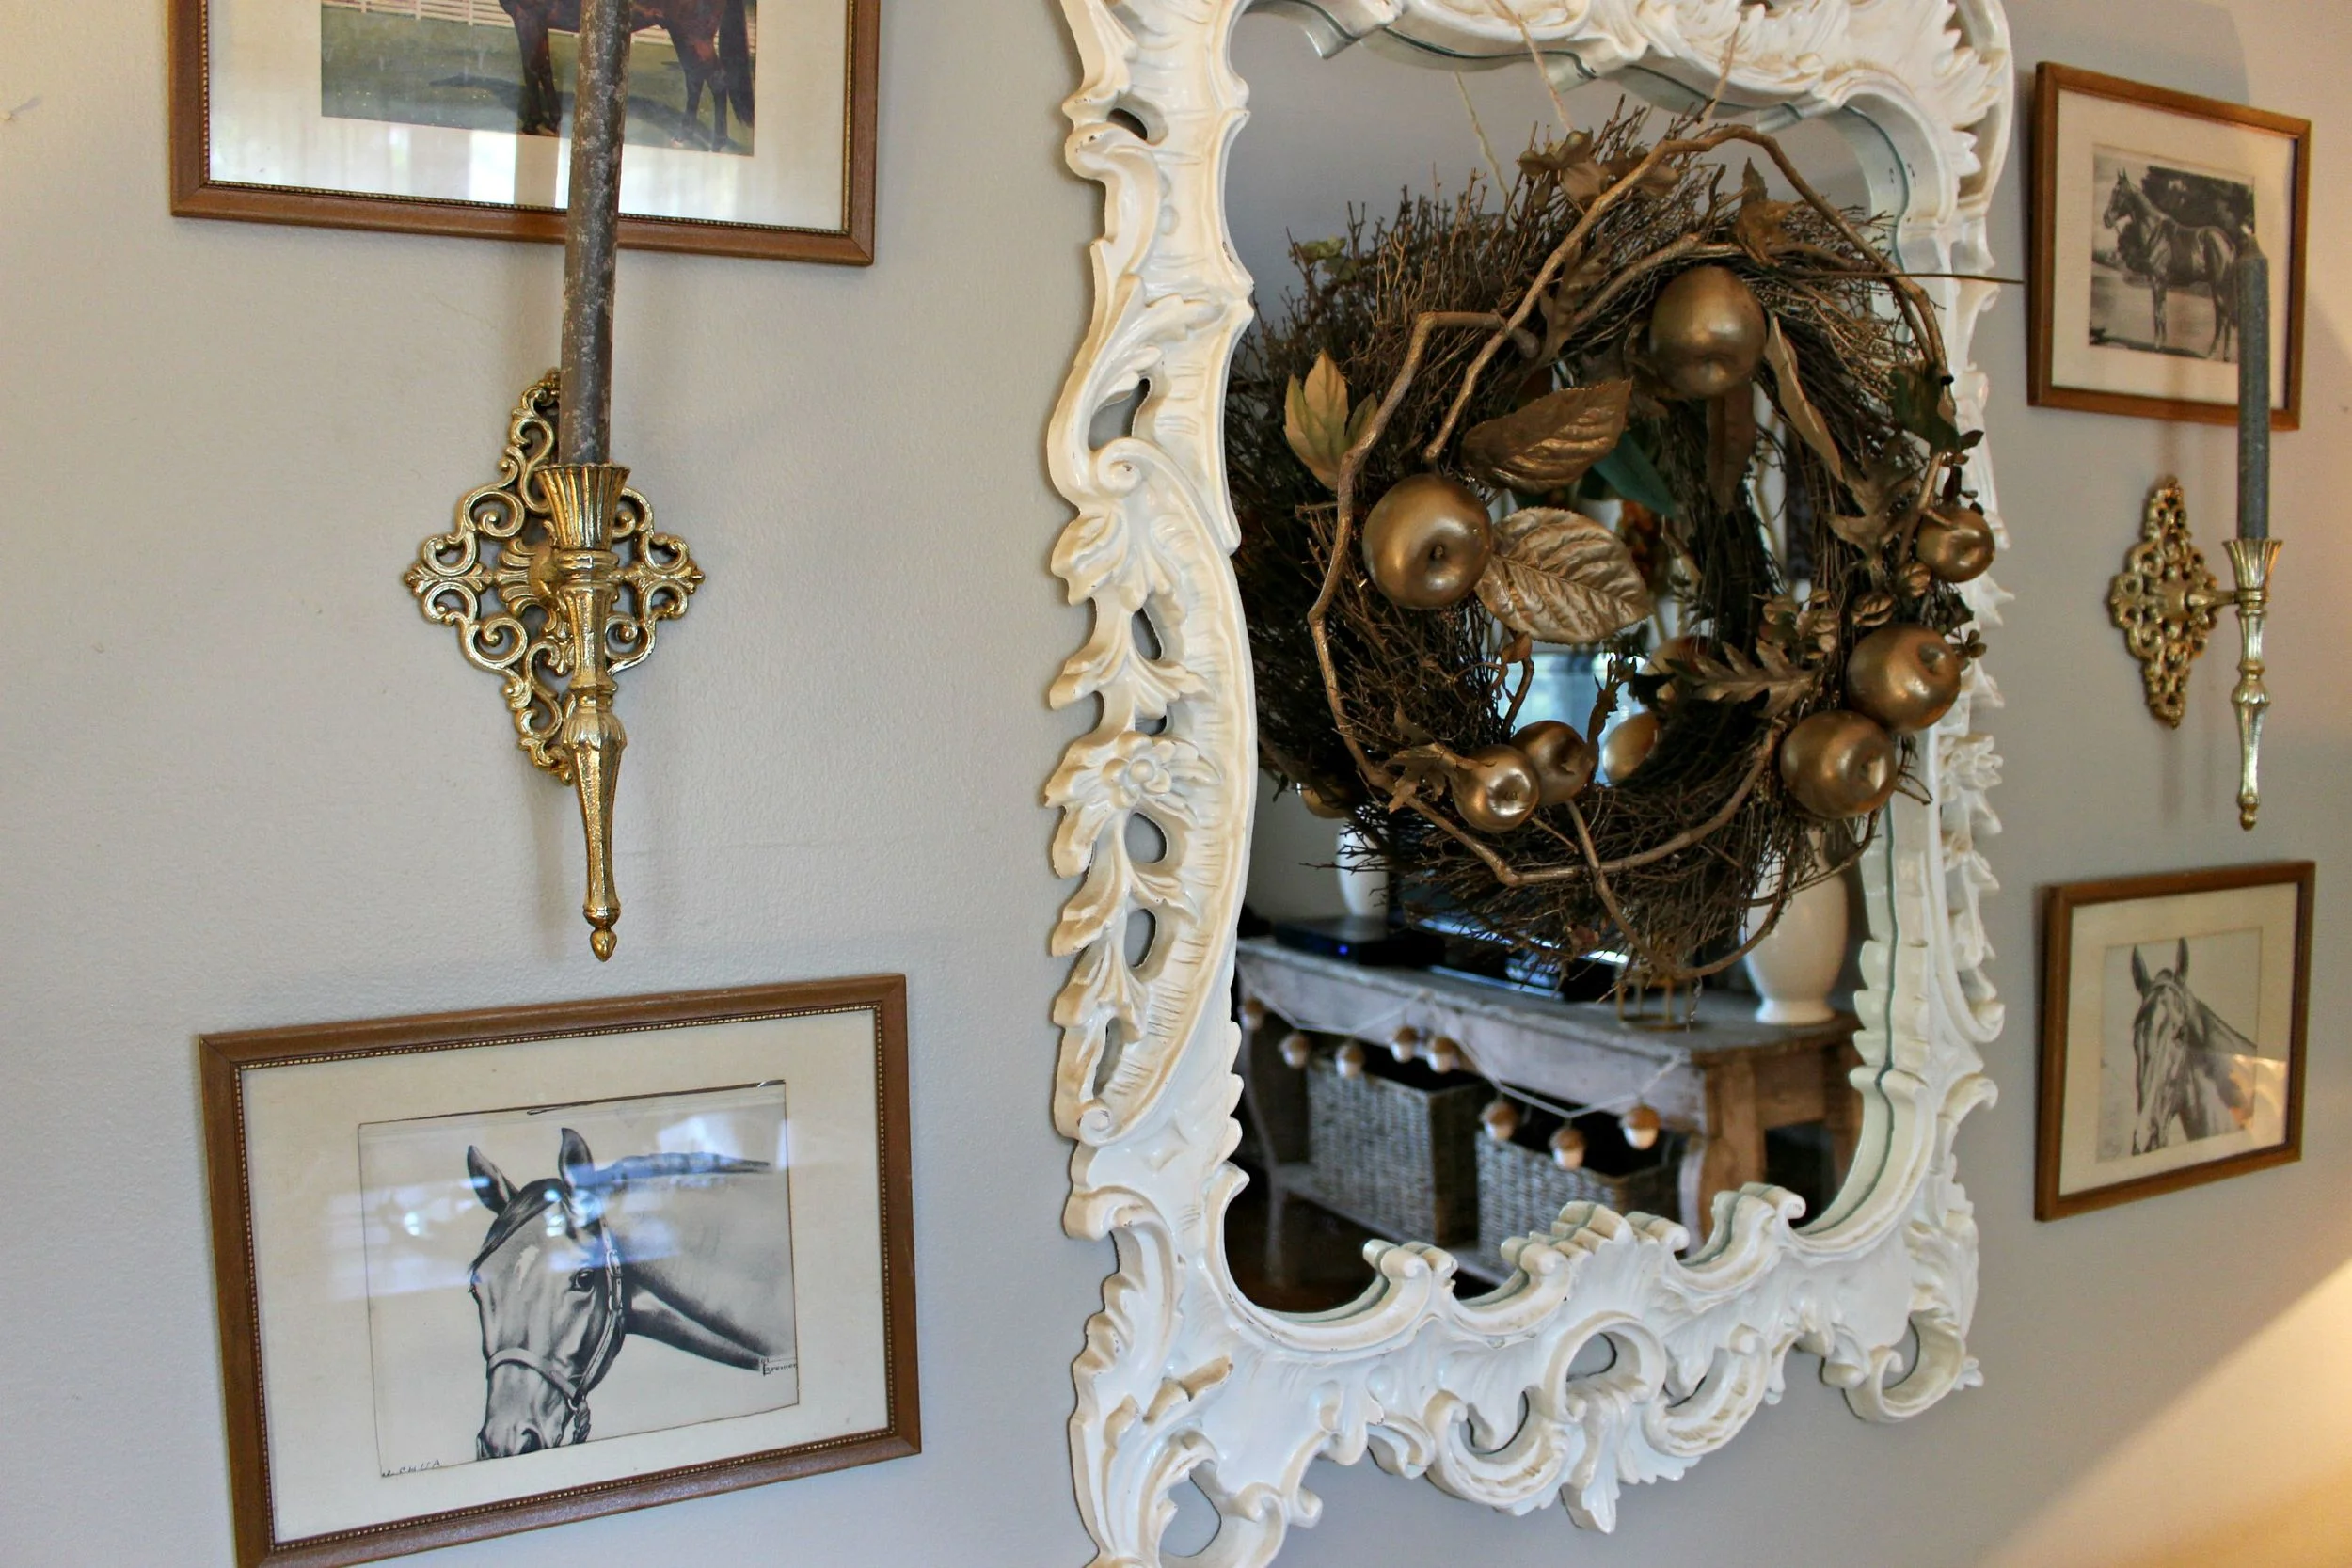
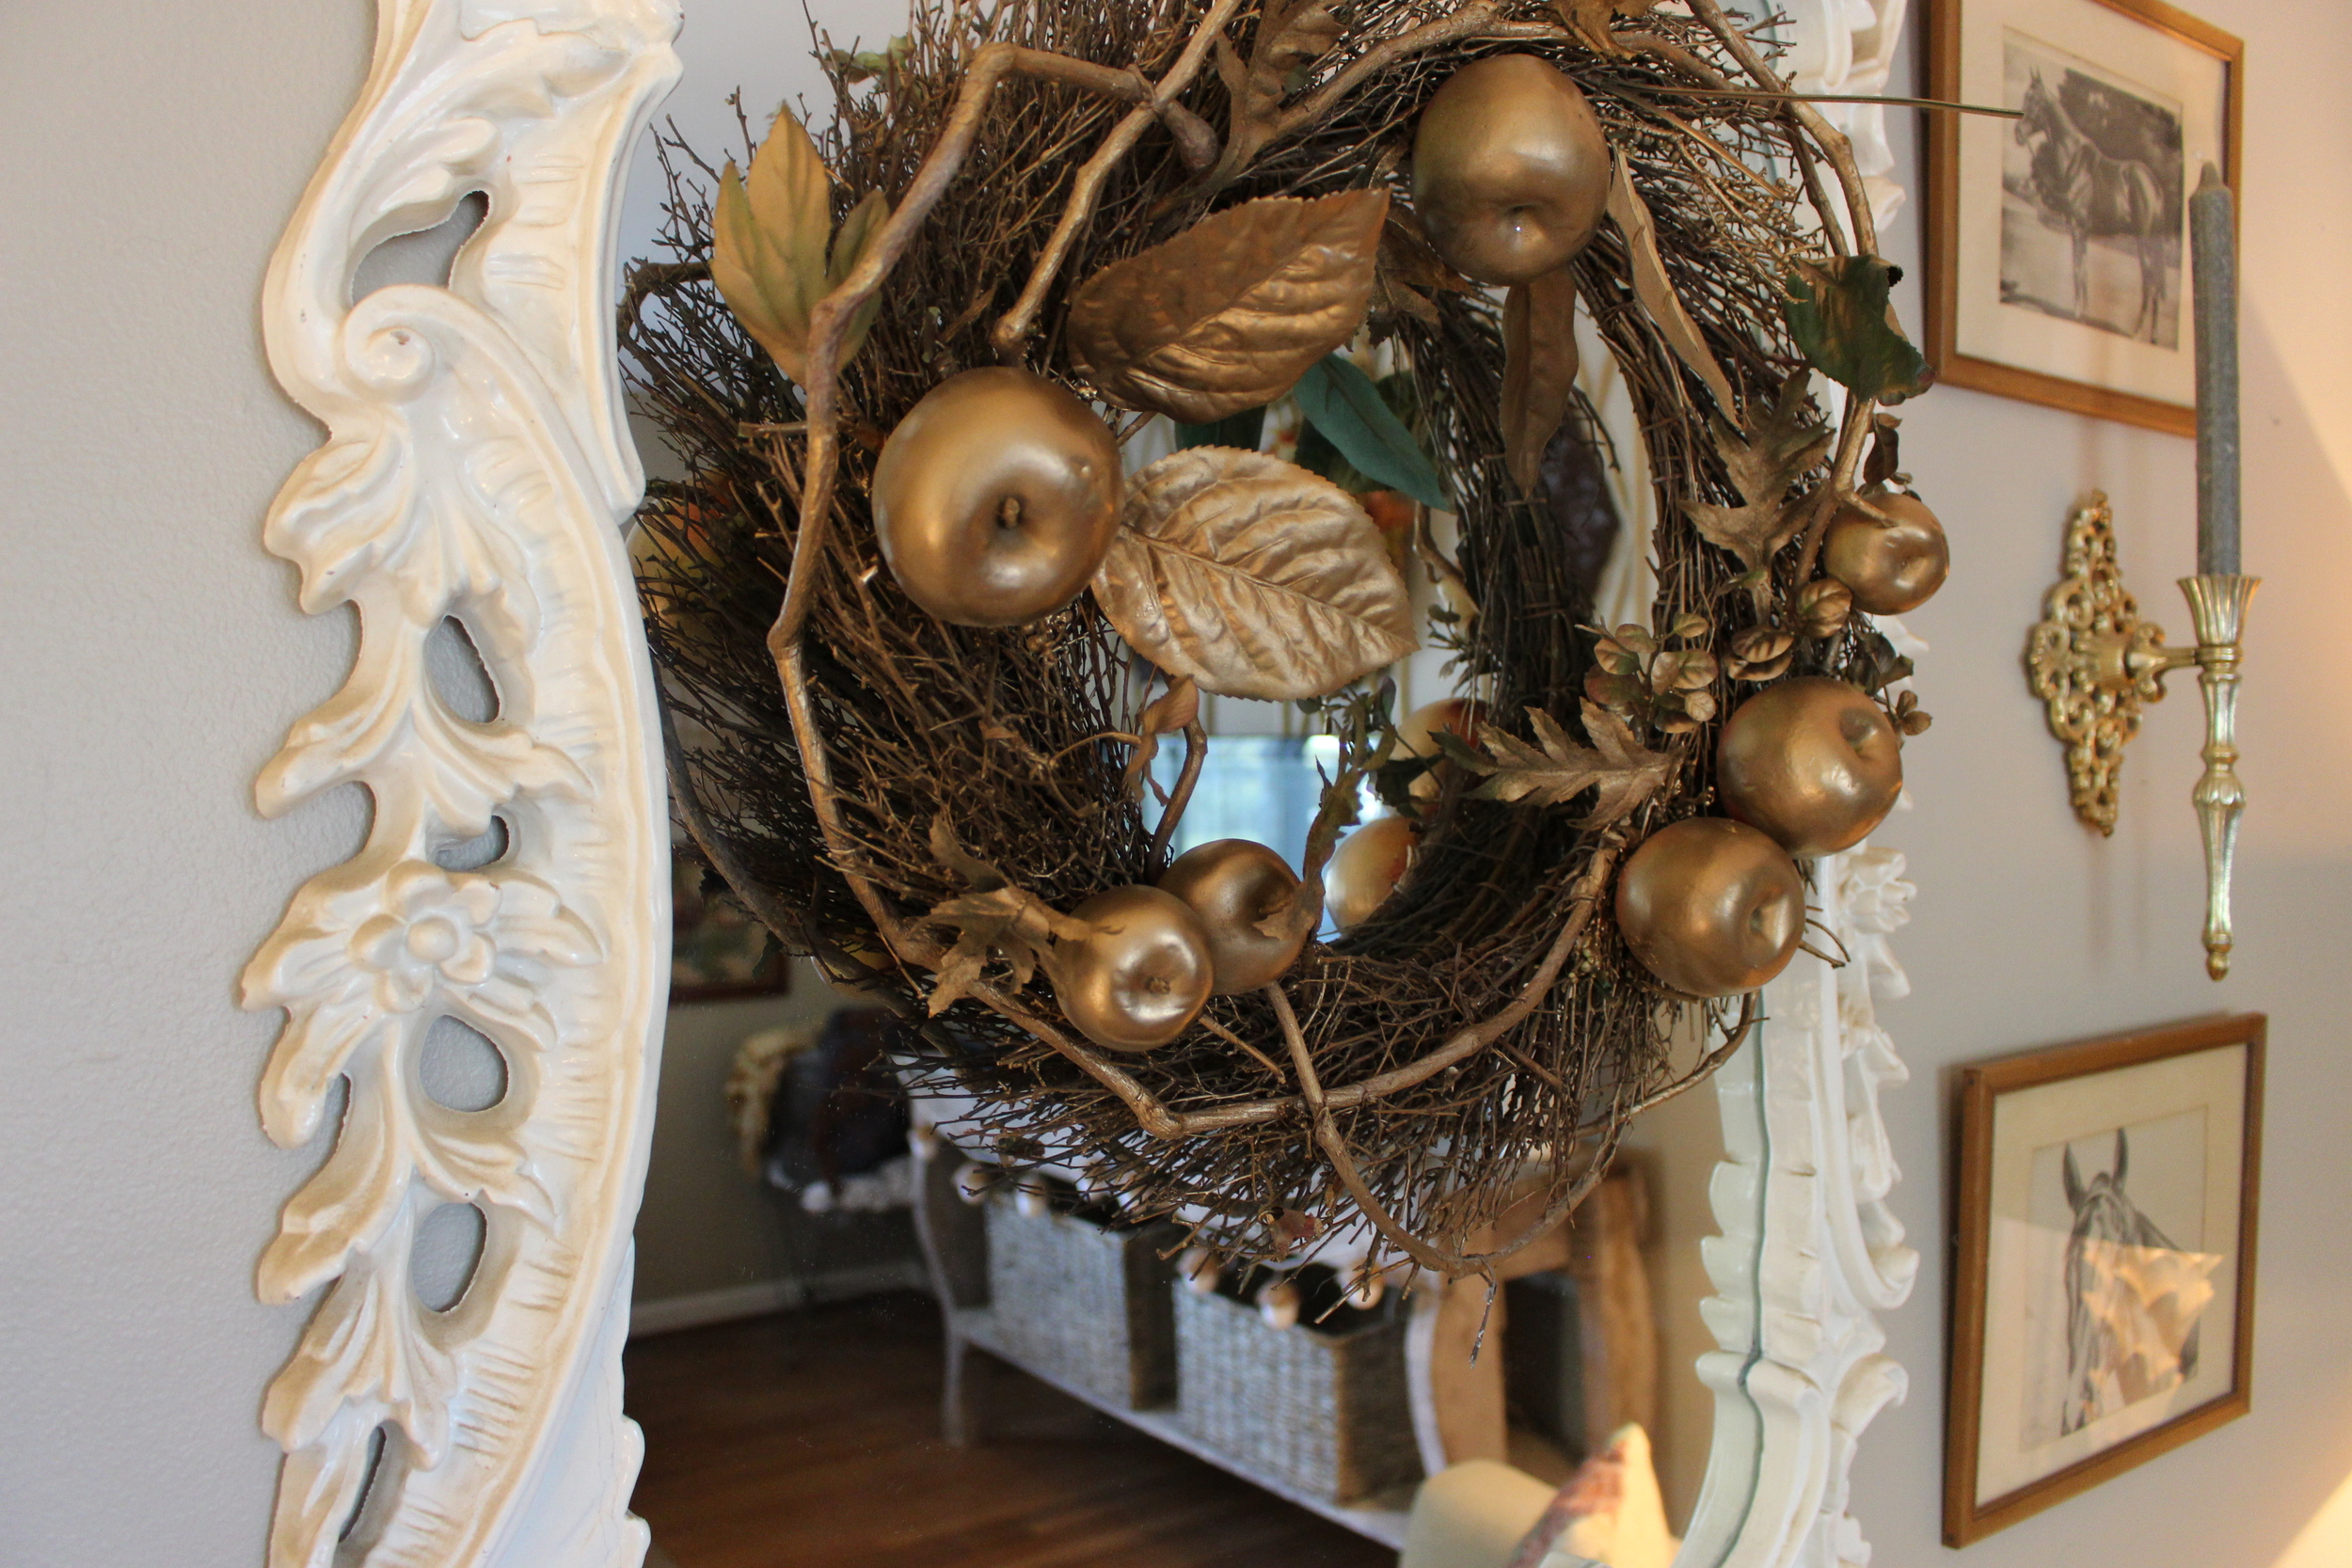
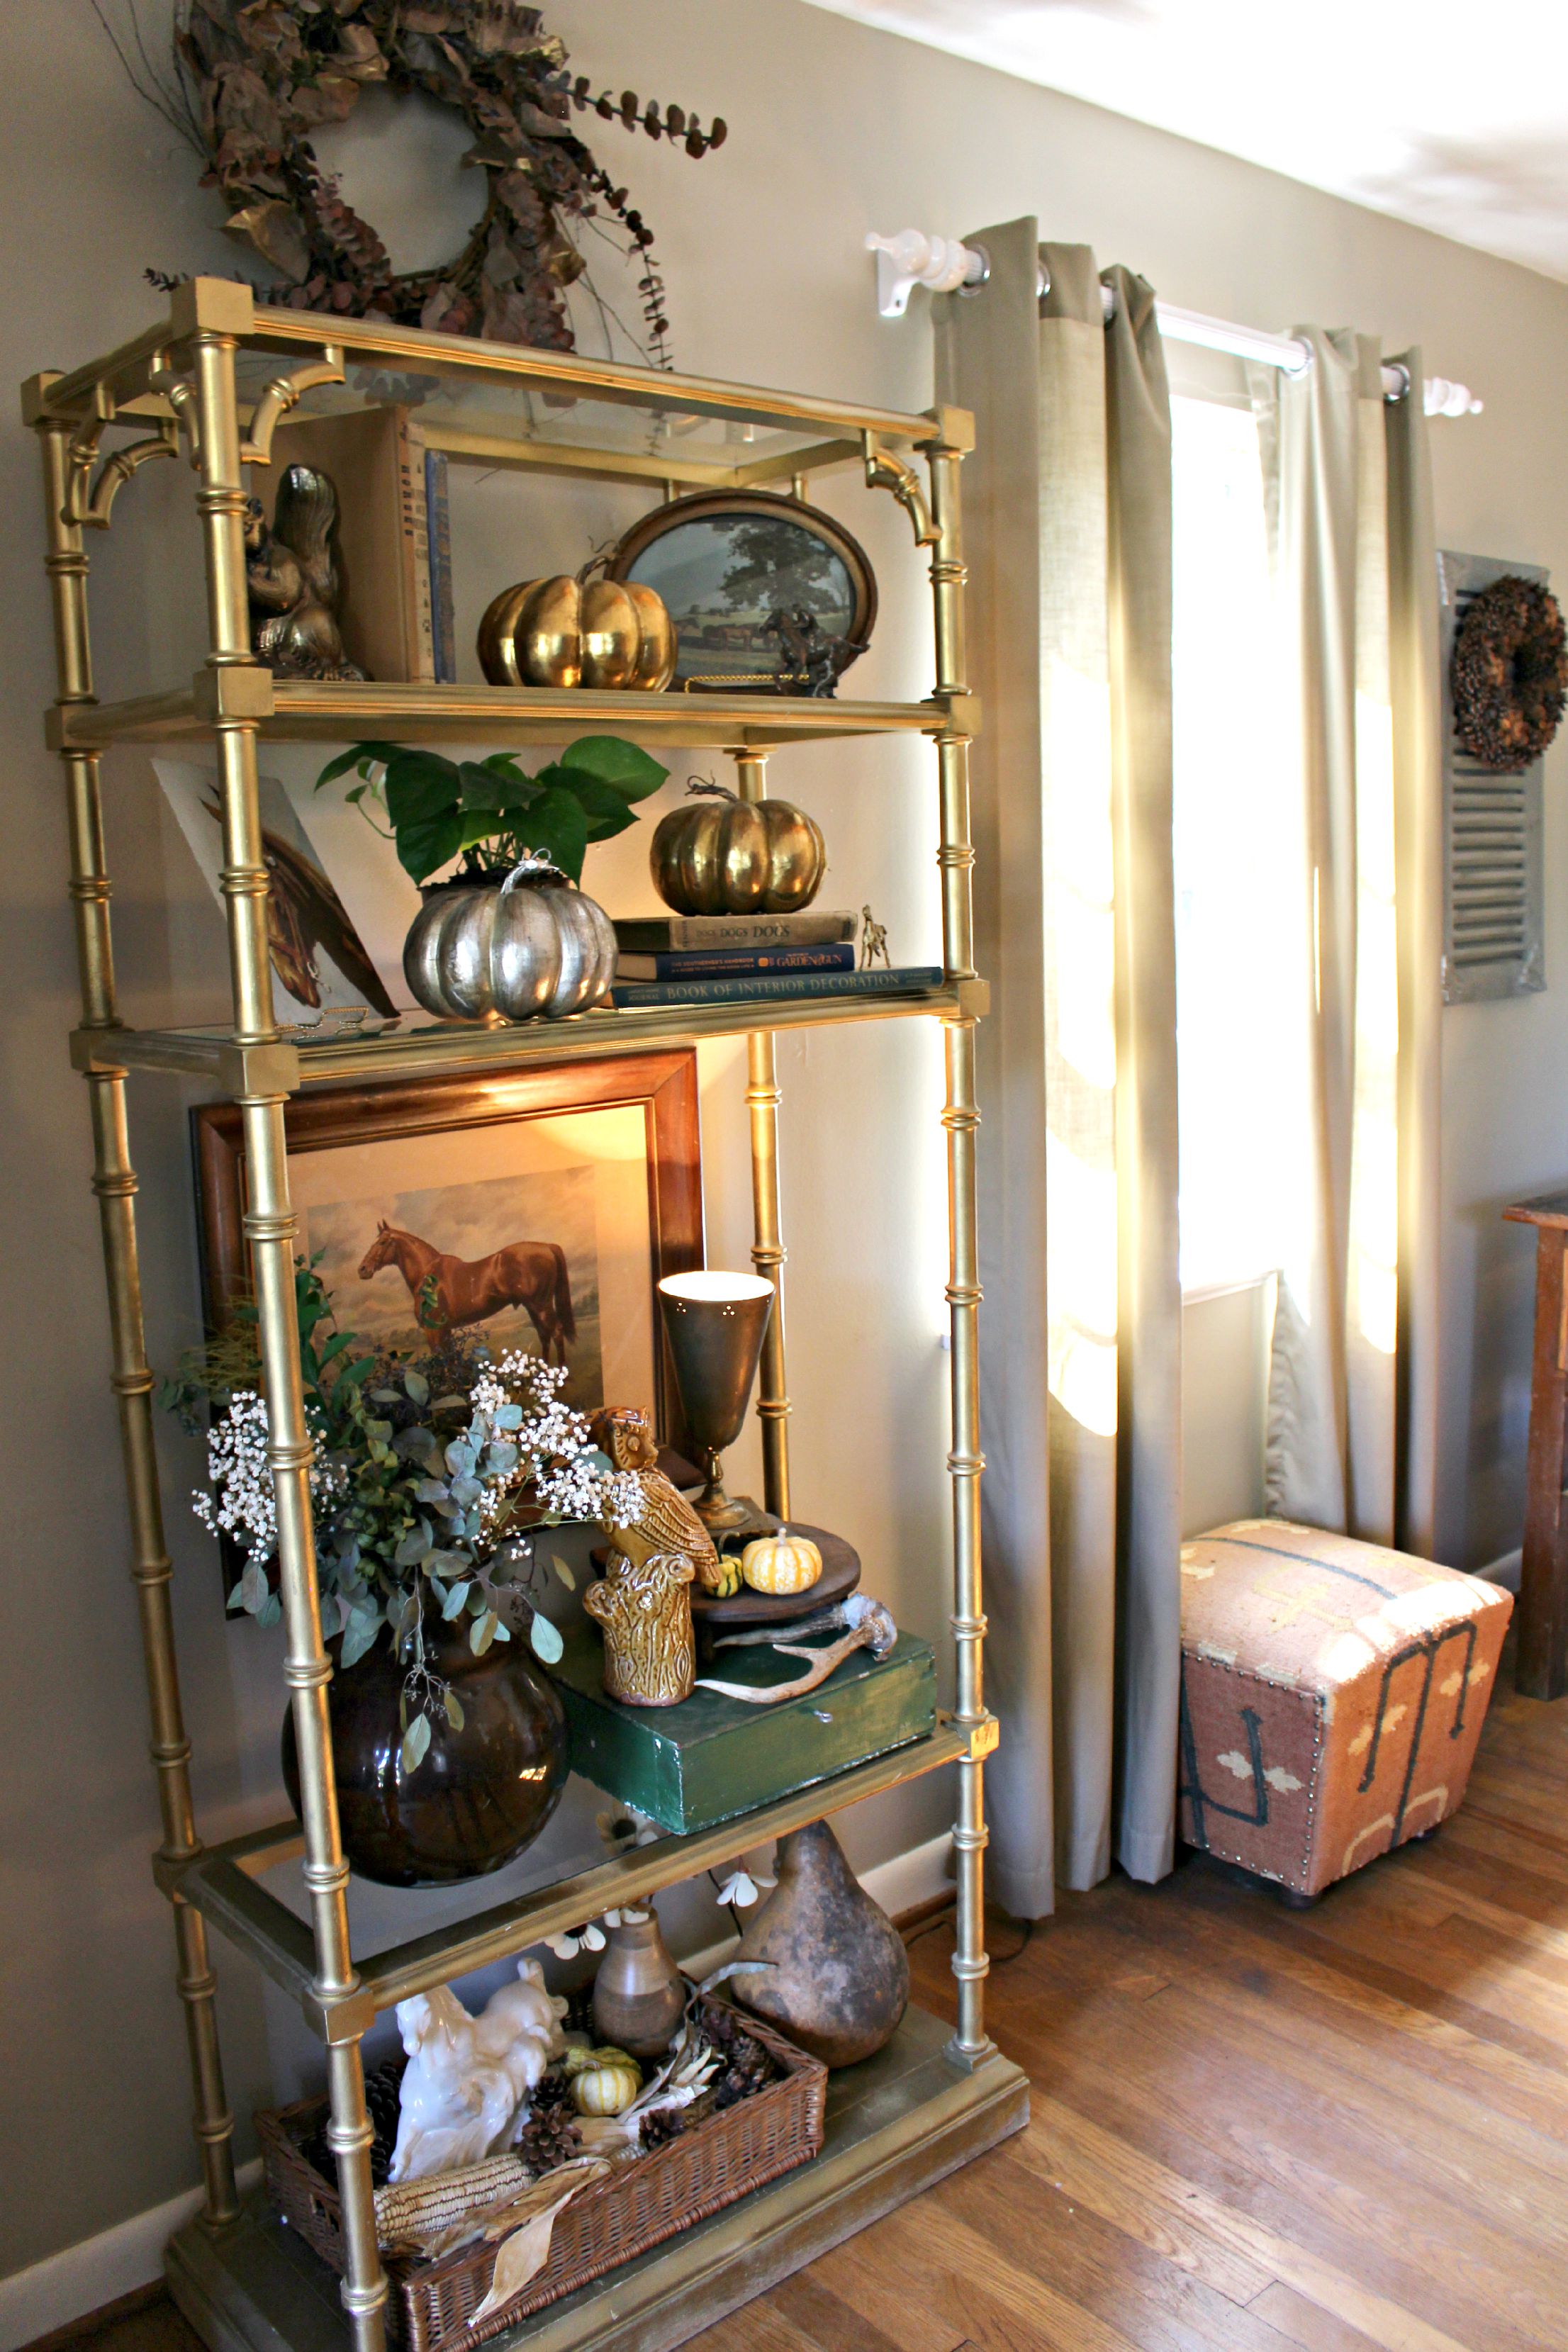
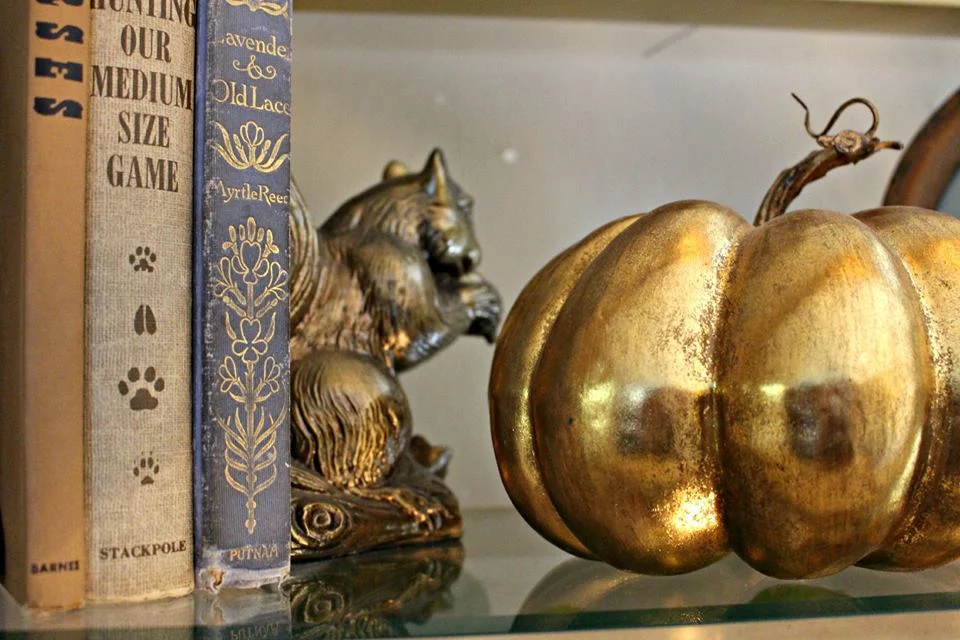
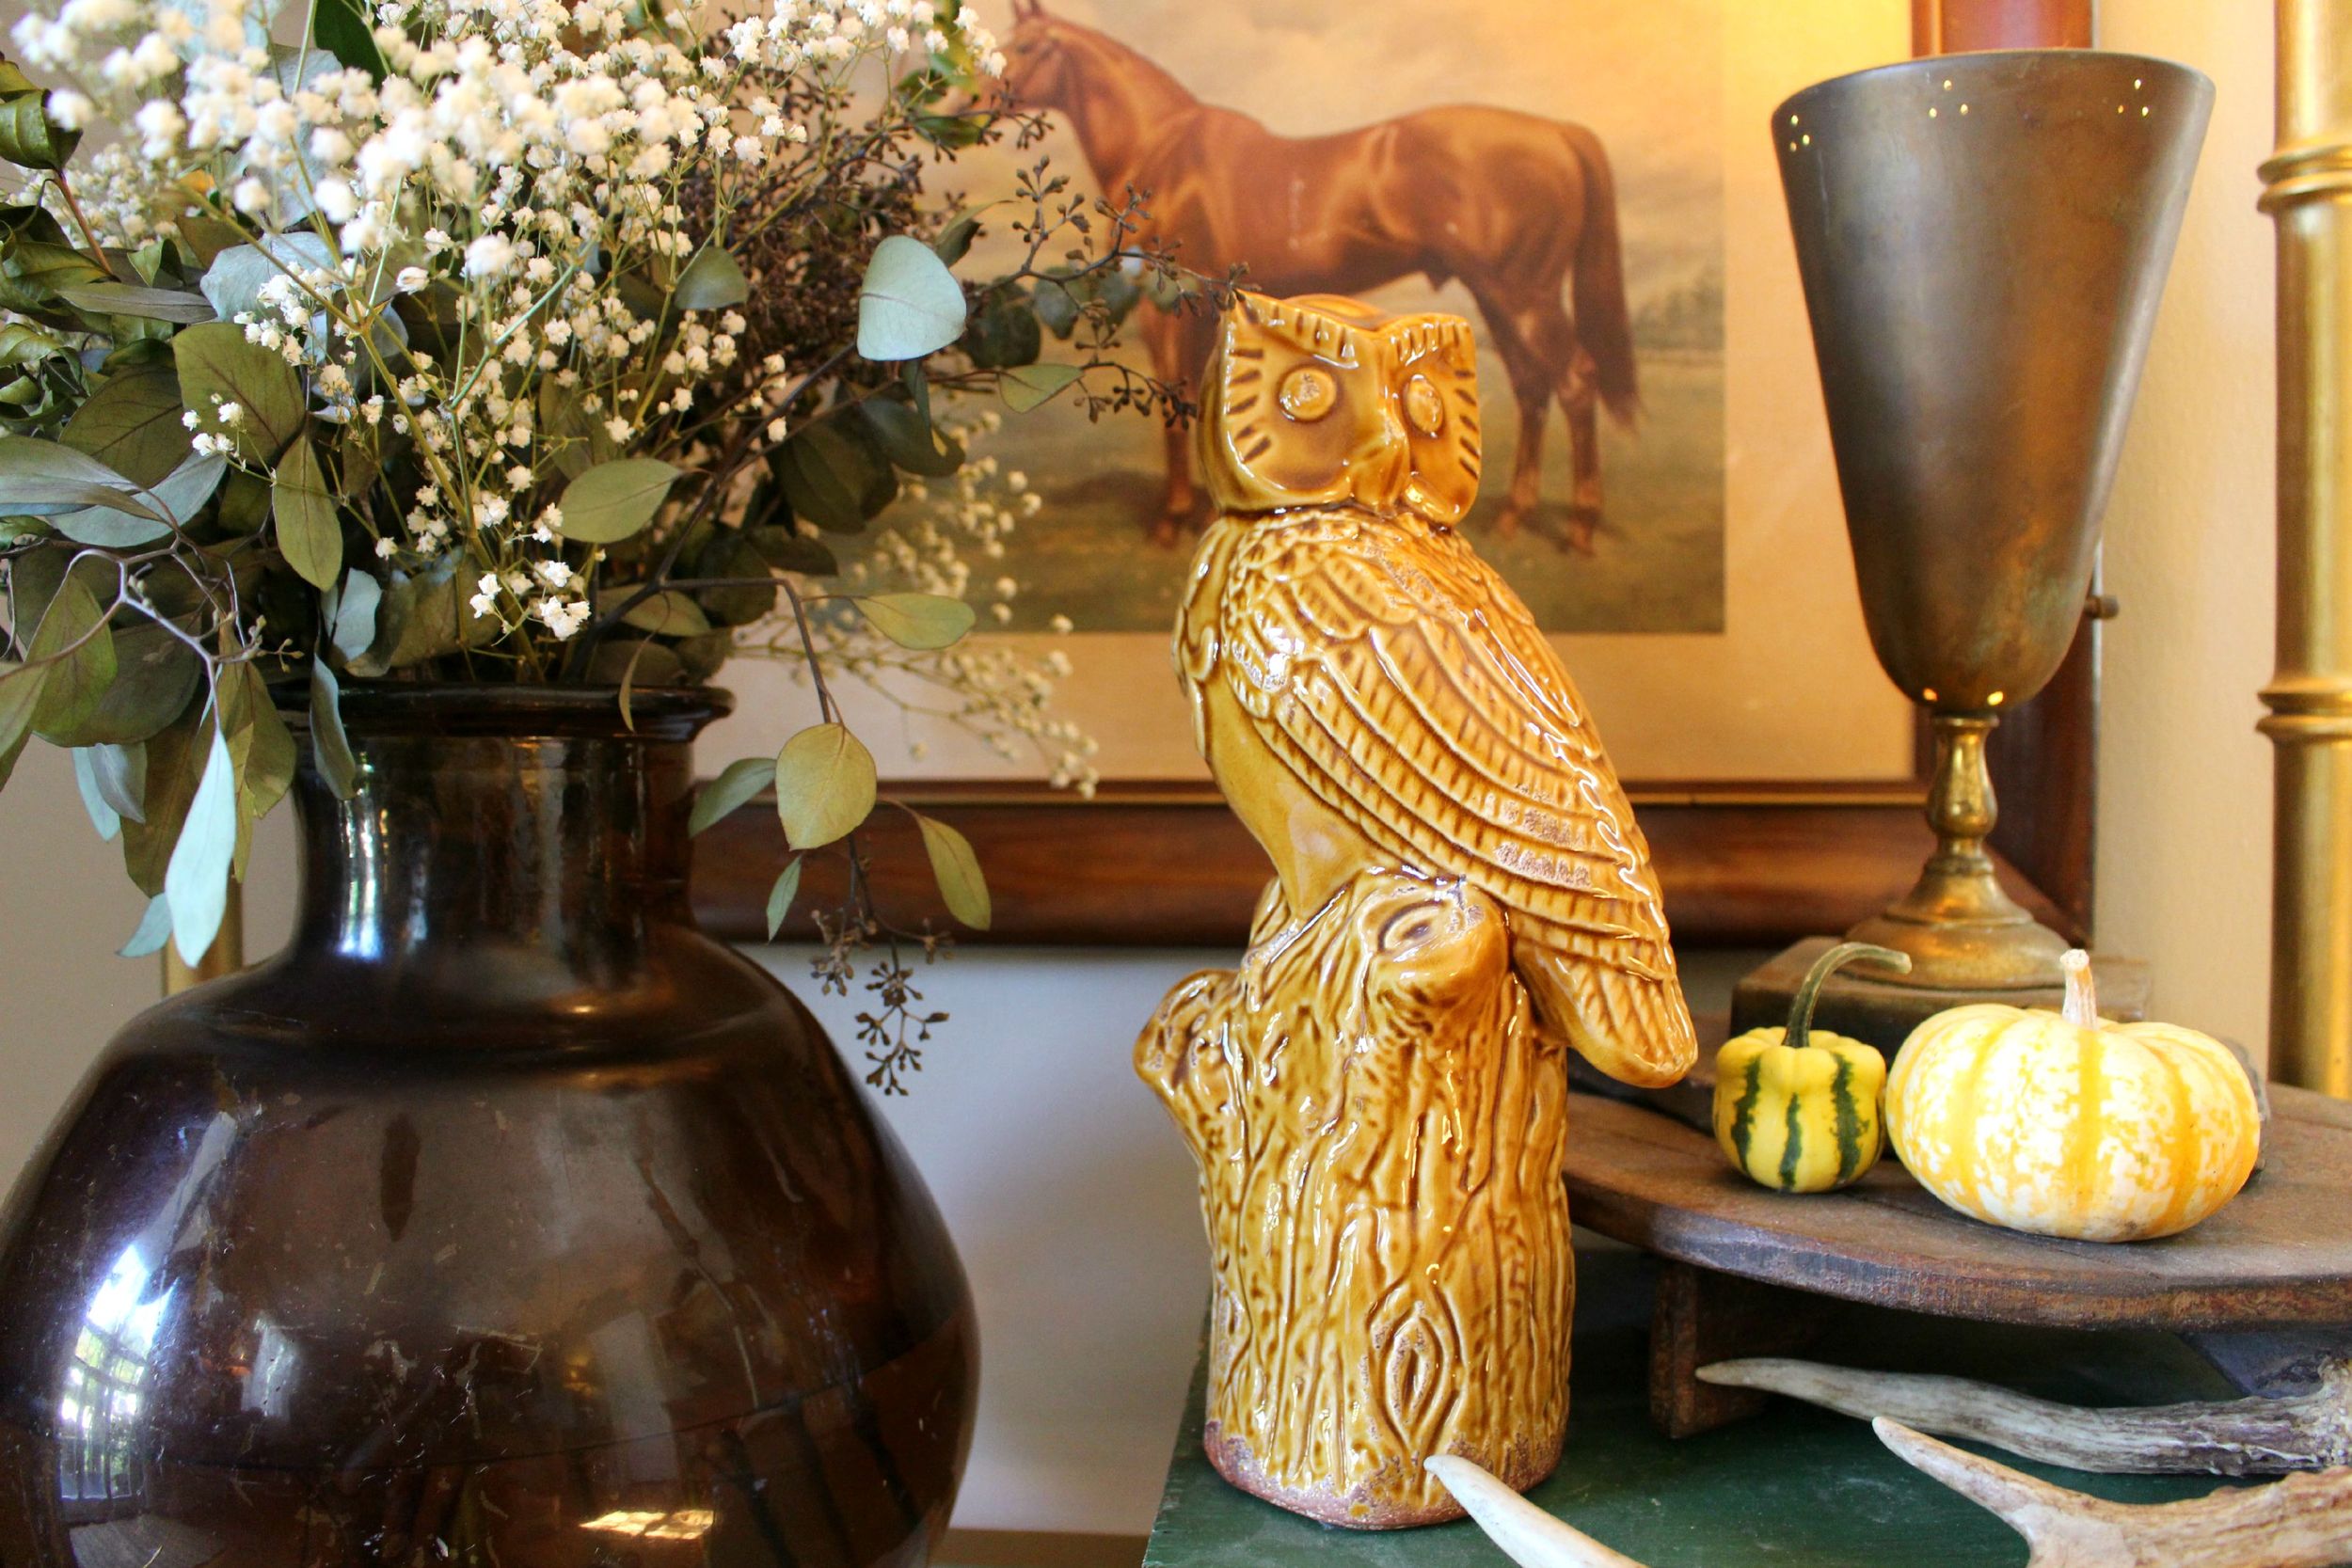
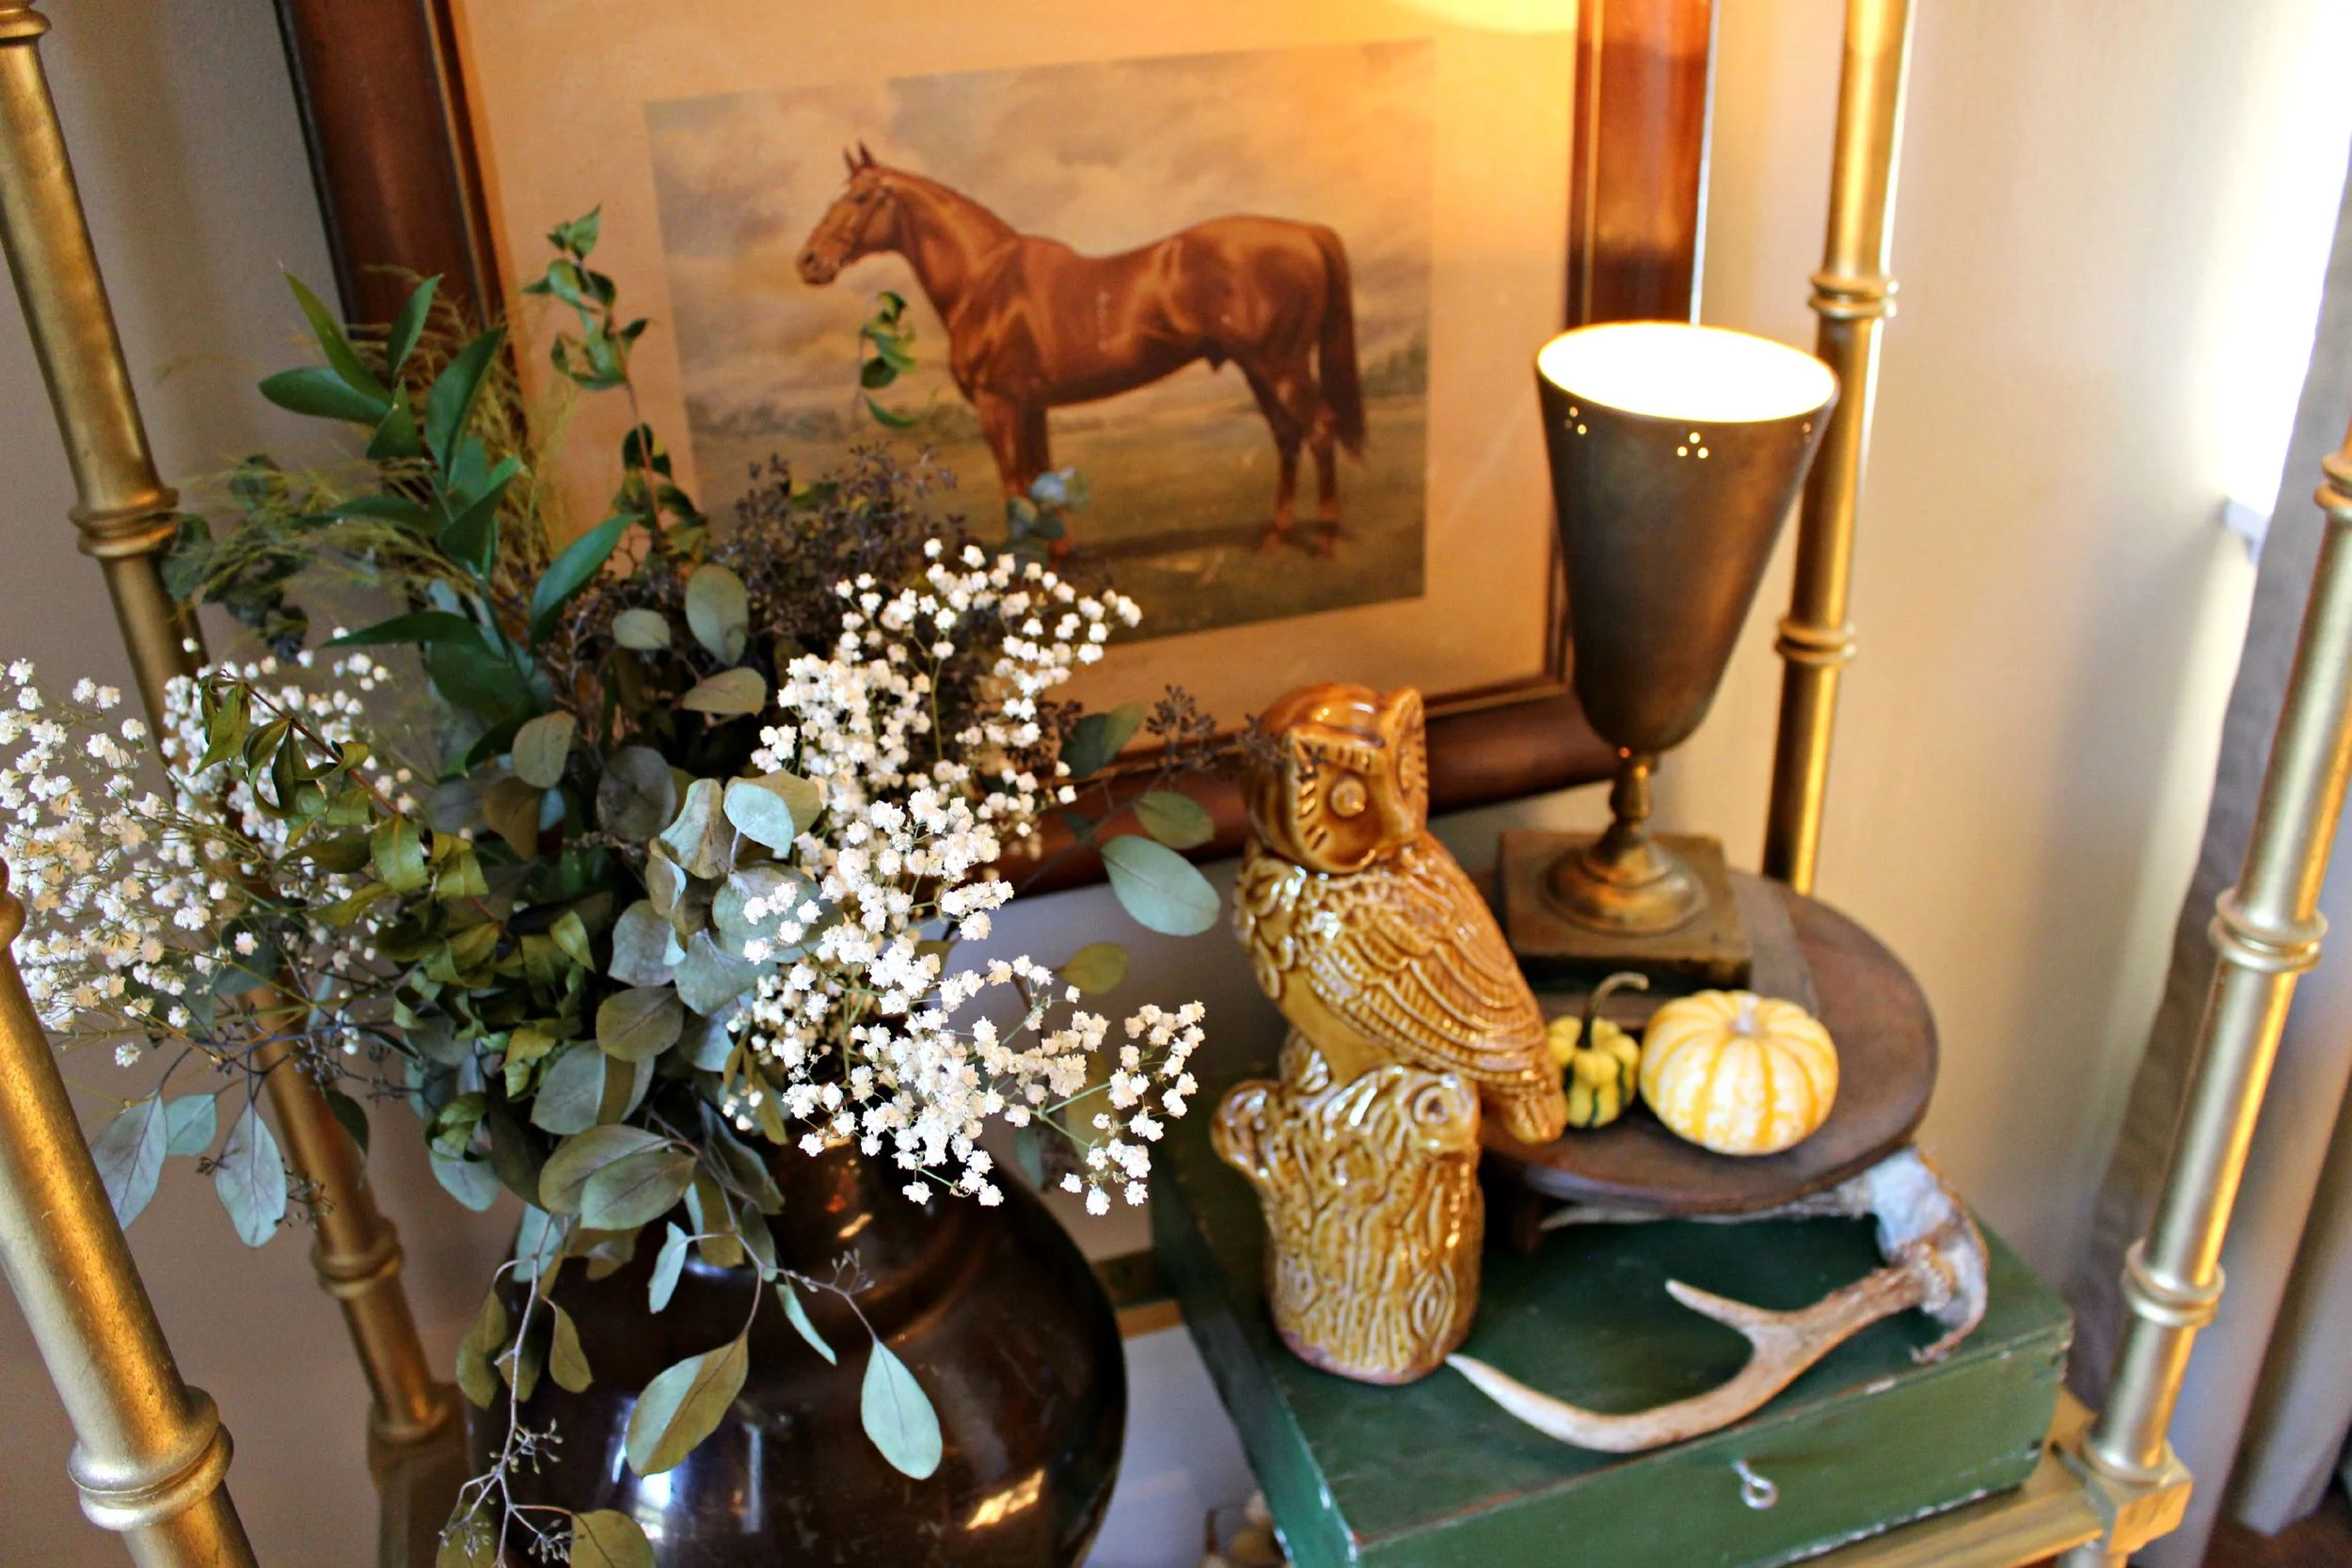
Collecting : I have some staple items I use year after year, and I always purchase a few new things too. Many of the vintage decorations (like my squirrel bookends, wood leaf plaques, horse pictures, etc.), I collect throughout the year and save for the holiday. Thrift shops, garage sales, and peddler malls are treasure troves for seasonal decor as long as you keep your mind open about it throughout the year. For example, I ALWAYS buy good wreaths whenever I see them. The gold fruit/leave wreath on my big white mirror was from a thrift store and I just spray painted it gold! I use it for both fall and Christmas in that same spot. Twig wreaths and pine cones wreaths are a couple of other kinds of wreaths that are easy to find while thrifting. I also always buy natural elements (like greenery, pinecones, twigs, etc.) If you continue collecting these, you will never have to pay full price for them at the craft store and you can use them to fill space all over your room (empty vases, jars, baskets, etc.) Any time I purchase a holiday decoration out of season, I bring it up to the attic and place it in the proper section (even if I'm just setting it on top of a tub or to the side). When you start unpacking your decor it's so nice to have new decorations that most of the time you forgot about!
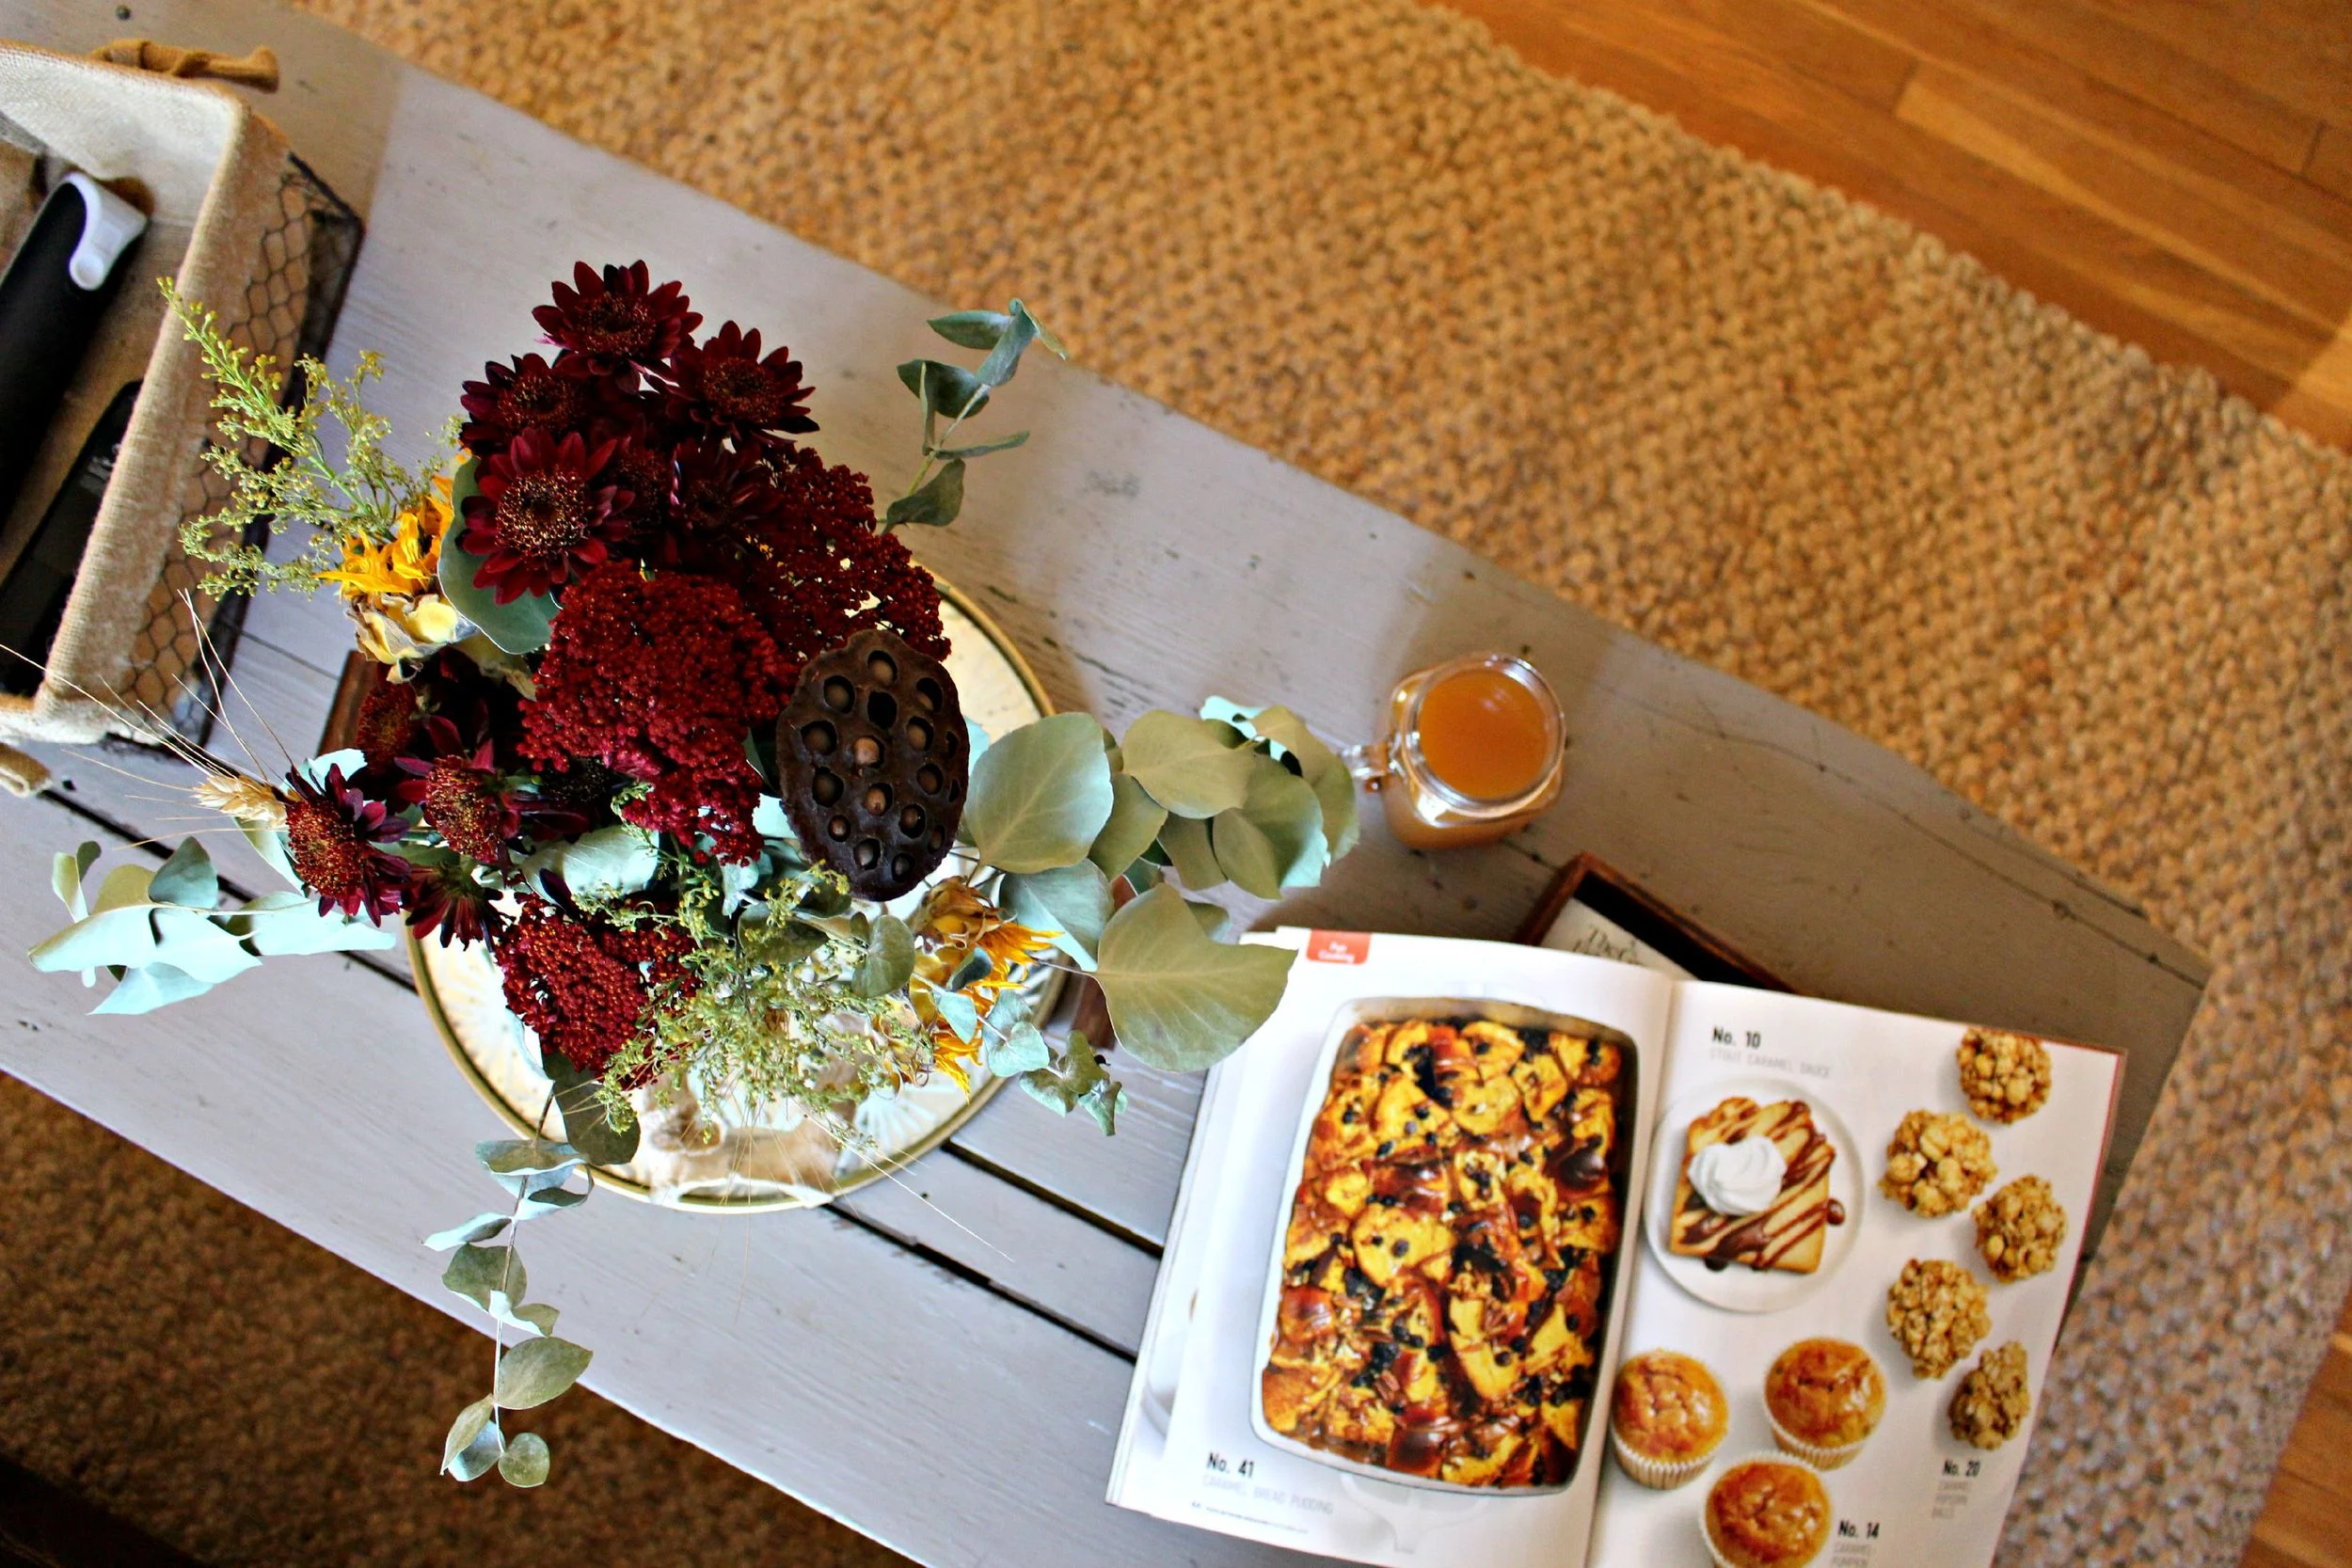
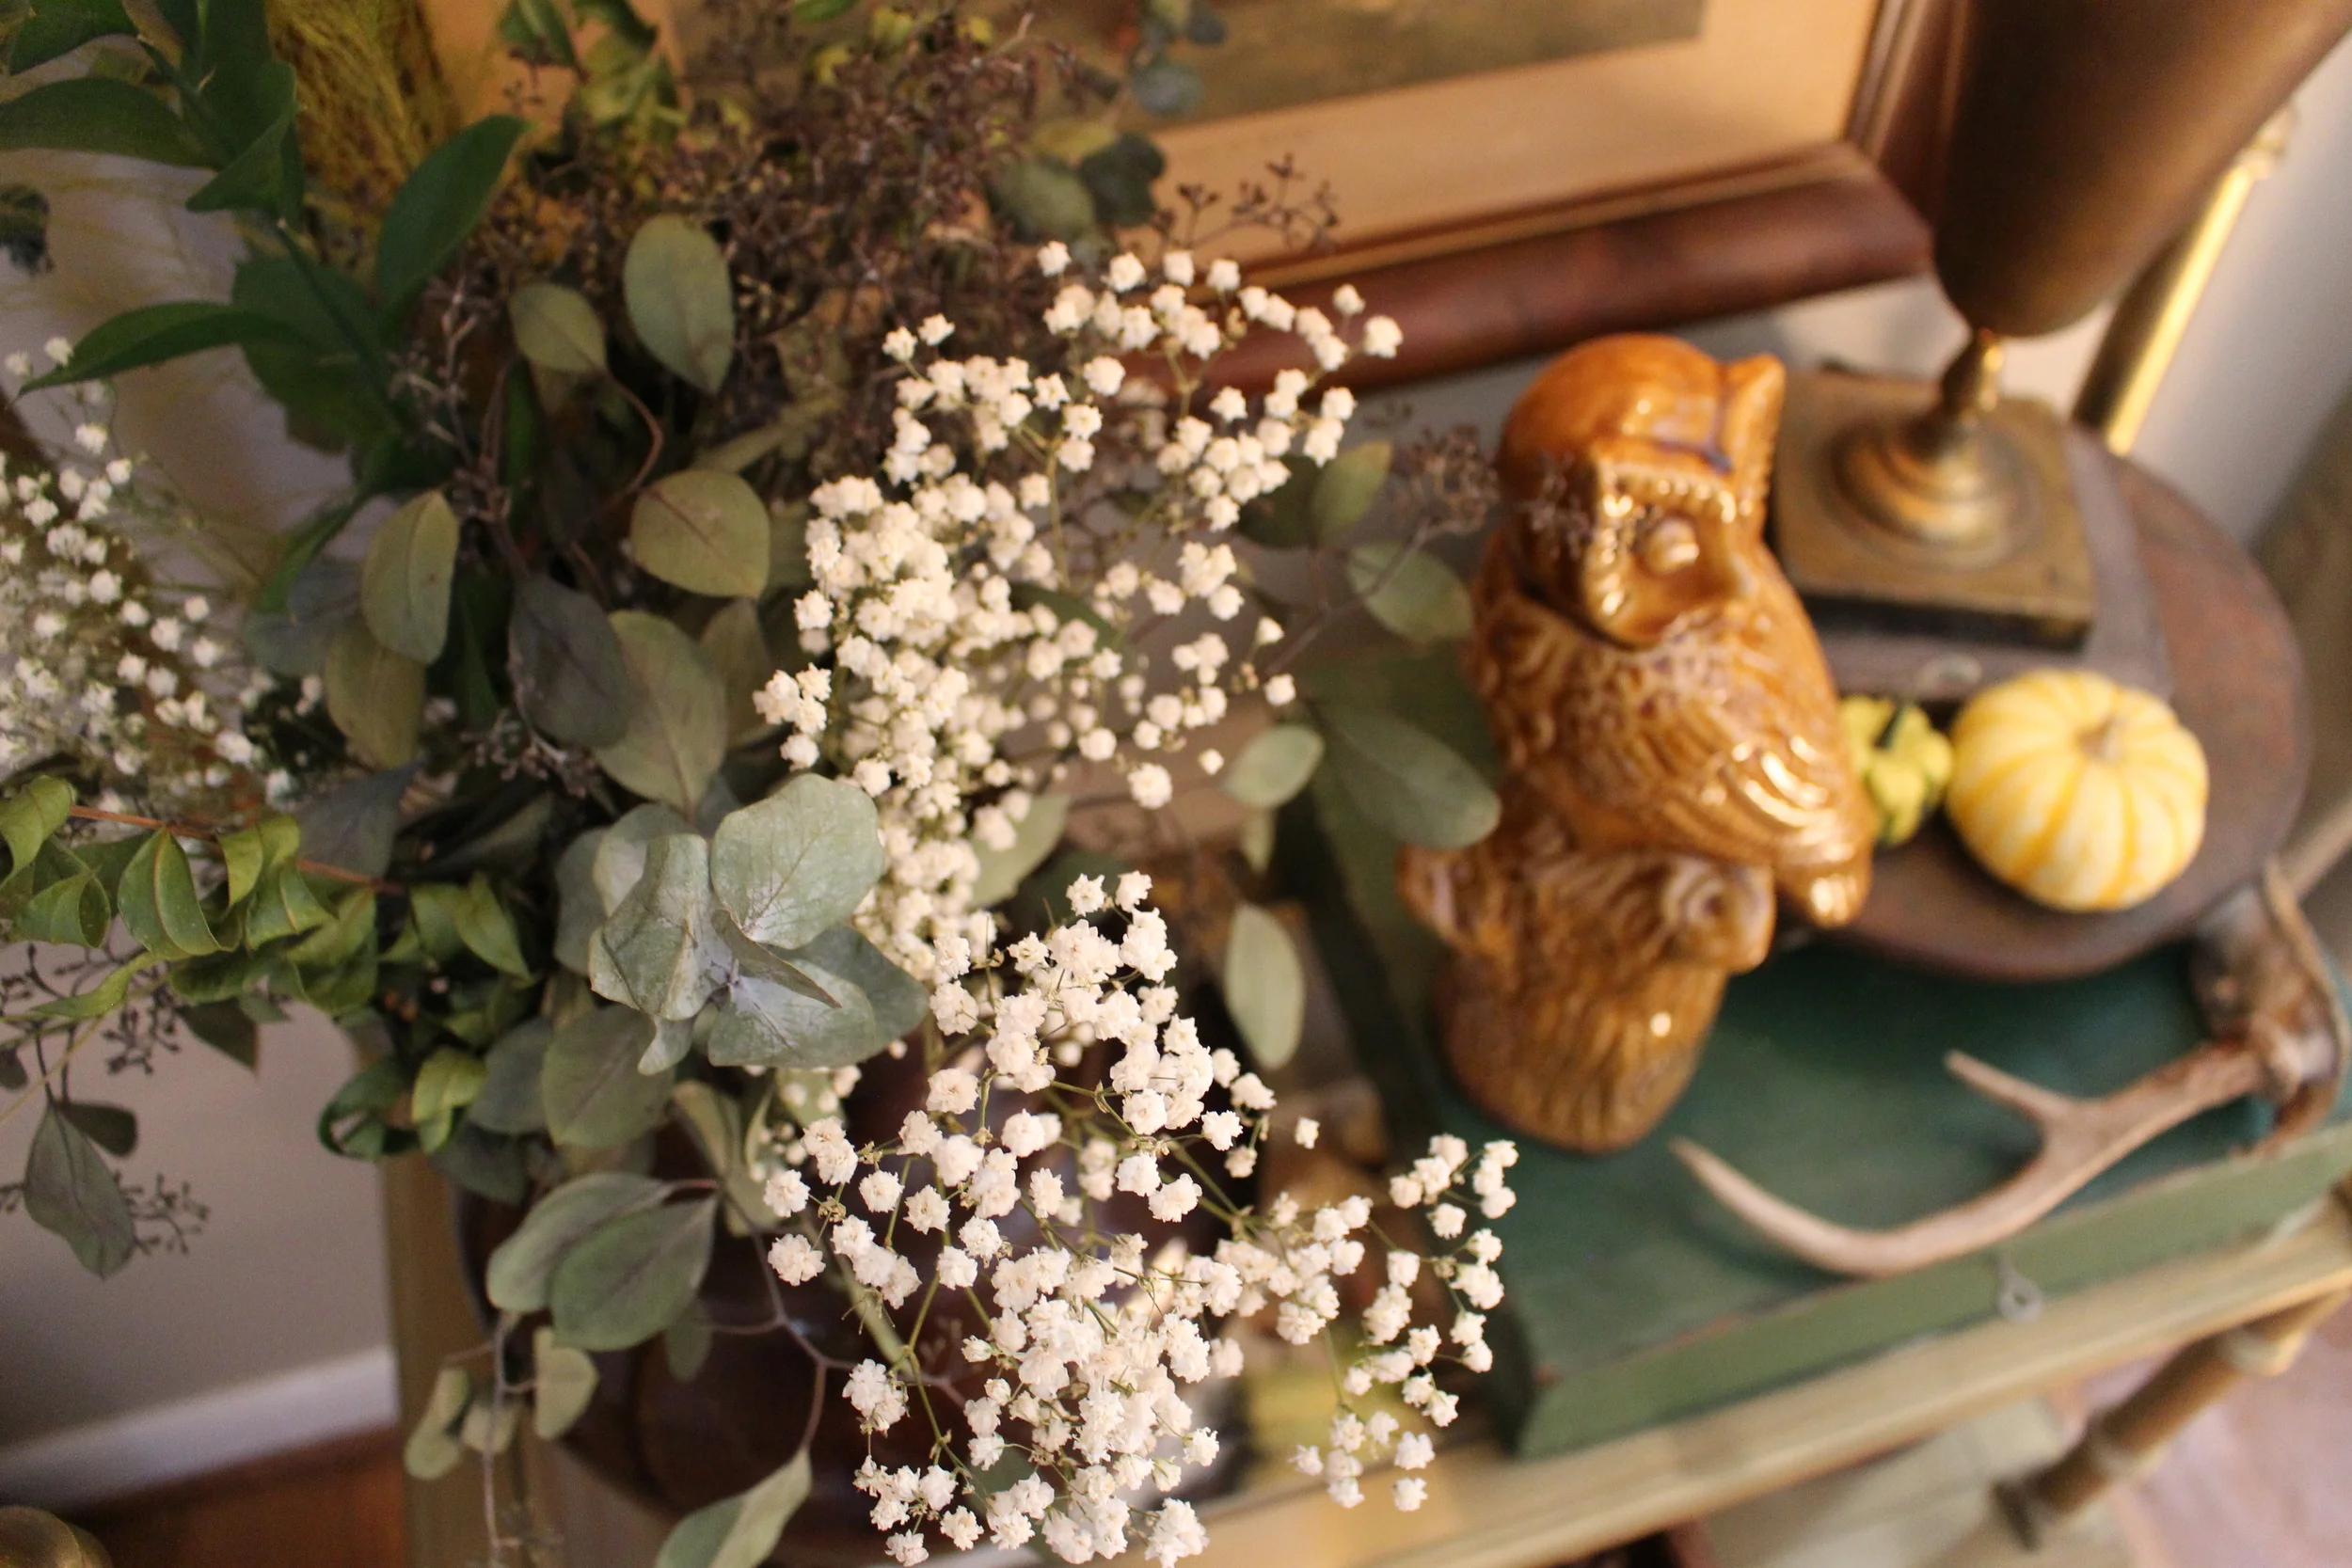
Add Nature: Real, natural elements like pumpkins, gourds, and flowers are so important to my decor every year. If you don't want to store decorations, this is one thing you can add to any space to make it feel seasonal. Trader Joe's always has a good selection of unique pumpkins and beautiful florals. The farmer's market is also a great place to get unique items (I got my white Indian corn there this year and all of my mini squashes). I never skimp on these items and think they are so important to completing the space. Here's a tutorial I use to preserve my pumpkins so that they last the entire season.

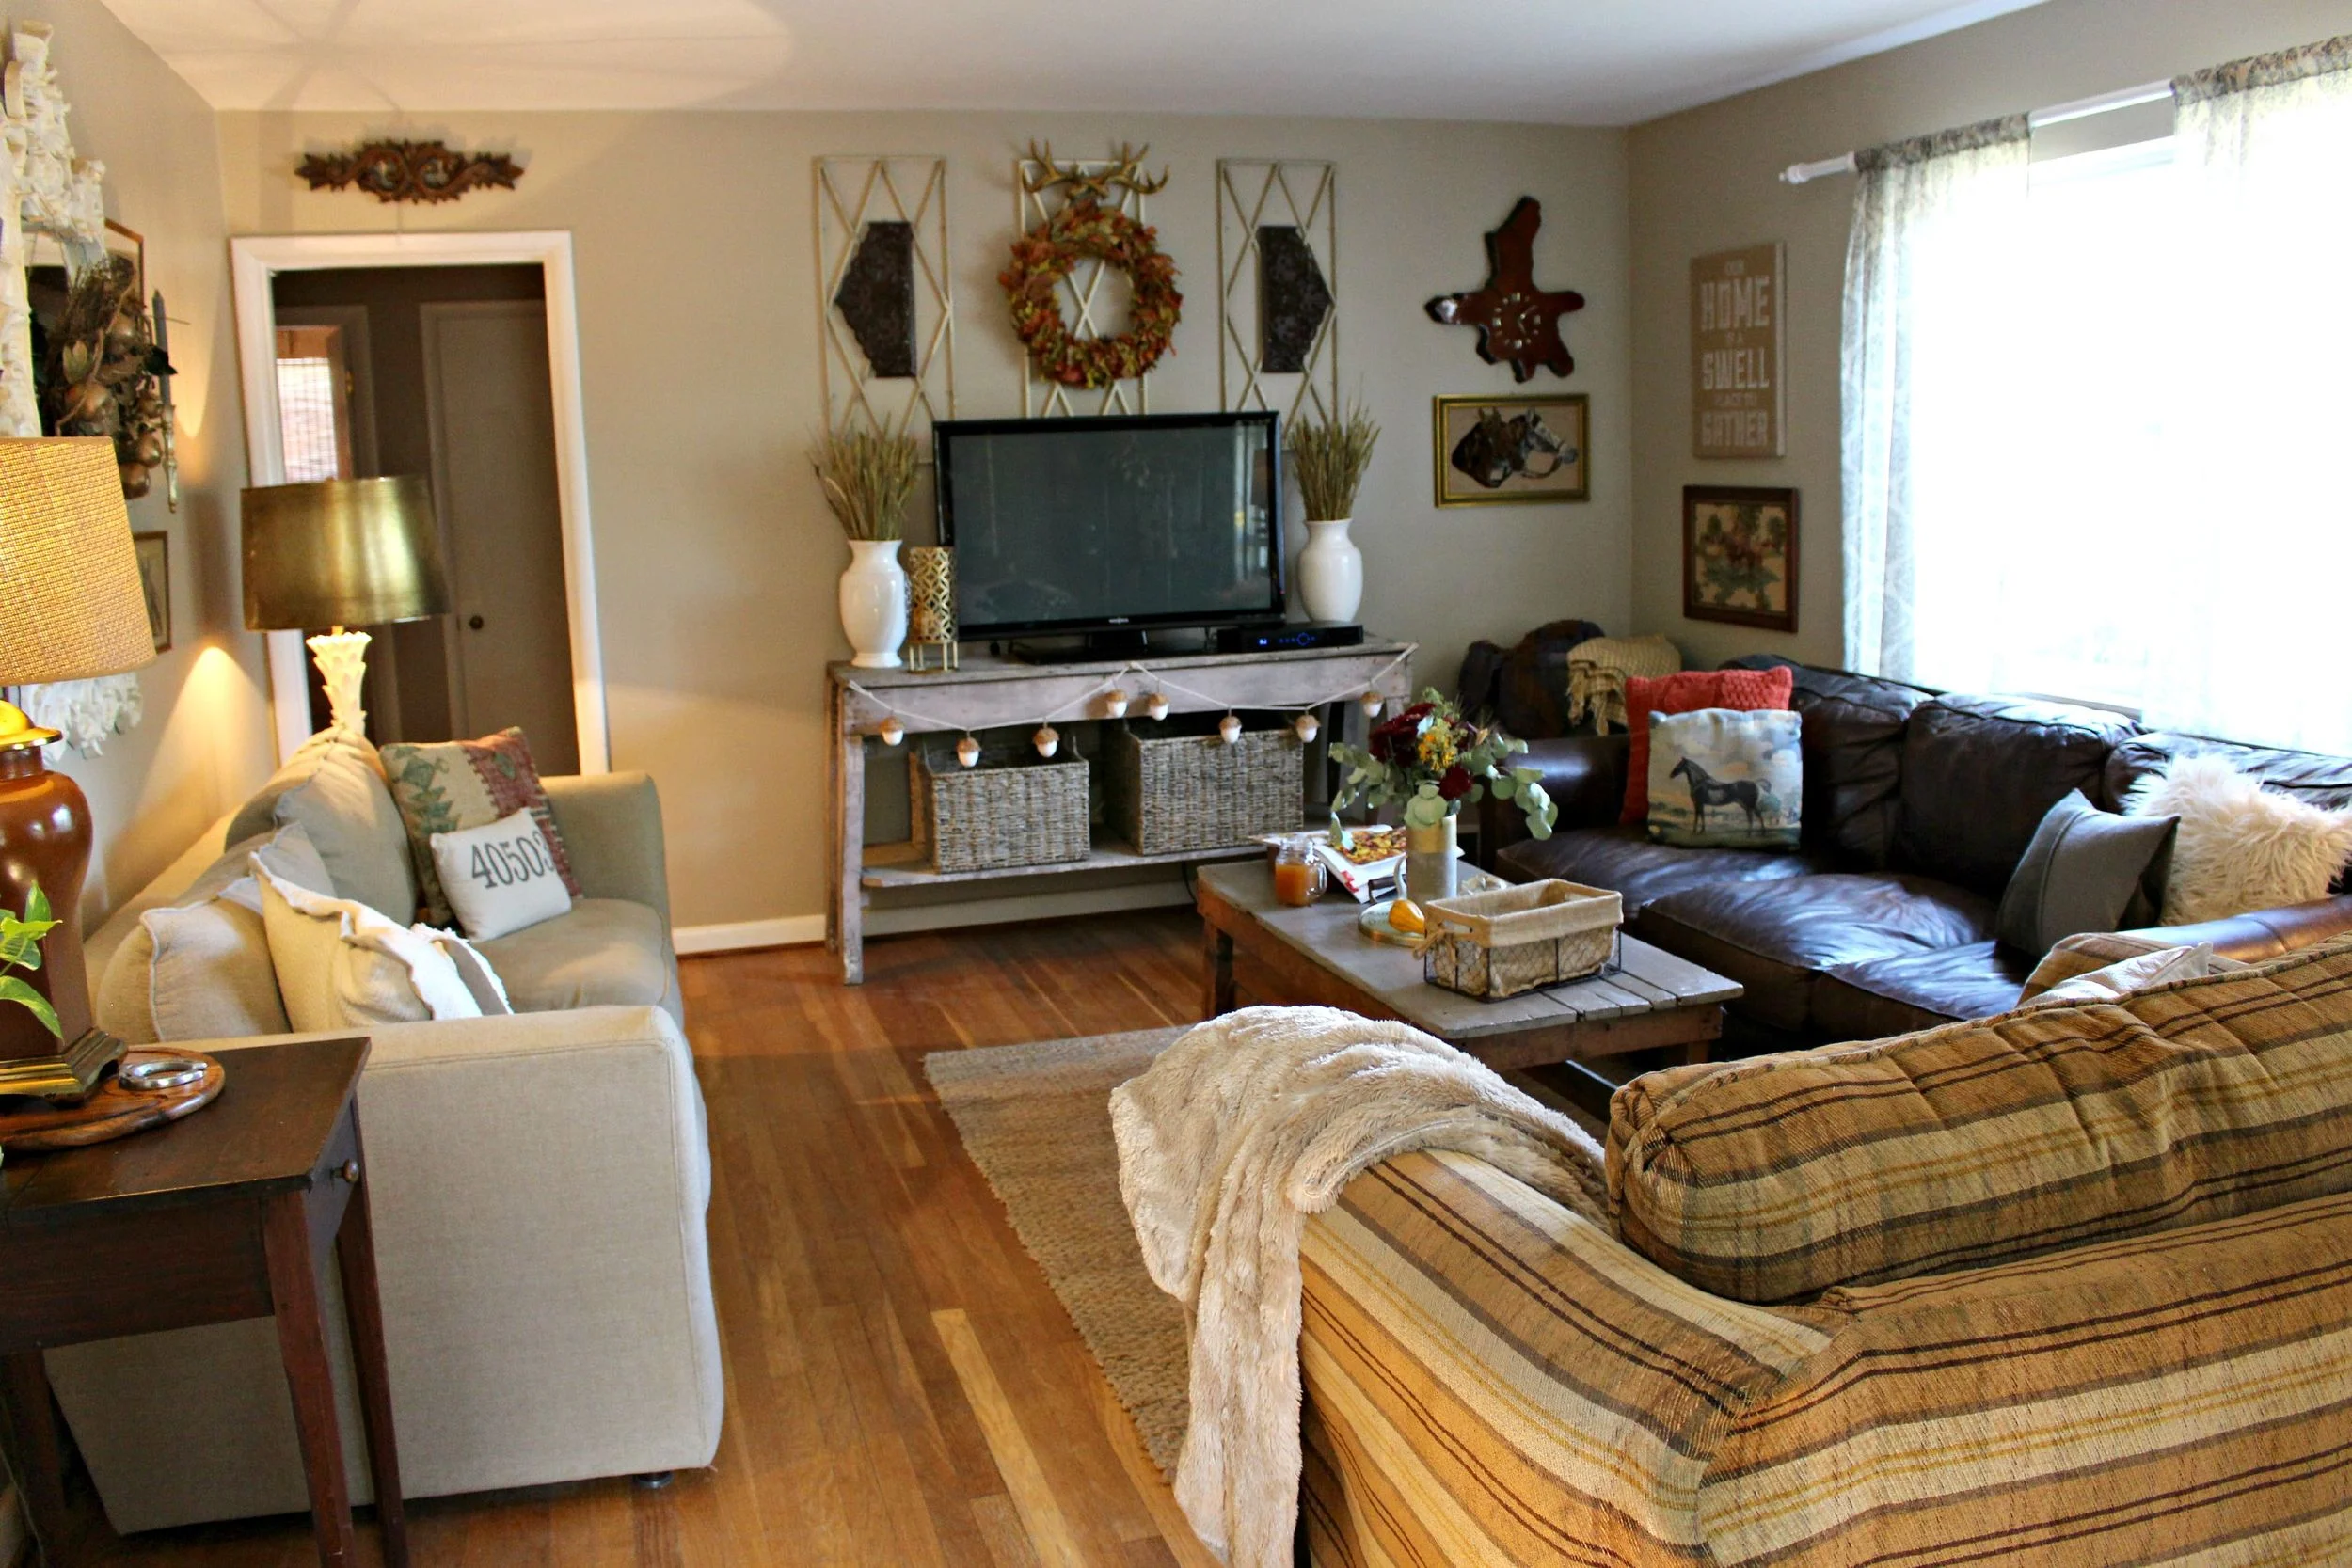
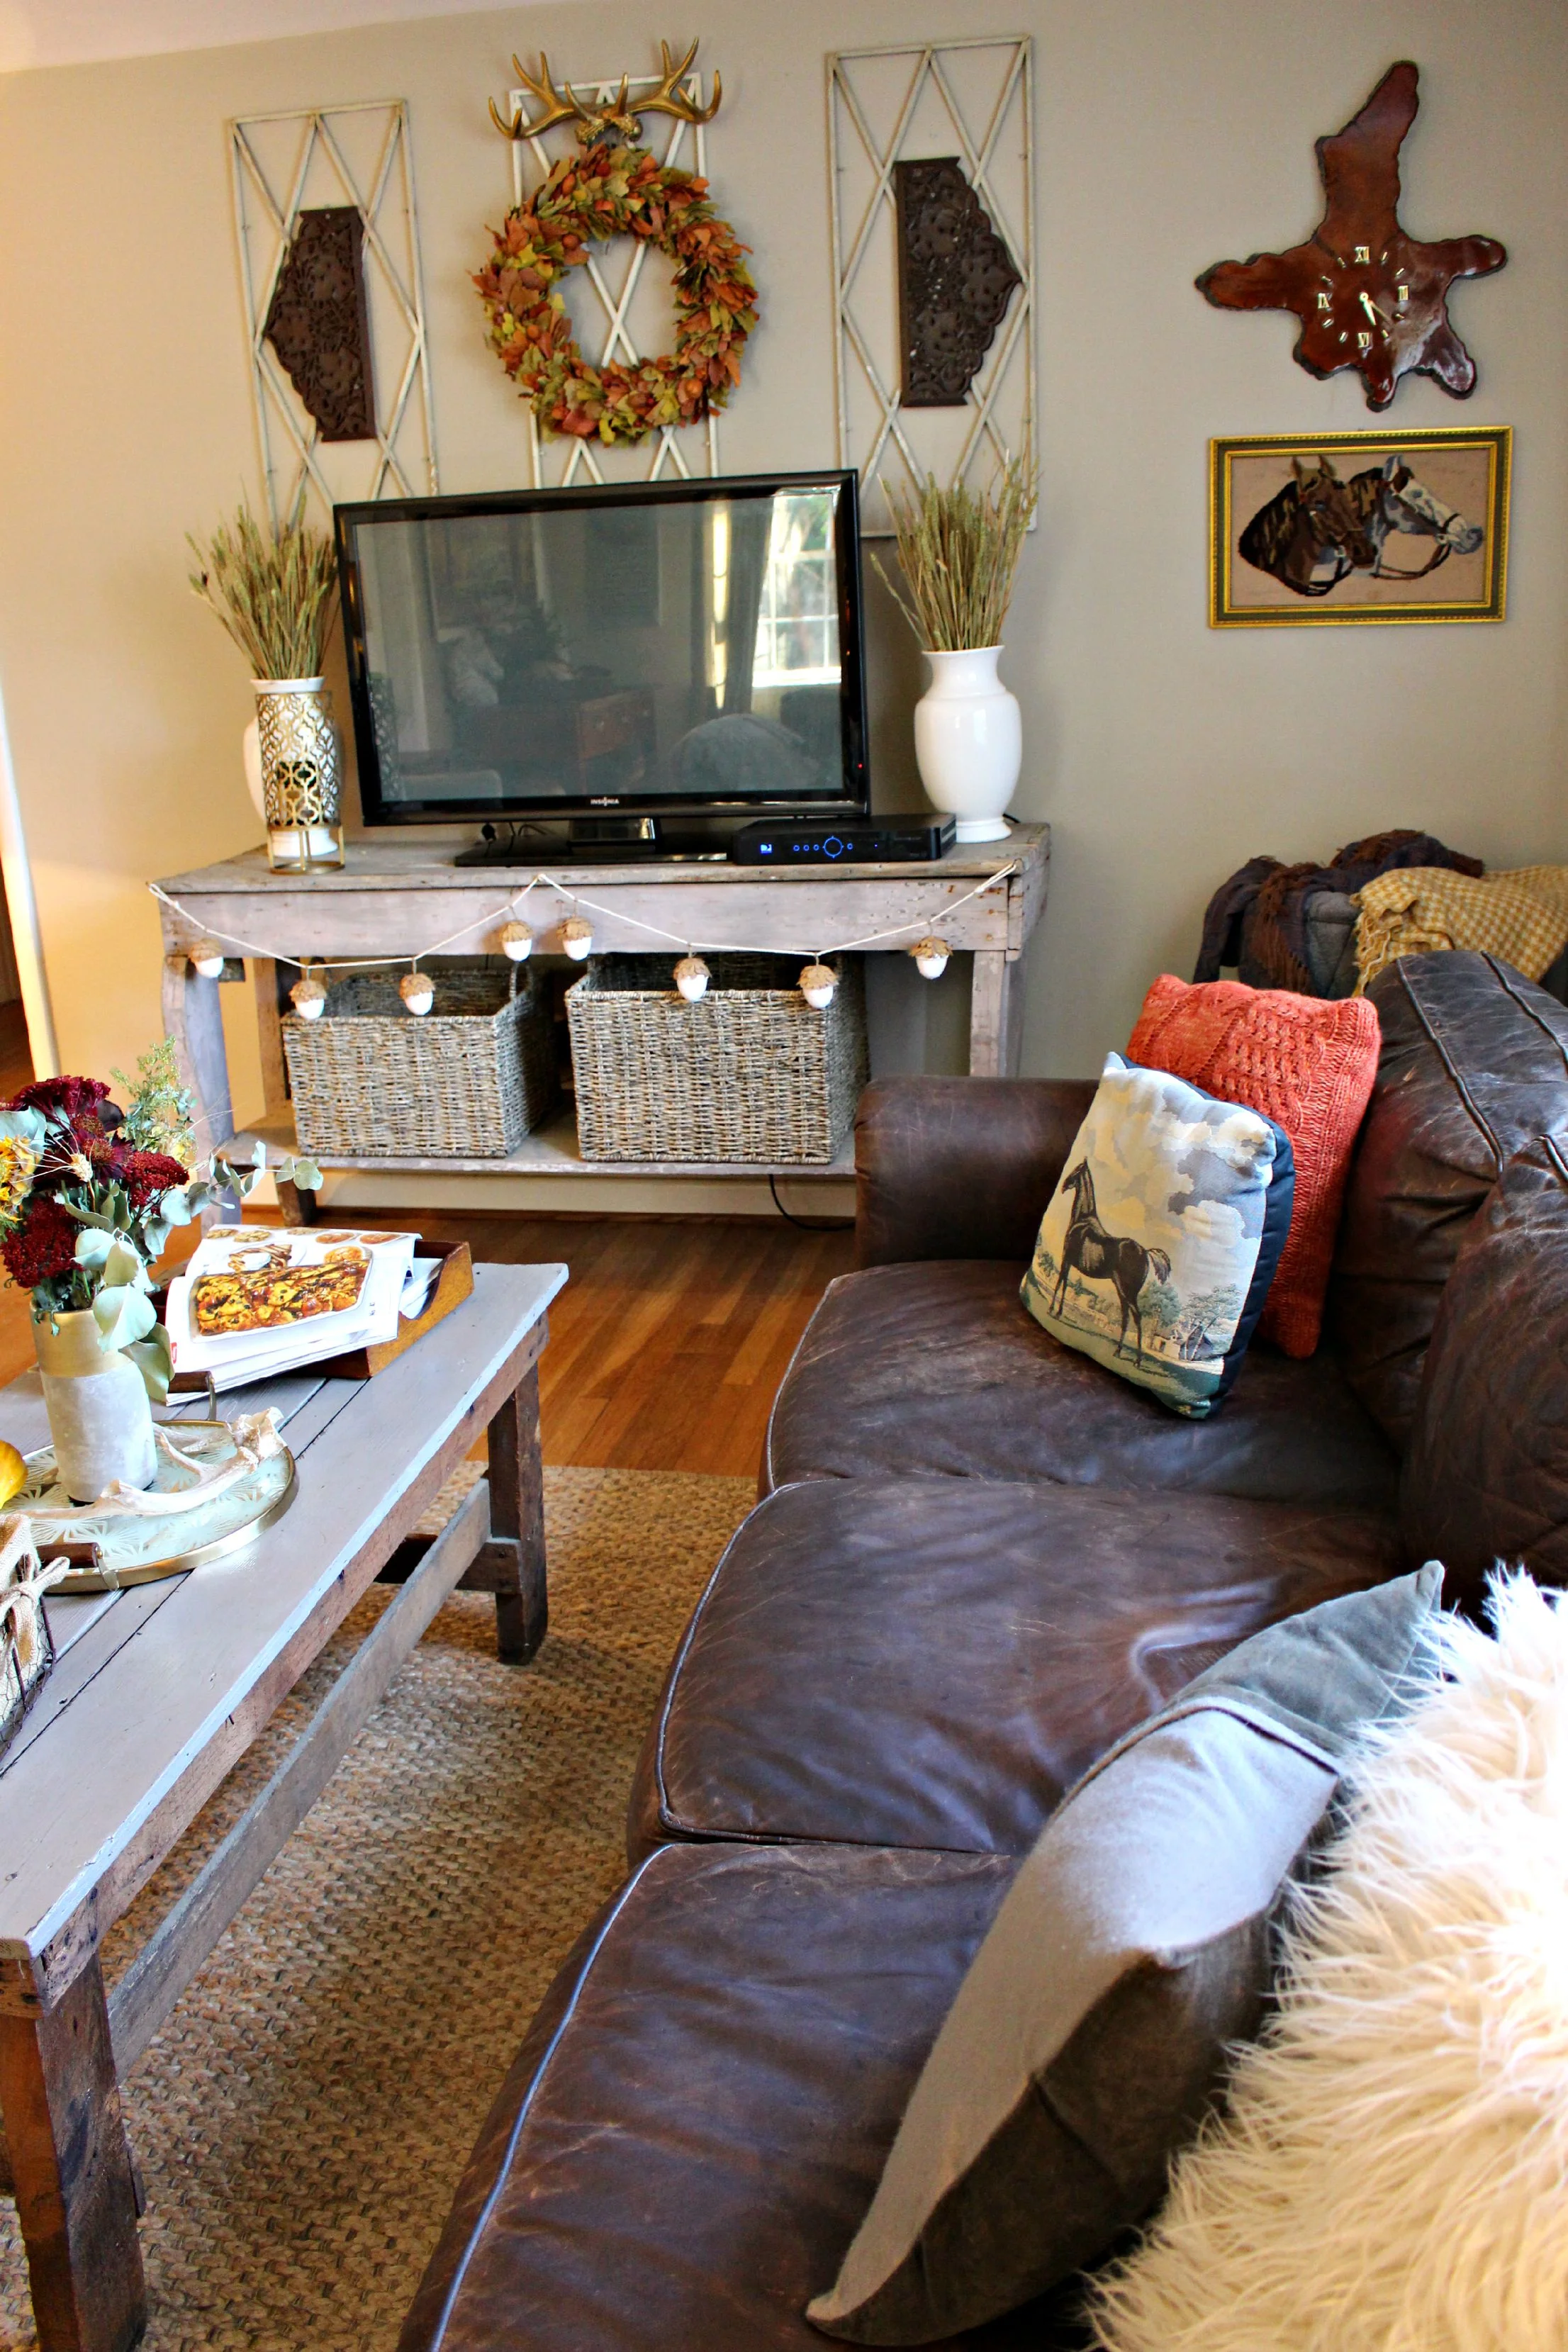
Antlers: Hobby Lobby (spray painted gold) | Wreath: Smith + Hawken from Target bought at Bargain Hunt | White paneled shutters: thrifted | Leaf plaques: thrifted
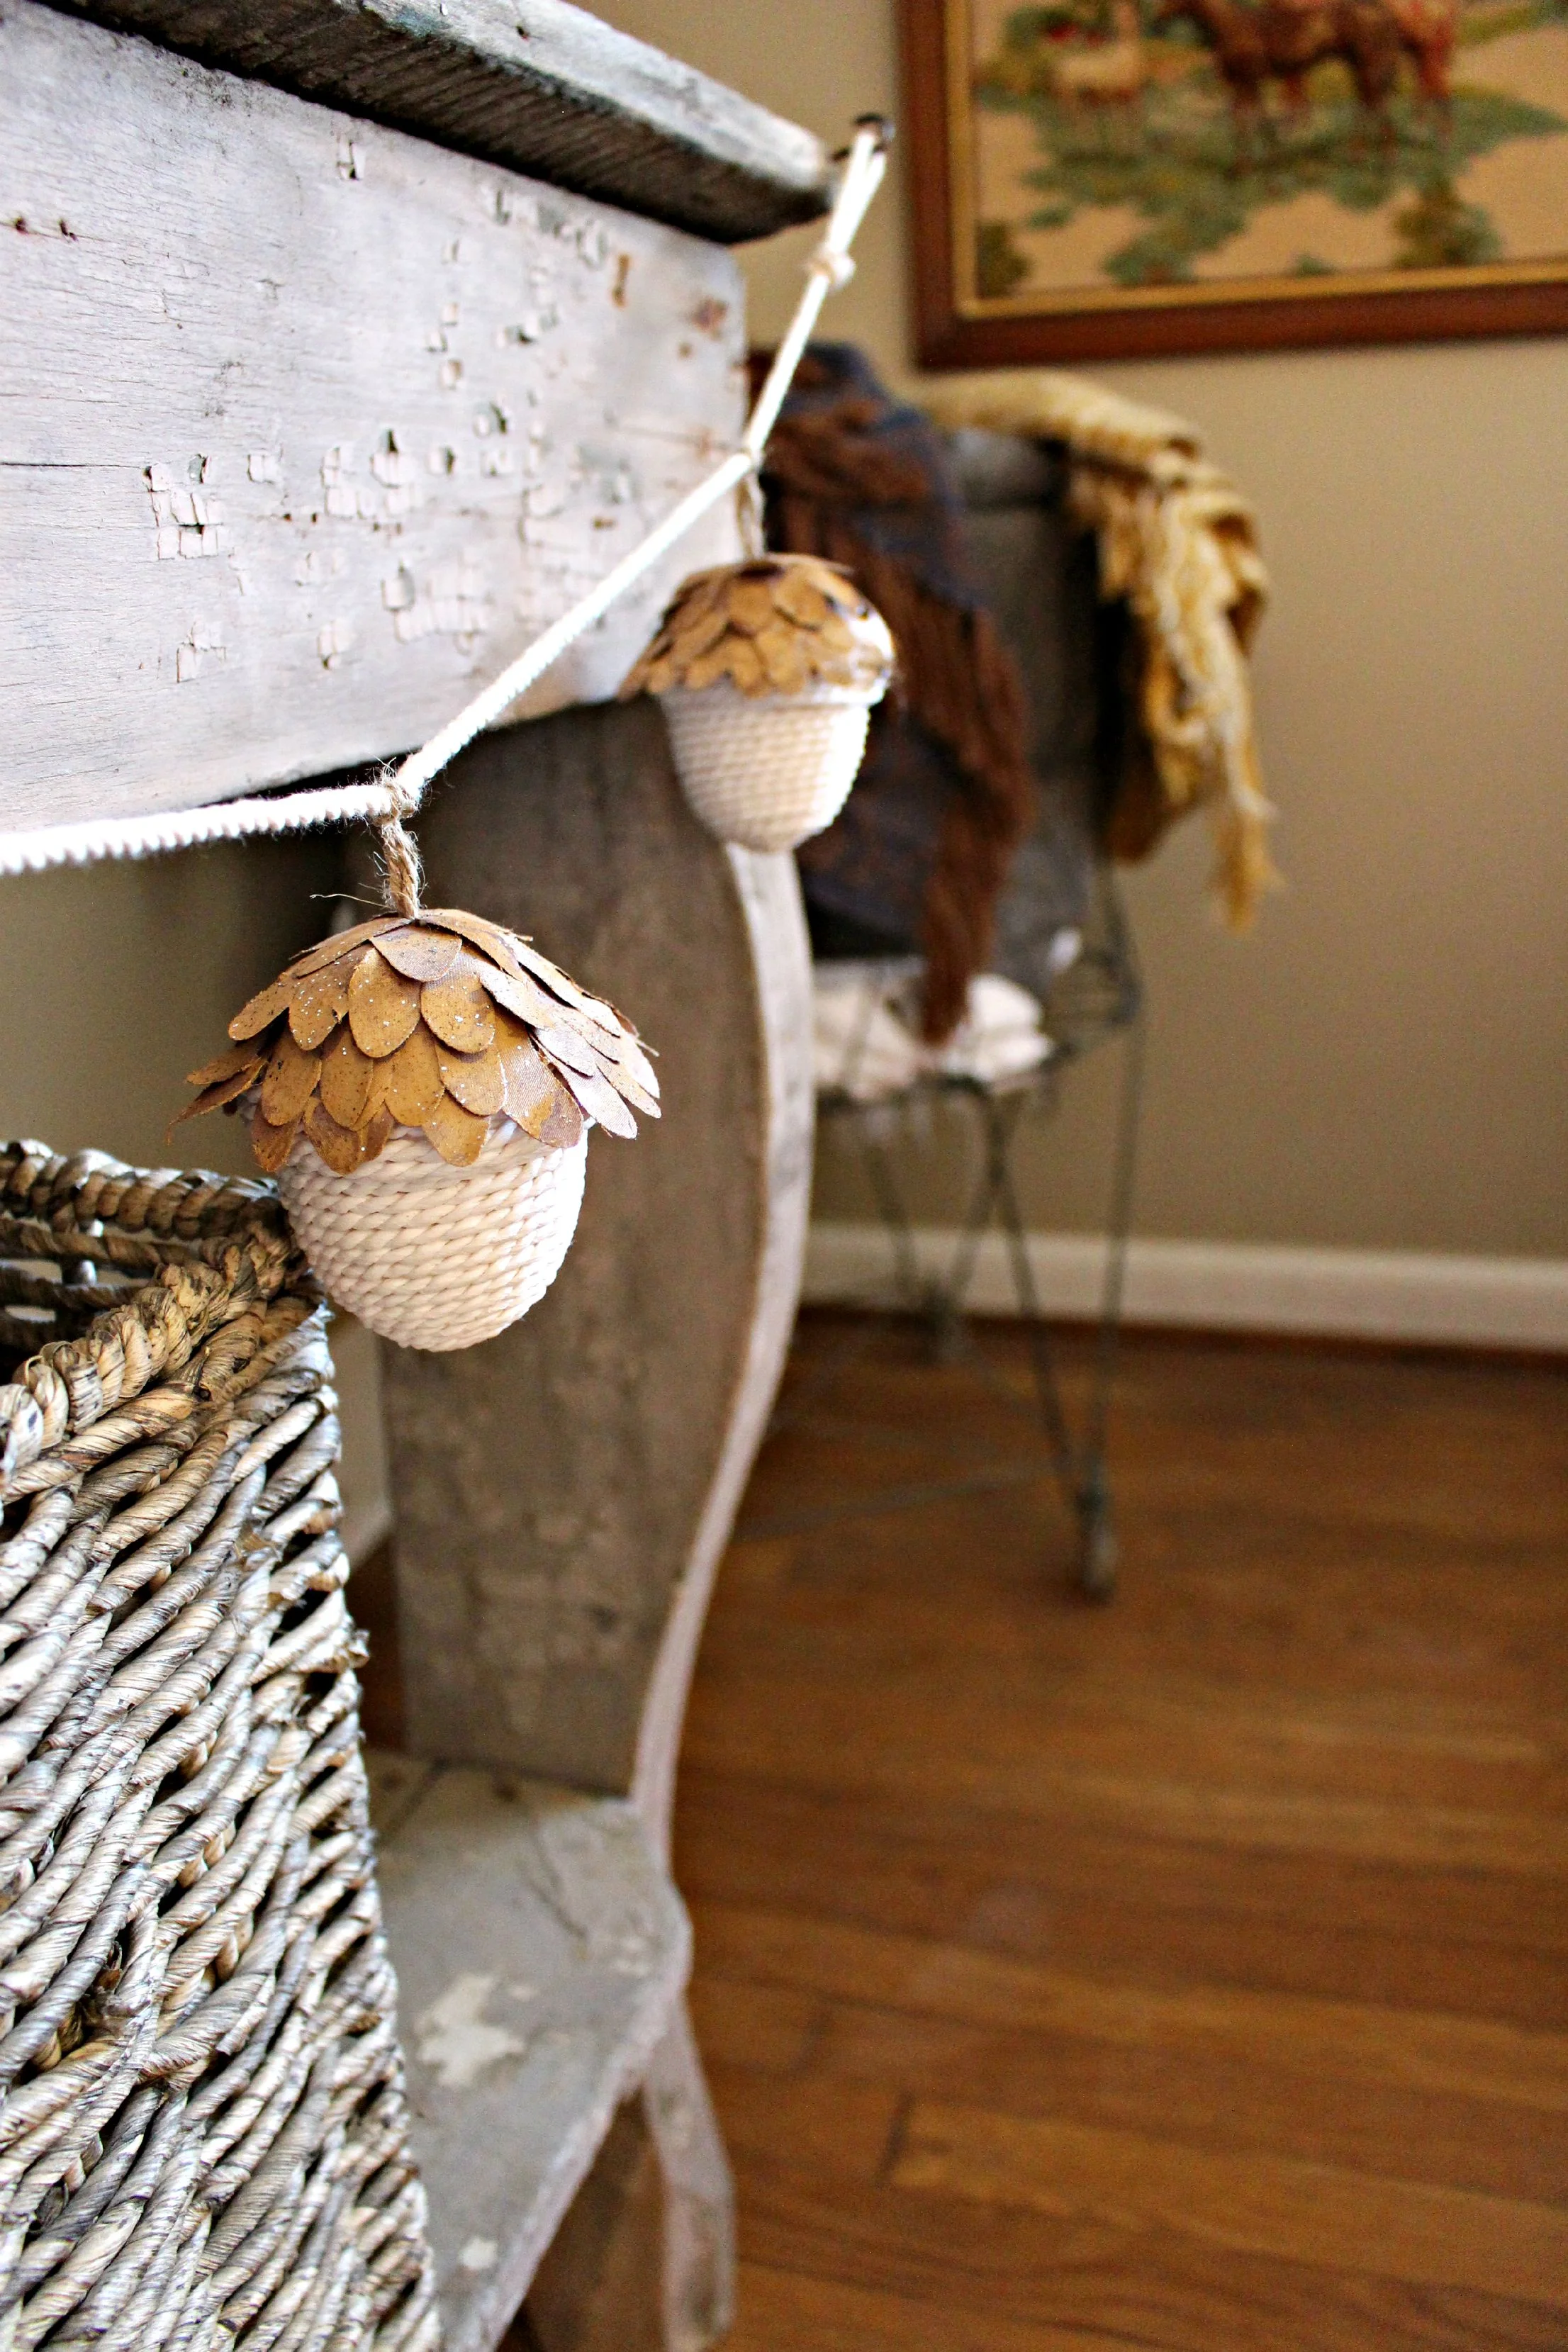
New Items: I love mixing vintage and new, and every year I purchase a few new items to freshen up the space. This year for example, I got the adorable acorn garland from Target (not available online, but check your local store-only $7.99!), as well as some new textured pillows from Target, and a new accent rug by the door. I also got the wreath above my television from Bargain Hunt, but it is Smith & Hawken brand from Target. If you have never been, Bargain Hunt, is similar to Big Lots but with better brands (including TONS of Target stuff). They offer major discounts on items that have been returned to stores, maybe opened, but they are still in perfect condition. They also discount items the longer that they are in stores! Many times you can find items that are at Target right now for half the price. Other places I like to find new decor are Home Goods, TJMaxx, Marshall's, and Hobby Lobby.
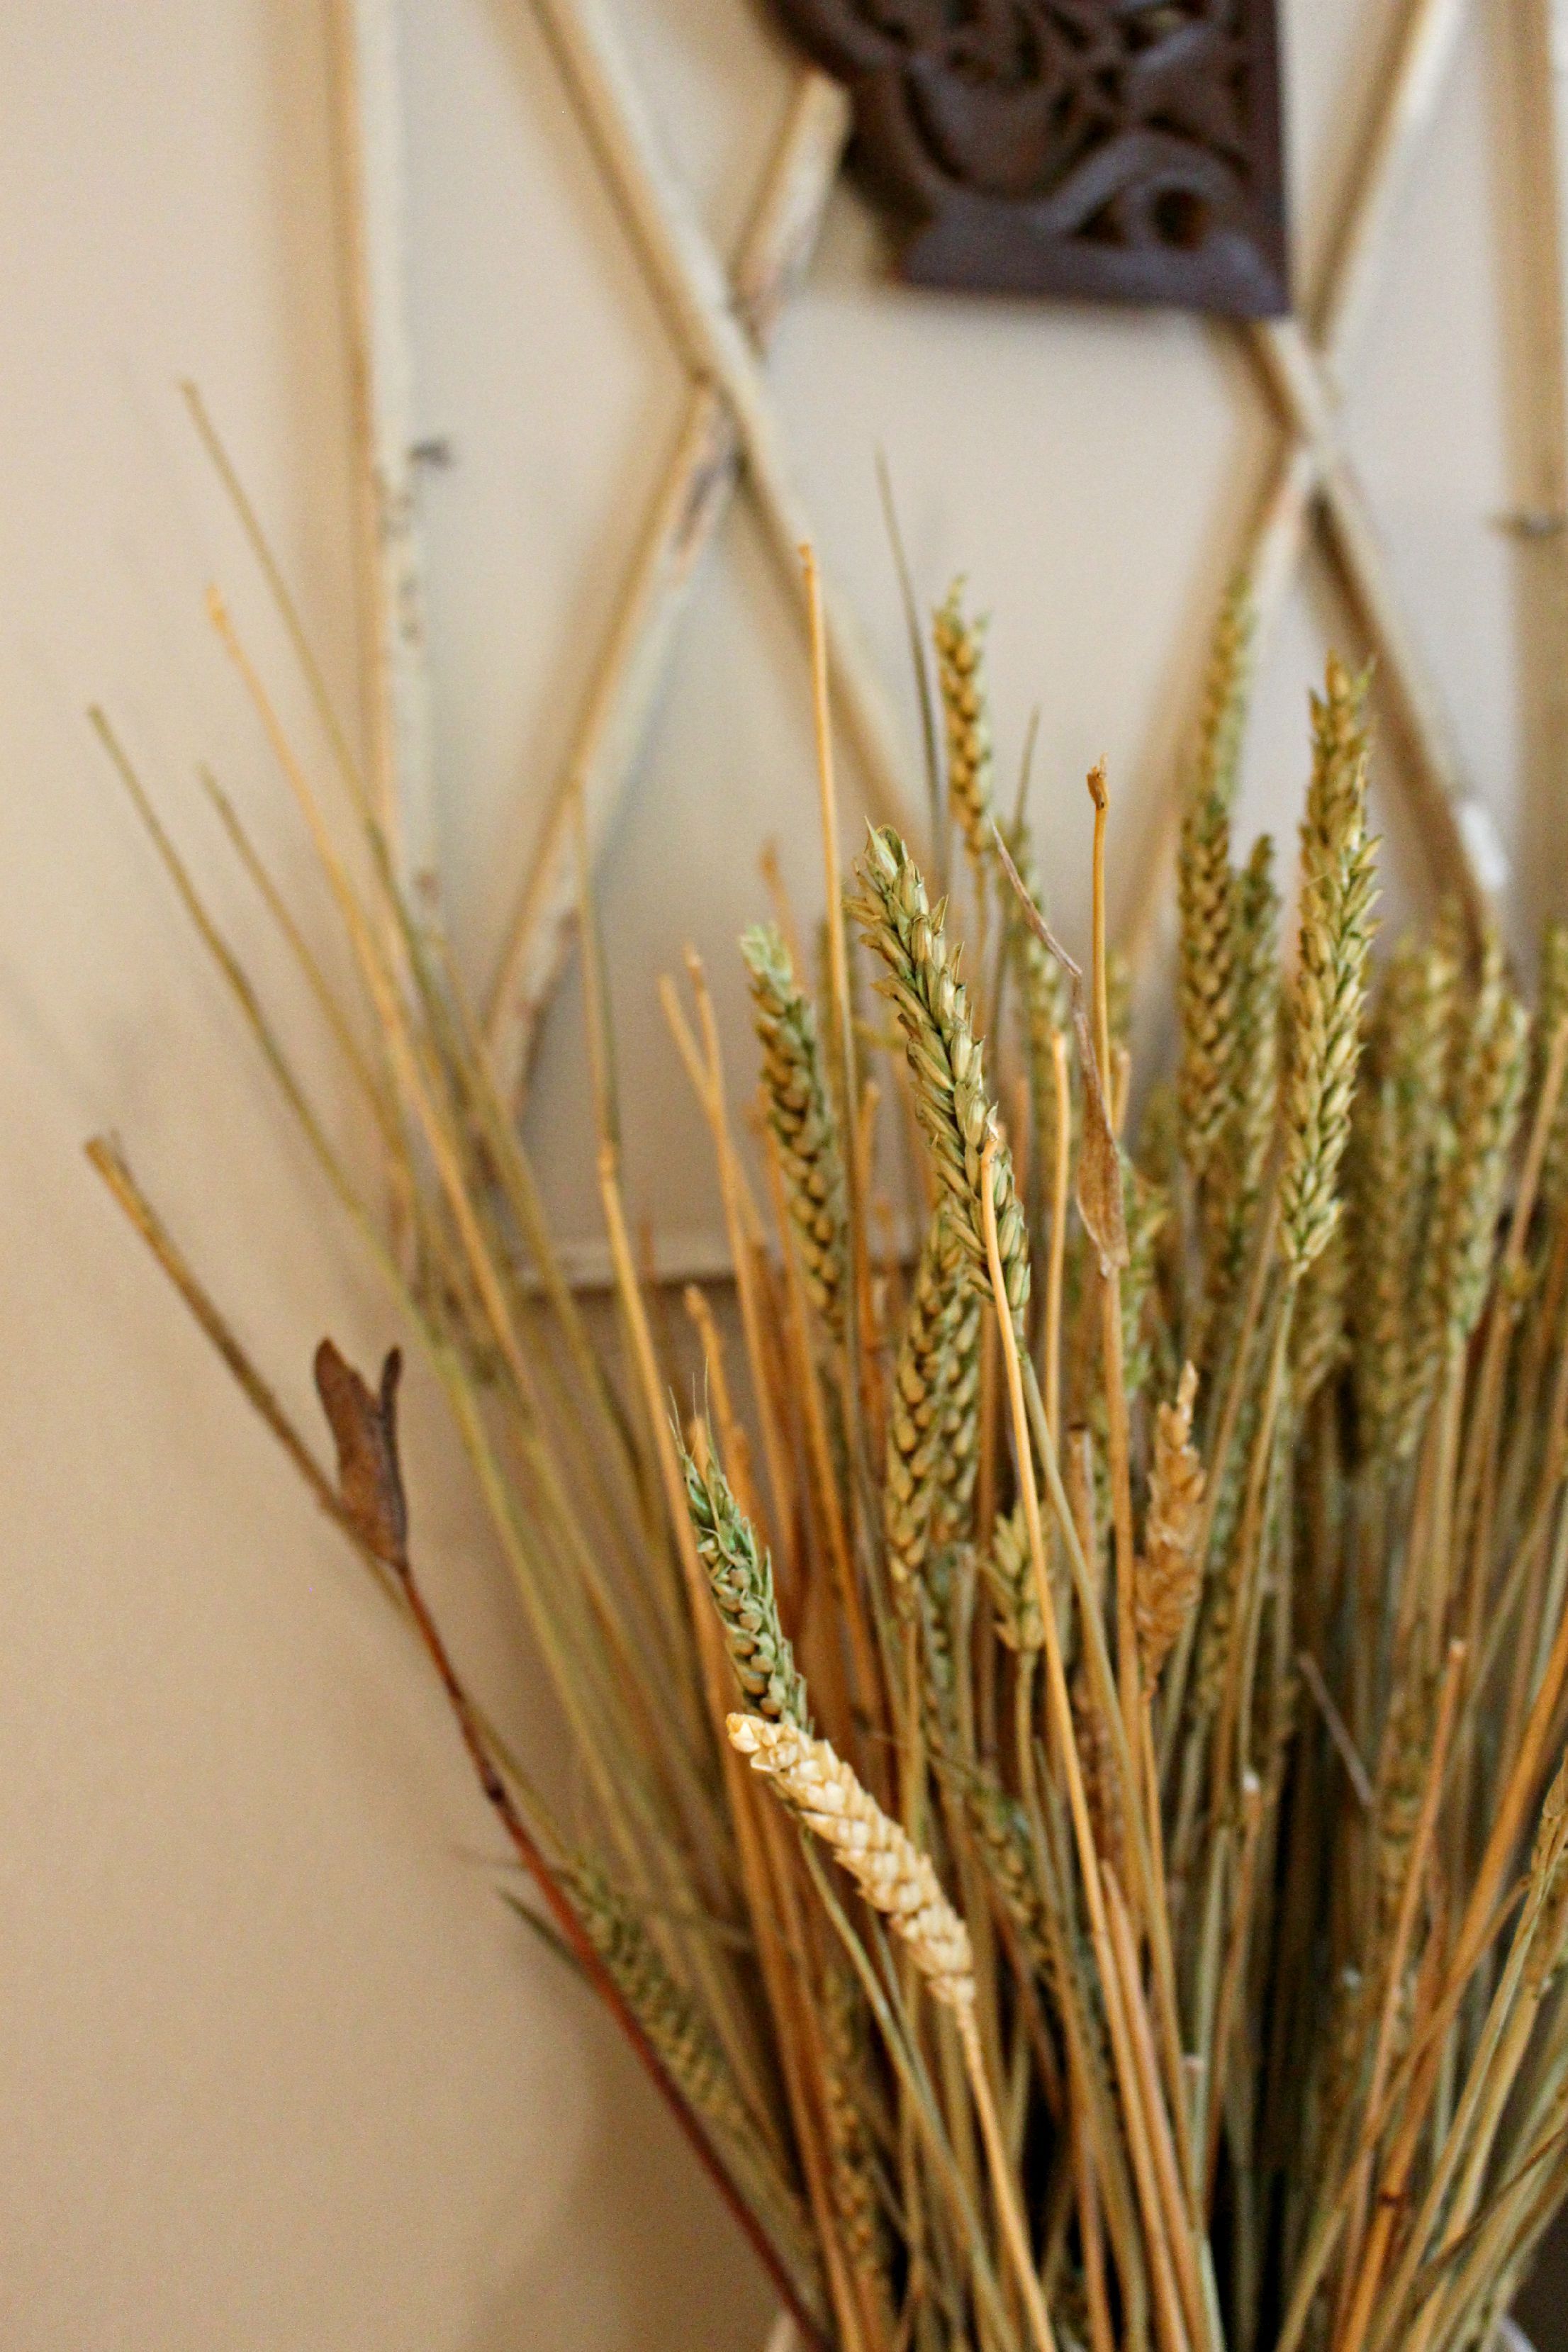
Wheat vase filler: Hobby Lobby
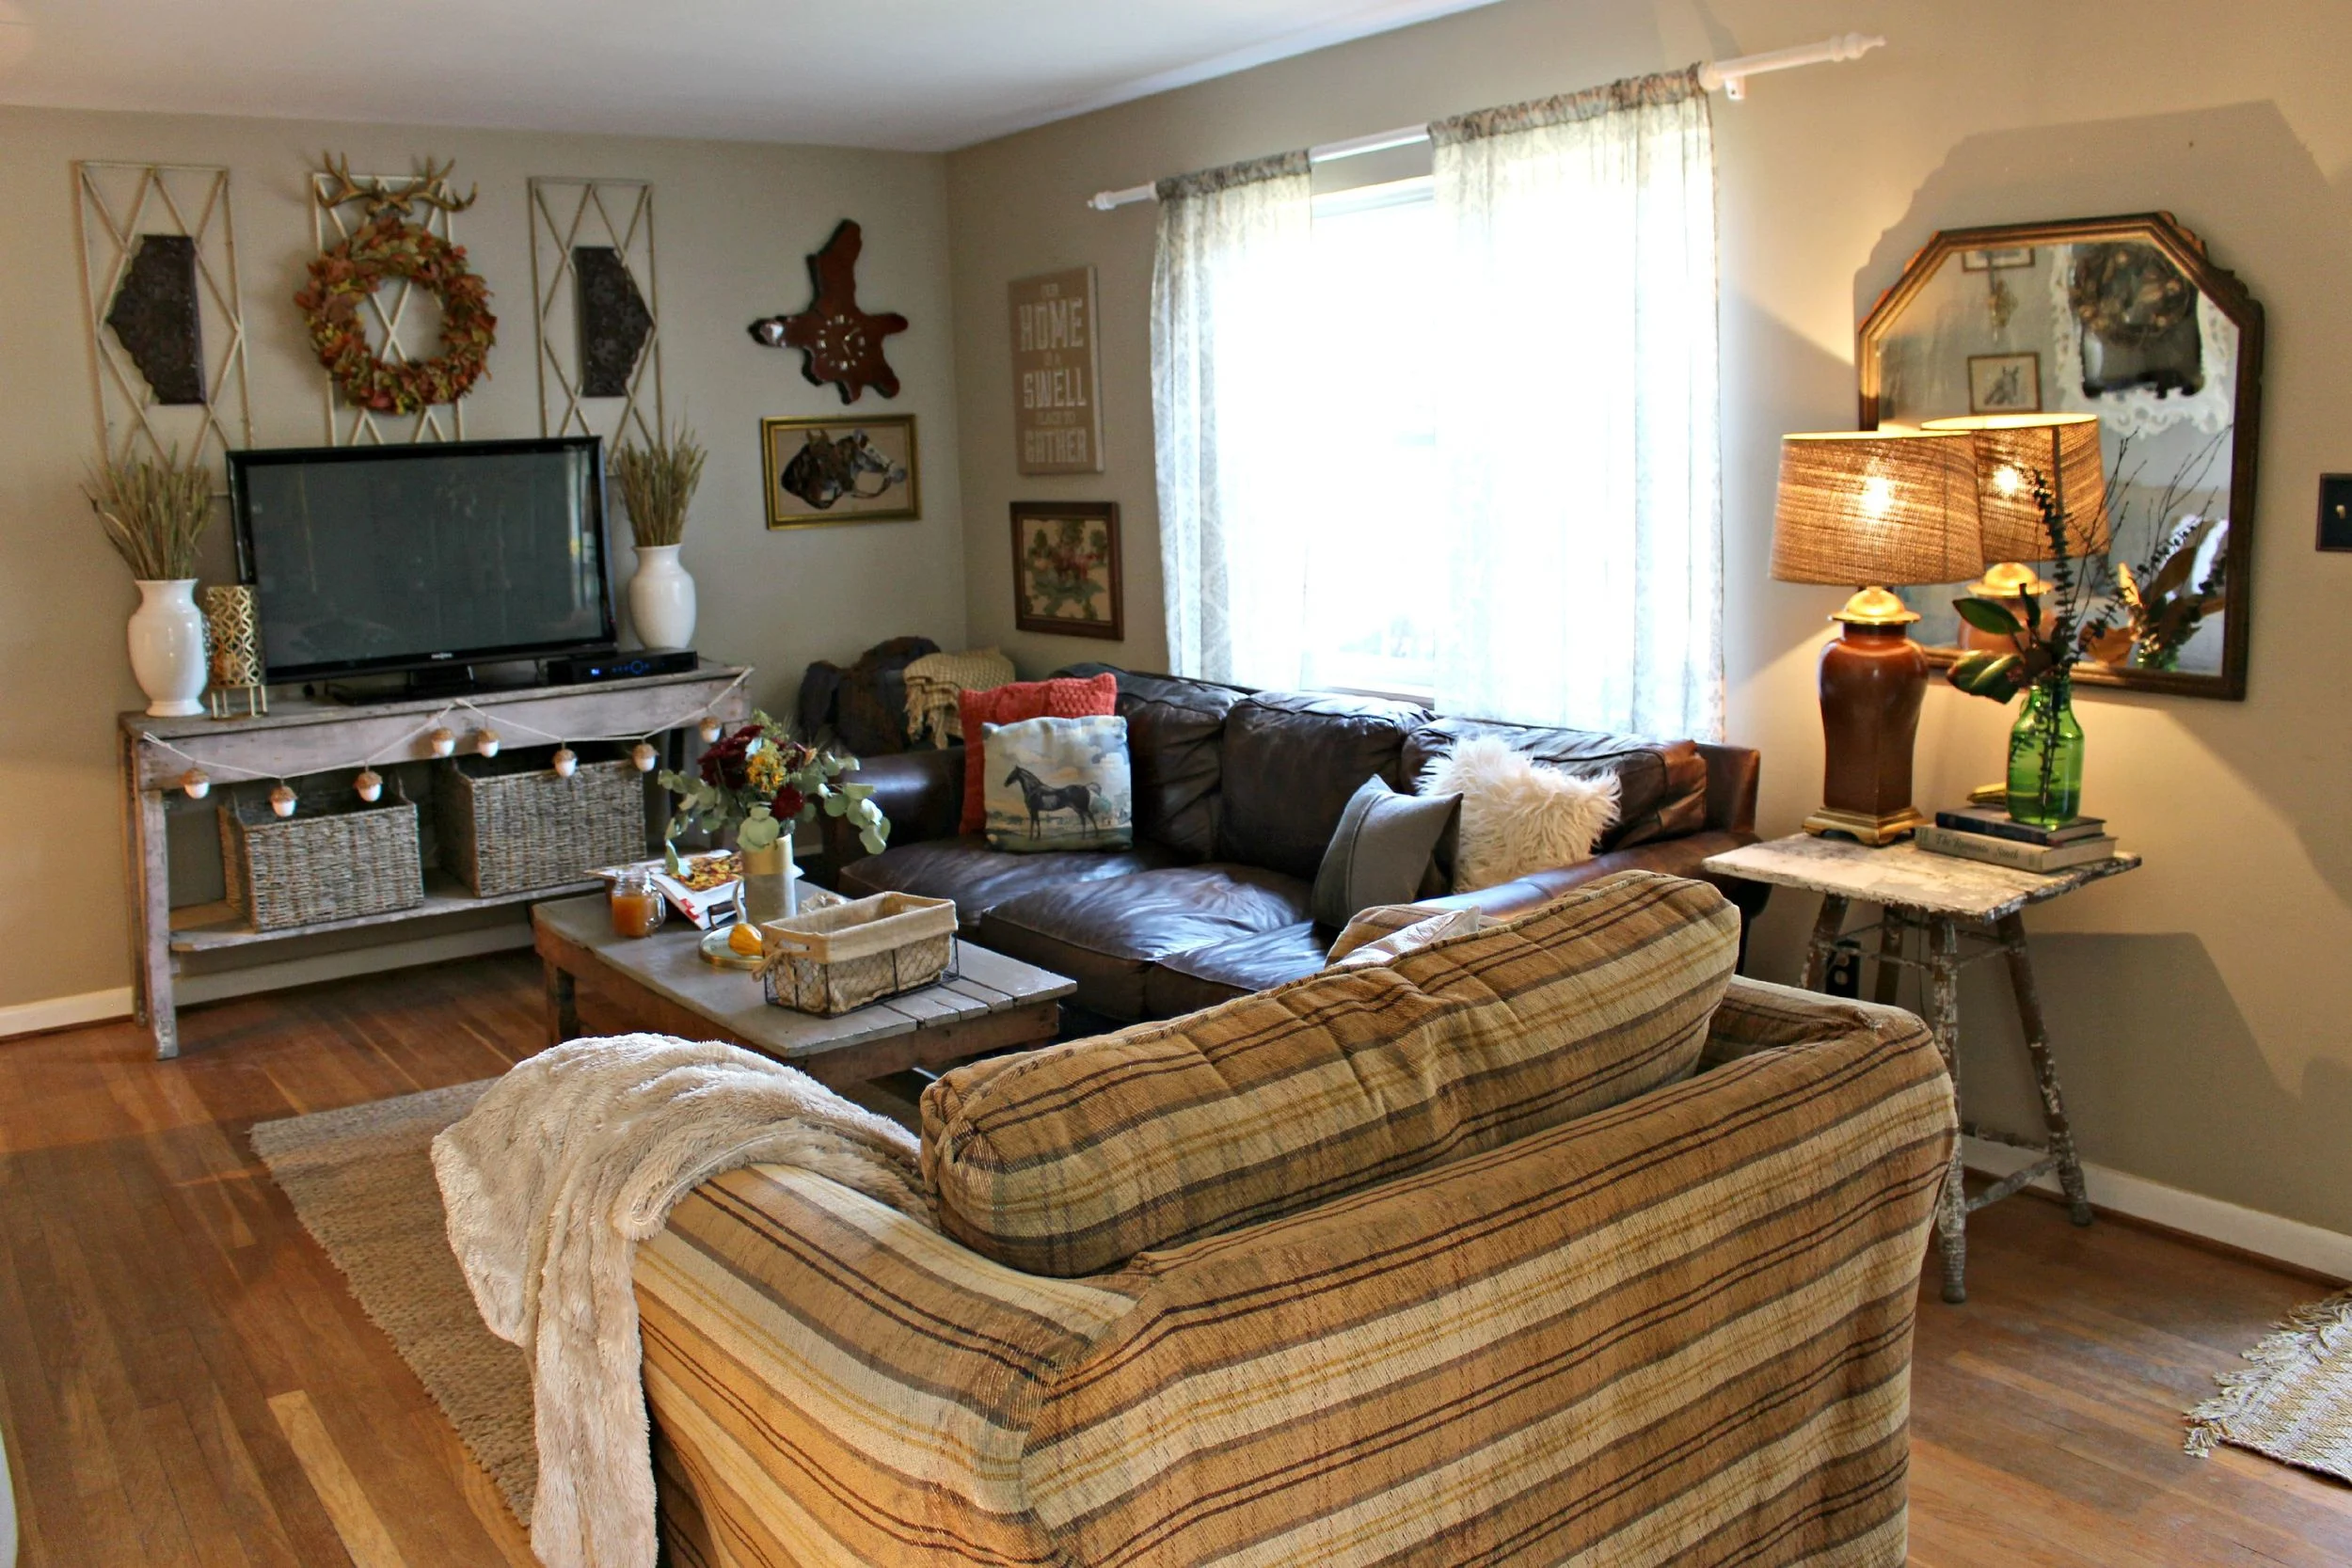
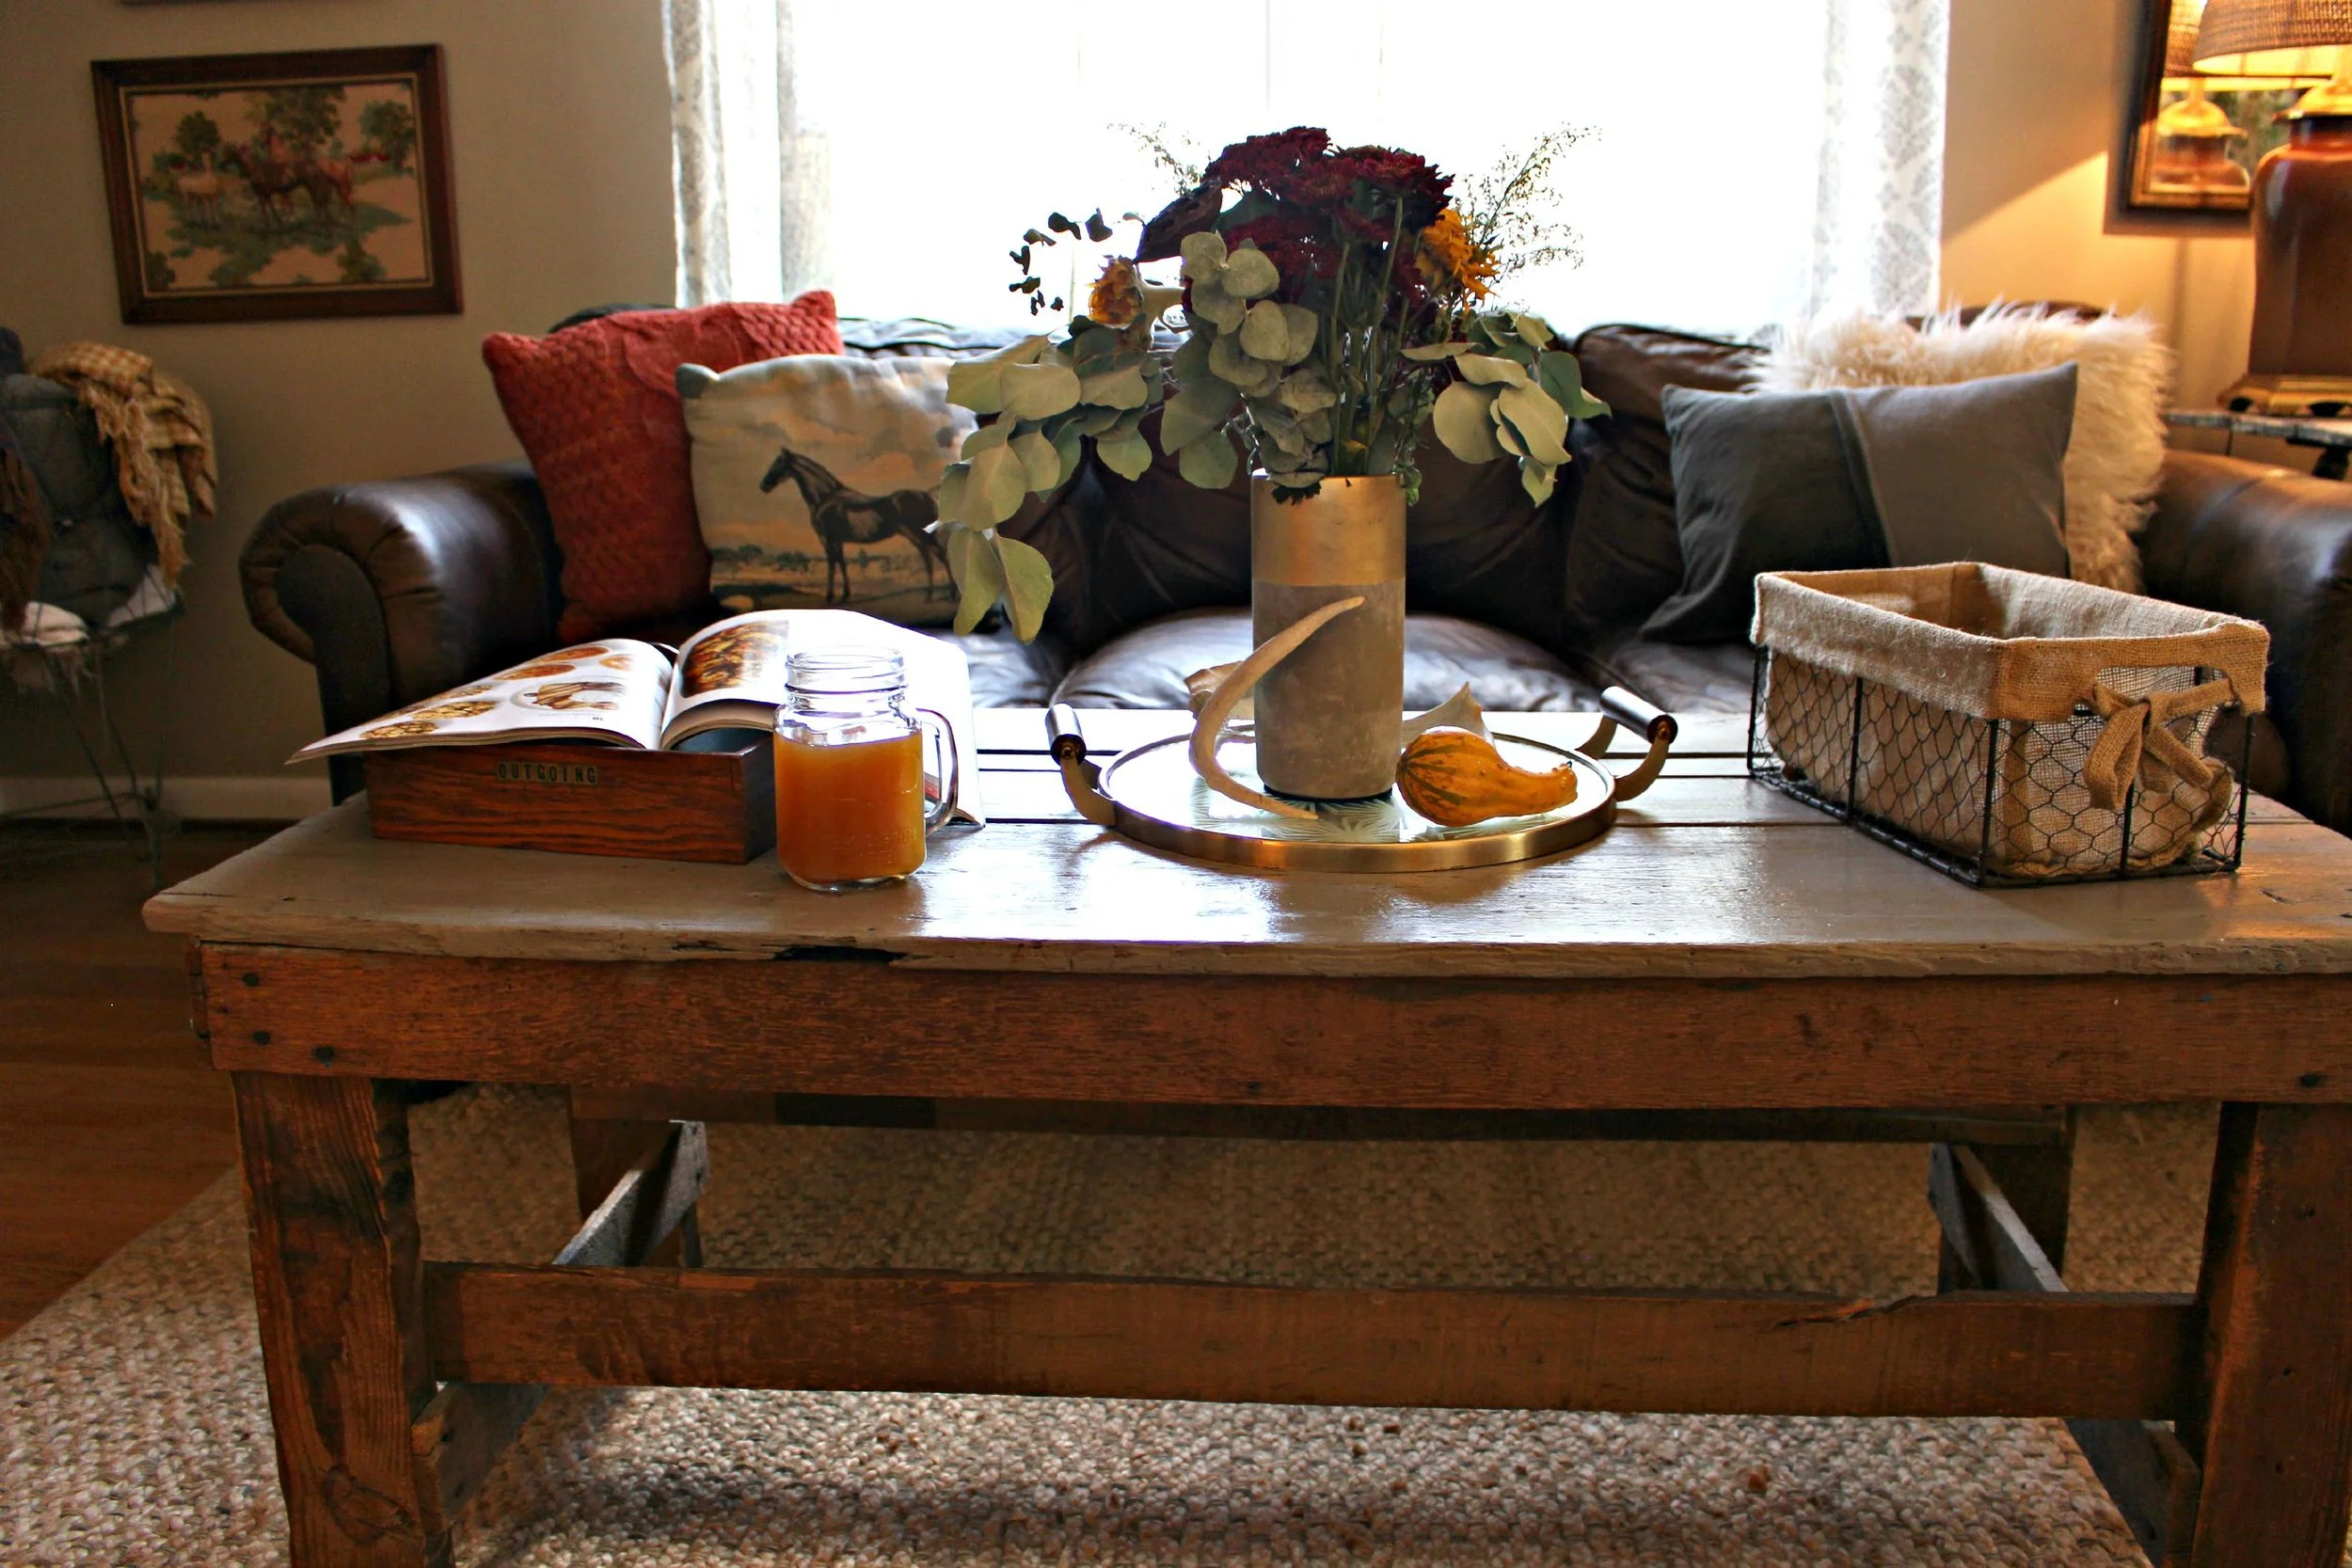
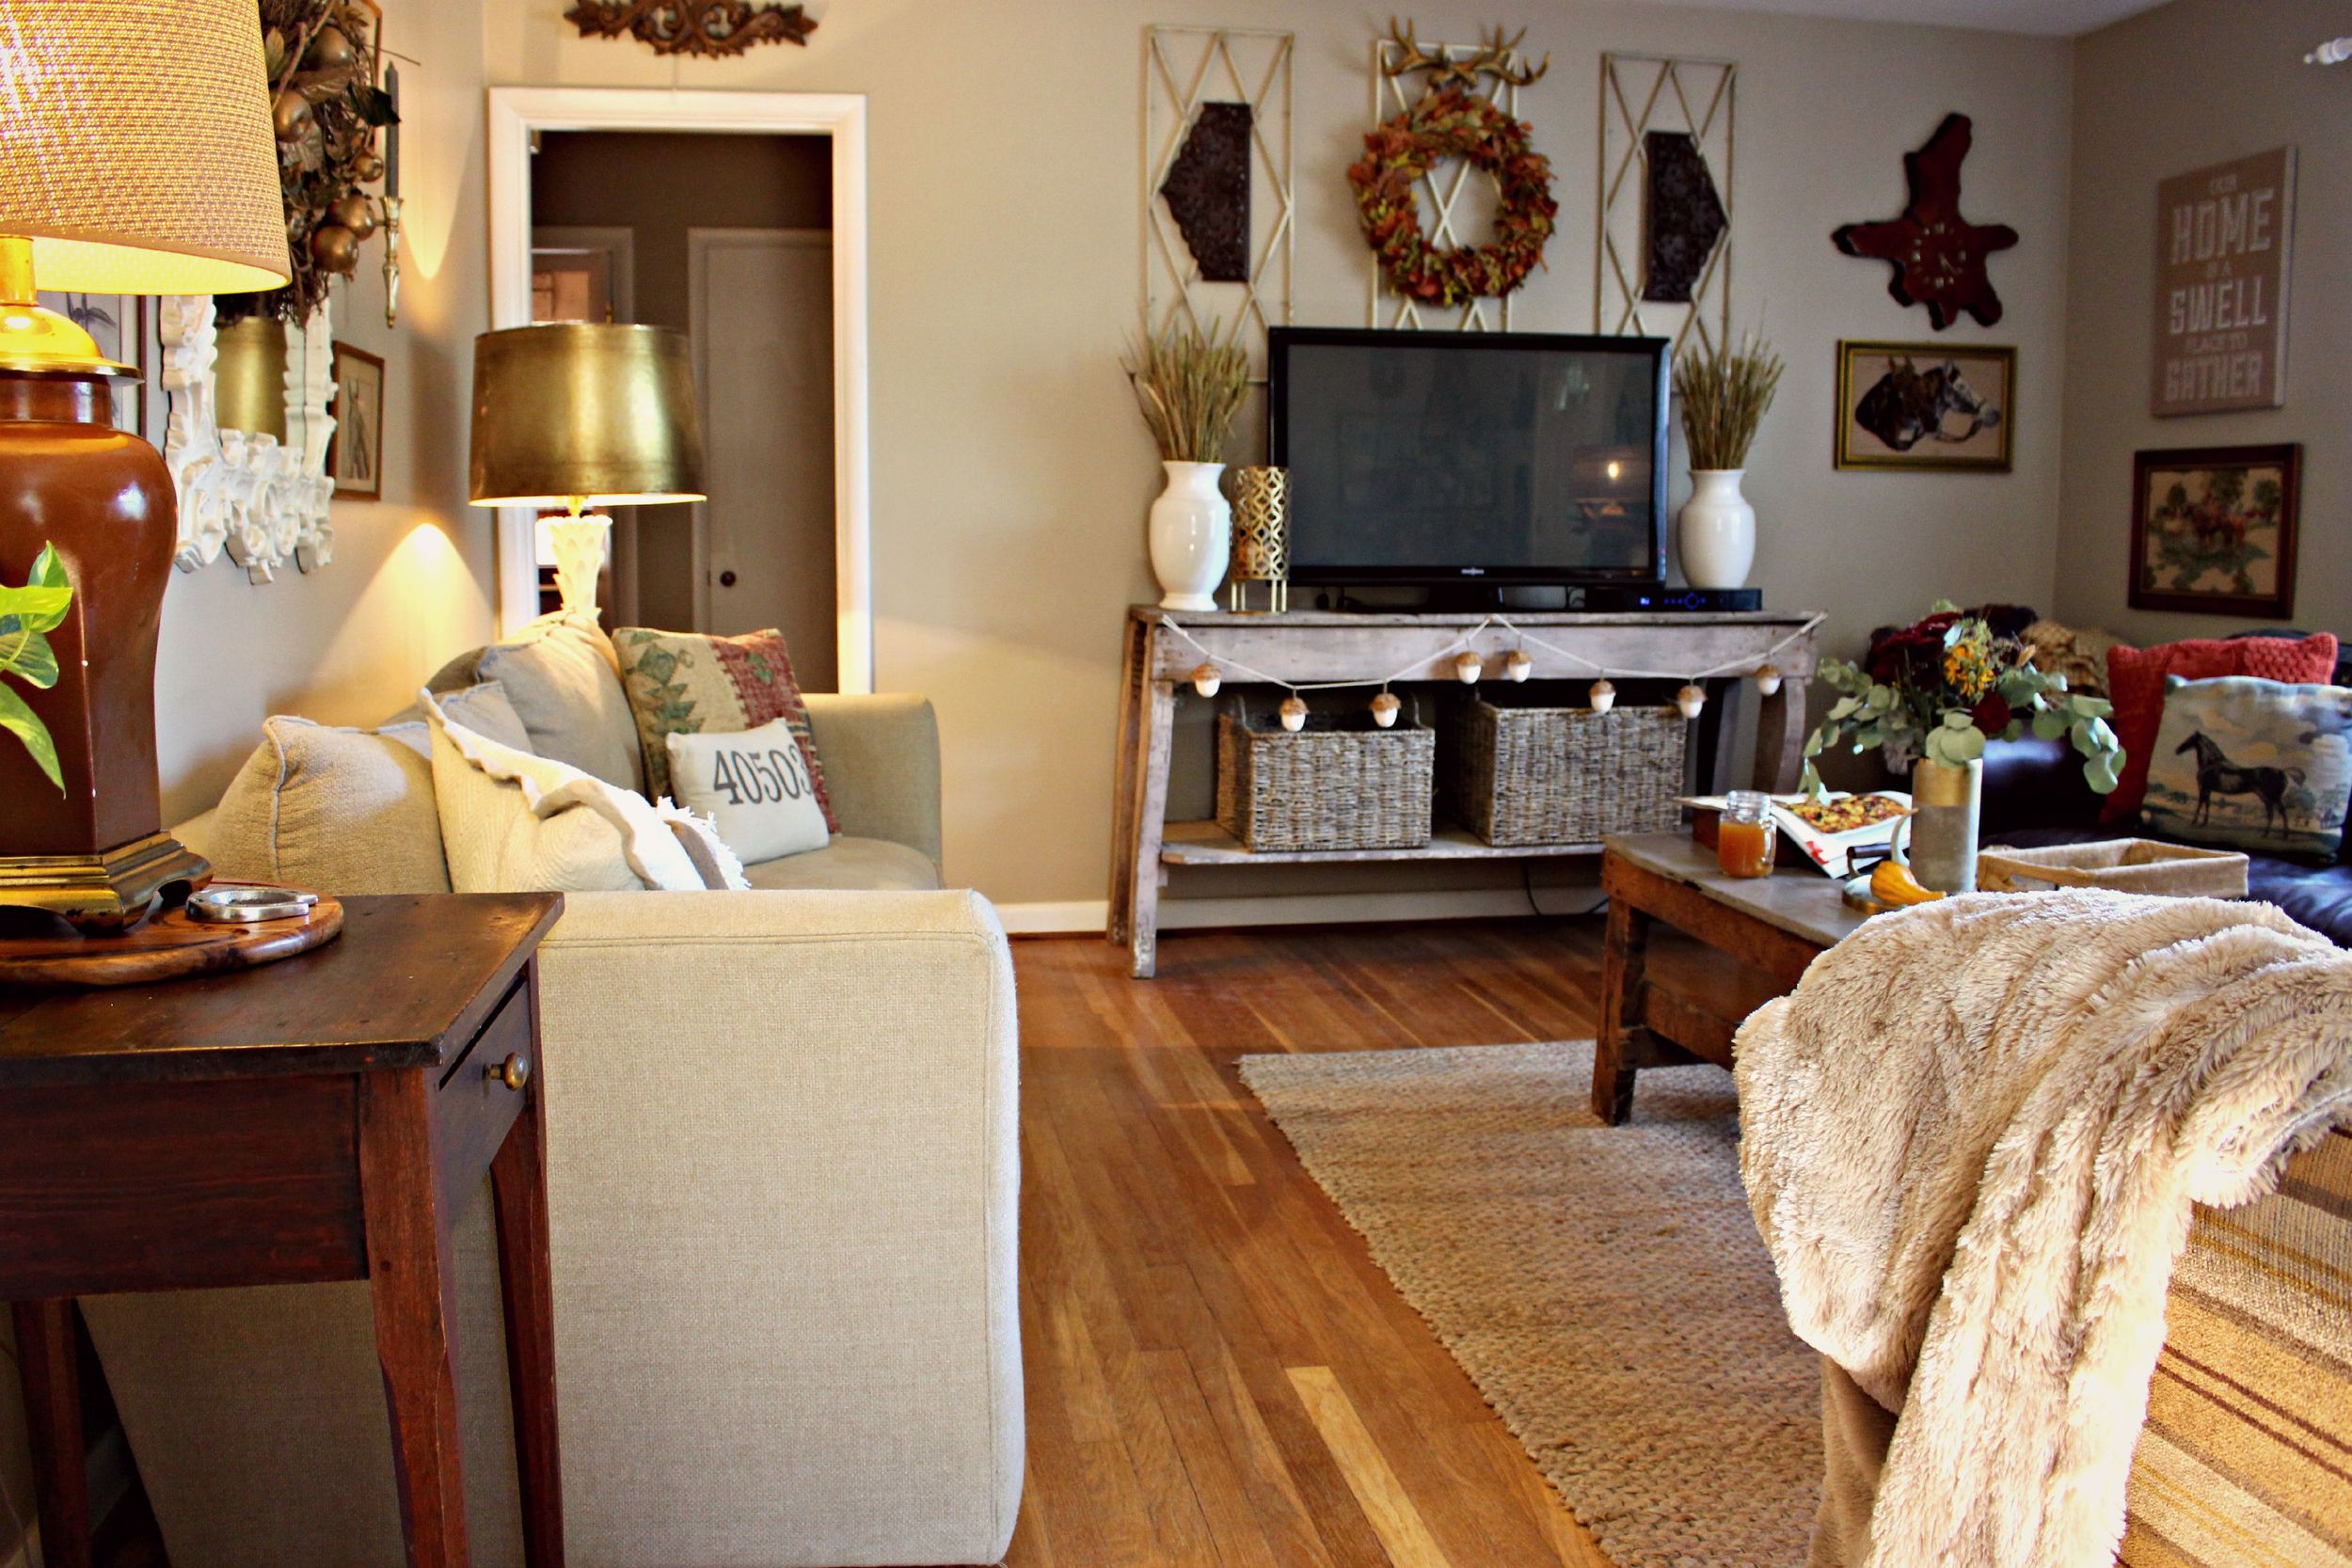
The Process: I start by pulling items that need to go from the room. Anything too summery or that won't match with the look. I will pack these things up in the empty tubs after I have removed all my fall decor from them. Next I start placing the items that I put in the same place every year. For example I always fill the white vases beside my television with wheat. I always hang a wreath above the television with the wooden leaf plaques on each side. Sometimes you might decide to change things up, but start by placing things that you know for sure where they are going. Next I start doing more involved areas like my shelves, which I sometimes have to switch around several times before I find what I like. Thankfully this room is pretty easy for fall because I already have a lot of fall colors and horse items that can work with the theme. I like to switch out pillows with each season and add more knits and textures for fall. I keep a stock pile of pillows (also in my attic). Basically any time I see a pillow that I like on sale or clearance, or while thrifitng, I buy it. Even if I can't use it right away, I might use it somewhere for my holiday decor, or I might use it when I redecorate something in the future! I complete the decorating process with finishing touches like the pumpkins, gourds, and flowers. I try to change every part of the room up just slightly so that it feels fresh and new.
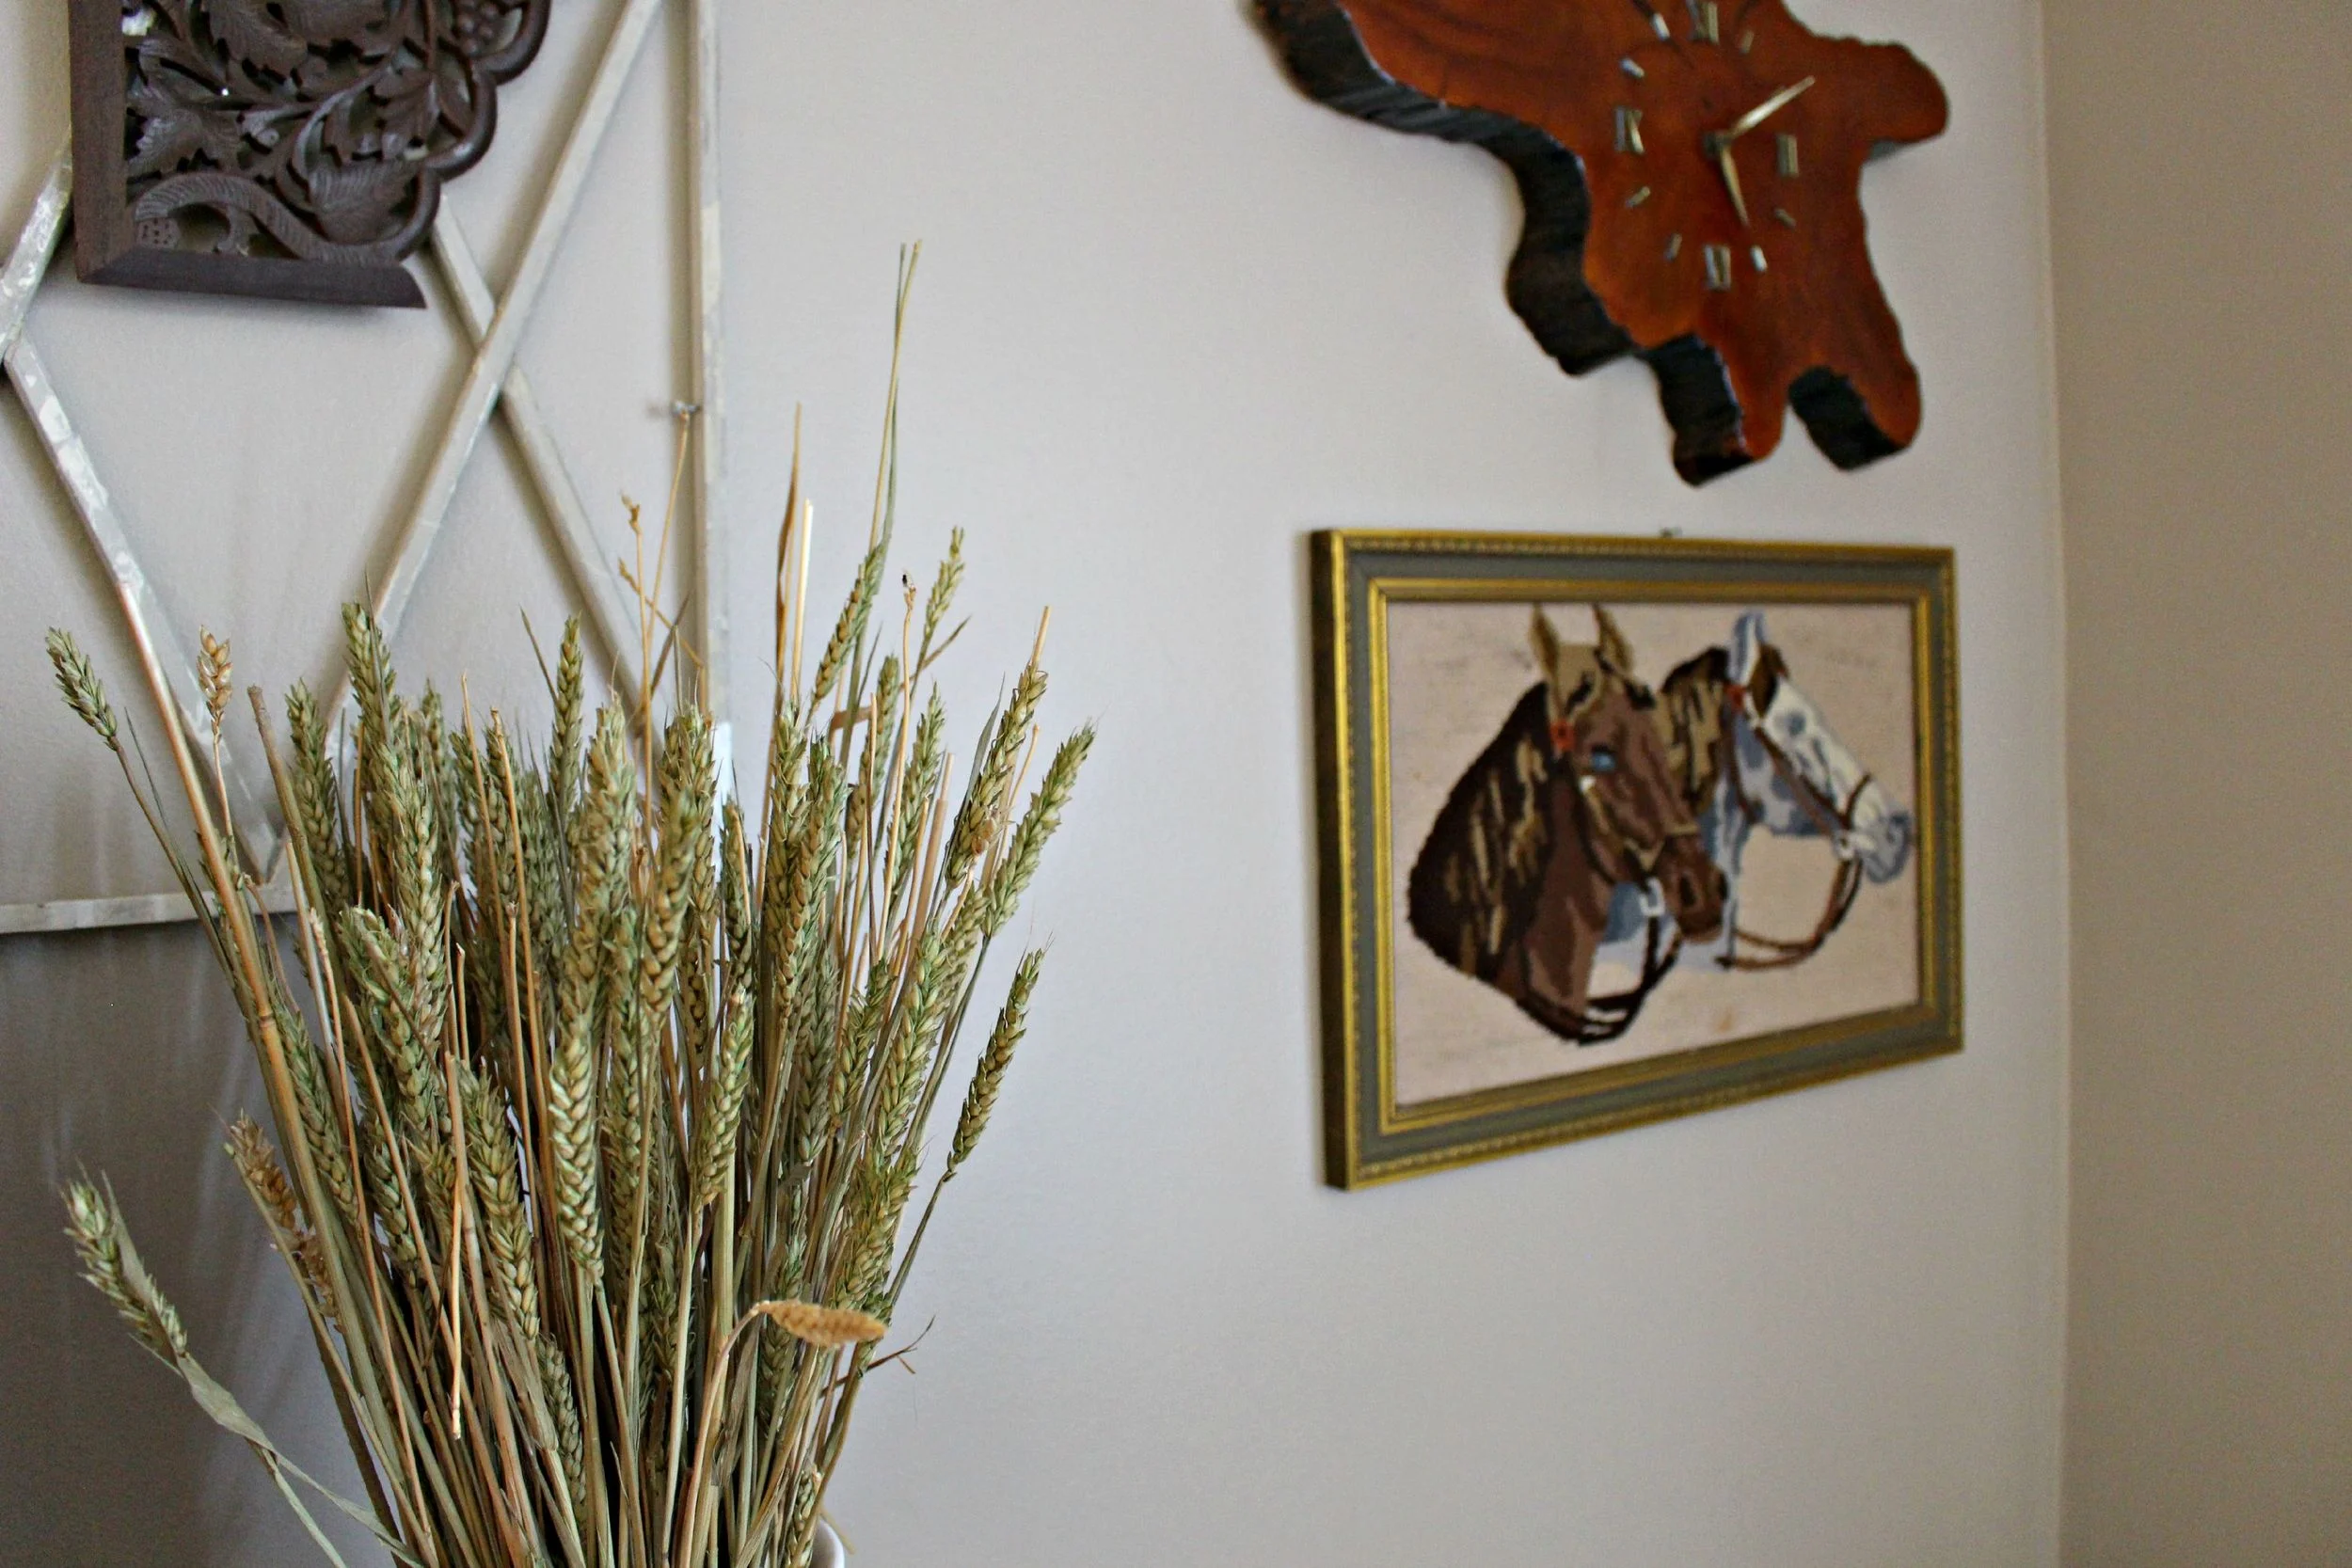
vintage cypress clock: vintage/thrifted (similar here) | vintage horse pictures: thrifted
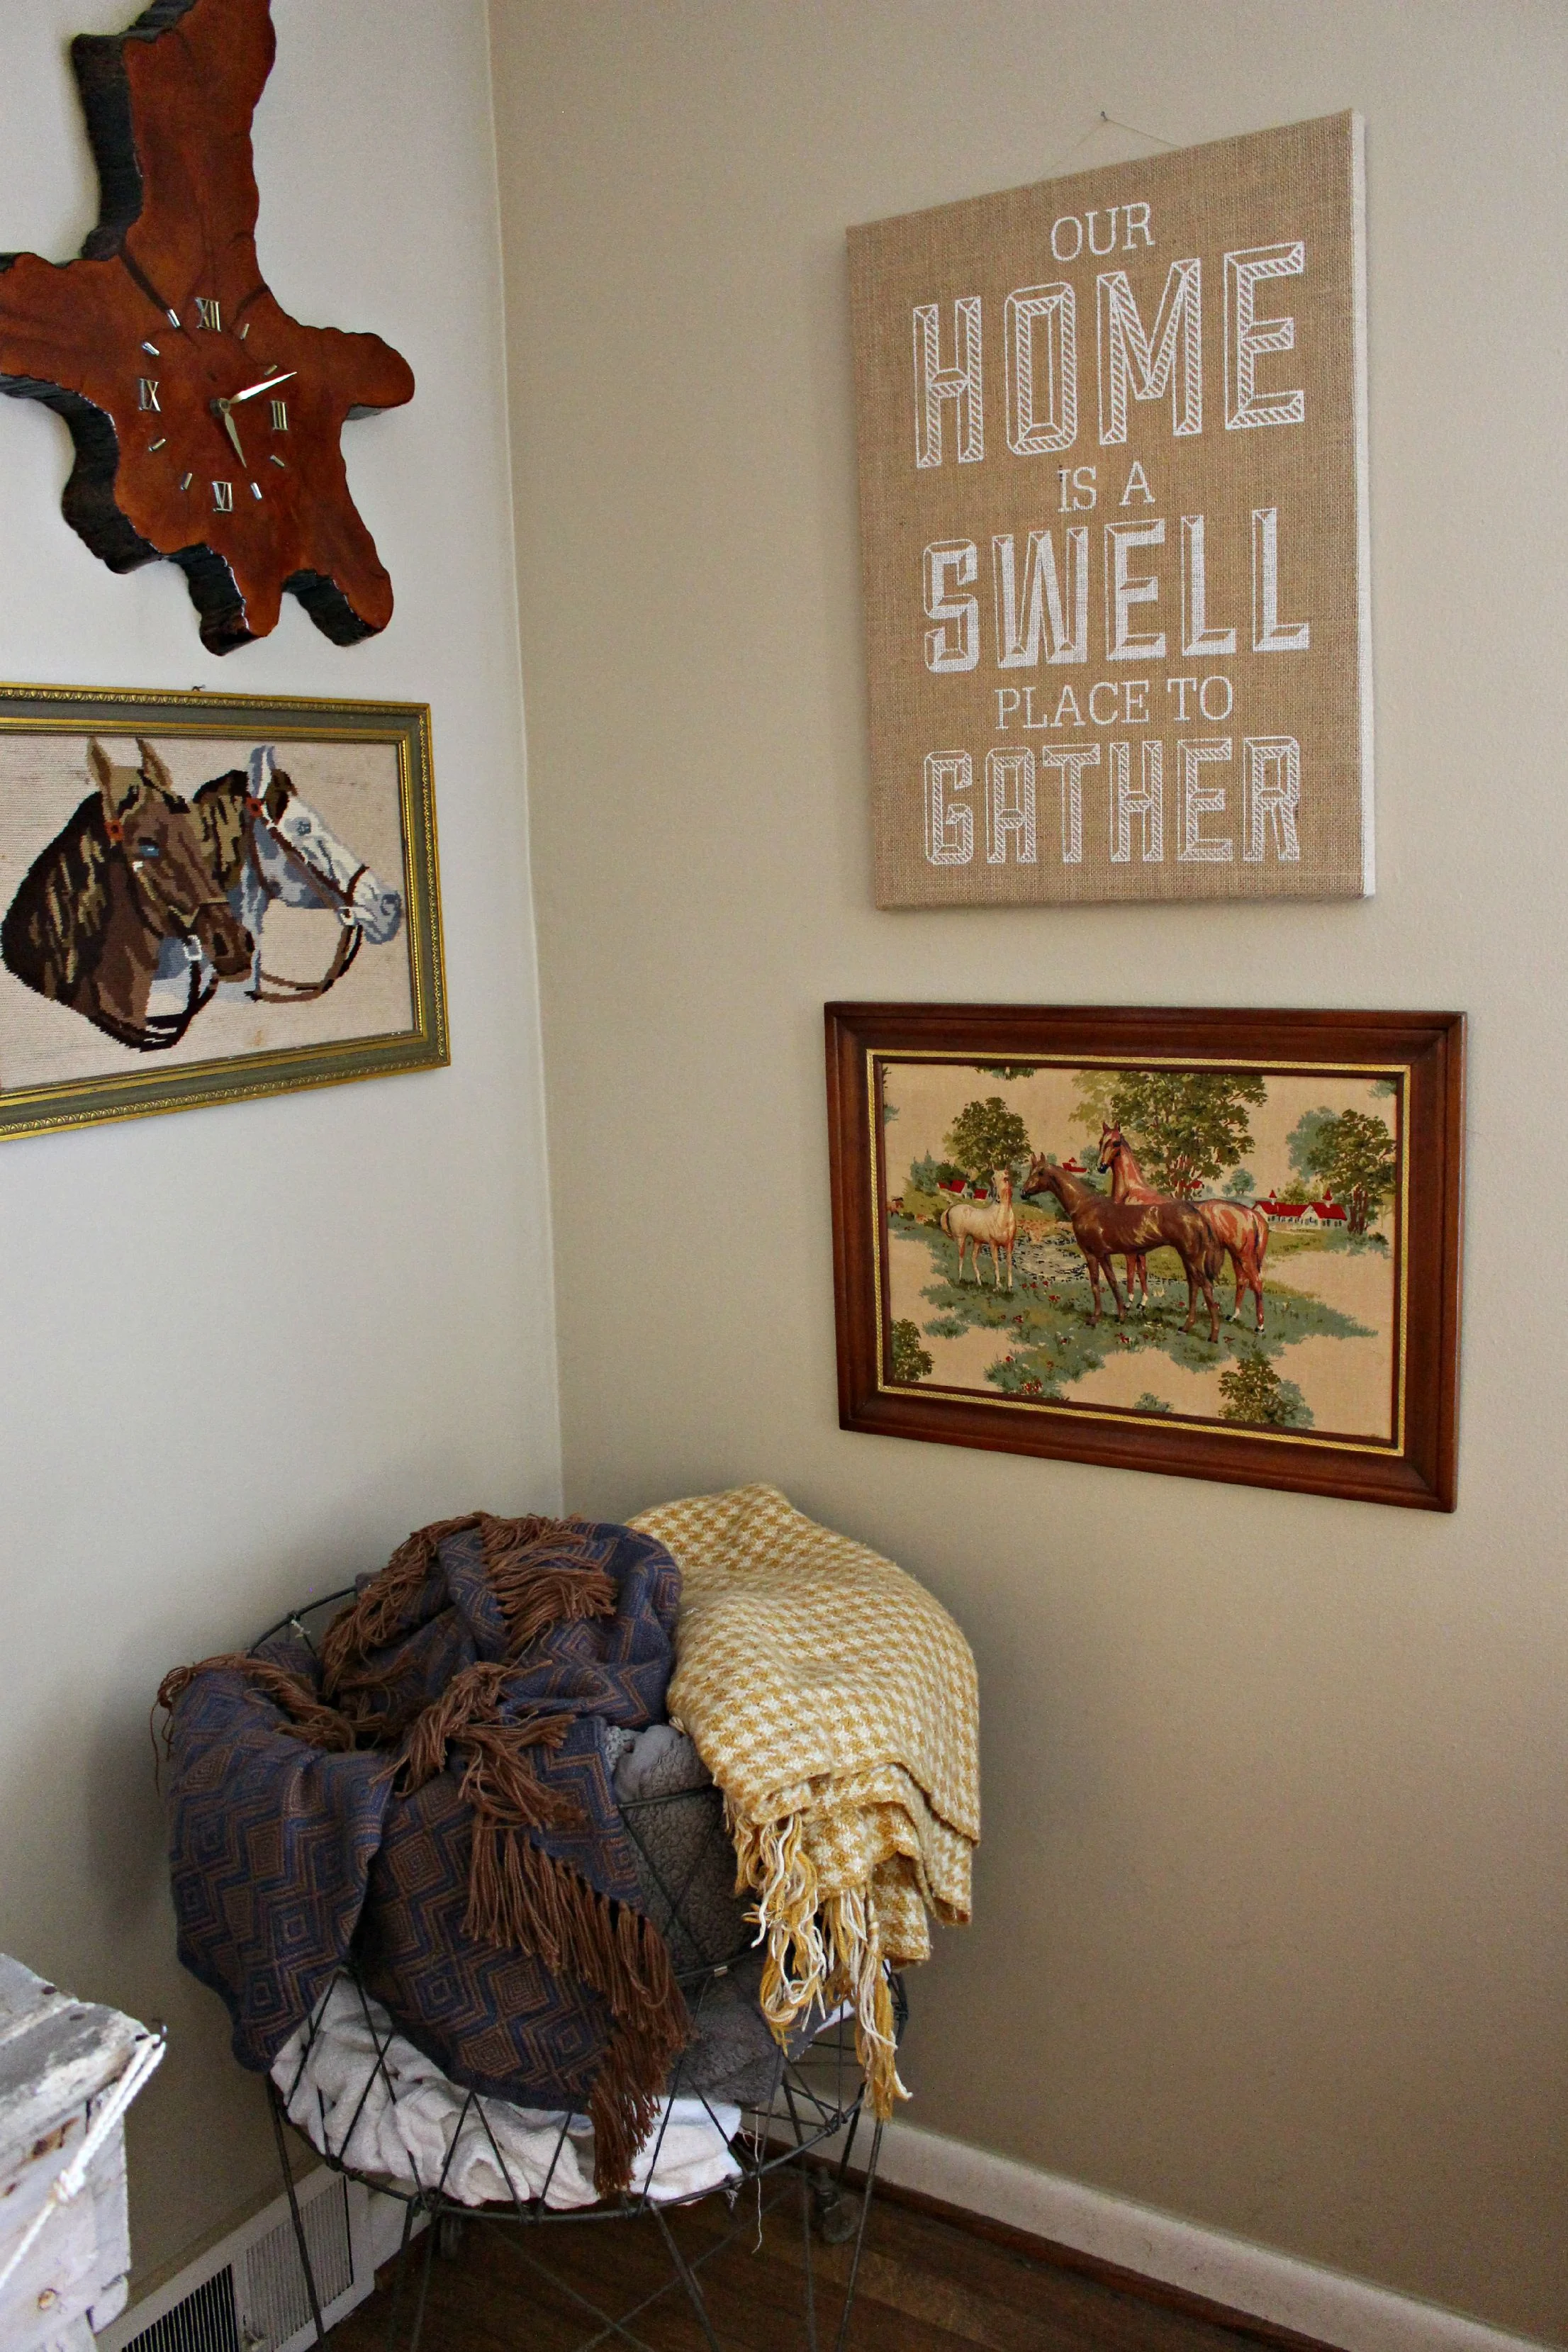
Horse pictures + clock: thrifted | blankets: Target + thrifted | metal rolling basket: thrifted | "Our Home is a Swell Place to Gather": Target via Bargain Hunt
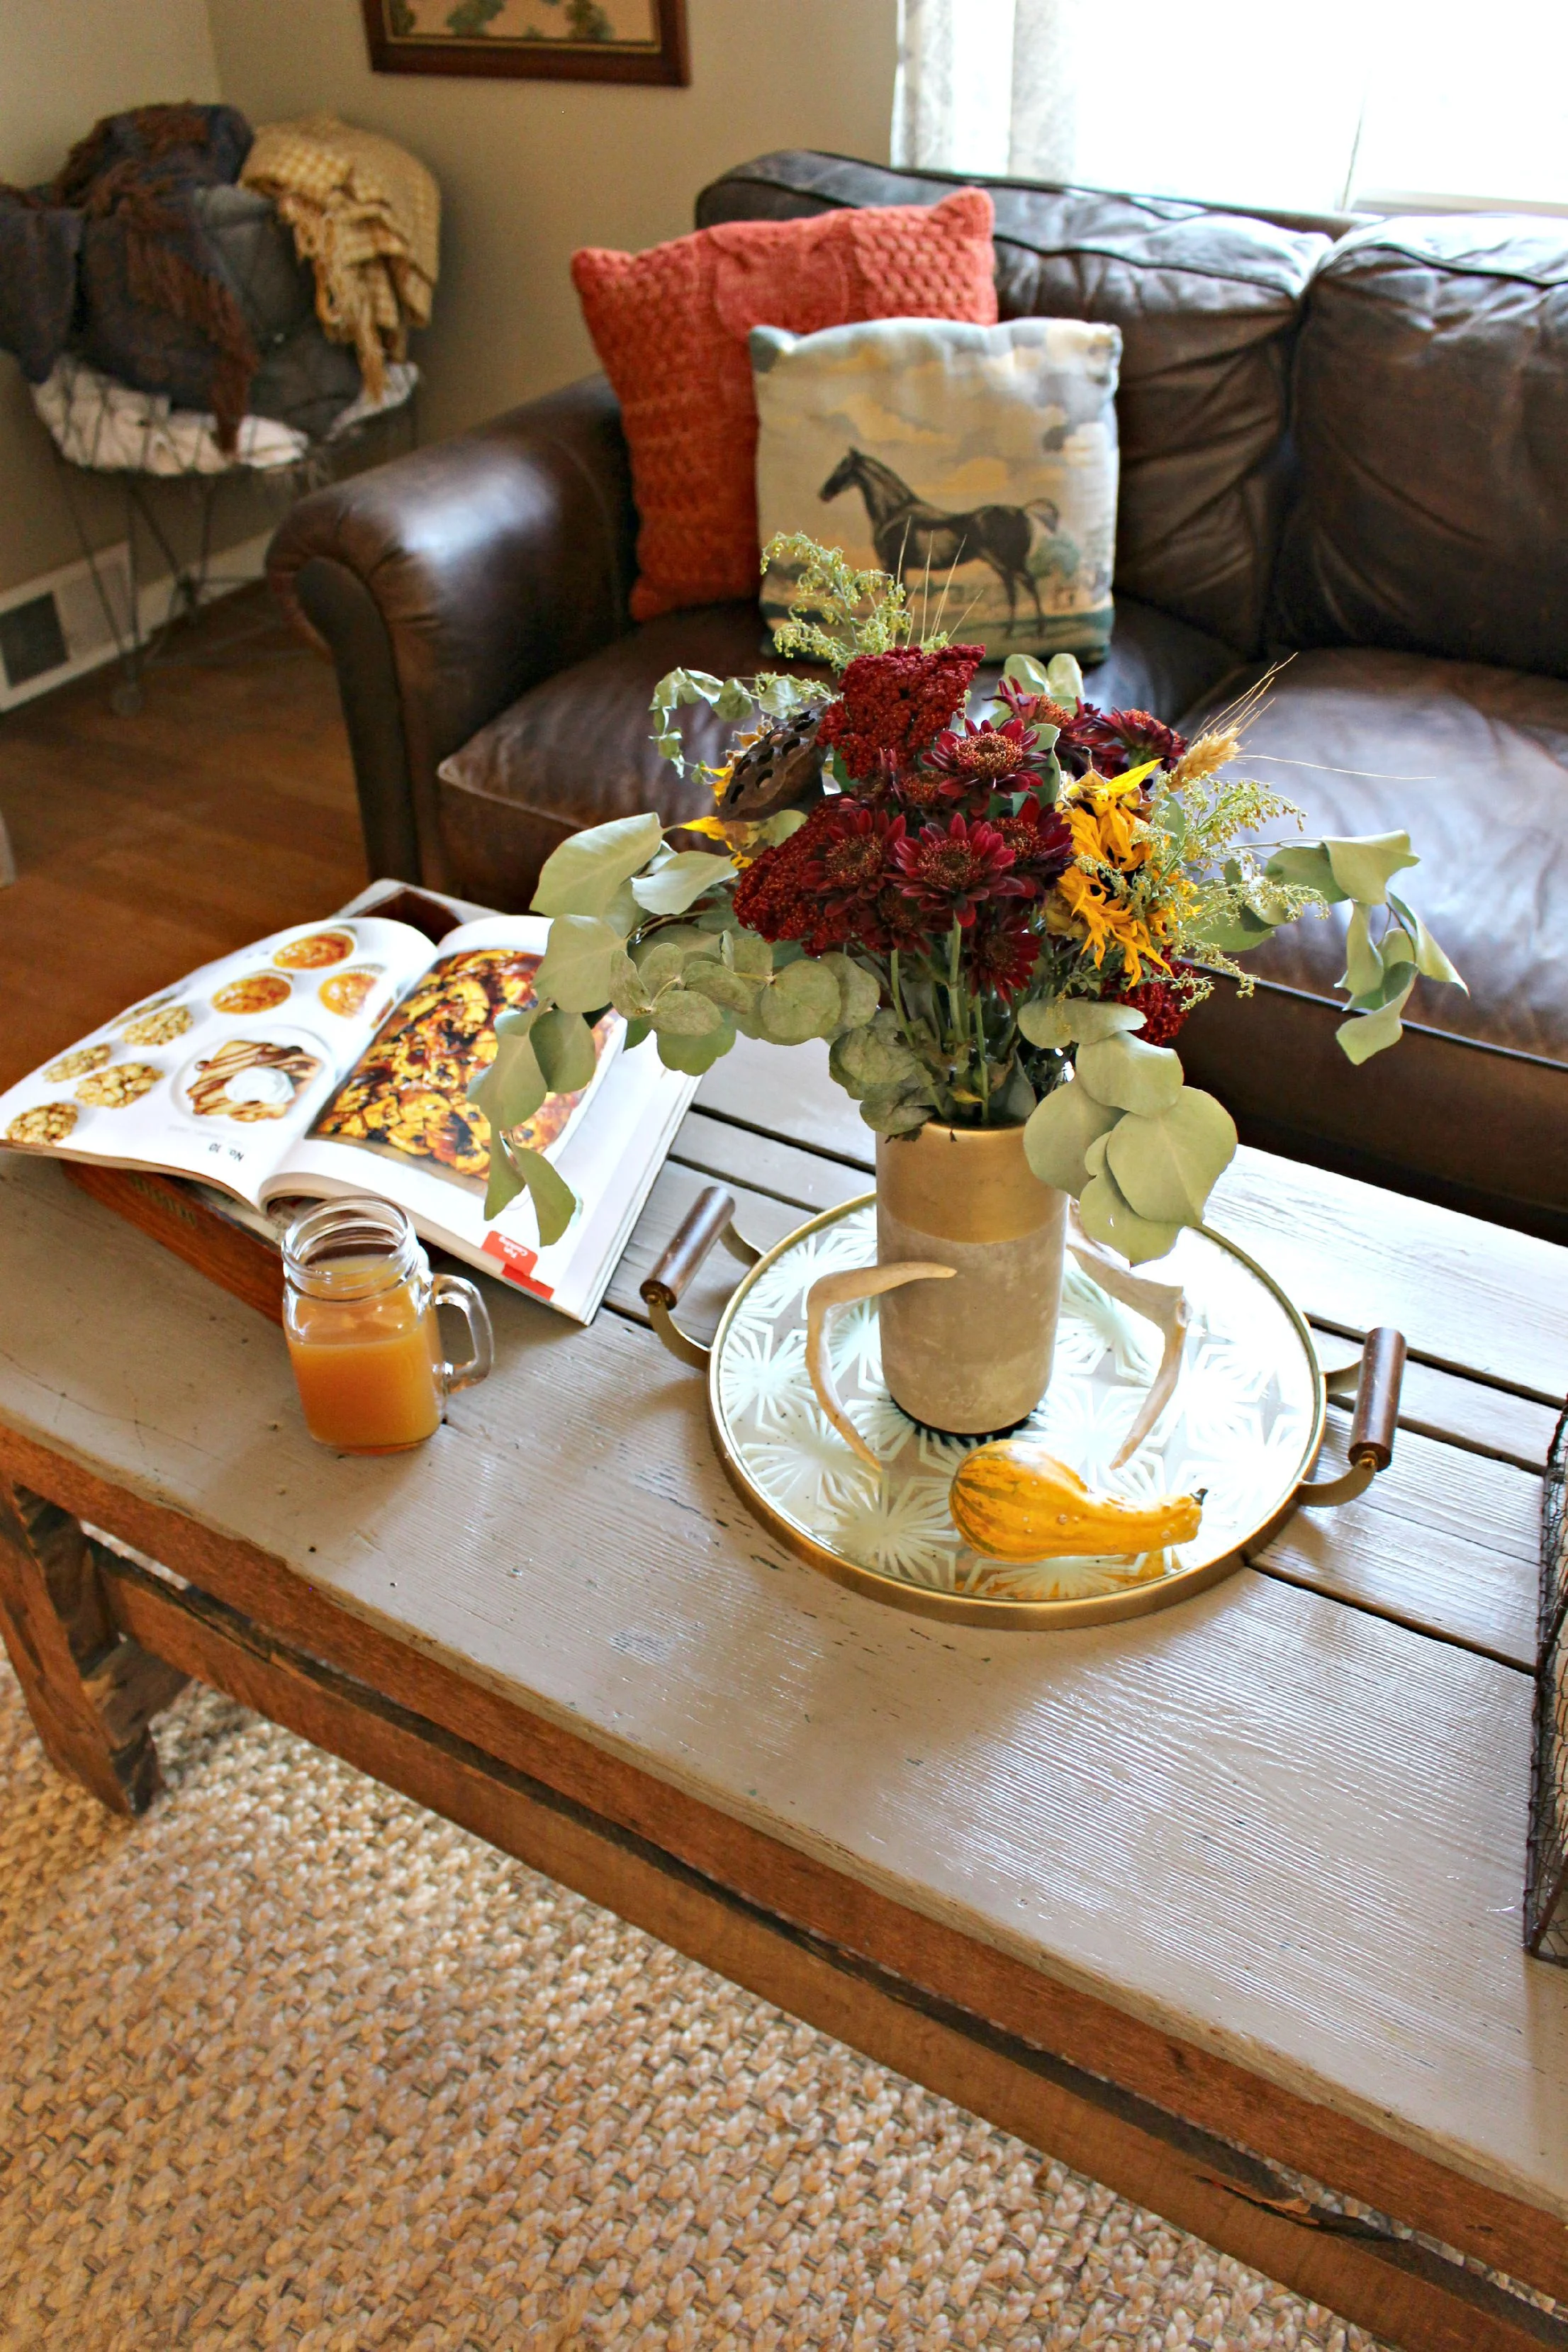
Orange knit pillow: Target | Horse pillow: vintage/thrifted | Mirror tray: Target (old)
Gold fruit wreath: thrifted + spray painted
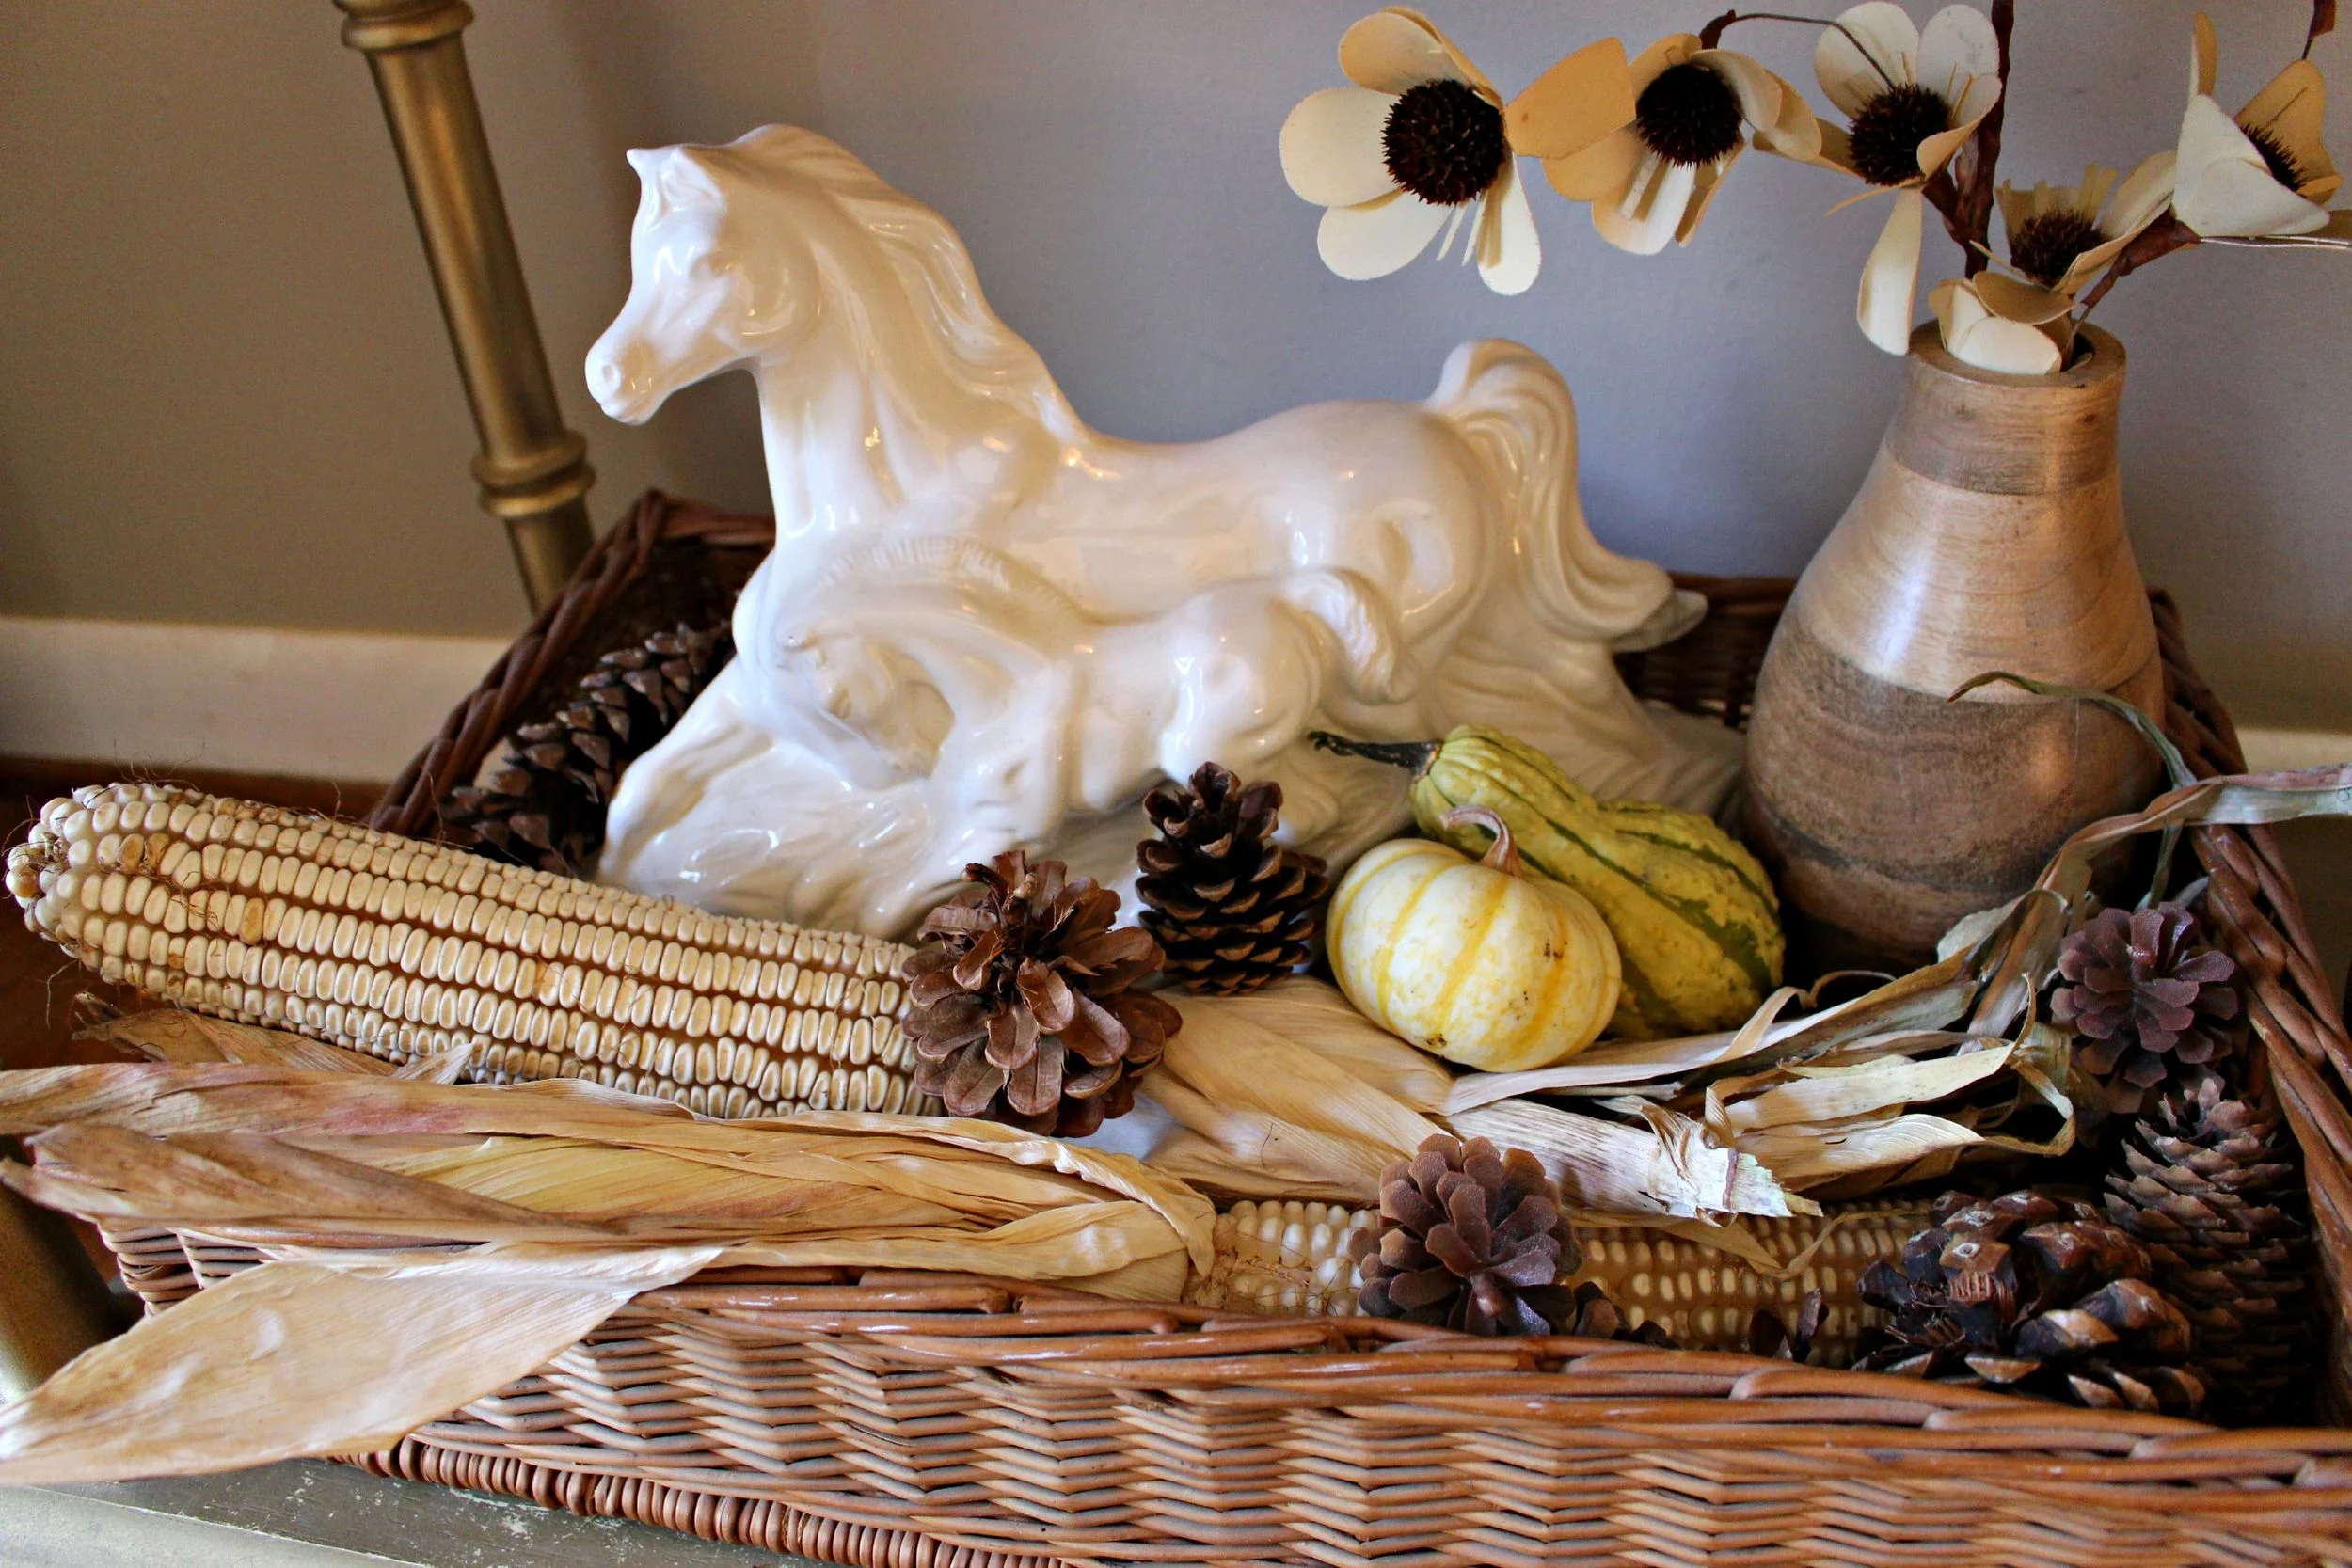
All thrifted | Indian corn + squash is from the farmer's market
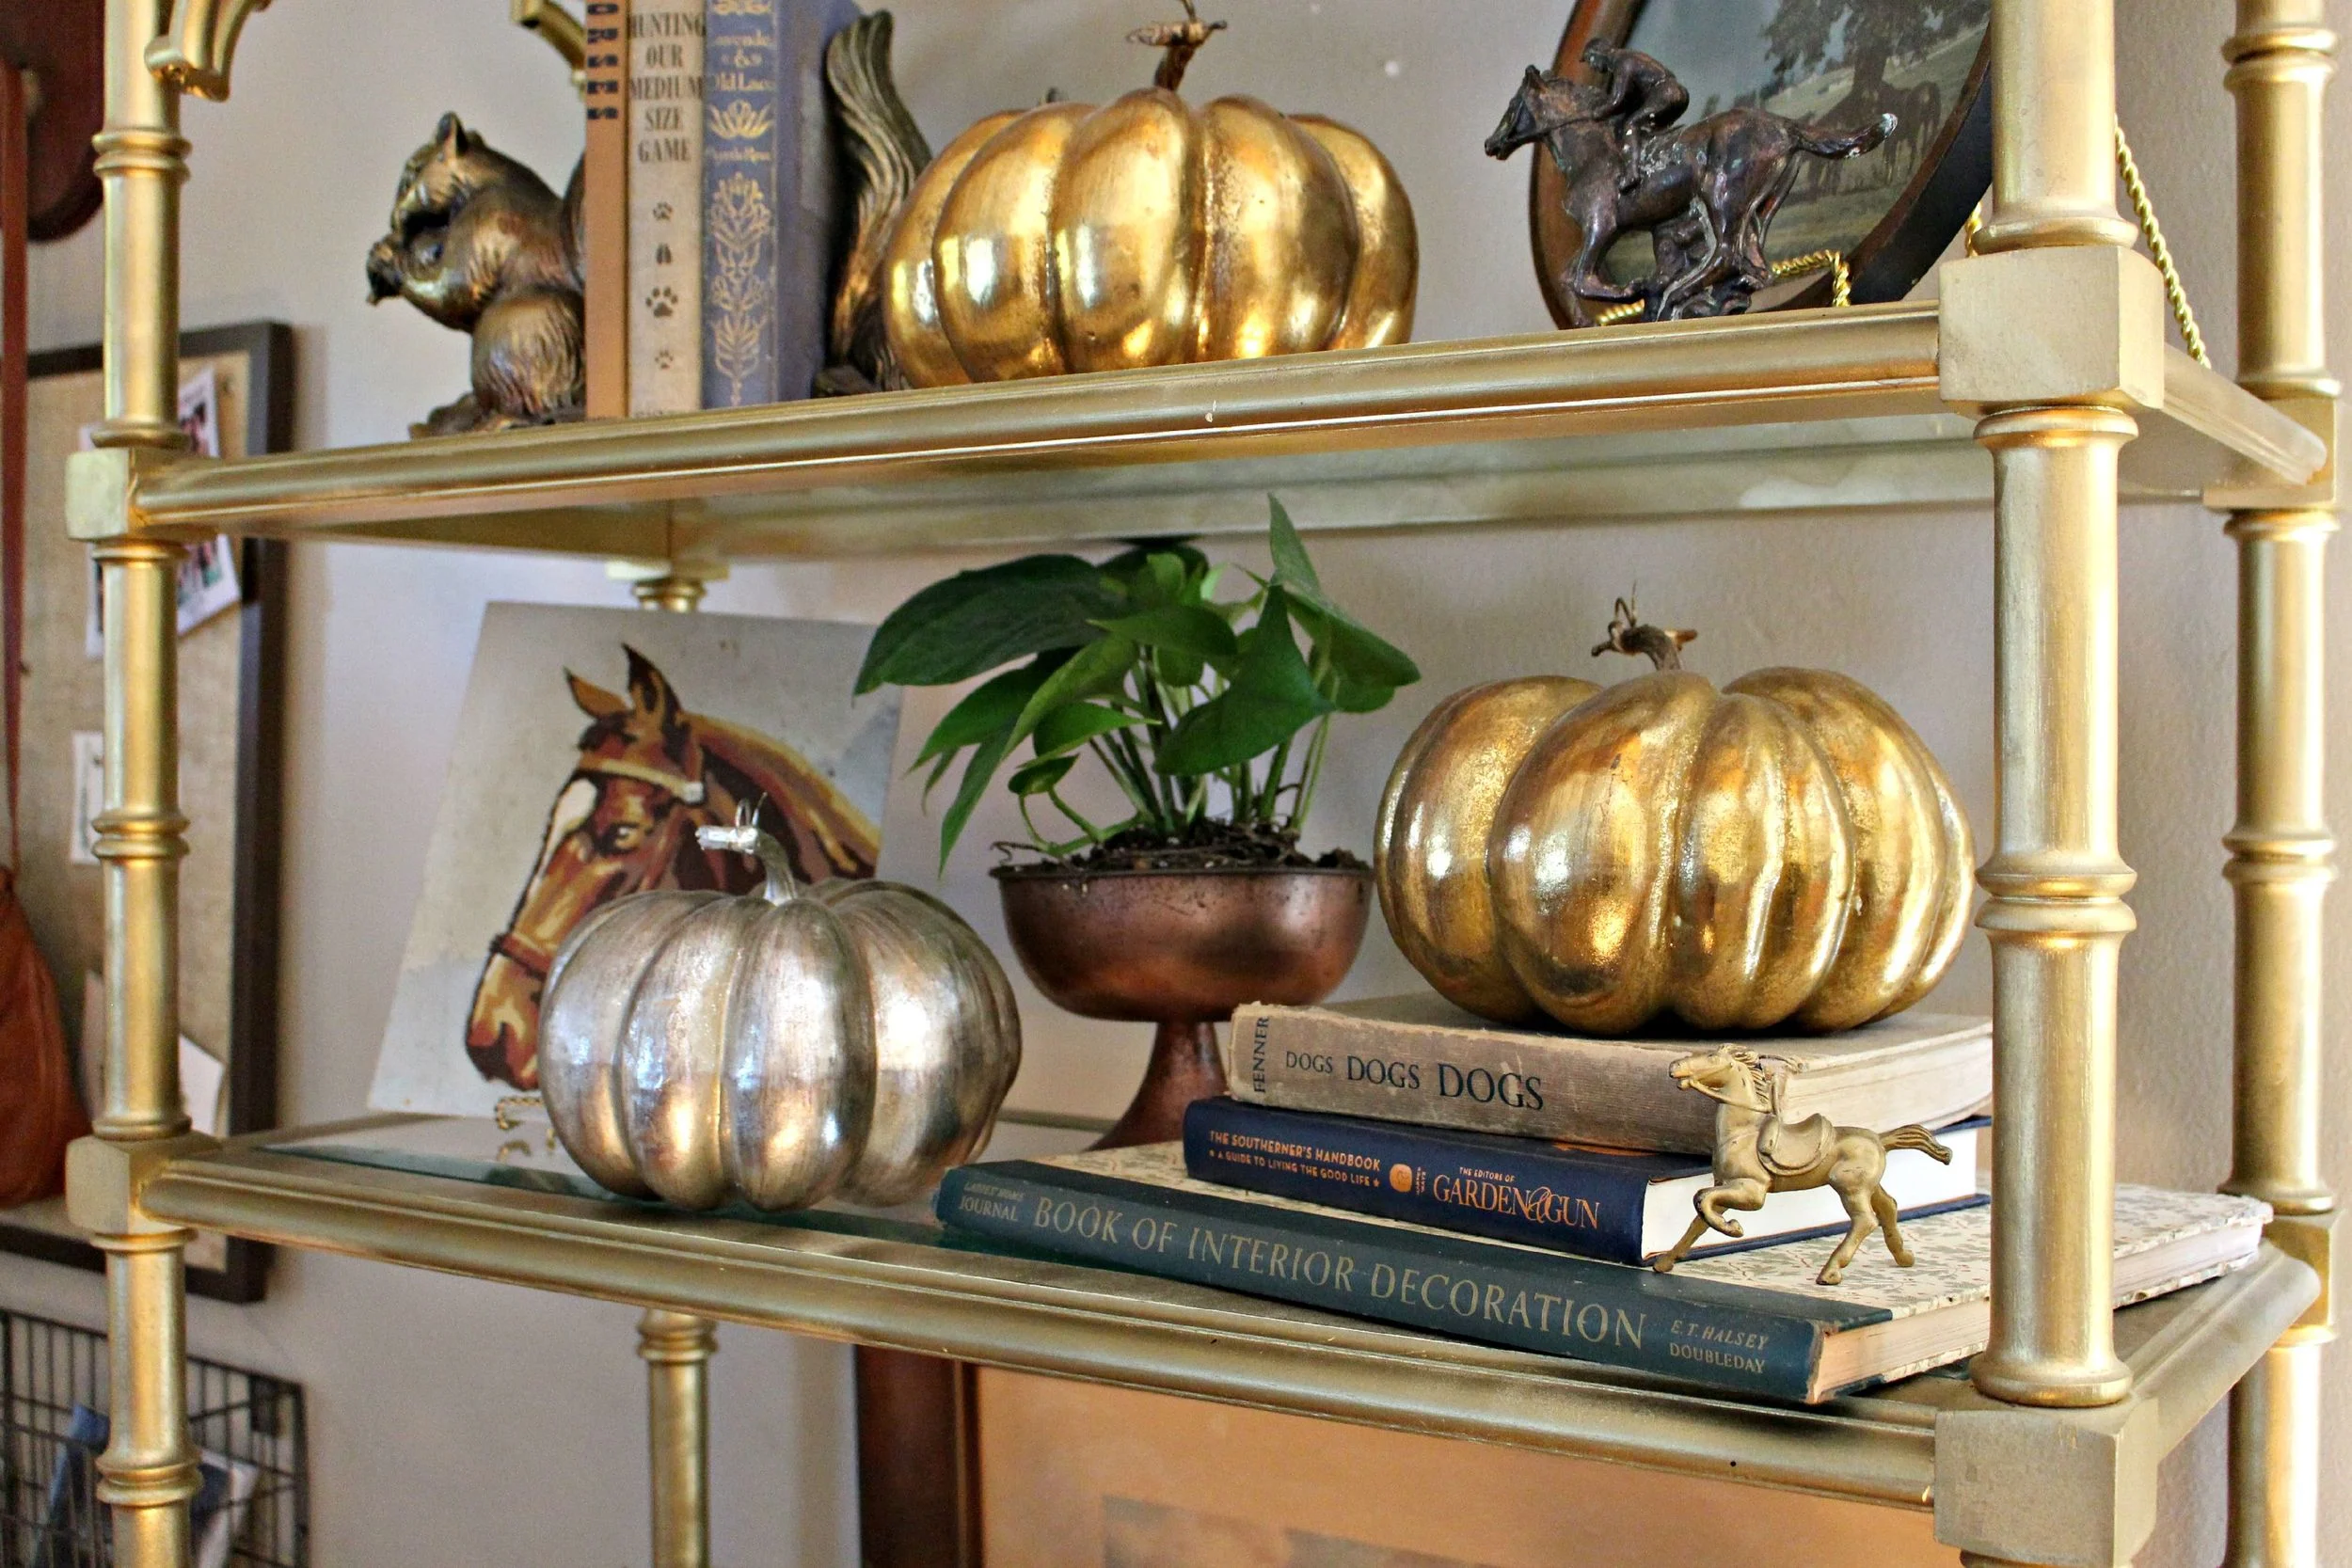
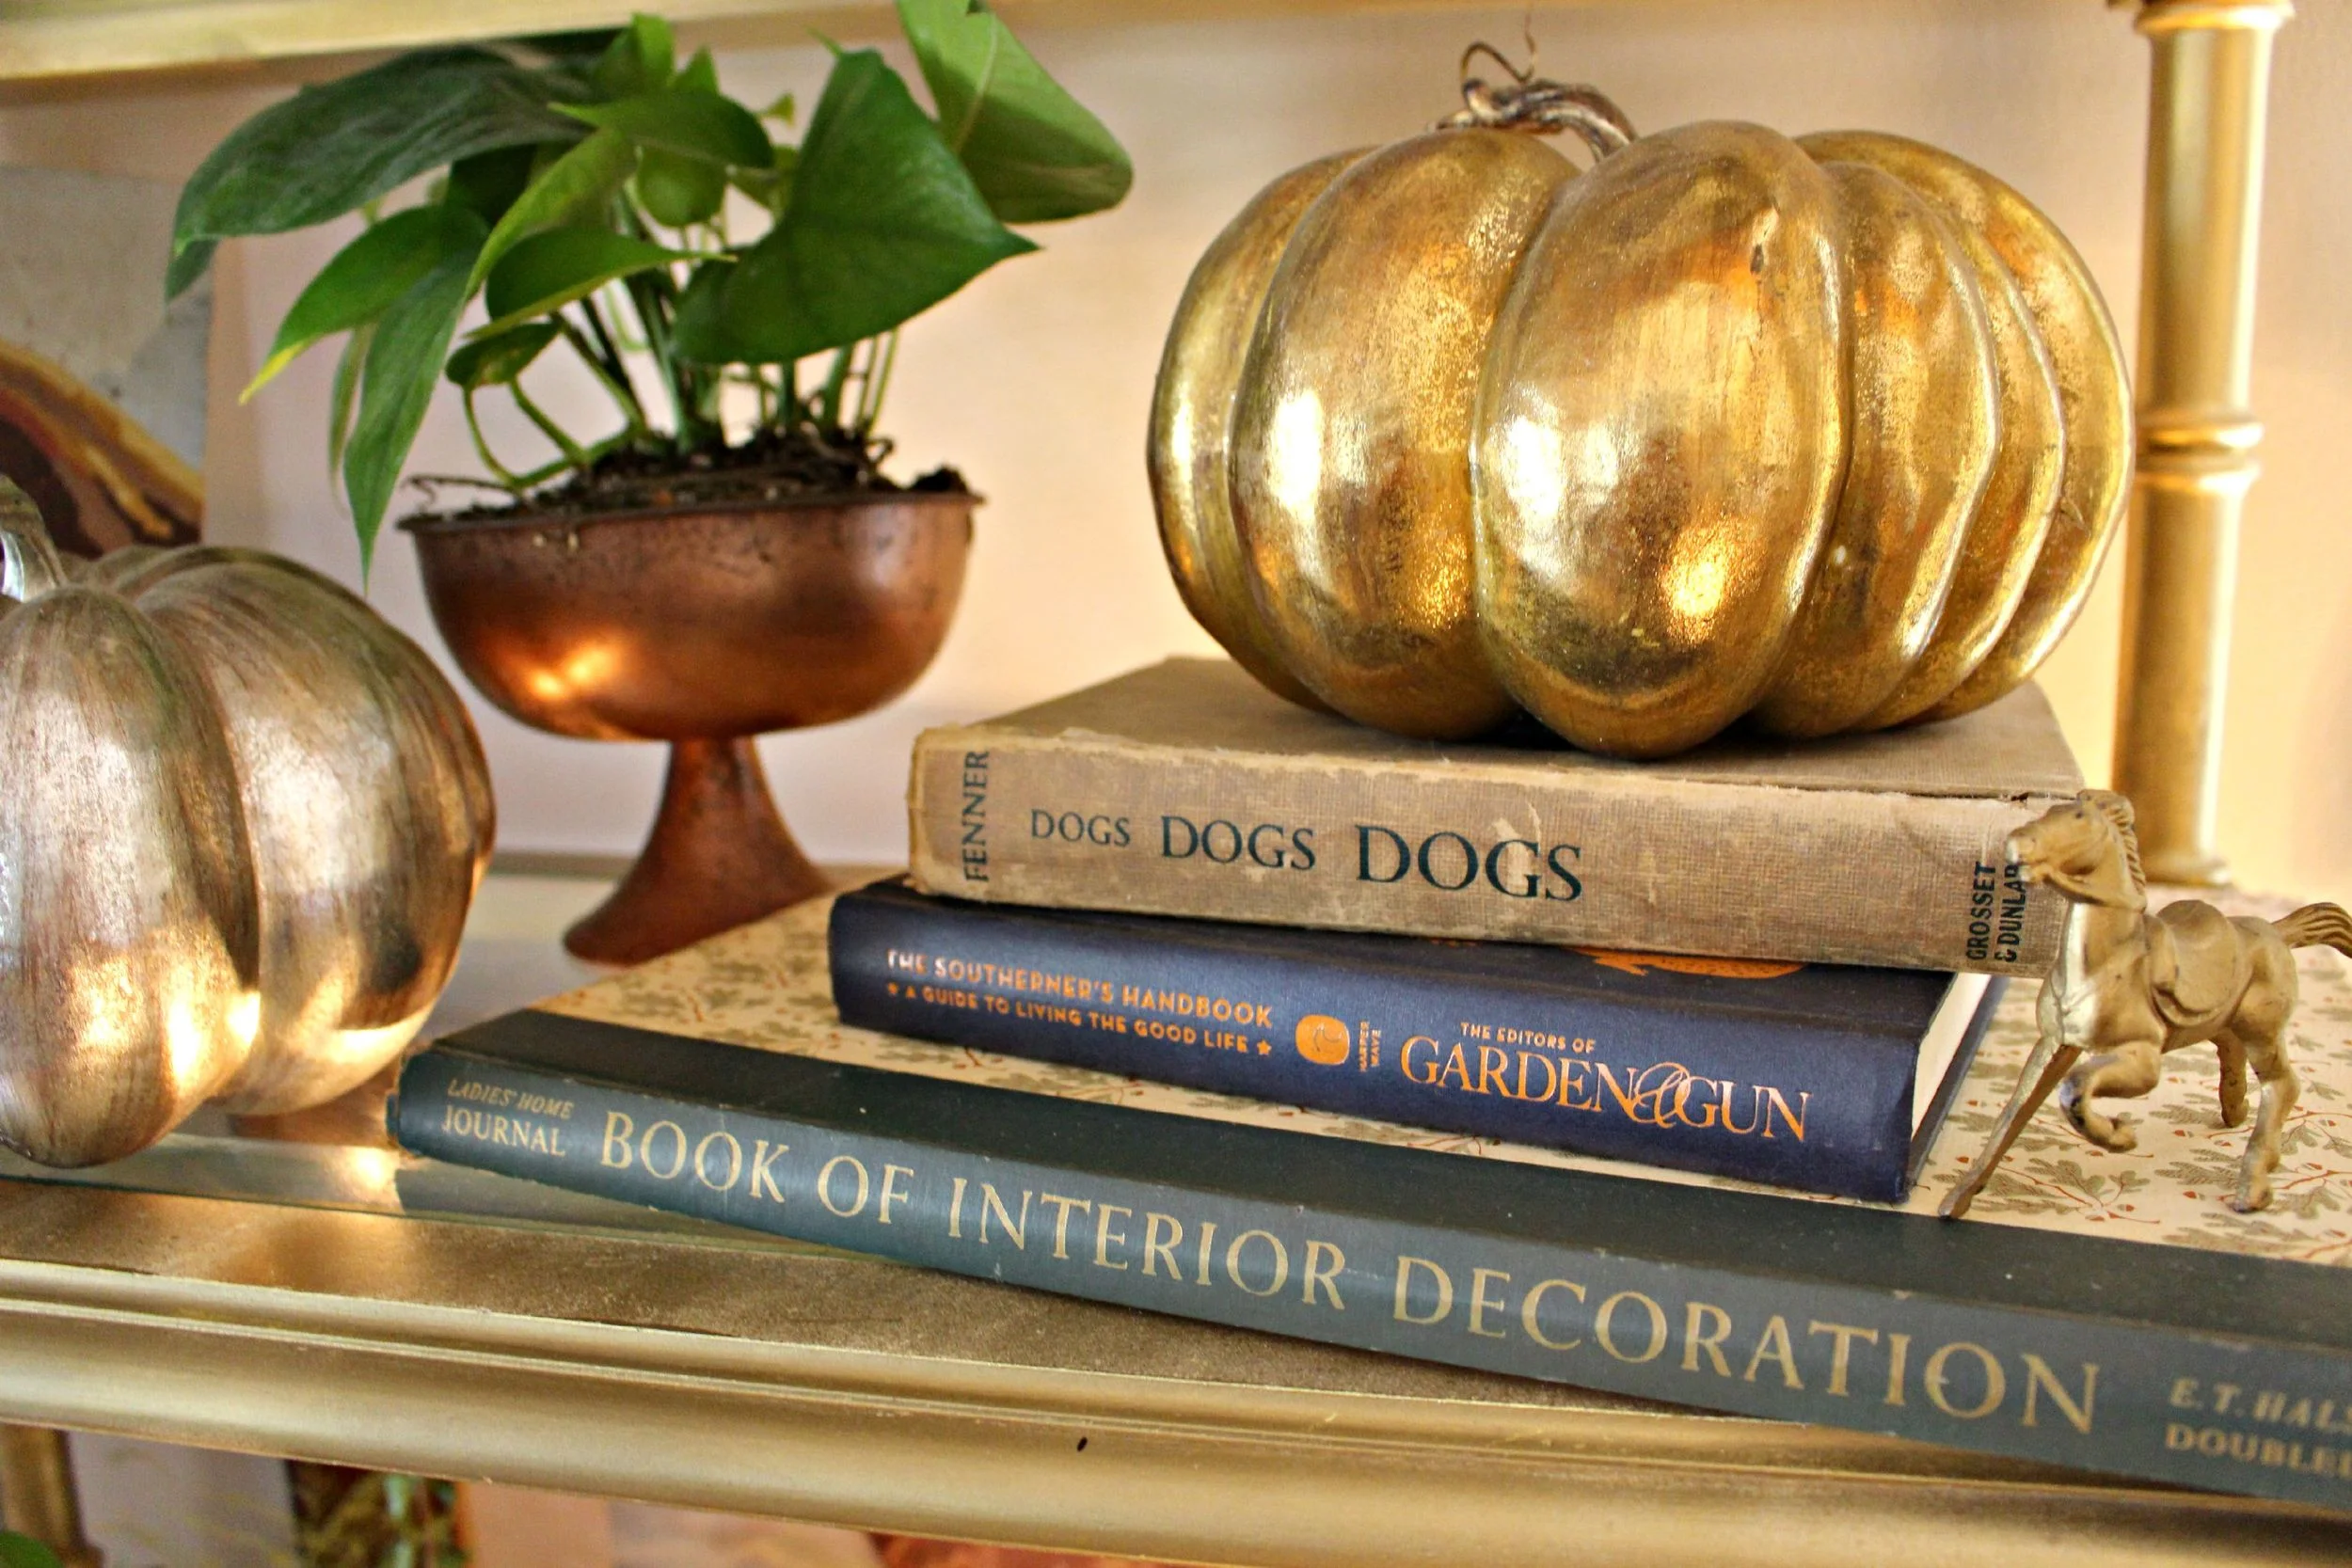
all vintage/thrifted minus the pumpkins that were from TJMaxx many years ago
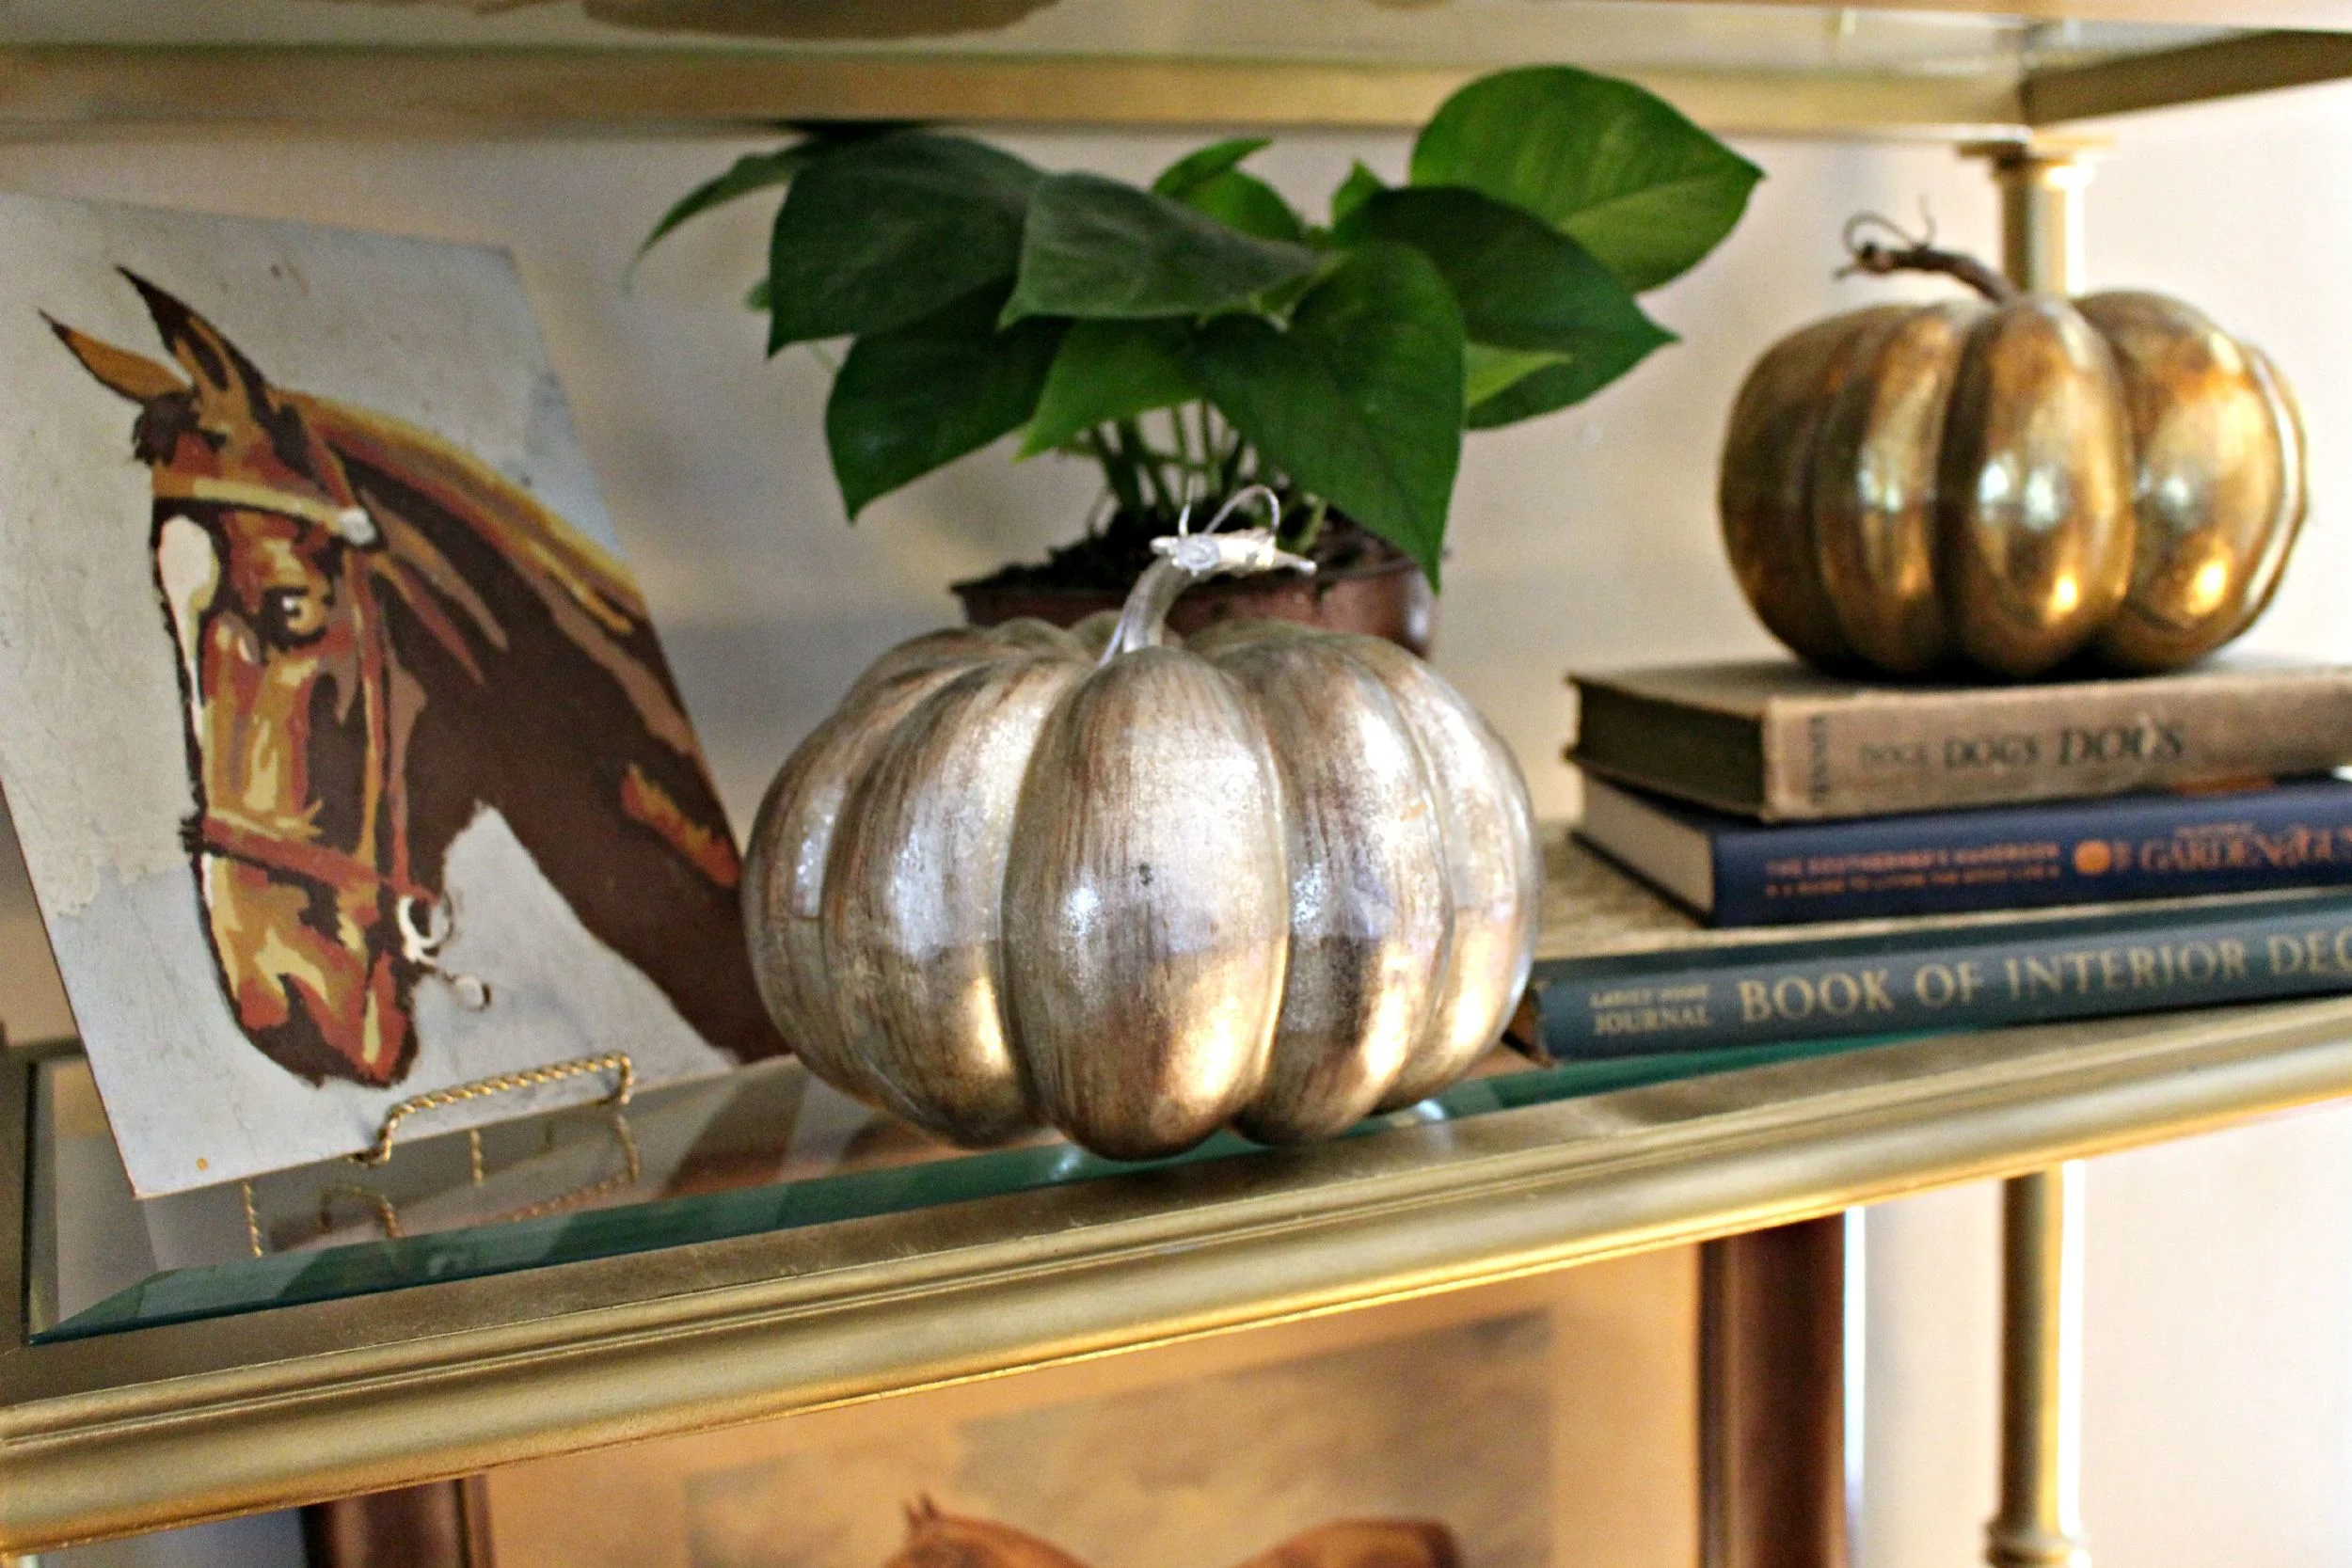
all vintage/thrifted minus the pumpkins that were from TJMaxx many years ago
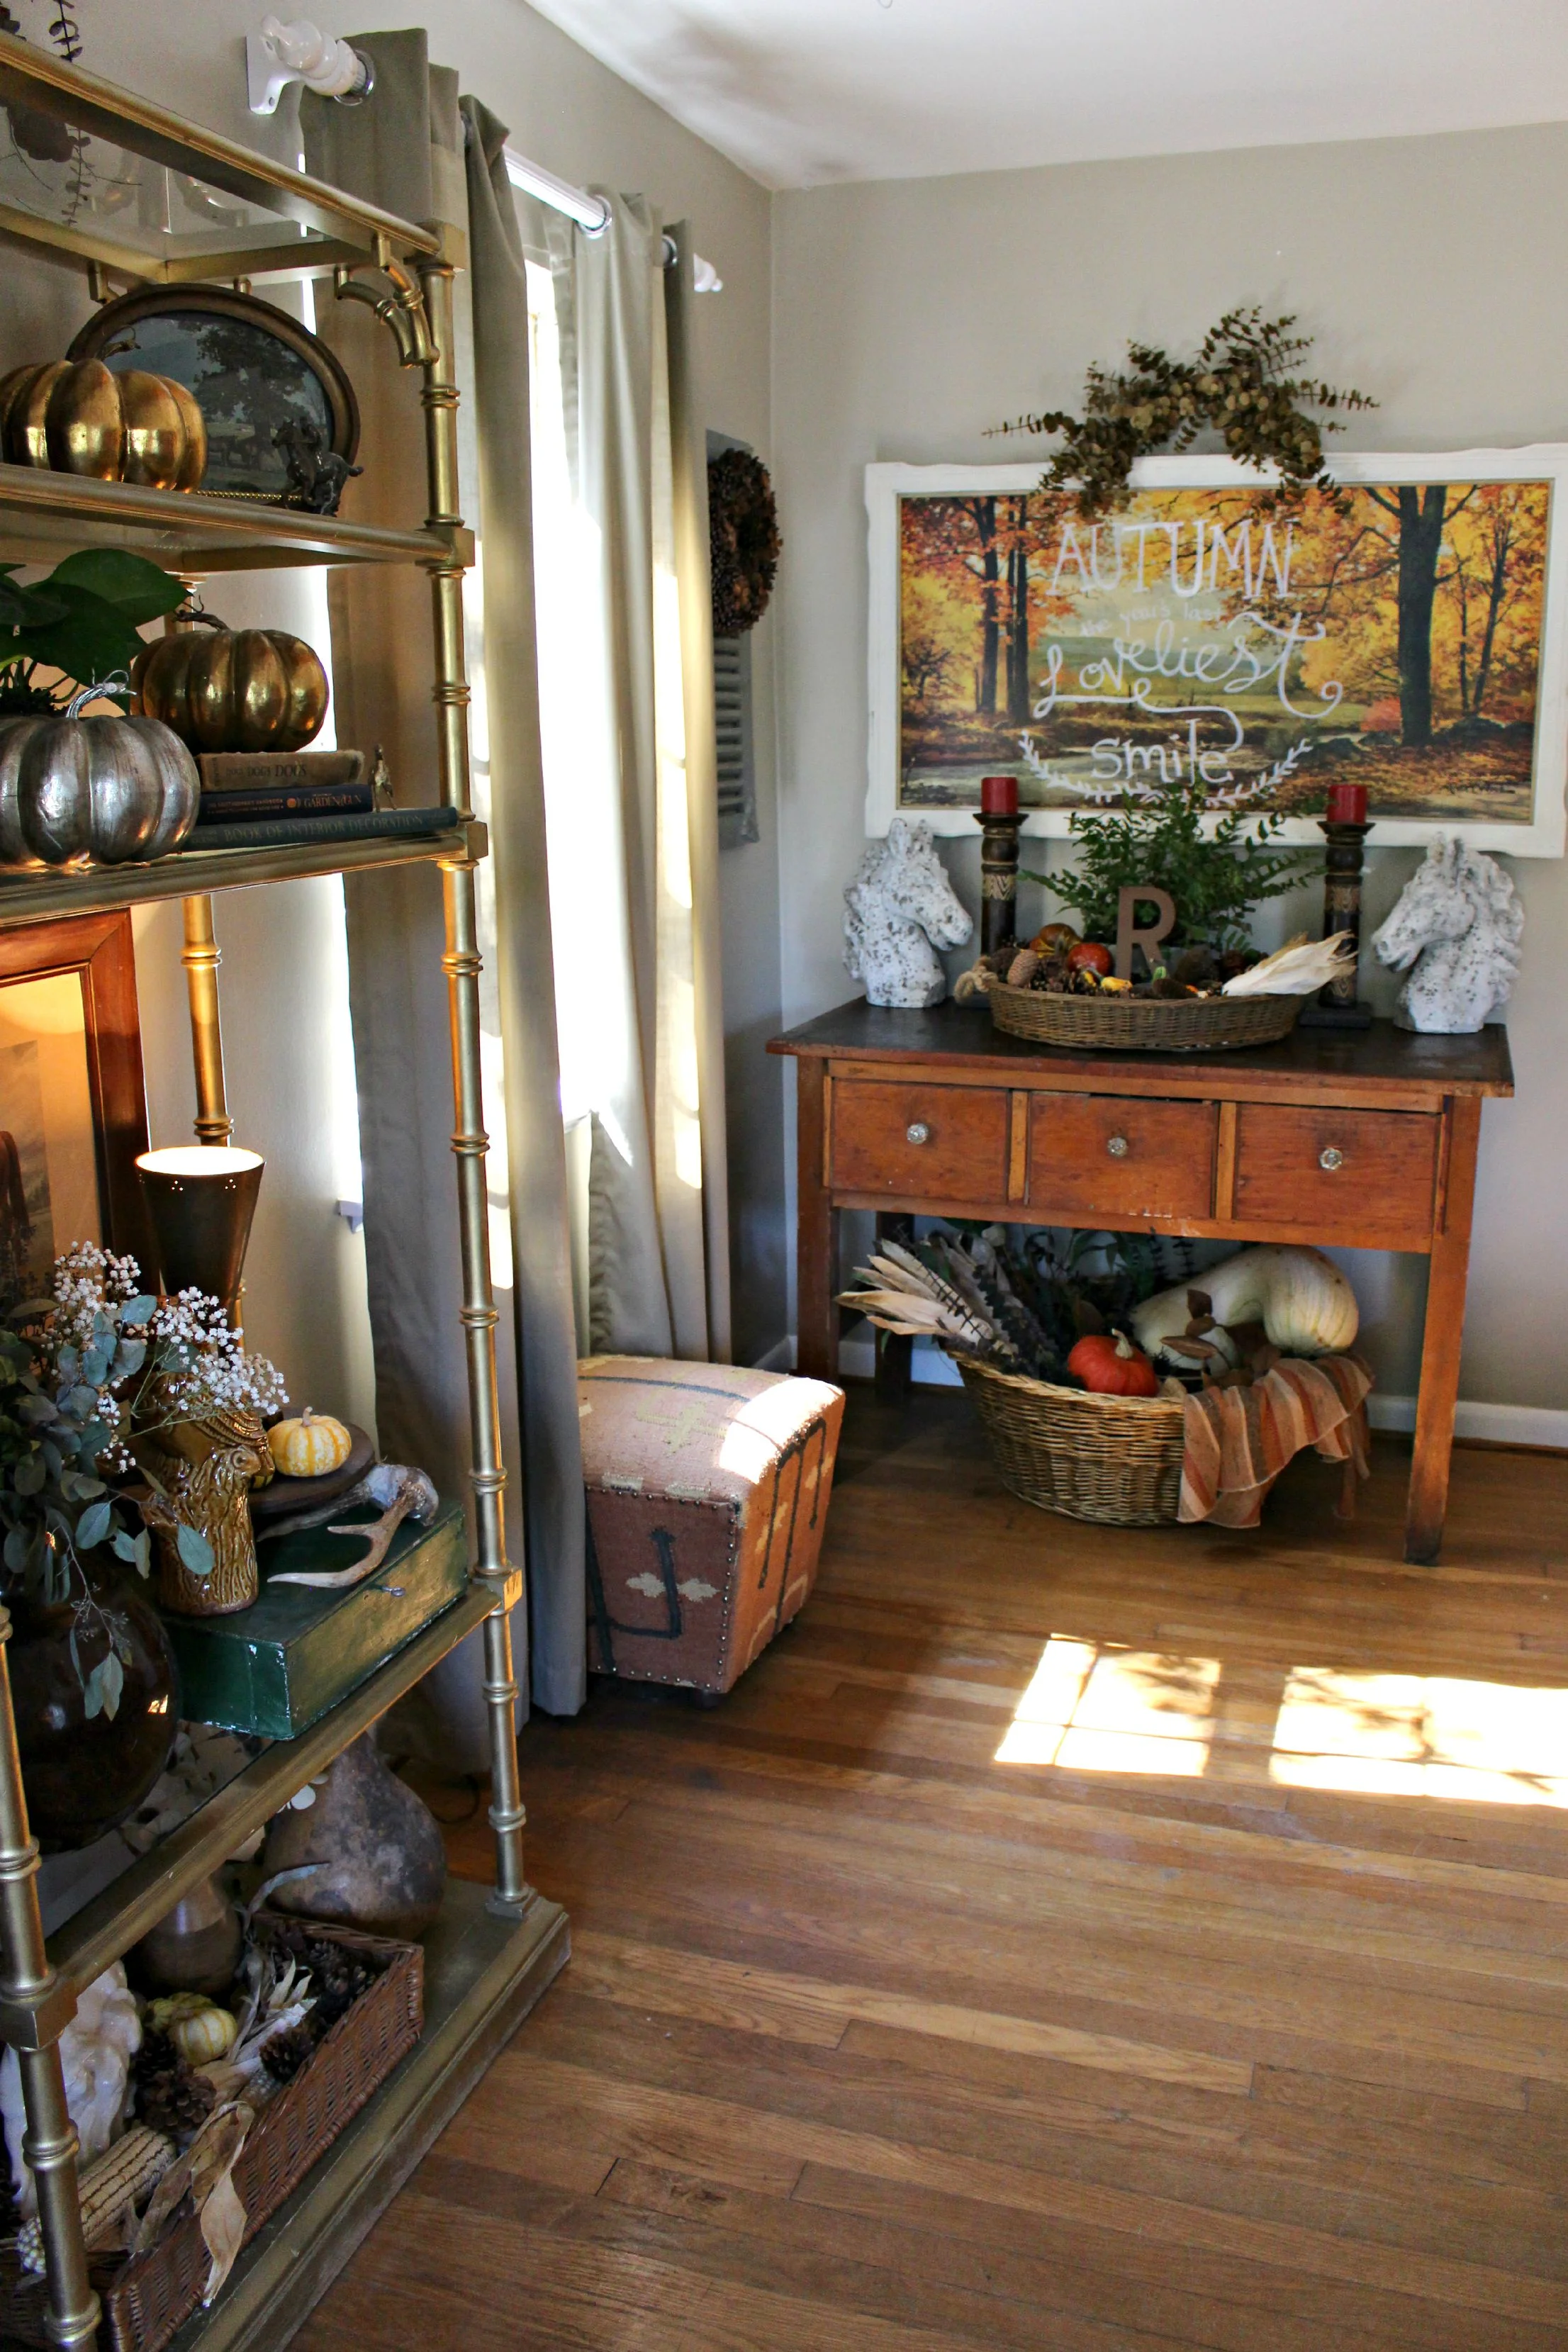
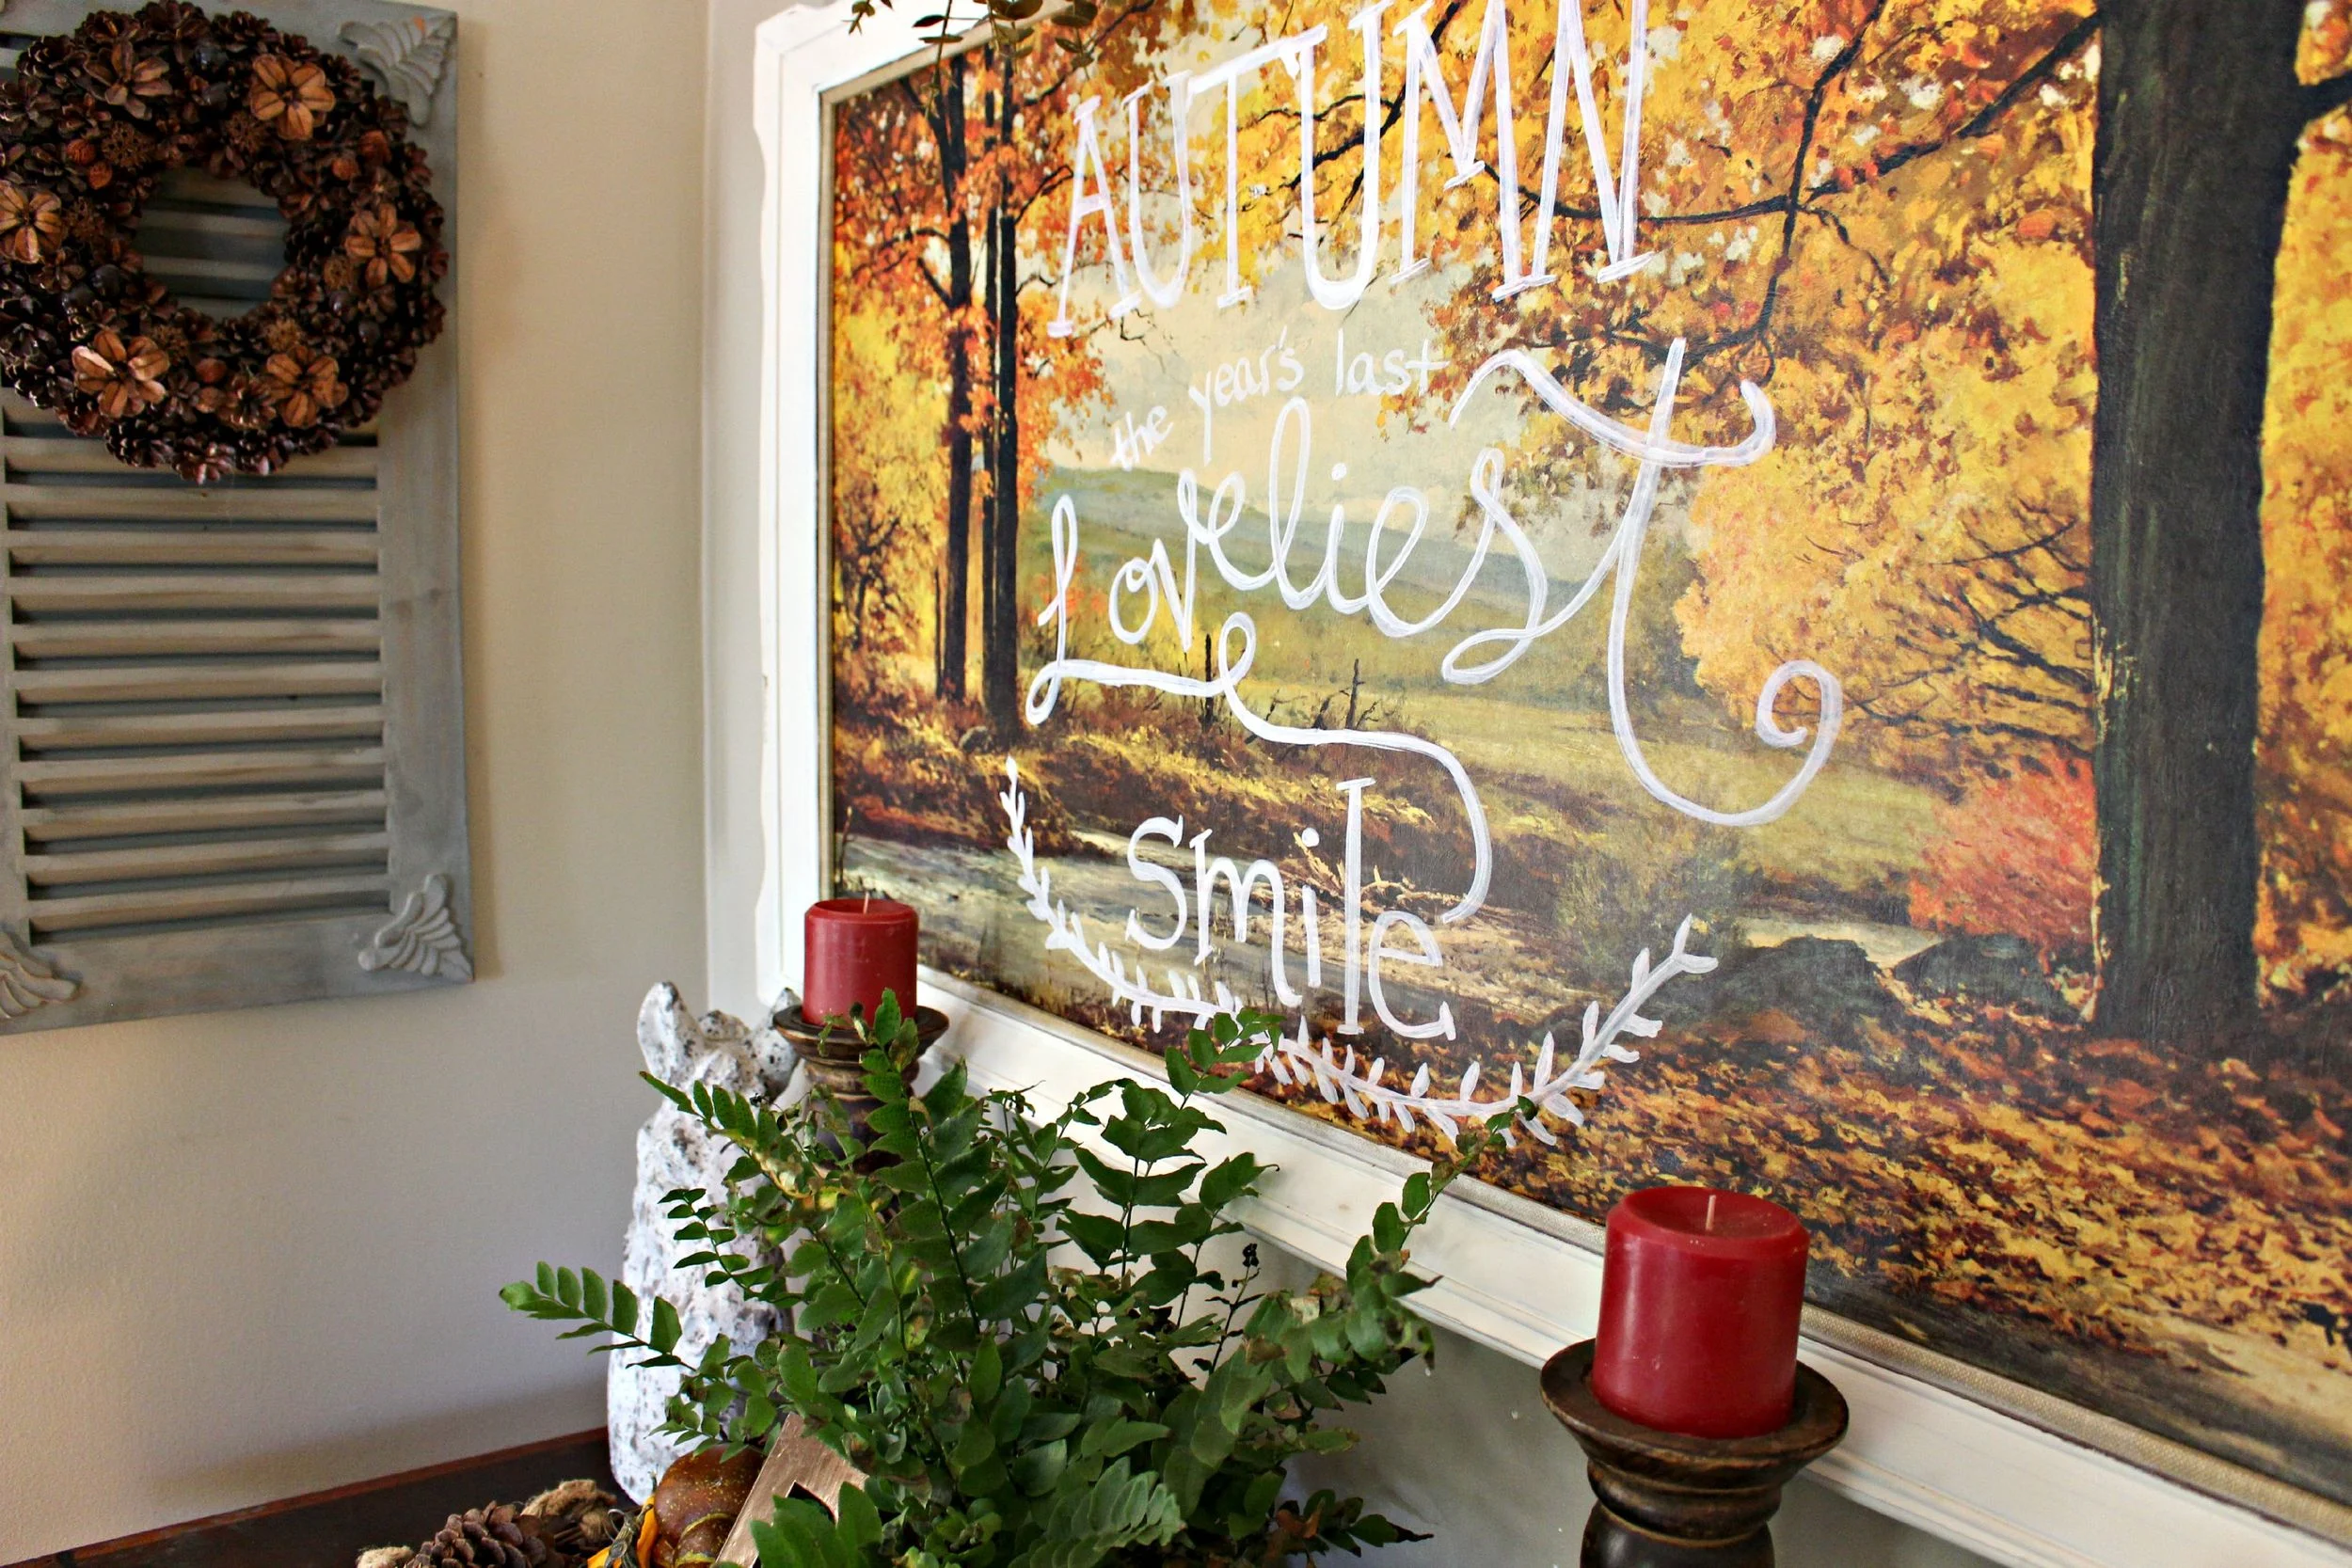
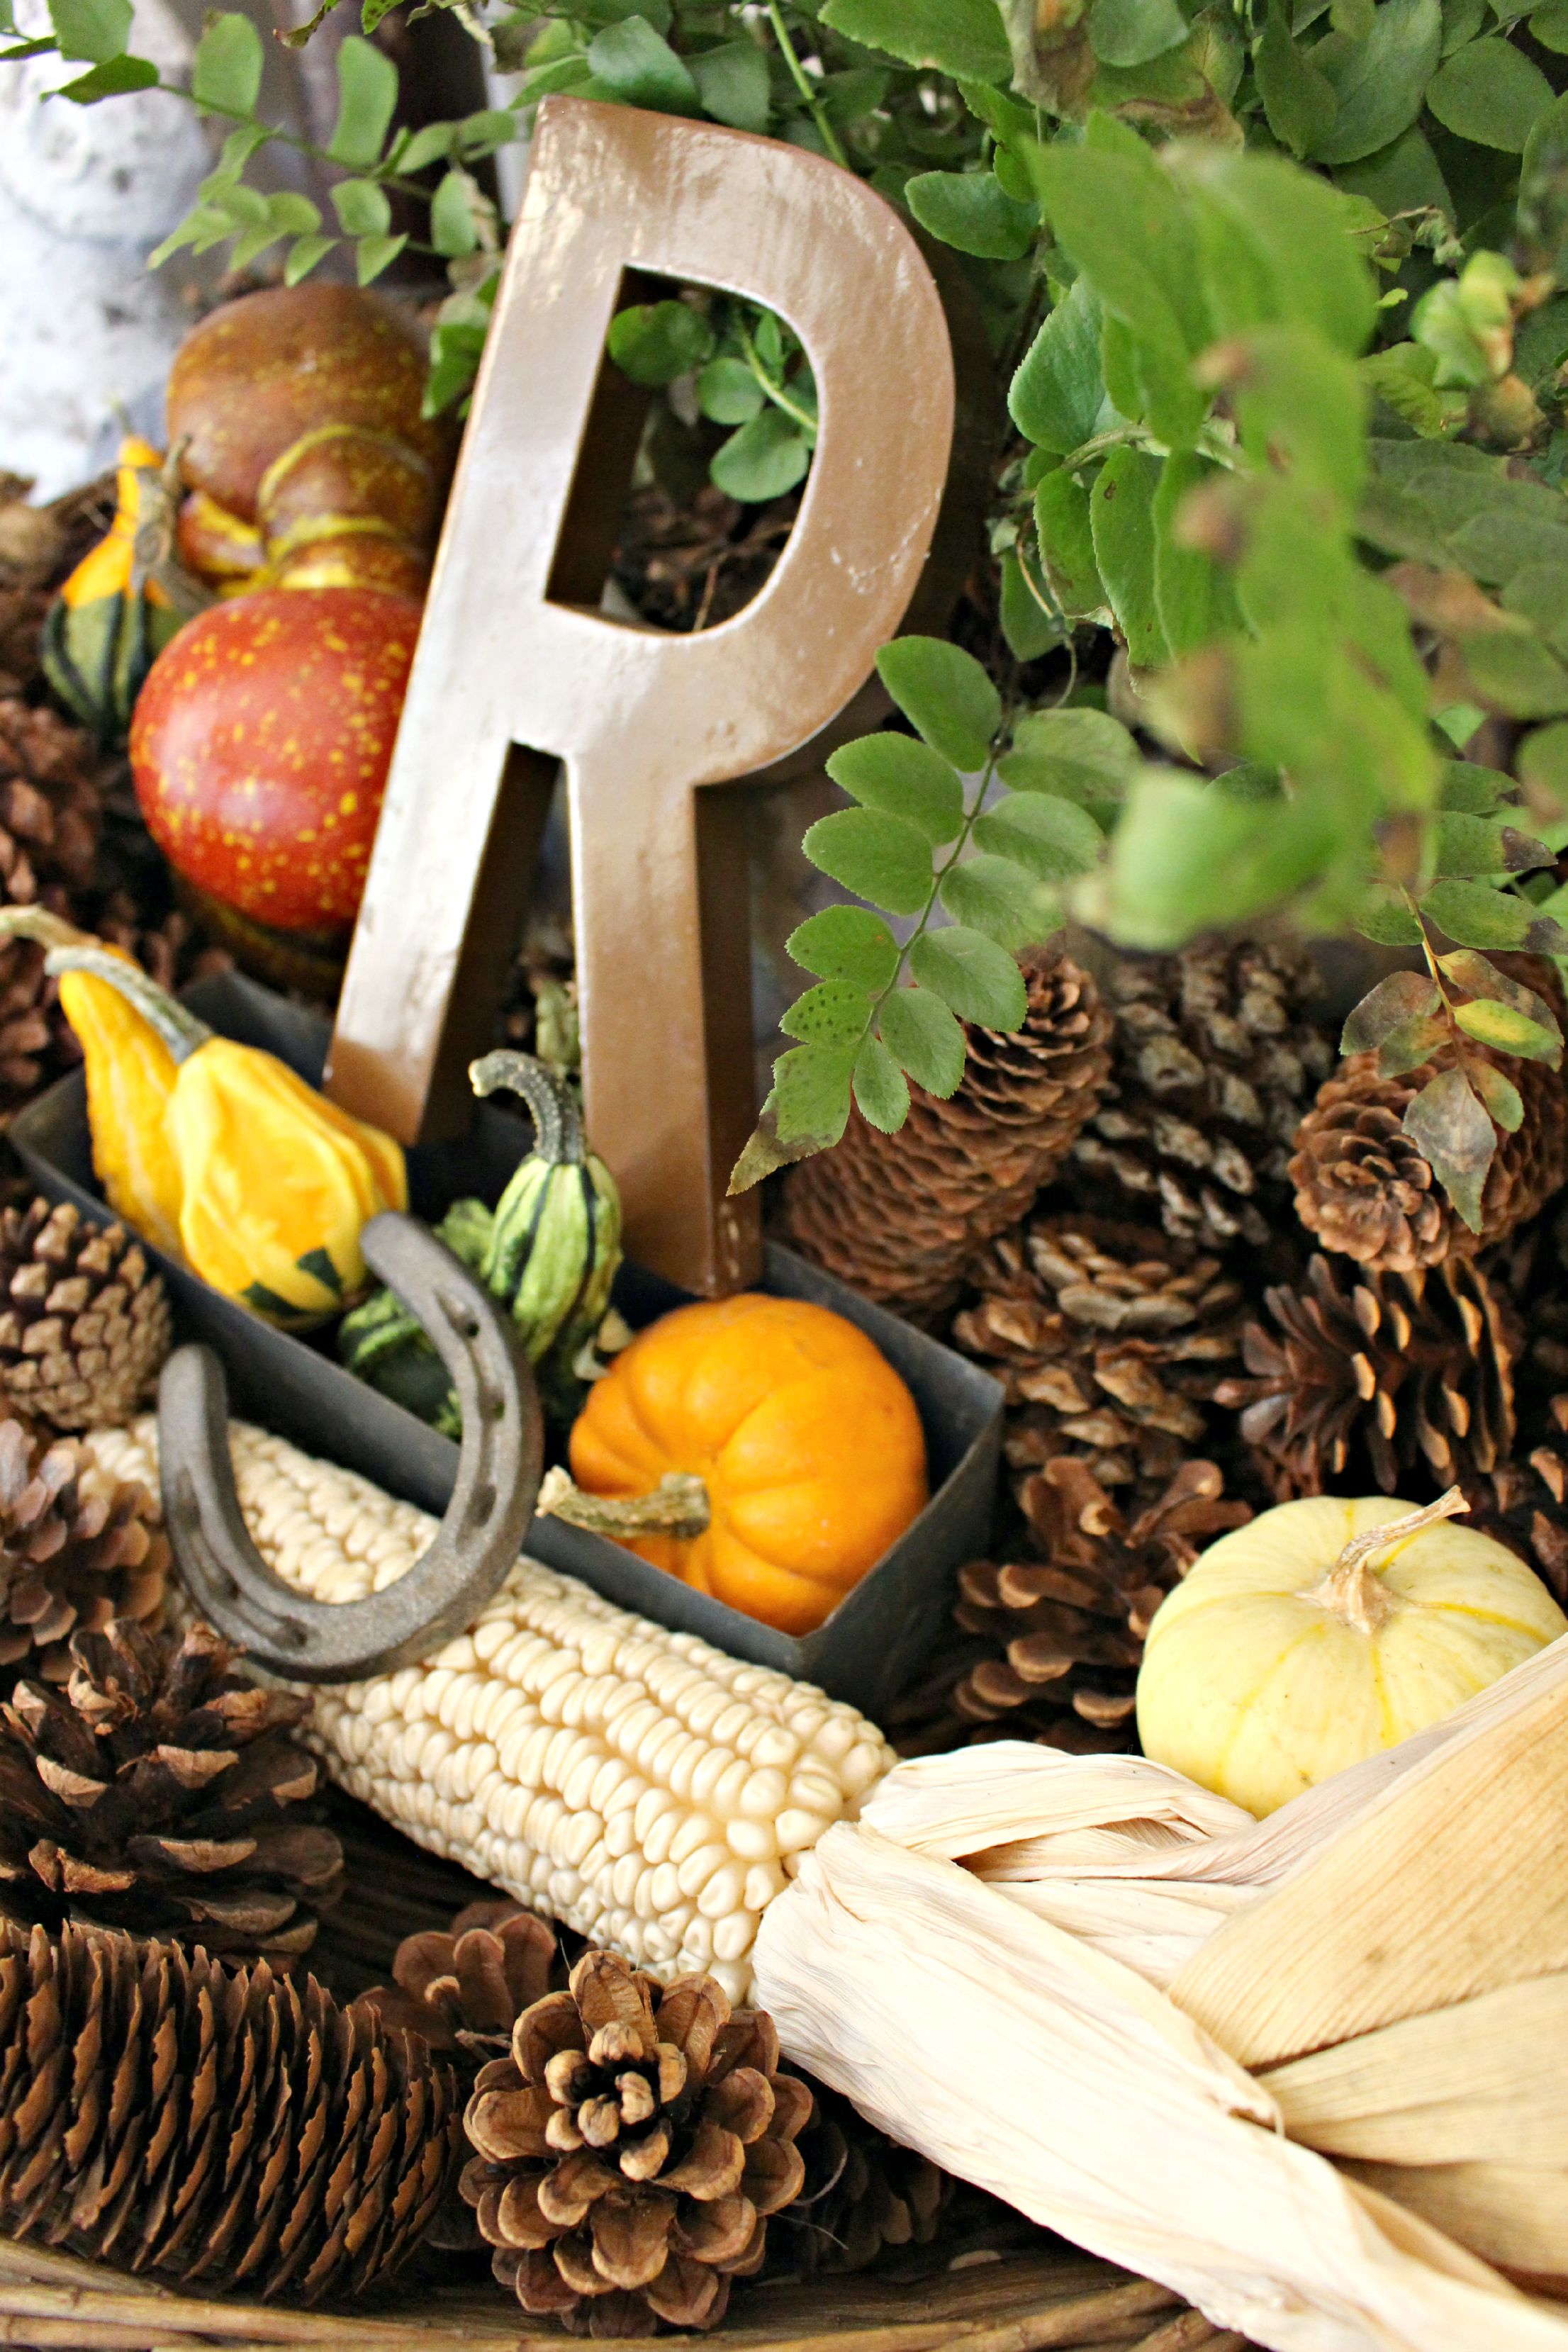
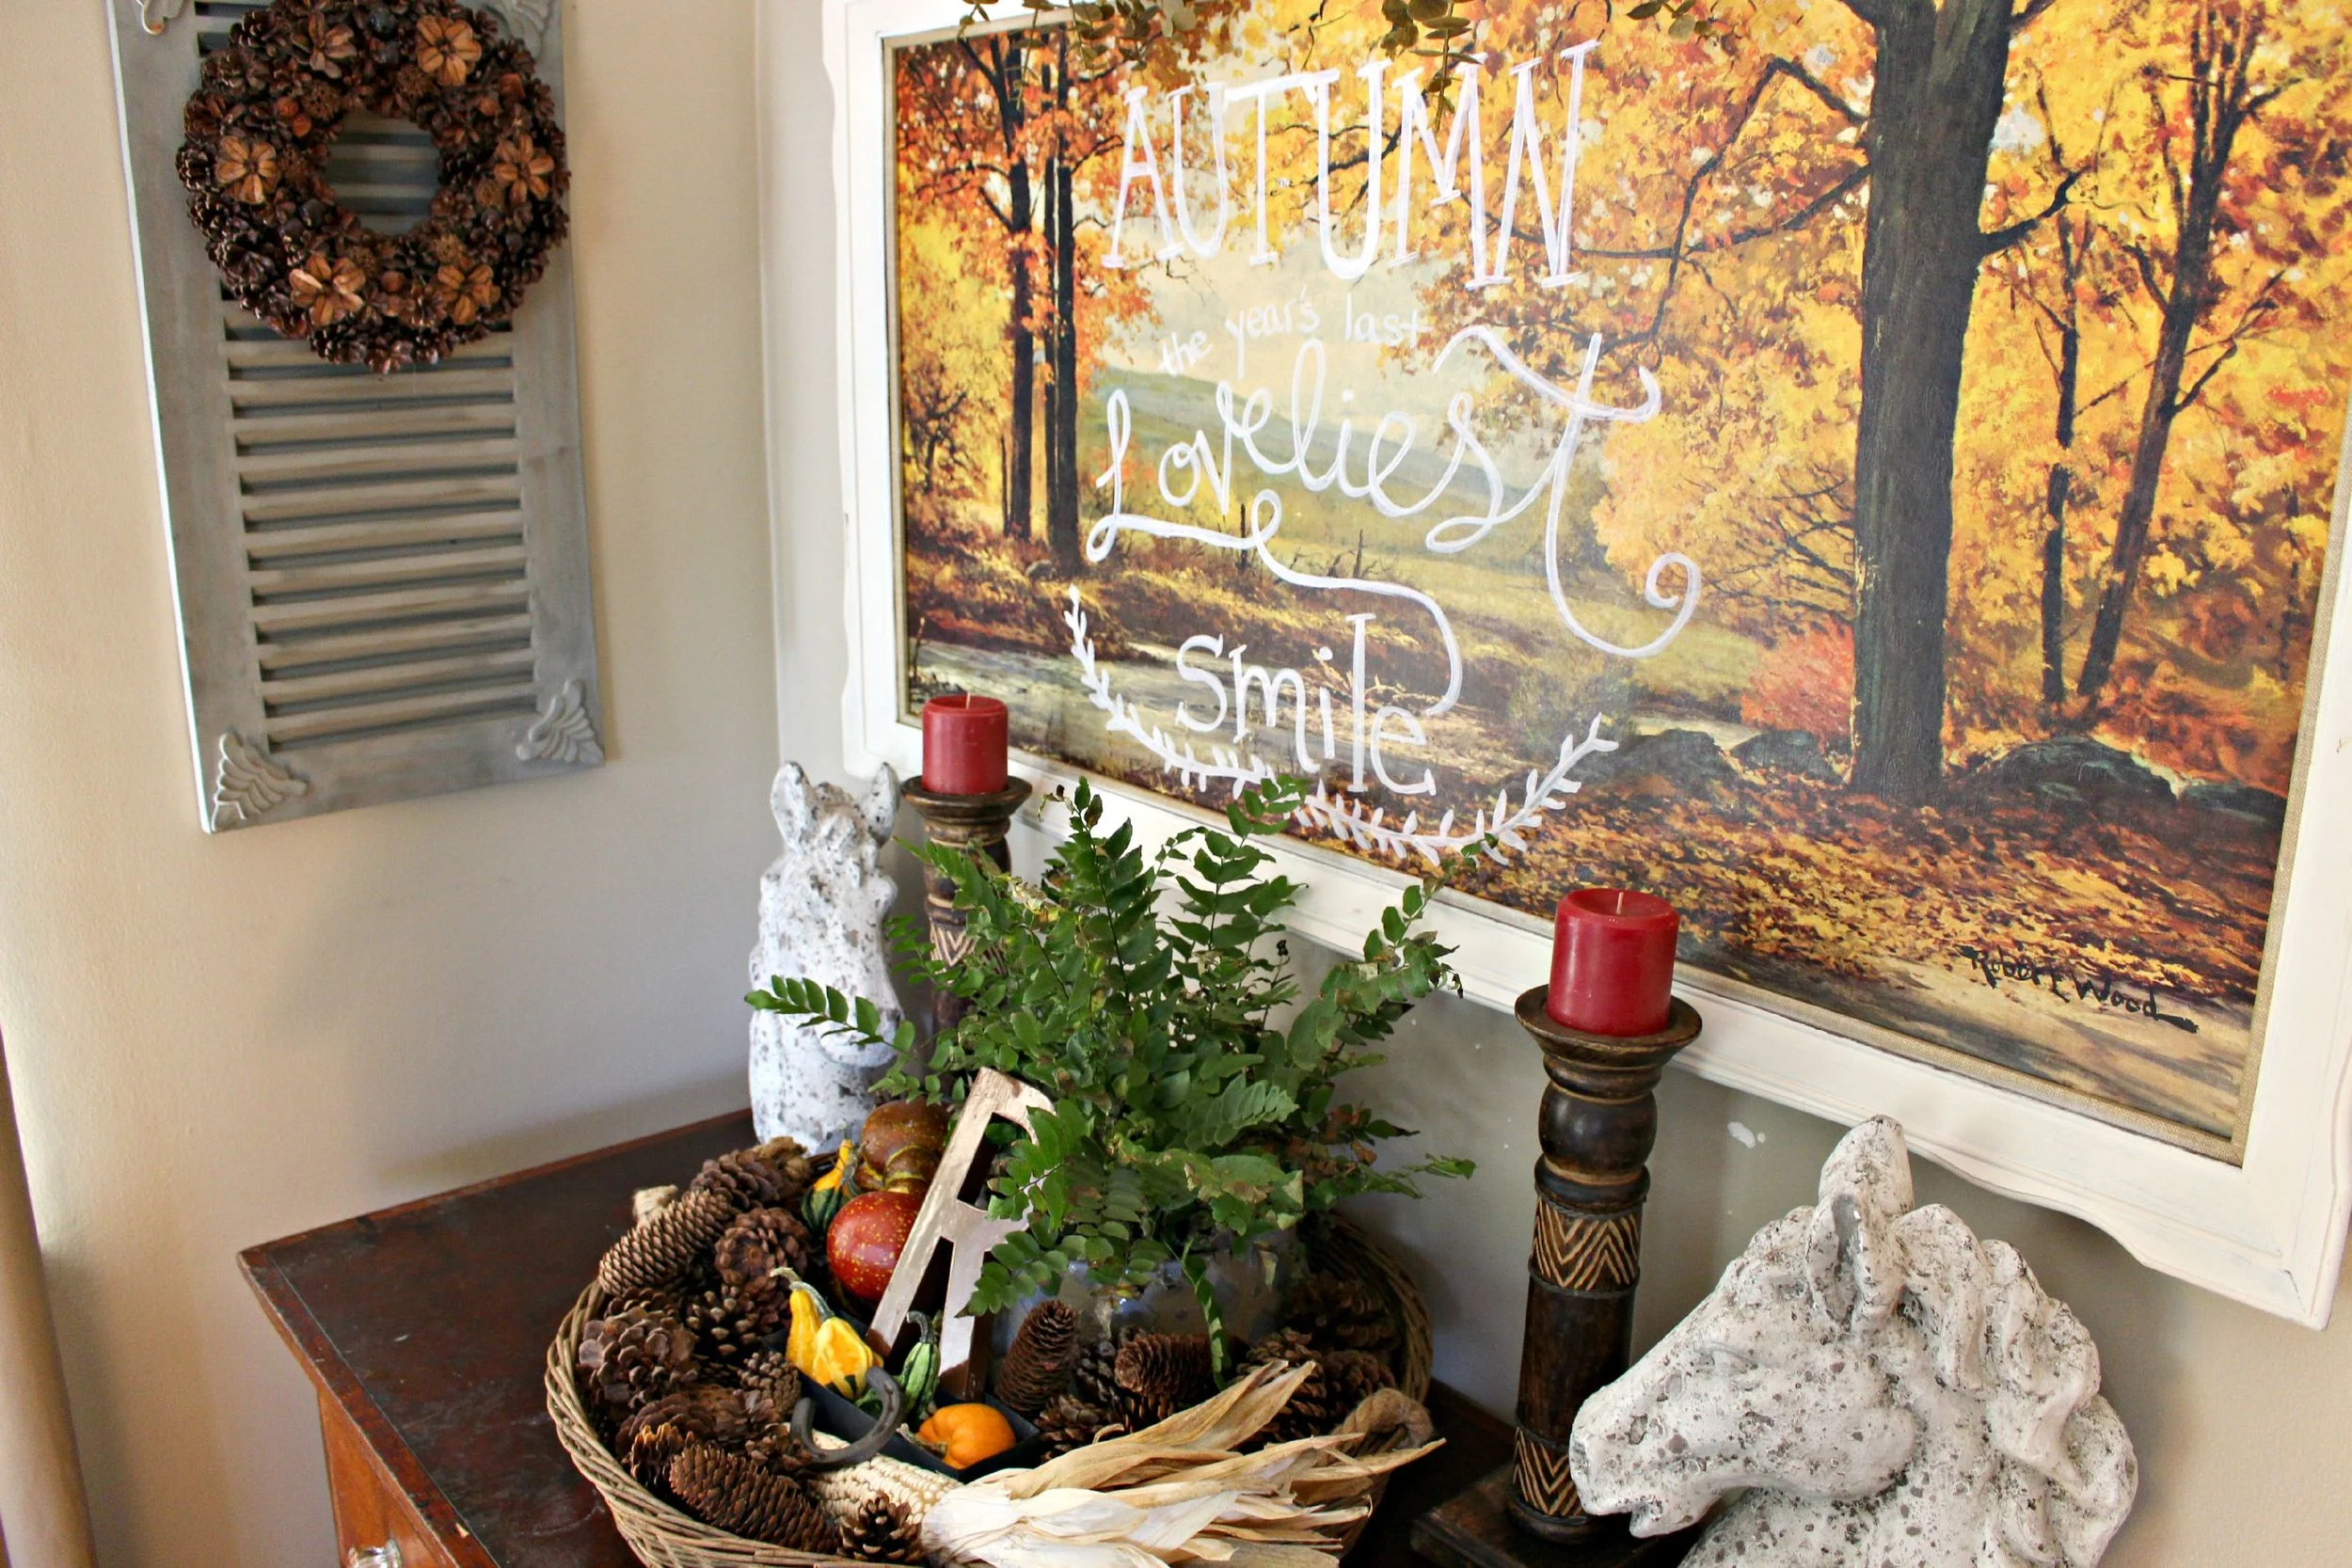
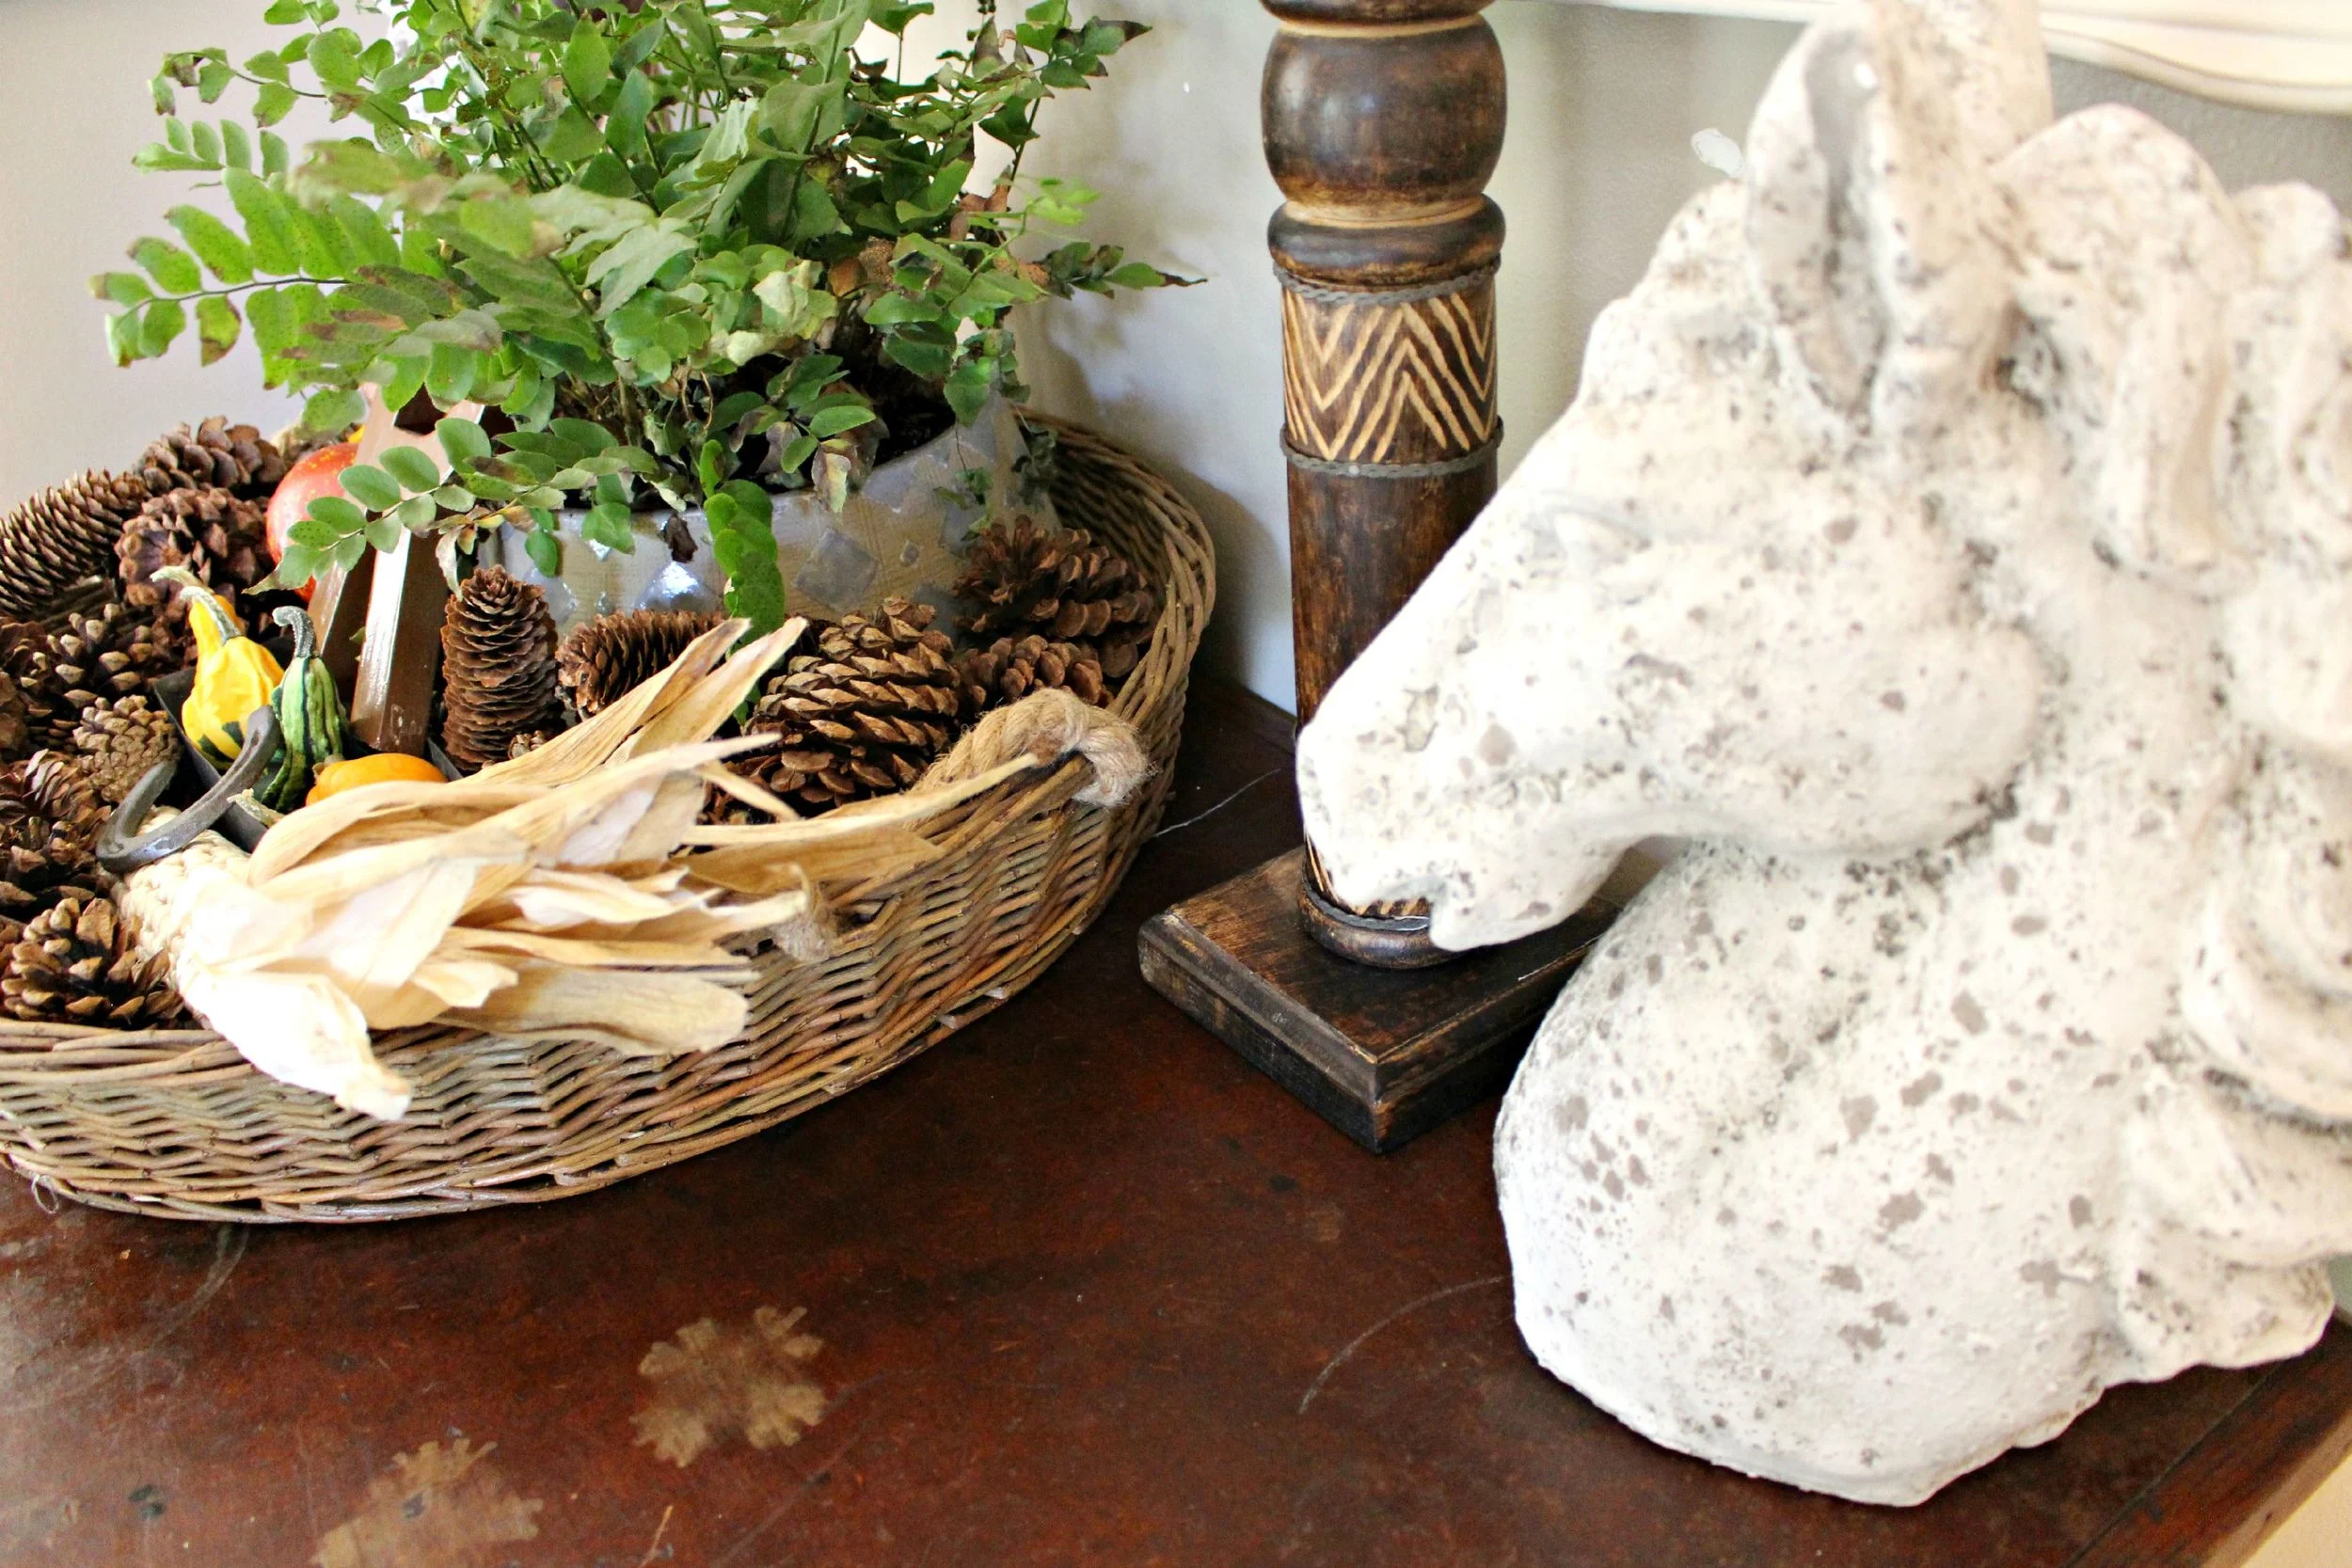
DIY upcycled painting: thrifted (get the tutorial here) | Baskets: thrifted | Pouf: thrifted | Produce/indian corn: farmer's market | Gold eucalyptus above painting: thrifted | Concrete horse heads: Home Goods | letter "R": vintage/thrifted
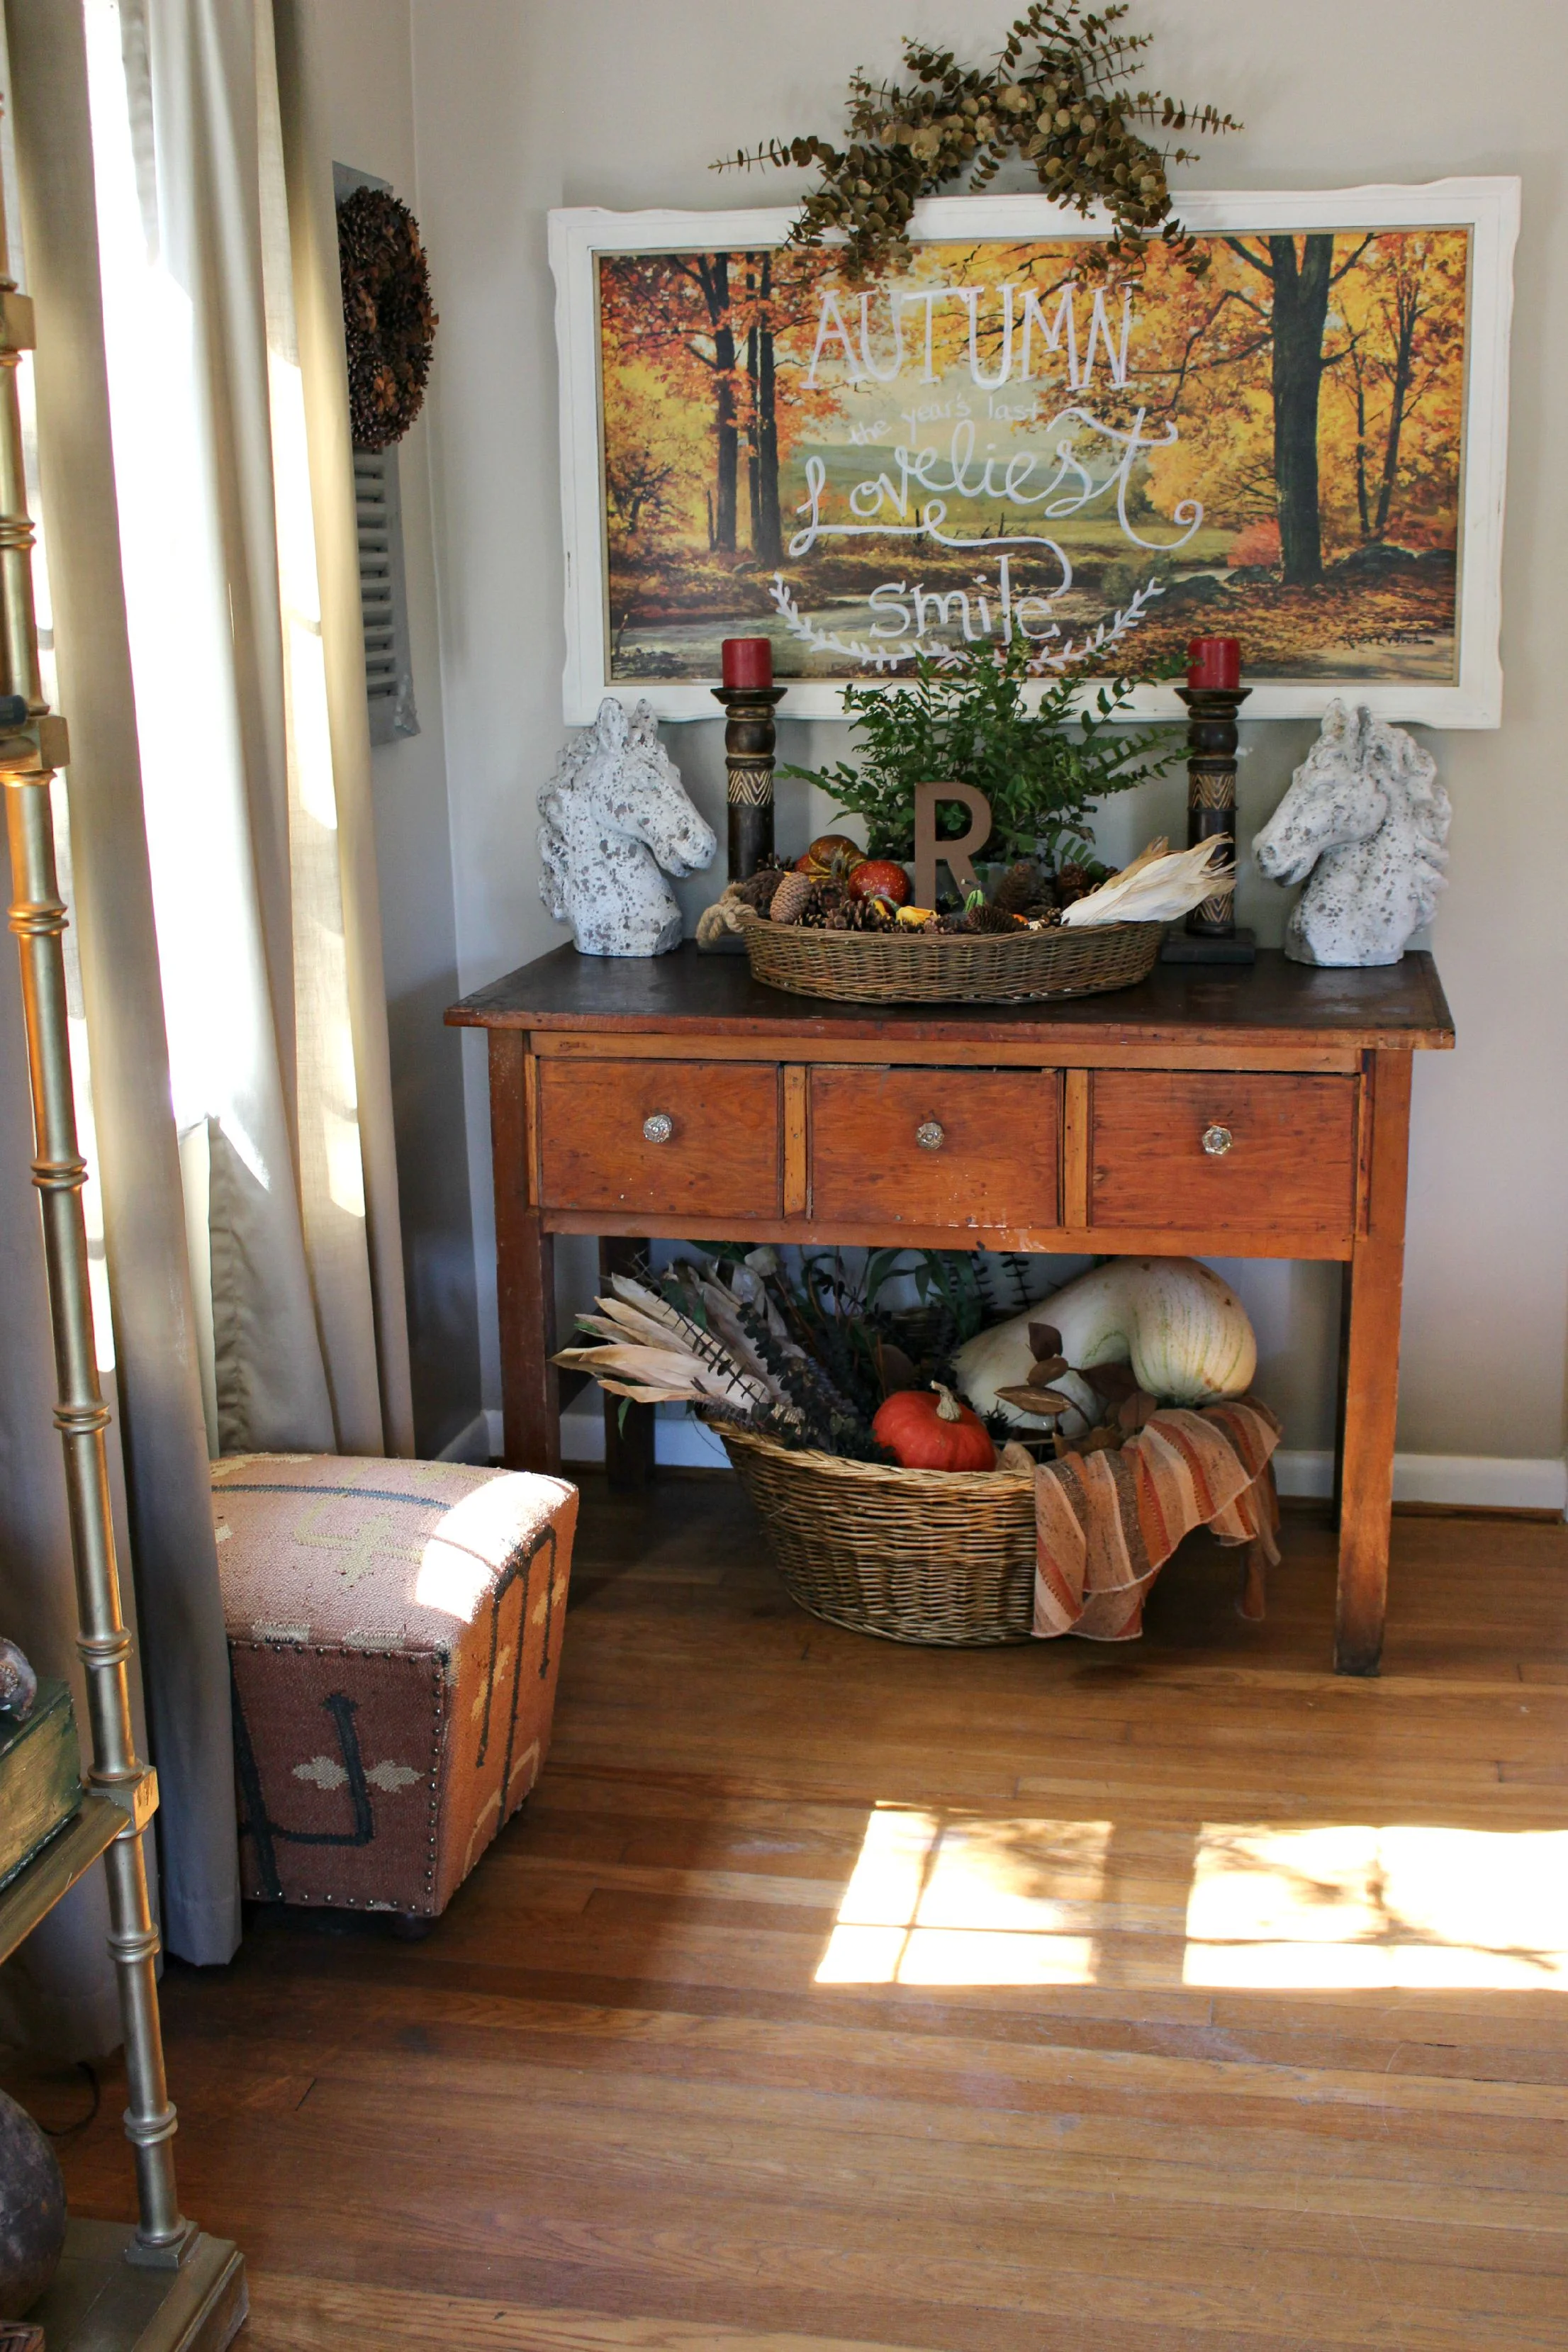
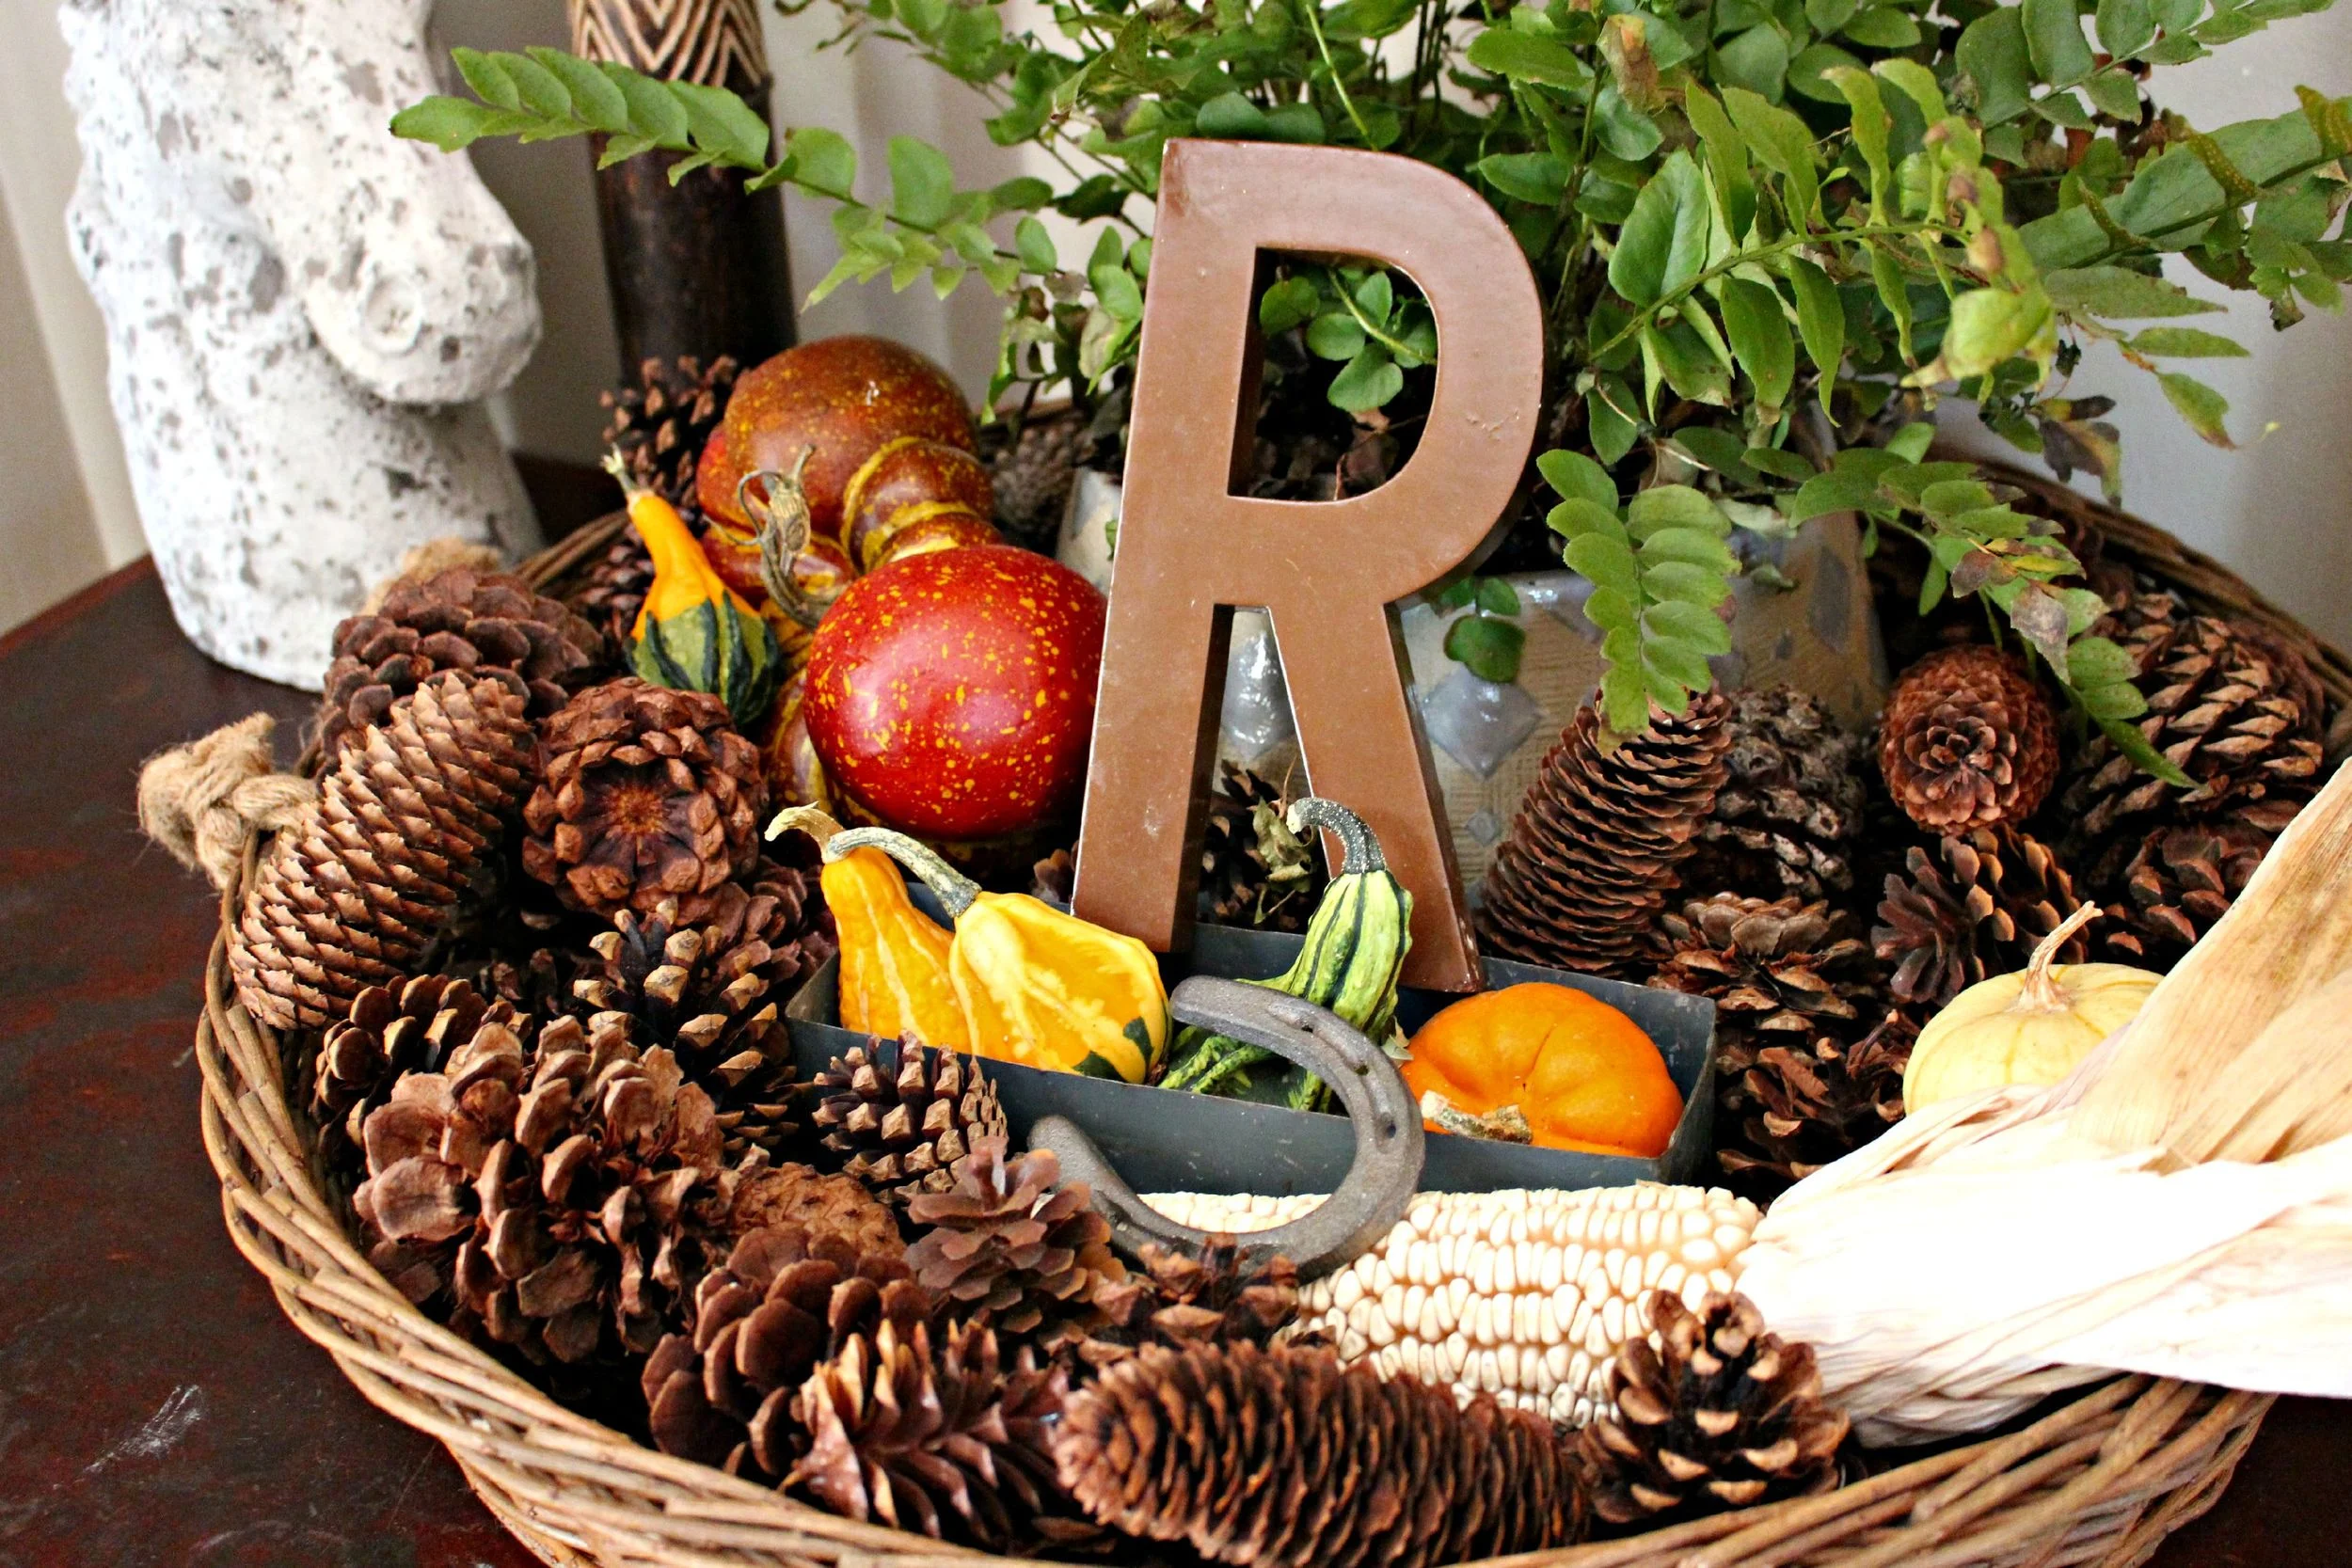
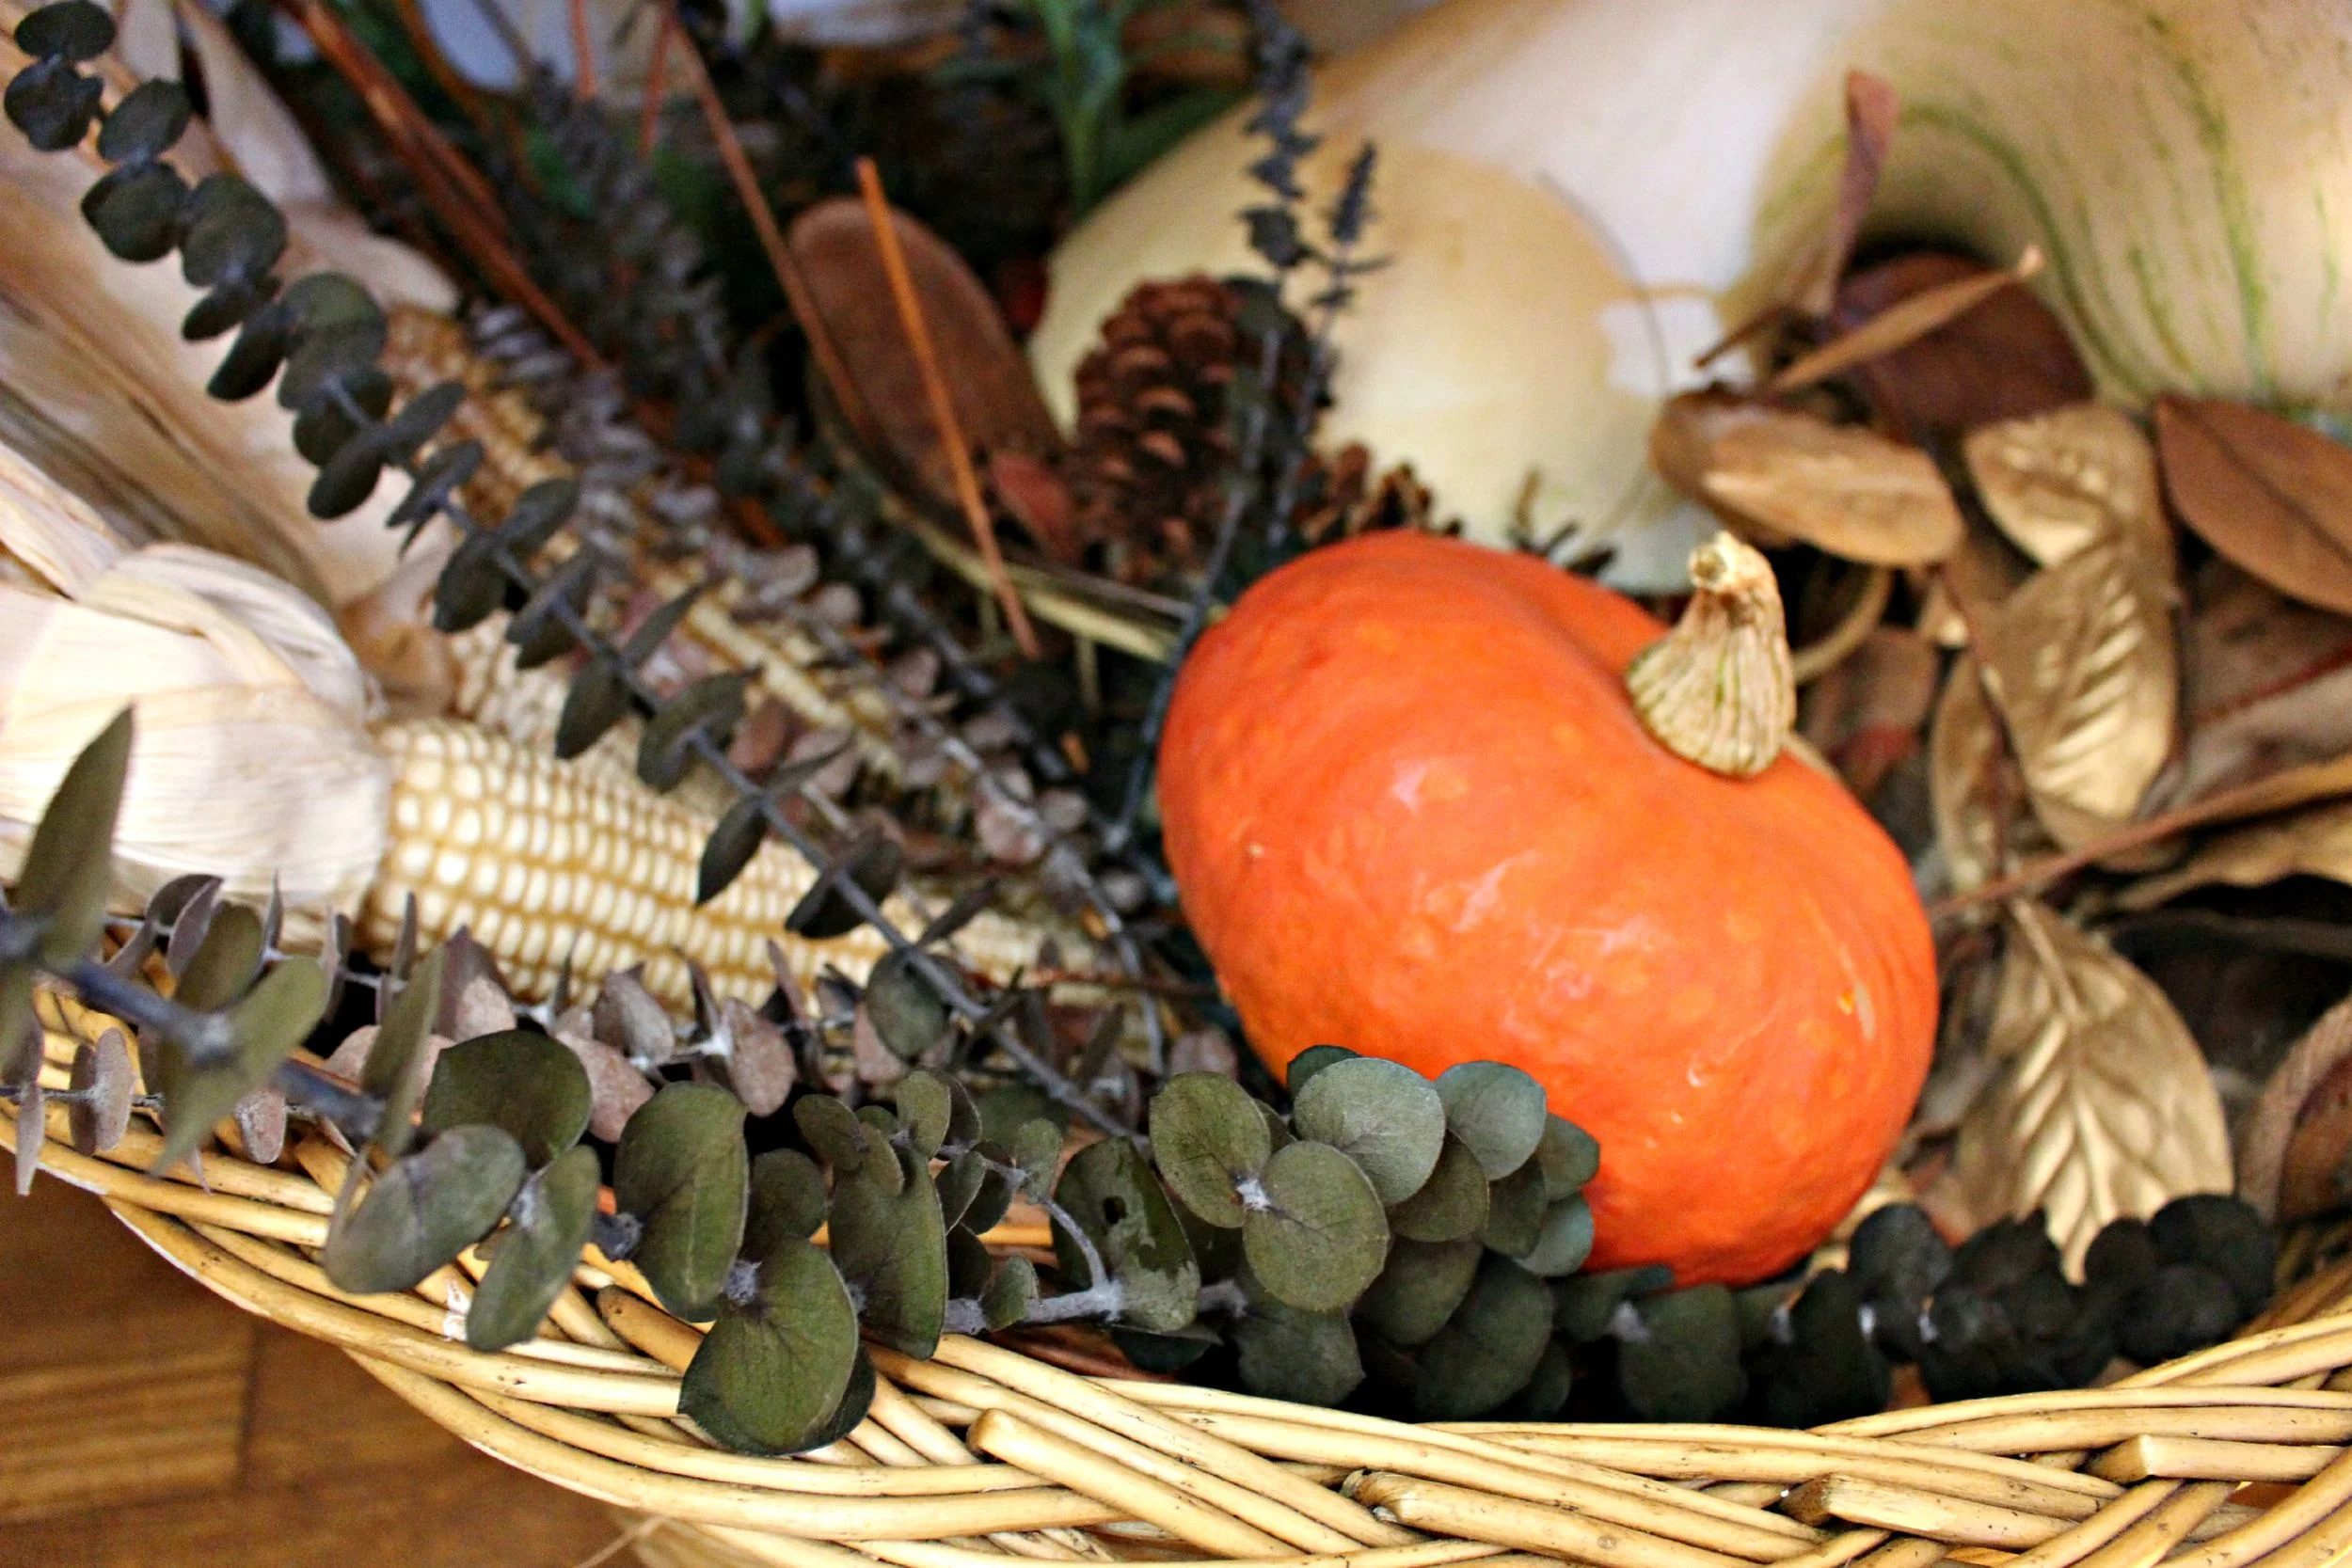
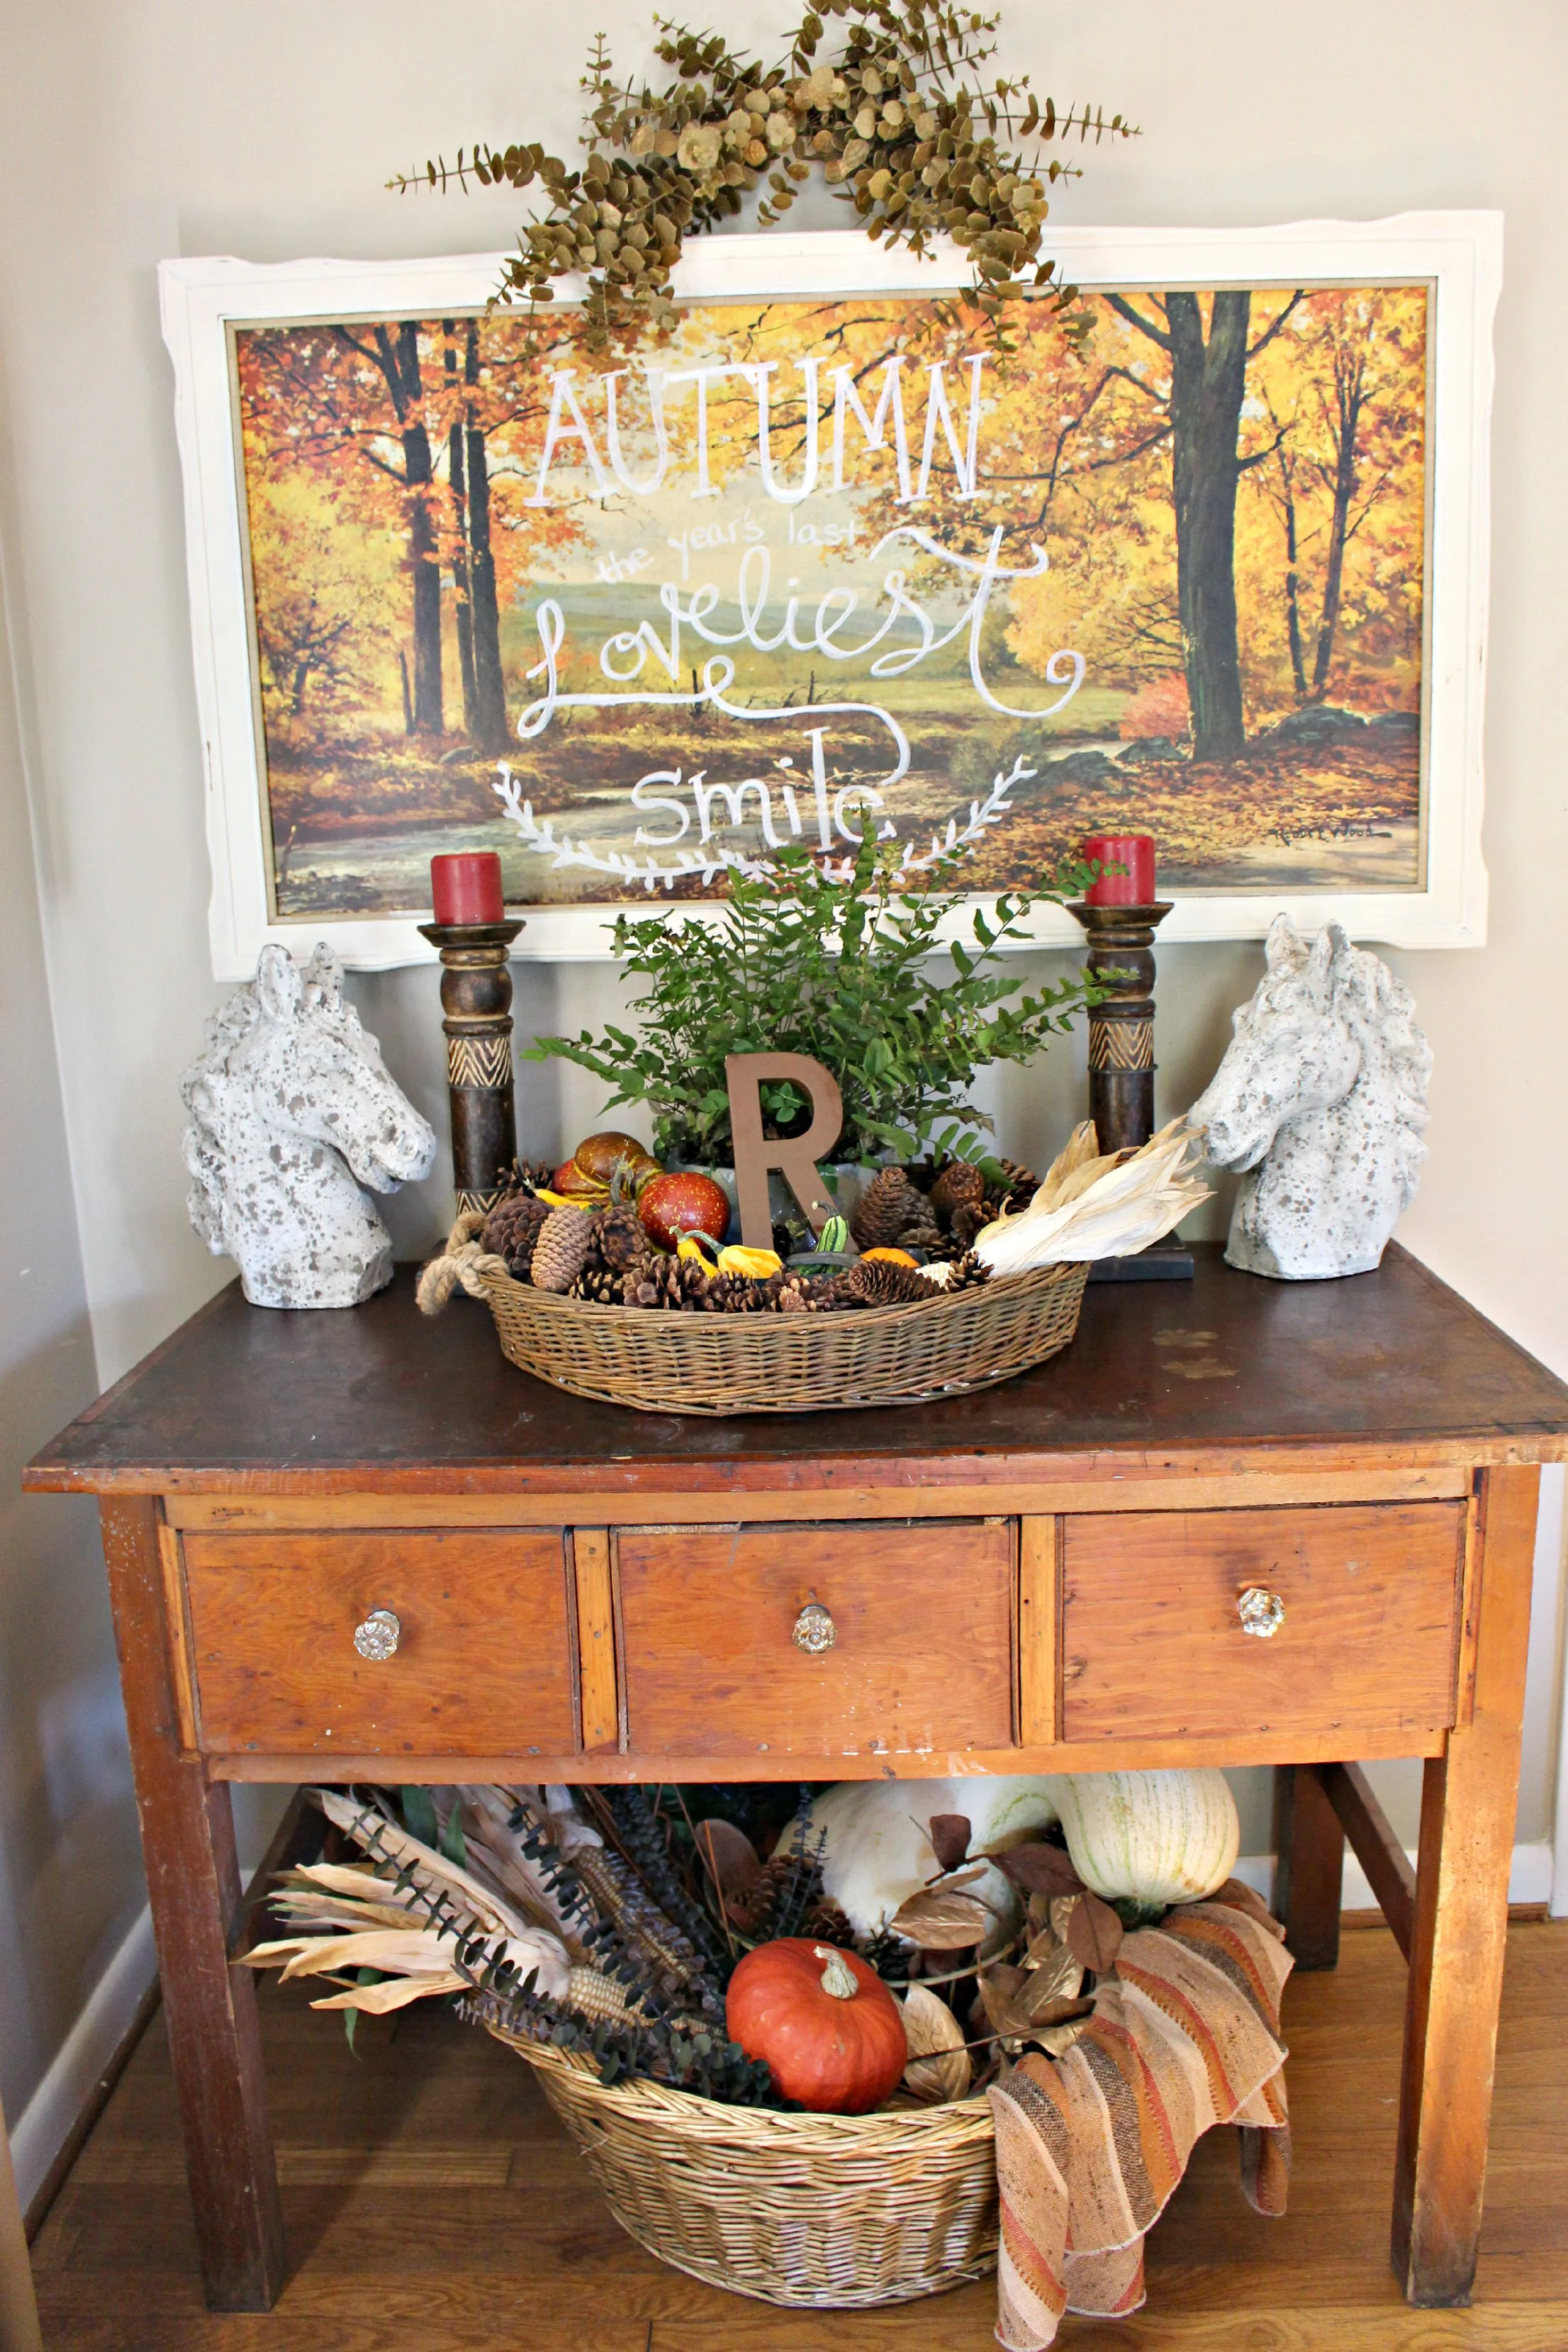
DIY upcycled painting: thrifted (get the tutorial here) | Baskets: thrifted | Pouf: thrifted | Produce/indian corn: farmer's market | Gold eucalyptus above painting: thrifted | Concrete horse heads: Home Goods | letter "R": vintage/thrifted
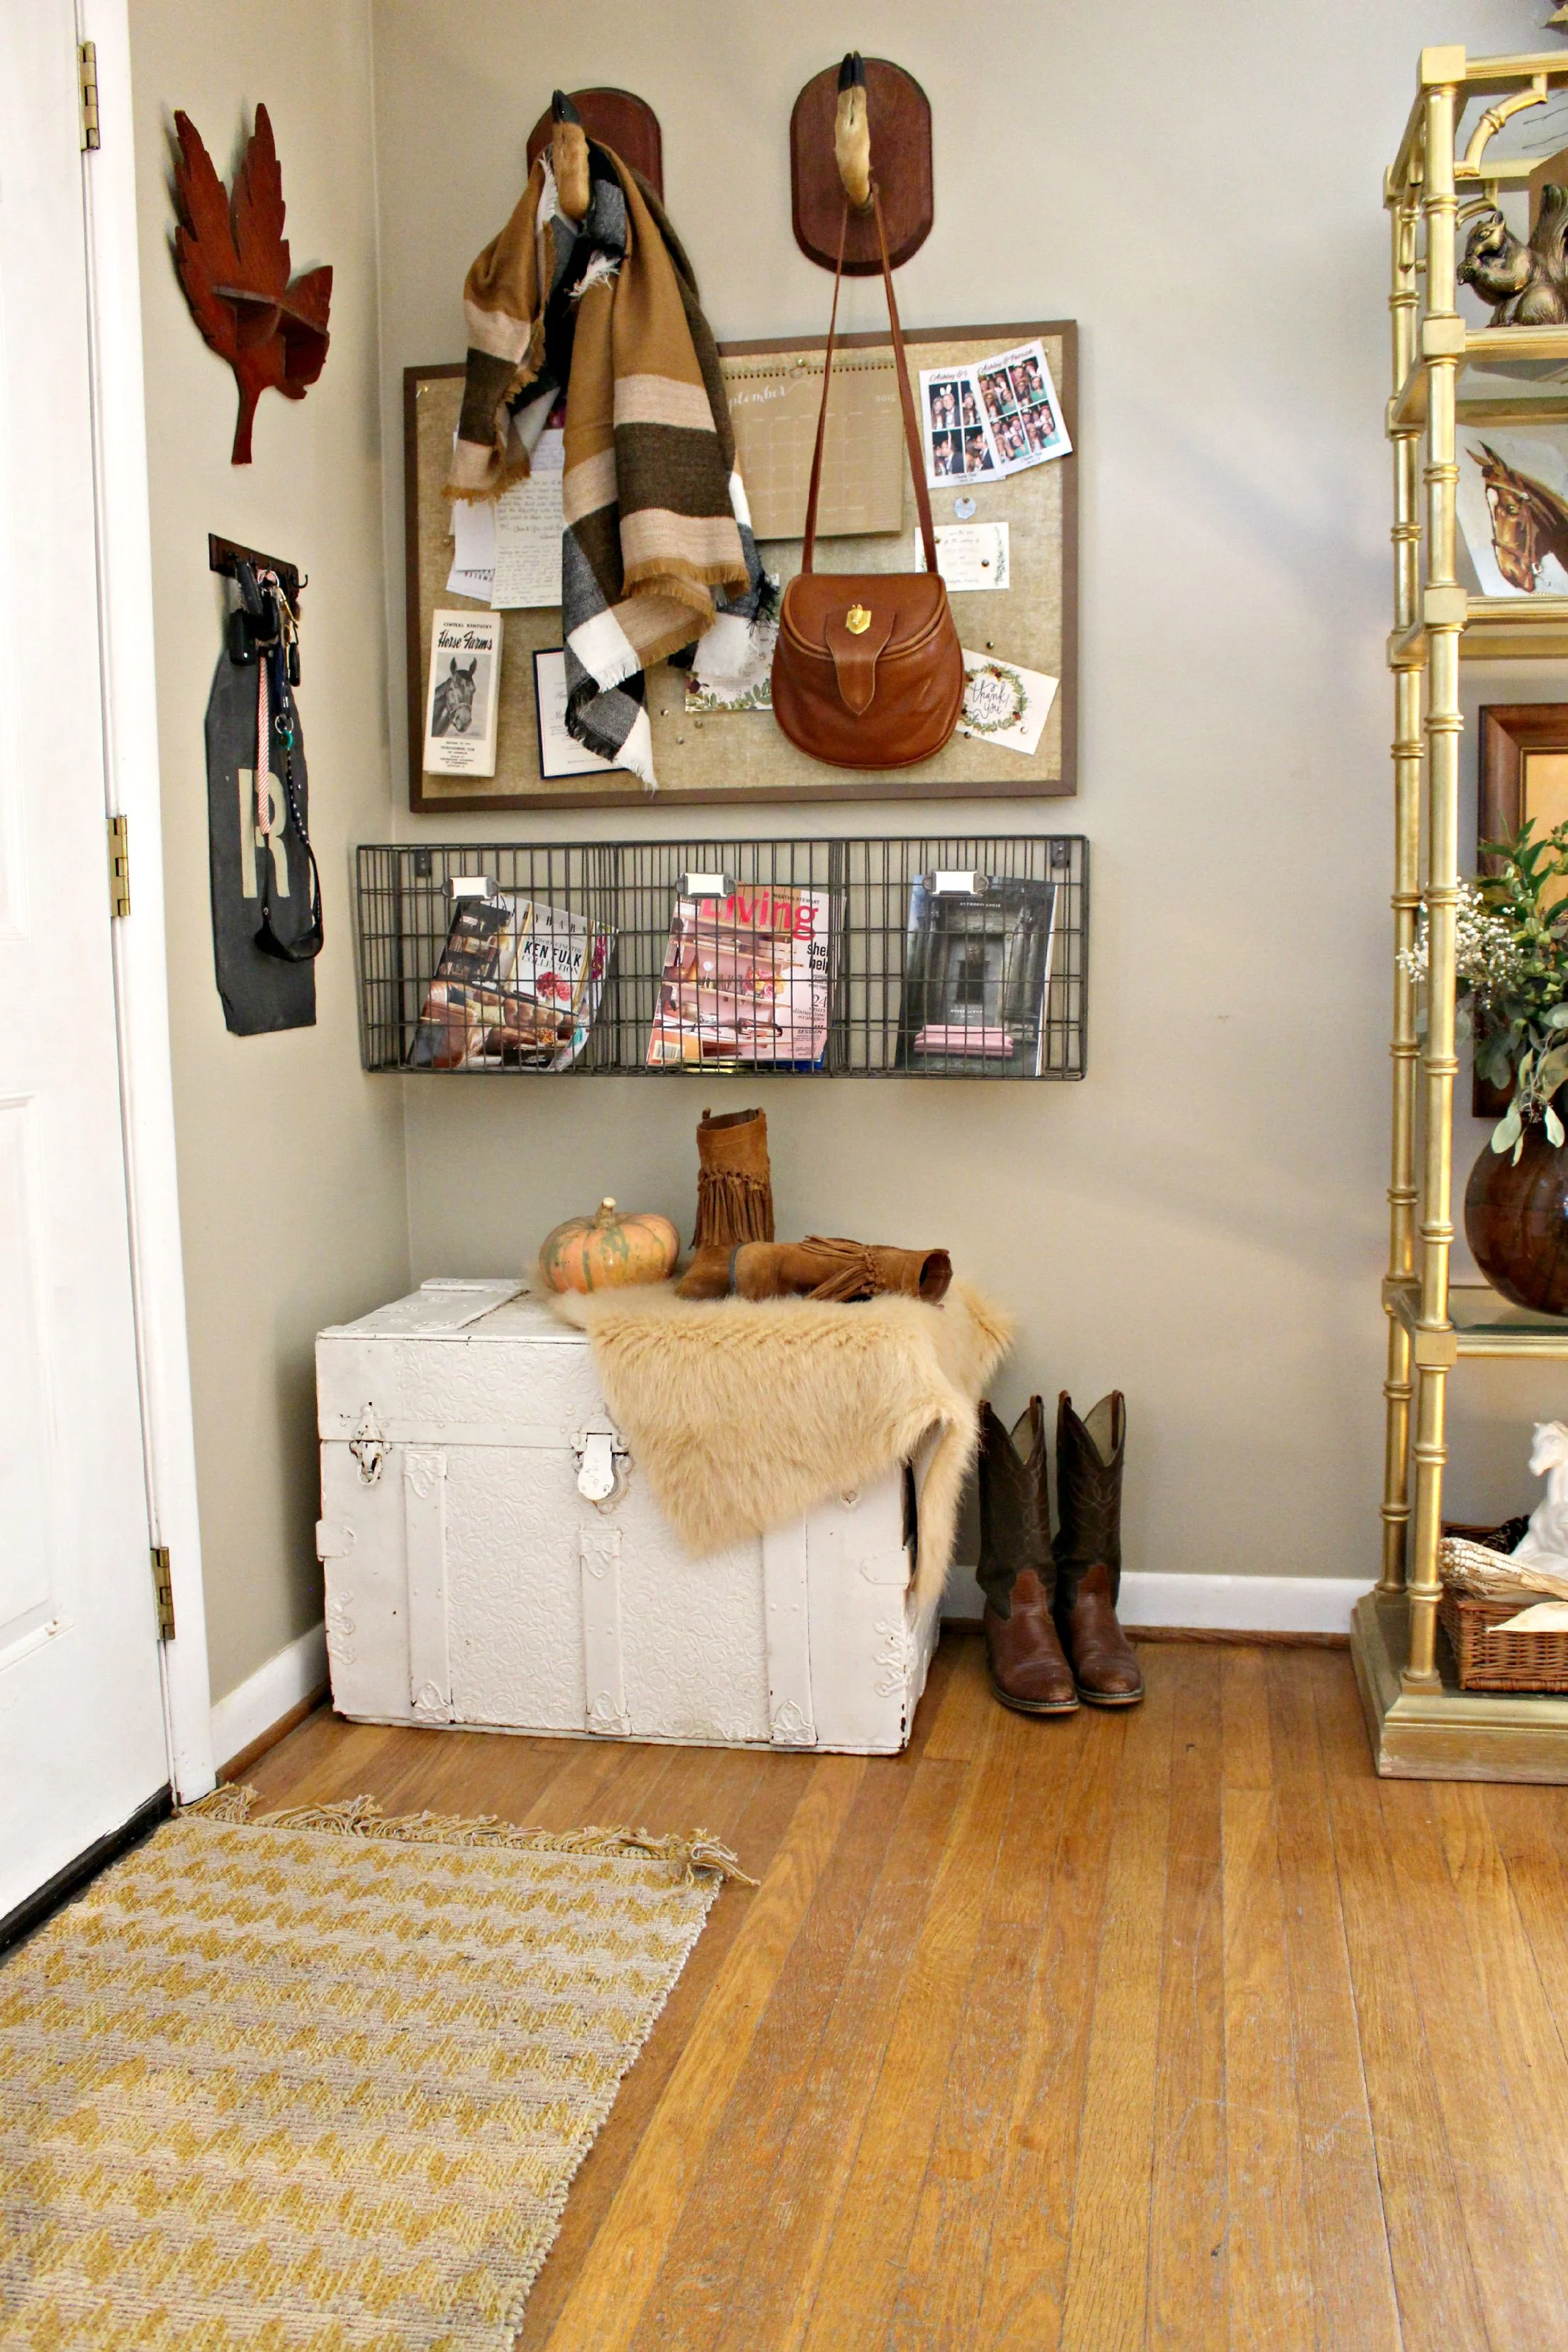
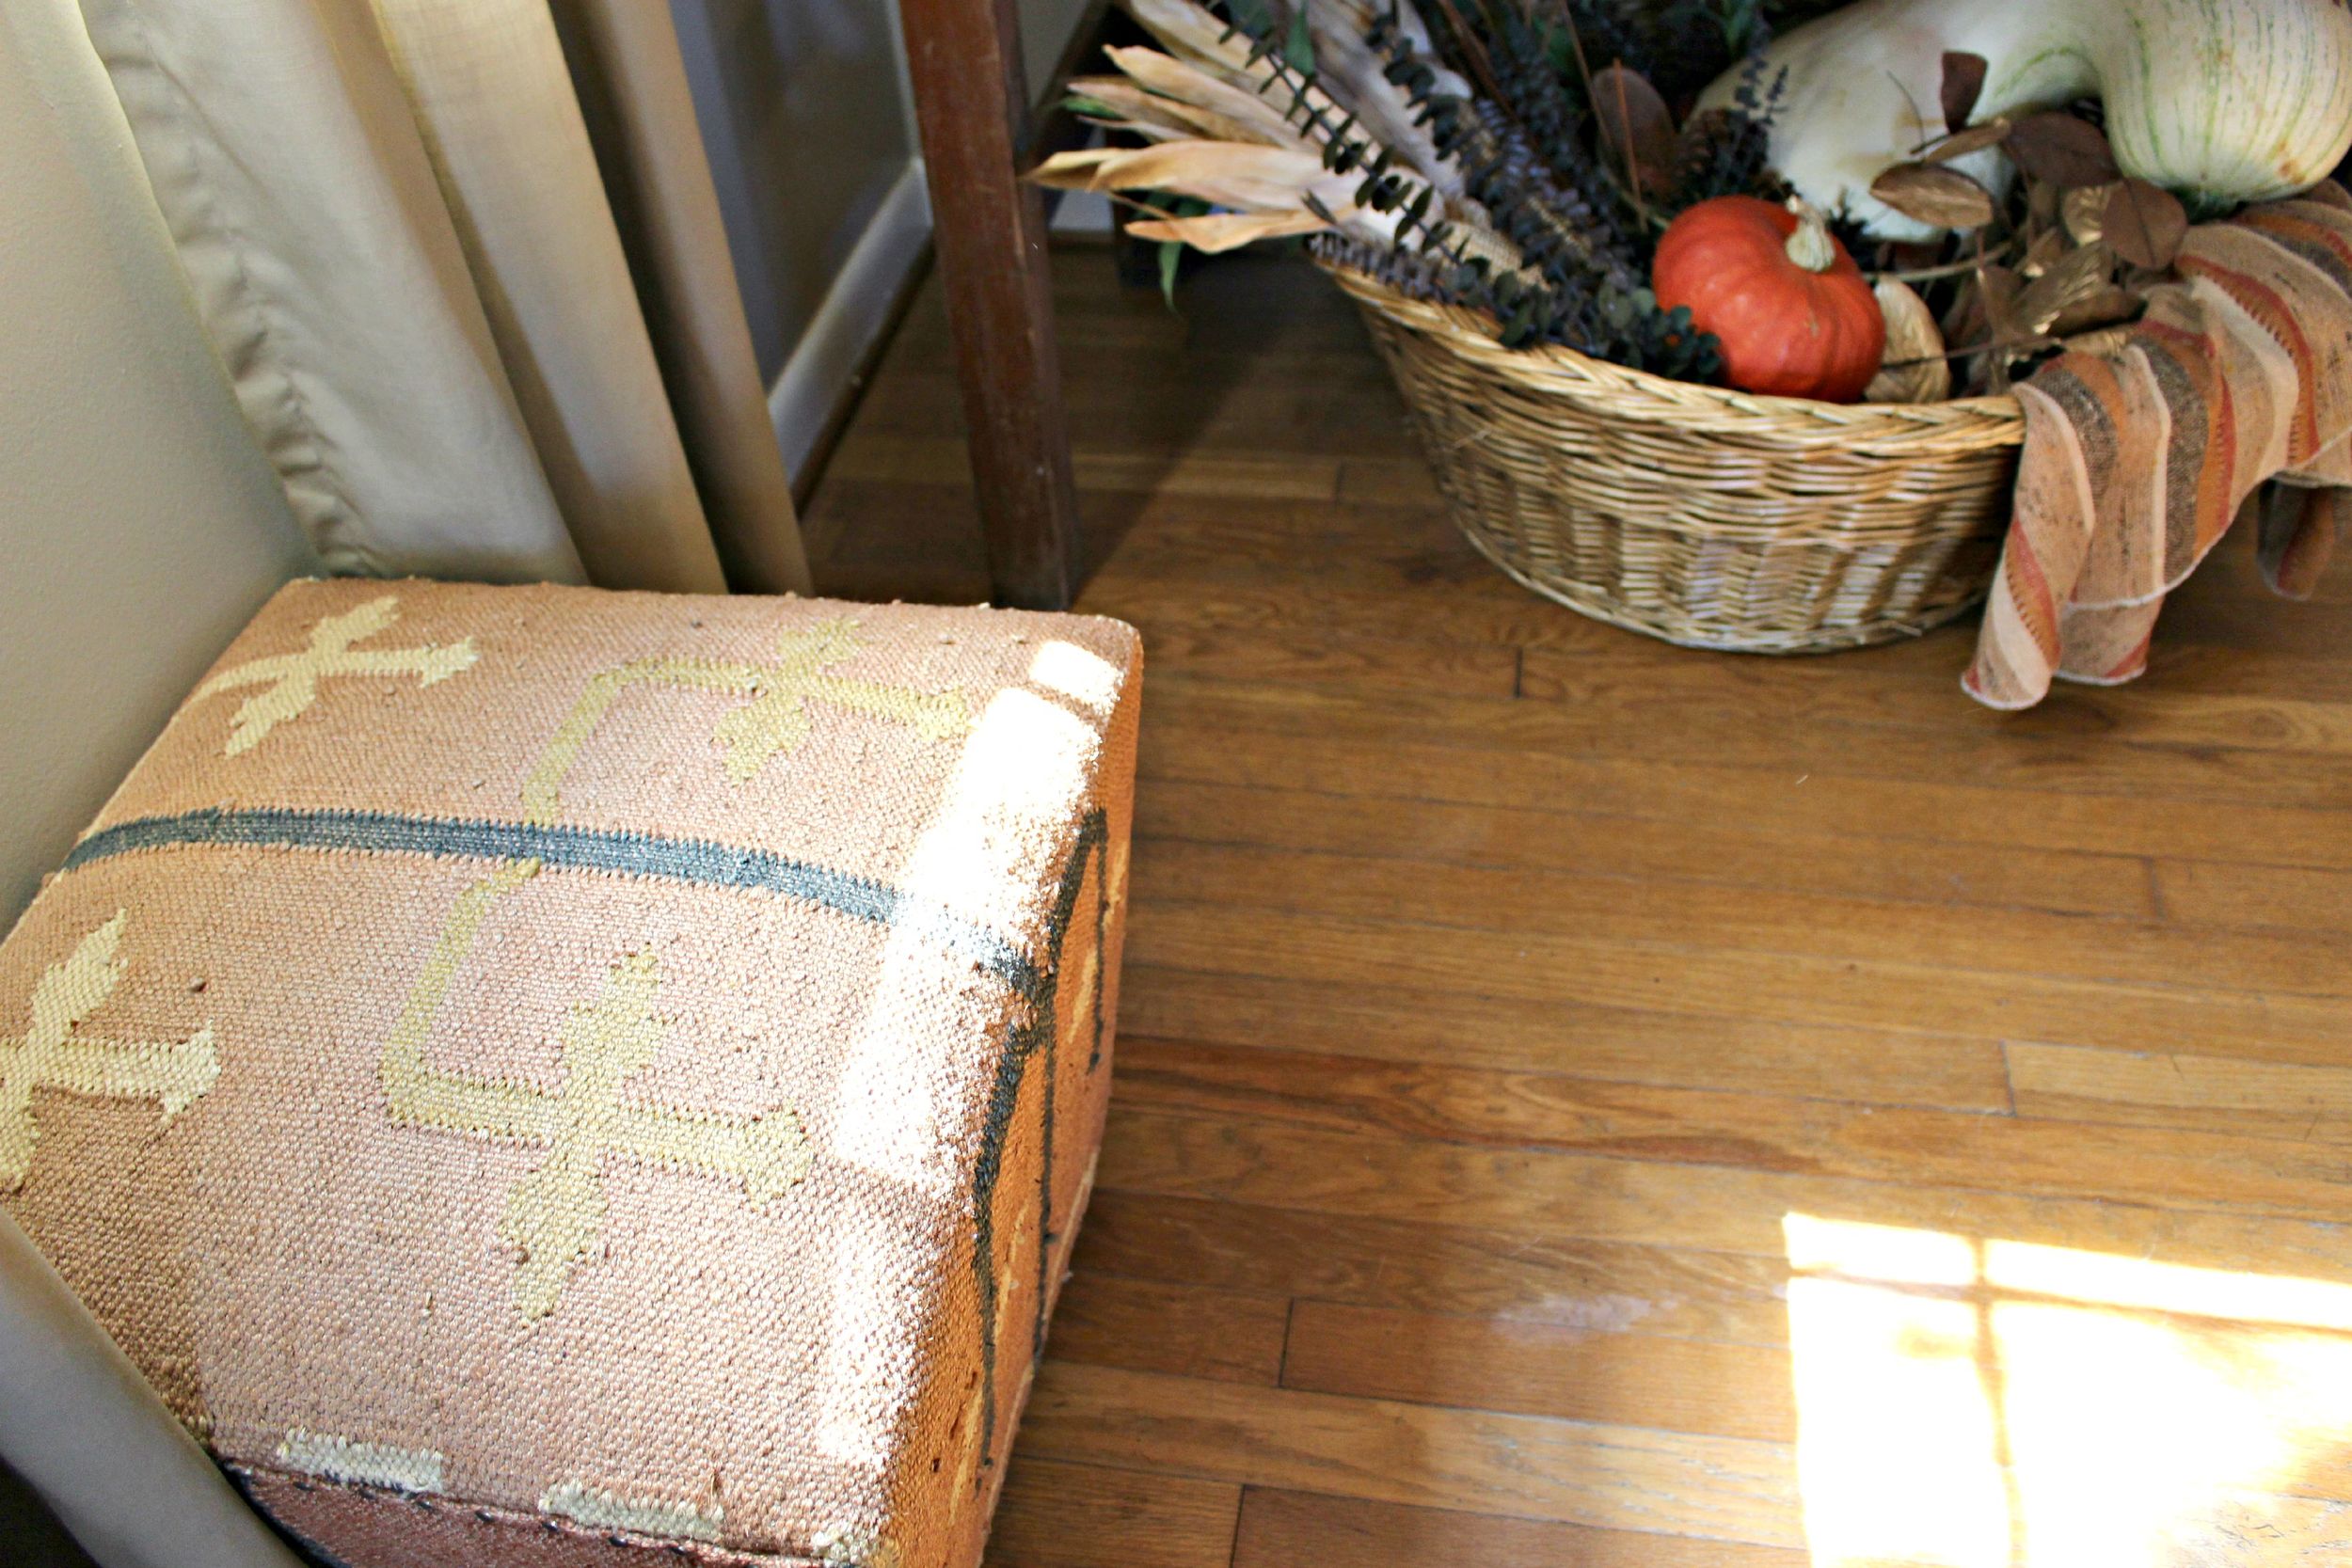
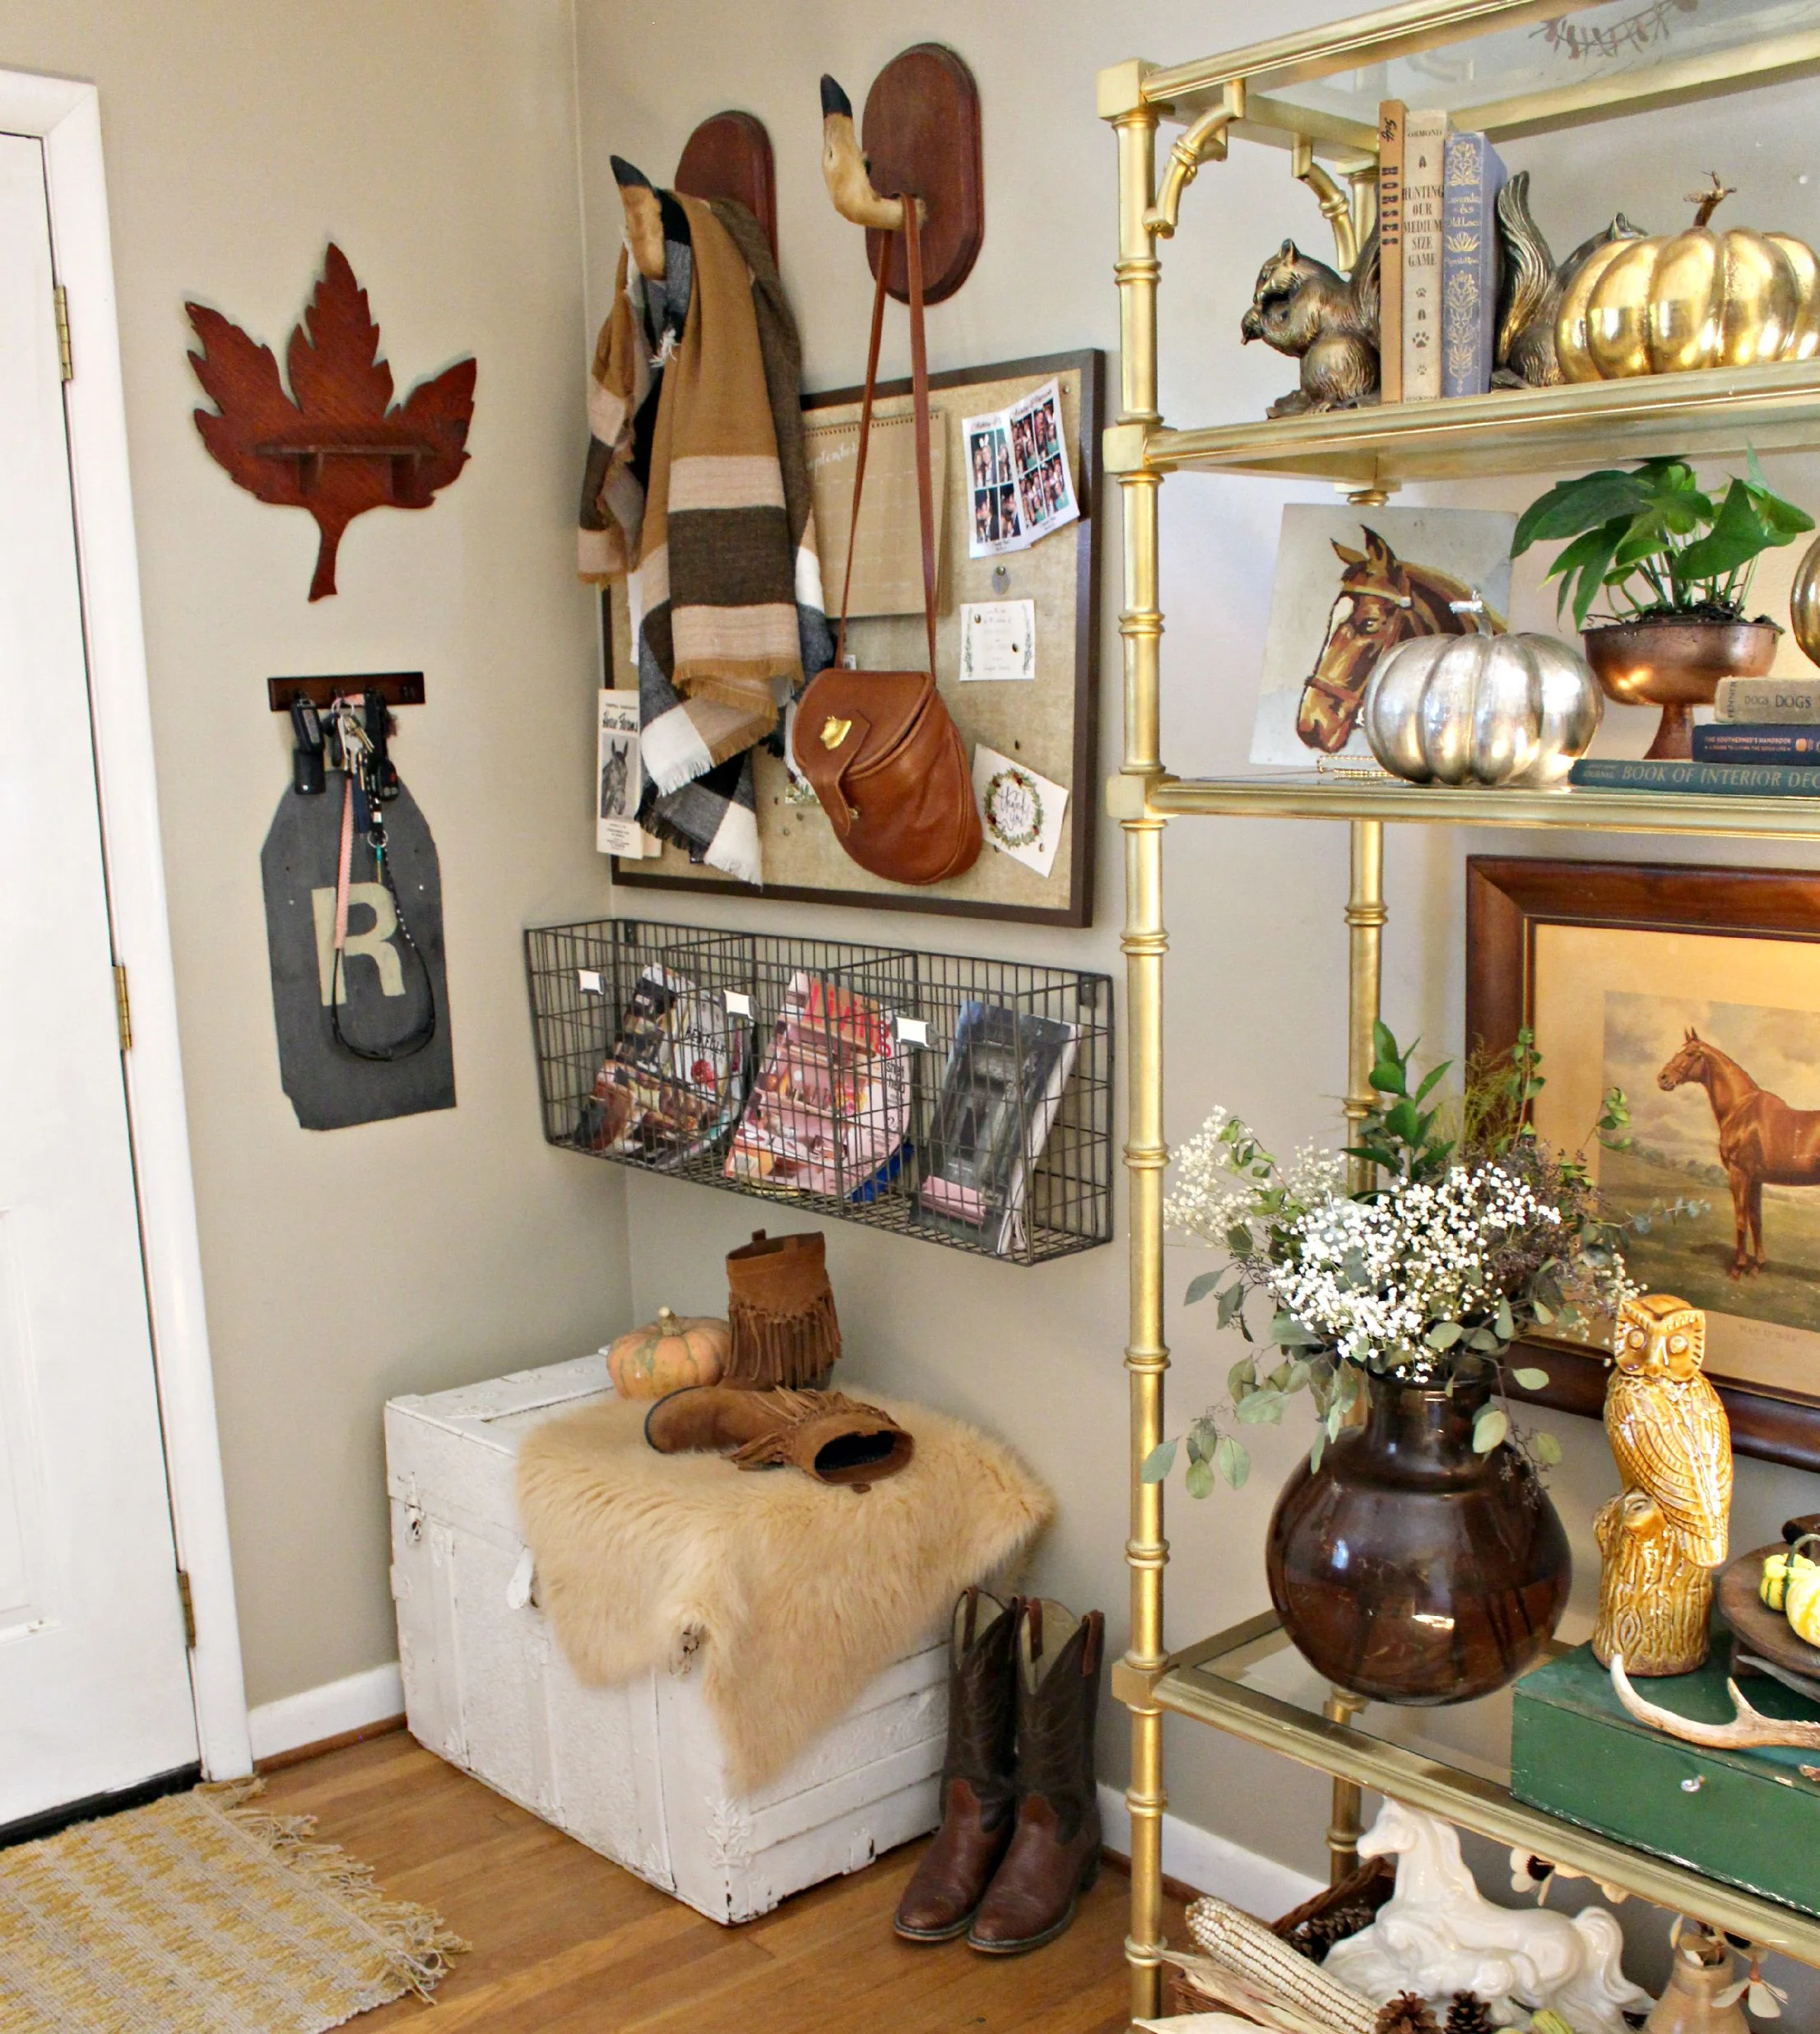
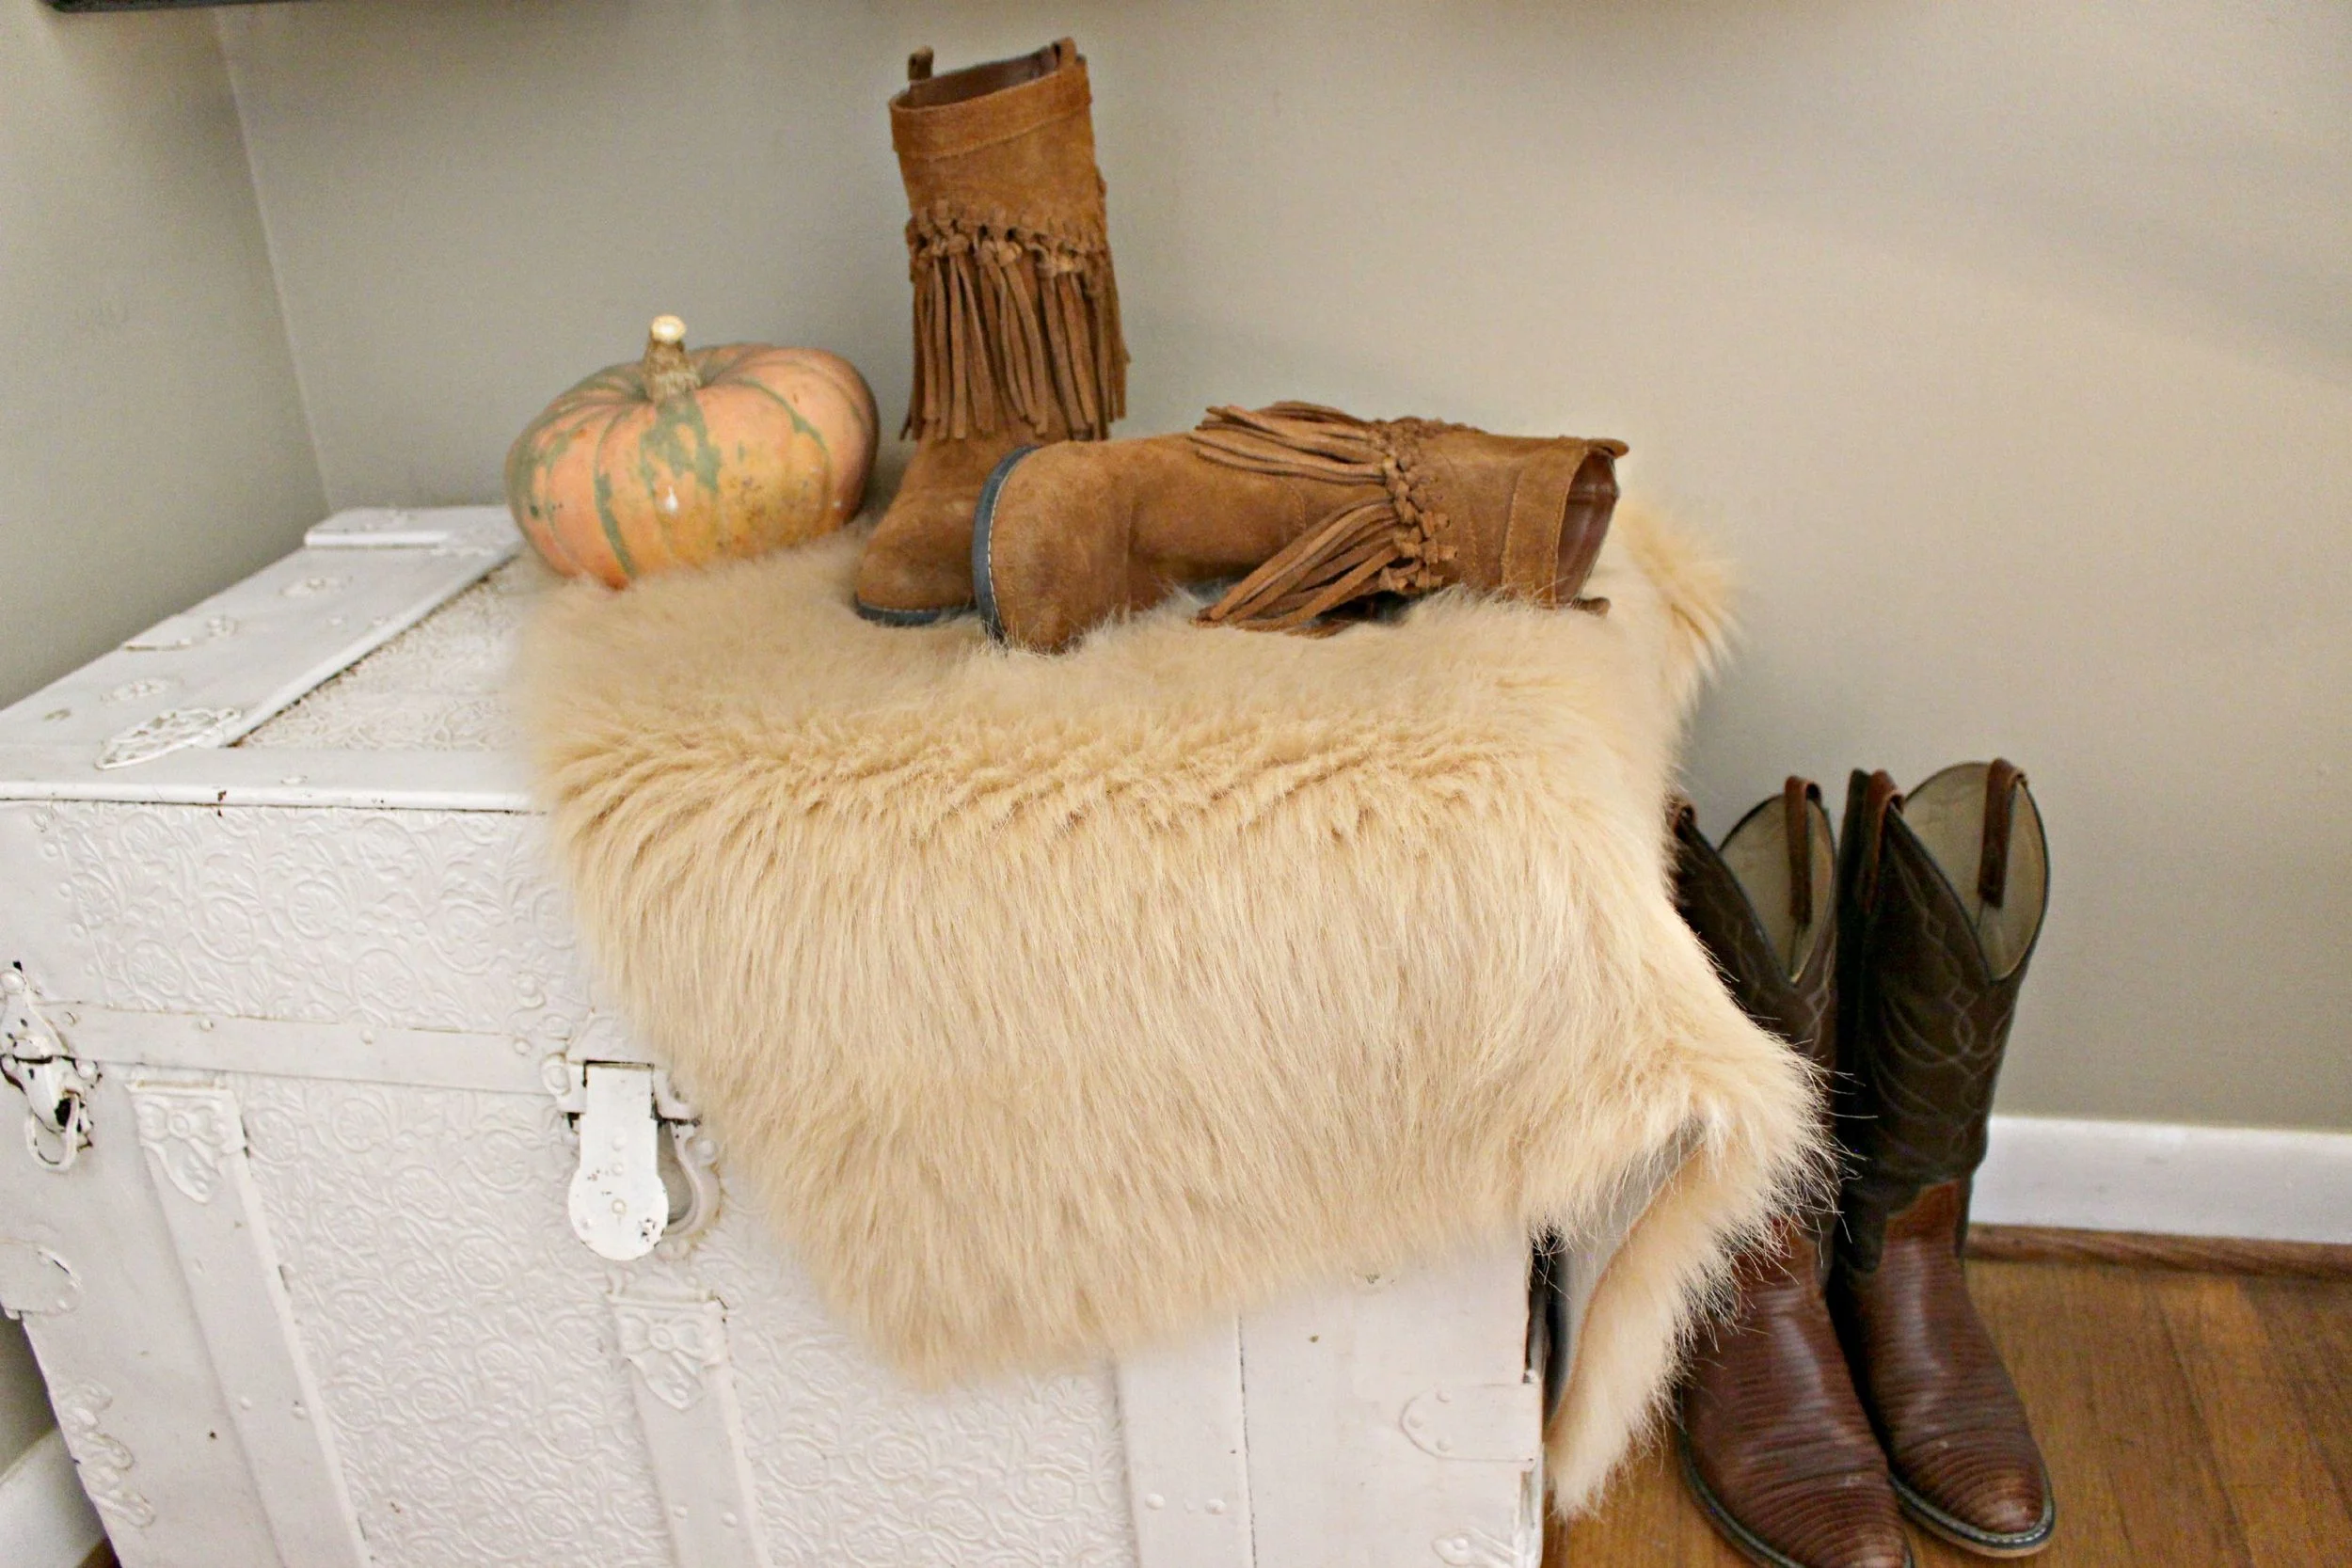
Chevron accent rug: Target | Plaid scarf: Miss Molly Vintage | Sheepskin: Home Goods | Trunk, Bulletin Board, Baskets, Deer Foot Hooks, Leaf Shelf: all vintage/thrifted

Hobby Lobby Zebra Print Rolling Scrapbook Case
Source: https://gatheredky.com/blog/tag/hobby+lobby
0 Response to "Hobby Lobby Zebra Print Rolling Scrapbook Case"
Post a Comment